How to Remove Color Paint From a Wall Without Ruining the Surface
You can remove color paint from a wall without ruining the surface by starting with the gentlest method and only stepping up if needed. First, identify paint type and test a hidden spot. Try warm soapy water and a soft cloth, then rubbing alcohol for fresh water-based spots, TSP for tougher stains, and a low-toxicity stripper for oil-based paint. Sand or scrape only as a last resort, patch and prime any damage, and keep going to learn detailed methods and tips.
How to Remove Color Paint from a Wall Without Ruining the Surface (Quick Answer & Hook)
If the paint is water-based, you’ll usually remove it with mild soap, warm water, and a soft sponge.
For oil-based or multiple coats, you’ll need stronger solvents or a scraper.
Try a small test patch first so you don’t damage the finish, and stop if the surface starts to soften or peel.
Call a pro when the wall is historic, textured, has lead paint, or when DIY methods fail.
Quick Answer Best immediate approach based on paint type
When you need to remove color paint from a wall quickly, start by identifying the paint type—water-based (latex) wipes away differently than oil-based or enamel—so you don’t damage the surface.
For latex, use warm soapy water and a soft cloth; for oil or enamel, use mineral spirits or a commercial remover sparingly.
Test first, work gently, and rinse thoroughly.
When to call a professional vs. DIY
Wondering whether you should tackle paint removal yourself or call a pro?
If the paint covers a small area, the surface is durable, and you’re comfortable with basic tools, go DIY.
Call a professional for large jobs, delicate or historical surfaces, lead paint, severe damage, or if you’re short on time.
Pros guarantee safety, proper prep, and a flawless finish.
Basic Understanding What You’re Dealing With
Before you start, identify the paint type — latex, oil-based, spray, acrylic or enamel — and the wall finish, from flat or eggshell to semi-gloss, gloss, primed drywall, plaster, wallpaper or brick.
Those combinations matter because pigment, stain age and thickness, plus surface porosity, determine how hard the paint will come off.
Knowing these factors helps you pick the right remover and technique so you don’t damage the wall.
Types of paint stains and finishes (latex, oil-based, spray paint, acrylic, enamel)
Paint stains fall into a few common categories—latex, oil-based, spray paint, acrylic, and enamel—and knowing which one you’re dealing with lets you choose the right removal method.
Latex is water-based and usually softens with soap and water; oil-based needs solvents.
Spray paint bonds fast; acrylic behaves like flexible latex.
Enamel cures hard and may require stronger removers or gentle mechanical action.
Types of wall surfaces and coatings (flat, eggshell, satin, semi-gloss, gloss, primed drywall, plaster, wallpaper, brick)
Surface texture and coating determine how a wall will react when you remove paint, so it’s crucial to identify what you’re working on.
Flat and eggshell absorb more and scratch easily; satin, semi-gloss, and gloss resist moisture and tolerate gentle scrubbing.
Primed drywall is smooth; plaster can be porous or brittle.
Wallpaper and brick need specialized, gentler approaches to avoid damage.
Factors that affect removal difficulty (age of stain, thickness, pigments, surface porosity)
Because age, build, color and the wall’s porosity all change how paint comes off, you should assess each factor before you start stripping.
Older paint bonds and may need stronger solvent or heat. Thick layers resist removal more than thin coats. Dark pigments can stain porous surfaces.
Test a small area to judge adhesion, porosity, and pigment transfer, then choose a method that minimizes damage.
Safety, Preparation, and Required Tools
Before you start, make sure the room is well-ventilated, wear proper PPE, and cover floors and furniture to prevent damage.
Gather the right tools and materials—scrapers, chemical remover or heat gun, rags, sponges, and a waste container—so you won’t stop mid-job.
Always test your chosen method on a small, inconspicuous patch first to confirm it works without harming the wall.
Safety precautions (ventilation, PPE, protecting flooring and furniture)
When you start removing paint, take steps to keep the air clear and the work area protected: open windows or run a fan for ventilation, wear appropriate PPE (gloves, goggles, and a respirator rated for paint fumes or dust), and cover floors and furniture with drop cloths or plastic sheeting secured with tape.
Keep pets and kids away, avoid eating nearby, and ventilate continuously until odors fade.
Tools and materials checklist
Now that you’ve set up ventilation and PPE and protected the room, gather the tools and materials you’ll need for safe, effective paint removal.
You’ll want quality, simple items that minimize damage and speed the job. Consider:
- Plastic drop cloths, painter’s tape, and rags
- Scrapers, nylon pads, and sanding blocks
- Chemical stripper, mild detergent, and a spray bottle
How to test a small inconspicuous area safely
Although it’s a small step, testing an inconspicuous patch lets you verify which removal method works and how the underlying surface reacts, so you can avoid costly mistakes.
Choose a hidden corner, wear gloves and goggles, and try your mildest solvent or scraper first.
Wait for full drying, inspect for discoloration or damage, then proceed gradually with the appropriate technique.
Step-by-Step Paint Removal Methods
First, you’ll identify the paint type and wall finish so you pick the right approach.
Start with the gentlest method—soap, water, and a soft cloth—then move to rubbing alcohol for water-based paints, household degreasers or TSP for tougher stains, and finally use paint removers or strippers safely on stubborn oil-based or enamel spots.
Work from least to most aggressive to protect the wall.
Step 1 Identify paint type and wall finish
Before you pick a removal method, identify the paint type and the wall finish so you’ll know what’ll come off and what’ll survive the process.
Check whether paint is latex, oil, or acrylic by testing a small hidden spot with rubbing alcohol.
Note substrate—drywall, plaster, wood, or textured surface—and any finish sheen so you choose compatible techniques and avoid damage.
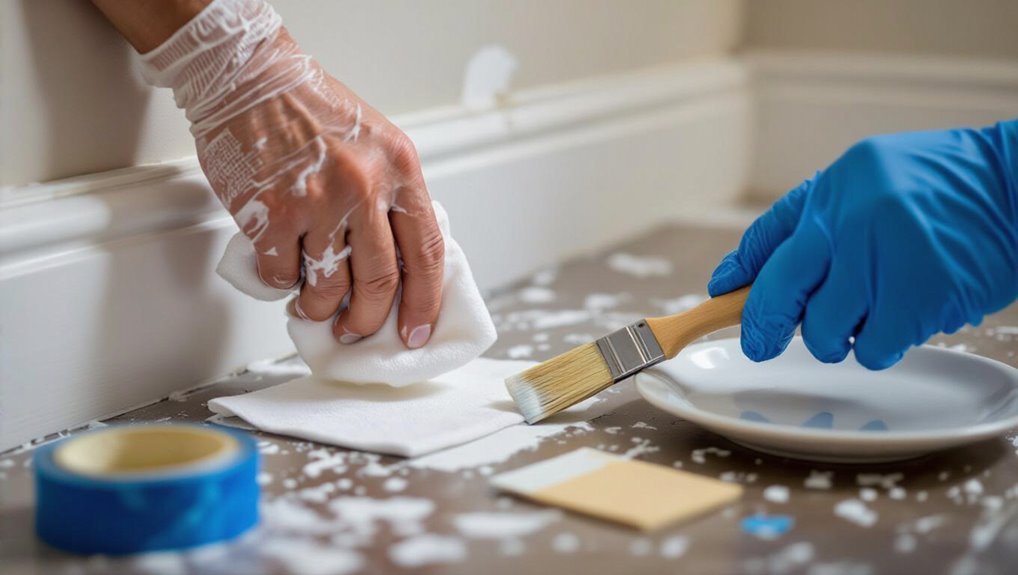
Step 2 Start with the gentlest method: soap, water, and soft cloth
Start by trying the gentlest option: warm water, mild dish soap, and a soft cloth.
Dampen the cloth, wring it well, and blot or gently rub the paint spot in small circles. Rinse frequently, change to a clean area of the cloth, and avoid scrubbing hard.
Test a hidden spot first to verify the finish won’t dull or lift before proceeding.
Step 3 Use rubbing alcohol or isopropyl alcohol for water-based paints
Reach for rubbing alcohol (70% isopropyl) when soap and water won’t lift fresh water-based paint; it dissolves latex and acrylic without harsh abrasives.
Dampen a clean cloth, blot gently, and work from paint edges inward. Rinse the area with water, pat dry, and repeat sparingly.
Test first in an inconspicuous spot to verify no finish softening or discoloration occurs.
Step 4 Apply household degreasers or trisodium phosphate (TSP) for stronger stains
If rubbing alcohol doesn’t lift the stain or the paint’s been drying a while, stronger cleaners will do the job.
Mix a mild household degreaser or TSP per label instructions, wear gloves and eye protection, and test a hidden spot.
Apply with a sponge, work gently, rinse thoroughly, and let dry.
Repeat once if needed, avoiding excessive scrubbing that might damage the finish.
Step 5 Use paint removers/strippers safely for stubborn oil-based or enamel spots
When milder cleaners won’t budge oil-based or enamel spots, you’ll need a chemical paint remover or stripper designed for those finishes; choose a solvent or gel labeled for oil or enamel, read the product instructions and hazard warnings, and work in a well-ventilated area with gloves and eye protection.
Test a small hidden area, apply per directions, wait recommended time, then wipe residue with appropriate solvent and neutralize.
Step 6 Mechanical removal: gentle scraping, sanding, or micro-abrasion techniques
Start with the least aggressive tool and work up: gentle scraping, light sanding, or micro-abrasion each remove paint by physically loosening or abrading the finish, so you should match the method to the paint type and the substrate.
Use a plastic scraper, fine-grit sandpaper, or a micro-abrasive pad.
Test a small area, keep even pressure, clean dust, and inspect for damage as you go.
Step 7 Heat gun technique for thick layers (when appropriate)
Use a heat gun to soften thick paint layers so you can scrape them off more easily; this method’s speed makes it ideal for stubborn, multiple-coat finishes on durable substrates.
Hold the gun 6–8 inches away, move steadily, watch for bubbling, then scrape with a flat scraper.
Wear gloves, eye protection, and a respirator; avoid plaster, wallpaper, or near flammable materials.
Step 8 Clean-up and neutralizing residues after removal
After you’ve removed the paint, tackle cleanup promptly to prevent residue from reattaching or staining surrounding surfaces.
Wipe with a damp microfiber cloth, rinse often, and use a mild detergent for stubborn spots.
Neutralize any chemical stripper with the manufacturer’s recommended solvent or baking soda solution.
Dry thoroughly, ventilate the room, and dispose of contaminated rags and waste per local hazardous-waste guidelines.
Step 9 Repairing minor surface damage (spackling, sanding, priming)
Patch any nicks or gouges with spackling compound, let it dry, then sand smooth so the surface is ready for primer.
Apply a thin layer, overfill slightly, and feather edges.
Sand with fine-grit paper until flush, wipe dust with a damp cloth, and inspect under good light.
Spot-prime repaired areas to seal and guarantee even adhesion before final paint.
Step 10 Repainting touch-ups and color matching
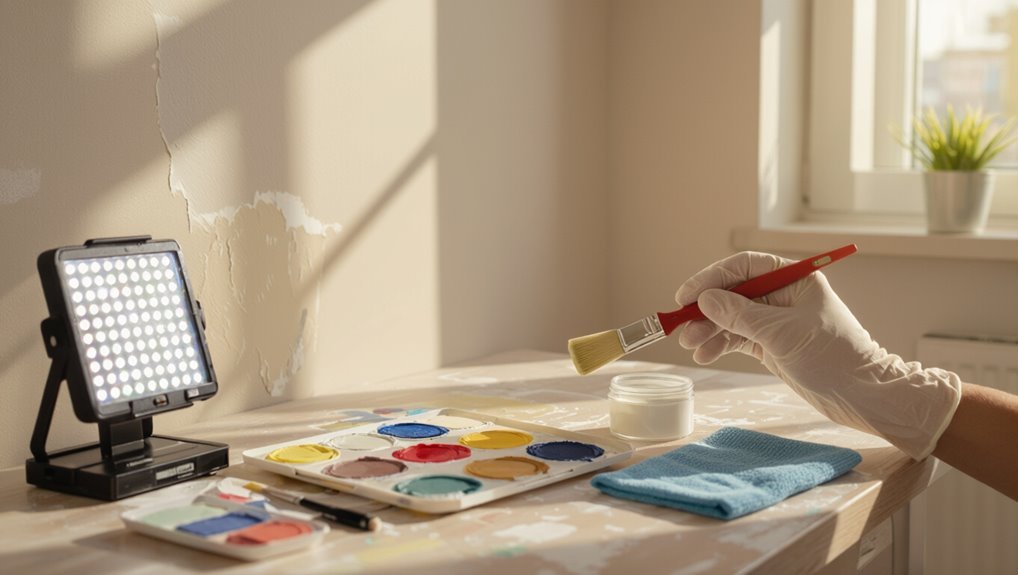
Now you’ll address touch-ups and color matching to make the repaired area blend seamlessly with the rest of the wall.
Test paint on a small scrap or hidden spot, compare under natural light, and tint if needed.
Use thin coats, feather edges with a brush or mini-roller, let each dry fully, and recoat until texture and sheen match the surrounding surface for an invisible repair.
Method Selection Guide (Comparison)
Now you’ll compare methods side-by-side with a quick table showing which techniques work best for different paint types and wall finishes.
Use the table to decide when chemical strippers, mechanical sanding, or heat are most appropriate for your surface and paint.
Consider factors like finish sensitivity, indoor use, and time required to pick the safest, most effective approach.
Quick comparison table of methods vs. paint types and wall finishes
Match the right removal method to your paint type and wall finish to save time and avoid damage. Use the table below to quickly compare effectiveness, risk, and best surface matches so you can pick the safest, most efficient option.
| Method | Best for paint | Safe on finish |
|---|---|---|
| Gentle scraper | Flakes, latex | Matte, textured |
| Solvent wipe | Oil, enamel | Gloss, sealed |
| Sanding pad | Thick coats | Unpainted, durable |
When to choose chemical vs. mechanical vs. heat methods
When deciding between chemical, mechanical, or heat removal, consider the paint type, wall finish, and how much surface risk you’ll accept—chemicals dissolve stubborn oil and enamel, mechanical methods scrape or sand off thick or flaking layers, and heat softens many coatings for safe peeling.
Choose chemicals for porous or detailed surfaces, mechanical for durable substrates, and heat for smooth, hard finishes—always test first.
Common Mistakes That Ruin Wall Surfaces
Don’t grab the roughest pads or start with high-grit sanding—you’ll gouge or thin the surface.
Don’t use strong chemicals without testing and neutralizing them first, and don’t rush removal or you’ll get discoloration and paint bleed.
Finally, don’t skip priming before repainting, or the new coat won’t adhere or cover properly.
Using overly abrasive tools or high-grit sanding too early
If you grab a coarse sanding block or a metal scraper too soon, you’ll do more harm than good—deep scratches, gouges, and uneven patches are often the result.
Start with gentle methods: soft scrapers, fine-grit sandpaper, or chemical removers designed for paint. Work slowly, test a small area, and increase abrasiveness only when necessary to preserve the underlying drywall or plaster.
Applying harsh chemicals without testing or neutralizing
Because harsh chemical strippers and solvents can eat through paint, primer, and even drywall paper, you should always test and neutralize before full application.
Patch-test in an inconspicuous spot, follow manufacturer neutralizing steps, and ventilate.
Wear gloves and eye protection, use minimal dwell time, and rinse thoroughly.
Skipping tests or neutralization risks softening, staining, or hidden damage that you’ll then have to repair.
Rushing removal and causing discoloration or paint bleed
When you rush paint removal, you’re far more likely to smear fresh color into adjacent areas or strip unevenly and leave visible bleed-through.
Move slowly, test small sections, and use gentle, controlled strokes with appropriate tools.
Pause to clean residues and reassess progress. Rushing forces harsher methods and uneven pressure, which cause staining and require more repair later—take the time to protect edges.
Skipping priming before repainting
Although skipping primer might seem like a time-saver, it often dooms your new paint to poor adhesion, uneven coverage, and visible stains bleeding through.
Don’t assume fresh paint will hide remnants or seal porous patches. Apply an appropriate primer to block stains, equalize surface porosity, and improve topcoat bonding.
Proper priming saves time and prevents costly touch-ups later.
Prevention, Maintenance, and Best Practices
Before you start any painting or everyday activity near walls, you should protect surfaces with drop cloths, painter’s tape, and temporary barriers to prevent splatters and scuffs.
Choose durable, washable finishes or clear protective coatings to make future stains easier to clean and resist penetration.
If paint does get on the wall, act fast: blot excess, avoid rubbing, and use the appropriate solvent for the paint type to limit absorption and simplify removal.
How to protect walls during painting projects and daily use
If you want your paint to stay fresh and scuff-free, adopt a few simple protection and maintenance habits: use drop cloths and painter’s tape while working, keep furniture slightly off walls with felt pads, clean marks promptly with gentle cleaners, avoid abrasives, control humidity and temperature, and teach household members to use doorstops and lint-free cloths.
Inspect periodically and touch up small chips immediately.
Best protective coatings for future stain resistance
Choosing the right protective coating can dramatically reduce future stains and make cleanup simple, so pick a finish that matches your room’s use and traffic level: high-gloss and semi-gloss resist scrubbing and moisture best for kitchens, bathrooms, and trim; satin works well in hallways and family rooms; and durable flat or eggshell with a stain-blocking primer suits low-traffic areas while preserving a matte look.
Use washable paints, clear polyurethane for trim, and moisture-resistant sealers where needed to repel spills and simplify maintenance.
Quick-response tips to limit paint penetration and ease removal
Protective coatings cut down on future stains, but accidents still happen, so acting fast will keep paint from soaking deep into wall surfaces and trim.
Blot fresh drips with a microfiber cloth, don’t rub. Cover edges with painter’s tape, lift excess with a plastic scraper, then clean residue with mild soap or solvent recommended for your paint type.
Ventilate and test first.
Tools, Products, and DIY vs. Professional Costs
You’ll want a clear shortlist of recommended products by category—gentle cleaners for small spots, stronger solvents for latex or oil paints, chemical strippers for stubborn layers, and the right tools like scrapers, sanders, and protective gear.
I’ll also outline estimated time and out-of-pocket costs for a DIY approach versus hiring a pro so you can weigh effort against expense.
That way you can choose the method that fits your budget, timeline, and comfort level.
Recommended products by category (cleaners, solvents, strippers, tools)
Before you start scraping or soaking, get the right mix of cleaners, solvents, strippers and tools so the job’s faster and safer:
- Citrus or soy-based cleaner for gentle residue removal.
- Denatured alcohol or acetone for spot testing and stubborn latex.
- Gel paint stripper, plastic scrapers, heat gun (low setting) and nylon brushes.
Choose PPE, test small areas, and follow label instructions to protect the finish.
Estimated time and cost for DIY vs professional service
A small room with minor paint splatters will take you a few hours and a couple dozen dollars in supplies, while extensive jobs or multiple rooms can span days and cost a few hundred—knowing the likely time and expense up front helps you decide whether to DIY or hire pros.
If you DIY, budget time for prep, testing, and drying; pros save time but add labor fees and disposal costs.
Troubleshooting Scenarios (Case-Based Solutions)
You’ll face different fixes depending on the surface and paint type, so we’ll walk through clear, case-based steps for each problem.
You’ll learn how to tackle spray paint on interior drywall, dried oil-based drips on semi-gloss trim, acrylic splatter on textured walls, and what to do when paint has bled into primer or the drywall paper.
Follow the targeted methods and you’ll know when a simple cleanup will do or when repair or repainting is necessary.
Removing spray paint from interior painted drywall
Start by evaluating the spray paint—note the paint type (water- or oil-based), how long it’s been on the drywall, and whether the wall’s finish is flat, eggshell, or gloss.
These factors determine which removal method will work best and how much surface damage you risk.
Test a hidden spot with mild soap and water, then try isopropyl alcohol or a citrus-based remover; gently blot, don’t scrub.
Removing dried oil-based paint drips from semi-gloss trim
Assess the drip by noting its size, hardness, and whether the semi-gloss trim beneath is intact or already nicked from prior attempts; that tells you whether you can gently remove it with a solvent or need to resort to mechanical means and touch-up.
If solvent-eligible, soften with mineral spirits on a cloth, rub lightly, then clean and polish.
For hardened drips, carefully scrape, sand fine, and repaint.
Removing acrylic paint splatter on textured walls
Identify the splatter pattern and paint age before you act:
Fresh acrylic on a textured surface often wipes away with water and mild soap, while dried droplets may need softening with rubbing alcohol or a commercial acrylic remover and careful mechanical removal to avoid damaging the texture.
Test a small area, blot softened spots, scrape gently with a plastic scraper, then clean and dry the area.
When paint has bled into primer or drywall paper remediation steps
When paint has bled into primer or the paper face of drywall, you’ll need to treat the stain differently than surface splatter: the pigment has often penetrated the paper fibers or sealer, so simply cleaning won’t remove it and aggressive scraping can tear the drywall.
Lightly sand feathering edges, apply a stain-blocking primer, then repaint.
For severe bleed-through, replace the damaged paper or patch the drywall.
FAQ Common Questions About Removing Paint from Walls
You’ll want clear answers to common concerns like whether bleach or a heat gun is safe, how removal affects the original color or texture, and how long to wait before repainting.
If the paint might contain lead, you’ll need specific safety steps and disposal methods.
Let’s walk through these FAQs so you can pick the right method and protect yourself and your walls.
Can I use bleach to remove paint stains?
Can bleach remove paint stains? You can use bleach to lighten water-based stains, but it won’t dissolve latex or oil paint.
Test a hidden spot first. Use diluted bleach, gloves, and ventilation. Rinse thoroughly and avoid prolonged contact to prevent surface damage or discoloration.
For stubborn or oil-based paint, choose a proper remover or consult a pro.
Will removing paint remove the original wall color or texture?
Lightening a water-based stain with bleach might leave the surface looking different, so it’s reasonable to wonder if paint removal will strip the original wall color or texture.
It can—especially with aggressive chemical strippers or abrasive sanding. Test a hidden spot first, use gentler methods, and stop when residue’s gone.
If texture’s altered, you may need minor touch-up patching rather than full resurfacing.
How long should I wait to repaint after removing paint?
Because the surface needs to be fully dry and clean before new paint goes on, wait at least 24–48 hours after water-based stripping and longer after solvent-based strippers—usually 72 hours—to guarantee no residue or moisture remains.
Check for tackiness, odor, or residue; if any appear, extend drying time.
Lightly sand and wipe with a tack cloth before priming and repainting.
Is it safe to use a heat gun on plaster or drywall?
Wondering if a heat gun will harm plaster or drywall? You can use one carefully: keep the nozzle moving, hold it several inches away, and use lower temperatures to avoid blistering or gypsum damage.
Test a small area first. Watch for dust or softening that signals overheating.
Wear eye and respiratory protection, and ventilate the room while working.
What if the paint contains lead what precautions should I take?
If you suspect old paint may contain lead, treat the job much more cautiously than you’d for modern finishes — especially after using heat or sanding, which can release toxic dust and fumes.
Stop work, test paint with a kit or hire a certified inspector.
Use HEPA-equipped vacuums, disposable coveralls, and respirators.
Follow local disposal rules and consider hiring a lead-safe contractor.