How to Paint a Stripe on a Wall Without Paint Bleeding Under the Tape
You can get razor‑sharp stripes by starting with a clean, primed wall and high‑quality painter’s tape, pressing it firmly with a straightedge. Seal the tape edge by brushing a thin coat of the base color or using clear caulk, then apply thin, even coats of your stripe color with a small roller or angled brush. Remove tape while paint is tacky at a 45° angle and touch up as needed; follow the steps below to learn pro tips and variations.
Quick Answer Can You Paint a Stripe Without Paint Bleeding Under the Tape?
Yes—you can avoid paint bleeding by pressing down the tape edges, sealing them with a thin coat of the base color, and then applying your stripe color.
Try these DIY steps for typical walls, but call a pro if the surface is textured, the stripe must be perfectly crisp, or you lack time.
You’ll get better results faster when you match the method to the job’s difficulty.
One-sentence solution
If you seal the tape edges with the base wall color or a clear paint-sealant first, you can paint a crisp stripe without bleed-through.
To learn how to paint a stripe on a wall without bleeding, press tape firmly, use quality painter’s tape, apply the seal coat, let it dry, then roll thin coats of the stripe color, removing tape at a 45° angle.
When to use professional vs. DIY methods
When you want a crisp stripe without bleed, choose DIY for simple, small projects and hire a pro for complex layouts, large walls, textured surfaces, or when a perfect finish matters and you lack time or confidence.
You can tackle straight, easy stripes with good tape, sealant, and patience.
Call a professional if precision, speed, or tricky surfaces exceed your skills or schedule.
Basic Understanding Why Paint Bleeds Under Tape
You’ll notice paint bleeds when tape doesn’t stick well to a rough or dusty surface, or when the tape’s adhesive isn’t right for the wall texture.
Certain tapes and paint types—like low-adhesion painter’s tape used with heavy, glossy paints—are more prone to seepage.
Also pay attention to paint thickness and how you apply it, because high-viscosity paint or heavy brush/roller strokes push color under imperfect tape seals.
How tape adhesion and surface texture affect bleeding
Because tape only sticks where it contacts the wall, the quality of that contact and the wall’s texture largely determine whether paint seeps underneath.
Press tape firmly, working edges into seams and pores. Smooth surfaces give continuous contact; textured or porous plaster leaves gaps where paint migrates.
Clean dust and oils, and consider gentle heat or a roller to improve adhesion before painting.
Types of tape and paint that cause issues
Once you’ve secured the tape and addressed surface texture, the next factor is the materials themselves: certain tapes and paints are more prone to letting color creep under the edge.
Cheap, overly flexible masking tape and low-quality painter’s tape often lack consistent adhesive. Glossy or heavily pigmented paints can exacerbate seepage when paired with incompatible tape; choose tapes rated for delicate surfaces and sharp lines.
Role of paint viscosity and application method
1 key reason paint bleeds under tape is how thick the paint is and how you apply it: thin, runny paint seeps more easily under edges, while overly heavy, gloopy coats can push up and lift tape, so you need to match viscosity and technique to the job.
Use moderate-bodied paint, apply thin multiple coats, roll or brush away from the tape, and let each layer cure.
Essential Tools and Materials You Need
Before you tape and paint, make sure you’ve got the right supplies: quality painter’s tape (or suitable alternatives), paints, primers, sealants, and edge sealers.
You’ll also want the proper tools—brushes, rollers, utility knives, caulk, and putty knives—and safety gear like gloves and goggles plus drop cloths for prep.
Having these on hand will keep edges sharp, prevent bleed-through, and make cleanup easier.
Recommended painter’s tapes and alternatives
When you’re masking a stripe, choosing the right painter’s tape makes the difference between crisp edges and frustrating bleed-through; look for tapes labeled “sharp line” or “delicate surface” that balance adhesion with clean removal.
You can also use low-tack masking, vinyl trim tape, or paper-backed tape for different surfaces, and consider alternatives when needed:
- Blue painter’s tape (general)
- Green “sharp edge” tape
- Thin vinyl trim tape
- Drafting or frisket paper
Paints, primers, sealants, and edge sealers
Paint choice, primer type, and the right sealants determine how crisp your stripe will look and how long it lasts.
Use compatible primer for surface porosity, choose a low-viscosity paint for smooth edges, and seal tape edges before cutting paint. Finish with an edge sealer or clear coat for durability.
- Primer matched to substrate
- Low-V paint for edges
- Tape edge sealer
- Clear topcoat
Tools: brushes, rollers, utility knives, caulk, putty knives
Tools make the job precise: you’ll need a selection of brushes for cutting in, a small roller for filling in, a sharp utility knife for trimming tape, caulk for sealing gaps, and a putty knife for smoothing imperfections.
Choose quality tools, keep blades sharp, and work methodically to avoid mistakes.
- angled sash brush
- small dense roller
- new utility knife
- flexible putty knife
Safety gear and preparation materials
Having the right brushes and knives is only part of the job; you’ll also want proper safety gear and prep materials before you cut a stripe.
Wear goggles and a mask, use drop cloths, and keep a level and pencil handy. Prep guarantees clean lines and safety.
- Safety goggles
- Respirator or dust mask
- Drop cloths and gloves
- Painter’s level and pencil
Step-by-Step Process to Paint a Crisp Stripe
Start by prepping and cleaning the wall so paint will stick evenly.
Then measure, mark, and level your stripe before applying tape with proper techniques to get straight lines and sealed edges.
Finally, choose a sealing method (clear caulk, diluted paint, or sealant) and use a primer or base coat to lock in crisp edges.
Step 1 Prepare and clean the wall surface
Before you tape or paint, clean and prep the wall so the stripe will lay flat and stick well.
Remove dust, grease, and loose paint with a damp cloth or mild detergent; rinse and let dry.
Fill holes and sand rough spots smooth, then wipe away residue.
Guarantee the surface is fully dry and free of contaminants before applying primer or tape.
Step 2 Measure, mark, and level your stripe layout
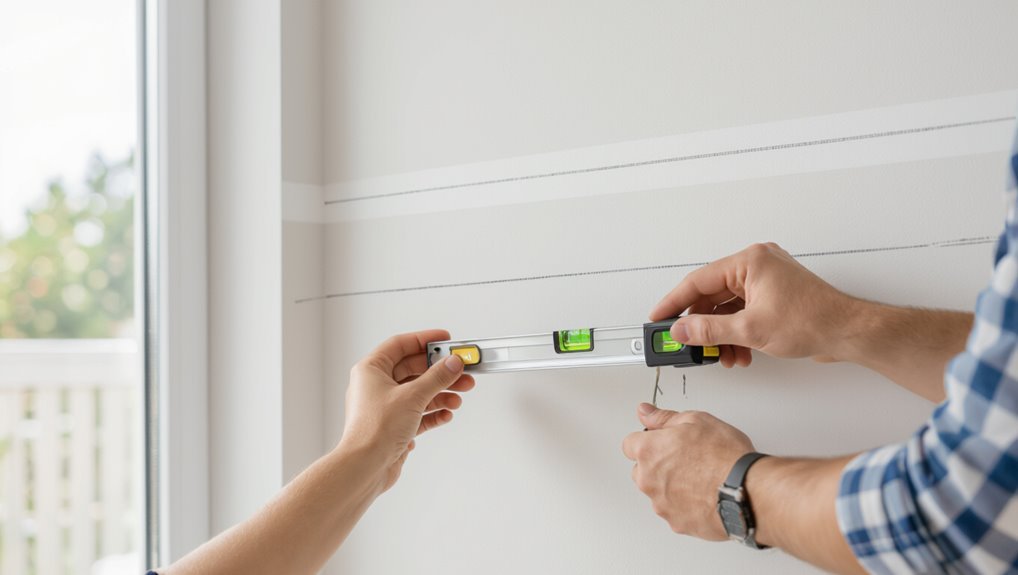
1. Measure the wall width and decide stripe placement. Use a tape measure and pencil to mark top and bottom points, then snap chalk lines or draw faint straight guides.
Check spacing against corners, outlets, and trim. Use a level to guarantee each line is perfectly horizontal.
Re-measure diagonally if needed so stripes stay parallel and consistent before taping.
Step 3 Apply tape correctly: techniques for straight lines
Once you’ve confirmed your layout, apply low-tack painter’s tape along the pencil or chalk lines, pressing it firmly with your finger or a plastic putty knife to seal the edges and prevent paint bleed.
Work in continuous strips, overlap ends slightly, and keep tape taut. Use a level as you go, smooth out bubbles, and remove any dust to guarantee crisp, straight edges for painting.
Step 4 Seal tape edges to prevent bleeding (options: clear caulk, diluted paint, sealant)
Although you’ve taped the line carefully, you’ll still need to seal the tape edges to stop paint from bleeding under them; choose from clear caulk, diluted paint, or a specialized sealant depending on the surface and paint type.
Run a thin bead of caulk or paint seal along the tape, smooth it into the gap, let it dry fully, then paint confidently knowing edges are protected.
Step 5 Prime or base-coat technique for edge control
After sealing the tape edges, prime or apply a base coat along the stripe line to lock in that barrier and create a uniform surface for the topcoat.
Use a small brush or narrow roller to run a thin, even coat right against the tape. Let it fully dry, inspect for gaps, and touch any missed spots so the final color lays down crisp and consistent.
Step 6 Painting techniques that minimize bleed (roller vs. brush, thin coats)
Choose your tools and apply thin, even layers to keep paint from seeping under the tape: use a small roller for larger stripes to cover evenly without excess pressure, and switch to a fine angled brush for edges or tight spots, working with light, short strokes and thin coats so each layer dries smooth before you add the next.
Feather strokes away from the tape and avoid overloading.
Step 7 Removing tape the right way and timing
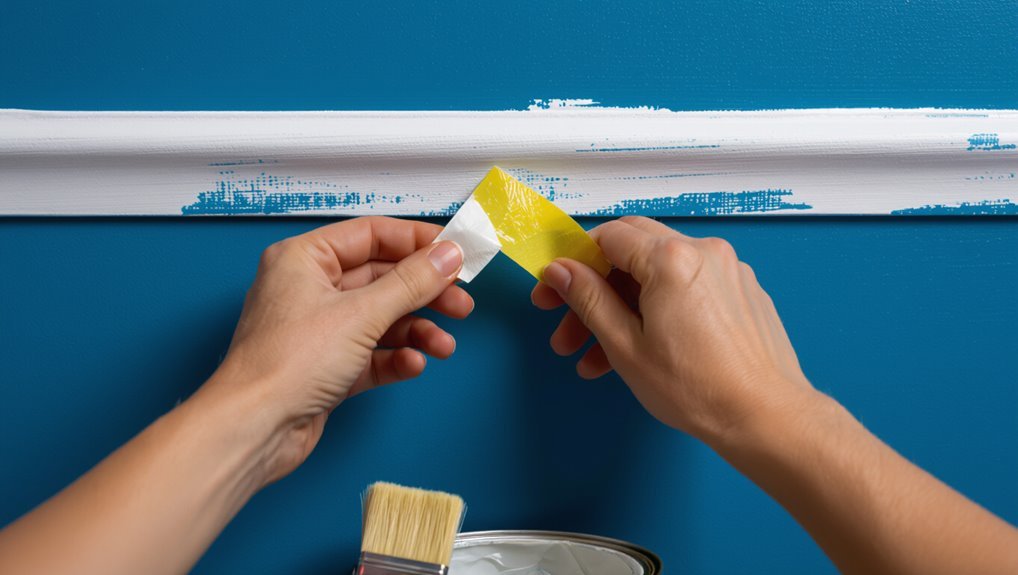
Once your final thin coat has dried to the point it’s tacky-free but not fully cured, pull the tape off carefully to reveal a sharp edge.
Pull slowly at a 45-degree angle back against itself, keeping tension low. If paint bridges the tape, use a fresh utility knife to score along the edge first.
Work in sections for consistent results.
Step 8 Touch-ups and final sealing
1 final pass will tidy up any imperfections and lock in your stripe’s clean look.
Inspect edges for tiny gaps or rough spots. Use a fine brush and matching paint to touch up chips or bleed marks, feathering gently.
Once dry, apply a clear matte sealer or satin finish to protect the stripe.
Let cure fully before rehanging or cleaning the wall.
Alternative Methods and Comparisons
You can compare adhesive vinyl or stencil strips with painter’s tape to decide which gives the cleanest edge for your skill level.
Weigh caulking tape edges against the paint-over-seal method to see which minimizes bleed and cleanup for your wall type.
Finally, consider time, cost, and complexity to know when hiring a pro makes more sense than doing it yourself.
Using adhesive vinyl or stencil strips vs. painter’s tape
When weighing options for crisp wall stripes, adhesive vinyl or stencil strips offer a different set of trade-offs than traditional painter’s tape: they can give a perfectly uniform edge with less fuss, but they demand careful placement and often cost more per linear foot. You’ll place vinyl for repeatable accuracy; tape stays flexible for curves.
| Vinyl/Stencils | Painter’s Tape |
|---|---|
| Precise edge | Flexible use |
| Higher cost | Lower cost |
| Reusable | Single-use |
Pros and cons of caulking tape edges vs. paint-over-seal method
If you want razor-sharp stripe edges without relying solely on tape or vinyl, you can choose between caulking the tape edge or sealing it by painting over the tape with the base color first. Caulking fills gaps for cleaner cuts; paint-seal is faster and simpler. Choose based on surface, drying time, and your patience.
| Method | Speed | Precision |
|---|---|---|
| Caulk | Slow | High |
| Paint-seal | Fast | Medium |
When to hire a pro vs. DIY cost and time comparison
Decide whether to tackle the stripe yourself or hire a pro by weighing time, cost, and skill: small, simple stripes on smooth walls can take a few hours and minimal expense, while complex patterns, high ceilings, or plaster repairs often justify professional rates because they’ll save you time and risk. Compare options:
| Task | DIY | Pro |
|---|---|---|
| Cost | Low | High |
| Time | Longer | Faster |
| Risk | Higher | Lower |
Common Mistakes That Cause Bleeding and How to Fix Them
You’ll often see bleeding because of the wrong or old tape, a dirty or unprimed surface, or by laying on too much paint or too many passes.
Remove tape at the right time and angle, and know how to fix bleed marks without re-taping when possible.
I’ll walk you through quick fixes and prevention so your stripe comes out sharp.
Improper tape selection or old tape
Anyone can ruin a crisp stripe by picking the wrong tape or using old, brittle tape; it’s one of the most common causes of paint bleed.
Use fresh, high-quality painter’s tape rated for your surface—delicate for freshly painted walls, medium for standard drywall.
Press edges firmly, replace brittle or stretched tape, and test a small patch to guarantee a tight seal before painting.
Skipping surface cleaning or priming
Skipping a quick clean or primer sounds tempting when you’re enthusiastic to see the stripe, but it’s the fastest way to invite paint bleed and uneven coverage.
Wipe dust, grease, and chalky residue with a damp cloth and mild cleaner.
Prime porous or patched areas to seal surface texture and promote adhesion.
Proper prep keeps edges crisp and reduces touch-ups.
Applying heavy paint loads or too many passes
Load your brush or roller lightly and work with thin, even coats—slathering on paint or repeatedly going over the same line is the quickest way to force wet paint under your tape and cause bleeding.
Apply several thin coats, letting each dry fully. Use a lighter touch at the tape edge, feathering inward.
If bleed appears, wait for drying, sand lightly, and repaint carefully.
Removing tape at the wrong time or angle
When you pull tape off at the wrong time or angle, you can lift fresh paint or tug edges and create a jagged line that looks like bleeding.
Wait until paint’s dry to the touch, score the tape edge with a utility knife, and peel slowly back on itself at about 45 degrees.
If paint still lifts, let it cure longer before smoothing.
Fixing bleed marks without re-taping
Even if you followed the tape-removal steps, paint can still feather under the edge and leave thin bleed marks.
You can fix them without re-taping: sand lightly with fine grit, wipe clean, then feather a tiny amount of matching color with a fine brush or angled brush.
For white gaps, use a slim brush and touch up with primer or the base wall color for a seamless finish.
Professional Tips and Best Practices for Perfect Stripes
Pick tape that matches your wall texture and paint type, and pay attention to room temperature, humidity, and drying times so your edges cure cleanly.
Use edge sealers or smart cutting-in tricks to lock paint lines, and set up guides or a consistent measuring system to keep stripe widths repeatable.
With the right materials and controlled conditions you’ll get sharp, professional stripes every time.
Choosing the right tape for your wall type and paint
One of the smartest moves you can make before taping is matching tape type to your wall surface and paint finish, because the wrong tape will lift paint or pull off drywall paper.
Choose low-tack paper tape for fresh drywall or delicate finishes, medium-adhesion for standard painted walls, and high-adhesion or contractor-grade for textured surfaces.
Test a small area before committing.
Temperature, humidity, and drying time considerations
Because paint cures differently in varying climates, you should account for temperature and humidity before you tape and paint, not after.
Check label-recommended temperature and relative humidity ranges, schedule painting during stable conditions, and allow longer drying between coats when it’s cool or humid.
Faster curing in warm, dry rooms reduces bleed risk; avoid rushing tape removal—peel when paint’s dry-to-touch, not fully cured.
Using edge sealers and cutting-in tricks
Start by sealing the tape edge to stop bleed-through before you roll or brush—edge sealers bond the tape to the wall and create a crisp barrier that keeps paint lines sharp.
After sealing, cut in with a steady angled brush for clean corners. Remove tape while paint is tacky, and touch up any tiny flaws with a fine brush to preserve straight, professional-looking stripes.
Maintaining consistent stripe width and repeatability
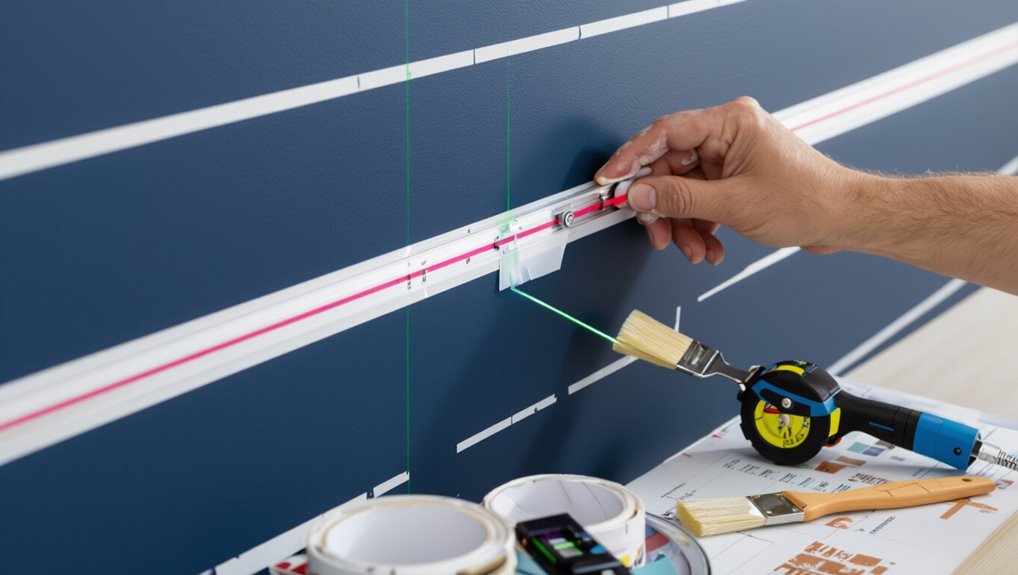
Once you’ve sealed edges and cut in cleanly, focus on repeatability so every stripe matches the last.
Measure and mark a reference line, use a level or laser, and apply painter’s tape along that guide.
Keep tape tension consistent, use a straightedge for long runs, and paint in the same direction and speed.
Photograph or note measurements for future runs to replicate results.
Project Variations and Advanced Techniques
You can expand beyond simple stripes by mixing multiple colors or creating stair-step and curved patterns with custom templates and careful masking.
For textured or wallpapered walls, you’ll need specific primers, flexible tape, and touch-up techniques to keep edges crisp.
In high-traffic areas, pick durable paints and finishes so your stripes hold up to wear and cleaning.
Multi-color stripes and stair-step patterns
Color can change the whole feel of a room, and multi-color stripes or stair-step patterns let you get creative without overwhelming the space.
Plan colors, test samples, and map measurements. Use high-quality tape, seal edges with a thin layer of base color, then apply each hue one at a time.
Remove tape slowly after drying. Balance bold and neutral tones for cohesion.
Textured walls and wallpapered surfaces
Moving from flat paint to textured walls or wallpapered surfaces calls for a different approach and a bit more patience.
You’ll prep by cleaning and testing adhesion, use high-quality flexible painter’s tape, and press tape into crevices with a putty knife or caulking tool.
For wallpaper, seal edges with clear acrylic or thin caulk, then apply paint thinly to avoid seepage and uneven texture.
Curved or angled stripes templates and masking approaches
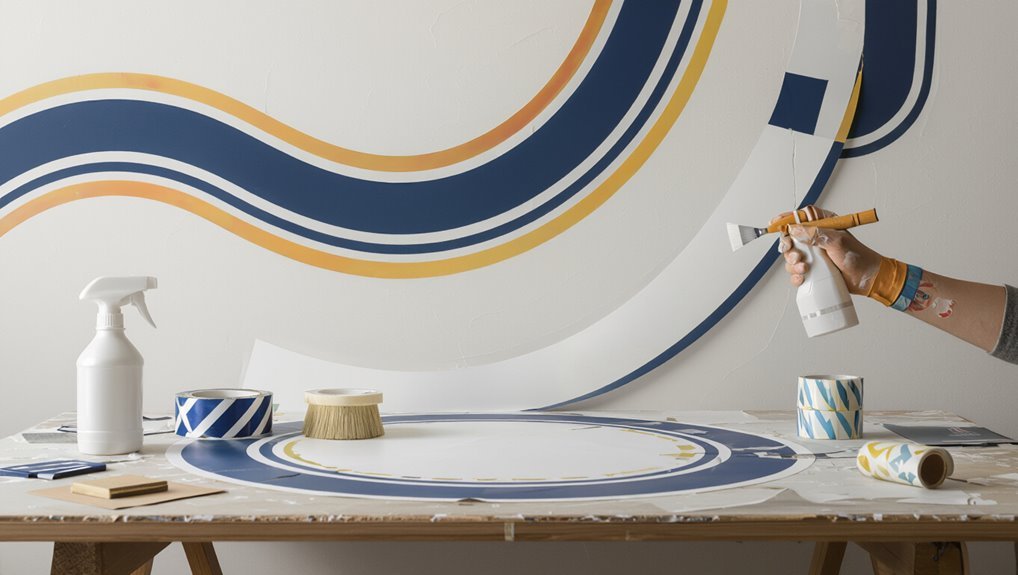
When working with curved or angled stripes, plan your lines and choose templates that match the radius or angle you want. Then mask carefully to keep edges crisp.
Trace templates with a pencil, secure flexible French curves or cardboard guides, and apply low-tack tape in short sections.
Seal tape edges with base color, paint in thin coats, and remove tape while paint’s tacky for clean curves.
High-traffic areas and durable finish options
Curved or angled stripes look great, but in hallways, kids’ rooms, or entryways you’ll want a finish that stands up to scuffs and frequent cleaning.
Choose satin or semi-gloss for durability; they wipe clean without showing streaks.
Prep with a tough primer, seal edges with clear acrylic before taping, and apply thin, even coats.
Consider washable paint for extra resilience.
Cost, Time Estimate, and Materials Checklist
Before you start, you’ll want a clear budget: list typical costs for paint, tape, tools, and any pro help.
Expect time ranges based on room size and stripe complexity so you can schedule the job realistically.
Finally, print a concise materials checklist to bring everything to the site and avoid last-minute runs.
Typical budget breakdown
A straightforward stripe project usually costs $30–$120 for supplies and takes 2–6 hours from prep to cleanup, depending on wall size and whether you’re cutting crisp edges by hand or with tape. You’ll budget for paint, tape, rollers, and primer; plan time for drying and cleanup; and buy extras for mistakes.
| Item | Estimated Cost | Notes |
|---|---|---|
| Paint | $15–$60 | Sample first |
| Tape | $5–$15 | High-quality |
| Tools | $10–$40 | Rollers, brushes |
| Extras | $0–$5 | Rags, gloves |
Time estimates by room size and complexity
Small rooms with simple horizontal stripes usually take 2–3 hours and cost $30–$60 in materials.
Larger rooms or complex patterns with multiple colors, vertical or diagonal lines, and detailed edge work can stretch to a full day and $60–$120.
Plan time for taping, priming, drying between coats, and cleanup, and bring along extra tape and touch-up paint in case you need them.
- Allow drying between coats
- Tape and measure carefully
- Work in sections for accuracy
- Keep spare paint for fixes
Final materials checklist to print
1 concise checklist helps you gather everything needed to paint stripes efficiently—include cost estimates, time ranges, and the exact materials so you can print and take it to the job.
You’ll find estimated costs, realistic time blocks, and a printable materials list. Use it at prep and on-site to avoid delays and bleeding.
- Paint and primer
- Painter’s tape and sealant
- Rollers, brushes, trays
- Drop cloths, measuring tools
FAQ Painting Stripes Without Bleeding
You’ll want quick, practical answers to common bleeding problems like when to remove tape and whether regular masking tape will do.
I’ll cover tape timing, using painter’s vs masking tape, whether spraying helps, how to seal textured walls, and the best fixes for bleed-through.
Read on and you’ll know exactly what to try next.
How long should I wait before removing painter’s tape?
If you wait too long the paint can dry to the tape and pull when you remove it, so peel the tape while the paint is still tacky—typically 30 to 60 minutes after the topcoat is applied, depending on temperature and paint type.
Test an inconspicuous corner; if paint lifts, wait a bit longer.
Pull tape back on itself at a 45° angle for a clean edge.
Can I use regular masking tape instead of painter’s tape?
Wondering whether regular masking tape will do the job? You can use it for quick, low-stakes projects, but it’s thinner and less adhesive than painter’s tape, so paint can seep or lift when removed.
For crisp stripes, choose quality painter’s tape designed for walls; if you must use masking tape, press edges firmly, seal with a thin clear coat or base color, and remove carefully.
Will spraying paint reduce bleeding compared to rolling?
Masking tape can work in a pinch, but when bleeding is your main worry, spray application often gives cleaner edges than rolling.
You’ll get finer, more even coverage with less pressure forcing paint under tape. Control distance and overlap to avoid mist.
Spraying dries faster, so remove tape sooner to prevent film lifting. Practice on scrap before committing to the wall.
How do I seal textured surfaces before taping?
Start by cleaning the surface and filling deep crevices so your sealer can sit evenly on the texture; you’ll want a dust-free, dry wall before you apply anything.
Choose a thin, high-build acrylic primer or latex-based skim coat to level texture without hiding character.
Roll or brush it smooth, let it cure fully, then sand lightly where needed.
Apply tape to the sealed area.
What’s the best fix if I already have bleed-through lines?
Don’t panic — you can usually fix bleed-through lines without repainting the whole wall.
Lightly sand the affected stripe to remove flaky edges, then wipe clean.
Apply a thin coat of good-quality primer or stain-blocking sealer over the bleed marks, let it dry, and repaint the stripe with a crisp edge using fresh painter’s tape and a firm brush or roller.