How to Paint a Sunset on a Wall A Step-by-Step Mural Guide
You can paint a striking sunset mural on a wall by planning a simple composition, prepping the surface, and layering blended gradients, clouds, and silhouettes. Start by choosing a horizon, sketching a scaled layout, and priming the wall. Block in large color washes with rollers or brushes, blend wet-on-wet for smooth shifts, then add clouds, sun, and foreground silhouettes. Work in stages to allow drying and touch-ups, and keep going to learn tips for tools, sealing, and upkeep.
Quick Answer Can You Paint a Sunset Mural on a Wall and How Long It Takes
Yes—you can paint a sunset mural on a wall by sketching a horizon, blocking in large color gradients, and adding detail layers.
Expect a simple mural to take a few hours and a more detailed, large-scale piece to take one to two days, depending on experience and drying times.
It’s a moderate project: beginners can do it with patience, while pros will finish faster.
One-sentence summary of the process
If you’ve got basic painting supplies and a few hours to spare, you can definitely paint a sunset mural on a wall. A small-to-medium mural typically takes 3–8 hours, while larger or more detailed pieces may require a full day or several sessions.
You’ll prep the wall, block in horizon and gradient colors, blend layers, add silhouettes and highlights, then seal for protection.
Typical time and difficulty estimate
You can definitely tackle a sunset mural with basic supplies, and how long it takes depends mostly on size, detail, and your experience.
You’ll spend less time on small, simple gradients and more on complex scenes. Plan carefully, work in stages, and expect drying breaks.
- Small (1–2 hours)
- Medium (4–8 hours)
- Large/detailed (1–3 days)
What Is a Sunset Mural and Why Choose It
A sunset mural is a painted scene that captures twilight colors and shapes, from realistic skies to stylized gradients, silhouettes, or graphic interpretations.
You’ll find they brighten rooms, add mood outdoors, and can make small spaces feel larger or cozier depending on style and scale.
They work well on interior feature walls, porches, fences, and any smooth exterior surface that accepts paint.
Definition and common styles (realistic, stylized, gradient, silhouette)
Choosing a sunset mural means bringing warm, shifting color and mood to a space, and you’ll find several common styles—realistic, stylized, gradient, and silhouette—each offering a different visual impact and ease of execution.
You can aim for photorealistic skies with detailed clouds, simplified shapes and bold colors for stylized looks, soft blended gradients for atmosphere, or high-contrast silhouettes for drama.
Benefits of a sunset mural for rooms and exteriors
Sunset murals bring warm, shifting light and calm energy into both interiors and exteriors, and they work for almost any setting—from cozy bedrooms to storefront facades.
You’ll boost mood, add visual depth, and personalize space without heavy renovation.
Consider benefits like:
- Mood enhancement and relaxation
- Visual focal point that complements décor
- Increased curb or room appeal and resale value
Where sunset murals work best (surfaces and rooms)
You’ll find sunset murals adapt well to many surfaces and rooms, from smooth interior drywall that showcases blended color gradients to textured exterior stucco that adds rugged charm.
You can brighten living rooms, bedrooms, nurseries, and feature walls, or enliven patios, fences, and garage doors.
Choose sealed plywood, primed concrete, or high-quality exterior paint for longevity and easy maintenance.
Materials, Tools, and Paint Types You Need
Before you start sketching, you’ll want to choose the right paints—acrylic or latex, and whether you need exterior-grade for durability or interior for easy cleanup.
Gather brushes, rollers, sprayers, and any specialty tools, plus prep supplies like primer, sandpaper, tape, drop cloths, and scaffolding for safe access.
Finally, bring color-selection tools and basic color-mixing knowledge so you can blend seamless sunset gradients on the wall.
Paint types (acrylic, latex, exterior vs interior)
When choosing paint for your mural, pick a type that matches the surface and location: acrylics dry fast, handle blending and layering well, and work on many substrates, while latex (water-based house paint) covers large areas affordably and resists peeling on properly primed walls; for outdoor murals you’ll want exterior-grade formulations or a weatherproof clearcoat to protect against UV and moisture.
| Type | Best Use | Notes |
|---|---|---|
| Acrylic | Detail, blends | Fast-dry |
| Latex | Large areas | Economical |
| Exterior | Outdoor | UV/moisture resistant |
| Interior | Indoor | Low VOC |
| Primer | All | Improves adhesion |
Brushes, rollers, sprayers, and specialty tools
Tools matter as much as paint for a sunset mural: choosing the right brushes, rollers, sprayers, and specialty tools lets you lay smooth gradients, crisp edges, and textured accents with efficiency and control.
You’ll pick tools for scale, finish, and technique. Consider:
- Soft filbert and flat brushes for blending and edges
- Foam rollers for even washes
- HVLP sprayer or airbrush for seamless fades and fine mist
Prep supplies: primer, sandpaper, tape, drop cloths, scaffolding
Now that you’ve picked brushes, rollers, and sprayers that fit your scale and finish, get your surface ready so those tools can do their best work.
Prime for adhesion, sand rough spots, and protect surroundings. Use quality tape and drop cloths. Rent scaffolding for high areas and steady work.
- Primer and sanding
- Tape and protection
- Scaffolding and safety
Color selection tools and color-mixing basics
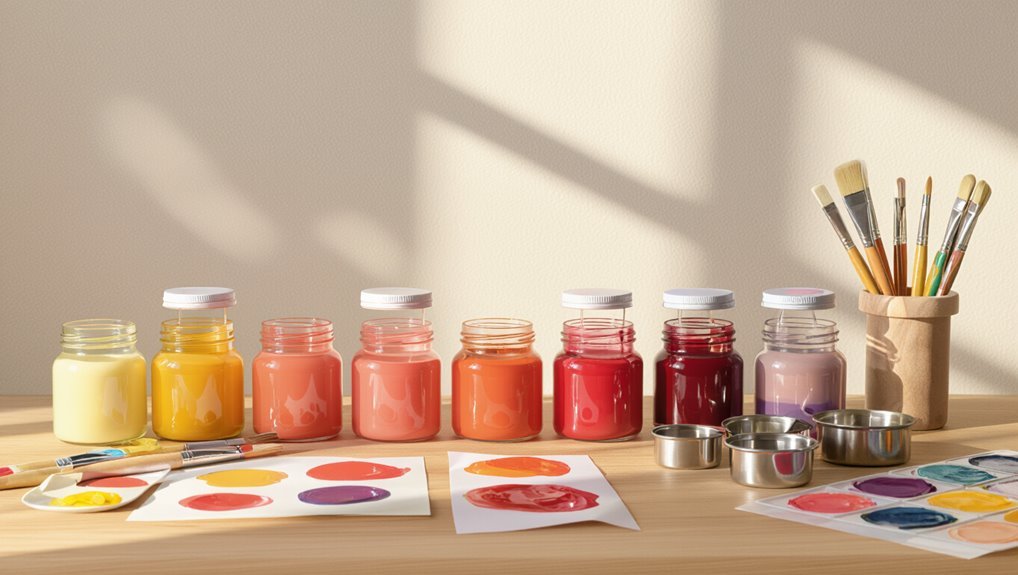
Pick a concise palette of five to seven swatches and you’ll have the range needed to mix believable sunsets without overcomplicating decisions.
Use a color wheel, value scale, and digital palette app to plan harmonies. Choose primary warm hues plus a cool counterpoint.
Practice tinting, shading, and glazing with small mixes. Keep notes on ratios and test swatches on the wall before committing.
Surface Preparation: Making the Wall Ready
Before you start painting, inspect the wall for cracks, mold, or flaking paint and make any necessary repairs so your mural will last.
Then clean, sand, and apply primer in a logical step-by-step order to create a smooth, stable surface.
Finally, mask and protect nearby areas to keep edges sharp and prevent accidental splatters.
Inspecting and repairing the wall (cracks, mold, flaking paint)
If your wall has cracks, mold, or peeling paint, address those issues first so your mural will adhere well and last.
Inspect thoroughly, marking damaged areas. Scrape loose paint, treat mold with appropriate cleaner and let it dry, then fill cracks and holes with exterior-grade filler.
Check for structural moisture sources and fix them before painting to prevent future deterioration.
Cleaning, sanding, and priming step-by-step
1. Clean the wall with mild detergent, rinse thoroughly, and let it dry.
Sand rough spots and feather edges until smooth. Wipe dust with a tack cloth, then apply primer evenly. Follow manufacturer’s drying times.
- Use a fine-grit sanding block.
- Choose a stain-blocking primer for repairs.
- Work in thin, even primer coats and check for uniform coverage.
Masking and protecting adjacent areas
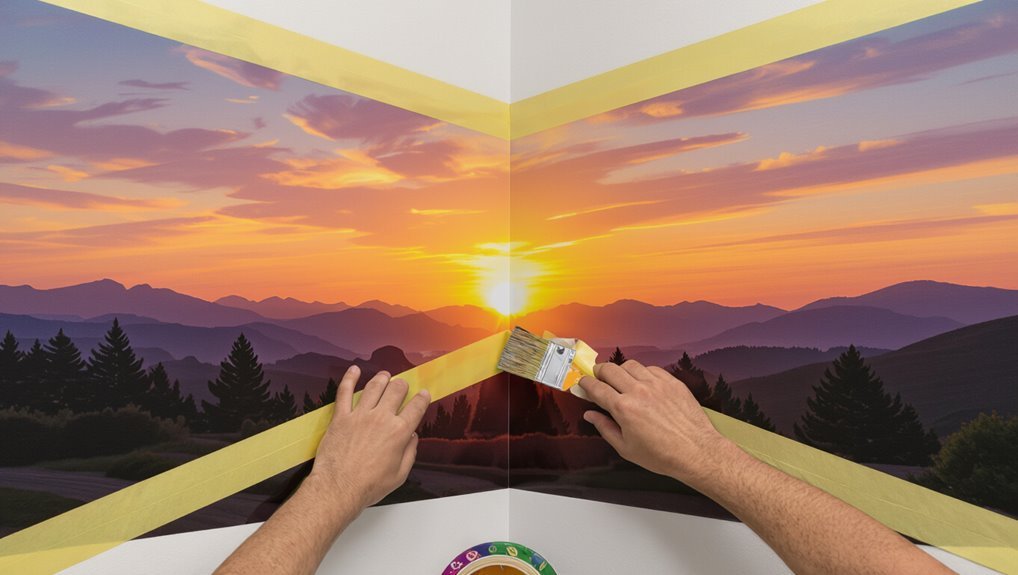
Once the wall’s primed and dry, protect floors, trim, and adjacent walls with careful masking so paint stays only where you want it.
Use low-tack painter’s tape along edges, overlap with plastic sheeting for large areas, and secure drop cloths on the floor.
Press tape firmly, remove it while paint’s tacky to avoid peeling, and check seams to prevent bleed-through.
Designing Your Sunset Planning and Stenciling
Start by choosing a strong composition—set your horizon line, pick a focal point, and decide which silhouettes will frame the scene.
Make a scaled sketch and transfer it to the wall using a grid or projector, then map out your color palette and gradient plan so shifts read smoothly.
For repetitive shapes like palm trees and birds, cut simple templates or stencils to save time and keep edges consistent.
Choosing a composition: horizon line, focal points, silhouettes
When you pick your horizon line, decide whether you want sky-dominant drama or a grounded, intimate scene—each choice changes the mural’s mood and where viewers’ eyes land.
Place focal points like the sun, a tree, or a building off-center using the rule of thirds.
Use silhouettes to anchor foreground contrast, guide sightlines, and simplify painting while keeping strong visual impact.
Creating a scaled sketch and transferring it to the wall (grid method, projector)
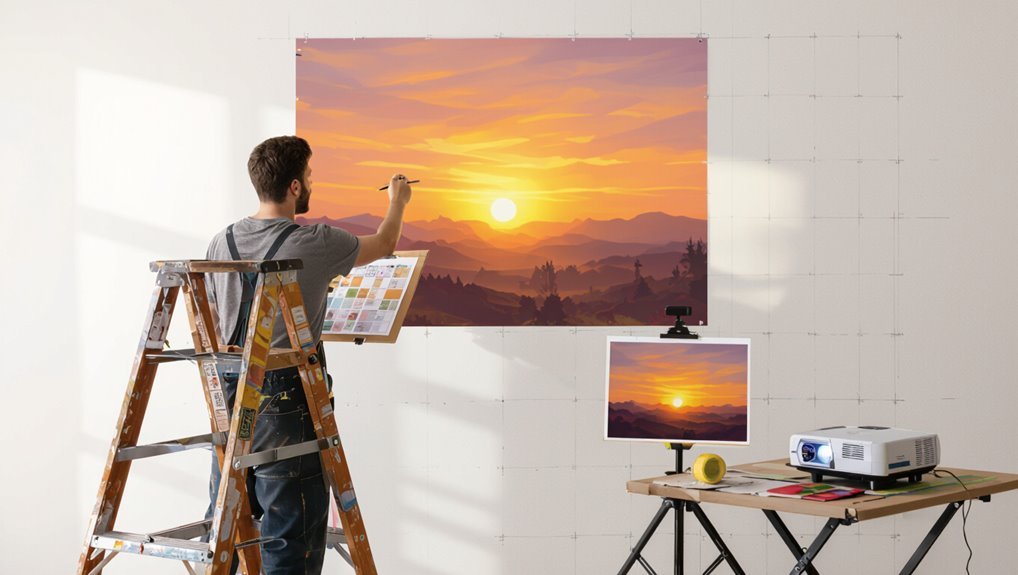
Before you transfer anything, make a scaled sketch that matches your wall’s proportions so your composition reads the way you intend at full size.
Grid the sketch and wall with matching squares, label coordinates, then copy block by block for accuracy.
Or use a projector to trace outlines at night, securing taped edges and adjusting focus so key lines align before you paint.
Selecting a color palette and gradient plan
Even if you’ve sketched and transferred the composition, choosing a cohesive palette and a clear gradient plan will determine how convincingly your sunset reads from a distance; pick a limited range of hues, decide whether the horizon will glow warm or cool, and map where each value shifts so you can blend smoothly and maintain contrast for focal elements.
- Choose 3–5 harmonized colors
- Plan value stops across the wall
- Test blends on a swatch before painting
Simple templates and stencils for common elements (palm trees, birds)
Start with 2–3 simple silhouettes you can repeat across the wall, like a streamlined palm frond, a curved trunk, and a few flying bird shapes. These basic templates speed up painting, keep proportions consistent, and let you layer detail only where viewers will focus.
Trace stencils on cardstock, adjust scale with photocopies, and cut clean edges. Use sponge or roller for crisp fills, brush for accents.
Step-by-Step Painting Process
Start by laying a base coat and marking the horizon so you’ve got a clean foundation.
Then block in large color gradients top-to-bottom or bottom-to-top, using wet-on-wet, dry brushing, or sponging to blend smooth shifts.
Finish by adding clouds, the sun, atmospheric layers, and painting silhouettes or foreground elements to complete the scene.
Step 1 Base coat and establishing the horizon
1. You’ll start by prepping the wall—clean, sand, and prime for adhesion.
Roll a uniform base coat in a neutral or mid-tone that supports your sunset palette. Use even strokes and let it dry fully.
Then mark the horizon with a light pencil line or low-tack tape, ensuring it’s level and at your desired eye-height before proceeding.
Step 2 Blocking in large color gradients (top-to-bottom or bottom-to-top)
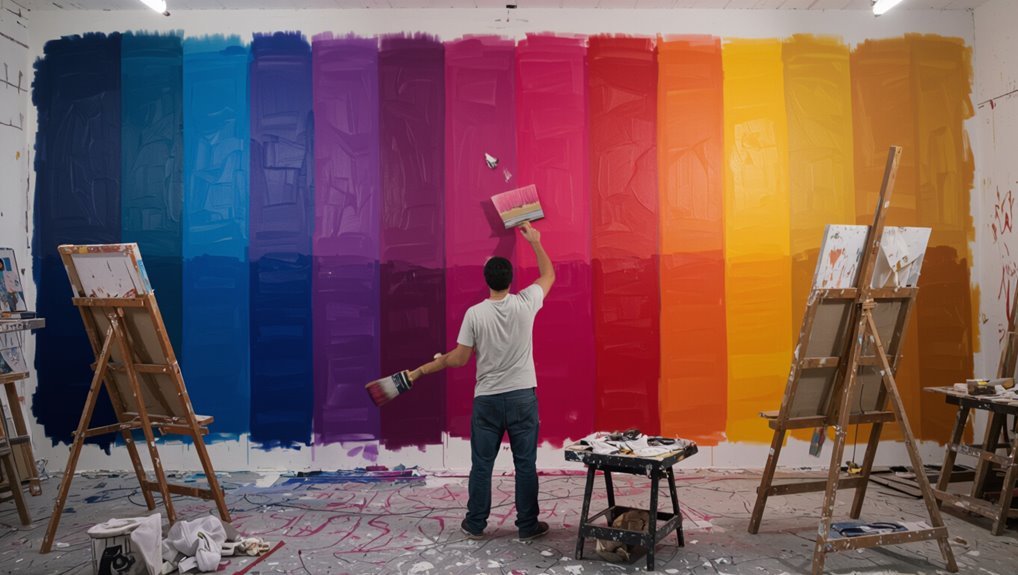
Lay down broad swaths of color to establish the mural’s main gradients, working either top-to-bottom or bottom-to-top depending on your comfort and the paint behavior; use large brushes or rollers and blend where colors meet so shifts read smooth from a distance.
Block in sky zones, the horizon band, and foreground tones, keeping edges loose and adjusting saturation to maintain overall balance before finer work.
Step 3 Blending techniques for smooth transitions (wet-on-wet, dry brushing, sponging)
Once your gradients are blocked in and still tacky, choose a blending method—wet-on-wet for seamless fades, dry brushing for soft edges and texture, or sponging for mottled shifts—and work promptly so colors merge smoothly without muddying.
Use a large, soft brush for gentle pulls, a nearly dry brush for feathering, or a natural sponge with light taps; step back often to judge changes.
Step 4 Adding clouds, sun, and atmospheric layers
Now you’ll add the clouds, sun, and atmospheric layers to give the mural depth and drama—start by blocking in the sun’s position and basic cloud shapes.
Then build translucent glazes and highlights to suggest distance and light. Use soft edges and layered washes for far clouds, stronger contrasts for nearer ones, glaze warm hues around the sun, and add subtle cool tones toward the horizon.
Step 5 Painting silhouettes and foreground elements
Begin by mapping the main silhouettes—trees, buildings, or figures—against the glowing sky, sketching their simplified shapes with a thin brush or charcoal so you can adjust composition before committing to paint.
Block in flat, dark tones for foreground forms, keeping edges crisp or slightly ragged for variety.
Use varied brush sizes to suggest branches, rooftops, and distant objects, maintaining scale and contrast.
Step 6 Details, highlights, and subtle glows
As you refine the mural, focus on adding small details, crisp highlights, and soft glows that sell the illusion of light and depth.
Use a fine brush to pick out rim light on clouds, trees, and water. Glaze thin layers for warm halos, and dab tiny specular highlights where the sun kisses edges.
Step back often to balance intensity and keep shifts smooth.
Step 7 Final touch-ups and protective clear coat
Inspect your mural closely from different angles and distances, fixing any stray brushstrokes, uneven edges, or color inconsistencies with a small brush and thin mixes.
Then test a removable swatch of final varnish in an inconspicuous spot to confirm sheen and compatibility before committing to a protective clear coat.
Once satisfied, clean dust, apply even thin coats of UV-resistant varnish, allowing full drying between layers.
Techniques and Tips to Improve Results
To sharpen your sunset mural, focus on practical tips like quick color-blending tricks and a tidy palette setup that speeds decisions.
Learn how to handle tight or awkward spots, use rollers and coordinated team workflows for big walls, and keep ladder and scaffold safety front and center.
Also prioritize ventilation and protective gear so you stay safe while working fast.
Color blending shortcuts and palette organization
While you mix fewer paints, you’ll get smoother shifts faster by using a limited, organized palette and a couple of blending shortcuts.
Keep tubes labeled, premix key midtones, and use tool tricks to blend quickly.
- Use three core hues plus white and a dark
- Premix graded tints for each horizon band
- Blend wet edges with a soft brush or sponge
Working with limited space or awkward surfaces
If you’re working in a tight corner or on a textured wall, adapt your approach so the space itself becomes part of the design: scale down motifs, use vertical gradients to emphasize height, and let texture catch light for natural highlights.
Use small brushes, foam pads, and stencils to control detail.
Test blends on scrap, plan sections, and accept imperfections as character.
Speed techniques for large walls (rollers + brushes, team workflow)
Start by mapping the wall into workable zones so you and any helpers can move fast without bumping into each other: assign rollers to broad areas for base coats, detail brushes for edges and blended sections, and a “floater” who fills gaps and smooths overlaps.
Use long nap rollers for even coverage, stagger work to let sections tack, and communicate color shifts so blends stay seamless.
Safety tips for ladders, scaffolding, and ventilation
Because a safe setup keeps your team working efficiently, secure ladders on level ground, lock scaffold casters, and inspect platforms before climbing.
Wear non-slip shoes and a harness when working high. Keep tools tethered and clear fall zones.
Ventilate the area with fans or open windows, wear respirators for fumes, and follow paint manufacturer safety guidelines to protect health and workflow.
Common Mistakes and How to Fix Them
You’ll run into a few common problems—muddy blends from overworking paint, uneven gradients or brush marks, scale and perspective slips, and adhesion failures—and you should be ready with fixes.
Stop blending when colors are still slightly wet and lift or rework streaks with a clean dry brush or glaze to restore clarity.
For perspective or scale, step back and sketch corrective lines, and for adhesion issues sand and prime the dried area before repainting.
Overblending or muddy colors causes and corrections
When you overblend a sunset mural, colors can turn muddy and lose their luminous edges, making the sky look flat instead of vibrant. That usually happens when pigments are mixed too thoroughly, too early, or with too much medium.
To fix it, work in thin transparent layers, let edges dry before glazing, use clean brushes, and restore contrast with fresh, unmixed hues.
Uneven gradients and visible brush marks remedies
If your gradients look stripy or brush marks keep popping up across the sky, it’s usually a technique or timing issue you can fix quickly; start by checking paint consistency and how you’re moving the brush.
Thin paint slightly, work wet-on-wet, use long horizontal strokes, feather edges with a dry soft brush, and blend quickly.
Light sanding and a thin glaze can smooth stubborn ridges.
Scale and perspective errors quick adjustments
Because a sunset mural reads best when objects feel believable in size and space, check basic scale and perspective early so you can correct issues before they compound.
Step back, view from desired vantage points, and use a simple horizon line and vanishing point to realign elements.
Shrink or enlarge shapes, redraw foreground overlaps, and adjust shadow angles until depth and proportion look natural.
Paint adhesion problems and how to repair after drying
Though you’ve finished the mural, paint adhesion problems can still show up later; peeling, flaking, or powdery areas usually mean the surface or paint failed to bond.
Scrape loose paint, sand feathered edges, clean with mild detergent, and let dry.
Prime bare spots with a suitable primer, then repaint matching sheen.
Seal with a clear exterior sealer to prevent recurrence.
Maintenance, Durability, and Sealing
To keep your sunset mural looking its best, pick the right sealant and topcoat for whether it’s inside or outside, and apply it according to the manufacturer’s instructions.
Clean gently with mild soap and water, touch up small chips with matching paint, and use clear filler for minor cracks.
Plan to refresh high-traffic or sun-exposed areas every few years so colors stay vibrant and protective layers remain intact.
Best sealants and topcoats for indoor and outdoor murals
A durable, well-chosen sealant will protect your mural from dirt, UV, moisture, and everyday wear, so picking the right topcoat—one matched to your paint type and location—is essential.
Choose a finish and formulation that suits interior or exterior use, and apply per manufacturer instructions to guarantee longevity.
- Water-based polyurethane for indoor acrylics
- UV-stable exterior acrylic varnish
- Anti-graffiti clear coat for public spaces
Cleaning and minor repair tips over time
After sealing your mural, you’ll want a simple maintenance plan to keep it looking fresh over time.
Dust weekly with a soft microfiber cloth; avoid harsh cleaners.
For grime, use mild soap and water on a sponge, rinse gently.
Patch chips with matching acrylics, feather edges, and reseal small areas.
Inspect yearly for fading, mold, or moisture and address problems promptly.
When to repaint or refresh the mural
If you notice colors losing vibrancy or the surface showing wear, plan a refresh sooner rather than later—doing touch-ups or a full repaint while damage is limited saves time and materials.
Check annually for fading, peeling, mildew, or chalking. Reapply sealer every 3–5 years outdoors, sooner in harsh climates.
Touch up small areas promptly; schedule full repaints when damage becomes widespread.
Cost, Time, and When to Hire a Professional
You’ll want a clear cost breakdown covering materials, tools, and any labor so you can budget the mural properly.
Estimate time based on the mural’s size and complexity to plan your schedule and avoid rushed work.
If the job is large, technically challenging, or you don’t have the right equipment, consider hiring a pro and learn how to find one with solid references and a strong portfolio.
Cost breakdown by materials, tools, and labor
When planning a sunset mural, break costs into three clear buckets—materials, tools, and labor—so you can see where savings matter and when to hire help. Prioritize quality paint and brushes, rent specialty gear only if needed, and compare labor quotes. Use the table to estimate and decide if DIY fits your budget.
| Item | Estimated Cost | DIY? |
|---|---|---|
| Paints | $50–$300 | Yes |
| Brushes | $10–$80 | Yes |
| Ladders | $20–$100/day | Maybe |
| Pro labor | $200–$1,000+ | No |
Time estimate by mural size and complexity
Estimate how long a sunset mural will take by combining three factors: wall size, design complexity, and your experience level.
Smaller, simple gradients can take a day; medium walls with details require a weekend; large or intricate scenes stretch to several weekends.
Plan for drying, touch-ups, and breaks.
- Small/simple: 6–12 hours
- Medium/moderate: 1–3 days
- Large/complex: 1–3+ weeks
Signs you should hire a pro and how to find one
If your time estimates for a sunset mural start to tip into weeks or the design includes complex elements like portraiture, intricate silhouettes, or layered glazing, it’s worth considering a professional.
Hire when budget, safety (ladders/scaffolding), or precision exceed your skills.
Expect pro rates by size and detail; get quotes, check portfolios and reviews, ask about insurance, timelines, and revisions before committing.
Project Examples and Inspiration
You can start with quick small-room sunset ideas that fit tight spaces and simple palettes.
For larger exterior walls, I’ll show bold concept layouts and tried-and-true color combinations to help you plan.
I’ll also include before-and-after mini case studies so you can see practical results and learn what to tweak.
Quick small-room sunset ideas
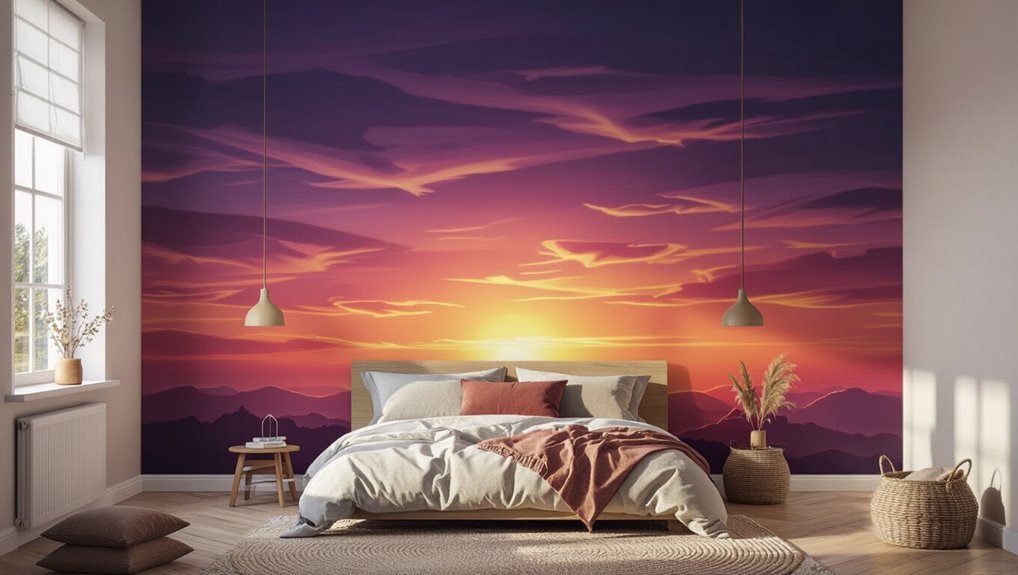
When space is tight, a sunset mural can still make a bold statement—think a narrow ombré wall behind a bed, a corner sunrise that wraps around a closet, or a mini horizon above a desk to add depth and warmth.
Use restrained palettes, simple silhouettes (palm, bird, distant boat), and quick blending techniques. Scale motifs to fit, tape crisp edges, and layer glazes for subtle glow.
Large exterior wall concepts and color palettes
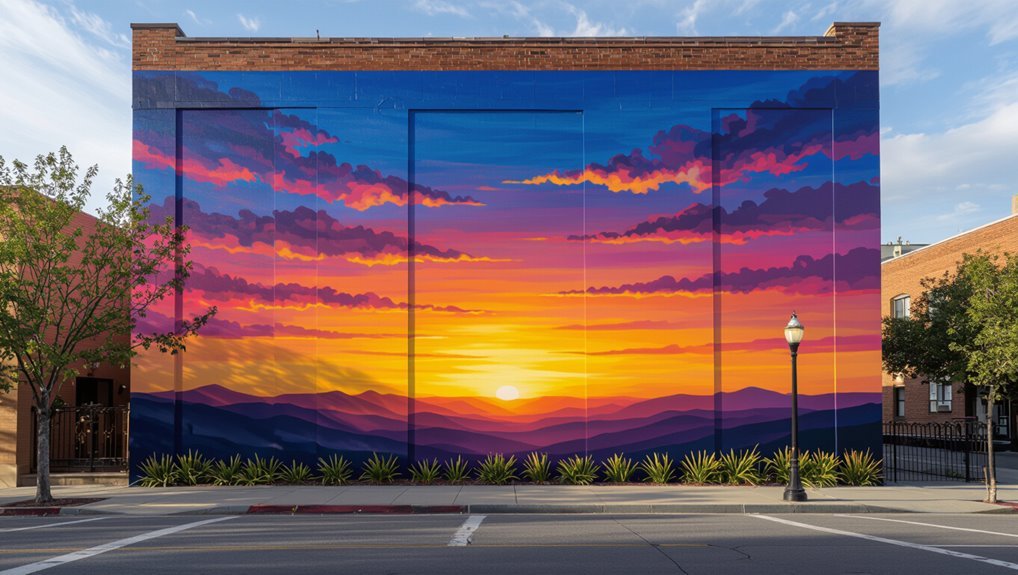
Because large exterior walls demand boldness and careful planning, start by imagining how scale, sightlines, and local light will change your sunset’s impact.
Choose high-contrast palettes—deep indigos, magentas, fiery oranges—and plan gradients that read from afar.
Factor durability: UV-resistant, exterior-grade pigments and sealants.
Sketch compositions that anchor to architecture, use focal silhouettes, and test small swatches in real light.
Before-and-after mini case studies
Start with three compact case studies that show clear transformations: a blank stucco wall turned into a luminous gradient that lifts a neighborhood corner, a faded brick facade refreshed with silhouetted palms to create a tropical focal point, and a previously cluttered alley simplified with a dusk sky that unifies disparate murals.
You see color choices that read well from afar.
You note techniques that sped the job.
You learn placement tricks for impact.
Frequently Asked Questions
You probably have practical questions after seeing those project examples, and this FAQ will answer the most common ones.
You’ll learn which paints are safest for indoor work, whether you can use a projector to trace a sunset, and how to mix a believable palette.
It also covers outdoor durability, how long murals last, and simple fixes if you make a mistake halfway through.
What paints are safest for indoor sunset murals?
Wondering which paints are safest for an indoor sunset mural?
Choose low-VOC or zero-VOC latex wall paints and acrylics labeled non-toxic. They dry fast, clean up with water, and reduce fumes.
Use water-based primers and sealers with low emissions.
Ventilate the room while painting and during curing.
Avoid oil-based or solvent-heavy paints unless you can provide strong ventilation and respirators.
Can I use a projector to trace a sunset image?
After choosing low‑VOC paints and ensuring good ventilation, consider how you’ll transfer your sunset design to the wall — and yes, using a projector to trace an image is a common, effective option.
You can project at night, adjust scale, and mark key lines lightly with pencil or chalk. Lock the projector, check focal sharpness, and refine outlines before painting to keep proportions accurate.
How do I mix a believable sunset palette?
How do colors blend into that glowing horizon?
Start with a warm base: cadmium yellow, cadmium red, and a touch of alizarin for depth.
Mix incremental tints toward orange and pink, add ultramarine or dioxazine violet to cool edges, and use a muted blue for distant sky.
Test swatches, adjust saturation with gray or complementary tones, and blend wet edges smoothly.
How long does a mural last outdoors?
Curious about lifespan? Outdoors, a well-prepared, primed, and sealed mural can last 5–15 years before notable fading or wear.
UV-resistant paints and quality clearcoat extend life; heavy sun, moisture, pollution, and physical damage shorten it. Regular inspections and touch-ups every few years preserve color and integrity.
Proper substrate prep and protective coatings give you the best longevity.
What if I make a mistake halfway through?
Even with careful prep and durable coatings, mistakes happen — especially on a large outdoor piece.
If you mess up, stop and assess: let paint dry, then sand or scrape uneven areas. Reprime exposed substrate, match colors, and repaint in thin layers.
For big errors, paint over with base coat and redraw. Seal repairs with protective varnish once cured.