How to Paint Edges of Walls Without Tape Like a Professional
You can get crisp, professional wall edges without tape by mastering a steady angled brush, loading only the tip, and using short controlled strokes while keeping a wet edge for smooth blending into the roller-applied paint. Hold the brush like a pencil, feather any overlaps with a soft brush or damp cloth, and touch up tiny gaps with a fine-tip brush. With practice and the right tools you’ll speed up work and reduce waste—keep going to learn step-by-step tips and fixes.
How to Paint Wall Edges Without Tape Quick Answer and What You’ll Achieve
You can get clean-looking edges without tape by using the sash brush, an angled brush for cutting in, or the shield-and-roll technique.
Skip tape when walls are smooth, trim is straight, and you’re comfortable with steady brush control or a steadying support.
Doing this saves time and avoids tape residue while still giving sharp, professional-looking lines.
Direct answer: Best methods summarized
1 practical way to paint clean wall edges without tape is to use a steady angled brush and a controlled “cut-in” technique: hold the brush like a pencil, load just the tip, and paint a thin line along the trim, then blend outward with a roller while the cut-in is still wet.
For how to paint edges of walls without tape, also use a steady hand, quality brush, and small batches.
When to skip tape: suitable surfaces and situations
When the surface is smooth and the trim is straight, skip the tape and cut in by hand — you’ll save time and still get sharp results.
Choose rooms with minimal texture, dry walls, and stable light so you can see edges.
Use a steady angled brush, keep a wet edge, and practice short controlled strokes.
Reserve tape for rough, uneven, or high-contrast areas.
Basic Understanding Why Edge Painting Without Tape Works
You’ll see cutting-in is a skill-based approach that lets you paint crisp edges by controlling brush angle and stroke, rather than relying on tape as a barrier.
With the right brush, a loaded mini-roller, quality paint, and a clean, primed surface, you’re giving yourself the tools and conditions for sharp lines.
Preparing the wall—repairing imperfections and removing dust—is what makes those tools actually work.
How cutting-in differs from taping
Because cutting-in lets you control the brush right at the edge, it delivers a different result than taping: instead of relying on a barrier, you’re forming a precise paint line with steady technique and the right tools.
Cutting-in demands consistent hand pressure, deliberate strokes, and corrective feathering; taping depends on placement and seal. You’ll adjust technique, not tape, to prevent bleeding and achieve crisp edges.
Tools, materials, and surface preparation overview
Shifting from technique to gear, get the right tools and prep so edge painting without tape actually works.
You’ll need sharp edging tools, smooth clean surfaces, and appropriate paint consistency. Prep removes dust and unevenness; the right brush and steady hand control bleed.
Follow simple surface fixes before you paint.
- angled sash brush, mini-roller
- clean, sanded, primed edges
- thinned paint, steady wrist
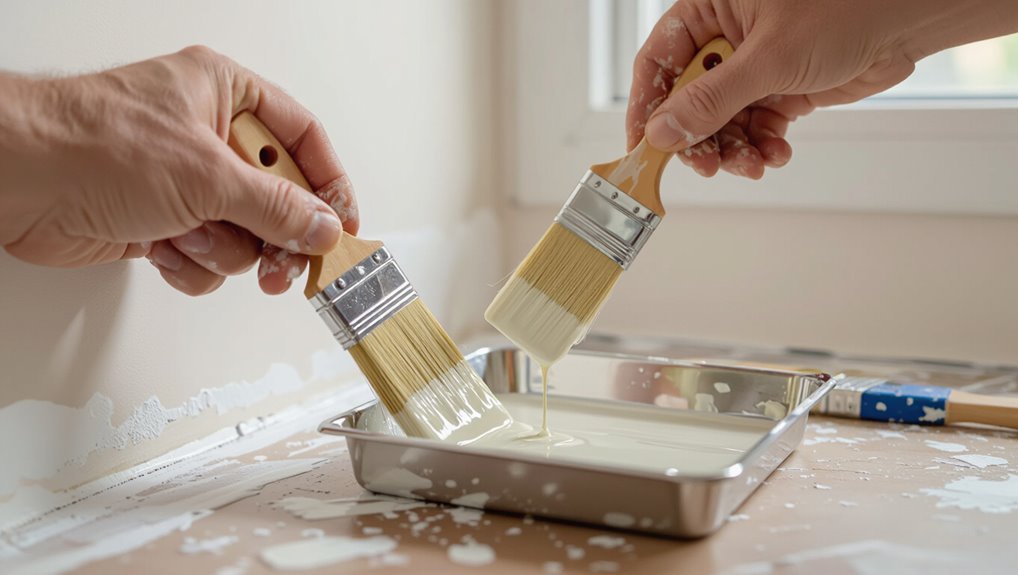
Tools and Materials You Need
You’ll want the right brushes—angled sash for precise edges and a sturdy trim brush for small flat areas.
Use a mini roller or shield edger for faster coverage, and pick paint with the right viscosity and sheen—latex dries faster, oil levels out differently.
Also gather painter’s cloths, a damp sponge, a cutting-in tool, and a bucket so you can work cleanly and correct mistakes quickly.
Brushes: angled sash vs. trim brushes

Choosing the right brush makes edging without tape much easier: angled sash brushes give you control along corners and between surfaces, while straight trim brushes hold more paint for longer runs.
You’ll pick sash for precision and trim for speed; both require steady pressure and short strokes.
- Use sash for tight lines and windows
- Use trim for baseboards and long edges
- Match brush size to trim width
Rollers and edgers: mini rollers, shield edgers
A mini roller and a shield edger make cutting in faster and cleaner without tape: the roller covers small wall sections smoothly, while the shield protects adjacent surfaces as you glide along trim and corners.
You’ll move quicker, keep lines sharp, and touch up with a brush where needed.
- Mini roller for tight spots
- Shield edger for straight edges
- Small brush for corrections
Paint types and viscosity: latex vs. oil, sheen considerations
Once your roller and edger have laid down clean lines, pick a paint type and viscosity that match the room and tools—latex goes on easier with rollers and dries fast, while oil offers a smoother finish and longer open time for brushwork.
Choose sheen and thin as needed for edge control:
- Latex: lower viscosity, quick drying, easy cleanup
- Oil: higher open time, smoother leveling
- Sheen: flat hides flaws, satin/eggshell easier to clean
Auxiliary items: painter’s cloths, damp sponge, cutting-in tool, bucket
Grab a few well-chosen auxiliary items before you start cutting in and rolling: clean painter’s cloths for wiping drips and smoothing edges, a damp sponge for softening hard lines and removing mistakes, a reliable cutting-in tool for crisp boundaries at trim and corners, and a sturdy bucket for mixing, thinning, and carrying paint.
Use them efficiently to stay neat and precise.
- Cloths: lint-free, absorbent
- Sponge: well-wrung
- Cutting tool: angled brush or edger
Step-by-Step Method: Cutting-In Like a Professional
Before you touch the brush, make sure the surface’s clean, sanded, and patched so paint goes on smoothly.
Load and hold your brush properly, then position your body and arm for a steady hand.
Use a controlled cutting-in stroke—start, feather, and stop—then blend with the roller by back-rolling to maintain a wet edge.
Step 1 Prepare the surface: cleaning, sanding, and patching
Start by thoroughly preparing the wall: clean off dirt and grease, sand rough spots, and patch holes so paint adheres evenly and your cut-in lines stay crisp.
You’ll wipe with mild detergent, sand edges smooth, and apply lightweight filler. Let repairs dry fully, then sand and remove dust before painting.
- Clean with sponge and detergent
- Fill and sand holes
- Remove all dust
Step 2 Choose and load your brush correctly
Now that the wall’s clean, smooth, and dust-free, pick a brush that matches the job and load it properly to get sharp cut-in lines.
Use a sash or angled brush, dip one-third into paint, and tap off excess on the can rim.
Keep a small paint puddle on the ferrule for consistent flow.
- Angled sash brush
- One-third dip depth
- Tap off excess
Step 3 Establish a steady hand: body and arm positioning techniques
Step 3 focuses on how you position your body and arm so your hand stays steady while cutting in:
Stand facing the wall with feet shoulder-width, hinge at hips, and align shoulder to the long cut.
Rest your elbow against your torso for support, and use your forearm, not wrist, to move the brush smoothly.
- Square shoulders, staggered stance
- Elbow braced to torso
- Forearm-driven motion
Step 4 The cutting-in stroke: starting, feathering, and stopping
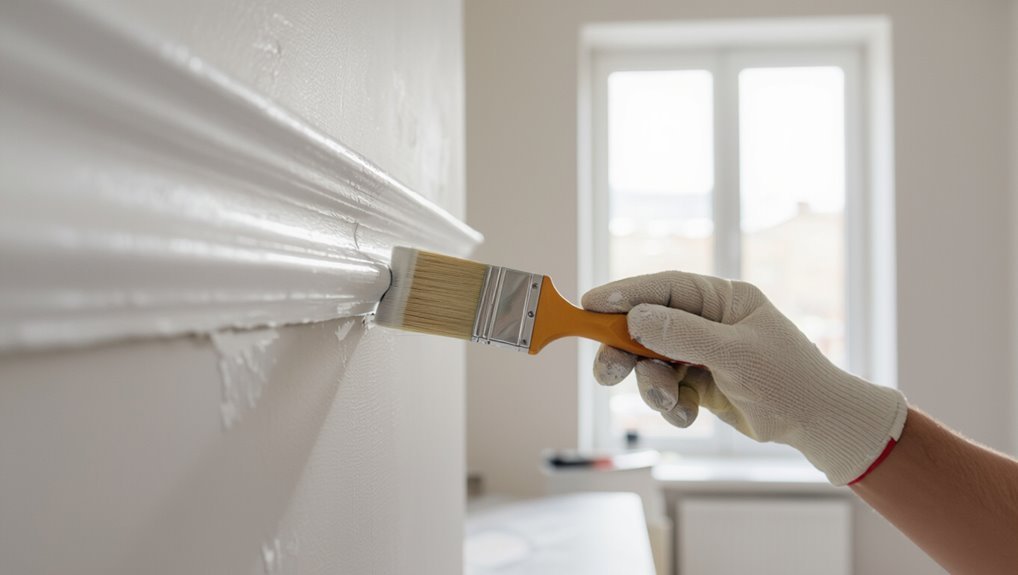
Begin each cut-in with confidence: load the brush correctly, touch the bristles to the corner or edge, and pull a controlled line along the trim while keeping your wrist steady and your forearm driving the motion.
Feather outward by reducing pressure and angling the brush slightly, maintaining a thin, even bead.
Stop smoothly at ends; reload as needed to avoid blobs or drips.
Step 5 Blend with the roller: back-rolling and wet edge management
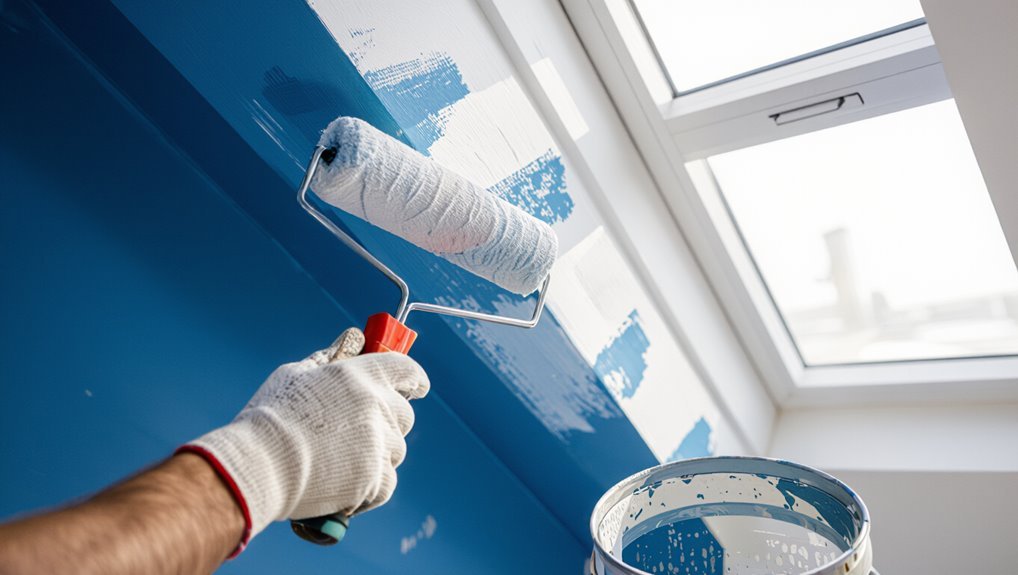
Match the roller to your brushwork and immediately back-roll the cut-in area so the brushed edge blends seamlessly into the field paint; this evens out texture, eliminates lap marks, and preserves a wet edge for a smooth, uniform finish.
Then continue rolling, overlapping slightly into the brushed strip to merge strokes without reloading.
- Use a short-nap roller for control
- Roll light to avoid splatter
- Work in 3–4 foot sections
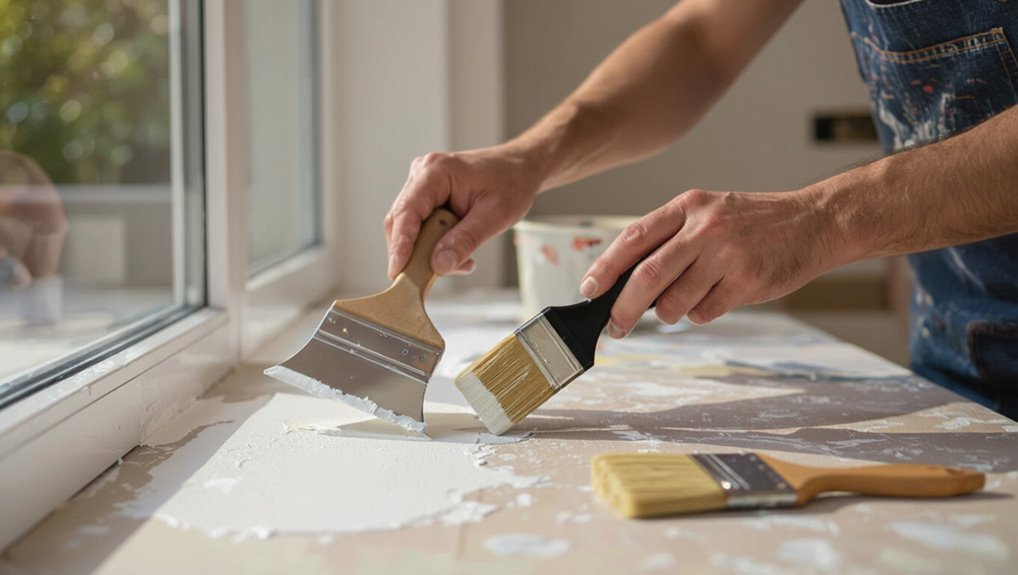
Step 6 Fixing small mistakes immediately: wipe, feather, and touch-up
Catch mistakes while the paint’s still wet so they’re quick to fix and virtually invisible.
You’ll wipe excess with a damp cloth, feather edges with a soft brush, and touch up tiny gaps with a fine-tip brush. Work gently, matching pressure and stroke direction for seamless blending.
- Wipe excess immediately
- Feather from wet into dry
- Touch up with light strokes
Alternative No-Tape Techniques and Tools
You can speed up clean edges without tape by using paint shields or edgers—these give control but can leave thin gaps or catch excess paint if you rush.
A mini roller lets you block in edges quickly before cutting in, reducing brush marks and touch-ups.
For irregular trim, try putty, removable caulk, or adhesive gum as DIY masks that peel away when the paint’s dry.
Use of paint shields and edgers: pros and cons
1 useful no-tape option is a paint shield or edger, tools that let you cut clean lines by guiding the brush or roller along trim and corners.
They speed work and reduce tape fuss, but need steady hands and can cause gouges or missed spots. Choose quality shields and practice.
- Faster than taping
- Risk of nicks and uneven paint
- Requires steady technique
Using a mini roller to paint edges first
If a paint shield or edger isn’t giving you the control you want, switch to a mini roller to tackle edges first.
You’ll load less paint, work faster than a brush, and blend into the field coat smoothly. Roll toward corners, feather slightly, then finish with a light touch-up.
- Use a dense 2–3″ nap
- Keep a controlled, slow stroke
- Blend into the main wall
DIY masking alternatives: putty, gum, or removable caulk
Try pressable putty, painter’s gum, or removable silicone caulk when tape won’t cut it—these compounds let you seal gaps, protect trim, and create crisp paint lines without the hassle of tape.
You’ll press, smooth, paint, then peel away when dry. Choose based on surface, cure time, and residue risk.
- Pressable putty for quick seals
- Painter’s gum for curves
- Removable caulk for gaps
Comparison: Tape vs. No-Tape Approaches
You’ll want to weigh precision, speed, and final finish when choosing tape or no-tape methods.
Tape can give sharper lines faster for beginners, while freehand or edge tools cut costs and waste but may take more practice to perfect.
Consider the time, material expense, and cleanup trade-offs to pick the approach that fits your project and skill level.
Precision, speed, and finish quality comparison
When you weigh tape against no-tape methods, three things matter most: edge precision, job speed, and the final surface look. You’ll find tape gives cleaner edges but slows setup; no-tape needs steady hands and dries faster with minimal residue. Choose based on your skill and timeline.
| Aspect | Tape | No-Tape |
|---|---|---|
| Precision | High | Medium |
| Speed | Low | High |
| Finish | Very clean | Clean if careful |
Cost, waste, and time trade-offs
Beyond edge quality and speed, cost, waste, and time commitments can tip the balance between using tape and going tape-free.
You’ll weigh upfront tape costs, cleanup waste, and the time savings from avoiding mistakes. Choose based on project size, skill, and environmental concerns.
- Tape: lower risk, more waste, modest cost
- No-tape: less waste, skill-driven time savings
- Hybrid: balance risk and efficiency
Common Problems and How to Fix Them
You’ll run into a few common issues when painting without tape, like wavy edges from a shaky hand, paint bleed where seams aren’t sealed, and visible brush marks or streaks.
For each problem I’ll explain the causes and quick fixes you can use on the spot, plus prevention tips to avoid repeats.
Start by identifying which issue you have so you can apply the right correction.
Wavy or uneven edge lines: causes and corrections
If your paint edge looks wavy or uneven, it usually means the brush or roller technique, paint load, or surface prep wasn’t consistent, and you can fix it without starting over.
You can smooth ripples by feathering, sanding light high spots, and reloading your tool correctly. Focus on steady strokes and thin coats for a crisp line.
- Feather edges with a dry brush
- Lightly sand highs
- Use thinner, even coats
Paint bleed and seepage: emergency fixes
Once you’ve smoothed wavy edges and feathered high spots, the next problem you might face is paint bleeding or seeping under your edge—often from overloading the brush, pressing too hard, or gaps in masking.
Act fast: blot excess, wait to dry, then scrape and touch up with a fine brush.
- Blot excess with a damp rag
- Scrape dried seepage gently
- Touch up after full dry
Brush marks and streaks: prevention and repair
Fight brush marks before they happen by choosing the right tools and technique: use a high-quality brush or foam applicator, load it evenly without overloading, and maintain a wet edge while applying thin, consistent strokes.
If streaks appear, sand lightly, wipe dust, and repaint with thinner coats. Use long, continuous strokes and feather edges to blend.
- Sand, clean, repaint
- Thin coats, wet edge
- Feather and blend
Pro Tips, Best Practices, and Routine Maintenance
You’ll get steadier lines if you practice simple hand-control drills before you paint.
Learn the right paint thinning and how much to load on your brush or roller so the coverage is smooth without drips.
Clean and care for your brushes after each session to keep edges crisp and tools lasting longer.
Practice drills to improve hand control
Because steady hands make the difference between crisp edges and frustrating touch-ups, practicing simple drills will sharpen your control and confidence.
You’ll train wrist stability, smooth strokes, and consistent speed with short sessions. Focus on posture, grip, and breathing while simulating edges on scrap material.
- Slow, continuous straight-line strokes
- Short controlled flicks for corners
- Wrist-rotation drills with a loaded brush
Optimal paint thinning and load amounts
One key to smooth, controlled cuts is getting your paint viscosity and brush or roller load just right: thin latex slightly with water (5–10%) for even flow, avoid overloading to prevent drips, and test on scrap before cutting in.
- Thin enough for smooth flow, not runny
- Load brush to middle of bristles
- Wring roller to avoid dripping
Cleaning and caring for brushes for crisp edges
Keep your brushes clean and conditioned so they give you crisp, predictable edges every time. Rinse thoroughly after each use, reshape bristles, and store flat or hanging to prevent splaying.
Deep-clean solvent for oil-based paints and mild soap for latex keeps performance sharp. Regularly inspect ferrules and handles for damage to avoid stray bristles.
- Rinse and reshape
- Deep-clean as needed
- Store properly
Real-Life Scenarios: Which Method to Use When
When you’re painting around trim, windows, and door frames, you’ll want a steady brush and steady hand to protect edges without tape.
For high-contrast color changes or tricky textures, use edge-cutting techniques and slower, controlled strokes so the new color stays crisp.
In large rooms you’ll focus on a rolling-and-cutting workflow for speed, while in small spaces you’ll work more carefully to avoid smudges and overlaps.
Painting around trim, windows, and door frames

Although tricky edges can intimidate you, painting around trim, windows, and door frames without tape is straightforward if you pick the right method for the situation.
You’ll choose based on trim profile, paint sheen, and tolerance for touch-ups. Use steady hands, angled brushes, and thin coats to control bleed and achieve crisp lines.
- Cut-in with angled brush
- Back-brush technique
- Use a sash brush for windows
High-contrast color changes and tricky textures
Moving from narrow trim lines to broader color shifts raises different challenges: high-contrast color changes and textured surfaces demand more control to avoid visible bleed and uneven coverage.
You’ll need sharper edging, feathered technique, and slower work on textures to blend. Choose brushes and rollers that match texture and pressure.
- Use a stiff angled brush for edges
- Feather with a dry brush
- Roll with nap matching texture
Large rooms vs. small spaces workflow
If you’re painting a large room, set up a systematic workflow—cut in one wall, roll that wall, then move clockwise—so you keep a wet edge and don’t rework dried paint.
In a small space, work wall-by-wall or even section-by-section to avoid oversaturation and maintain control around corners and fixtures.
Plan pace, tools, and breaks to keep consistency.
- Large room: sequence and wet edge
- Small space: short sections, steady control
- Both: proper brush, roller, and lighting
FAQ Common Questions About Painting Edges Without Tape
You can get crisp, professional-looking edges without tape—yes, even as a beginner—by using the right brush, angle, and technique.
I’ll cover what brush size and angle work best for narrow trim, how long to wait between cutting-in and rolling, whether a paint shield can scratch surfaces, and how to fix severe bleed-through after paint dries.
Read on and you’ll get practical, quick answers to these common edge-painting questions.
Can beginners achieve professional-looking edges without tape?
Wondering whether beginners can get crisp, pro-looking edges without tape? Yes—you can.
Start slow, practice steady hand control, use a high-quality angled brush, load it properly, and work in short, confident strokes.
Keep a damp rag nearby to catch mistakes and feather edges immediately.
With patience and these basics, you’ll produce clean, professional results faster than you expect.
What brush size and angle should I use for narrow trim?
Choice of brush makes the biggest difference for narrow trim: pick a sash or angled brush 1 to 1.5 inches wide so you’ve got enough bristle to load paint but still control tight lines.
Hold the brush at a slight angle, leading with the toe for precision. Use light, steady strokes, feathering outward to blend with the wall for a crisp, consistent edge.
How long should I wait between cutting-in and rolling?
Let the cut-in paint set until it’s still tacky but not wet — usually 10–30 minutes depending on temperature, humidity, and the paint’s sheen — then roll.
Check by lightly touching an inconspicuous spot; if paint lifts or strings, wait longer.
Roll with a loaded roller and blend into the cut-in using a wet edge to avoid lap marks.
Will using a paint shield scratch my walls or trim?
Will a paint shield scratch your walls or trim? It can if you press hard, drag rough metal, or use a damaged edge.
To avoid marks, hold it lightly against the surface, keep the shield clean, use a shield with a smooth plastic or rubber edge, and test on an inconspicuous spot first.
Replace any dented shields before serious work.
How do I fix severe bleed-through after paint dries?
If paint has bled through and dried, don’t panic — you can usually fix it without redoing the whole wall.
Sand the bleed spot lightly, clean dust, then apply stain-blocking primer to seal stains.
Once dry, feather in matching paint with a small brush or mini roller.
For large areas, repeat primer, then repaint.
Inspect and touch up as needed.