How to Paint Wooden Beams on the Ceiling for a Rustic, Polished Look
You can give ceiling beams a rustic yet polished look by cleaning, repairing, sanding, priming, and layering paint with glazing or dry-brushing techniques. Start by dusting, degreasing, and fixing holes or loose knots, then sand progressively and apply a compatible primer. Use thin coats, sand between layers, and choose glazing for refinement or wiping and dry-brushing for texture. Finish with a clear satin or matte topcoat for protection and cure fully—keep going to learn the step-by-step methods and tips.
Quick Answer Can You Paint Ceiling Wooden Beams for a Rustic, Polished Look?
You can paint ceiling wooden beams to get a rustic yet polished look by prepping, priming, and using a durable topcoat for even coverage.
Choose paint when you want color or uniformity, stain or leave natural to highlight grain and character.
Expect a half- to full-day project for most rooms, modest cost for paints and supplies, and moderate difficulty if you’re comfortable on a ladder.
One-sentence summary of the process
Yes—you can paint ceiling wooden beams to achieve a rustic yet polished look.
Start by cleaning and sanding, then prime to seal any tannins; fill gaps and caulk joints.
Apply thin, even coats of paint with a brush following grain, lightly sanding between coats for smoothness.
Finish with a protective topcoat to guarantee durability and maintain that refined, rustic appearance.
When to paint versus stain or leave natural
Sometimes the choice to paint, stain, or leave your ceiling beams natural comes down to the room’s style and how much maintenance you’re willing to do.
Choose paint for a clean, modern or painted-trim look and easier touch-ups.
Pick stain to highlight grain and warmth with moderate upkeep.
Leave natural if you want raw texture and minimal intervention, accepting potential sealing needs.
Estimated time, cost, and difficulty
If you’re weighing paint versus stain or leaving beams natural, it’s helpful to know what painting them will take in time, money, and effort.
Expect 1–3 days depending on size and drying times. Budget $50–300 for paint, primers, brushes, and drop cloths; pro labor raises costs.
Difficulty is moderate: you’ll need ladders, prep, and steady hands but no specialized skills.
Understanding Ceiling Wooden Beams Materials and Effects
Before you pick paint, you’ll want to know whether your beams are solid wood, engineered, or faux, since each type needs different prep.
Consider species and texture too, because grain and porosity affect how well paint sticks and how much primer you’ll need.
Finally, match your finish to the visual goal—keep knots and rough texture for rustic, smooth sanded beams for polished, or light distressed paint for a modern farmhouse look.
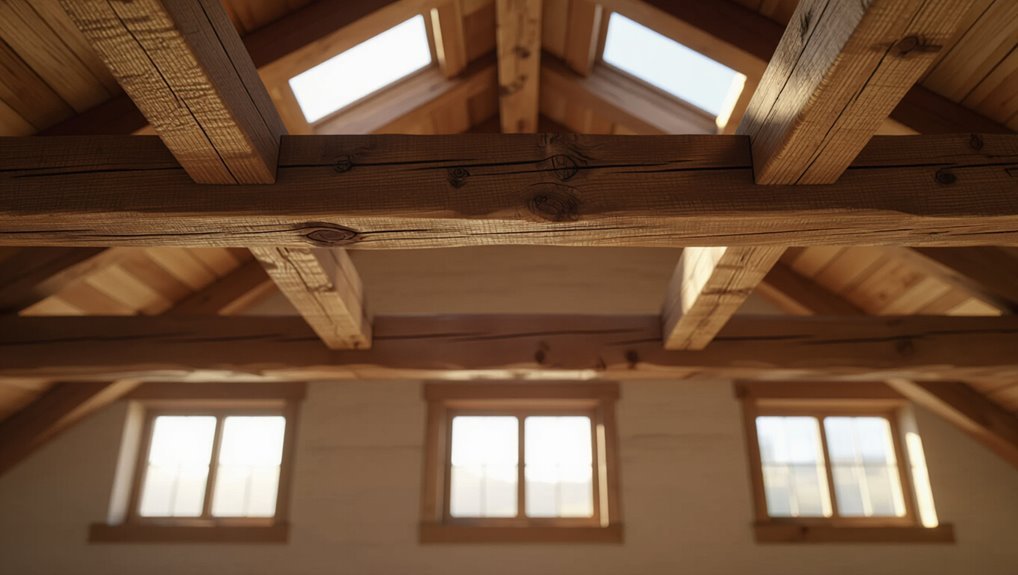
Types of beams (solid wood, engineered, faux beams)
Wooden beams come in three main varieties—solid wood, engineered, and faux—and each behaves differently when you paint it. You’ll prep, prime, and paint each type differently: solid needs careful sanding, engineered accepts paint well with light scuffing, and faux takes specialty primers.
Consider weight, mounting, and finish compatibility before starting.
- Solid wood: traditional, absorbs stain
- Engineered: stable, paint-friendly
- Faux: lightweight, needs bonding primer
- Installation: affects prep and repair
How wood species and texture affect paint adhesion
Because species and surface texture determine how paint bonds, you’ll want to match your prep and primer to the beam’s characteristics.
Softwoods like pine need deglossing and tighter-grit sanding to prevent grain raise; hardwoods often need stronger etching or bonding primers.
Smooth, factory-finished faux beams may require scuffing and high-bond primer.
Test adhesion in an inconspicuous spot before full application.
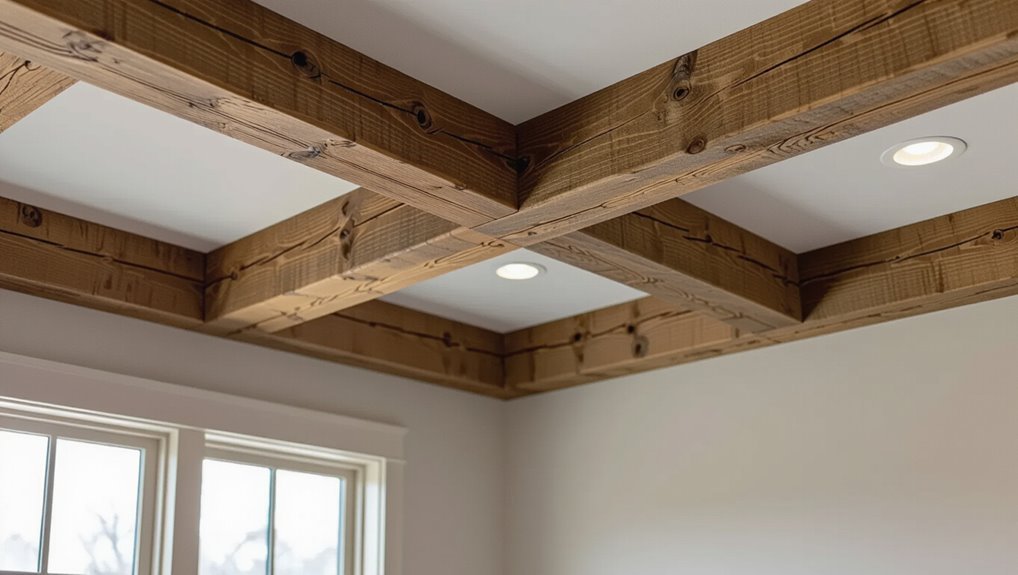
Visual styles: rustic, polished, modern farmhouse desired outcomes
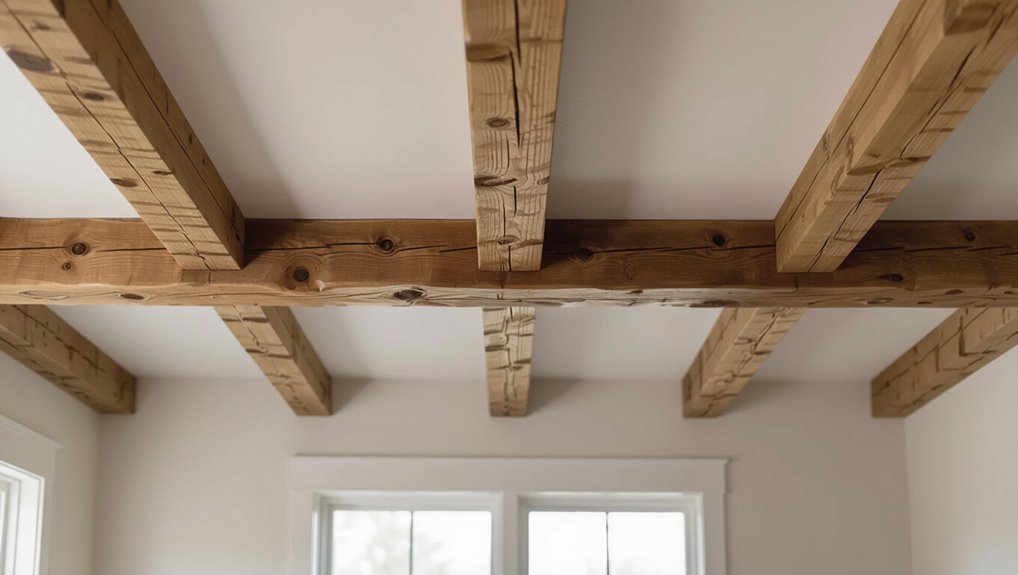
Style guides help you pick the right finish for your beams: aim for textured, low-sheen paints or stains for a rustic look; smooth, satin or semi-gloss finishes for a polished aesthetic; and warm whites, soft grays, or lightly stained natural tones for a modern farmhouse vibe.
Choose distressing or wire brushing for rustic depth, crisp edges and even coats for polished, and soft, muted hues for farmhouse cohesion.
Tools, Materials, and Safety Preparations
Before you start, gather a checklist of essential tools and materials—brushes, rollers, drop cloths, sandpaper, primers, and the paints or finishes you’re considering.
You’ll choose between latex, oil-based, chalk, milk paint, or varnish depending on the look and durability you want.
Don’t forget proper safety gear and site protection like sturdy ladders or scaffolding, dust control, masks, and eye protection.
Essential tools and materials checklist
To tackle painting wooden beams confidently, gather a compact set of reliable tools, quality materials, and basic safety gear so you’re prepared for every step—from surface prep to final coat.
You’ll want sturdy tools, proper cleaners, and protection to work safely overhead without mess or damage.
- Sandpaper, sanding block, and scraper
- Brushes, mini rollers, and extension pole
- Tack cloths, primer, masking tape
- Gloves, goggles, and respirator
Paint types and finishes best for beams (latex, oil-based, chalk, milk paint, varnish)
Choosing the right paint and finish will shape your beam’s look, durability, and maintenance needs, so pick with purpose.
For painted beams, use high-quality latex for easy cleanup or oil-based for durability and smoother leveling.
Chalk or milk paint give a distressed, matte rustic look.
Seal raw or painted surfaces with satin or gloss varnish for protection and easier cleaning.
Safety gear and worksite protection (ladders, scaffolding, dust control)
While you’re preparing to paint beams overhead, equip yourself with the right safety gear and secure the worksite so you can move confidently—sturdy ladders or scaffoldings rated for your load, non-slip footwear, eye and respiratory protection, and drop cloths to contain dust and paint.
Check ladder footing, lock scaffolding, ventilate the area, use a dust mask or respirator when sanding, and keep tools tethered to prevent falls.
Quick Surface Assessment What to Look For Before Painting
Before you start painting, take a close look for damage like rot, insect holes, or structural cracks that need repair.
Check the existing finish—paint, stain, or sealer—to determine how much sanding or stripping it’ll require, and confirm the wood is dry and well-ventilated from the attic to prevent future moisture problems.
If you spot significant decay or sagging, don’t paint until you address ventilation or structural issues.
Inspecting for damage, rot, insect issues
Even if the beams look fine at first glance, take a close look for soft spots, cracking, or small holes that could signal rot or insect activity; these issues will affect adhesion and require repair before you paint.
Probe suspect areas with a screwdriver, smell for mustiness, and inspect joints and attic access.
Treat or replace damaged wood, and document spots for follow-up repairs.
Existing finishes: paint, stain, sealer how they affect prep
If your beams already wear paint, stain, or a clear sealer, you need to identify the type and condition before you pick a prep method and new finish.
Check for flaking paint, glossy sealer, or penetrated stain. Sanding, deglossing, or chemical stripping depend on adhesion and layer thickness.
Test a small area, note tannin bleed, and choose primer compatible with the existing coating.
Moisture, attic ventilation, and structural considerations
When you inspect beams, look for signs of moisture, poor attic ventilation, and structural movement that could undermine any new finish.
Dark stains, soft or spongy wood, mold or mildew growth, and persistent condensation all point to excess moisture, while sagging, cracked joints, or split members signal structural issues that need repair before painting.
Fix leaks, improve ventilation, replace or sister damaged timbers, and allow drying.
Step-by-Step How to Paint Wooden Ceiling Beams
Before you start, you’ll want to set up drop cloths, mask off nearby surfaces, and protect furniture and floors.
Clean the beams thoroughly to remove dust, grease, and mildew, then repair cracks, holes, and knots and sand to the appropriate grit for your desired finish.
Finish by applying the right primer with proper technique so paint adheres and the result lasts.
Step 1 Set up and protect surrounding surfaces
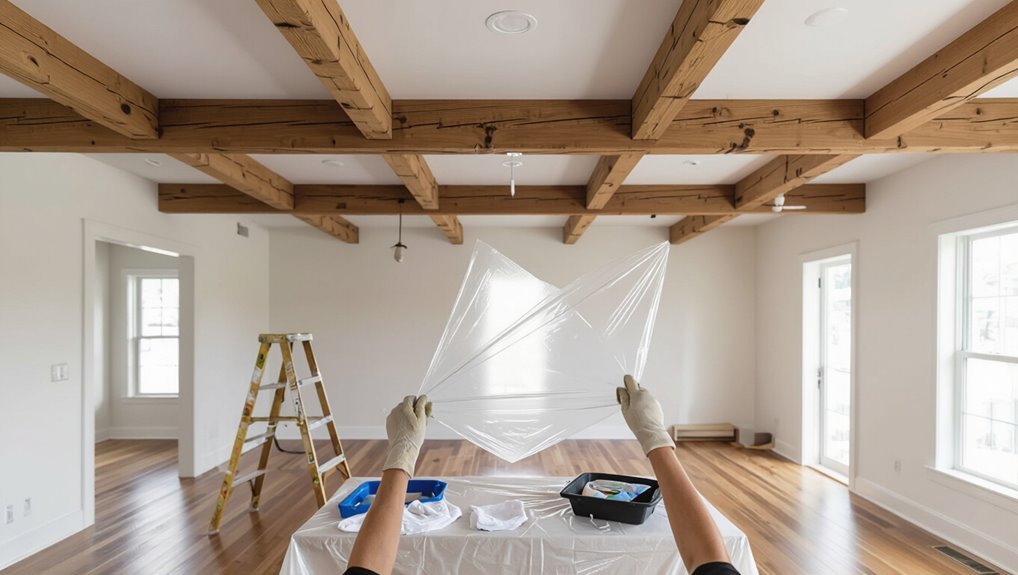
Start by clearing the work area and covering everything within reach so dust, drips, and paint won’t cause extra cleanup or damage.
Tape trim and edges, lay drop cloths over floors and furniture, remove light fixtures or shield them, and position a stable ladder.
Keep tools organized and a trash bin close for used tape and rags.
- Painter’s tape
- Drop cloths
- Ladder
- Trash bin
Step 2 Clean beams: dust, grease, and mildew removal
Tackle cleaning the beams thoroughly so paint will adhere and finish evenly: remove dust with a soft-bristle brush or vacuum, degrease stubborn spots with a trisodium phosphate (TSP) solution or a household degreaser, and treat any mildew with a diluted bleach solution (1 part bleach to 3 parts water) while protecting surrounding surfaces.
Rinse residues, let wood dry fully, and wear gloves and eye protection.
Step 3 Repair and fill cracks, holes, and knots
Now that the beams are clean and dry, inspect them closely for cracks, holes, and loose knots so you can repair defects that would telegraph through paint.
Remove loose splinters, glue or secure wobbly knots, and fill gaps with appropriate wood filler or epoxy.
Let repairs cure fully, then wipe away dust. Proper patching prevents visible imperfections under your finish.
Step 4 Sanding: how much and what grit for different finishes
Before you prime or paint, sand each repaired and raw area until it feels smooth and the surface profile matches the rest of the beam; you’ll remove old finish edges, feather filler, and dull raised grain so paint adheres evenly.
- Start with 80–120 grit for shaping and filler feathering.
- Move to 150–180 grit for smoothing.
- Use 220 grit for a fine, polished base.
- Light hand-sanding between coats with 320 grit.
Step 5 Priming: choosing the right primer and application tips
With the surface sanded smooth and feathered, pick a primer that matches the beam’s material and the topcoat you plan to use so paint bonds properly and hides imperfections.
Use an oil-based primer for tannin-rich woods, shellac for severe bleed, or a high-quality latex for general use.
Apply thin, even coats, sand lightly between coats, and allow full cure before painting.
Step 6 Painting techniques for a rustic vs polished look (brush, ragging, dry brushing, glazing)
Choose the finish you want—rustic or polished—then pick techniques that achieve it: brush strokes and glazing yield a smooth, refined look, while ragging, dry brushing, and distressing create texture and age.
For polished, use even brush strokes then thin glaze to deepen grain.
For rustic, apply base, wipe with a rag, dry brush lighter highlights, and scuff selectively for authentic wear.
Step 7 Applying topcoat or clear sealer for protection
Seal the finish by rolling or brushing on a clear topcoat to lock in color and protect the beams from wear, moisture, and dust.
Choose satin or matte water-based polyurethane for easy cleanup and minimal yellowing.
Apply thin, even coats, sanding lightly between coats with fine grit.
Work along the grain, avoid drips, and allow recommended recoat time for durable, long-lasting protection.
Step 8 Cleanup and curing time
Once the topcoat’s dry to the touch, tidy your workspace by removing drop cloths, washing brushes and rollers with warm soapy water (for water-based products), and wiping drips or splatters with a damp cloth before they cure.
Let beams cure fully—usually 24–72 hours for touch and up to a week for full hardness. Avoid heavy contact, control humidity and temperature, and ventilate the room.
Design Choices to Achieve Rustic vs Polished Finishes
Decide whether you want warm, muted tones and antiqued textures for a rustic feel or crisp, neutral hues for a polished, contemporary look.
Use distressing, glazing, or rubbing techniques to age beams for rustic appeal.
For a factory-smooth finish, sand thoroughly, apply multiple thin coats, and sand lightly between coats.
Color selection strategies for rustic warmth vs contemporary polish
When you’re choosing colors for wooden beams, think about how temperature, contrast, and texture will set the room’s mood.
You’ll pick warm, earthy tones and muted finishes for rustic warmth, or cool neutrals and crisp contrasts for contemporary polish.
Consider sheen and surrounding surfaces to balance cohesion.
- Warm browns and ochres
- Cool grays and whites
- Low contrast for cozy feel
- High contrast for sleek look
Distressing and antiquing techniques for rustic appeal
If you want beams that feel aged and lived-in, distressing and antiquing techniques give you controlled wear, layered color, and subtle patina that read as authentic rather than fake.
You’ll dry-brush, sand edges, and knock back highlights to expose grain. Glazes and tinted waxes settle into crevices for depth.
Work incrementally, testing stains and rub-through to avoid overdoing the effect.
Achieving a smooth, polished factory-finish look (sanding, multiple thin coats, sanding between coats)
Start by sanding each beam smooth with progressively finer grits so the surface is uniform and free of tool marks.
You’ll then apply multiple thin, even coats of finish, sanding lightly between coats to knock down dust nibs and promote adhesion for a mirror-like, factory-quality sheen.
Use a tack cloth, thin brush or foam applicator, maintain consistent direction, cure fully, then buff lightly for an even, reflective surface.
Alternatives and Comparisons
Before you pick a finish, compare paint, stain, whitewash and limewash to see which matches the look and maintenance you want.
Consider faux beam options too—spray paint, veneer or stainable faux materials can mimic real wood at lower cost.
Finally, weigh complexity and safety to decide when you can DIY and when it’s worth hiring a pro.
Paint vs stain vs whitewash vs limewash
When choosing a finish for wooden beams, you’ll weigh durability, appearance, and maintenance: paint offers opaque, long-lasting coverage and easy color matching; stain soaks into the wood to highlight grain with less surface buildup; whitewash gives a translucent, rustic wash that lightens without hiding texture; and limewash delivers a matte, mineral-rich look that ages naturally but needs more upkeep.
| Option | Best use |
|---|---|
| Paint | High coverage |
| Stain | Grain emphasis |
| Whitewash | Soft lightening |
| Limewash | Aged matte finish |
Faux beam finishing options (spray paint, veneer, stainable faux products)
Although faux beams save weight and cost, you still have several finishing routes to match real wood or create a custom look.
You can spray paint for quick, even coverage and subtle texture; apply wood veneer for authentic grain and depth; or choose stainable faux products that accept dyes and topcoats, letting you distress, blend, or seal finishes to mimic aged or polished timber.
When to hire a pro vs DIY
Deciding whether to hire a pro or tackle beam work yourself comes down to your skill level, budget, time, and risk tolerance.
If you’re comfortable on ladders, have painting experience, and want to save money, DIY suits you.
Hire a pro if beams need repairs, precise finishes, or safe ceiling access.
Pros guarantee speed, quality, and insurance coverage.
Common Problems, Mistakes, and How to Avoid Them
When paint peels, flakes, or bubbles on your beams it’s usually moisture, poor prep, or incompatible products — you’ll learn how to fix and prevent each cause.
You’ll also see how to avoid visible brush marks or lap lines by choosing the right tools and technique.
Finally, we’ll cover how to troubleshoot mismatched sheen or color inconsistencies so your beams look uniform.
Peeling, flaking, or bubbling paint causes and fixes
If paint on your wooden beams starts peeling, flaking, or bubbling, it’s usually because moisture, poor adhesion, or surface contamination got between the wood and the coating.
Remove loose paint, sand to sound edges, clean with degreaser, and dry thoroughly.
Prime with a compatible bonding primer, then repaint with proper temperature and humidity.
Fix ventilation or leaks to prevent recurrence.
Visible brush marks or lap lines and how to prevent them
Anyone who’s brushed a beam can spot visible brush marks or lap lines—they happen when paint dries before you can blend fresh strokes into wet edges.
Work in small sections, keep a wet edge, and use long, even strokes with a high-quality brush.
Thin coats, proper thinning per label, and light sanding between coats eliminate ridges so your beams look smooth and intentional.
Mismatched sheen or color inconsistencies troubleshooting
Because paint sheen and color depend on surface prep, application technique, and product choice, you’ll often spot inconsistencies that aren’t really the paint’s fault.
Check for uneven sanding, leftover stains, or different primer use. Test small patches, feather new coats into old, and use the same batch and sheen.
If problems persist, sand and re-prime before repainting for uniform finish.
Best Practices and Pro Tips
Pick the right time and conditions to paint—moderate temperature, low humidity, and clean, dry wood will give you the best finish.
Plan simple maintenance and touch-up routines so small spots don’t become big repairs.
In high-humidity or older homes, use moisture-resistant primers and paints and check beams periodically to maximize durability.
Timing and environmental conditions for painting
While paint adheres best when temperatures and humidity are steady, you’ll get the cleanest, longest-lasting finish by choosing days with moderate temps (roughly 50–85°F / 10–29°C), low humidity, and little wind; avoid painting in direct sun or just before rain.
Work when air circulation is gentle, allow full drying between coats per manufacturer times, and acclimate new paint cans indoors before application.
Long-term maintenance and touch-up strategies
If you want your painted beams to stay looking sharp for years, set up a simple maintenance routine: inspect annually (or after severe weather), clean gently with a soft brush and mild detergent, and address small chips or wear immediately with spot-sanding and touch-up paint from the same batch or a matched color.
- Keep leftover paint labeled and sealed
- File small repairs promptly
- Refinish edges showing wear
- Note touch-up locations in a maintenance log
Maximizing durability in high-humidity or old-home settings
Because moisture and old wood present unique challenges, you’ll prioritize ventilation, moisture control, and compatible coatings to keep painted beams lasting. Seal any rot or gaps, use high-quality primers and paints formulated for humid or historic conditions, and allow slower-drying products extra cure time so coatings fully bond before heavy use.
Inspect regularly, address leaks, use mildew-resistant finishes, and consider sacrificial clear coats for easier future touch-ups.
Cost Breakdown and Time Estimates
You’ll compare typical DIY material costs—paint, primer, sandpaper, and tape—against what professionals charge for labor and markup.
Expect small single-beam jobs to take a few hours, medium rooms a day, and complex high or multiple-beam projects up to several days.
Use beam size and room complexity to estimate time and decide whether hiring pros makes financial sense.
Typical DIY material costs vs professional labor
Comparing DIY material costs to hiring a pro helps you decide whether to tackle beam painting yourself or hire labor; expect to spend $30–$150 on materials for a typical room (paint, primer, brushes, sandpaper, tape, drop cloths) versus $200–$800+ for professional labor depending on beam size, finish, and access.
| Choice | Cost | Feeling |
|---|---|---|
| DIY | $30–$150 | Proud |
| Pro | $200–$800+ | Relieved |
| Hybrid | $100–$400 | Confident |
Time estimates by beam size and room complexity
Besides money, time is the other big factor when deciding whether to DIY or hire a pro.
Small rooms with one or two narrow beams take 4–8 hours for prep, sanding, priming and two coats.
Large rooms or multiple wide beams need 1–3 days.
Complex ceilings with high or obstructed beams add setup and safety time, possibly extending the job to a week.
Project Checklist Before, During, After
Before you start, check the pre-paint list: surface prep, primer, supplies, and safety gear.
On the day, follow a day-of checklist to confirm lighting, ventilation, tack cloths, and working order of brushes and rollers.
After you’re done, run through a post-paint checklist for cleanup, touch-ups, and cure time before reattaching fixtures.
Pre-paint checklist
Start with a clear checklist so you know what to do before, during, and after painting your wooden beams.
Prepare tools, clear the room, and plan ventilation. Inspect beams for damage, measure surfaces, and choose paint/primer.
- Gather primer, paint, brushes, rollers
- Sanding pads, filler, scraper
- Drop cloths, tape, ladder
- Safety gear: mask, goggles, gloves
Day-of checklist
Checklist: on the day you paint, run through a concise sequence to keep the job smooth and safe. You’ll prep, protect, and pace yourself to finish efficiently.
- Confirm ventilation, lighting, and ladder stability.
- Lay drop cloths and tape edges.
- Stir paint, test a small area, and start with brushes for edges.
- Take timed breaks, hydrate, and inspect progress before cleanup.
Post-paint checklist
When you finish painting the beams, follow a short post-paint checklist to guarantee the job cures cleanly and your space is restored.
Let paint dry per product instructions, ventilate the room, remove tape and protective coverings carefully, and inspect for touch-ups.
Check for drips, even coverage, and proper sheen before replacing fixtures.
- Remove tape slowly
- Ventilate thoroughly
- Inspect for drips
- Light touch-ups only
Frequently Asked Questions
You probably have a few quick questions before you start, like whether you can paint over stained or varnished beams and if paint will make your ceiling feel lower.
You’ll also want to know how to care for painted beams in kitchens or bathrooms, whether you can get a whitewashed look with regular paint, and how long to wait before hanging lights or décor.
I’ll answer each of these so you can finish with confidence.
Can I paint beams that are already stained or varnished?
Yes — you can paint beams that are already stained or varnished, but you’ll need to prep the surface so the new paint will stick.
Sand lightly to scuff the finish, clean off dust and grease, and repair any damage.
Apply a high-quality bonding primer formulated for glossy surfaces, then paint with your chosen topcoat.
Follow manufacturer drying times for best adhesion.
Will painting beams make my ceiling look lower?
If you’ve prepped and primed stained or varnished beams, you might wonder whether painting them will make the ceiling feel lower.
Painting can visually lower height if you use dark, contrasting colors. To preserve openness, choose lighter or matching tones, paint the ceiling a bright neutral, and keep beam edges crisp.
Strategic lighting and vertical décor also help maintain perceived height.
How do I maintain painted beams in a kitchen or bathroom?
Because kitchens and bathrooms face more moisture, grease, and frequent cleaning, painted beams there need a bit more care than in dry rooms.
Wipe regularly with a soft, damp cloth and mild detergent, avoid abrasive scrubbers, and dry promptly.
Reapply a water-resistant clear coat every few years, inspect for peeling or mold, and touch up chips with matching paint to keep beams looking fresh.
Can I achieve a whitewashed look with regular paint?
Maintaining painted beams in moist rooms is one thing; creating a specific finish is another, and you can get a whitewashed look using regular paint with a few simple techniques.
Dilute latex or chalk paint with water, brush on thin coats, then wipe back with a rag to reveal grain.
Seal lightly with matte poly to protect the subtle translucence without gloss.
How long before I can hang light fixtures or décor from painted beams?
How long should you wait before hanging light fixtures or décor from freshly painted beams?
Wait for paint to fully cure, not just dry to the touch.
Latex usually dries in hours but cures in 7–14 days; oil-based can take 2–7 days to dry, up to 30 days to cure.
Follow paint manufacturer recommendations and avoid heavy loads until full cure; use proper anchors and hardware.