
How to Paint a Peeling Deck Without It Peeling Again
You can stop your deck from peeling again by stripping all loose paint, repairing or replacing any soft or rotten boards, and sanding to a solid, clean surface so primer and paint can bond. Make sure the wood is fully dry (below about 15% moisture), use a high-quality bonding primer, and topcoat with exterior acrylic paint in appropriate weather. Follow proper fastening and maintenance steps to prevent future failure, and keep going to learn the full process.
Quick Answer: Stop Peeling Deck Paint Now
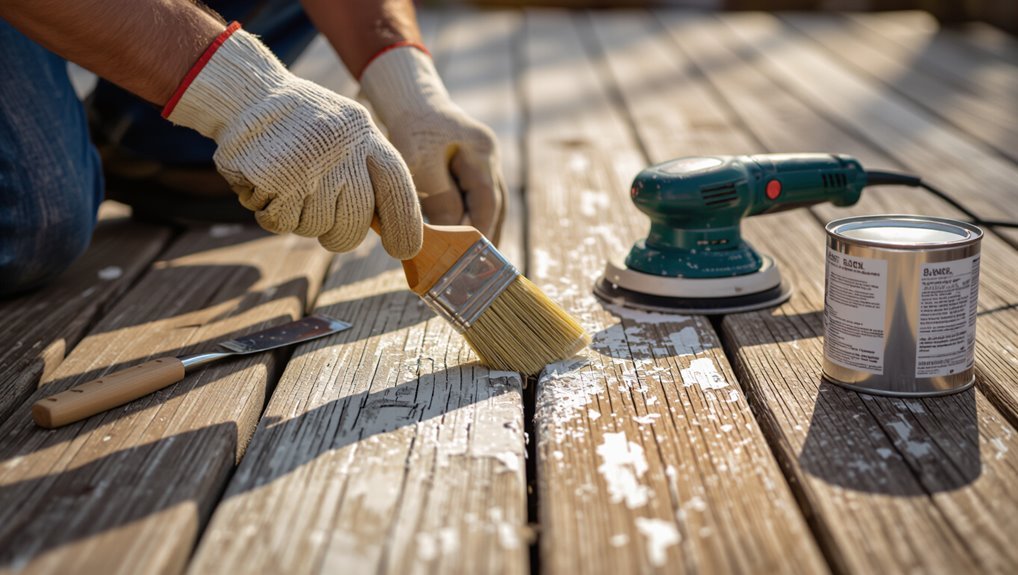
Stop peeling deck paint now by tackling the root causes: moisture, poor surface prep, and incompatible coatings.
You’ll strip loose paint, dry and repair wood, then choose compatible primers and exterior deck paints.
Follow proper sanding, cleaning, and sealing steps so peeling solutions actually work.
That disciplined approach boosts paint longevity and prevents repeat failure, saving time and money over the long run.
How to Tell If Paint or Wood Is Failing
Look at the peel pattern and how much paint has lifted to judge whether it’s localized or widespread.
Press and probe the boards—if the wood feels spongy or crumbles, you’ve likely got rot.
Do a simple adhesion test by scraping or taping a small area to see if the paint is bonding or failing.
Peel Pattern And Extent
Peel patterns tell you whether paint failure is surface-level or a sign of deeper wood damage: small, powdery flakes often mean old paint or UV breakdown, while large sheets lifting from seams, boards splitting, or wood that crumbles beneath the paint indicate moisture, rot, or adhesion loss.
You should map peel patterns and perform extent analysis to decide sanding, spot repairs, or full removal.
Wood Softness And Rot
Mapping peel patterns helps you spot where the problem might be coming from, but you also need to check whether the wood itself is failing.
Do a thorough wood inspection and moisture assessment, probing boards for softness and fungal growth. Focus on rot identification and board integrity to guide wood treatment and decay prevention. Confirm structural stability.
- Probe
- Smell
- Replace
Paint Adhesion Test
How can you tell whether the paint is the problem or the wood beneath it? Use simple paint testing: score a small area, peel back, and press tape firmly then rip it off.
If paint stays, wood likely fails; if paint lifts, coating adhesion fails.
Try multiple adhesion methods and test spots across boards. Record results before repairing or replacing to target the real issue.
Common Causes of Peeling Deck Paint
When paint starts lifting or flaking on your deck, it’s usually because one or more preventable issues disrupted the coating’s bond to the wood.
You’ll spot common peeling causes: moisture issues, poor wood condition, and lack of surface preparation.
You’ll notice peeling usually stems from moisture, deteriorating wood, or inadequate surface prep.
Also watch environmental factors, improper application, and bad product selection.
Fix the root problems before repainting.
- Moisture issues
- Surface preparation
- Product selection
Decide: Repair, Replace, or Repaint Boards
Start by inspecting each board for soft spots, cracks, and loose fasteners so you know what you’re up against.
Decide whether the damage is surface-level, repairable, or structural rot that needs replacement.
When you replace boards, match the material and grain to keep the deck strong and looking consistent.
Inspect Board Condition
Begin by walking the entire deck and closely inspecting each board for rot, cracks, or severe cupping so you can decide whether to repair, replace, or simply repaint.
You’ll perform a deck integrity assessment and a board surface evaluation, noting loose fasteners and soft spots.
Prioritize actions:
- Repair
- Replace
- Repaint
Assess Rot Versus Damage
Before you decide on a course of action, closely probe suspect areas to distinguish surface damage from structural rot so you know whether to repair, replace, or simply repaint each board.
Use a screwdriver for rot identification; soft, crumbly wood needs replacement.
For intact but gouged boards, perform a focused damage assessment, patching and sanding before repainting.
Document findings and prioritize safety.
Match Material And Grain
Material and grain tell you whether a patched board will blend or stand out, so match species, board width, and grain direction when deciding to repair, replace, or simply repaint.
You’ll check wood compatibility and grain matching to avoid visible seams.
Consider:
- Repair if compatible grain and minor damage.
- Replace mismatched species or widths.
- Repaint only when appearance aligns.
Tools and Materials Checklist
You’ll need a handful of reliable tools and the right supplies to strip loose paint, prep the wood, and apply a durable finish—think scraper, power sander, wire brush, exterior-grade primer and paint, and quality brushes or a sprayer.
Add sandpaper, filler, caulk, drop cloths, and paint thinner.
Follow safety precautions, and prioritize thorough surface preparation to guarantee adhesion and longevity.
Safety Gear and Site Setup
Start by equipping yourself with the right personal protective gear: a respirator rated for paint chips and dust, safety goggles, durable gloves, and slip-resistant shoes.
You’ll guarantee safety gear, protective clothing, and proper footwear are used. Emphasize workspace organization and ventilation importance.
Follow tool safety and maintain hazard awareness.
- Clear debris
- Ventilate area
- Secure tools
Inspect Every Board: What to Mark
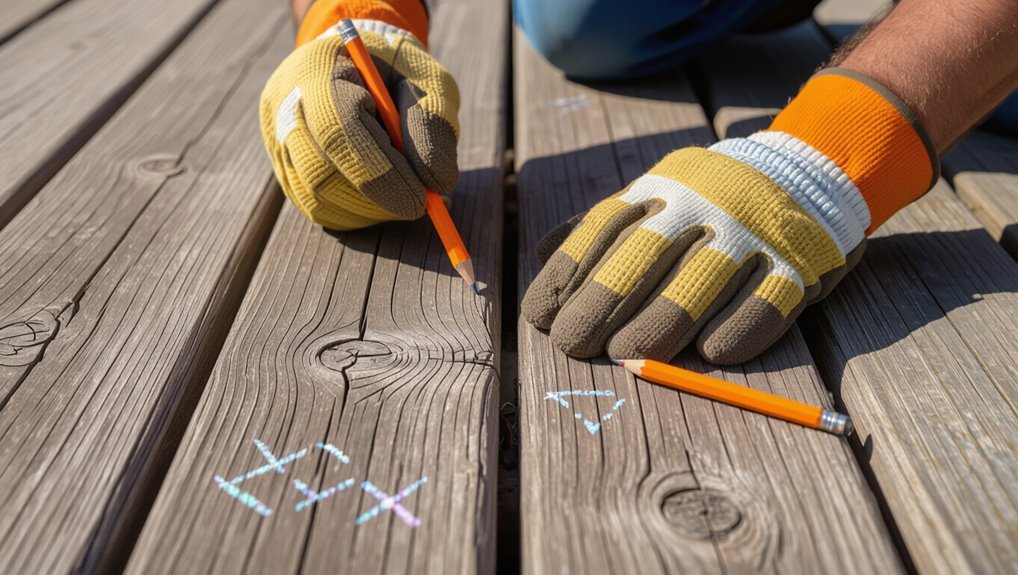
Before you strip or sand, walk the entire deck board-by-board and mark anything that’s loose, rotted, split, or bowed so you’ll know what needs repair or replacement. Note deck surface defects, board stability, moisture levels, weather exposure, paint compatibility, and wood grain direction to plan repairs and finishing.
| Mark | Issue | Action |
|---|---|---|
| X | Loose | Tighten |
| R | Rot | Replace |
| S | Split | Repair |
How to Remove Loose Paint Without Damage
Scrape away loose paint gently, working with the grain and using a putty knife or paint scraper held at a low angle to avoid gouging the wood.
You’ll use proper paint removal techniques and light sanding for smooth surface preparation.
Then clean debris and let dry.
Follow steps:
- Scrape
- Sand
- Clean and dry
Stripping Options: Chemical vs Mechanical
You’ll weigh chemical strippers—fast and effective but messy and caustic—against mechanical methods like sanding, scraping, or power washing, which are cleaner but more labor-intensive.
Consider the wood type, how much paint you must remove, and safety or environmental concerns before you choose.
Next, we’ll compare pros and cons and give practical tips for each method.
Chemical Stripper Pros/Cons
One of the fastest ways to remove old finish is with a chemical stripper, which softens and lifts paint so you can wipe or scrape it away with less elbow grease.
You’ll appreciate chemical efficiency, but follow safety precautions.
Pros: deep removal, less sanding.
Cons: toxic waste, surface etching, cost.
Decide based on finish condition and disposal capability.
Mechanical Stripping Methods
If chemical strippers aren’t right for your project or you want to avoid hazardous waste, mechanical methods offer fast, effective alternatives for removing old finish.
You’ll choose stripping tools like orbital sanders, floor sanders, or power washers depending on deck size and condition.
Work with grit progression, keep pressure even, and wear protection.
Mechanical methods remove finish quickly and prep wood for long-lasting paint.
Deck Cleaning After Stripping: Best Methods
After stripping the old paint, you’ll need to thoroughly clean the deck to remove dust, stripper residue, and any remaining loose fibers so new paint can bond properly.
Use deck maintenance tips and proper cleaning tools.
Follow steps below:
- Sweep and vacuum debris.
- Scrub with a deck cleaner and stiff brush.
- Rinse thoroughly with a garden hose or pressure washer on low.
Drying and Moisture Testing Before Painting
Before you paint, check the deck’s moisture with a meter—aim for the manufacturer’s recommended percentage before proceeding.
Allow enough drying time after cleaning or rain, and remember that thicker boards and shaded areas take longer.
Plan work around dry weather and use fans or open windows to improve ventilation so paint adheres properly.
Moisture Meter Readings
When you’re ready to test the deck, use a moisture meter to confirm the wood is dry enough for paint; ideal readings are generally below 15% for most coatings, though some finishes require 12% or less.
Check multiple boards and locations to verify reading accuracy. Use consistent probe placement, calibrate the meter, and record results.
- Test center and edges
- Calibrate first
- Log readings
Drying Time Guidelines
If you’ve confirmed low moisture readings, let the deck dry long enough for both surface and deeper wood to stabilize—typically 24 to 72 hours of warm, dry weather for hardwoods and softwoods, but up to a week after heavy rain or high humidity.
Check several spots with your meter; start painting only when readings stay consistently low.
Plan around drying time and ideal conditions.
Weather And Ventilation
You’ve checked moisture and let the wood stabilize; now pay attention to weather and ventilation because they determine how well the deck will dry and how accurate further moisture readings will be.
Consider weather impact and ventilation importance when scheduling work:
- Choose dry, mild days.
- Guarantee cross-ventilation and sun exposure.
- Re-test moisture after 24–48 hours of drying.
How to Sand for a Stable Paint Bond
Start by thoroughly sanding the peeling areas and their immediate surroundings so the new paint has a solid, clean surface to grip.
Use proper deck preparation techniques: remove loose paint with a scraper, then blend edges with medium-grit sandpaper.
Follow consistent sanding methods—orbital or hand sanding—until surfaces are smooth, dust-free, and slightly abraded for ideal adhesion before you move on.
Choosing the Right Primer for Peeling Decks
Now that surfaces are clean, sanded, and free of loose paint, pick a primer that restores adhesion and blocks stains so your topcoat will last.
With surfaces clean and sanded, choose a primer that restores adhesion and blocks stains for lasting topcoat results.
You’ll compare primer types, check drying time, and plan primer application for even coverage.
- Clean substrate
- Choose compatible primer
- Apply evenly with recommended tools
Bonding Primer vs Oil or Latex Primer
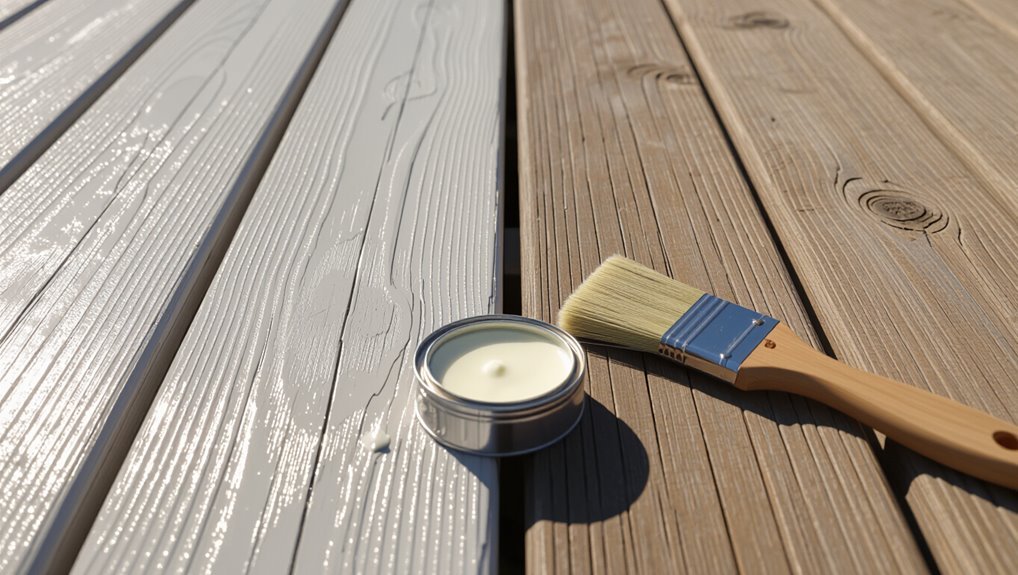
When you’re prepping a peeling deck, choosing the right primer can make the difference between a long-lasting repair and more peeling soon.
Bonding primers give superior adhesion to worn surfaces, while oil and latex primers each have pros and cons depending on your deck material and weather conditions.
We’ll compare their adhesion, application methods, and when a bonding primer is worth the extra cost.
Bonding Primer Benefits
A good bonding primer gives you a reliable base that sticks to weathered, peeling wood where ordinary oil or latex primers might fail.
You’ll get bonding primer advantages like adhesion, flexibility, and fast curing.
Consider bonding primer applications for deck repair before topcoat.
Benefits you’ll notice:
- Improved adhesion
- Reduced flaking
- Longer topcoat life
Oil Vs. Latex
Although bonding primers share some traits with oil-based formulas, you’ll choose differently depending on the wood’s condition and your topcoat: bonding primers are engineered for adhesion on failing, chalky surfaces and often come in both oil and latex formulations, while traditional oil primers penetrate and seal bare wood and latex primers offer easier cleanup and better flexibility.
| Feature | Oil | Latex |
|---|---|---|
| Advantages | oil advantages, seal | easier cleanup |
| Drying | longer drying times | faster drying times |
| Durability | finish durability | latex disadvantages on chalky |
Application And Adhesion
Because adhesion determines how long your finish will last, pick the primer based on surface condition and topcoat type: Bonding primers stick to chalky or weathered boards; oil primers seal knots; latex primers suit clean, previously painted wood.
Use proper surface preparation and adhesion techniques.
- Clean and sand
- Spot-prime problem areas
- Match primer to topcoat for best bond
Paint vs Solid Stain vs Semi-Transparent Stain
When you decide how to finish a peeling deck, you’ll weigh durability, maintenance, and appearance—paint hides flaws and offers bold color, solid stain gives opaque protection with easier upkeep, and semi-transparent stain shows wood grain while needing the most frequent reapplication.
You’ll choose paint for maximum paint durability and color, solid stain for balanced protection and stain longevity, or semi-transparent for natural look.
Match Product to Wood Species and Exposure
First, identify whether your deck is softwood like pine or hardwood like ipe, because each soaks up finishes differently.
Then consider how much sun and moisture the deck gets—constant sun, heavy rain, or shaded areas need different UV and water protection.
Finally, pick paints or stains that are formulated for your wood type and exposure to guarantee adhesion and longevity.
Identify Your Wood Type
Wood species and exposure determine which paints, primers, and prep methods will bond and last, so you should identify your deck’s wood before choosing products.
You’ll check grain, weight, and resin to distinguish hardwood identification versus softwood characteristics. Then match treatment:
- Dense, oily hardwoods: use oil-based primer.
- Softwoods: use primer for tannins.
- Pressure-treated: use adhesion primer.
Consider Sun And Moisture
Because sun and moisture change how finishes bond and wear, match your paint system to both the species and the exposure.
Assess sun exposure on each side of the deck and note shaded, wet areas.
Choose coatings and prep that address UV degradation and moisture management—seal end grains, allow proper drying, and use primers suited for your wood so paint adheres and lasts.
Choose Compatible Products
When choosing paint or stain, match the product to the species and the deck’s exposure so coatings can penetrate, flex, and resist the specific stresses they’ll face.
You’ll pick compatible paint types and apply proper surface preparation techniques.
Consider:
- Softwood vs hardwood suitability
- Oil vs acrylic flexibility
- UV and moisture resistance ratings
Choose products that match the wood and conditions.
Pick Sheen and Color for Durability
Anyone choosing a paint sheen and color should focus on durability first: higher sheens like satin or semi-gloss resist moisture and abrasion better than flat finishes.
Darker or cooler tones can hide wear while lighter colors reflect heat to protect the wood.
You’ll pick durable finishes and smart color selection to minimize maintenance, match sunlight exposure, and make future touch-ups less noticeable.
Prepare Joists, Railings, and Steps
Before you paint, check the joists for rot or loose fasteners and repair or replace any damaged boards.
Clean railings and steps thoroughly—scrub off dirt, mildew, and peeling paint so the new finish bonds well.
Let everything dry completely before priming or painting.
Inspect And Repair Joists
Start at the joists: lift loose boards and run your hand along each joist to feel for soft spots, rot, or insect damage.
You’ll perform a quick structural assessment to confirm joist integrity, then repair or replace damaged sections.
Prioritize:
- Replace rotten joists
- Sister weakened joists
- Treat insect damage
Finish by fastening boards securely and rechecking connections.
Clean Railings And Steps
Grab a stiff brush and a garden hose, then tackle the railings and steps by removing dirt, cobwebs, and loose paint so the surface will accept cleaner and primer.
Scrub with a mild detergent or deck cleaner, rinse thoroughly, and let dry.
Use railing cleaning techniques like a small brush for spindles.
These deck maintenance tips prevent trapped moisture and guarantee primer adhesion.
Best Application Conditions: Temperature and Humidity
When you paint a peeling deck, choose a dry day with moderate temperatures and low humidity so the coating can adhere and cure properly.
Pick a dry, mild day with low humidity so the paint can properly adhere and cure.
You’ll aim for ideal temperature and monitor humidity levels before and during painting.
Follow these simple checks:
- Temperature: 50–85°F (10–29°C)
- Relative humidity: under 60%
- No rain forecast for 24 hours after application
Brushes, Rollers, or Sprayers: Which to Use?
Curious which tool will give you the best finish? You’ll pick based on surface preparation, texture preferences, and product compatibility.
Use brush types for edges and detailed work, rollers for coverage efficiency on flat boards, and sprayers for speed and uniform finish options.
Match application techniques to paint durability goals and chosen product; test on scrap to confirm adhesion and appearance.
How to Apply Primer for Full Adhesion
Start by ensuring the deck is fully clean, dry, and free of loose paint or mildew so the primer can bond properly; any remaining contaminants will undermine adhesion.
Start with a spotless, dry deck—no loose paint or mildew—so primer can properly bond.
Choose primer types suited to wood and old paint, follow surface preparation steps, and apply evenly.
Prioritize:
- Sand rough spots
- Fill gaps and let dry
- Thin coats for uniform coverage
Cutting In and Painting Deck Boards Cleanly
Start by mastering proper cutting-in technique so you can paint tight lines along railings and joists without getting sloppy on adjacent surfaces.
Use a steady hand, the right angled brush, and light pressure to control the edge paint and avoid drips.
If you tape edges, press the tape down firmly and pull it off while the paint’s still tacky for the cleanest result.
Proper Cutting-In Technique
When you cut in along railings, posts, and board edges, steady your brush and work in short, controlled strokes so the paint lays down cleanly without drips or ragged lines.
Use proper cutting in techniques and focus on edge painting for crisp results.
Follow these steps:
- Load brush sparingly.
- Maintain steady angle.
- Feather into field paint.
Edge Paint Control
1 important skill for a clean-looking deck is controlling the paint at edges and board seams, and you’ll get it by keeping a steady hand, the right brush load, and deliberate short strokes.
You’ll practice edge sealing by running a loaded angled brush along rails, then use thin paint layering across boards to avoid buildup.
Finish with light feathering to blend and prevent drips.
How Many Coats and Dry Times Between Coats?
How many coats you need depends on the product and the deck’s condition: typically you’ll apply two thin coats of deck paint or stain, letting each coat dry fully before adding the next to guarantee adhesion and even coverage.
Follow proper paint layers and observe drying intervals.
- Apply first thin coat
- Wait manufacturer-recommended time
- Apply second thin coat
Seams, End Grain, and Fastener Head Technique
Before you paint, you’ll want to seal board seams and gaps to keep moisture from wicking in.
Pay special attention to end grain—it’s like a sponge and needs primer or sealer so paint bonds and lasts.
Also scrape and seal fastener heads and countersink or replace rusty screws to prevent future peeling.
Seal Seams Properly
When seams, end grain, and fastener heads aren’t properly sealed, moisture gets trapped and your new finish won’t last—so take the time to do it right.
You’ll use seam sealing and waterproofing techniques to keep water out. Follow steps:
- Clean and dry seams.
- Apply marine-grade sealant.
- Tool seams flush and cure fully.
Check periodically for gaps and reseal.
Treat End Grain & Fasteners
Now that seams are sealed, focus on the spots that shed water fastest: end grain and fastener heads.
You’ll dry and sand end grain, then apply a penetrating end grain treatment to seal fibers.
Countersink or tighten loose screws, replace corroded nails, and coat heads with rust inhibitor and paint for fastener protection.
This prevents moisture wicking and paint failure.
Avoid Mistakes That Cause Paint to Peel Again
1 key to a long-lasting finish is avoiding the common mistakes that make paint peel again: skip poor surface prep, don’t use the wrong paint or primer, and avoid painting in unsuitable weather.
Apply deck preparation techniques and follow paint selection criteria. Inspect, sand, and clean thoroughly.
Prioritize:
- Proper prep
- Right primer/paint
- Correct conditions
Treating Tannin Bleed and Resinous Woods
Because tannins and resinous sap can bleed through paint and stain over time, you need to treat these woods before priming so your finish stays clean and durable.
Use a tannin treatment or wood bleach on oak, cedar, and redwood, then rinse and dry.
For resinous pines, scrape excess sap, apply a resin management solvent, and spot-prime before full priming.
Prevent Mold, Mildew, and Algae Under Paint
Treat tannin and sap issues first so moisture and organic residues don’t invite growth under your finish.
You’ll focus on surface preparation, moisture control, and environmental factors to guarantee mold prevention, mildew resistance, and algae treatment.
Use cleaners, biocides, and proper drying.
Key steps:
- Clean and biocide.
- Dry and seal.
- Choose coating techniques for paint longevity and wood preservation, aiding deck maintenance.
Seasonal Maintenance for Painted Decks
When seasons change, you should inspect your painted deck every few months for cracks, peeling, or areas where moisture is collecting so small problems don’t become major repairs.
Perform seasonal inspections: sweep debris, clear gutters, and check railings and fasteners.
Touch up chips with compatible paint, reseal exposed wood, and keep a simple deck maintenance log so issues are caught early.
Spot-Repair vs Full Recoat: Decision Guide
Decide between a spot-repair and a full recoat by evaluating the extent and cause of the damage:
small, isolated peeling or chipped areas from wear can be fixed with targeted sanding and touch-up, but widespread peeling, recurring moisture problems, or multiple failed layers usually mean you should strip and recoat the entire deck.
Use spot repair techniques for limited issues; consider full recoat considerations when structural or coverage problems repeat.
- Inspect
- Test adhesion
- Choose method
Cost Breakdown: Materials, Tools, and Labor
Before you commit, know what you’ll need and why: material costs (paint, primer, cleaners), essential and optional tools, and whether you’ll hire labor or DIY will drive your total. Do a clear cost analysis and material selection, weigh tool expenses and labor costs, compare DIY savings versus professional rates, and apply pricing strategies for smart budget considerations.
| Item | Estimate | Notes |
|---|---|---|
| Paint/Primer | $100–$300 | Coverage varies |
| Tools | $50–$200 | Rent vs buy |
| Labor | $200–$800+ | Professional rates |
Realistic DIY Timeline for a 12×16 Deck
Now that you’ve mapped costs and tools, let’s lay out a realistic timeline so you can plan weekends and know when the deck will be ready for use.
Day 1: clear and repair.
Day 2: strip and sand.
Day 3: prime and paint.
- Prep
- Paint
- Cure.
Follow deck maintenance tips and seasonal care to extend finish life—inspect yearly, touch up chips promptly.
Hiring a Pro: Questions and Expectations
Thinking of hiring a pro? Ask about cost considerations and a clear project timeline, plus contractor experience and past work.
Clarify job scope, material preferences, warranty details, and communication expectations.
Clarify the job scope, preferred materials, warranty terms, and how you’ll communicate throughout the project.
Request quality assurance measures, inspection checkpoints, and written estimates.
Confirm timelines, payment schedule, and remedies for defects so you’ll avoid surprises and guarantee the deck stays painted without peeling again.
Product Picks for Long-Lasting Systems
If you want a deck finish that actually lasts, choose products designed to work together as a system — primer, paint or stain, and a compatible sealer — rather than mixing random cans.
Pick long lasting products labeled for exterior decks. Consider:
- Bonding primer
- Acrylic deck paint
- UV-resistant sealer
Test compatibility, follow manufacturer directions, and apply per prep guidelines.
Troubleshooting Post-Paint Problems
When paint peels or bubbles after you’ve finished a deck, don’t panic—you can usually diagnose and fix the issue by checking a few common causes like poor adhesion, trapped moisture, or incorrect product layering.
Inspect adhesion, scrape loose paint, test moisture, and confirm primer/topcoat compatibility.
Repair, sand, and recoat with recommended systems.
Follow deck maintenance tips and paint longevity strategies to prevent recurrence.
Environmental Rules and Paint Disposal
Because paint and related materials can harm waterways and soil, you need to follow local regulations for storage, cleanup, and disposal.
You must respect environmental regulations and seek paint recycling options.
Follow simple steps to avoid contamination and fines:
- Seal containers and use absorbents for spills.
- Take leftover paint to approved drop-off.
- Label waste and keep records.
Pre-Inspection Checklist After Painting
1 quick walk-through after the paint dries will catch most issues before your final inspection; check for runs, missed spots, uneven sheen, tackiness, and any paint on hardware or trim.
Use a checklist reflecting pre painting considerations you noted, inspect seams and fasteners, and test adhesion in small areas.
Document defects for touch-up during your post painting evaluation and schedule a final cure check.
Frequently Asked Questions
Can I Paint a Deck in Freezing or Near-Freezing Conditions?
No, you shouldn’t paint in freezing or near-freezing conditions; follow temperature guidelines, wait for warmer, dry days, and use deck preparation tips like cleaning and sanding so paint adheres properly and won’t peel later.
Will Painting Over Older Oil-Based Stain Cause Adhesion Problems?
Yes—you can paint over older oil-based stain, but it can cause adhesion problems unless you use proper adhesion techniques and check stain compatibility; you’ll need thorough cleaning, sanding, and a suitable bonding primer to guarantee good adhesion.
How Do I Protect Nearby Plants During Chemical Stripping?
Wear a tin-foil hat — then shield plants like they’re celebrities. Use barriers, watered soil, plastic sheeting, gentle chemical stripping techniques, rinse runoff away, move potted specimens, and apply plant protection methods so they don’t get scorched or soaked.
Can Pet-Safe Sealers Be Used Over Exterior Deck Paint?
Yes — you can use pet safe options over deck paint if the surface’s clean, dry, and fully cured. You’ll want a compatible, non-toxic sealer labeled for exterior use and follow manufacturer cure times carefully.
What Warranty Can I Expect From Paint Manufacturers for Decks?
You’ll usually get modest coverage — think a promise, not a miracle: deck paint durability warranties often span 1–10 years, varying by product; check paint warranty specifics for coverage limits, prep requirements, and exclusions.
