
How to Clean Garage Walls Before Painting for Better Adhesion
You’ll get strong paint adhesion only if you remove grease, dust, mildew, and any chalky residue first. Start by sweeping/vacuuming, then test a suitable degreaser on a small hidden spot. Scrub top to bottom with stiff brushes, working in sections, and rinse until there are no suds or slick spots. Dry completely—check corners and seams—then spot-prime stains or rust and let primer cure. Follow these steps to avoid peeling and you’ll get better results next.
Identify Garage Wall Contaminants Before Cleaning
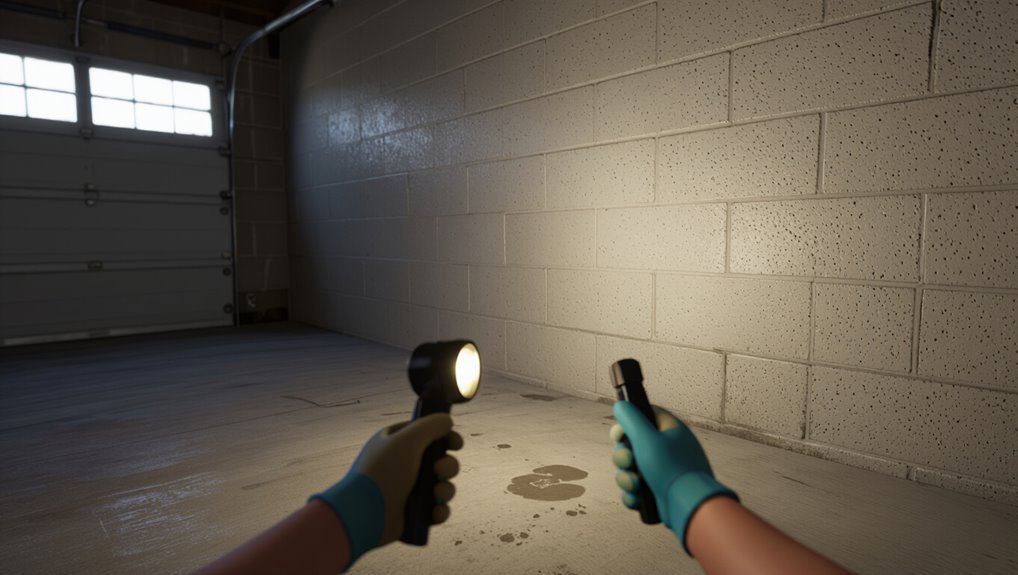
Before you grab a brush, you should identify what’s contaminating your garage walls. Look for oil sheen, grease streaks, tire marks, and water spots. Check corners, near doors, and around floor joints where spills collect.
Smell for solvent fumes or mildew odor. Touch stained areas to see if residue feels slick, gritty, or chalky. Distinguish contaminant types: organic grime from vehicles, oily residue from machinery, mildew from dampness, and dust from sanding or construction.
Match your cleaning methods to the contaminant: degrease for oils, mildew treatment for spores, and spot scrubbing for stains.
Collect Supplies for Garage Wall Degreasing
Pick a degreaser that matches your grime, like a heavy-duty cleaner for oily spots or a mild option for general buildup.
Gather a stiff brush, scrub sponge, buckets, rags, and a hose or pressure washer for rinsing.
Wear gloves, eye protection, and a mask, then read the label so you use it safely.
Choose Degreaser Type
To get garage walls ready for paint, you need the right degreaser for the grime you’re dealing with—most garages collect everything from greasy fingerprints to automotive residue.
Pick based on contamination level and your surface type, then check degreaser effectiveness on similar oil/grease stains. If you want eco friendly options, choose citrus or enzyme-based concentrates, and avoid harsh solvents unless you must.
- Use heavy-duty alkaline cleaners for thick caked grease.
- Choose citrus/degreasing gels for fingerprints and light vehicle marks.
- Match labels to drywall, concrete, or painted finishes to prevent damage.
Gather Cleaning Tools
Gather the right cleaning tools first so you can degrease efficiently and protect the wall surface.
Before you start, assemble a stiff-bristle scrub brush, a roller or sponge, and clean microfiber cloths for wiping.
Add plastic buckets for mixing cleaner and rinse water, plus measuring cups.
You’ll also want a garden sprayer or pump sprayer to apply degreaser evenly.
For tight corners, grab an old toothbrush and an extension pole.
Choose tools that won’t scratch your wall materials.
Use these cleaning techniques to loosen grease, lift grime, and keep residue from spreading.
Use Safety Gear
Before you start scrubbing, suit up so you don’t breathe fumes or splash degreaser onto your skin.
Put on safety goggles to block splatter, and wear gloves for gloves usage to keep chemicals off your hands. Choose a respirator if the product calls for it, and long sleeves to protect your arms.
Ventilate the garage by opening doors and running a fan away from your face.
Then check your supplies before you mix or pour: make sure rags, buckets, and brushes are ready so you don’t rush.
Add:
- Protective coveralls
- Non-slip footwear
- A first-aid kit nearby
Pick the Right Cleaner for Your Wall Type
Figure out whether your garage walls are concrete or drywall before you start, because the right cleaner depends on the surface.
If you see heavy grease, use a degreaser on concrete, but if you need a stronger option, consider a TSP substitute that matches the manufacturer’s guidance.
If you’re working with drywall, choose a gentler cleaner to avoid damaging the paper and paint-ready surface.
Identify Concrete Vs Drywall
Your garage walls aren’t all the same, and that difference matters for cleaning. Before you pick products, identify whether you’re dealing with concrete or drywall.
Concrete characteristics include a porous, grainy surface that absorbs water; you’ll often see dusty residue from drilling or old spackle.
Drywall properties look smoother, with paper-faced edges, screws, and taping seams; it can bubble if moisture soaks in.
- Sprinkle water to see absorption speed.
- Check for aggregate texture versus taped joints.
- Press gently: chalky dust suggests concrete.
Choose Degreaser Or TSP Substitute
Once you know whether you’re dealing with concrete or drywall, you can match the cleaner to the grime instead of scrubbing blindly.
For concrete, use a degreaser or a TSP substitute to break oil, grease, and tire marks; then rinse well to prevent residue.
For drywall, pick a safer substitute degreaser, since harsh TSP can damage paper and reduce adhesion.
Follow simple cleaning methods: test a small spot, scrub with a stiff brush or sponge, keep surfaces wet, and rinse until water sheets clear.
Choose effective solutions that fit the wall, so paint bonds tightly.
Clear the Garage and Protect Floors First
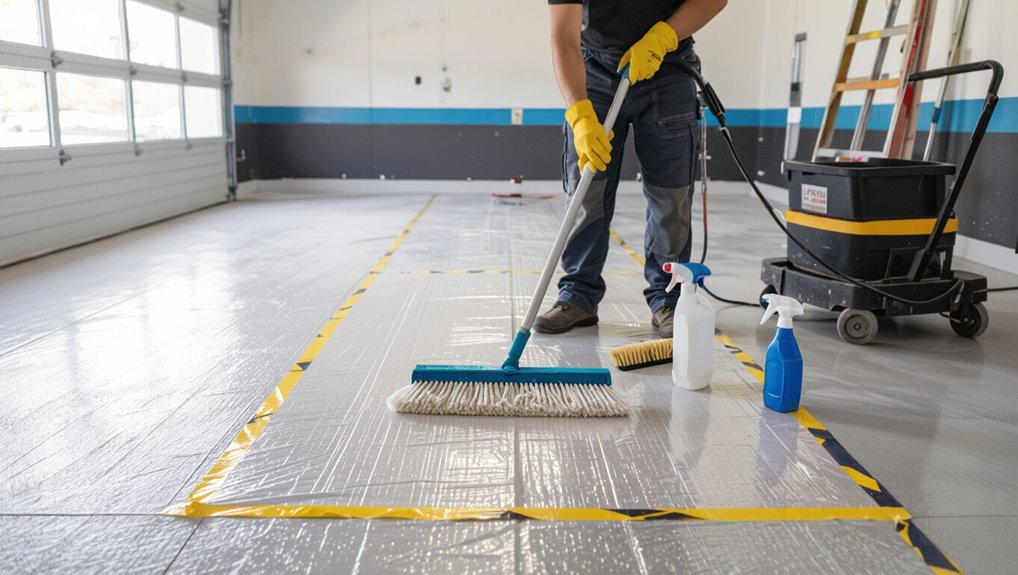
Before you touch a paint roller, clear the garage of tools, shelves, and car accessories so you can work without stepping around obstacles. You’ll improve safety and keep dust off fresh cleaning.
Next, organize tools and plan storage: move items into the driveway or a covered area, and label bins so you can find everything later. Protect floors with plastic sheeting or painter’s drop cloths, taped at seams, and cover vents and drains.
Organize tools and plan storage in the driveway or a covered area, label bins, and protect floors with taped plastic or drop cloths.
Then vacuum or sweep once more so debris doesn’t track back onto walls.
- Remove wall-hung items
- Cover floors and mask edges
- Re-check pathways and lighting
Test Cleaner Compatibility on a Small Spot
With the floors covered and the workspace cleared, test any cleaner on a small, hidden patch of the garage wall to confirm it won’t stain, damage drywall, or lift old paint.
Do cleaner testing by applying the product exactly as directed, using a clean sponge or cloth. Let it sit the recommended time, then rinse or wipe it off with clean water.
Wait at least 24 hours, checking for discoloration, bubbling, soft spots, or tackiness. If the wall changes, switch cleaners and repeat.
This spot compatibility check prevents surprises and protects your final paint adhesion.
Dry Brush Off Loose Dust and Cobwebs
Start by dry-brushing the entire wall to remove loose dust, grit, and cobwebs before you apply any cleaner or primer.
You should use proper dust removal techniques and the right cleaning tools so paint can grip the surface instead of sliding over debris. Work from top to bottom, using steady strokes and brushing into corners, seams, and around outlets.
Pay extra attention to ceiling edges where webs cling. Then repeat until the bristles pick up little to nothing.
- Use a stiff nylon brush.
- Knock down cobwebs with a broom.
- Brush seams and corners thoroughly.
Vacuum Garage Walls to Remove Drywall Grit
Vacuum the garage walls thoroughly to lift fine drywall dust, grit, and residue that dry-brushing can leave behind.
Use a shop vac with a brush attachment and work from top to bottom, keeping the nozzle close to the surface without scraping. Pay extra attention to seams, corners, and around outlets where grit collects.
Slow your passes so the vacuum pulls dust removal deep into texture, not just the surface.
Finish with a second quick sweep across the whole area to catch remaining particles.
This wall preparation step helps paint bond evenly and reduces bumps.
Wash With Detergent to Lift Grime and Grease
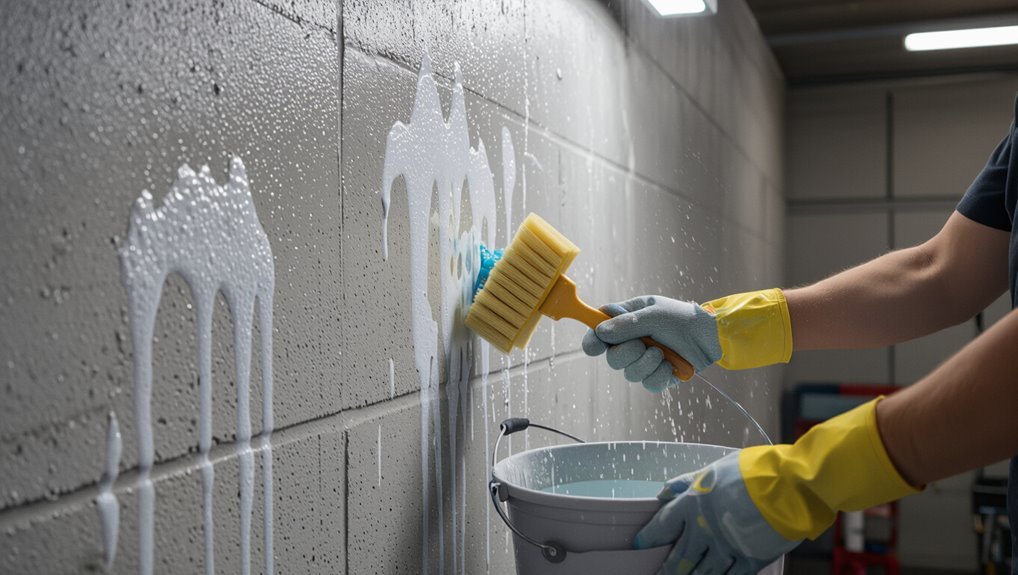
After you vacuum up the grit, use a strong detergent to degrease your garage walls and lift grime fast.
Scrub the surface thoroughly, then rinse well so no soap film or residue remains.
Let everything dry completely before you start painting.
Degrease With Strong Detergent
Degreasing is the key step that makes paint actually stick, so wash your garage walls with a strong detergent to lift grime and grease.
You need real degreaser effectiveness, which starts with the right detergent concentration: too weak won’t cut oil, too strong can be wasteful.
Mix cleaner with warm water, then apply it evenly using a sponge or pump sprayer. Work from top to bottom to keep streaks from drying.
Add these focus points:
- Spot-test in a small area.
- Let suds dwell briefly.
- Use fresh rinse water and change when oily.
Scrub Walls Thoroughly And Rinse
Once the detergent has loosened the grease and grime, you need to scrub the walls thoroughly to lift what’s left in the pores. Use stiff-bristle brushes or a sponge on poles, and work in small sections so you don’t miss spots. Try these scrub techniques and then switch to reliable rinse methods.
| Area | Scrub techniques | Rinse methods |
|---|---|---|
| Corners | Angle brush | Sweep water out |
| Stains | Press firmly | Flush until clear |
| Edges | Back-and-forth | Wipe with clean water |
Refill your bucket often, scrub again where sheen remains, and rinse until no suds or residue show.
Dry Completely Before Painting
Before you paint, you must dry the garage walls completely so no detergent, grease, or rinse water ruins your finish; start by washing the surface with a degreasing detergent and warm water, then scrub in small sections until the grime lifts out of the pores.
After rinsing, use drying techniques: wipe with clean towels, then let air circulate with fans and time.
Check seams, corners, and patch areas—water hides there. Moisture impact matters: trapped dampness can blister paint, weaken adhesion, and invite mildew.
- Use a moisture meter if possible.
- Keep the space warm and ventilated.
- Wait until no sheen or cool spots remain.
Degrease Oily Stains Using a TSP Substitute
Grab a TSP substitute and a stiff scrub brush to tackle oily garage stains without the harshness of traditional TSP.
Use proper cleaning techniques: dilute the substitute exactly as the label directs, then apply it to the greasy spots. Scrub in firm, circular motions, working from edges toward the center so you don’t spread residue.
Dilute the substitute per label directions, apply to greasy spots, and scrub in firm circles from edges inward to prevent spreading residue.
For heavy buildup, reapply and scrub again until the surface stops looking slick and glossy. Rinse with clean water after each pass, then let the wall dry fully.
This stain removal step boosts paint adhesion by eliminating oily contaminants before you roll on primer.
Scrub With Hot Water and Firm Pressure
Grab hot water and a degreaser, then wet the wall thoroughly so the grime starts to lift.
Use a stiff brush or scrub pad and apply firm pressure to work the cleaner into stains and rough spots.
Keep scrubbing until the surface feels clean and the runoff looks clearer, then rinse well before you move on.
Use Hot Water And Degreaser
Start by mixing a hot-water degreaser and scrubbing the walls with firm pressure, so the cleaner cuts through oil, tire marks, and grime. You need this step for effective cleaning techniques and proper surface preparation before you paint.
Use a stiff brush and keep the solution moving to lift greasy residue instead of smearing it. If spots stay slick, reapply degreaser and work in small sections until the water sheens clear.
Then rinse thoroughly with clean water and let everything dry completely.
- Follow label dilution and wear gloves.
- Focus on corners where buildup hides.
- Replace dirty water to prevent re-deposit.
Apply Firm Scrub Pressure
Apply firm scrub pressure with your stiff brush while the hot degreaser is still working, because that extra pressure breaks up oil, tire residue, and embedded grime instead of just spreading it around.
Use aggressive scrub techniques: work in small sections, keep the brush bristles moving, and target seams, corners, and floor-to-wall edges where buildup hides.
Rinse frequently with hot water so you’re lifting loosened residue, not smearing it back. If water beads or dark streaks remain, scrub again and rinse until the wall runs clean.
Good wall preparation now means better paint adhesion later.
Rinse Thoroughly to Prevent Soap Residue
After you’ve washed the walls with a degreaser or soapy cleaner, rinse thoroughly with clean water and work from the top down.
Rinse thoroughly with clean water after degreasing or soapy cleaning, working top down to remove residue before priming.
Don’t leave any film behind—residue can block adhesion and cause peeling. Use effective rinsing techniques, especially where foamier soap types linger in corners, seams, and around hardware. Keep the rinse moving until water runs clear and slick, then repeat once if you see suds.
- Rinse in sections, overlapping each pass.
- Spot-check corners with a clean rag.
- Let walls dry fully before priming.
Remove Mildew With Bleach-Safe Cleaning Steps
Mildew can grow fast on garage walls, so treat it promptly with bleach-safe steps before you paint.
Wear gloves and eye protection, then dry-scrub loose spots. Mix a mildew-safe cleaner or hydrogen-peroxide solution, and apply it directly to stained areas. Let it dwell as directed, then scrub with a stiff brush. Rinse well and let the surface fully dry.
For mildew prevention, keep humidity down: improve ventilation, fix leaks, and don’t trap moisture after washing.
If you prefer gentler options, use bleach alternatives instead of chlorine-based products to protect coatings and promote adhesion.
Eliminate Mildew Odor Before Painting
Before you paint, you need to get rid of the musty smell trapped in porous garage wall surfaces. You can’t rely on masking odors; you must perform odor removal so coating sticks and mildew prevention starts now.
Ventilate the space, then wipe the walls again with a mild, mildew-safe cleaner and warm water, and let them dry fully. After that, use a deodorizing rinse or peroxide-based product only where needed.
Ventilate, wipe with mild mildew-safe cleaner and warm water, dry fully—then use a deodorizing rinse or peroxide only where needed.
- Rinse thoroughly; don’t leave residue.
- Use fans and heat to dry fast, preventing re-growth.
- Spot-treat any lingering stains, then re-check the smell.
Scrape Away Old Flaky Paint Completely
Scrape away old flaking paint until the surface feels solid and uniform.
Work methodically, removing loose layers thoroughly so no bubbles or chips remain.
If you leave any flaky edges behind, the new paint won’t stick as well.
Remove Flaking Paint Fully
Start by locating every area where the old coating is bubbling, peeling, or chalking. Then physically remove it down to any paint that’s still firmly bonded.
Use reliable paint removal techniques—work a putty knife across edges to lift loose flakes and scrape steadily, not gouging the concrete or drywall. Vacuum grit often and wipe with a damp rag so you can see what’s truly left.
After you finish, inspect under bright light for stubborn edges and repeat spot removal.
Follow these surface preparation tips:
- Scrape to firm substrate only.
- Sand feathered borders smooth.
- Remove dust completely.
Scrape Loose Layers Thoroughly
Once you’ve identified every spot where the coating bubbled or chalked, focus on getting all loose material off the wall.
Grab a scraper, put on safety glasses, and use steady pressure to peel away every scale and flake.
Switch angles as needed so the blade catches under edges, not just skims the surface.
Work section by section until you hit firm, sound paint or bare drywall.
Vacuum debris and wipe with a damp rag, then let it dry.
Thorough scraping techniques prevent weak spots, improve paint adhesion, and stop peeling through your new finish.
Inspect again in bright light.
Feather Edges So New Paint Blends Smoothly
After you clean and dry the garage walls, you’ll want to feather the edges of any patch, scrape, or old paint you sanded so the new coat won’t show seams.
Use light pressure to sand outward from the repair, creating feather edges that disappear into the surrounding surface. Wipe dust, then inspect under angled light to spot ridges. Aim for smooth transitions where texture changes.
- Sand with 120-150 grit, then refine with 220 grit.
- Blend patches in wide arcs, keeping edges thin.
- Spot-prime scuffed areas and let dry before rolling.
Remove Efflorescence and White Salt Stains
Start by spotting efflorescence salt deposits—those chalky white patches that show moisture moving through concrete or masonry.
Scrub the area firmly with water and a stiff brush to lift loose residue, then rinse and let it dry.
If stains linger, neutralize the surface with a mild acid wash, rinse well, and wait until the wall is fully dry before you paint.
Identify Efflorescence Salt Deposits
Before you paint, inspect your garage walls for efflorescence—those chalky white salts that form when moisture moves through masonry, concrete, or mortar and leaves mineral deposits behind.
To nail efflorescence identification, look for powdery bloom, darkened edges around spots, and tiny white specks that reappear after drying. Use your dry hand to feel for gritty residue, not just discoloration. Confirm patterns: they often track moisture paths from leaks or condensation.
Then plan salt removal if you see any deposits.
- Check corners, seams, and around cracks
- Flash-dry a spot and recheck after 24 hours
- Mark all stained areas for later treatment
Scrub With Water And Brush
Scrub the affected areas using clean water and a stiff nylon or wire brush, working the wall in small sections so you can physically lift and rinse away the chalky residue.
Wet the surface, then apply firm pressure and use tight, overlapping strokes to break up white salt deposits. Keep rinsing as you go; don’t let the loosened salts dry back onto the wall.
If you see flaking, keep scrubbing until the surface feels smooth and clean. These scrubbing techniques are core to wall preparation, improving paint adhesion and reducing future staining.
Let the wall fully dry before you proceed.
Neutralize With Mild Acid Wash
Neutralize the remaining efflorescence and white salt stains with a mild acid wash to prevent them from bleeding through your new paint.
Mix a mild acid wash per label directions, wear gloves, and apply it to damp walls so you don’t scorch masonry. Let it react briefly, then rinse thoroughly with clean water until runoff stays clear. This step boosts acid wash benefits by improving adhesion and supporting solid surface preparation.
- Treat small sections, keeping dwell time consistent
- Scrub after dwell to lift salts from pores
- Rinse, then dry completely before priming
Treat Rust Spots Before They Bleed Through
Once you spot rust stains on your garage walls, you need to treat them right away so they don’t bleed through your new paint.
Scrub the area with a stiff brush, then remove all loose powder until the surface looks uniform.
Next, apply a rust treatment designed for masonry or concrete, following the label exactly; don’t dilute.
Let it dry fully, because impatience causes failures.
Afterward, seal the treated patches with a stain-blocking primer so you lock in any remaining oxidation.
Use these prevention methods: keep water off the wall, repair leaks fast, and improve ventilation.
Kill Mold Spores With Dwell Time
After you scrub the mold away, don’t let the surface dry right away—keep it wet to kill any remaining spores.
Apply your mold-killing solution and let it sit for the recommended dwell time so it keeps working.
If you see the wall drying too fast, mist or reapply to maintain moisture longer.
Dwell Time For Mold Kill
Let the mold-killing cleaner dwell on the garage wall for the exact amount of time listed on the product label, so it can penetrate porous surfaces and kill mold spores—not just the visible growth.
You’re building mold prevention strategies and choosing effective cleaning solutions that actually work. Don’t rinse early; set a timer and keep the surface undisturbed.
If you move on too fast, you’ll leave live spores that can rebound before paint cures.
- Read the label dwell time and follow it exactly.
- Apply evenly, focusing on seams and stains.
- After dwell, rinse per directions and allow full drying.
Keep Surfaces Wet Longer
Keep the surface wet for the full dwell time on the product label, not just until it looks dry. After you apply the cleaner or mildewcide, maintain moisture retention by misting lightly when needed.
Don’t rinse early; you need contact time to kill mold spores and prevent regrowth. Use consistent cleaning techniques: scrub to lift growth, then re-wet treated spots and edges where paint may fail.
Work in small sections so the chemical stays active. When the dwell time ends, rinse as directed and let the wall dry completely before priming.
Let Garage Walls Dry Fully Before Primer
Make sure your garage walls dry completely before you prime them. After washing, you can use drying techniques like fans, dehumidifiers, and steady airflow so moisture doesn’t linger in pores or cracks.
Then wait for the walls to reach ideal conditions—dry to the touch, uniform in color, and free of any damp patches. If you prime too early, trapped moisture can weaken adhesion and cause bubbling later.
- Check corners, seams, and behind storage mounting points.
- Verify humidity stays low during drying techniques.
- Prime only after surfaces feel consistently dry.
Spot-Clean Oily Areas Again for Adhesion
Spot-check the wall again for any lingering oil patches, then degrease those areas thoroughly with a suitable cleaner.
Rinse well to remove residue, and don’t stop until the surface is fully dry.
If you skip drying, primer and paint won’t bond well, so verify it before you move on.
Re-Spot Check Oil Patches
Before you roll on primer or paint, re-spot check any oil patches you found earlier and clean them again so the surface holds adhesion. You must confirm your oil patch identification hasn’t shifted, because fresh smears can ruin adhesion improvement.
Walk the wall with a bright flashlight from different angles, then wipe suspect spots with a dry rag and reapply spot cleaning if you see wetness, dark halos, or greasy sheen. Afterward, let everything dry fully, and inspect again before priming.
- Mark edges with painter’s tape.
- Re-wipe until no transfer occurs.
- Recheck under angled light.
Degrease With Cleaner Thoroughly
Now that you’ve re-identified any oily trouble spots, degrease them again with a proper cleaner so the surface can actually grip the primer.
Apply your degreaser directly to the stained areas, not just around them, and work it in with a stiff brush or scrub pad.
Use the manufacturer’s dilution and contact time so the cleaner breaks down grease, soot, and residue.
Wipe away loosened grime as you go, repeating until the rag stays clean.
This step is key surface preparation, using effective cleaning techniques to boost adhesion where it matters most.
Rinse And Fully Dry
After degreasing, rinse the entire area with clean water so you remove every trace of cleaner and dissolved residue.
Don’t rush—oil can hide in seams, so use solid rinse techniques: start high, work down, and overlap passes.
Then switch to drying methods that fully evaporate moisture; trapped dampness ruins adhesion and can cause peeling.
Spot-clean any oily streaks again with the same degreasing approach, then rinse.
- Rinse until runoff looks clear.
- Wipe seams with a clean rag.
- Let walls dry completely before priming.
Sand Rough Spots to Help Paint Grip
Sand down rough spots so the paint can grip evenly.
Use sanding techniques that match your wall condition: start with 120-grit paper for raised ridges or sharp drips, then switch to 180-grit to refine scratches.
Lightly press and keep your strokes consistent, feathering edges until the surface feels uniform to the touch.
Lightly press with consistent strokes, feathering edges until the wall feels uniformly smooth to the touch.
Vacuum dust as you go, then wipe with a clean, dry cloth.
This step improves paint adhesion by removing loose material and creating micro-texture for the coating to bond.
Don’t sand through drywall or expose bare substrate unnecessarily.
Smooth Remaining Bumps and Uneven Texture
After sanding the rough spots, you should inspect the wall and mark any remaining bumps or uneven texture.
If you see low areas or ridges, skim coat them to even things out, then let it cure.
Once it’s dry, sand the coated areas to a smooth finish so your paint goes on evenly.
Identify Remaining Bumps
Grab a bright light and run your hand across the wall to spot any bumps or uneven texture. As part of your bump identification and surface assessment, you confirm what still needs attention before painting.
Move the light low and angled; shadows reveal ridges you can’t feel at first. Mark every problem spot with painter’s tape so you don’t miss it later.
- Press your palm gently to locate hard lumps and soft ridges.
- Check seams, nail holes, and former patches under angled light.
- Circle any rough spots where texture changes abruptly.
Skim Coat Uneven Texture
Once you’ve marked the bumps and uneven areas, use a skim coat to level what’s left.
Mix ready-mix or joint compound to a smooth, spreadable consistency. Apply thin layers with a 6–10 in taping knife, feathering edges into the surrounding wall for clean changeover.
Use skim coat techniques: press firmly to fill low spots, then scrape off excess to avoid ridges. Let the coat set until it’s firm, not tacky, and check coverage under a side light.
Repeat for surface leveling only where texture remains, keeping layers light and even.
Sand To Smooth Finish
Sand the skim-coated spots to a smooth, paint-ready finish. After your skim coat dries, you’ll remove remaining bumps and uneven texture by using the right sanding techniques.
Keep pressure light and move in steady passes, then feather edges so seams disappear. Check often with your palm and a bright light to spot dull low spots.
Use surface preparation to prevent new defects: clean dust off before priming, and don’t over-sand into bare drywall or concrete. Finish with a final wipe.
- Start with 120-grit, then 180-grit.
- Use a sanding block on walls.
- Vacuum and tack-cloth thoroughly.
Patch Cracks: Clean, Fill, and Feather
Before you patch cracks, clean them out so the filler bonds well: use a stiff brush or scraper to remove dust, loose paint, and flaking edges, then vacuum and wipe the area with a damp rag (and let it fully dry).
Do a crack assessment first: open up any loose edges and remove anything that crumbles.
Mix or choose a suitable patch filler, press it into the crack, and overfill slightly.
After it sets, sand smoothly using feathering techniques so the repair blends into the surrounding wall.
Wipe away sanding dust and inspect under light.
Fill Nail Holes for a Uniform Surface
Fill nail holes with a suitable wood putty or patch compound so your garage wall goes on smooth and even.
Fill nail holes with wood putty or patch compound to keep your garage wall smooth, even, and ready for finishing.
For solid Nail Hole Repair and better Surface Preparation, press material into each divot, then scrape flush with a putty knife. Work in thin layers so you don’t create ridges. Let it cure fully before you sand.
- Clean dust from holes so the compound bonds.
- Overfill slightly, then feather edges for a flat finish.
- Sand once cured until touch-feel matches the surrounding wall.
Create a Consistent Surface Profile for Primer
Before you prime, assess the garage wall for cracks, stains, and any rough patches so you know what needs attention.
Scrape off loose paint, dust, and debris, then smooth high spots until the surface feels consistent.
When you’re ready, apply primer evenly to create a uniform profile that helps your finish paint adhere and look clean.
Assess Existing Surface Condition
First, you need to assess the garage wall’s existing surface so your primer can bond consistently.
Do a quick surface evaluation by walking the area in bright light and checking for texture changes, stains, or peeling.
Then, perform damage assessment: note cracks, holes, rust spots, and water marks so you can plan spot fixes before priming.
Use this process:
1) Look for flaking paint, chalking, and uneven sheen.
2) Probe soft spots with a scraper and mark unstable areas.
3) Check for moisture intrusion at corners, seams, and above outlets.
Remove Loose Paint And Debris
Once you’ve mapped the problem spots from your surface assessment, scrape away anything that won’t hold paint. Use a putty knife or scraper to remove loose paint, bubbling coatings, and flaking edges until you reach solid, sound material.
Vacuum the wall thoroughly, then brush gaps and corners to lift grit and dust. For stubborn chips, repeat paint removal in small sections rather than grinding blindly.
Wipe the entire surface with a damp rag or tack cloth to finish surface preparation. Check again for dull, gritty patches—anything loose must go before you move on.
Apply Primer For Uniform Profile
Now you need to apply primer to create a consistent, paint-ready surface profile. After your surface preparation, you’ll get stronger bonding with careful primer application.
Work methodically:
[1) Stir the primer, then cut in edges with a brush for clean lines.]
[2) Roll or spray a thin, even coat, keeping a wet edge to avoid lap marks.]
[3) Let it dry fully, then lightly sand any high spots so the next layer grips.]
Check for pinholes or missed patches and spot-prime before painting.
Wipe Sanding Dust off With Tack Cloth
Use a tack cloth right after sanding to capture lingering dust that regular wiping can miss. You should keep your surface dry and move the tack cloth in long, gentle strokes, then flip or replace it once it loads up.
Try tack cloth techniques: press lightly, avoid scrubbing grooves, and work from top to bottom so particles don’t fall onto cleaned areas. If you see gray residue on the cloth, keep going until it stays clean.
Good dust removal improves primer grip and paint adhesion, especially on rough or pitted garage walls.
Final Rinse for Clean, Paint-Ready Walls
After you’ve removed all residue, give your garage walls a final water rinse to wash away any remaining grime.
Keep rinsing thoroughly so nothing slick or dusty is left behind.
Then let the walls dry completely before you start painting.
Final Water Rinse Thoroughly
Rinse the garage walls thoroughly with clean water, keeping the stream steady and even so you wash away every remaining soap residue and loosened grit. This final rinse should reach corners, seams, and textured areas where grime hides.
Move top to bottom, then switch to a second pass to guarantee nothing clings.
- Use a hose or pump sprayer to flood the surface lightly, not aggressively.
- Pay extra attention to drips and run lines where soap residue collects.
- Wipe a small test section with a clean cloth; it should come away clean.
Allow Walls to Dry Completely
Once the final water pass is done, let your garage walls dry completely before you paint, so no lingering moisture weakens the bond or causes streaks. Use drying techniques that fit your space: open doors, run fans, and keep airflow steady. Aim for ideal drying by waiting at least overnight, then check spots that stay darker or feel cool. If you see damp patches, extend the wait and increase ventilation. Use this quick guide:
| Check | When | Action |
|---|---|---|
| Surface | 1-2 hrs | Pause painting |
| Smell | Next morning | Ventilate more |
| Dampness | Any time | Extend ideal drying |
| Cool areas | After fans | Recheck dry time |
| Drips | During checks | Stop and dry |
Check for Chalky Residue (And Fix It)
How can you tell if your garage wall is ready for paint? After it dries, rub a clean white cloth across the surface. If you see chalky residue on the cloth, don’t paint yet. That dust ruins adhesion, so you must improve surface preparation first.
After it dries, rub a clean white cloth across the wall; if it leaves chalky residue, skip painting and prep the surface first.
To fix it, you’ll need to scrub the area until it no longer smears, then rinse and let it dry again. If the chalking returns quickly, spot-treat the affected spots and repeat cleaning.
- Perform a dry rub test.
- Scrub firmly, then rinse.
- Re-test for residue before priming.
Remove Waxy or Oily Coatings Safely
Spot waxy or oily patches before you prime, because they can block paint from bonding and cause peeling later.
Scrape any loose residue with a plastic putty knife, then wipe with a degreasing cleaner.
Use proper cleaning solutions—commercial degreasers or a mix of warm water and dish detergent—follow labels carefully.
For stubborn areas, apply a stronger degreaser, scrub in circles, and rinse with clean water.
Let the wall dry fully.
Finish with thorough surface preparation: wipe again, confirm no slick feel remains, then prime so adhesion stays strong.
Wear gloves and ventilate.
Strip Heavy Contamination Without Damaging Drywall
After degreasing waxy or oily spots, you’ll still run into heavy contamination—soot, smoke film, greasy grime, or overspray—that won’t release with light cleaning.
Even after degreasing, soot, smoke film, greasy grime, and overspray often cling—resisting light cleaning and demanding careful treatment.
Use a gentle abrasive pad and cleaner made for painted masonry, not harsh solvents that risk drywall damage. Work in small sections, keeping surfaces damp to prevent grit from grinding in. For stuck deposits, wipe with diluted detergent, then lightly rinse and dry.
- Test a small patch for color shift or paper lift.
- Scrub with minimal pressure, circular, then rinse.
- Spot-prime any remaining stain to seal it.
Stop before you sand through drywall.
Use Degreaser Carefully to Avoid Surface Etching
Use a degreaser carefully, because aggressive products and over-scrubbing can etch porous drywall and leave a dull, uneven surface that shows through your paint. You want controlled degreaser application: test a small spot, then dilute exactly as the label says. Apply with a soft sponge, light pressure, and short sections. Don’t let foam sit longer than directed. Rinse thoroughly with clean water and wipe dry so residues don’t cause new problems or surface etching.
| Action | Goal |
|---|---|
| Test spot | Check etching risk |
| Dilute properly | Control strength |
| Light scrubbing | Remove grease safely |
| Timed dwell | Prevent dull marks |
| Full rinse | Stop residue |
Avoid Flash-Drying While You Wash
While you’re washing the garage walls, don’t let the water flash-dry between passes—grease and detergent can leave streaks and patchy residues that won’t disappear after primer.
Keep your washing methods consistent: wet, scrub, rinse, then immediately re-wet if needed. Use water-flow control so you don’t “bake” contaminants into the concrete or drywall.
- Work in small sections and rinse right after scrubbing.
- Maintain a continuous sheen; avoid “flash drying techniques” that rely on fast evaporation.
- Blot with clean towels or squeegee, then proceed to the next pass while surfaces stay damp.
Ventilate and Manage Humidity During Prep
Once you’ve avoided flash-drying and kept the surface consistently wet, shift your focus to air movement: ventilate the garage so dampness has somewhere to go.
Open the roll-up door a few inches and use box fans to push fresh air across the walls, not straight at one spot. This is where your ventilation strategies matter: keep airflow steady while you scrub and rinse, then continue for drying.
If humidity spikes, run a dehumidifier or add a second fan on a low setting. Monitor for condensation on concrete; adjust humidity control immediately.
Protect Outlets, Sensors, and Fixtures
Before you touch a wall with cleaner or primer, protect anything that can short, stain, or get coated—outlets, light fixtures, door sensors, smoke detectors, and any exposed wiring.
Pull power at the breaker first, then remove or cover outlet covers and mask sensors with painter’s tape and plastic. Wrap fixtures with drop cloths or disposable bags for fixture shielding, and keep aerosol cleaners away.
Check seams where wiring enters boxes.
- Unplug and cover outlets tightly.
- Use sensor protection for door sensors.
- Perform electrical safety checks before priming.
Cover Floors, Trim, and Doors to Prevent Splatter
After you shield outlets, sensors, and fixtures, turn your attention to the surfaces that paint splatter and cleaner drips love to ruin.
Lay drop cloths or plastic sheeting for floor protection, overlapping seams and taping edges to baseboards. Cover trim with painter’s tape plus masking paper, pressing firmly along corners so paint can’t creep.
Swing doors and frames shut, then mask door edges and handles with film or paper to prevent stray spray.
If you use a roller, keep a clean border by adding cardboard shields at the floor line. This splatter prevention saves cleanup time.
Use Fans to Dry Evenly and Thoroughly
Position a couple of box fans so they move air across every painted wall without blasting directly at one spot. You want steady airflow that pulls moisture from seams, corners, and rough patches.
Start with fan placement about 6–10 ft away, then adjust angle to sweep the whole surface. Use drying techniques that keep humidity dropping until the wall feels uniformly dry to the touch, not just in the center.
- Target corners and baseboards with angled airflow.
- Maintain spacing between fans for even circulation.
- Check periodically; don’t rush paint—adhesion needs fully dry walls.
Re-Clean Before Priming: When Should You Do It?
Once the walls feel dry from your fan setup, you still need to re-clean right before priming. Your re clean timing matters because dust, sanding residue, and light grime return quickly in a garage.
Do a quick surface wipe within the same day you finish washing, ideally after final sanding and just before primer opens. If you wait longer, sweep the floor, re-wipe the walls, and remove any fingerprints or drips.
For best painting preparation, check for chalky residue on a clean rag; repeat cleaning until the rag stays clean.
Prime Right After Cleaning for Best Bonding
Prime right after you finish your final wipe so the surface stays clean, dry, and ready to bond. Don’t let dust or moisture creep back in; proper timing is your best tool for adhesion.
Prime right after your final wipe to keep surfaces clean and dry—timing prevents dust or moisture from harming adhesion.
After you confirm the wall is fully dry, brush or roll primer in smooth, even coats, keeping edges wet as you work. Use steady pressure to push primer into any remaining pores for solid surface preparation. If you cleaned, paused, and the film returned, re-wipe before priming.
- Inspect for haze, grime, or chalking.
- Apply primer promptly, within the same day.
- Let it cure fully before topcoat.
Choose Primer Based on What the Wall Needs
Your primer choices start with the condition of the garage wall after cleaning, not with the color you plan to paint. You match primer types to specific wall conditions. If you see glossy residue or leftover stains, use a bonding or stain-blocking primer. For bare drywall, choose a drywall primer to seal. For rough masonry or concrete, pick a masonry primer for grip. When metal shows rust, use a rust-inhibiting primer, then topcoat later. Use this quick guide:
| Wall condition | Best primer type | Key reason |
|---|---|---|
| Clean, dull concrete | masonry | grips pores |
| Stains/odors | stain-blocking | stops bleed |
| Rusted metal | rust-inhibiting | prevents corrosion |
| Drywall seams | drywall | smooths absorption |
Apply Paint After Every Prep Check Passes
Move on to painting only after every prep check passes. You should treat your prep checklist as a gate: no missed debris, no loose spots, and no leftover moisture.
When you confirm the wall is sound, you apply paint promptly to protect fresh bonding surfaces. Use paint adhesion tips by matching coat timing to temperature and humidity, and by maintaining a consistent thickness with smooth, even strokes.
Before the first pass, verify edges and corners are fully coated, then keep rechecking. If anything fails later, stop and correct immediately.
- Confirm surface dryness.
- Maintain correct coat thickness.
- Re-check edges and corners before drying.
Avoid Peeling: Common Cleaning Prep Mistakes
Even if you plan to paint soon, common cleaning mistakes can sabotage adhesion and trigger peeling later. You should avoid quick rinses that leave soap, dust, or oil film behind.
Don’t skip degreasing stained areas; grease blocks primer bonding. Use the right cleaning techniques: scrub firmly, let cleaners dwell briefly, then rinse and allow full dry time.
Never paint over chalky residues, flaking paint, or glossy spots—roughen or remove them first. Be consistent with adhesion importance: if water beads or wipes off as gray powder, clean again before coating.
Troubleshoot Adhesion Problems After Repainting
After you repaint, you might notice adhesion issues like bubbling, lifting edges, or paint that wipes off. Those symptoms usually point to a specific prep or product mistake.
You must act fast: test a small spot, then scrape loose paint and re-clean. Check for dust, grease, or moisture hiding in seams; those contaminate bonding.
Then verify paint compatibility: oil-based over latex, or primer mismatch, can fail even if walls look fine.
- Spot-sand to bare substrate, then re-prime.
- Use the right cleaner/degreaser, let it fully dry.
- Follow manufacturer recoat windows and compatible systems.
Frequently Asked Questions
Can I Paint Garage Walls Immediately After Washing, or Must I Wait?
You can paint right after washing only if the walls are completely dry; otherwise, wait. You need adequate drying time—usually 24 hours, depending on humidity and ventilation—to prevent peeling or poor adhesion.
What’s the Safest Way to Remove Grease Without Damaging Drywall Paper?
Most homeowners unknowingly leave residue—tests show microscopic grease film can cut paint adhesion by up to 50%. Scrape loose gunk, then wipe with degreaser on a damp cloth, using gentle pressure to protect drywall paper and remove grease fully.
How Do I Know if My Wall Has Efflorescence or Just Dirt?
You can tell efflorescence causes from dirt identification by looking for white, powdery salt stains that linger after wiping and return when damp. Dirt smears, wipes clean, and won’t reappear. Test with water and observe any bubbling or crust.
Should I Use a Primer if the Wall Only Has Minor Stains?
Yes—use a primer if stains remain, even minor ones, because it locks down residue for better adhesion. First do stain removal; then choose a primer matched to your paint types (e.g., stain-blocking/adhesion primer).
Why Does Paint Still Peel Even After Thorough Cleaning?
You might think thorough cleaning guarantees success, but paint can still peel because peeling causes adhesion issues: moisture, chalky residue, loose old paint, oils seeping from cracks, or skipped primer. If contamination stays, fresh coats lose grip and fail fast.
Conclusion
Before you start painting your garage walls, make sure you’ve identified contaminants, degreased correctly, and tested cleaner compatibility. Clear the space, protect the floors, and choose the right primer for the wall type. Then, prep thoroughly—because rushing this step usually leads to peeling and weak adhesion. If something feels off after repainting, troubleshoot quickly rather than hoping for the best. Like they say, an ounce of prevention beats a pound of cure.
