
Can You Plaster Over a Painted Ceiling? What to Know Before You Try
Yes, you can plaster over a painted ceiling, but only if the paint’s firmly bonded. Start by cleaning the surface well, scuff-sanding glossy areas, and scraping off any loose or flaking paint. Do a tape test or scrape test to confirm adhesion. Prime with a bonding primer suited to the existing paint, then skim in thin coats. Check for moisture problems and cracks first, or the plaster may fail. Keep going—you’ll want the details before you start.
Can You Plaster Over a Painted Ceiling?
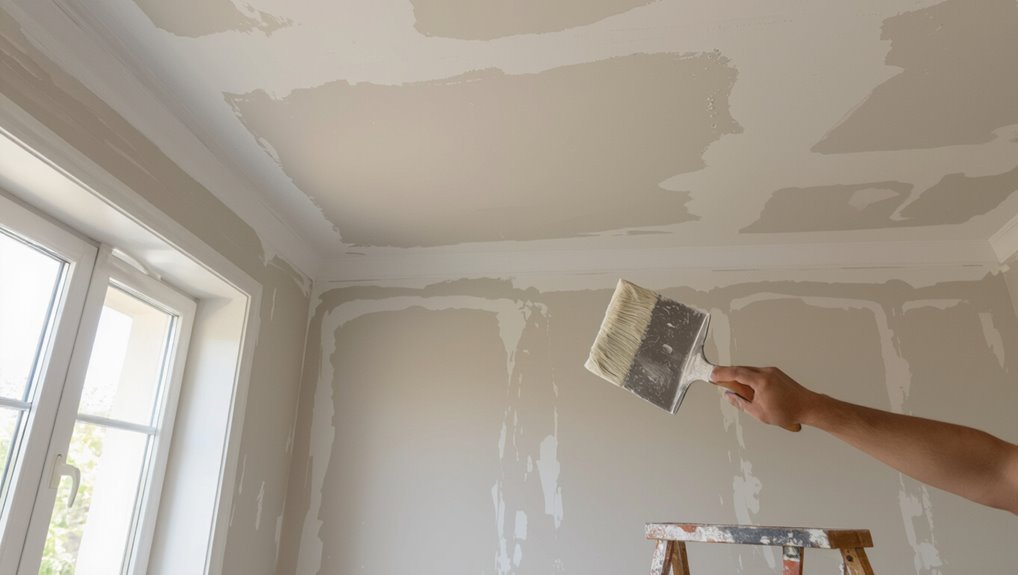
Yes, you can plaster over a painted ceiling, but you shouldn’t just skim straight onto glossy paint. You need solid plaster adhesion, which depends on good ceiling preparation.
First, clean off grease, dust, and stains, then let the surface dry fully. Next, lightly abrade shiny areas to dull the paint, and wipe away all sanding residue.
If the paint flakes or feels loose, you must remove it before continuing. Prime the ceiling with a suitable bonding primer, then apply your filler or skim coat in thin passes.
Press firmly and feather edges to keep lines smooth.
When Painted Ceilings Must Be Stripped
You should strip a painted ceiling if you notice peeling, bubbling, or flaking paint, because plaster won’t bond well to failing layers.
If the ceiling could contain older lead-based paint, don’t risk sanding or scraping—check local guidance and take proper precautions.
Once you spot these hazards or instability, you should plan for stripping before you plaster.
Signs Of Failing Paint Layers
Before you plaster over a painted ceiling, look closely for signs that the existing paint layers won’t stay bonded—because plaster needs a stable surface to grab onto.
If you notice paint deterioration or adhesion issues, don’t assume skim-coating will fix it. You should strip back to sound material when you see:
- Flaking or peeling when you lightly scrape
- Cracks that widen across paint and plaster
- Bubbling, blistering, or soft spots that flex
- Powdery residue or chalking after wiping
- Stained, water-darkened areas returning after drying
Older Lead-Based Paint Hazards
Even if the ceiling looks solid, older painted ceilings can hide lead-based paint that poses a serious risk when you cut, sand, or scrape it. You need lead paint safety before any ceiling restoration.
If your home was built before 1978, treat the surface as suspect. Look for peeling, chalky dust, or damaged trim, then assume powder could contain lead.
Avoid dry sanding; it creates airborne particles you can breathe. Instead, test the paint through a certified lab or use proper screening.
If lead is confirmed, strip only with qualified contractors. Seal and clean thoroughly afterward, using HEPA vacuums and disposable coverings.
Spot Flaking Paint and Loose Chips First
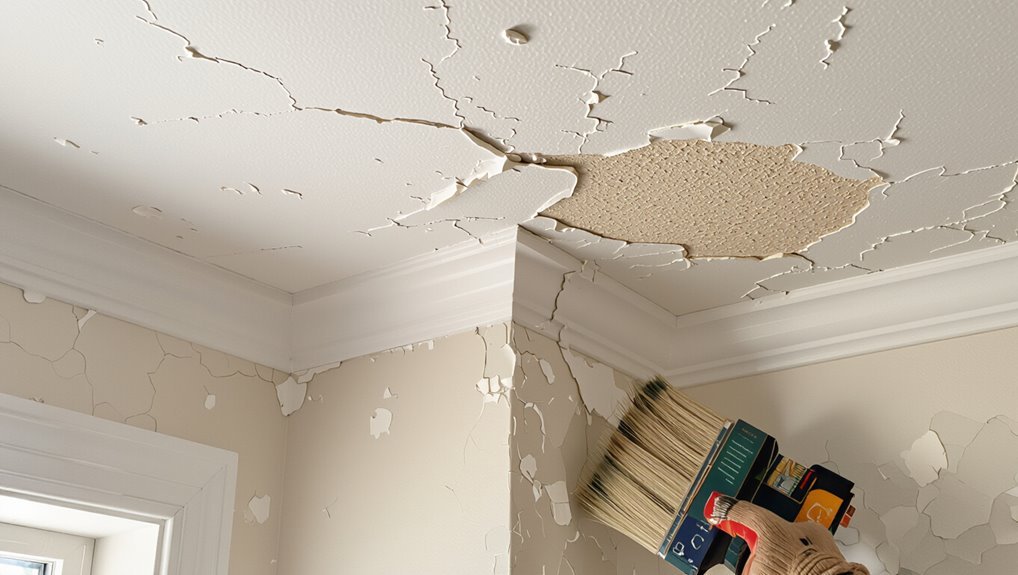
Start by inspecting the ceiling closely for spot flaking paint and loose chips, since plaster won’t bond well to failing coatings. You need solid ceiling preparation before you even think about patching.
Look for raised spots, powdery areas, and edges that catch your fingernail. If you spot trouble, plan targeted paint removal so new plaster can grip the substrate.
- Check seams, corners, and water-stain areas first
- Tap lightly to find hollow or detached sections
- Scrape loose flakes until you hit firm paint or bare material
- Feather edges to avoid ridges under plaster
- Vacuum dust and wipe surfaces clean
Tape Test or Scrape Test for Paint Bond
Before you plaster, you should run a tape test to check surface bond by pressing tape onto the painted area and pulling it off.
If the tape lifts paint or grit, you’ve got weak bonding and need to address it first.
If you’re unsure, you can do a scrape test—use a putty knife to see whether the paint lifts or crumbles, which signals poor adhesion.
Tape Test For Surface Bond
So you’re wondering whether your painted ceiling will actually hold plaster—here’s a quick tape test to check the bond.
Before you start adhesion techniques, do solid surface preparation by testing where plaster will go. Press painter’s tape firmly onto a small area, then pull it off quickly at a 45° angle. If paint lifts with the tape, the bond is weak and you’ll need better prep or removal. If the tape comes away clean, the paint-to-substrate connection looks sound.
- Choose a hidden corner first
- Use strong painter’s tape
- Test multiple spots
- Note any powdering or flaking
- Proceed only if paint stays put
Scrape Test For Paint Adhesion
How can you tell whether your painted ceiling will bond well with plaster? Do a scrape test: use a putty knife at a 45° angle and scrape firmly in several spots. If paint flakes, dusts, or lifts in sheets, you’ve got poor adhesion testing and weak paint compatibility. If the finish stays hard and cohesive, plaster can key in.
| Scrape result | What you see | Next step |
|---|---|---|
| Loose | Chips easily | Stop; remove paint |
| Powdery | Chalk marks | Prime or strip |
| Peeling edge | Lift at cracks | Sand, spot-prime |
| Stays solid | No damage | Proceed carefully |
| Tough layers | Hard, minimal marks | Clean, plaster-ready |
How to Tell Water-Based vs Oil-Based Paint
Wondering what you’re actually dealing with? You can nail water based identification versus oil based characteristics with a few quick checks.
First, wipe a hidden spot with a damp cloth: if color lifts easily, you’ve likely got water-based paint.
Next, rub lightly with a bit of rubbing alcohol on a test area: water-based often softens, while oil-based stays tougher.
Look at the finish, too—oil paints usually feel slicker and harder, holding a subtle sheen.
Then do this:
- Damp-cloth color transfer
- Rubbing alcohol behavior
- Drying time feel (oil lags)
- Surface hardness when scratched
- Odor when sanding
Watch for Gloss Paint That Repels Plaster
Once you’ve sorted out whether the paint behaves like water-based or oil-based, you still need to check the sheen—gloss or semi-gloss paint can interfere with adhesion and make plaster won’t key in.
Next, run a clean dry cloth over the surface; if you see slippery residue or it feels slick, assume poor plaster adhesion.
You can lightly scuff an unseen corner with sandpaper: gloss paint should turn dull quickly. If it resists, doesn’t roughen, or pills, you need extra preparation—deglossing, sanding, or a bonding primer—before plastering.
Check for Damp Marks and Water Staining
Check the ceiling carefully for any damp marks, dark patches, or tide-like staining, since these often signal hidden moisture.
Look for likely sources such as leaks from above, condensation around vents, or failed plumbing so you can stop the problem before plastering.
If you spot active staining or soft spots, you should investigate and fix the cause first, not just cover it up.
Inspect Damp Marks Closely
Start by inspecting every damp mark and water stain on the ceiling, because plaster won’t bond well to a surface that’s still carrying moisture.
Do damp detection carefully: look for tide lines, soft paint, blistering, and dark patches that expand. Use close inspection in good light, then touch-test gently—if anything feels tacky or powdery, you need moisture assessment before plastering.
Check around edges, light fittings, and any repaired spots, since signs can reappear after drying.
- Measure stain size and color change
- Photograph for before/after tracking
- Note any recurring rings or streaks
- Smell for musty, stale odors
- Mark the exact locations to revisit
Identify Water Staining Causes
Before you decide on plastering, you need to identify what’s causing the water staining, because different sources demand different repairs. Check for damp marks and press a finger on the discolored area. If it feels soft or wet, you’re dealing with water damage and active moisture issues, not just old discoloration. Look near pipes, bathrooms, roofs, and windows; pinpoint likely staining sources. Use this quick guide:
| Spot | Likely cause |
|---|---|
| Center | Roof leak |
| Near wall | Pipe seepage |
| Above window | Condensation |
Match findings to ceiling maintenance before you patch.
Fix Cracks and Hairlines Before Skimming
You’ll get the smoothest skim coat when you fix any cracks and hairlines first, because loose or moving edges will telegraph through the new plaster.
Before you skim, remove any flaking paint around the damage, then run a scraper to open the crack slightly.
Do your crack repair with a suitable filler, and do hairline fixes with a thin, quick-setting compound so you don’t leave ridges.
Let every patch fully cure, then sand flush and vacuum dust before priming.
- Chase loose edges
- Clean with a dry brush
- Apply filler in layers
- Feather sand around repairs
- Prime after cure
Handle Peeling, Blistering, and Bubbling Paint
You should spot peeling and flaking areas right away, because plaster won’t bond well to loose paint.
If you find blisters, cut them out and let the surface dry fully before you skim.
For bubbling paint, remove it completely so you’re working on a solid, stable base.
Identify Peeling And Flaking Areas
Inspect the ceiling closely and mark every spot where the paint has begun to fail, especially where it’s peeling, flaking, blistering, or bubbling.
You’ll want to spot not just obvious patches, but early changes too. Focus on peeling paint and any areas with rough flaking texture, since plaster won’t bond well to unstable coatings.
- Look for lifted edges you can catch with a fingertip
- Watch for chalky residue around cracks
- Mark seams where layers have separated
- Note hairline breaks and tiny raised bumps
- Circle any spot with uneven sheen or shadowing
Fix Blisters Before Plastering
Before you plaster over the ceiling, you need to treat any blisters, bubbling, or peeling paint first, since loose coatings will keep lifting and ruin the new bond. Scrape loose paint back to solid substrate, then sand feathered edges until smooth. Use blister removal techniques: dry the area, cut out any raised film, and patch with a bonding filler. Prime with a stain-blocking primer if moisture staining appears. Follow ceiling preparation tips by checking for dampness and improving ventilation before skimming.
| Problem | Quick fix |
|---|---|
| Blisters | Cut, scrape, fill |
| Bubbling | Dry, sand, prime |
| Peeling | Remove loose layers |
| Edges | Feather smooth |
| Stains | Block before patch |
Remove Bubbling Paint Completely
Remove bubbling paint completely by attacking the problem at the source: dry the ceiling thoroughly, then scrape back every blister until you reach firmly bonded material.
If moisture sits behind the coating, bubbling paint causes keep returning. You need repair techniques that actually stop the bond failure: press on with a scraper, feather edges, and vacuum grit so plaster can grip.
Spot-check stains and fix leaks before you patch.
- Check for dampness and leaks
- Scrape to solid, sound paint
- Feather rough edges smooth
- Prime with a stain-blocking sealer
- Re-plaster only after full cure
How Ceiling Texture Changes Plaster Bonding
Ceiling texture strongly influences how well new plaster bonds to the surface, because it changes both the contact area and the way moisture moves through the substrate.
If the ceiling is smooth or glossy, you get less keying surface, so you face adhesion challenges when plaster tries to grip.
With heavy stipple, peaks and valleys increase contact area, but they can also trap dust and weak paint film.
You then notice that texture impact affects curing: moisture escapes faster in porous ridges, leaving thin, under-bonded spots, while dense areas stay wetter too long.
Prepare Painted Ceilings for Maximum Keying
To get strong plaster bonding, you need maximum keying on the existing paint surface. Before you proceed, use prep techniques that create mechanical grip, not just roughness.
Start by cleaning off dust, grease, and loose flaking so your keying methods can bite. Then dull the paint evenly across the ceiling with abrasion, and confirm no glossy areas remain. If you find peeling, remove weak paint back to solid edges, feathering the shift.
- Degrease thoroughly, let fully dry
- Scrape and feather loose paint
- Abrade to a consistent dull finish
- Vacuum and wipe dust residues
- Prime if the surface is sealed or chalky
Sand Painted Ceilings for Better Plaster Grip
Before you plaster, you should dry scuff-sand the painted ceiling with a grit that matches the paint’s condition.
After sanding, you clean off every bit of dust so the plaster can bond properly.
If you skip the dusting, you’ll weaken adhesion and risk patchy results.
Dry Scuff-Sand With Grit
Dry scuff-sanding helps plaster grip, so you’ll want to start by lightly abrading the painted surface with grit sandpaper (like 120–150) instead of wetting it.
Use solid dry sanding techniques and smart grit selection to dull the gloss without digging into the paint too deeply. Work in smooth passes, and focus on glossy areas, runs, and peeling edges.
- Feather any loose flaking with a quick touch
- Keep pressure light to avoid gouges
- Sand edges and corners thoroughly
- Stop when the sheen turns matte
- Switch to finer grit for uniform texture
Wipe debris-free before moving on to plaster work.
Clean Dust Before Plastering
Once you’ve scuff-sanded the glossy paint, you need to remove every bit of dust so plaster can bond instead of sliding.
Vacuum the ceiling thoroughly with a HEPA shop vac, then wipe with a damp microfiber to catch fine particles. Use dust removal techniques that start dry, then finish slightly wet—don’t soak the surface.
After wiping, let the area dry completely before you plaster. For stubborn residue, lightly dampen a cloth with clean water, rinse, and repeat.
Follow ceiling cleaning methods carefully: no sweeping, no dry brushing, or you’ll just resuspend grit.
Clean the Ceiling: Dust, Grease, Smoke Residue
Start by clearing every loose contaminant from the ceiling so your plaster can bond to the surface—not to grime. You’ll get better results when you handle dust removal, grease elimination, and smoke cleaning as part of ceiling preparation.
Clear loose contaminants from your ceiling so plaster bonds to the surface—not grime—after dust, grease, and smoke cleaning prep.
Work top to bottom, vacuum with a HEPA attachment, then wipe with a damp microfiber cloth. Let everything dry fully before any further work.
- Vacuum edges and corners thoroughly
- Degrease stains with a suitable cleaner
- Spot-clean nicotine with smoke residue remover
- Rinse with clean water, then dry
- Scrape flaking paint and dust it away
Prime a Painted Ceiling Before Plastering
Before you plaster over an existing painted ceiling, you need to prime it so the new layer bonds reliably.
Start with solid ceiling preparation: let the surface dry fully, then check for peeling paint or damp spots.
Apply a bonding primer using a roller and brush edges, working evenly and thinly.
Choose between primer types based on what you found: if the old paint is glossy or stained, you’ll need a primer made for adhesion and sealing.
Keep ventilation on and respect cure times before plastering. If you rush, plaster can delaminate.
Choose the Right Primer for Plaster Bond
Start by using a bonding primer first, because it’s what helps the plaster grip firmly.
Then match the primer to the existing paint type—oil-based needs different chemistry than latex or acrylic.
If you skip either step, you risk weak adhesion and cracks down the line.
Use Bonding Primer First
A bonding primer is the key to making plaster stick to a painted ceiling, so you should apply one before you start patching or skimming. You can’t rely on hope or spot-sanding alone; you need proper bonding techniques and smart primer selection so the surface doesn’t peel later.
Brush or roll a thin, even coat, then let it cure fully as the label directs.
- Clean off dust and grease thoroughly
- Lightly scuff glossy paint to help grip
- Apply primer in one continuous layer
- Respect cure time before skim coats
- Spot-prime trouble areas before plastering
Match Primer To Paint Type
Once you scuff and clean the ceiling, match your bonding primer to the existing paint so the plaster bonds reliably.
First, identify whether the old coating is latex, oil-based, or glossy enamel. Then pick the right primer types: use a stain-blocking, adhesion-promoting bonding primer for glossy or sealed surfaces, and a drywall/latex-compatible bonding primer for matte paint.
Check paint compatibility on the label—oil-to-water primers need special “oil-block” formulas. If you’re unsure, do a small patch test; if it peels, switch primers before you apply plaster.
Use Bonding Additives if the Ceiling Feels Slick
If your painted ceiling feels slick or slightly chalky, you’ll usually need a bonding additive before you plaster over it. You want plaster to grip, so don’t skip this step if your slick surfaces are trying to release.
Use bonding additives mixed into your primer or bonding coat, following the label exactly. Then let it dry fully before skimming.
Mix bonding additives into your primer or bonding coat per the label, then let it fully dry before you skim.
- Check for chalk transfer with a dry cloth
- Clean grease and dust with a degreaser
- Mix bonding additives to the stated ratio
- Apply a uniform coat, don’t spot-prime only
- Allow proper cure time, then inspect for adhesion
Which Plaster Works Best for Ceiling Skimming?
Choosing the right plaster for ceiling skimming depends on the state of your ceiling and how smooth you want the finish.
For small, even areas, use a ready-mixed finishing plaster for a quick, fine coat. If your ceiling is patchy or slightly uneven, pick a multi-finish or bonding plaster as your base, then skim with a finishing product.
For stubborn texture, choose plaster types suited to thin application and strong adhesion.
No matter what you buy, focus on ceiling preparation: clean, dust-free surfaces, firm edges, and good priming so the skim bonds reliably and levels out.
How Thick Should Plaster Be for Levels?
To get good levels, you should aim for a target plaster thickness that’s only as thick as the dips require, usually building in layers rather than piling it on.
Keep your feathering depth within the manufacturer’s limits so edges blend smoothly without cracking or sagging.
Then plan for drying and cure time—thicker sections take longer, so you don’t rush sanding or applying finishes.
Target Thickness For Leveling
When you’re leveling a ceiling, aim for plaster thickness that matches the high-and-low profile rather than a one-size number—thin skim coats handle minor imperfections, while deeper spots may need a phased buildup.
Start by mapping low areas with a straightedge, then apply plaster thickness only where needed. Use leveling techniques like tight passes, consistent pressure, and checking as you go.
- Target skim where dips are slight
- Build in layers for deeper waves
- Recheck after each set cures
- Keep feather edges tight to prevent ridges
- Match thickness to measured deviations, not guesswork
Feathering Depth Limits Explained
Feathering depth limits matter because plaster shrinks as it cures, and that shrinkage can leave ridges if you taper too aggressively. For best results, you feather in layers, not in one disappearing edge.
Use sound depth measurement: mark your low and high spots, then stop your feather where thickness is still substantial. Typically, keep feather edges thin but not paper-like; aim for a stable final skim thickness rather than chasing dead-flat instantly.
With good feathering techniques, blend each pass wider than the last, and stop before the edge turns weak or brittle.
Drying And Cure Time Considerations
Once you’ve leveled the ceiling with plaster, your next concern is cure time, because thickness controls how long it stays workable and how flat it finishes. Aim for thin, controlled coats so you don’t trap moisture.
Use drying techniques like steady airflow and gentle heat, but avoid drafts that crack edges. Your curing methods should include allowing full set before sanding or painting.
- Check each coat: thicker spots need longer
- Wait until surface feels cool, dry, firm
- Use a fan, not blasting air directly
- Keep humidity stable for consistent curing
- Test a scrap; don’t guess the timeline
How to Skim Coat Over Existing Paint
Before you skim coat over existing paint, prep the surface so the new layer bonds instead of peeling.
Start with ceiling preparation: clean off dust, grease, and loose flaking areas, then wash and let dry.
Lightly sand the painted surface to dull the sheen, and vacuum thoroughly.
If paint is glossy or chalky, consider a primer/sealer to improve adhesion.
Mix a smooth topping compound to a creamy consistency.
Use your hawk and trowel, applying thin passes with consistent pressure.
Practice skimming techniques on a scrap before you move across the ceiling, keeping each coat even.
Feather Edges to Avoid Lumps and Ridging
When you apply topping compound, feather every edge to prevent ridges and lumps from showing through. Use feathering techniques that blend the new coat outward, not straight down to zero. Keep a consistent thickness, and rework only while the compound stays workable.
If you chase ridges after they set, you’ll create more texture. For smooth application, use a clean wide knife, wipe off excess, and pull in one direction per pass.
- Don’t leave hard stops at junctions
- Feather each layer wider than the last
- Use light pressure at the perimeter
- Check corners under bright angled light
- Keep your tools clean between strokes
Prevent Pinholes and Air Bubbles in Plaster
Before you plaster, seal the painted surface so air can’t escape through it.
Apply thin coats instead of thick layers, and let each coat dry properly before you continue.
Follow the right curing time so you don’t trap moisture that leads to pinholes and air bubbles.
Seal Painted Surface First
To prevent pinholes and air bubbles from showing up in your plaster, you need to seal the painted ceiling surface first. You’re improving paint adhesion by doing solid surface preparation before you mix or spread anything.
A good sealer keeps dust and loose paint from interfering and reduces trapped air under the first plaster lift.
- Clean the ceiling and remove peeling paint.
- Spot-prime stained or chalky areas.
- Apply a ceiling-rated bonding sealer evenly.
- Let it cure fully per label directions.
- Recheck for tackiness or flaking before plastering.
Apply Thin Coats, Not Thick
After you’ve sealed the painted ceiling, focus on how you apply the plaster. Use your application techniques to keep layers thin: aim for a smooth 1/8-inch or less per pass, spreading fast but evenly.
If you go thick, you trap air, and pinholes and bubbles pop up as the plaster settles. Work in small sections, pressing firmly so the mix bonds, then skim off ridges with steady strokes.
Let each coat cover flaws from your surface preparation, but don’t overload them. Build up gradually until level.
Use Proper Drying And Curing
Once you’ve applied your thin plaster coats, you need to control the drying so it cures evenly. If you rush, you invite pinholes and air bubbles.
Use steady room conditions and watch for surface skinning; then apply your next coat only when ready. Good drying techniques and curing methods work together: slow, consistent moisture loss beats fast drying.
Keep fans low, avoid direct heat, and mist lightly if the ceiling flashes dry.
- Maintain stable temperature and airflow
- Avoid overheating or drafts
- Use gentle misting to slow cure
- Let each coat reach the right set
- Spot-check for bumps and rework early
Let Plaster Cure Fully Before You Decorate
Let your new plaster cure fully before you decorate, because decorating too soon can trap moisture and cause cracking, bubbling, or peeling.
Follow the curing process until the surface feels completely dry and firm throughout, not just on top. Plan your decorating timeline around full cure: wait long enough for chemical set and moisture release, then ventilate the room to help.
When you’re ready, prime before paint or wallpaper, since a fresh surface still needs uniform absorption. If you rush, you’ll risk stains and poor adhesion, forcing premature repairs.
What If Plaster Feels Soft or Powdery?
If your plaster feels soft or powdery when you lightly touch it, treat that as a warning sign—don’t plaster over or decorate yet. You likely have weak plaster texture, poor bonding, or contamination, and new layers can fail fast.
For safe ceiling preparation, take these steps:
- Test multiple spots, including edges and seams
- Scrape off loose material to reach firm, solid substrate
- Vacuum dust thoroughly; powder blocks adhesion
- Let affected areas dry and recheck firmness
- Use a compatible primer or bonding agent before any new work
Then proceed, because a stable base matters more than coverage.
Patch Misses After the First Drying Pass
After your first drying pass, patch misses show up fast—sunken spots, pinholes, or uneven ridges that refuse to blend.
You should stop and check what failed: did the patch detach, or did it shrink while curing? If plaster adhesion is weak, it lifts at edges and leaves ghost seams.
Rework those areas by scraping to sound material, cleaning dust, then applying a thinner layer next.
Use drying techniques that match the room—avoid drafts and sudden heat, which can skin the surface and trap moisture.
Let each skim fully set before you add more.
Prime Again Before Painting the Finished Ceiling
Once the patch work cures and you’ve sanded everything smooth, prime the entire ceiling again before you paint. Don’t skip this step: it locks down dust, evens out absorption, and supports a clean topcoat.
For ceiling preparation, you want full coverage, especially over repaired areas and any feathered edges. Choose the right primer selection based on your surface—use a stain-blocking sealer if patches show bleed-through. Apply one uniform coat, let it dry fully, then lightly scuff if needed.
- Mix primer thoroughly
- Apply with roller, keep a wet edge
- Cover repairs and connections
- Follow dry times exactly
- Scuff glossy spots before topcoat
Can You Plaster Over Gloss Paint Without Sanding?
Can you plaster over gloss paint without sanding? You can, but you’ll face plaster adhesion challenges because gloss stays smooth and non-porous. Without sanding, bonding compounds struggle to grip, so the skim can crack or pop off. Your best move is to roughen the surface lightly or use a bonding primer made for slick paint.
| Surface | What to expect |
|---|---|
| Un-sanded gloss | Weak key, higher risk |
| Lightly dulled | Better grip, steadier cure |
| Bonding primer | Improved adhesion, less risk |
| Full sand | Most reliable for repair |
Is It Safe to Plaster Over Stippled Paint?
Plastering over stippled paint can be safe, but it depends on how well the existing finish holds and how thick the stipple texture is. You need to treat it like a delicate base: test the surface first, because any loose spots become plaster adhesion challenges fast.
If the stipple is heavy, you may need additional flattening so the new layer sets evenly, reducing future sagging and gaps.
- Scrape to find loose edges
- Wash away chalky residue
- Spot-prime to improve bond
- Skim to level deep texture
- Let cure fully before painting
Address stippled paint concerns early for best results.
Ceiling Cracks From Movement vs Poor Adhesion
When your ceiling develops cracks, you usually need to decide whether movement or poor adhesion caused them, because the fix depends on the root problem. If you spot stair-step lines, widening gaps after seasons, or cracks that track joists, you’re likely seeing ceiling movement. In that case, plaster over paint won’t stop them unless you stabilize the structure first. If cracks appear after a patch, a previous skim, or peeling paint, you’re dealing with adhesion issues; the existing coat simply won’t bond. Use this quick guide to choose the right approach:
| Sign | Likely cause |
|---|---|
| Shifting over time | ceiling movement |
| Cracks near seams | poor bonding |
| Hairline with flex | ceiling movement |
| Paint flakes before cracking | adhesion issues |
| Random patch failures | adhesion issues |
Common Mistakes When Plastering Over Paint
Before you reach for a tub of filler, you need to spot the big traps that make patchwork fail—because plaster that sticks to paint one day can crumble the next.
You’ll run into common pitfalls when you skip proper surface preparation, like working over glossy coatings or loose flaking paint.
- Sand too little, leaving paint film intact
- Miss degreasing, so plaster won’t key in
- Don’t prime unprepared spots or edges
- Overfill tiny gaps, trapping shrink stress
- Rush drying, then blame the plaster
Check adhesion, then commit to thorough surface preparation.
When to Hire a Pro for Painted Ceilings?
Sometimes, the smartest move is to hire a pro for a painted ceiling—especially if you’re dealing with widespread flaking paint, stubborn glossy surfaces, or uneven damage that needs more than simple patching.
You should call in a contractor when your plaster substrate seems compromised, the texture is inconsistent, or you suspect hidden layers. A professional assessment helps you identify adhesion problems and recommend the right prep plan, including safe paint removal techniques.
If the ceiling shows cracks returning after repairs, call a pro before you cover mistakes. They’ll test surfaces, manage dust, and guarantee proper bonding.
Cost, Time, and Risk: Plastering vs Stripping
Cost, time, and risk vary a lot depending on whether you plaster over the existing painted ceiling or strip back to solid plaster first.
If you go straight to plastering, you boost time efficiency, but you must do risk assessment first to avoid peeling paint and cracking.
Stripping usually raises labor intensity and material expenses, yet it lowers long-term risk and improves adhesion.
- Strong cost comparison: compare prep tools vs bonding products
- Expect longer project duration after stripping
- Factor added labor intensity for scraping and disposal
- Use material expenses for primer, bonding, and fill
- Plan risk assessment for loose paint or stains
Frequently Asked Questions
Can I Plaster Over Moldy Paint, or Must I Remove It First?
Yes, you should remove moldy paint first. You can’t safely plaster over active mold. Do thorough mold removal, then do solid paint preparation—scrape loose paint, clean, dry, and treat the area—before skimming so it bonds and won’t reappear.
What if the Paint Is From Asbestos-Containing Ceilings—How Do I Check Safely?
Test first: “When in doubt, don’t.” You can’t safely plaster over suspected asbestos. Hire certified asbestos testing, then follow professional safe removal guidance, including sealing, air monitoring, and disposal. Don’t DIY—check labels, age, and building records.
Will Plaster Bond to Aerosol “spray” Paint or Metallic Paints?
Yes, but only if you prep properly: roughen the surface, remove dust, and prime. Aerosol spray paint can limit spray paint adhesion; glossy/metallic paint concerns also reduce bonding. Test a patch, then plaster over with bonding primer.
How Long Should I Wait Before Plastering After Heavy Cleaning or Degreasing?
After heavy cleaning or degreasing, you should wait until the surface feels completely dry and odor-free. Use drying time as your guide—typically 24 hours. Rely on thorough cleaning techniques: wipe, rinse if needed, then air-dry.
Do I Need to Re-Prime if the Ceiling Gets Dusty While I Skim?
Do you need to re-prime if the ceiling gets dusty while you skim? Yes—light dust can weaken bond. Use dust prevention, wipe with a damp cloth, and follow your skimming techniques. If powder remains, re-prime or skim won’t stick well.
Conclusion
You can sometimes plaster over a painted ceiling, but you’ll need to “prove” the paint holds first—by testing for loose chips, checking for flaking, and scraping/taping to confirm a solid bond. If you find cracks from movement or suspect water/oil-based paint that won’t grip, you might end up stripping instead. You’ll save time only if adhesion checks out; otherwise, hiring a pro can prevent a bumpy redo.
