
What Sheen Should You Use for Trim and Doors? The Right Finish Explained
For most homes, use satin on trim and semi-gloss on doors. Satin gives trim a soft, durable finish that resists scuffs and fingerprints without looking shiny. Semi-gloss on doors makes cleanup easy and holds up to everyday wear. Save gloss for front entry or feature doors when you want maximum light reflection and crisp edges—just expect it to show bumps. If you want to choose the perfect sheen, keep going to learn the “why” behind it.
Pick Trim Sheen: Satin for Most Homes
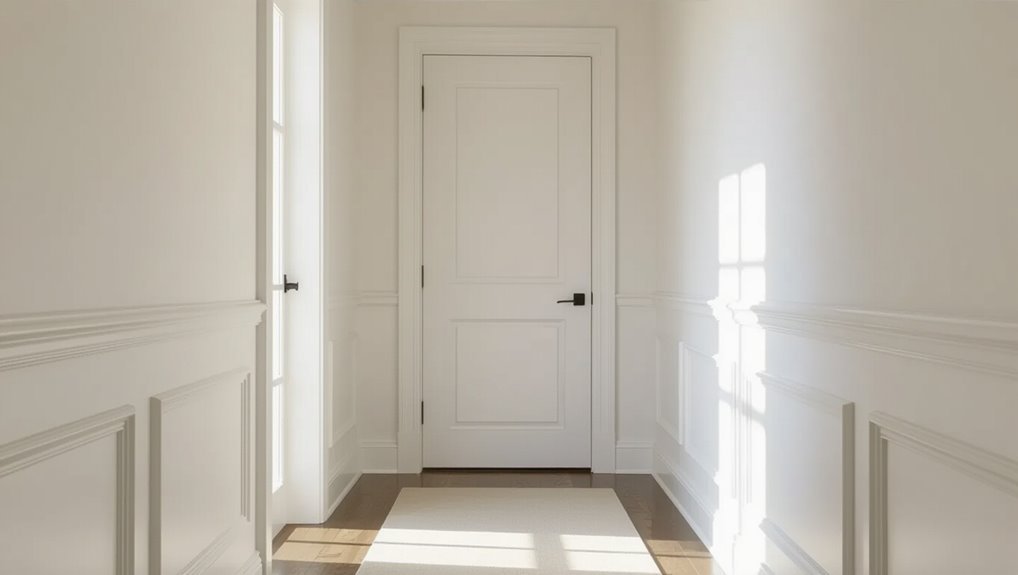
Most homes look best when you choose satin paint for trim, because its gentle sheen resists scuffs and fingerprints while still blending smoothly on baseboards, casing, and door frames.
Choose satin paint for trim to resist scuffs and fingerprints while blending smoothly on baseboards, casing, and door frames.
You get reliable sheen durability in busy rooms, hallways, and kid-friendly spaces. When you match trim color to walls, satin helps the finish stay even without looking flat or chalky.
You should also consider existing lighting: satin reflects soft highlights, so details stay crisp.
For best results, prep surfaces well, then apply a smooth second coat for consistent coverage.
Pick Door Sheen: Semi-Gloss for Everyday Use
Choose semi-gloss for your doors if you want a finish that cleans up easily and keeps looking sharp.
Match the sheen to how much traffic your space gets, since higher-use areas need more durability and better wipeability.
When you pick the right semi-gloss level, you protect the surface and maintain a consistent look.
Choose Semi-Gloss For Doors
When you’re finishing interior doors, semi-gloss paint gives you the everyday durability you need without looking too shiny.
It delivers the right door sheen: smooth enough to wipe away fingerprints, scuffs, and light smudges, yet not reflective like high-gloss. You’ll also get reliable finish durability, so the surface resists wear from daily handling and casual contact.
Apply it evenly, using a quality brush or small roller, and let coats dry fully for a tough, sealed look. This is an easy, dependable choice for most homes.
Match Sheen To Traffic Use
Pick a door sheen based on how you’ll use the space, because everyday contact demands more than decoration.
Choose semi-gloss for doors that face high traffic patterns and heavy usage frequency. It resists scuffs from shoes, handles, and kids, and it wipes clean without losing shine.
If your hallway sees daily comings and goings, semi-gloss keeps doors looking fresh with less maintenance.
For lower-traffic rooms—like spare bedrooms—you can soften the sheen, but keep durability in mind.
Match the finish to your real routine, not showroom photos.
When to Go Gloss: Only for Maximum Impact
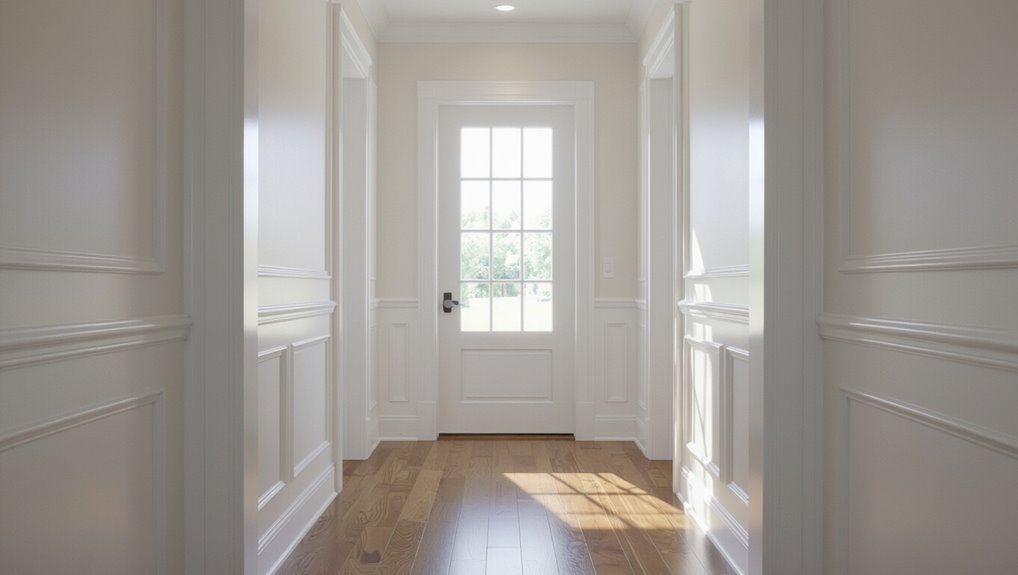
For trim and doors, gloss earns its keep only in high-visibility spots where you want the finish to “read” from across the room.
You choose gloss when you need strong gloss benefits and bold impact aesthetics—think entryways, feature doors, and narrow hallways lined with trim. You also use it to highlight crisp edges, hardware, and detailing, especially in larger, brighter spaces.
Go glossy sparingly: it shows scuffs and bumps, so skip it for heavily used kids’ areas or frequently cleaned zones.
Go glossy sparingly—it shows scuffs and bumps, so avoid it in heavily used kids’ areas or frequently cleaned spaces.
When you want a statement, gloss delivers; when you want quiet, choose satin.
Sheen Basics: How Light Reflection Really Works
When you choose a sheen, you’re really choosing how surfaces bounce light—smooth finishes reflect more, while textured ones scatter it.
Higher sheen levels increase contrast and can create glare, especially under bright lights or at certain angles.
Because the finish affects appearance, you’ll see different trim and door colors shift in warmth and depth as the lighting changes.
Light Reflection Mechanisms
To understand how sheen works on trim and doors, you need to know that light reflection isn’t just “shiny vs. dull”—it depends on the surface’s microtexture and how the finish levels out.
When light hits, you redirect it through smooth peaks and valleys, not just gloss. With different sheen types, you create varied reflection paths: flatter surfaces scatter more light for softer, even color.
Smoother leveling reduces microtexture, so light reflects more coherently, emphasizing grain and edges. You’ll notice how coatings trap or release glare by controlling film build and cure, shaping the light reflection you experience.
Sheen Levels And Glare
Now that you understand how coatings shape microtexture and control how light bounces, sheen levels come down to how much glare they send back at you.
On doors and trim, you want the surface to reflect light predictably, not flash. Higher sheen amplifies sheen effects, creating sharper highlights that can feel harsh, especially near windows or bright fixtures.
Lower sheen spreads reflection and helps glare reduction, making edges look calmer and touchpoints easier to see.
Use semi-gloss where you need wipeability but still want controlled shine, and choose satin or eggshell when glare reduction matters most.
How Finish Affects Appearance
Finish sheen changes how light reflects off a surface, and that directly controls how your doors and trim look in real rooms. When you go glossier, the surface mirrors more light, so highlight lines and roller marks stand out.
A satin or eggshell finish softens reflections, making trim feel smoother and helping small dents disappear. If your doors get frequent touch, you’ll care about finish durability, because more sheen can show scuffs faster.
Match your aesthetic preferences: matte reads calm and modern, while semi-gloss feels crisp and clean. Always test samples under your room’s lighting.
Match Trim to Walls and Ceilings
Matching trim to your walls and ceilings starts with choosing the right sheen and undertone so changes look intentional.
Aim for harmony between trim color and the wall palette: if your walls run warm, pick trim with a matching warm undertone; cool walls need cool trim. You can slightly deepen the trim color for definition, but don’t switch undertones.
Aim for harmony between trim and walls: warm undertones with warm palettes, cool undertones with cool walls—deepen slightly, not change undertones.
For ceilings, keep trims consistent across rooms so shifts feel seamless.
When you’re unsure, test samples in daylight and at night—your wall coordination should hold up under both. This keeps doors and trim looking custom, not accidental.
How Sheen Affects Roller Marks and Texture
When you choose higher sheen, you make roller marks easier to spot because the finish reflects light more sharply.
As you move from matte to semi-gloss or gloss, you also reveal more surface texture and minor imperfections.
You’ll get smoother-looking trim and doors when you match the sheen to how perfect you can keep the surface.
Sheen Changes Roller Marking
Because sheen changes how paint reflects light, it also changes how you’ll notice roller marking on trim and doors. When you use more sheen, highlights get sharper, so roller marking stands out sooner, especially along edges and corners. You can reduce visible issues by loading the roller consistently, maintaining a wet edge, and rolling in one direction. Focus on roller texture: thicker naps can transfer more pattern, while smoother naps lay down fewer lines. Also consider sheen durability—less forgiving coatings may show streaks after drying.
| Sheen level | Roller marking visibility |
|---|---|
| Flat | Low |
| Eggshell | Medium |
| Satin | High |
Higher Sheen Shows Surface Texture
Higher sheen doesn’t just change color—it sharpens how light skims across a surface, which makes roller marks and subtle texture far more noticeable.
When you choose a higher sheen on trim or doors, you increase texture visibility, so even tiny surface imperfections catch the light. You may see uneven nap, brush pressure, or dry spots before the coat fully levels.
If you work with imperfect prep or older doors, the gloss will highlight dents, pits, and grain lines. For smoother results, you need proper sanding and consistent application, or you’ll reveal every flaw.
Avoid Mismatched Sheens on Trim Details
To keep your home looking intentional, match the sheen on every trim detail—especially at door edges, casing returns, and baseboard junctions.
When you allow mismatched finishes, the light catches inconsistencies and ruins your color coordination. You should inspect each junction point before you commit to touch-ups, then apply the same sheen within the same run.
- Use identical product sheen on door stops, casing, and base caps
- Check corners and returns under daylight and lamps
- Spot-repair only with the matching sheen, not “close enough”
Choose Based on Traffic, Hands, and Scuffs
Pick a trim sheen that fits your everyday wear, since doors and their casing take the most contact.
For busy hallways, factor in traffic considerations: choose a satin or semi-gloss for stronger scuff resistance.
If your doors get frequent hand contact, favor finishes that reduce fingerprints and dents, boosting finish longevity.
Match sheen to your durability factors and environment suitability—steam, humidity, and sun change performance.
Match sheen to durability and environment: steam, humidity, and sun can shift finish performance and longevity.
Higher sheen can lower maintenance frequency, while still supporting aesthetic balance and smooth color coordination.
Prioritize scuff resistance where bags, keys, and shoes hit most.
Clean Without Dulling: What Sheen Handles It
Can the finish you choose actually keep its look while you clean it? When you pick the right sheen, you stop dulling while you maintain shine.
Use proper cleaning techniques that lift grime without grinding dust into the surface. You’ll also protect sheen durability, especially on doors that get wiped often.
- Use a soft microfiber cloth and mild soap to prevent dulling.
- Avoid abrasive pads; they scratch and haze the finish.
- Dry buff lightly after cleaning to restore clarity.
If you skip these steps, even a beautiful sheen can look tired fast.
Touch-Up Reality: What Finish Hides Best
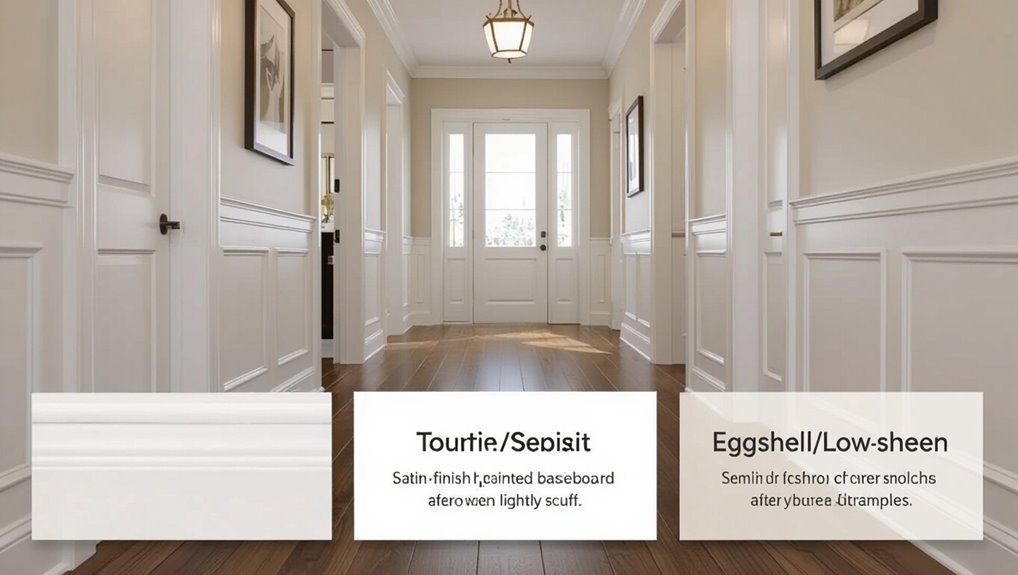
Even when you clean correctly, doors and trim still take daily hits—scuffs, nicks, and fingerprints—so the sheen you choose affects how well those blemishes disappear.
For touch-up reality, you’ll get the best camouflage with a satin or eggshell sheen. It reflects light softly, so small wear spots blend in.
Use touch up techniques that match the original sheen and color: lightly scuff, wipe clean, spot-prime if needed, then feather the repair edges.
Higher-gloss shows every patch line, while flat can look muddy. Choose finish durability you can maintain, because regular minor touch-ups keep it looking even.
Stop Peeling: Reduce Failure on Rough Surfaces
Peeling on rough surfaces usually starts when paint can’t grip the substrate, so you have to prep for adhesion before you touch a brush. You need solid surface prep: clean, sand, and remove loose edges so primers bond firmly.
You’ll also want texture consistency—match patch texture to the surrounding substrate, then smooth high spots to prevent thin, weak film areas. Use the right application techniques: back-brush lightly, keep a wet edge, and avoid overworking.
Consider spot-priming chalky spots, then topcoat with consistent thickness.
- Scrape loose paint, then sand feathered edges
- Spot-prime stains or bare patches
- Maintain even coats using controlled stroke patterns
Protect High-Wear Edges and Door Hardware Areas
High-wear edges and door hardware zones take the hardest knocks, so you need a tougher coating approach than you’d use on flat areas.
Before you paint, protect corners, stops, and latch plates with an extra layer where scuffs start. Use a finish rated for high wear protection, and apply it evenly around knobs, hinges, and strike points.
Don’t thin it too much—thin coats burn off faster under repeated contact. When you reinstall hardware, avoid dragging metal across fresh film.
With the right topcoat and careful application, you’ll improve door hardware durability and keep edges crisp longer.
Use the Right Primer for a Smooth Sheen
Choose a bonding primer type that works with your surface and topcoat so adhesion holds up.
Match the primer’s sheen level to your sheen plan, then apply it evenly to avoid flashing and blotches.
Let the primer cure fully before you paint—rushing that step is what usually ruins a smooth finish.
Choose Bonding Primer Type
Before you apply sheen-ready paint, pick the right bonding primer so the finish grips smoothly and stays even, especially on trim and doors.
Choose among bonding primer options based on surface condition. Start with primer types that seal glossy finishes, bind dusty drywall edges, and resist tannin bleed on wood.
If you’re repainting slick varnish or old doors, use a high-adhesion bonding primer. For bare wood or repairs, select a bonding primer that blocks stains and levels.
- Adhesion bonding primer for slick surfaces
- Stain-blocking bonding primer for wood
- Repair-focused bonding primer for patched areas
Match Primer Sheen Level
Once you’ve picked the right bonding primer, you can match the primer’s sheen level to keep your trim and door paint smooth instead of streaky.
Check your primer types: flat helps hide scars, while satin reflects more, improving sheen durability.
Follow strong surface preparation, then use your application techniques—brush, roll, and back-brush lightly—to maintain even coverage.
Verify finish compatibility with your topcoat, because gloss primers can change color impact and texture visibility.
Plan for light conditions; bright rooms show wave marks.
Prioritize sheen maintenance and cleanability factors so future wipe-downs stay easy.
Let Primer Cure Fully
Letting the primer cure fully is what locks in a smooth sheen on trim and doors.
Don’t rush your primer application—if you paint too soon, the topcoat can drag, fisheye, or look uneven. Check the label for the curing time, then give the surface enough days to harden.
Keep airflow steady and avoid humid, cold spots that slow dry-down.
- Confirm the recommended curing time before sanding or topcoating
- Let primer dry hard to the touch, not just “set”
- Recoat promptly once fully cured to preserve a uniform sheen
Use Satin to Hide Minor Trim Imperfections
If you’ve got small nicks, pinholes, or hairline scratches along your trim, satin sheen usually gives you a smarter finish than high-gloss. You’ll appreciate the satin benefits because the lower sheen reflects light more softly, so minor trim imperfections don’t stand out.
Before you paint, lightly sand rough spots and wipe away dust. Then choose a satin trim paint and apply two smooth coats with a brush or pad, keeping a wet edge.
Let each coat dry fully, and avoid overworking the surface. You’ll end up with a clean, even look that hides small flaws well.
Semi-Gloss Benefits: Better Wipe Resistance
After you’ve used satin to soften the look of minor trim marks, semi-gloss steps in when you need durability.
You’ll love how semi-gloss durability resists everyday smudges, fingerprints, and splashy splatters on trim and door faces. When you wipe, the finish holds up better than flatter sheens, so you don’t keep chasing dull patches.
That means better cleaning ease: you can remove marks with a damp cloth without grinding the surface. Use semi-gloss when traffic, kids, or pets make scuffs inevitable.
- Wipes clean fast without heavy scrubbing
- Stands up to frequent towel contact
- Maintains a crisp sheen in high-use areas
Gloss on Doors: Best for Scrubbing and Durability
Gloss paint on doors gives you a tougher, more scrub-friendly surface that stands up to daily wear. You’ll get strong gloss benefits when you focus on thorough surface preparation: scuff, clean, and prime bare spots so finish durability holds.
Use cleaning techniques that won’t grind dirt into the surface—soft cloths, mild soap, and gentle circular strokes. This helps maintain sheen longevity and supports tougher spot treatment.
Note that gloss shows texture visibility more than flatter sheens, so smooth application matters. Match color compatibility with your trim, then follow maintenance tips to keep the door looking fresh.
Fingerprints: Choose a Door Sheen That Hides Them
Once you’ve dialed in gloss durability on doors, you’ll want to think about smudges next—fingerprints show up fast on high-sheen surfaces.
You want a finish with real fingerprint resistance so everyday touch marks don’t grab attention. Instead of chasing mirror-like shine, choose a satin or eggshell look that balances depth and wipe-ability while maintaining sheen durability.
- Go satin for a softer reflectance that hides smears.
- Use eggshell on busy doors where hands pass daily.
- Avoid semi-gloss unless you can clean often.
When you pick the right sheen, your door stays clean-looking longer with less scrubbing and fewer visible marks.
UV and Sunlight: Prevent Fading in Bright Rooms
Bright rooms expose trim and doors to steady UV from windows, and that sunlight can fade pigments, dull sheen, and make finishes look uneven over time.
You need UV protection—start with protective coatings rated for exterior-grade or UV resistance. Choose finishes with stabilizers, and keep them evenly applied to support paint longevity.
Manage sunlight exposure using window treatments like blinds or sheer curtains that improve light diffusion. Adjust room orientation when possible; direct rays hit faster on some sides.
In your interior design choices, prioritize consistent coverage, and recoat before early color fading spreads.
Dark vs Light Colors: How Sheen Shows Difference
When you choose light colors, you’ll see texture and clean details pop right away.
With dark colors, sheen can make brush marks and uneven coverage more noticeable.
Either way, higher sheen adds reflective depth—so you’ll get a different look on trim and doors depending on color tone.
Light Colors Reveal Texture
Light-colored trim and doors make texture easier to see because sheen exaggerates small surface differences—nicks, brush marks, wood grain, and grain-to-pore contrast catch the light more clearly.
If you’re aiming for texture enhancement, choose a finish where color contrast helps the eye separate details from flat areas. You’ll notice uneven sanding faster, especially on corners and door edges.
To keep the look crisp, you should:
- Pick smooth prep so light sheen won’t highlight defects
- Match sheen across trim pieces to avoid visual patchiness
- Use consistent lighting when judging texture enhancement
Dark Colors Show Brush Marks
Dark colors make brush marks far more noticeable, because sheen amplifies tiny ridges and streaks as the surface reflects light.
When you choose a trim or door finish in deep tones, your brush techniques matter more than ever. Use smooth, controlled strokes, keep a wet edge, and avoid overworking the same area.
Lay off lightly to prevent texture build-up, then watch how light skims across the paint film.
The color effects of dark pigments also emphasize unevenness, so small imperfections become visible.
If you must touch up, blend quickly and feather edges.
Sheen Changes Reflective Depth
Sheen controls how much your trim and doors reflect, so it changes how “deep” a color looks as light skims across the finish.
With dark colors, higher sheen boosts reflective qualities, making edges feel richer but also revealing every scuff.
With light colors, low sheen softens glare and keeps visual impact calm, so the shade reads smoother.
Use this guide to choose confidently:
- Matte: minimizes shine for subtle depth
- Satin: balances warmth with clear reflective qualities
- Semi-gloss: maximizes contrast and sharp visual impact in daylight
Humidity Matters: Pick Door Sheen for Damp Areas
When your door sits in a humid space—like a laundry room, entryway, or bathroom—your finish choices matter.
Choose a sheen that resists moisture so you reduce the humidity impact on the door surface. A satin or semi-gloss sheen typically holds up better than flat because it sheds water and wipes clean without soaking in.
You should also keep edges sealed and fix drips fast; that’s key to door maintenance. For heavy dampness, prioritize moisture-resistant paints or primers and apply even coats.
Regularly inspect for bubbling, then spot-sand and recoat early to prevent damage.
Work With Your Cleaner: Match Sheen to Products
Ask your cleaner to confirm the finish type you’re using, then match your trim or door sheen to that cleaner’s finish so they work together.
Before you commit, test compatibility on a hidden spot and watch for dulling, streaks, or tackiness after drying.
If it doesn’t look right, switch sheen products now rather than fixing it after the whole area is done.
Match Sheen To Cleaner Finish
Picking the right sheen starts with your cleaner, because the product you use drives what your finish can tolerate and how evenly it’ll reflect light.
You should match sheen to the way your cleaner performs, then you should follow solid surface preparation with consistent cleaning techniques. If your cleaner leaves residue, you’ll get dull spots or uneven sheen.
To stay reliable, work in this order:
- Use the cleaner as directed, then rinse and dry fully
- Let surface preparation eliminate oils, waxes, and residue
- Choose sheen that reflects evenly after the cleaned surface is dry
Test Compatibility On Hidden Areas
Before you commit to a sheen, test compatibility on a hidden area—especially because different cleaners leave behind residues that can change how trim and doors look once they dry. Do hidden testing: wipe, let the surface cure, then apply your chosen finish. Keep a small spot near hinges or backs. You’re running a compatibility check, not guessing.
| Area | Cleaner residue risk |
|---|---|
| Hinges | High |
| Behind door | Medium |
| Closet trim | Low |
After drying, inspect for dulling, peeling, or streaks. If it reacts, switch cleaners or adjust sheen.
Match Your Paint Sheen to Hardware Finish
When you match your paint sheen to your hardware finish, you help every surface look intentional instead of mismatched. Aim for hardware compatibility by choosing similar reflectivity: satin paint pairs well with brushed nickel, while semi-gloss can complement polished chrome.
You’ll create aesthetic harmony when the door handles, hinges, and trim share the same visual intensity. Test in a small spot, then dry fully before judging shine.
- Pick satin for most modern finishes and everyday durability
- Use semi-gloss when hardware looks brighter or more polished
- Avoid flat paint near metal hardware; it can look dull and uneven
Open-Plan Living Rooms: Keep Trim Sharp and Subtle
In an open-plan living room, you want trim to stay sharp without drawing attention.
Choose satin for a subtle sheen, then seal edges so they look crisp and clean.
Match your door trim to your wall finish to keep the whole space feeling cohesive.
Choose Satin For Subtle Sheen
Satin paint gives your open-plan living room trim a subtle sheen that reads polished without stealing attention from your walls.
If you want satin sheen advantages, choose satin on doors and casing so light glides across edges while staying understated. You’ll also handle everyday scuffs better than with flatter finishes, and touch-ups blend more easily.
Consider these points:
- Choose satin for a clean, soft reflection.
- Compare satin versus eggshell: satin shows more light; eggshell stays matte.
- Pick a consistent sheen across trim and doors for visual calm.
Seal Edges For Clean Lines
Once you seal the trim edges, you lock in crisp lines that stay sharp in an open-plan space. Use reliable edge sealing techniques to block moisture and prevent paint bleed, so your clean line strategies hold up around doors, baseboards, and casing. Before you paint, caulk only where needed, then tool it smooth and let it cure fully. Wipe away excess and lightly sand sealed spots for an even surface.
| Step | Tool | Goal |
|---|---|---|
| Prep | Damp rag | Remove dust |
| Caulk | Painter’s caulk | Seal gaps |
| Tool | Finger/knife | Smooth bead |
| Sand | 220-grit | Level surface |
| Paint | Brush/roller | Crisp coverage |
Match Door Trim To Walls
After you seal the trim edges for clean, moisture-resistant lines, you can keep the look sharp by matching door trim to the wall finish and undertone.
In open-plan living rooms, you want subtle trim color coordination so the doorway feels integrated, not boxed. Choose trim that reflects the same warmth or coolness as your paint, then account for wall texture considerations—matte walls hide imperfections, while smoother surfaces show them.
- Pull undertones from wall samples before buying sheen
- Match sheen levels to reduce glare around door edges
- Use a fine brush to keep color lines crisp
Hallways: Semi-Gloss Sheen for High-Traffic Doors
If you want hallway doors to look crisp while standing up to daily wear, choose a semi-gloss sheen. You’ll boost hallway aesthetics and protect door durability, because semi-gloss resists scuffs, fingerprints, and frequent wipe-downs better than flat or eggshell. You’ll also highlight trim edges, keeping the whole corridor looking clean even after busy days.
| Area | Sheen | Why it works |
|---|---|---|
| Door faces | Semi-gloss | Easy to clean |
| Hinges/frames | Semi-gloss | Hides marks |
| Touch zones | Semi-gloss | Durable barrier |
Kitchens, Mudrooms, Entryways: The Most Durable Choice
For kitchens, mudrooms, and entryways, you need a tougher sheen that can handle constant hands-on traffic.
Choose a wipeable finish in these high-touch areas so scuffs and splashes don’t become permanent stains.
You’ll keep your trim and doors looking sharp with less effort.
High-Touch Areas Need Toughness
In high-touch spaces like kitchens, mudrooms, and entryways, you need finishes that can handle daily wear without losing their look.
You should think regarding durability comparison and choose sheens that resist scuffs, fingerprints, and moisture splashes. Look for tough, wipeable coatings and plan maintenance tips before installation—then touch-ups won’t become a project.
- Prefer semi-gloss or satin over flat on doors and trim.
- Use gentle cleaners; avoid harsh solvents that dull sheen.
- Keep a small matching touch-up kit for fast, clean repairs.
Ideal For Kitchens And Mudrooms
Kitchens, mudrooms, and entryways earn the most traffic and the most abuse—grease splatter, wet boots, scuffs, and fingerprints show up fast. You want sheens that keep looking clean while resisting daily wear.
For kitchens, choose a satin or semi-gloss on trim and doors so marks don’t sink in and wiping stays effortless.
For mudrooms, prioritize mudroom durability: a slightly higher sheen hides minor scuffs and handles shoe traffic without dulling.
Match your kitchen finishes to these tougher sheens, and you’ll maintain crisp edges and color longer, even in messy routines.
Entryways Benefit From Wipeable Finish
Entryways take the hardest hits—mud, salt, water spots, and fingerprints—so you need a wipeable sheen that keeps looking fresh between cleanings.
Choose wipeable finishes on doors, trim, and frames to boost entryway durability without fighting scuffs. You’ll wipe away grime quickly, and the sheen holds up to daily traffic and damp shoes.
- Use a semi-gloss or satin wipeable finish for easy cleaning
- Spot-treat marks fast with a damp cloth, not harsh scrubs
- Recoat only when needed to maintain consistent sheen
Bedrooms and Offices: Satin Trim Looks Clean
Satin trim brings a polished, lived-in look to bedrooms and offices—without the shine that can feel too glossy.
Satin trim delivers a polished, lived-in feel in bedrooms and offices—just enough sheen to avoid that overly glossy look.
Choose satin paint because it hides minor scuffs, so your bedroom aesthetics stay fresh even with everyday use. In work spaces, you’ll love how satin softens glare from lamps and windows, supporting a calm office ambiance.
Apply it to door casings, baseboards, and trim for a consistent sheen that reads clean in both morning and evening light.
You’ll also find satin easier to maintain than higher-gloss finishes, while still feeling crisp and intentional.
Kids’ Homes: Semi-Gloss Doors That Clean Easy
Semi-gloss doors work especially well in kids’ homes because they wipe down fast and resist everyday scuffs.
When you plan kids’ decor, you want surfaces that take contact without looking tired. Choose a semi-gloss finish for entry doors to rooms, closet doors, and bathroom doors, then follow simple cleaning tips to keep them bright. You’ll cut scrubbing time and still manage fingerprints.
- Wipe with a damp microfiber cloth, not abrasives
- Spot-clean with mild soap for marks and smudges
- Dry immediately to prevent streaks
Front Doors: Gloss for Maximum Protection
If you want maximum protection, choose a high-gloss exterior finish for your front door.
You’ll better shield the surface against weather and UV fading while keeping it easier to wipe clean.
Before you paint, consider a pre-primed door surface so the topcoat bonds well and holds up longer.
Choose High-Gloss Exterior Finish
When you pick a front door finish, choose a high-gloss exterior coating to protect against rain, UV rays, and daily wear. High gloss benefits show up immediately: you get a slick, reflective surface that resists scuffs, wipes clean fast, and looks crisp longer.
For exterior durability, you should also match the product to your door material and apply it evenly with proper prep, so the film stays continuous and tough.
- Smooth, reflective look that hides minor marks
- Easier cleaning with less scrubbing
- Strong coating build for better exterior durability
Protect Against Weather And UV
To protect your front door from weather and UV damage, choose a high-gloss exterior finish that forms a tough, continuous film over the wood or metal.
You gain strong weather resistance because the cured surface sheds rain, resists moisture intrusion, and resists cracking. You also get UV protection by limiting sun-driven fading and oxidation.
Apply the product evenly, and don’t rush cure time before exposing the door to full sun or heavy rain.
If your door faces direct rays, maintain the gloss with periodic recoat, keeping seams and edges sealed.
Consider Pre-Primed Door Surface
Opt for a pre-primed door surface on your front door, and finish it with a high-gloss exterior system for maximum protection.
You’ll get solid pre-primed benefits because the primer bonds tightly and helps repel moisture before the topcoat ever touches.
Start with surface preparation: clean off dust and grease, lightly scuff glossy spots, then wipe tack-free.
Next, apply your high-gloss sheen in smooth, even strokes to lock in shine and resist UV fading.
- Use bonding primer-friendly cleaners
- Lightly sand for paint adhesion
- Seal edges, hinges, and panels thoroughly
Patchiness Fix: Correct Sheen Mismatch Problems
Even if you buy the same sheen and brand, patch areas can still show through—so you need to match the finish before you seal the repair. For sheen compatibility, feather sand the edges, wipe dust, then test the restored spot with your topcoat. If it flashes lighter or darker, stop and reapply until it matches. Use trim maintenance steps: let coats dry fully, then lightly scuff for adhesion.
| Patch symptom | Fix |
|---|---|
| Glossy halo | Sand & recoat |
| Flat-looking spot | Add sheen layer |
| Dry, rough edges | Feather blend |
| Dark blotch | Prime lightly |
Avoid Touch-Up Lines When Recoating Trim
When you recoat trim, you can accidentally create a visible touch-up line if you start and stop too abruptly, so you need a smooth, continuous workflow.
Recoat trim smoothly—starting and stopping abruptly can leave a visible touch-up line, so maintain a continuous workflow.
Keep a wet edge by reloading your brush or foam and working from one end to the other without pausing. Use light pressure so the film lays evenly, then feather the edge with paint blending strokes to dissolve any overlap.
Try these touch up techniques:
- Start off the surface, then glide onto trim
- Maintain consistent brush direction and speed
- Blend into the prior coat before it sets
Prevent Brush Marks: Technique by Sheen Level
Pick a sheen level that matches the surface so it dries smooth and hides imperfections instead of showing every ripple.
You prevent brush marks by keeping your strokes light and even, then laying off gently without pressing.
When you switch sheen, adjust your technique right away so your finish stays consistent from edge to edge.
Choose Correct Sheen Level
Selecting the right sheen level is your first defense against brush marks on trim and doors. Use sheen selection to control how light reflects, which helps hide or reveal streaks while you work.
For most trim, pick a satin or semi-gloss; they level out better and hold up to daily cleaning, improving finish durability. If you’re covering bare wood or uneven surfaces, stay slightly more forgiving with satin rather than high gloss, which magnifies every miss.
- Satin: forgiving leveling, strong finish durability
- Semi-gloss: cleaner look, durable for high traffic
- Matte/flat: use only if imperfections aren’t obvious in light
Maintain Light, Even Strokes
Once your sheen level fits the trim or door, you still need technique to stop brush marks. Load your brush lightly, then use painting techniques that keep pressure steady.
Work from one edge toward the other, always following the grain or panel lines. Maintain stroke consistency by starting each pass in the same spot and stopping the same distance from corners.
Don’t go back over areas that start to set; you’ll drag the finish and create ridges. Reload only when the sheen dulls.
Feather the overlap quickly, using smooth, even strokes.
Avoid Lap Marks: Timing and Application Tips
To avoid lap marks, you need to manage your timing as you apply sheen: work in manageable sections, keep a wet edge, and don’t let the prior pass start to tack up before you brush back over it.
Your timing techniques matter—plan your application strategies so each new stroke overlaps the last while it’s still fluid. Finish one door edge at a time, and use steady pressure to prevent streaking.
Time your sheen so each stroke overlaps while it’s still fluid; finish one door edge at a time with steady, even pressure.
- Load your brush consistently, then feather lightly at section boundaries
- Spot-check for tackiness every few minutes; adjust pace as needed
- Maintain a wet edge by brushing back immediately, not after drying starts
New vs Bare Wood Doors: Choose the Sheen Right
When you’re spraying or brushing sheen on trim and doors, start by matching the finish to the substrate—new sealed doors and bare wood doors need different sheens to look right and wear evenly.
For new wood, you’ll usually get the best uniform look with satin or semi-gloss, because the surface is sealed and reflects light consistently.
For bare wood, you need a sheen that helps blend and controls absorption; choose satin first to balance grain pop and scuff resistance.
Always test a small area, let it dry fully, then confirm the sheen before you finish the full door.
Repainting Trim: Pick the Sheen for Existing Surfaces
Repainting trim works best when you match the sheen to what’s already there, because gloss levels blend differently from one layer to the next.
Before you brush, inspect existing surfaces for shine, scuffs, and uneven wear. If you spot glossy patches, you’ll need the same sheen to avoid flashing.
Follow these trim maintenance tips: clean residue, let the wood dry fully, and scuff-sand to improve adhesion. Use ideal primer selection on stained or bare areas so the new coat won’t spot or peel.
Then apply a consistent topcoat in thin, even passes.
- Match eggshell to eggshell, satin to satin
- Scuff-sand between coats for uniform sheen
- Prime problem spots before topcoat
Interior vs Exterior Doors: Finish Type Differences
After you match the sheen on trim, you’ll get better results when you treat door finishes differently based on where the door lives. Indoors, choose interior finishes that balance sheen effects with easy cleaning for everyday traffic considerations. Outdoors, select exterior finishes that resist moisture, UV, and temperature swings to support durability factors. Use these cues to guide your aesthetic preferences:
| Location | What to prioritize |
|---|---|
| Interior | Smooth wipe-down |
| Interior | Light sheen effects |
| Exterior | Moisture resistance |
| Exterior | UV and heat stability |
| Both | Prep and seal edges |
Cost vs Longevity: Satin vs Semi-Gloss vs Gloss
How do you balance upfront cost against long-term performance when picking between satin, semi-gloss, and gloss for trim and doors?
Start your cost analysis by matching sheen durability to your traffic considerations and cleaning ease needs. In a longevity comparison, satin often hides scuffs, while semi-gloss resists stains and scratches; gloss lasts too, but demands careful finish maintenance.
Your aesthetic preferences matter, yet surface compatibility decides adhesion and film build.
- Satin: best for lower-sheen aesthetic; good surface compatibility
- Semi-gloss: strong longevity; easier touch-ups than gloss
- Gloss: maximum cleaning ease; shows imperfections more
Choose wisely for lasting results.
Common Sheen Mistakes: Dull, Shiny, and Uneven Results
When you pick the wrong sheen or apply it inconsistently, you’ll end up with trim that looks dull, doors that turn too shiny, or both—often in ways that won’t match the rest of the room. Before you paint, use sheen selection tips to avoid common finish errors. If you overwork semi-gloss, you’ll chase streaks and bubbles. If you skip proper prep, you’ll trap dust and create uneven sheen. If you roll too fast, you’ll leave lap marks that catch light. Check your results like this:
| Area | Problem | Fix |
|---|---|---|
| Trim | Dull | Add thin coats |
| Door | Shiny | Reduce gloss pickup |
| Both | Uneven | Sand + recoat |
| Touchups | Blotchy | Feather edges |
Best Trim-and-Door Sheen Pairing for Your Home?
What sheen combo gives your trim the crisp look you want without making doors glare? You’ll get the best results by matching sheen to how each surface catches light.
Use satin on doors to keep them cleanable, then pair it with eggshell or low-satin on trim so trim color combinations stay subtle and sharp.
- Choose eggshell trim for soft contrast with painted walls
- Match satin doors to reduce streaks from fingerprints
- Consider door design styles: panels like satin, modern slabs prefer low-sheen
When you balance these finishes, your trim and doors look intentional, not mismatched.
Frequently Asked Questions
Can I Mix Satin Trim and Semi-Gloss Doors in the Same Room?
Yes, you can mix satin trim with semi-gloss doors in the same room. You should focus on color coordination and consistent sheen so everything looks intentional. Semi-gloss usually offers better finish durability, especially on doors, while satin stays softer.
Does Primer Choice Change Sheen Appearance After Drying?
Yes—primer choice changes sheen after drying; like a shadow, it follows your finish. Use compatible primer types for your sheen levels: oil-based primers deepen gloss, latex primers look truer. Always test on scrap, then dry fully before judging.
Why Does Semi-Gloss Show Roller Marks More on Textured Trim?
Semi-gloss shows roller marks more on textured trim because the paint pools in recesses and bridges ridges; uneven grip magnifies texture. You’ll see lines where the roller compresses peaks, especially on rough textured surfaces.
How Soon Can I Close Doors After Painting Semi-Gloss?
You can usually close semi-gloss doors after about 2–4 hours, but wait overnight if you want best drying time and paint adhesion. Like a medieval knight, don’t rush—check the surface feels fully dry and hard.
What Sheen Is Safest for Doors Near Kitchen Heat and Steam?
Choose a water-based semi-gloss or satin with good heat resistance and steam durability. Apply properly primed surfaces, let it cure fully, and avoid direct steam. Wipe with mild soap; you’ll get tougher, easier-to-clean doors near the kitchen.
Conclusion
So now you know the secret: satin trim usually looks clean and forgiving, while semi-gloss doors take wear and light-up everyday traffic without dulling or scuffing fast. But don’t rush—if you chase the wrong sheen, you can end up with flat, lifeless trim or a door that screams “too shiny.” Ready to choose confidently? Match your trim to your walls, and your space will feel right the first time.
