Can Spray Paint Dry in Cold Weather? Tips for Faster Drying
Yes — you can get spray paint to dry in cold weather, but you’ll need to adjust technique and give it time. Work in a sheltered, ventilated area, warm cans and the surface slightly, use low‑temperature formulas, apply thin coats with longer flash times, and boost airflow and gentle indirect heat to speed solvent evaporation. Expect much longer cure times and do tack checks before handling. Keep going for practical tips, product picks, and troubleshooting to improve results.
Quick Answer: Can Spray Paint Dry in Cold Weather?
Although cold slows the chemical reactions and solvent evaporation that cure spray paint, it can still dry — just much more slowly and often less evenly.
You’ll notice longer tack times, increased risk of runs, and duller finish in cold weather.
You can still get usable results, but expect extended drying and curing periods, and plan projects around slower paint performance.
1-Minute Checklist for Painting in Cold Weather
Cold weather slows drying and raises risks like runs and uneven finish, so you’ll want a short, practical checklist before you start spraying.
Check temperature and humidity, choose proper spray paint selection rated for low temps, shake cans well, test on scrap, warm cans and surface slightly, use thin coats, allow extended flash times, work sheltered from wind, and have heat source ready for cold weather preparation.
How Cold Affects Spray-Paint Chemistry
When temperatures drop, the solvents in spray paint evaporate more slowly and the polymer binders struggle to coalesce, so you’ll see longer tack times, greater risk of orange peel, and weaker film formation if you don’t adjust your technique. You should compensate by warming cans, applying thinner coats, and allowing extra flash time to manage spray paint properties and cold temperature effects.
| Issue | Effect |
|---|---|
| Solvent evaporation | Slower |
| Binder coalescence | Impaired |
| Finish quality | Orange peel |
| Tack time | Longer |
Drying vs. Curing: What’s the Difference and Why It Matters

You’ll notice “dry” and “cure” used interchangeably, but they mean different things: drying is when solvents evaporate and the surface feels dry, while curing is the chemical hardening that gives the coating its full strength.
That curing process depends on temperature, humidity, and ventilation, so the environment you’re working in directly affects how long it takes.
Plan your timing and handling accordingly, because premature stress on paint that’s dry but not cured will cause scratches, tackiness, or failure.
Drying Versus Curing
Although they often get used interchangeably, drying and curing are two distinct processes you need to understand to get durable, professional-looking spray paint finishes.
Drying times refer to solvent evaporation—surface dryness—while curing processes mean chemical crosslinking that gives full hardness and adhesion.
You’ll check labels for both, allow adequate time between coats, and avoid handling until the paint has fully cured for best results.
Environmental Impact
Because drying mainly expels solvents into the air while curing locks chemicals into a solid film, the environmental footprint of your spray-paint job depends on which stage dominates—and how you manage it.
You should choose eco friendly options, work in well-ventilated areas, and allow full curing to reduce off-gassing.
Adopt sustainable practices like low-VOC paints, proper disposal, and minimizing overspray to limit environmental harm.
How to Tell If Paint Has Fully Cured in Cold Temps

In cold temps you’ll want to check surface hardness first by gently pressing or fingernail-scratching a discreet spot to see if the paint resists indentation.
Look for visual clues like uniform sheen, absence of tackiness, and any whitening or bubbling that signals incomplete cure.
Combine what you see with how it feels—if it’s firm, dry to the touch, and shows no surface defects, it’s likely cured.
Surface Hardness Check
When temperatures drop, paint can feel dry to the touch long before it’s fully cured.
So you’ll want to perform a simple surface hardness check to be sure the coating will resist scratches, scuffs, and solvents. Use proper surface preparation and temperature monitoring before testing.
- Light fingernail press — check resilience.
- Coin scratch — low pressure only.
- Solvent spot — quick dab, blot immediately.
Visual And Tactile Signs
Any coat that’s truly cured in cold weather will show consistent visual and tactile cues you can check without specialized tools.
Look for even sheen, absence of tacky spots, and no fingerprint marks — those visual cues signal surface completion.
Use gentle tactile feedback: light press with a clean finger and run your palm; it should feel firm, smooth, and non-stick, not soft or gummy.
Minimum Temperature Limits Printed on Spray Cans
Although spray cans say a minimum temperature, don’t treat that number as a vague suggestion — it’s the lowest ambient temp at which the solvent will evaporate and the propellant will perform reliably.
You should follow minimum temperature guidelines and manufacturer recommendations to avoid poor coverage or clogging.
Consider these actions:
- Check can label before use.
- Warm cans to recommended temp.
- Test a small spray area first.
Choosing Spray Paint Formulated for Cold Weather
If you’ll be painting in chilly conditions, pick a spray paint labeled for low temperatures so the solvents and propellant will still atomize and dry properly.
You’ll want cold weather formulations that resist clogging and promote curing.
Test on a scrap for adhesion, follow manufacturer prep instructions, and use paint adhesion strategies like light multiple coats and brief warm-ups between passes to guarantee proper bonding.
Solvent-Based vs. Water-Based Paint in Cold Conditions
When you’re painting in cold weather, remember solvent-based paints dry faster because solvents evaporate even at lower temperatures, while water-based paints can slow or stop drying as water takes longer to evaporate and can even freeze.
That freeze risk can ruin a finish, so you’ll want to keep waterborne coats above their minimum temperature and apply thinner layers.
Also note adhesion changes with temperature—some solvents help tack and bond in cold air, whereas waterborne systems may not adhere well unless the surface and paint are warmed.
Solvent Evaporation Rates
Because temperature and humidity directly affect how solvents leave a paint film, you’ll notice big differences between solvent-based and water-based sprays in cold conditions.
Solvent behavior and solvent interactions change with evaporation conditions; temperature effects alter drying mechanisms and paint performance under environmental factors, creating cold challenges.
- Solvent volatility vs. water retention
- Slower evaporation in low heat
- Increased flow and sag risks
Waterborne Freeze Risks
Although cold doesn’t affect all spray paints the same way, you’ll see the biggest risks with waterborne formulas because their carrier—the water—can freeze inside the film or the can, disrupting pigment dispersion and binder coalescence.
You should favor waterborne advantages only when you control temperature; use heated storage, warm up cans, and practice freeze prevention to avoid phase separation and ruined batches.
Temperature-Dependent Adhesion
If temperatures drop below a paint’s designed range, adhesion suffers—and you’ll notice different failure modes with solvent-based versus water-based systems.
You must manage temperature sensitivity, surface compatibility, and ambient conditions to reduce adhesion challenges. Consider:
- Solvent-based: better cold effects tolerance; adjust application techniques.
- Water-based: vulnerable to freeze; use cold resistant formulas.
- Monitor temperature variations and paint interaction.
Look for “Fast-Dry” and “Low-Temp” Labels: What They Mean
When you shop for spray paint, check for “Fast-Dry” and “Low-Temp” labels so you know how quickly the paint will cure and what conditions it needs; fast-dry formulas shorten tack-free time for quick handling, while low-temp variants keep drying performance in cool or damp environments. Look for fast dry benefits and low temp options.
| Label | Benefit | Best Use |
|---|---|---|
| Fast-Dry | Quicker tack-free | Quick projects |
| Low-Temp | Maintains cure | Cold/damp days |
| Hybrid | Balanced | Variable weather |
How Surface Type Changes Cold-Weather Results (Metal, Wood, Plastic, Masonry)
When you spray paint in cold weather, the surface matters: metal draws heat away quickly and can slow drying, wood soaks up moisture and paint into its pores, and plastics and masonry each react differently to low temperatures.
You’ll need to account for metal’s conductivity, wood’s porosity and dampness, and how plastics may become brittle while masonry holds cold and moisture. Those differences change prep, product choice, and drying time.
Metal: Temperature Conductivity Effects
Metal surfaces suck heat away from wet paint much faster than wood, plastic, or masonry, so you’ll notice faster skinning but slower overall cure in cold weather.
Metals’ high thermal conductivity, metal expansion, and temperature fluctuations affect paint adhesion; surface treatment and insulation properties matter before painting near the freezing point.
Consider these tips:
- Preheat substrate.
- Use primer for metal types.
- Add thermal barrier.
Wood: Porosity And Moisture
Because wood soaks up and holds moisture, cold-weather spray painting behaves differently than it does on metal or plastic: you’ll see longer dry times, higher risk of blistering, and poorer adhesion if the substrate isn’t dry and stable.
You should check wood moisture, allow thorough drying, and use primers to reduce paint absorption.
Heat, dehumidification, and thin, controlled coats help achieve consistent cure.
Plastic And Masonry Differences
Wood’s tendency to hold moisture contrasts with the behavior you’ll see on plastic and masonry in cold weather, so adjust your approach accordingly.
- Plastic: plastic surface differences mean you’ll need adhesion promoters and warmer prep to avoid flaking.
- Masonry: masonry texture effects increase absorption and slow curing; use masonry primers and thin coats.
- General: raise ambient temp, use faster-drying formulas, and allow extra cure time.
Surface Temperature vs. Air Temperature: Why Both Matter
While air temperature sets the overall drying window, the temperature of the surface you’re painting directly controls how paint cures and bonds, so you can’t treat them as interchangeable.
You should monitor surface conductivity because metal or stone wick heat differently than wood or plastic. Low surface temps slow solvent evaporation even if air circulation is good, so warm the substrate or adjust timing accordingly.
Prep Steps: Clean, Dry, and Degrease Surfaces in the Cold
When you’re painting in cold weather, start by cleaning the surface thoroughly to remove dirt and loose paint.
Make sure the area is completely dry before you spray, since trapped moisture ruins adhesion and finish.
Finish prep by wiping with a suitable solvent to remove grease and oils so the paint bonds properly.
Clean Surfaces Thoroughly
Before you even shake the can, clean, dry, and degrease the surface so the paint will stick and cure evenly in cold conditions.
Use proper surface preparation and simple cleaning techniques to remove dirt, oil, and salt. Follow these steps:
- Wipe with degreaser and a lint-free cloth.
- Rinse, then blot dry thoroughly.
- Scuff smooth areas with fine sandpaper before painting.
Ensure Complete Drying
If temperatures drop below freezing, you’ll need to give extra attention to getting the surface fully dry so paint can bond and cure properly; trapped moisture freezes or slows solvent evaporation and causes running, poor adhesion, or whitening. Plan shifts in drying process, adjust spray techniques, and choose paint selection that tolerates temperature effects. Guarantee moisture control and good air circulation during surface preparation and project planning.
| Tip | Action |
|---|---|
| Moisture control | Wipe, heat, ventilate |
| Air circulation | Fans, shelter |
Degrease With Solvent
Since cold weather magnifies grease and film, degrease the surface with a solvent so paint can bond and cure properly; use a lint-free cloth and a manufacturer-recommended solvent, wiping until no residue lifts and letting the solvent evaporate fully before proceeding.
- Choose solvent types suited to the substrate.
- Use proper cleaning techniques: wipe, scrub, repeat.
- Confirm full evaporation and residue-free surface before painting.
Cold-Weather Sanding and Scuffing Tips
Though cold temps make paint cure slowly, you can still sand and scuff effectively by adjusting technique and timing. Use gentle pressure, finer grits, and short sessions to avoid clogging and damage. Focus on cold weather techniques and thorough surface preparation before repainting.
| Tool | Grit | Tip |
|---|---|---|
| Sandpaper | 320–600 | Light passes |
| Scotch-Brite | Medium | Even strokes |
| Tack cloth | Fine | Remove dust |
Primers That Work When It’s Cold
Pick a primer rated for low temperatures so your paint job bonds and cures reliably in the cold.
Choose cold weather primers that resist moisture and temperature sensitivity to avoid adhesion failures.
Choose primers built to resist moisture and temperature swings so your paint adheres and cures reliably in cold.
Consider:
- Acrylic latex primer — flexible and tolerates chill.
- Alkyd-based primer — strong adhesion in low temps.
- Fast-dry epoxy primer — excellent sealing despite cold, use per label.
Best Spray Technique to Avoid Tackiness in Cold Air
When you’re spraying in cold air, slow, controlled passes and proper overlap help prevent tacky spots by allowing each coat to flash off before the next one lands.
You’ll use lighter coats, allow longer flash times, and adjust your spray patterns and stroke speed for even coverage.
Make cold adjustments to thinner viscosity, avoid heavy buildup, and dry between layers to prevent tackiness.
Ideal Spray Distance and Pattern for Cold-Weather Spraying
When spraying in cold weather, you’ll want to hold the can or gun at the ideal distance — usually about 8–12 inches — to guarantee even coverage without puddling.
Use a steady, overlapping back-and-forth or side-to-side pattern to lay thin, uniform coats.
Adjust distance and pattern slightly if you see runs or heavy buildup so each pass dries before the next.
Optimal Spray Distance
One key adjustment for cold-weather spraying is holding the can or gun slightly closer than you’d in warm conditions—about 6–8 inches for most aerosol cans and 8–12 inches for HVLP or conventional spray guns—so the cooler air doesn’t cool the paint too much before it hits the surface.
Use ideal spray technique and cold distance adjustment:
- Keep steady, consistent motion.
- Overlap passes by ~50%.
- Test on scrap, adjust distance for atomization.
Recommended Spray Pattern
Aim for a narrow, even fan and keep the gun moving so you don’t lay down heavy edges that’ll sag or cool unevenly in cold air.
Use short, overlapping passes with consistent speed; that spray technique prevents pooling.
Test and set nozzle adjustment for a fine, even mist.
Hold the can or gun at the recommended distance and let thin, multiple coats build coverage.
Layering Strategy: Why Thin Coats Win in Low Temps
Although cold air slows solvent evaporation, you can still get smooth results by applying several thin coats instead of a single heavy one.
Use layering techniques to combat cold challenges and control runs. Follow this concise plan:
- Light, overlapping passes for even coverage.
- Keep cans moving to avoid pooling.
- Build color gradually to reduce sagging and trapped solvents.
How Long to Wait Between Coats in Cold Temperatures
In cold weather you’ll need an extended flash time between sprays so solvents can evaporate properly.
Check the paint can for a temperature-adjusted recoat window and add extra minutes for every 10°F (or 5°C) drop below the ideal range.
When in doubt, wait longer—rushing will trap solvent and ruin the finish.
Extended Flash Time
When temperatures drop, you’ll need to lengthen the flash time—the wait between light coats—because solvents evaporate slower and wet film won’t tack up as quickly in the cold.
You’ll manage extended drying and account for cold impact by waiting longer, testing tack, and adjusting pace.
- Wait 5–10 minutes extra per light coat.
- Perform tack checks before next pass.
- Note humidity alongside temperature.
Temperature-Adjusted Recoat
Because cold slows solvent evaporation, you’ll need to lengthen the wait between coats so each layer bonds without trapping solvent—typically add 5–15 minutes per light coat as a starting point, then use tack checks and feel to decide if more time’s required.
For temperature adjustments, monitor surface feel and humidity; adjust recoat timing upward in colder, damper conditions and test on scrap before proceeding.
3 Safe Ways to Raise Surface Temperature Before Painting
If the ambient temperature’s too low, you can safely raise the surface temperature before painting by using controlled, indirect heat sources and proper prep to avoid damaging the substrate or the paint.
Use temperature regulation, insulation methods, and gentle surface warming inside temporary shelters.
- Wrap and insulate parts to retain heat.
- Use indirect, low-intensity heat sources.
- Pre-warm materials gradually.
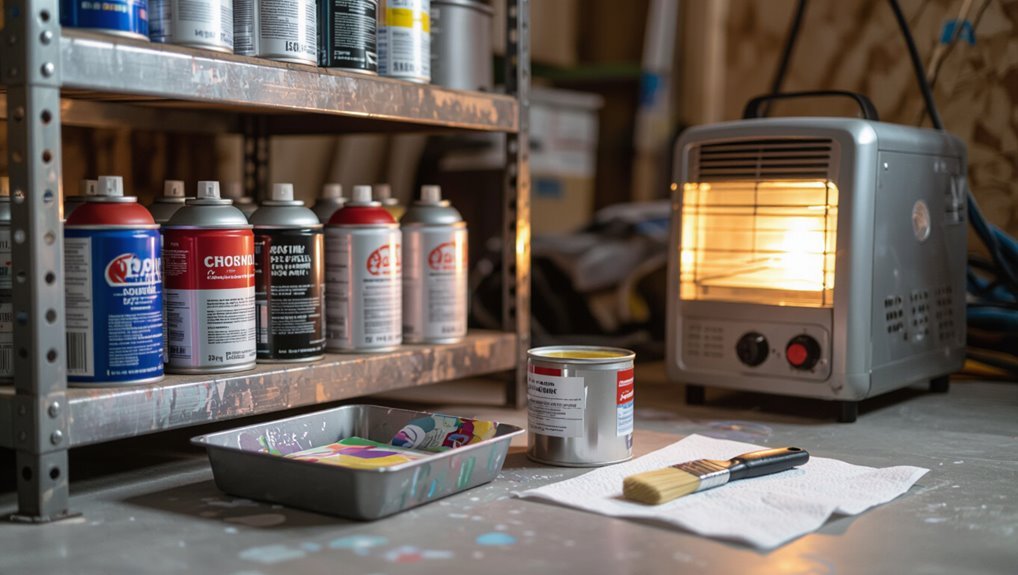
Use Portable Heaters Without Causing Runs or Bubbles
When you use a portable heater, position it so warm air flows evenly across the work without blasting any one spot.
Raise the temperature gradually to avoid softening the paint and causing runs or bubbles.
Also keep the area dry and watch for condensation that can ruin the finish.
Heater Placement Matters
Place portable heaters at a moderate distance and angle so they speed curing without blasting heat directly onto wet paint; you want gentle, even warmth that encourages solvent evaporation rather than forcing the surface to skin over and trap bubbles or cause runs.
- Choose heater types that offer adjustable output and fan-assisted heat distribution.
- Aim heat across panels, not at one spot.
- Monitor surface, reposition to avoid hotspots.
Control Temperature Gradually
Because sudden heat can force solvents to the surface and create runs or trapped bubbles, you’ll want to raise temperature in small, controlled increments so the paint can release solvents evenly and cure smoothly.
Use portable heaters at a distance, combine with temperature monitoring, and increase temps slowly.
Watch paint sheen for signs of stress, pause warming if blistering appears, and resume gradual warming only when stable.
Prevent Moisture And Runs
After you’ve warmed the area gradually, focus on keeping moisture and runs at bay while using portable heaters. You’ll balance temperature management and humidity effects to protect paint adhesion in cold climate weather conditions.
- Use gentle heat and monitor drying techniques to avoid bubbles.
- Guarantee surface preparation and controlled paint application for run prevention.
- Employ moisture control tools and ventilate for consistent curing.
How to Use Heat Guns and Hair Dryers Correctly on Paint
When you need to speed up drying, a heat gun or hair dryer can help—but use them carefully to avoid softening or blistering the paint.
Hold tool 12–18 inches away, keep it moving, and use low heat. Test on a hidden area first.
Monitor temperature to protect finish; proper heat application preserves paint safety and prevents bubbles or warping.
Improve Airflow to Speed Solvent Evaporation Safely
To speed solvent evaporation safely, you’ll want to increase cross ventilation by opening windows or doors opposite each other to create a steady airflow.
Position directional fans to move fresh air across the painted surface without blowing directly on it, which can cause dust or uneven drying.
Keep airflow moderate and consistent to avoid disturbing the finish while still clearing fumes.
Increase Cross Ventilation
If you want paint to dry faster and reduce fumes, boost cross ventilation by creating a clear airflow path through the space—open opposing windows or doors and position fans so air moves across the painted surface rather than just circulating in place.
Use ventilation techniques and airflow strategies to speed solvent evaporation safely.
- Remove obstructions
- Create inlet/outlet flow
- Monitor temperature and humidity
Use Directional Fans
Once you’ve set up cross ventilation, point directional fans so air flows directly across freshly painted surfaces to speed solvent evaporation and carry fumes away.
Position fans for ideal fan placement to create steady air circulation across drying zones. Angle fans to match spray angles and avoid blasting paint.
Monitor temperature and move fans as coats tack up to maintain even drying and reduce runs.
How to Avoid Moisture and Condensation While Painting
Because moisture ruins finish and slows drying, you’ll want to control humidity and temperature before and during painting.
Manage moisture control and condensation prevention through proper surface preparation and temperature management to guarantee a stable drying environment.
Monitor humidity levels and adapt paint application to avoid trapped dampness.
Use these steps:
- Seal and dry surfaces.
- Use heaters/dehumidifiers.
- Space coats for ventilation.
Time-of-Day and Weather: When to Paint Outdoors in Cold Weather
Choose a clear, dry window in the warmest part of the day—usually late morning to early afternoon—so paint can tack up before temperatures drop.
Check the forecast and avoid painting when overnight temperatures will fall near or below freezing.
Don’t paint if dampness or dew is expected, since overnight moisture will ruin the finish.
Ideal Painting Window
1 clear rule: paint when temperatures stay consistently within the paint manufacturer’s recommended range for both the daytime high and the overnight low.
Choose a perfect temperature and best humidity window, plan project timing, and confirm equipment setup.
Guarantee surface preparation and color selection suit conditions. Prioritize air circulation and safety precautions.
- Morning-to-afternoon
- Midweek forecast
- Wind-sheltered slot
Avoid Overnight Dampness
After picking the right daytime temperature and a calm, sheltered slot, make sure your finish has time to fully dry before the cold night sets in.
Plan so spray paint cures during daylight; avoid humid evenings and dew. If a forecast predicts overnight dampness, delay painting or use a temporary cover.
Cold weather slows solvent evaporation, so protect fresh coats until thoroughly dry.
Building a Temporary Tent or Shelter for Winter Painting
When winter temperatures and wind threaten your paint job, build a simple temporary tent or shelter to control heat, humidity, and overspray. A well-sealed enclosure lets you warm the air, keep condensation off the finish, and work safely without moving indoors.
- Use a framed temporary shelter with plastic sheeting and zippers for access.
- Add a thermostatically controlled heater and exhaust fan.
- Seal seams, elevate the work, and ventilate to avoid fumes during winter painting.
Use Sunlight and Passive Warming Techniques
If you can’t run heaters or want to save fuel, use sunlight and passive warming to raise surface and air temperatures for faster, more even drying.
Position your piece to maximize sunlight exposure, angle surfaces toward the sun, and use reflective panels to boost warmth.
Trap heat with clear plastic or a greenhouse-style cover for gentle passive heating without powered equipment.
Additives and Accelerators for Colder Jobs: When to Use Them
Although colder temps slow chemical reactions, you can speed spray paint drying with the right additives and accelerators—just use them selectively.
You’ll weigh additive benefits vs. weather considerations and pick accelerator types for cold performance. Follow precise application techniques and product recommendations to avoid runs.
- Thinners for flow
- Cold-weather accelerators
- Heat-activated boosters
When a Fast-Curing Clear Coat Is a Good Idea
Because fast-curing clears lock up quickly, you’ll choose them when you need rapid turnaround, cooler conditions, or a shorter window between coats. You’ll get fast drying benefits for protection and handling, but you must adjust application techniques: thinner coats, proper distance, and quick passes.
| Situation | Benefit | Tip |
|---|---|---|
| Cold job | Faster cure | Thin coats |
| Quick job | Early handling | Light passes |
| Layering | Reduced blush | Maintain distance |
How to Store and Handle Spray Cans in Cold Conditions
When temperatures drop, keep cans warm and steady to prevent clogging, poor spray patterns, and slow cure times; store them indoors at room temperature, shake them thoroughly before use, and hold them close to your body for a few minutes to let the propellant regain pressure.
You should follow simple spray paint storage and cold weather handling habits:
- Warm cans slowly, never heat directly.
- Store upright in insulated box.
- Test spray on scrap before job.
Troubleshooting Tacky Finishes, Long Dry Times, and Orange Peel
If your finish stays tacky, takes forever to dry, or comes out with orange peel, don’t guess—troubleshoot systematically by checking surface prep, paint thickness, temperature/humidity, and application technique.
You’ll identify causes of tacky finishes, long dry times, and orange peel from cold effects.
Adjust thinning, warmer staging, humidity control, and spray distance to fix drying issues, improve paint texture, and restore finish quality with targeted cold remedies.
Fixing Runs, Drips, Blistering, and Bloom From Cold Painting
Once you’ve ruled out tackiness and orange peel causes, address runs, drips, blistering, and bloom that cold conditions often create.
- Lightly sand raised runs, then recoat thinly when warmer—avoiding runs and focusing on fixing drips.
- Pinpoint blistering, sand, and apply a compatible primer to aid preventing blistering.
- For bloom, wipe solvent-friendly residue, let surface warm, and use slow-dry topcoat when managing bloom.
When to Strip and Start Over vs. Salvage Techniques
Decide quickly whether you can salvage the finish or you should strip and start over by evaluating adhesion, extent of defects, and underlying damage; minor runs, surface blisters, or bloom can often be corrected with targeted sanding, priming, and recoat, but widespread peeling, solvent lifting, or compromised substrate usually means you need to remove the finish and begin anew.
Use efficient strip techniques, paint removal tools, salvage methods like feathering and spot surface repair, or full paint removal and substrate prep when necessary.
Safety: Heating and Painting Outdoors Without Hazards
When you’re heating or painting outdoors, prioritize preventing ignition and inhalation risks by keeping heat sources, open flames, and high-temperature equipment well away from flammable paints, solvents, and their vapors.
Follow outdoor safety and winter precautions, use safe heating methods, and apply ventilation tips.
- Choose wind-sheltered spots and monitor paint hazards.
- Limit cold storage and prep time.
- Inspect equipment care and surface preparation.
Cost-Effective Equipment for Winter Spray Projects
After you’ve handled safety and setup, focus on equipment that keeps costs down without sacrificing results: portable infrared or forced-air heaters with thermostats, inexpensive windbreaks, and a good-quality cold-weather paint additive will cut recoat times and reduce wasted cans.
Choose budget friendly tools like compact heaters, reflectors, and tarps; combine them with winter spray strategies to speed drying and minimize material waste.
Quick Materials and Tool Checklist for Cold-Weather Painting
A compact checklist helps you grab the right materials and tools for cold-weather spray jobs so you don’t lose time or paint to low temps.
Use this quick guide to improve tool efficiency, material selection, surface preparation, and safety measures to combat temperature effects and protect paint adhesion and finish quality during project planning.
- Heated workspace kit
- Low-temp primer and paint
- Infrared thermometer and respirator
Example Projects That Worked in Cold Temps (Case Studies)
Because cold-weather spraying needs different tactics, these case studies show practical setups, materials, and step-by-step adjustments that actually worked so you can replicate them on your own projects. You’ll see cold weather projects, successful spray techniques, winter painting tips, temperature challenges, fast dry products, creative cold solutions, outdoor painting strategies, and effective surface preparation.
| Project | Result |
|---|---|
| Porch railing | Smooth finish |
| Metal gate | Rust-proof coat |
| Adirondack chair | Quick cure |
| Mailbox | Even coverage |
| Fence panel | Durable bond |
Budget and Time Tradeoffs: When to Push vs. Postpone
Those case studies show what’s possible in cold conditions, but they don’t cover every budget or schedule.
You’ll weigh budget considerations against time management: push if deadlines or cost of delay exceed heating or shelter rental; postpone if extra gear eats the budget or risks finish quality.
- Fast finish: rent heat, expect higher cost.
- Delay: save money, allow warmer days.
- Hybrid: partial shelter, staggered work.
Recommended Products for Cold-Weather Spray Painting
When you’re painting in cold weather, pick products formulated for low temperatures so you don’t fight drying issues or ruined finishes.
Use cold resistant paints and primers labeled for sub-50°F application, fast-dry formulas, and low-temperature clear coats.
Carry a portable heater, use aerosol heated cans sparingly, and follow winter painting tips: thin coats, proper ventilation, and warm storage for cans to guarantee consistent spray and cure.
Further Reading and Quick Reference Resources
Looking for quick references and deeper guides on spray paint drying? You’ll find concise resources covering cold weather considerations and practical painting techniques to speed curing, prevent runs, and choose products.
- Manufacturer tech sheets for temperature limits and recoat times.
- How-to videos showing application, drying checks, and heat tricks.
- Community forums and FAQs for troubleshooting and seasonal tips.
Frequently Asked Questions
Can I Spray Paint in Freezing Rain or Snow?
No — you shouldn’t spray paint in freezing rain or snow. You’ll ruin finish and adhesion; use spray paint techniques and cold weather precautions like heated shelter, moisture control, proper temps, and slower recoats to get safe, durable results.
Will Cold Weather Affect Paint Color or Gloss Long-Term?
Studies show pigments can fade up to 30% faster in harsh conditions; you’ll see color fading and reduced gloss retention if paint cures slowly in cold, so you’ll need proper primers, warm curing, and UV protection to prevent it.
How Do I Dispose of Partially Used Cans Frozen in Cold?
You should treat frozen paint disposal as hazardous; don’t throw cans in regular trash. Contact local hazardous waste or recycling spray cans programs, follow their instructions, and never puncture or incinerate partially used frozen cans.
Can I Use a Respirator Mask Effectively Inside a Heated Tent?
Like a lighthouse guiding safe work, you can use a respirator inside a heated tent if you pick proper respirator types (half/full-face with appropriate cartridges), guarantee indoor ventilation, seal leaks, and monitor airflow and filter condition regularly.
Do Decals or Stickers Adhere Properly When Applied in Cold?
Yes — sticker adhesion drops in cold temperature, so you’ll often get poorer bonding. Warm the surface, use high-tack decals, and press firmly; otherwise adhesives stiffen and peel, reducing long-term hold and appearance.
Conclusion
Think of spray painting in cold weather like coaxing a fire from damp kindling: you can do it, but you’ll need patience, shelter, and the right spark. Protect the work, warm the can, and choose fast-evaporating products so the flame catches; otherwise the effort smolders longer than you expect. When conditions or time conspire against you, pull back—stash the project for warmer days rather than chase a weak glow that never becomes a blaze.