Can You Cover Oil Based Paint With Latex Paint? Guide
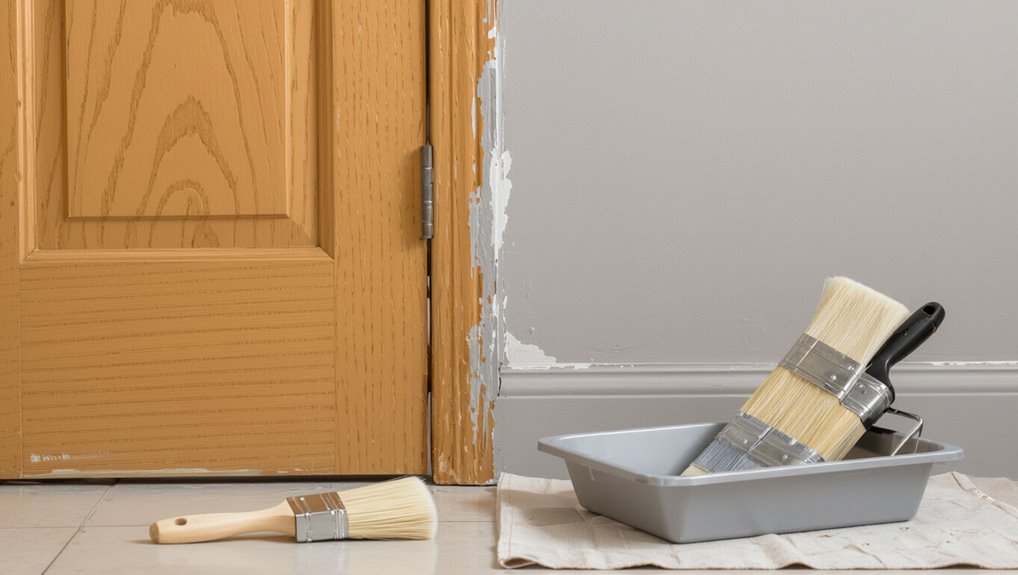
Yes — you can put latex over oil-based paint if you prep properly. You’ll need to scuff or sand glossy surfaces, remove grease, and prime with a high-adhesion bonding primer so the latex will stick and not peel. Avoid coating poorly cured, flaking, or heavily chalked oil paint without stabilizing or stripping first. Always test for lead before sanding, use proper ventilation and PPE, and allow full cure between coats — keep going and you’ll find detailed steps and tips to finish well.
Can You Put Latex Paint Over Oil-Based Paint?
Wondering if you can put latex paint over oil-based paint? You can, but paint compatibility matters: oil’s slick finish can hinder surface adhesion.
You’ll need to scuff, clean, and prime with a bonding primer to guarantee latex bonds. Skip those steps and you’ll likely face peeling or flaking.
Proper prep makes the conversion durable and effective.
When Painting Latex Over Oil Is a Good Choice
If you properly sand and prime the old oil finish, you can successfully use latex on many interior surfaces.
It’s a good choice for low-traffic areas like ceilings, closets, or decorative trim where wear is minimal.
Just make sure the substrate is clean, dry, and well-primed before you paint.
When Surface Is Properly Prepared
When you’ve stripped gloss, scuffed the surface, and removed loose paint and contaminants, latex paint can adhere reliably to an oil-based substrate; proper preparation—deglossing, thorough sanding, cleaning with a TSP substitute, and priming with a high-adhesion oil- or bonding primer—turns a risky job into a straightforward one. Use correct surface types and preparation techniques.
| Task | Tool | Result |
|---|---|---|
| Degloss | Sandpaper | Keying |
| Clean | TSP substitute | Residue-free |
| Prime | Bonding primer | Adhesion |
| Paint | Latex | Finish |
| Inspect | Touch-up | Durable |
Low-Traffic, Interior Surfaces
Because low-traffic interior areas see little wear, you can confidently use latex over properly prepped oil-based paint on walls, ceilings, and trim that don’t get bumped or scuffed often.
You should sand, clean, and prime to guarantee adhesion. Doing so maintains surface durability and helps paint longevity.
For closets, guest rooms, and formal dining, latex provides an efficient, low-maintenance finish.
When You Should Avoid Painting Latex Over Oil
You shouldn’t paint latex over high-gloss oil surfaces unless you’re willing to sand and properly prime first, because the slick finish prevents good adhesion.
Also avoid it on poorly cured old paint, since latex can trap solvents and cause blistering later.
If the oil paint is flaking or has a chalky finish, strip or stabilize it before applying latex to prevent peeling.
High-Gloss Oil Surfaces
If your oil-based surface has a high-gloss finish, don’t assume latex will stick or look right without extra prep.
You’ll face adhesion issues because high gloss durability resists new coatings. Do a thorough sanding, clean and use a bonding primer; otherwise the sheen comparison will reveal patchy, peeling results.
Skip direct latex application on smooth, glossy oil without proper prep.
Poorly Cured Old Paint
High-gloss oil that’s been sanded and primed still isn’t safe territory when the underlying oil finish never fully cured.
Poorly cured oil paint can stay tacky, stain through, or react with latex, so you should avoid painting latex over it.
If you ignore this, poor adhesion and paint compatibility issues will emerge.
Strip or fully recoat with compatible products before applying latex.
Flaking Or Chalky Finish
When oil paint is flaking or has turned chalky, don’t try to cover it with latex—those loose particles prevent proper adhesion and will cause the new coat to fail quickly. You’ll need to remove loose paint, address flaking issues, and eliminate the chalky appearance before priming. Otherwise paint peels, wastes money, and looks terrible.
| Emotion | Reality |
|---|---|
| Frustration | Peeling |
| Regret | Mess |
| Relief | Repair |
| Pride | Finish |
Test Existing Paint: Oil or Latex?
Wondering whether the old paint is oil or latex? You can determine paint composition with a simple surface testing method: rub a cotton ball soaked in rubbing alcohol on a small area.
If paint softens or comes off, it’s latex; if not, it’s likely oil-based.
Mark results and plan appropriate prep—sanding or priming—before repainting with latex.
Ideal Surface Conditions: Adhesion, Dryness, Cleanliness

Now that you’ve identified whether the old coat is oil or latex, get the surface ready so paint will stick, dry, and look smooth. You’ll perform surface evaluations, confirm dryness, and use adhesion techniques like sanding or bonding primer. Check for loose flakes, gloss, and moisture before painting.
| Check | Action |
|---|---|
| Gloss | Sand |
| Moisture | Dry |
| Flaking | Remove |
Clean Oil‑Based Surfaces Properly Before Painting
Before you paint, remove grease and oils with a good cleaner so the latex will stick.
Then degloss and scuff sand glossy oil-based surfaces to give the new paint a mechanical grip.
Use TSP or a TSP substitute for final cleaning, rinsing thoroughly and letting the surface dry before priming.
Remove Grease And Oils
Start by stripping away any grease, oil, or wax residue—these contaminants prevent latex from bonding to oil-based surfaces and lead to peeling.
Use a degreaser or tris substitute, follow product instructions, and rinse thoroughly.
For localized spots, try a citrus-based cleaner for grease removal or a solvent recommended for oil cleaning.
Let the surface dry completely before proceeding.
Degloss And Scuff Sand
Deglossing and scuff sanding the oil‑based surface creates the tooth latex paint needs to stick, so grab a fine‑to‑medium grit sandpaper (220–320 for smooth finishes, 120–180 for heavier buildup) and work evenly until the glossy sheen is dulled and any loose finish is removed.
- Test degloss methods on an inconspicuous spot.
- Sand with steady pressure.
- Wipe dust between passes.
- Inspect for smooth, dull texture for scuff sanding.
Use TSP Or Substitute
1 simple cleaning step makes a big difference: wash the oil‑based surface with trisodium phosphate (TSP) or a TSP substitute to remove grease, wax, and grime that’ll stop latex from bonding properly.
You should rinse thoroughly, dry, and inspect for residue.
Use TSP alternatives or eco friendly cleaners when preferred, but make certain they’re designed for paint prep so primer and latex adhere reliably.
Sanding for Adhesion: Grit, Technique, How Much
You’ll want to sand oil-based paint lightly to give latex something to grip—use 220–320 grit for glossy finishes and 120–150 only if there’s heavy buildup or flaking to level.
Use proper sanding techniques and thoughtful grit selection to avoid damage. Aim for dulling shine, not stripping.
- Test a small area first
- Sand with the grain
- Clean dust thoroughly
- Inspect for smoothness
Best Primers for Covering Oil‑Based Paint With Latex
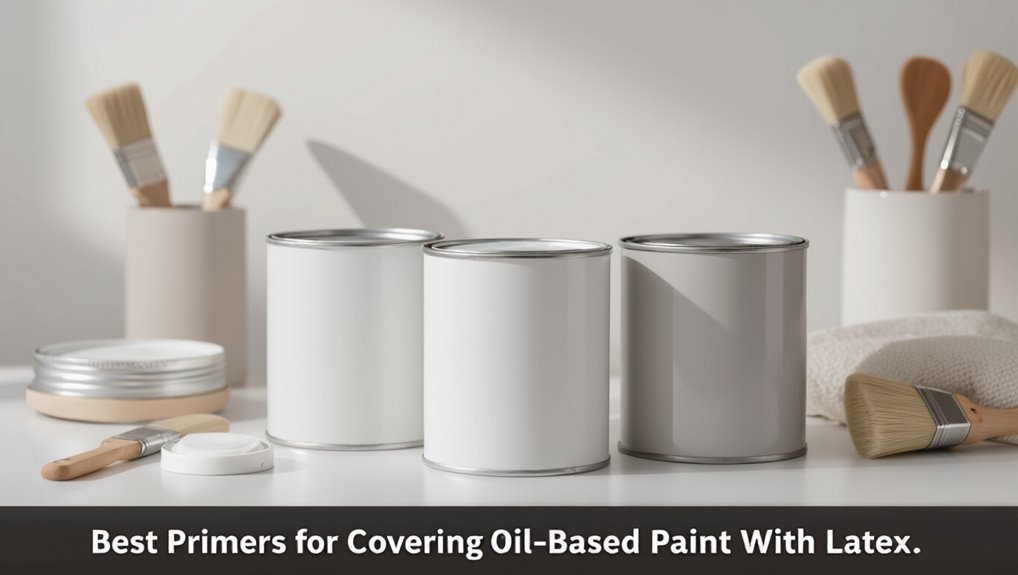
Picking the right primer makes the difference between a durable latex finish and one that peels or stains through, so choose a product formulated to bond to oil-based surfaces and block tannins and gloss.
Look for the best bonding primers labeled for oil-to-latex use, shellac or high-quality acrylic primers, or waterborne alkyds. These give adhesion and stain sealing; consider oil paint alternatives only if substrate replacement’s possible.
Apply Bonding Primer: Step‑by‑Step
Before you prime, clean the surface thoroughly and scuff it with fine-grit sandpaper to remove grease and gloss.
Wipe away dust, let the surface dry, then mask off areas you don’t want primed.
Apply the bonding primer in thin, even coats with a high-quality brush or roller, following the maker’s drying times between coats.
Surface Cleaning And Scuffing
Surface prep matters: clean, degloss, and scuff the old oil finish so the bonding primer can adhere properly.
You’ll focus on surface preparation and proven cleaning techniques before priming. Do these steps:
- Wash with TSP substitute to remove grease and dirt
- Rinse and dry thoroughly
- Sand lightly with 220-grit to scuff gloss
- Wipe with tack cloth to remove dust
Primer Application Technique
Start by stirring the bonding primer thoroughly to reincorporate any settled pigment, then pour a small amount into a clean tray so you can work without contaminating the main can.
Choose primer types suited for oil-to-latex shifts. Use a high-quality brush for edges and a roller for flats, maintaining wet edges.
Follow recommended application methods, dry times, and sanding between coats for best adhesion.
When to Choose a Shellac Primer Instead
If you’re working with tricky stains, fresh smoke damage, or heavy tannin bleed-through that oil or latex primers can’t lock, reach for a shellac primer instead.
You’ll choose shellac when others fail; know shellac benefits and how it compares among primer types.
- Seals smoke and odor fast
- Blocks severe tannins
- Dries very quickly
- Bonds to glossy surfaces
Choosing the Right Latex Finish Over Oil Surfaces
When you’re covering an oil-painted area with latex, pick a finish that matches the room’s wear and look—eggshell or satin for walls and high-traffic spots, semi-gloss for trim and kitchens, and flat only for low-use ceilings—because the wrong sheen will show imperfections, wear unevenly, or peel sooner despite proper priming.
Consider latex finish options and surface compatibility; test a small area to confirm adhesion and appearance.
How Temperature and Humidity Affect Adhesion
You’ll notice temperature plays a big role in how well latex bonds to an oil base—too cold and the paint won’t cure properly, too hot and it can skin over before it levels.
Humidity also changes drying time and can trap moisture under the new finish, leading to poor adhesion or blistering.
Control both conditions for the best chance of a strong, even bond.
Temperature Effects On Bonding
Although it might seem minor, temperature and humidity dramatically change how well latex paint bonds to oil-based surfaces; they affect drying time, surface tack, and the solvent evaporation rate that drives adhesion.
You’ll notice temperature sensitivity alters bonding strength. Keep in mind:
- Cooler temps slow cure
- Warm temps speed solvent loss
- Extreme cold weakens film
- Moderate temps optimize adhesion
Humidity’s Impact On Drying
Because moisture in the air slows latex paint’s water-based solvents from evaporating, high humidity lengthens drying time and can leave a tacky surface that won’t bond well to oil-based paint.
On the other hand, low humidity speeds evaporation and risks poor film formation and cracking.
You should practice humidity control, monitor drying times, and choose ventilated conditions or dehumidifiers so adhesion stays reliable.
Tools & Materials for Painting Latex Over Oil
Tools and materials matter most when you’re covering oil-based paint with latex—pick the right ones and the job goes faster and lasts longer.
Tools and materials make all the difference when switching from oil to latex—choose wisely for speed and durability
You’ll need primers, cleaners, and compatible solvents. Choose quality brush types and rollers, and consider paint additives for flow or adhesion. Don’t skip testing.
- Oil-cleaner or deglosser
- Bonding primer
- Nylon/Polyester brush types
- Latex-compatible additives
Painting Trim and Cabinets Over Oil: Tips
When you’re tackling trim and cabinets that were originally finished in oil, prep and patience make the difference between a long-lasting finish and one that peels or chips. You’ll focus on trim preparation, sanding, and choosing primers compatible with cabinet materials; use thin coats and light sanding between layers for durability.
| Step | Tool | Tip |
|---|---|---|
| 1 | Sandpaper | Degloss first |
| 2 | Primer | Bonding type |
| 3 | Paint | Thin coats |
| 4 | Sand | Light between coats |
Painting Walls and Ceilings Over Oil: Tips
Walls and ceilings finished in oil require careful prep to guarantee latex adheres and stays put; you’ll need to clean, degloss, and prime before painting.
Focus on surface repair, proper primer, and breathable latex. Consider color selection and appropriate finish types for durability and light reflection.
Focus on repairing surfaces, choose the right primer, and use breathable latex; pick colors and finishes for durability and light.
- Remove grease and dust
- Sand glossy spots
- Use bonding primer
- Test small area first
How Many Coats of Primer and Latex Paint You Need
After you’ve cleaned, sanded, and applied a bonding primer to oil-finished surfaces, decide how many primer and latex coats you’ll need based on color change, surface porosity, and durability requirements.
Generally apply one high-quality bonding primer (or two for severe stain coverage) then two coats of latex.
Choose primer types suited to adhesion, and use consistent paint application techniques—thin, even coats—for best coverage and durability.
Drying vs. Curing: Realistic Timeframes
Although your latex paint may feel dry to the touch within a few hours, it won’t be fully cured for days to weeks depending on temperature, humidity, and film thickness.
Drying means the surface is no longer tacky, while curing is the ongoing chemical process that gives the coating its final hardness and resistance.
- Expect varied drying times
- Monitor humidity and temp
- Thicker films extend curing processes
- Be patient: full cure equals durability
Prevent Peeling and Adhesion Failure
To prevent peeling and adhesion failure, you’ll need to prep the surface thoroughly by cleaning, sanding glossy areas, and removing loose paint.
Apply a quality bonding primer designed for latex over oil-based finishes to create a reliable adhesion layer.
Skip shortcuts here—proper prep and the right primer are what keep your new paint stuck down for years.
Proper Surface Preparation
Preparation matters: if you want latex paint to stick to oil-based surfaces without peeling, you need to remove loose paint, gloss, and contaminants, then roughen and prime the surface so the new coating can bond.
Do surface cleaning, sand to dull glossy sheen, and make smart primer selection. Follow these steps:
- Wash with degreaser
- Sand or scuff
- Repair flaws
- Prime appropriately
Use Bonding Primer
After cleaning, sanding, and repairing the surface, you should apply a bonding primer designed for oil-to-latex adhesion to prevent peeling and adhesion failure.
Choose primer types labeled for enamel-to-latex conversion, and follow manufacturer instructions for dry time and coat number.
Use proper bonding techniques—thin, even coats, light sanding between coats, and clean conditions—to guarantee strong adhesion and long-lasting results.
Fix Blistering, Cracking, and Other Common Problems
1 common issue you’ll run into when covering oil-based paint with latex is blistering, cracking, or peeling—usually caused by poor adhesion, moisture, or incompatible coatings.
You can fix blistering causes and apply cracking solutions by prepping and priming correctly.
Tips:
- Scrape loose paint
- Sand glossy surfaces
- Use a high-adhesion primer
- Allow full drying between coats
When to Remove Oil Paint Instead of Covering It
If the oil paint is peeling, has multiple layers of failing coatings, contains lead, or sits on a surface with structural damage, you should remove it rather than try to cover it with latex.
Covering in those cases only hides problems and often leads to faster failure, health risks, or costly rework.
You’ll choose oil paint removal when adhesion, substrate integrity, or paint compatibility are compromised.
Health & Safety: Lead, Dust Control, Ventilation
Before you cover old oil paint with latex, address health and safety risks—especially lead, dust, and ventilation—because ignoring them can harm you and others during prep and painting.
Follow these steps for safe work and reduce lead exposure and practice good dust management:
- Test for lead before sanding.
- Use HEPA vacuum and wet methods.
- Wear respirator and protective clothing.
- Ventilate thoroughly while you work.
Covering vs. Stripping: Cost & Time Comparison
When weighing whether to cover old oil paint with latex or strip it back, consider both upfront costs and the time each method demands so you can pick the option that fits your budget and schedule.
A brief cost analysis shows covering usually saves money and labor; stripping raises expenses and disposal fees.
For time efficiency, covering is faster, stripping is thorough but slow.
Maintenance Tips to Keep Latex Over Oil Looking Good
Covering old oil paint with latex can save time and money, but keeping that finish looking good takes a bit of regular care.
Covering old oil paint with latex saves time and money, though it needs occasional care to stay looking good.
You’ll extend latex paint longevity with simple surface maintenance and quick spot fixes. Follow these steps:
- Clean gently with mild soap and water.
- Touch up chips promptly.
- Avoid harsh scrubbing.
- Recoat high-wear areas every few years.
Quick, Printable Checklist to Finish Confidently
If you want a tidy, durable finish every time, use this short printable checklist to guide each step and avoid common mistakes.
Inspect surface, remove loose oil paint, sand to dull gloss. Clean thoroughly, degrease, and apply appropriate primer options.
Choose compatible latex primer, follow recommended drying times.
Use correct application techniques—brush, roller, or spray—apply thin even coats, and allow full cure before use.
Frequently Asked Questions
Can I Use Latex Paint Over Oil on Exterior Metal Surfaces?
Yes — you can, but you’ll need proper preparation techniques: clean, sand, and degloss the metal, then apply a compatible bonding or oil-blocking primer type. That guarantees latex adheres and resists peeling on exterior metal.
Will Latex Over Oil Affect Paint Color or Sheen Uniformity?
Boldly blending brings bothered beauty: you’ll likely see sheen differences and possible color changes if you skip proper prep. Sanding, priming with a bonding primer, and compatible topcoats will preserve uniformity and true tone.
Can I Mix a Small Amount of Oil Paint Into Latex for Touch-Ups?
No — you shouldn’t mix oil paint into latex for touch-ups; it’ll break paint compatibility and adhesion. Instead, use proper touch up techniques: match base type, use primer when needed, and test small areas first.
How Long Should I Wait Between Primer and Topcoat Application?
I’d wait the primer’s recommended drying times—usually 24 hours—before applying the topcoat. Like letting glue set on a favorite vase, proper paint compatibility guarantees adhesion, durability, and avoids lifting or uneven finish.
Does Latex Over Oil Affect Future Repainting Options?
Yes — it can limit future paint choices: you’ll face compatibility concerns if you later switch back to oil. You’ll need proper adhesion prep or a suitable primer to avoid peeling and guarantee smooth future repainting options.
Conclusion
You can usually put latex paint over oil-based paint if you prep right, but treat it like threading a needle: one wrong move and the finish won’t hold. Scuff and clean the surface, degrease, test for oil, and prime with a bonding primer when needed. Avoid skipping steps on high-moisture or high-heat surfaces, or where lead might lurk. With proper prep and safe practices, your latex topcoat will look great and last.