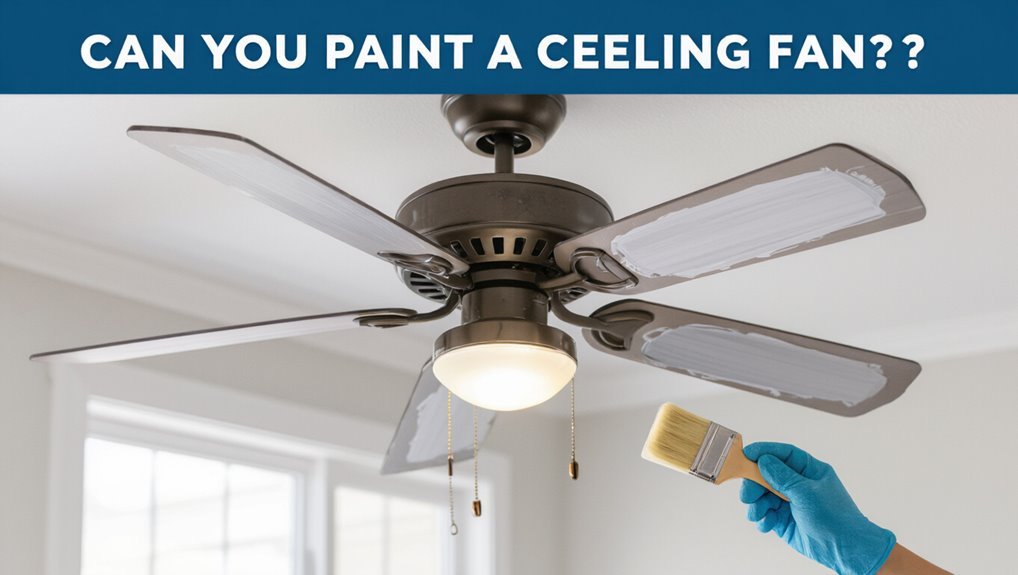
Can You Paint a Ceiling Fan? Safe Method and Best Practices
Yes — you can paint a ceiling fan safely if you take precautions and prep properly. Turn off power, remove blades and light kit, clean and sand surfaces, and use a bonding primer plus appropriate paint (spray for smooth coverage). Apply thin, even coats, let each layer dry fully, then cure and rebalance blades before reassembly. Mask the motor and wiring, use low‑VOC paint, and test at low speed; continue for tips on materials, techniques, and troubleshooting.
What People Mean by “Can You Paint a Ceiling Fan?
What do people usually mean when they ask “Can you paint a ceiling fan?” — they’re really asking whether it’s safe, practical, and worth the effort.
You want to change fan aesthetics without harming function, balance, or warranty. You’re weighing time, tools, and skill against DIY creativity.
Ultimately you’re asking if the visual payoff justifies the care and potential risks involved.
Quick Answer: When Painting a Fan Is Safe
When is it safe to paint a ceiling fan? You can paint when the fan is unplugged, blades removed, and you use proper painting techniques for even coverage. Prioritize drying time and low-VOC paint to protect ceiling fan aesthetics.
| Condition | Action |
|---|---|
| Power off | Disconnect power source |
| Blades removed | Paint separately |
| Drying time | Follow paint instructions |
How Paint Affects Motor Heat, Balance, and Warranty
Although painting fan blades and housing can freshen the look, you should consider how added coatings affect motor heat, blade balance, and warranty coverage.
Thin, even paint preserves motor efficiency and avoids trapping heat; thick or textured layers can unbalance blades, strain bearings, and void warranties.
Choose durable finishes to maximize paint longevity, test balance after drying, and document work to protect warranty claims.
Tools and Materials for Painting a Ceiling Fan
Now that you know how paint can affect motor heat, balance, and warranty, gather the right tools and materials to minimize those risks and get a clean, durable finish.
You’ll need screwdrivers, masking tape, drop cloths, tack cloths, sandpaper (fine-grit), a respirator, gloves, and cans or a spray gun.
Follow preparation steps, use safe spray techniques, and label removed hardware.
Best Paints for Fan Motors, Blades, and Housings
When you’re choosing paint, pick motor-safe formulas that won’t gum up bearings or trap heat — high-temp spray paints and specialized appliance enamels are good options.
For blades and housings, use paints matched to the material and finish you want: durable acrylics or enamel for wood and metal, and satin or semi-gloss for easy cleaning.
Always prep surfaces and use thin, even coats to keep balance and airflow intact.
Motor-Safe Paint Types
If you want your ceiling fan to look fresh without risking overheating or damage, choose paints formulated for heat resistance, electrical components, and flexible adhesion.
You’ll protect motor maintenance and guarantee paint longevity by using proper coatings.
- High-temp appliance paint for motors
- Flexible enamel for housings and joints
- Non-conductive, heat-stable spray for tight spaces
Blade And Housing Finishes
Start by matching paint types to each fan component so you get a durable, safe finish: use high-temp, non-conductive coatings on the motor housing and around wiring, choose flexible enamel or acrylic for blades to resist cracking and warping, and pick a fade- and moisture-resistant topcoat for exposed housings to maintain color and durability.
For blade aesthetics, use thin coats; for varied housing materials, test adhesion first.
Remove First or Paint In Place: Which to Choose?
Want to save time or avoid a risky climb? You can paint in place for quick DIY projects and modest fan aesthetics updates, but removing parts gives cleaner results and protects motors.
Consider:
- Paint in place: faster, less disassembly, more masking.
- Remove blades: better coverage, neater finish.
- Remove entire fan: safest for thorough refinishing and motor protection.
How to Safely Disconnect Power Before You Start
Before you touch a single screw, shut off the fan’s power at the breaker so you don’t risk a shock while working.
Confirm the circuit by flipping the breaker and testing the fan switch or a voltage tester.
Label the breaker and warn household members.
Treat all nearby power sources as live until you’ve verified they’re dead.
Follow safety precautions and manufacturer’s warnings before proceeding.
How to Remove Blades, Light Kits, and Canopies Safely
Once the power is off, you’ll want to support the fan assembly so nothing drops when you remove blades or the light kit.
Unscrew blades and mounting hardware in a methodical order, keeping parts together and labeled.
When you get to the canopy and wiring, disconnect each wire carefully and cap or tape exposed ends before fully removing the fixture.
Turn Off Power
Start by cutting power to the fan at the circuit breaker so you can safely remove blades, light kits, and the canopy; don’t rely on the wall switch alone.
Confirm the power source is dead, follow safety precautions, and use a tester before touching wires.
- Turn off circuit breaker
- Verify with voltage tester
- Keep screws and parts organized
Support Fan Assembly
Support the fan assembly with one hand or a helper while you loosen mounting screws so the motor housing doesn’t drop when you remove blades, light kits, or the canopy; use a ladder or step stool that gives you steady, level access and a small container to hold fasteners as you work.
Follow basic installation techniques: remove blades evenly, keep parts labeled, and support the unit to prevent strain or damage.
Disconnect Wiring Carefully
With the fan held steady and fasteners set aside, turn off power at the circuit breaker and verify the switch is off so you won’t risk a shock while working on the wiring.
You’ll follow wiring safety and proper disconnect methods as you remove blades, light kits, and canopies.
Use these steps:
- Label wires and take photos.
- Unscrew connectors, keeping parts organized.
- Cap exposed wires and test power off.
Labeling and Storing Parts for Easy Reassembly
Before you set parts aside, label each piece and group fasteners so you won’t guess where they go later.
Use tape and a marker to number blades, brackets, and screws, noting orientation.
Store small components in labeled bags or compartment boxes, keep related parts together, and place larger items safely.
This labeling parts and storing components routine speeds reassembly and prevents mistakes.
Cleaning and Degreasing Fan Blades and Metal Parts
Now that parts are labeled and organized, you’ll want to thoroughly clean and degrease the blades and metal pieces before painting.
Use gentle, effective cleaners to remove oil, dust, and residue so paint adhesion techniques work.
For fan blade maintenance, follow these steps:
- Wipe with degreaser and microfiber cloth.
- Rinse, dry completely.
- Use isopropyl wipe for final prep.
Strip Paint or Just Scuff and Prime?
Wondering whether to strip the old finish or just scuff and prime? You’ll choose based on condition: heavy flaking or lead paint needs stripping paint completely before repainting.
If finish is intact, scuffing surfaces with fine sandpaper, cleaning, and applying a suitable primer will give good adhesion.
Scuffing saves time and reduces risk, but don’t skip primer for durable results.
How to Sand Wood Fan Blades Correctly
Start by removing the blades and laying them on a flat, protected surface so you can work safely and accurately; you’ll get the cleanest result sanding them off the fan.
Choose grit progression and pressure based on wood types and finish. Use consistent strokes with the grain.
Tools and tips:
- 120–220 grit for finish prep
- Sanding block for even pressure
- Vacuum and tack cloth between steps
Primers for Wood, Metal, and Plastic Fan Blades
With the blades sanded and cleaned, pick a primer that matches the blade material to guarantee paint adhesion and durability.
For wood, use a stain-blocking acrylic primer; for metal, choose a rust-inhibiting metal primer; for plastic, select a bonding primer formulated for plastics.
Match primer types to fan blade materials, follow manufacturer instructions, and allow full cure before painting.
Spray Paint vs. Brush Paint: Choices for Even Coverage
Thinking about whether to spray or brush your fan blades? You’ll weigh speed, finish, and control.
Use spray application for smooth, fast coats; choose brush techniques for edges and touch-ups.
Use spray for smooth, speedy coats; switch to a brush for edges and precise touch-ups.
- Spray application: even, minimal brush marks
- Brush techniques: control at edges, less overspray
- Hybrid approach: spray main surfaces, brush details for best coverage
Masking the Motor, Wiring, and Glass Shades
Before you paint, you’ll need to mask the motor housing so paint doesn’t clog vents or moving parts.
Protect the wiring harness with painter’s tape and plastic to keep connections clean and safe.
Cover any glass shades completely or remove them to prevent overspray and accidental damage.
Masking Motor Housing
Masking the motor housing, wiring, and glass shades carefully protects the fan’s functional parts and guarantees a professional finish when you paint.
Use precise masking techniques for motor protection and clean lines. Cover moving parts, secure edges, and avoid adhesive on bearings.
- Use painter’s tape and plastic
- Wrap glass with paper first
- Mask vents and screws tightly
Protecting Wiring Harness
Now that the motor housing and shades are covered, focus on shielding the wiring harness so paint won’t compromise electrical connections or insulation.
Use painter’s tape and plastic sheeting to isolate wire bundles, secure exposed terminals with electrical tape, and cover connectors with small resealable bags.
You’ll maintain wiring safety and harness protection by keeping paint off insulation, avoiding heat sources, and checking integrity before reassembly.
Covering Glass Shades
Once the motor and wiring are sealed, turn your attention to the glass shades; you’ll want to protect them thoroughly so paint only hits designated surfaces.
Use careful shade protection and glass preparation to avoid drips. Cover edges tightly, secure with low-tack tape, and shield with plastic or paper.
- Mask each shade rim
- Wrap with soft paper
- Label for removal timing
Apply Paint in Thin, Even Coats for Durability
Start with thin, even strokes so each coat dries smoothly and bonds well to the surface.
You’ll keep brush or spray passes light, maintaining consistent paint application to prevent runs.
Let each thin layer set before adding the next to improve coat durability and adhesion.
Allow each thin layer to dry fully before the next coat to strengthen adhesion and durability.
Move methodically, cover edges evenly, and avoid overloading tools so finish stays uniform and long-lasting.
Drying and Curing Times: Avoid Drips and Tackiness
Make sure your fan is in a well-ventilated, dust-free space at the recommended temperature and humidity so each coat can dry properly.
Check the paint can for curing times—acrylics dry fast but still need full cure to avoid tackiness, while enamels and primers can take much longer.
Apply thin coats and watch the edges for runs so you can catch and smooth any drips before they set.
Proper Drying Environment
When you paint a ceiling fan, controlling the drying environment is as important as your prep work — temperature, humidity, and airflow determine how quickly coatings cure and whether they sag or stay tacky.
Maintain humidity control and temperature stability to prevent drips and tackiness.
Tips:
- Keep steady airflow, avoid direct blasts.
- Hold room temp 65–75°F.
- Use a dehumidifier if needed.
Paint Type Curing
After you’ve controlled temperature, humidity, and airflow, the paint itself determines how long surfaces feel tacky and when you can reassemble the fan.
Oil-based finishes usually have longer cure time but strong paint adhesion; acrylics dry fast but may need longer cure time for full hardness.
Follow manufacturer cure time, wait before handling, and test a hidden edge to verify no tackiness.
Preventing Drips
Start with thin, even coats and you’ll cut the chance of runs before they start.
Let each coat tack-free before recoat to boost paint adhesion and avoid tackiness. For drip prevention, watch edges and tilt blades as needed.
- Use light sprays or thin brush strokes.
- Wait recommended drying times.
- Inspect under bright light for tiny runs.
Refinishing Laminated or Reversible Blades Without Warping
Refinish laminated or reversible blades carefully to avoid delamination and warping: keep sanding light, use thin even coats, and control temperature and humidity so the adhesive layer isn’t stressed. You’ll respect blade materials and promote paint adhesion, sanding with fine grit, using bonding primer, and curing fully to prevent bubbles or separation.
| Fear | Hope | Relief |
|---|---|---|
| Sticky | Smooth | Secure |
| Crack | Renew | Calm |
| Warp | Restore | Happy |
Painting Two‑Tone or Reversible Blades Cleanly
If you’re painting two‑tone or reversible blades, prep and careful masking are your best friends to keep clean lines between finishes.
Clean each side thoroughly, mask the edges or center pivot, and paint one face at a time so you don’t contaminate the opposite finish.
When the first side’s fully cured, flip and repeat for crisp, professional results.
Prep And Masking
Preparing two-tone or reversible fan blades so your paint lines stay crisp requires careful cleaning, sanding, and precise masking before you even pick up a brush.
You’ll treat this as fan maintenance to guarantee adhesion and consistent paint application.
- Clean degrease, dry thoroughly
- Lightly sand edges for bonding
- Use low-tack tape and card guides for straight lines
Clean Flip Painting
When you flip a reversible fan blade to paint a second color, work methodically so the first side stays perfect; clamp blades by the hub, rest them on padded supports, and cover edges with low‑tack tape.
Use light coats, proper painting techniques, and allow full drying between flips. This preserves fan aesthetics, prevents drips, and guarantees crisp lines on both faces for a professional finish.
Safe Methods to Paint Motor Housings and Canopies
1 simple rule: always cut power and disconnect the fan before you touch the motor housing or canopy.
You’ll remove blades, mask wiring, and detach the canopy for safe, neat canopy painting and motor housing prep.
Use light sanding, degreaser, and appropriate primer. Follow these steps:
- Clean and degrease surfaces
- Sand and wipe dust away
- Mask electrical parts and nearby fixtures
When to Use a Clear Topcoat or Sealant
If you want your new finish to last and resist dust, moisture, and everyday wear, apply a clear topcoat or sealant after the paint fully cures.
You’ll choose based on use: indoor fans usually do well with a satin clear coat, while damp areas might need a moisture-rated sealant.
Consider clear coat benefits like UV resistance and easy cleaning when weighing sealant options.
Preventing Paint Buildup That Unbalances Blades
Because even a thin layer of paint on just one blade can throw a fan off balance, take steps to avoid uneven buildup from the start.
You’ll control paint thickness and preserve blade balance by working deliberately:
- Apply thin, even coats; wait between passes.
- Use a light spray or foam brush for uniform coverage.
- Rotate blades and inspect edges for drips before drying.
How to Rebalance Blades After Painting
Start by testing the fan at low speed to see how much vibration remains and which direction the wobble leans.
Note any blade weight changes from paint.
Remove blades, swap positions to isolate the heavy one.
Use a clip-on counterweight or adhesive weights for precise balance adjustment, re-test at each step, and trim or add weight until wobble stops.
Reassembly Checklist: Wiring, Mounting, Fasteners
Before you button the fan back up, check every wiring connection for tightness and correct color pairing so you don’t get shocks or shorts.
Make sure the mounting hardware is seated and the bracket is secured to the ceiling joist or support.
Finally, confirm fastener types and torque—use the right screws and tighten them to spec so nothing works loose.
Wiring Connections Check
When you’re ready to reassemble the fan, double-check every wiring connection to verify proper continuity and secure terminations; loose or miswired leads can cause wobble, shorts, or electrical hazards.
Follow wiring safety practices and confirm connection types match diagrams. Check each splice, insulated cap, and grounding point.
- Verify color-coded wires
- Tug-test every connector
- Use a multimeter for continuity
Secure Mounting Hardware
With the wiring confirmed, focus next on securing the fan’s mounting hardware so the unit sits solidly and quietly.
Tighten brackets and canopy fittings, align the motor housing, and confirm the downrod or flush mount seats correctly.
Check that no wires are pinched and that the canopy covers connections.
These steps enhance fan stability and support installation safety before final testing.
Fastener Torque And Types
1 key step in reassembly is getting fastener torque and types right: use the correct screws, bolts, and lock washers for each connection and tighten them to the manufacturer’s torque spec so the fan stays secure without stressing components.
You should match fastener types to material, follow torque specifications, and recheck connections.
- Use specified screws/bolts
- Include lock washers where noted
- Verify torque with a calibrated driver
How to Test the Fan and Lights After Reinstalling
Before you flip the circuit back on, double-check all wiring connections, mounting screws, and that the blades and light fixtures are securely fastened so you won’t risk sparks, wobble, or stripped threads.
Restore power, then test fan performance at each speed and direction. Confirm light functionality across dimmer settings and bulbs.
Listen for unusual noises and observe wobble; tighten or recheck connections as needed.
Common Painting Mistakes and How to Avoid Them
Although painting a ceiling fan can refresh a room, it’s easy to make mistakes that lead to drips, uneven coverage, or damaged components—so you’ll want to avoid common pitfalls like skipping prep, using the wrong paint, or rushing reassembly.
Follow simple paint tips and avoid common errors:
- Clean and sand surfaces first.
- Use primer and proper spray/brush paint.
- Mask electronics; let cures fully dry.
Alternatives to Painting: Replacement Blades and Wraps
If you don’t want to paint, you can swap in replacement blades to change the fan’s look without fuss.
You’ll find blades in different materials, finishes, and sizes to match your style and airflow needs.
For a temporary or budget-friendly update, try decorative blade wraps that apply like stickers and peel off later.
Replacement Blade Options
When repainting isn’t right for your fan, swapping the blades or using decorative wraps gives you a quick, low-risk upgrade that keeps motor balance and warranty intact.
- Choose blade materials for durability and style.
- Compare blade designs to match airflow and room scale.
- Review decorative options while checking performance impact so you don’t reduce efficiency or void specs.
Decorative Blade Wraps
Because you want a fresh look without altering blade balance or voiding warranties, decorative wraps give you a simple, reversible option for updating fan blades. You can apply vinyl wraps with varied decorative styles and blade patterns to match decor, remove them later, and avoid repainting.
| Material | Result |
|---|---|
| Vinyl | Durable finish |
| Fabric | Textured look |
| Adhesive film | Easy change |
| Laminate | Long-lasting |
When to Replace the Fan Instead of Repainting It
Though repainting can refresh a tired fixture, you’ll want to replace the fan if it shows structural damage, persistent wobble, noisy bearings, or outdated safety features that paint can’t fix.
Consider replacement when fan lifespan ends or you need serious aesthetic upgrades. Assess:
Consider replacing the fan when its lifespan ends or when major aesthetic or safety upgrades are needed.
- Irreparable motor or balance issues
- Cracked housing or blade warping
- Missing modern safety or wiring standards
Time and Cost: DIY Paint Job vs. Professional Refinishing
If you decide repairable issues don’t justify replacement, weigh time and cost before committing to a paint job: DIY painting will save money but take more of your time and effort, while professional refinishing costs more upfront but delivers faster, longer-lasting results. Consider DIY benefits vs. Professional costs, Time investment required, and a Quality comparison to decide.
| Option | Consideration |
|---|---|
| DIY | Lower cost, higher Time investment |
| Pro | Higher Professional costs, better Quality comparison |
Maintenance Tips to Keep Your Painted Fan Looking New
Keeping your painted ceiling fan looking new takes regular, simple care: dust the blades weekly with a microfiber cloth, wipe down the motor housing and blade brackets monthly with a damp (not wet) cloth and mild detergent, and inspect for chips or peeling every few months so you can touch up small spots before corrosion or grime sets in.
- Check screws and balance for safe operation.
- Use gentle paint care products.
- Schedule routine fan maintenance.
Frequently Asked Questions
Can Painted Fans Emit Fumes or Odors After Installation?
Yes—painted fans can emit fumes or odors after installation, especially with oil-based paints or solvent-heavy paint types; you should use low-VOC paints, ventilate well, and use odor control like activated charcoal or air purifiers.
Will Painting Affect the Fan’s Noise or Wobble Long-Term?
Want a quiet breeze or a wobbling fan resembling a carnival ride? You’ll usually avoid long-term noise or wobble if you use proper paint types, let coatings cure, and keep up regular fan maintenance.
How Does Humidity or Climate Affect Painted Fan Longevity?
Humidity and climate considerations matter: you’ll see humidity impact paint adhesion and corrosion, especially in coastal or humid climates. You’ll need moisture-resistant primers, corrosion-proof coatings, and regular inspections to preserve finish and motor longevity.
Are There Fire-Safety Regulations About Painting Ceiling Fans?
Yes—you’ll need to follow fire code regulations; paint shouldn’t impair motor vents or wiring. Consider fan material considerations like heat tolerance and coating flammability. Use high-temperature, nonconductive paint and consult local codes or an electrician.
Can Pets or Insects Be Attracted to Fresh Paint on a Fan?
About 30% of pet owners report pets investigating fresh paint; yes, animals and insects can be attracted. You’ll want low-odor paint types and manage drying time properly, keeping pets away until fumes and tackiness vanish.
Conclusion
You can paint a ceiling fan, but do it like a surgeon: carefully, cleanly, and with respect for the machine. Choose the right paint for each part, mask moving pieces, and balance blades to avoid wobble. If the motor’s old or warranty matters, think twice. A fresh finish can lift the room like a sunrise, but sometimes replacement is the wiser, steadier choice—keep maintenance gentle and your renovated fan will hum like a renewed heartbeat.