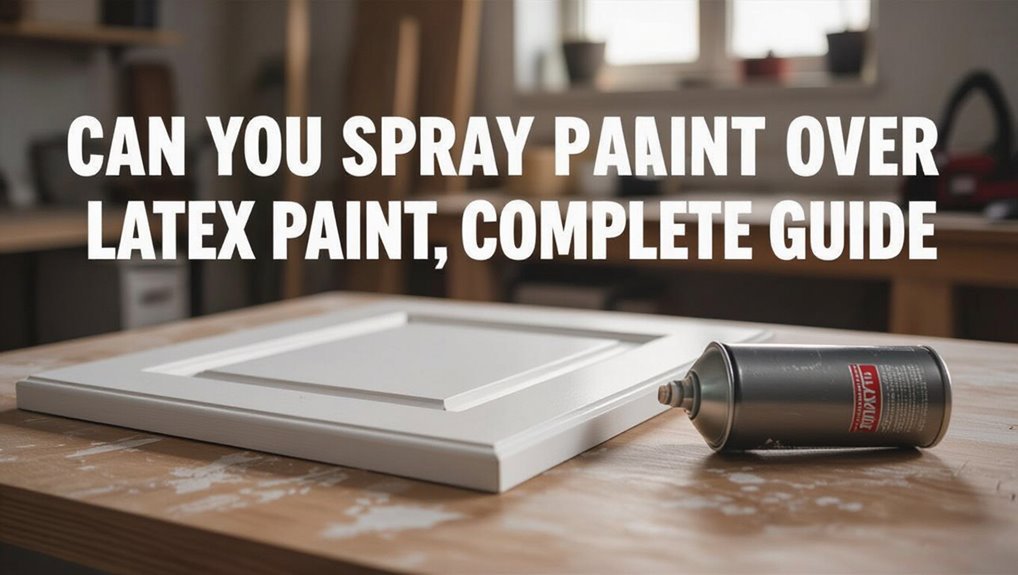
Can You Spray Paint Over Latex Paint? Complete Guide
Yes—you can spray paint over latex paint if you prep and pick compatible products. Start by cleaning, sanding, and deglossing glossy or chalky areas, then spot-prime glossy, stained, or patched spots with a bonding or stain-blocking primer. Use thin, overlapping spray coats 8–12 inches away, allow proper tack time, and watch temperature and humidity for good curing. Choose spray for large, smooth jobs and rollers for small textured areas, and keep reading to learn the full process.
Can You Spray Paint Over Latex Paint?
Yes—you can spray paint over latex paint, but you’ll get the best results when you prepare the surface first.
You’ll assess latex paint properties—gloss level, age, and cleanliness—then sand and degloss as needed. That prep improves spray paint adhesion and prevents peeling.
Prime glossy or oil-contaminated areas for consistent coverage, and make sure surfaces are dry and dust-free before spraying.
Quick Step-by-Step: Spray-Over Latex in 5 Minutes
Ready to transform your latex-painted surface in about five minutes?
First you’ll do quick prep—clean, sand lightly, and tack cloth—then decide if a bonding primer is needed based on gloss and adhesion.
Finally, use steady, overlapping passes with the sprayer, hold the recommended distance, and apply thin coats for even coverage.
Surface Prep Essentials
Before you pull the trigger, spend five minutes on basic prep so your spray finish bonds well and looks professional.
Wipe clean with a damp cloth, remove grease, and scuff glossy spots with fine sandpaper to equalize surface texture.
Tape edges, protect surroundings, and tack-rag to remove dust.
Short, focused prep boosts paint adhesion and prevents blemishes for a smooth spray job.
Primer Or No?
1 quick check will tell you whether you need primer: if the existing latex is glossy, stained, or patched, prime those areas first; if it’s flat, clean, and uniformly colored, you can usually spray directly with light scuffing and tack-cloth cleanup.
Consider primer effectiveness versus primer alternatives.
- Glossy or stained: prime.
- Flat, clean: skip.
- Mixed surfaces: spot prime.
Spray Technique Tips
If the surface checked out and you’ve prepped any glossy or patched spots, you can knock out a clean spray pass in about five minutes by working methodically: follow consistent strokes, keep 8–12 inches distance, overlap 50%, and let tack dry between coats. Use tested spray paint techniques and simple application methods.
| Step | Action |
|---|---|
| 1 | Shake can |
| 2 | Test spray |
| 3 | Spray pass |
| 4 | Wait tack |
| 5 | Recoat as needed |
When Spraying Over Latex Is a Good Idea
When you’re looking to speed up coverage, get a smoother finish, or tackle large, flat surfaces, spraying over existing latex paint can be a smart choice.
You’ll enjoy advantages of spraying and the latex paint benefits already present.
Consider situations where spraying excels:
- Uniform coverage on walls
- Fast application on cabinets
- Seamless touch-ups on trim
When You Should Avoid Spraying Over Latex
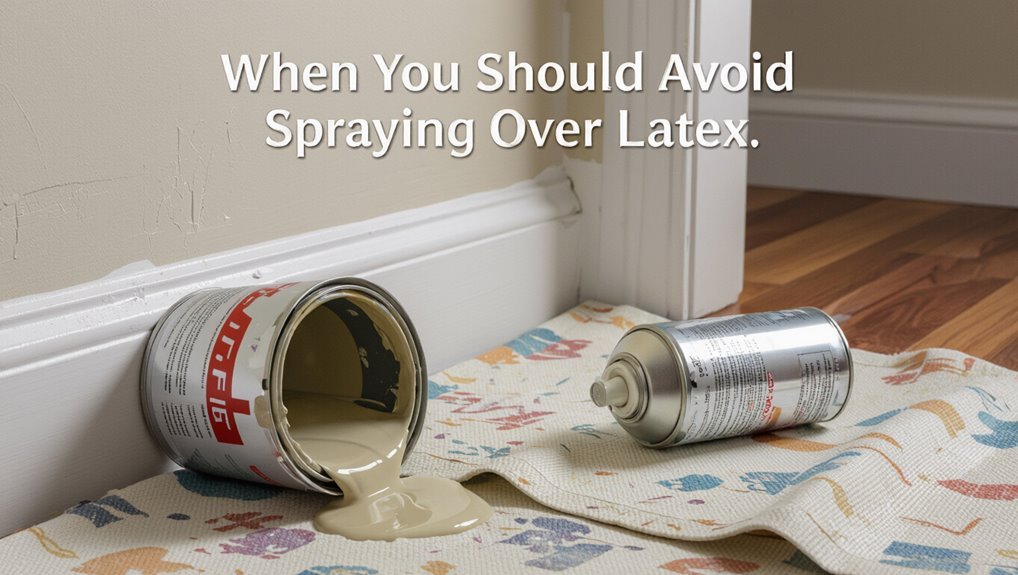
If the existing latex has a high-gloss finish, you shouldn’t just spray over it without sanding or scuffing first because the new coat won’t adhere well.
Also avoid spraying over damaged or flaking paint—loose areas need to be removed and repaired before you coat.
Skipping these prep steps will lead to peeling and a poor final result.
High-Gloss Latex Surfaces
Because high-gloss latex creates a very smooth, nonporous film, you’ll often get poor adhesion and visible defects if you try to spray new paint directly over it.
You should prep or avoid spraying when the surface shows the following:
- Untreated high gloss finish that repels primers.
- Areas where latex durability prevents bonding.
- Smooth trim or cabinets needing sanding or deglossing first.
Damaged Or Flaking Paint
Although it might seem faster to spray right over peeling or flaking latex, you shouldn’t—loose paint prevents proper adhesion and will cause the new coating to fail quickly.
You need to remove flaking paint, sand to sound substrate, and repair damaged surfaces before spraying. Spot-prime bare areas and use appropriate filler for gouges.
Skipping prep leads to bubbling, peeling, and wasted finish.
How Latex Paint Age and Condition Affect Adhesion
When you’re prepping a surface, remember that the age and condition of existing latex paint strongly determine how well a new coat will stick.
When prepping, consider existing latex paint’s age and condition — they largely dictate how well a new coat will adhere.
You’ll assess latex paint aging and key adhesion factors:
- Surface hardness — older, brittle layers resist bonding.
- Contamination — dirt or oils block adhesion.
- Flexibility — well-cured, slightly flexible paint accepts new coats better.
How to Test Paint Compatibility Before You Spray?
Now that you’ve checked the age, hardness, and cleanliness of the existing latex, you need to confirm that the new coating will bond and look right. Do small adhesion tests: clean, scuff, apply sample of different paint types, then tape test after curing. Compare finish and bonding before full spray.
| Test | Action | Result |
|---|---|---|
| Clean | Wipe | Ready |
| Scuff | Sand | Keyed |
| Sample | Spray | Cure |
| Tape | Pull | Pass/Fail |
Prep Checklist: What to Have Before You Start
Before you spray, make sure the surface is clean, dry, and free of grease or loose paint so the new coating will stick.
Gather your materials—tack cloths, mild detergent, sandpaper, primer, and compatible spray paint—plus tools like a respirator, drop cloths, and masking tape.
Having everything prepped saves time and prevents mistakes once you start spraying.
Surface Cleaning Essentials
1 clear, well-lit workspace and a short checklist will save you time and frustration—start by gathering the basics: a mild degreaser or TSP alternative, a bucket, clean rags or microfiber cloths, a soft-bristle brush or sponge, fine-grit sanding block (220–320), and protective gloves and goggles.
Follow focused cleaning methods to protect surface durability.
- Remove dirt/oil
- Scuff for adhesion
- Wipe residue away
Materials And Tools
You’ve cleaned and scuffed the surface; next, assemble the materials and tools that make the spray-paint job run smoothly. Gather primer, compatible spray paint, sandpaper, tack cloth, respirator, gloves, and drop cloths. Practice spray paint techniques on scrap to protect latex paint longevity.
| Item | Purpose |
|---|---|
| Primer | Adhesion |
| Spray paint | Finish |
| Sandpaper | Scuffing |
| Safety gear | Protection |
How to Clean Latex-Painted Surfaces for Spraying
If the surface looks clean but still feels grimy, you’ll need to remove that residue before you spray so the new finish bonds evenly.
You follow simple steps for latex paint care and ongoing surface maintenance. Clean with a mild detergent, rinse, and dry.
Follow simple latex paint care: wash with mild detergent, rinse thoroughly, and dry before proceeding.
Then:
- Degrease with TSP substitute.
- Rinse thoroughly.
- Let fully dry before priming or spraying.
How to Sand Latex Paint for Spray Adhesion
Once the surface is dry and free of grease, lightly sanding the old latex paint will give your spray a better grip and a smoother finish.
Use fine-grit (220–320) sandpaper or a sanding sponge, work evenly, and avoid penetrating to bare substrate.
Wipe dust with a tack cloth.
These sanding techniques boost adhesion improvement and help achieve uniform spray coverage without over-sanding.
Removing Loose or Flaking Latex Paint Safely
Because flaking paint can prevent new spray from adhering properly, you should remove all loose or peeling latex before priming or repainting.
Use safe removal techniques and protect yourself.
Steps to follow:
- Scrape loose areas with a putty knife, then sand edges smooth.
- Vacuum and wipe with a damp cloth to remove dust.
- Spot-treat stubborn spots with a chemical remover per instructions.
Choosing the Right Primer Over Latex
Before you spray, pick a primer that’s compatible with the surface—wood, drywall, or previously painted latex each have different needs.
Choose between bonding primers, oil-based, or shellac-based options based on adhesion and stain-blocking requirements.
Apply the primer evenly with the right tip and distance so you get full coverage and a good base for your topcoat.
Surface Compatibility
When you’re painting over existing latex, picking a primer that bonds to both the old finish and your new topcoat is essential; not all primers work equally on glossy or chalky latex.
You’ll assess surface texture and latex paint durability, then choose accordingly:
- Sand glossy areas for adhesion.
- Clean chalky surfaces thoroughly.
- Test a small area to confirm bonding before spraying.
Primer Types
Now that you’ve assessed the surface and handled glossy or chalky spots, pick a primer that will bond to the existing latex and accept your chosen topcoat.
Choose between acrylic, oil-based, shellac, or bonding primers based on primer types and required adhesion.
Check primer properties like drying time, flexibility, stain blocking, and compatibility with spray systems to guarantee a durable, smooth finish.
Application Technique
Choose the primer type that matches your surface and topcoat, then apply it with a consistent, even technique so it bonds to the existing latex and provides a smooth base for spraying.
You’ll focus on proper application methods and spray techniques.
Follow steps:
- Sand lightly, clean surface.
- Use thin, overlapping primer coats.
- Allow full dry/rehab time before topcoat.
Bonding Primer vs. Stain-Blocking Primer: When to Use Each
If your existing latex finish is glossy, stained, or particularly smooth, you’ll want a bonding primer to guarantee the new paint adheres.
Use bonding primer when adhesion is the main issue; its bonding properties help spray paint grip slick surfaces.
Choose a stain-blocking primer when tannins, water stains, or marker bleed-through threaten finish.
Match primer applications to the problem for best results.
Can You Use Shellac or Oil Primers Over Latex?
Because latex paints form a water-based, flexible film, you can put shellac- or oil-based primers over them—but you’ll need to scuff the surface and guarantee it’s clean and fully cured first.
You’ll see shellac compatibility with stubborn stains and oil primer benefits for adhesion.
Steps to follow:
- Scuff and clean.
- Spot-prime problem areas.
- Apply thin, even primer coats.
Best Spray Paint Formulas for Latex Bases (Acrylic, Enamel, Lacquer)
When you’re spraying over latex, acrylic sprays are usually your safest bet because they bond well and keep flexibility.
You can use enamel for tougher, glossier finishes, but expect longer cure times and the need for good adhesion prep.
Lacquer gives a fast, hard shell but can react with some latex surfaces, so test a small area first.
Acrylic Over Latex
Although latex creates a flexible, water-based film, you can successfully apply acrylic spray paint over it if you prep correctly and choose compatible formulas.
You’ll get improved acrylic texture and acrylic durability when you:
- Sand, clean, and prime for adhesion.
- Use 100% acrylic sprays labeled latex-friendly.
- Apply thin, even coats, allowing full dry time between layers.
Enamel And Lacquer
1 key advantage of enamel and lacquer sprays over latex is their hard, durable finish, but you’ll need proper prep to make them stick and perform.
You should sand, clean, and prime latex first. Enamel finishes resist chips; lacquer durability gives fast cure and a smooth, glossy surface.
Use compatible primers and test adhesion on a small area before full application.
How to Choose Spray Paint Finish and Sheen Over Latex
Choosing the right finish and sheen for spray painting over latex matters because it affects appearance, durability, and how well the new coat hides imperfections.
You’ll want to match the finish to the piece’s use and lighting—flat or matte for hiding flaws, satin for a soft, durable look, semi-gloss for trim and high-traffic areas, and gloss where maximum shine and washability are required.
Consider finish types and sheen levels:
- Durability vs concealment
- Lighting and aesthetic
- Maintenance and cleaning
Prep for Common Surfaces: Wood, Metal, Plastic, Drywall
Prep for each surface—wood, metal, plastic, and drywall—starts with cleaning, scuffing, and addressing damage so the spray paint bonds and looks even.
For wood preparation, sand, fill, and prime for surface adhesion.
Use metal treatment that removes oils and etches before priming.
Employ plastic sanding and a plastic primer for paint compatibility.
For drywall cleaning, patch, dust, and use appropriate spray techniques.
Spraying Painted Metal: Rust, Prep, and Primers
When you’re spraying over painted metal, start by knocking down rust with a wire brush or sandpaper until you reach clean, solid metal.
After removing loose corrosion, wipe the surface clean and apply a rust-inhibiting primer suited to the metal and topcoat—zinc or epoxy primers for heavy rust, self-etching or acrylic primers for light rust or bare spots.
Choosing the right primer guarantees adhesion and long-term protection before you spray your latex-compatible topcoat.
Rust Removal Steps
Start by evaluating the metal for surface rust, loose paint, and pitting so you know what level of removal is required before spraying.
Then follow clear rust removal steps to enable proper rust treatment and long-term rust prevention:
- Sand or wire-brush to bare metal.
- Clean debris and oil with solvent.
- Apply a rust converter where pitting remains, then allow to dry before painting.
Primer Selection Guide
Because the right primer determines adhesion, corrosion protection, and the smoothness of your finish, pick one formulated for metal and compatible with both the existing latex and your chosen topcoat.
Assess primer characteristics like bonding, rust inhibition, and flexibility. Match primer applications to conditions: self-etch for bare metal, epoxy for heavy corrosion, or acrylic for light rust and repainting.
Apply per manufacturer directions.
Spray Painting Latex-Painted Plastic: Special Tips
Tackle spray painting latex-painted plastic by first evaluating adhesion and surface texture so you know whether extra prep is needed.
Test spray paint compatibility on a hidden area, sand lightly if texture is slick, and use a plastic primer if adhesion fails.
Consider latex paint finishes and dry times to avoid runs.
- Test
- Sand
- Prime
How to Prep Glossy Latex Surfaces for Spraying
If your test spot showed good adhesion after light sanding and priming, prepping a glossy latex surface for spraying mainly means scuffing, cleaning, and removing any gloss that will cause the new paint to bead.
You’ll use glossy surface techniques: sand with fine grit, wipe with solvent or degreaser, and apply a bonding primer.
These adhesion improvement methods guarantee even spray application and durability.
Masking and Protecting Surrounding Areas From Overspray
Before you start spraying, protect every surface you don’t want painted by masking and covering them thoroughly—use painter’s tape along edges, plastic sheeting or drop cloths over furniture and floors, and paper or cardboard for trim and fixtures.
Use these masking techniques for overspray control:
- Seal seams tightly.
- Cover vents and hardware.
- Create a makeshift drop zone with weighted edges.
Best Temperature, Humidity, and Ventilation for Spray Painting
Masking prevents overspray, but proper environmental conditions determine how well the new coat of paint will lay down and cure.
You should prioritize temperature control: aim for 50–85°F.
Monitor humidity impact; keep relative humidity under 60% to prevent blushing and slow cure.
Guarantee ventilation importance by providing steady airflow to disperse fumes and speed drying.
Those ideal conditions yield smooth, durable results.
How to Apply Spray Paint in Thin, Even Coats
Start by holding the can or gun about 8–12 inches from the surface and move it in steady, overlapping strokes so each pass covers roughly 50% of the previous wet area.
You’ll control coat thickness with patience and consistent speed.
Follow spray paint techniques precisely:
- Keep motion steady.
- Apply multiple thin passes.
- Inspect and correct light spots promptly.
Dry Times: Primer, Base, and Top Coats
Dry times vary by product, temperature, and humidity, so you’ll want to plan each stage—primer, base coat, and top coat—rather than rush between them.
Check manufacturer specs for dry time factors like temp, humidity, and coat thickness.
Use proper layering techniques: apply thin primer, wait recommended cure, then base coats, and finish with top coat.
Don’t overload layers; allow recommended cures.
How Long to Wait Between Coats and Before Handling
After you’ve followed the manufacturer’s dry and cure times for primer and base coats, plan the wait between subsequent coats and before you handle the piece—rushing can ruin finish and adhesion.
Use recommended drying times and these handling tips:
- Wait stated recoat window (often 15–60 minutes).
- Allow full tack-free time before light handling.
- Cure fully (days) before heavy use.
How to Spray Large Furniture Versus Small Trim
One key difference when spraying large furniture versus small trim is scale: you’ll use wider, more even passes and a higher-volume spray pattern on big pieces, while tight passes and a finer pattern work best for delicate trim.
Adjust distance, speed, and overlap to match furniture sizes. Practice spray techniques on scrap, control drips on edges, and mask nearby areas for clean lines.
When and How to Sand Between Spray Coats (Dry vs. Wet)
While you can skip sanding between some spray coats, you’ll usually get a smoother, more durable finish if you sand to remove dust nibs, runs, and raised grain before recoating.
Use proper sanding techniques and respect drying times.
Choose:
- Light dry sanding (220–400 grit) for cured coats.
- Wet sanding (1000–2000 grit) for lacquer-like smoothness.
- Tack cloth and blow-off before next coat.
How to Avoid Runs, Orange Peel, and Common Finish Problems
Prevent runs, orange peel, and other finish problems by controlling three things: spray technique, material setup, and environment.
Use steady, overlapping passes, correct tip size, proper thinning, and consistent pressure for run prevention.
Keep temperature and humidity within product specs, mask and ventilate the area, and allow flash time between coats.
These steps guarantee finish enhancement and a smooth, durable topcoat.
Fixing Adhesion Failures and Peeling After Spraying
If your new finish is peeling or flaking, you’ll want to inspect the surface for missed sanding, failed deglossing, or leftover contaminants.
Gently scrape loose paint, sand to sound edges, and clean the area before spot-priming.
Then feather the repair into the surrounding finish and respray to guarantee proper adhesion.
Identify Poor Surface Prep
Paint failure usually starts with the surface—not the sprayer—so when you see peeling, blistering, or large areas where the new coat won’t bond, suspect poor prep.
You’ll spot surface imperfections and adhesion issues by checking:
- Loose or flaky paint
- Shiny, glossy patches resisting primer
- Dirt, oil, or mildew preventing contact
Address causes before repainting to avoid repeat failures.
Repair Peeling And Flaking
When you see peeling or flaking after spraying, start by removing all loose material and tracing the damage back to its source so you can fix the real problem, not just the symptoms. Use proper peeling techniques: sand, clean, prime. Apply flaking solutions: adhesion primer, flexible topcoat. Table for quick steps:
| Step | Action | Product |
|---|---|---|
| 1 | Remove | Scraper |
| 2 | Prep | Sand/clean |
| 3 | Seal | Primer/topcoat |
Achieving a Smooth, Professional-Looking Finish (Tips & Tools)
Although latex paint gives you a solid base, getting a smooth, professional-looking finish means using the right prep, tools, and technique—clean and sand the surface, choose a compatible primer, pick the correct spray tip and pressure, and maintain steady, overlapping passes to avoid runs and orange peel.
Although latex provides a good base, proper prep, primer, tip/pressure, and steady overlapping passes yield a smooth, professional finish.
Use proper spray paint techniques and respect surface textures.
- Use tack cloths.
- Adjust tip/psi.
- Keep consistent motion.
Clear Coats and Sealers for Latexed Surfaces
After you’ve achieved a smooth base with proper sanding, primer, and spray technique, protecting that finish with the right clear coat or sealer will keep it looking professional and durable. You’ll weigh clear coat options—acrylic, polyurethane, or water-based—and choose based on sheen and durability. Sealer benefits include UV resistance and scratch protection; apply thin even coats for best adhesion.
| Type | Benefit |
|---|---|
| Acrylic | Fast drying |
| Polyurethane | Durable |
| Water-based | Low odor |
| Wax | Easy buffing |
Safety: Ventilation, PPE, and Disposing Spray Cans
Because spray painting releases fumes and fine particles, you should work somewhere with strong ventilation—ideally outdoors or in a well-ventilated garage with cross‑drafts—or use a respirator rated for organic vapors and particulates if you’re inside.
Emphasize ventilation importance and PPE essentials.
Follow these steps:
- Wear respirator, gloves, goggles.
- Keep fans/airflow moving.
- Empty cans per local hazardous-waste rules.
Estimating Coverage and How Much Spray Paint You Need
A single 12-ounce spray can typically covers about 8–10 square feet per coat.
For coverage estimation, measure surface area, account for overlap and multiple thin coats, and divide by per-can yield. Roughly 1 can per 8–10 sq ft per coat is safe; smooth, nonporous surfaces use less.
Factor in waste and touch-ups to calculate total spray paint量 before you start.
When to Choose Brush/Roller or Spray Over Latex
When deciding whether to brush/roll or spray over latex, consider the size and detail of the surface—large, flat areas favor spraying, while trim and textured spots often need a brush or roller.
Also check paint compatibility so you don’t get adhesion or finish issues between latex and your chosen topcoat.
Finally, factor time and the finish you want: spraying is faster and smoother, brushing/rolling gives more control and thicker coverage.
Surface Size And Detail
You’ll pick your application method largely by matching the tool to the surface’s size and detail: use a brush or small roller for tight corners, trim, and textured or ornate areas where control matters, and choose a spray for large, flat surfaces where speed and uniform coverage are priorities.
Consider:
- Small, detailed areas — brush for control, mindful of surface texture and paint absorption.
- Medium panels — roller balances speed and finish.
- Large expanses — spray for uniformity and efficiency.
Paint Type Compatibility
Matching your application method to surface size and detail also means matching it to the paint types involved; some paints work well with a brush or roller over existing latex, while others demand spraying or special prep.
You’ll weigh paint adhesion factors and surface texture effects: use brush/roller for smooth, small areas and compatible alkyd or latex, spray for primers, enamels, textured or large surfaces needing thin, even coats.
Time And Finish Goals
If you need a fast, uniform finish over a large area, choose a sprayer; if you’re touching up small spots or want precise control over edges, grab a brush or roller.
You’ll balance time management and finish durability when deciding.
Consider:
- Sprayer: fastest, smoothest for big surfaces.
- Roller: good speed, moderate texture, durable.
- Brush: precise, slower, best for edges.
Project Timelines: Quick Refresh vs. Full Refinishing
When you’re deciding between a quick refresh and a full refinishing, think regarding time, disruption, and goals: estimate project duration honestly.
A quick refresh uses light sanding, primer touch-ups, and spray coats—minimal downtime and several refresh options.
Full refinishing requires stripping, thorough prep, and multiple dry times, delivering durable results but longer disruption.
Choose based on urgency, budget, and desired longevity.
Low-VOC and Eco-Friendly Spray Options for Latex Surfaces
Because air quality and safety matter as much as finish, you’ll want to choose low-VOC and eco-friendly spray options when working over latex surfaces.
You can pick products offering eco friendly alternatives and clear low voc benefits.
Consider:
- Water-based aerosol for low odor and quick cleanup.
- Plant-derived solvent sprays for reduced toxins.
- Low-VOC acrylics for durability and minimal emissions.
Quick Troubleshooting Checklist for Spraying Over Latex
Before you spray, run through a quick surface prep checklist to confirm the latex is clean, dry, sanded where needed, and primed if glossy.
If the finish still looks uneven or the sprayer sputters, check nozzle size, thinning ratio, and air pressure.
Keep these two simple checks handy so you can troubleshoot problems fast and get back to a smooth coat.
Surface Prep Checklist
A short checklist can save hours of rework, so run through these surface-prep items before you spray:
- Clean thoroughly — remove grease, dust, and chalking to protect paint adhesion.
- Sand lightly to even out surface texture and feather edges of glossy latex.
- Prime any bare spots or stains with a compatible primer to guarantee uniform coverage and bond.
Sprayer Troubleshooting
Troubleshoot your sprayer quickly to keep your latex job moving—common issues like sputtering, uneven spray, or clogs usually have simple fixes you can check in minutes.
Start with sprayer maintenance: clean filters, hoses, and the spray nozzle.
Check paint thinning, pressure settings, and wand seals.
Run water or solvent through before each use, and replace worn tips to restore consistent coverage.
Frequently Asked Questions
Can Spray Paint Over Latex Be Used Outdoors Long-Term Without a Topcoat?
No, you shouldn’t—spray paint over latex alone won’t provide reliable outdoor durability or long-term weather resistance; you’ll need a compatible clear topcoat to prevent fading, peeling, and UV or moisture damage for lasting protection.
Will Spray Painting Over Latex Change Fire Resistance or Flammability?
Right off the bat, it won’t move the needle much — you’ll still need to mind fire safety and paint compatibility; solvent-based spray can raise flammability slightly, so follow labels, ventilate, and use appropriate topcoats.
How Does Spray Painting Affect Warranty or Insurance for Painted Furniture?
You’ll likely void manufacturer warranty implications if you alter finishes without approval, and insurance coverage may exclude damage from DIY modifications; document changes, use approved methods, and check policies to avoid denied claims or disputes.
Can I Mix Leftover Spray Paint With Latex for Touch-Ups?
No, you shouldn’t mix leftover spray paint with latex — they’re usually incompatible. For reliable spray paint compatibility and touch up techniques, strip or prime the area, use matching product types, and test on a scrap before finishing.
Are There Spray Techniques to Mimic Brushed or Rolled Texture Over Latex?
Yes — you can. Imagine surprising depth: you’ll use spray paint techniques like misting, stippling, and controlled back-and-forth passes to create brush or roller texture effects, layering light coats and blending edges until the illusion’s convincing.
Conclusion
You can spray paint over latex in many cases, but don’t rush—prep matters. If the latex is clean, dry, and in good shape, a light scuff followed by primer (when needed) usually does the trick; otherwise, patch or strip first. For quick refreshes, spraying’s a time-saver; for heavy wear or poor adhesion, go with brush/roller or full refinishing. Keep safety and ventilation in mind, and you’ll avoid headaches down the road—don’t fix what ain’t broke.