How Long Does Chalk Paint Take to Dry on Wood
Chalk paint usually feels dry to the touch within 20–60 minutes, and you can typically apply a second thin coat after about 2–4 hours in normal room conditions. Thinner coats, good airflow, moderate heat (65–75°F) and low humidity speed drying; thick coats, high humidity or dense wood slow it. Expect full cure and maximum hardness in 1–3 weeks, with gentle use after a week — keep going for tips on speeding, prepping, and sealing for best results.
Quick Answer: Typical Chalk Paint Drying and Curing Times
While exact times vary with brand and conditions, chalk paint typically feels dry to the touch within 30 minutes to an hour and is ready for light handling in 1–2 hours. However, expect full curing and maximum hardness to take 2–3 weeks before heavy use or waxing.
You’ll find drying speeds influenced by temperature, humidity, and coat thickness. Thin coats dry faster, so you’ll usually apply two thin layers rather than one thick one.
Choose your color options knowing pigment can affect dry appearance, and experiment with texture effects like distressing or waxing after full cure for best, durable results.
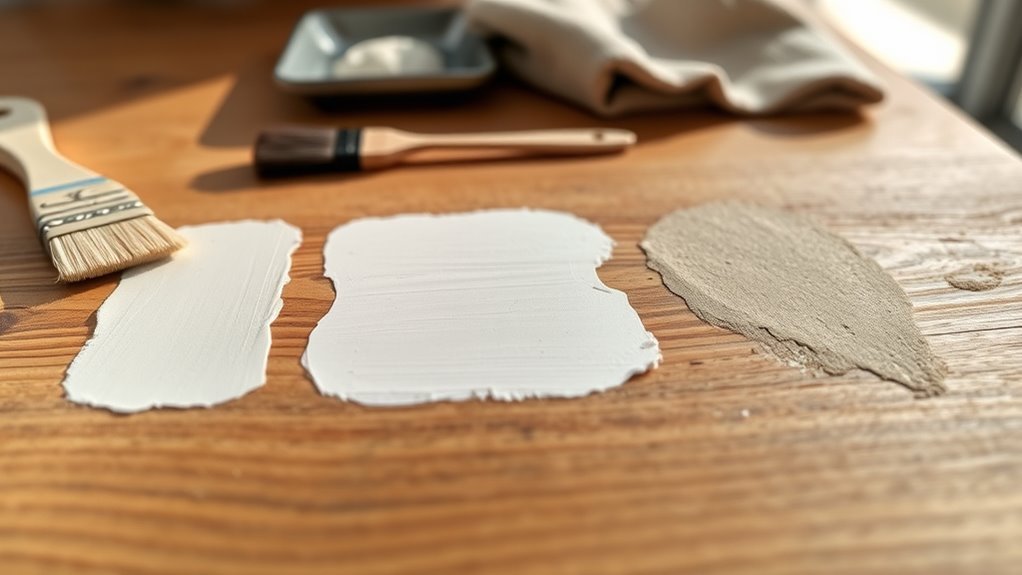
Chalk Paint: Surface-Dry vs. Touch-Dry vs. Ready for Second Coat
You’ll notice chalk paint often feels surface-dry within 20–30 minutes, but that doesn’t mean it’s prepared for everything.
Touch-dry is when it won’t transfer to your fingertip, which can occur within an hour depending on temperature and humidity.
Wait the manufacturer’s recommended recoat time—typically 2–4 hours—to guarantee the layer beneath won’t lift or gum up when you apply a second coat.
Surface Dry Time
Wondering how long chalk paint needs before you can touch it or add another coat? Surface dry time—when the paint no longer feels tacky—usually occurs within 20–60 minutes depending on temperature, humidity, and paint thickness.
Lighter color options may show drying signs faster than deep pigments, and textured furniture styles can trap moisture longer. You’ll gently test a hidden edge: if no paint transfers and the finish feels set, it’s surface dry.
Don’t confuse this with full cure; surface dry just means you can lightly handle the piece or proceed with delicate tasks without disturbing the finish.
Ready For Recoat
Now that you know how to check for surface dryness, you’ll want to distinguish between surface-dry, touch-dry, and truly ready for a second coat—each matters when planning your next step.
Surface-dry means the paint feels dry to the touch but solvents remain beneath.
Touch-dry is slightly firmer but still vulnerable to denting.
Truly ready for recoat requires full cure of the previous layer’s top solvents, usually after 2–4 hours or longer in cool or humid conditions.
Wait for this before layering for color blending or using decorative techniques, or you’ll risk lifting, streaks, or poor adhesion.
How Many Coats of Chalk Paint and How Long Between Them
Because the number of coats you need depends on the paint color, coverage, and finish you want, plan for at least two thin coats of chalk paint on most wood surfaces, letting each coat dry to the touch before applying the next—typically 30 minutes to an hour for thin layers, longer for thicker applications or in humid conditions.
You’ll add extra coats for deep color options or to achieve a uniform finish. Wait longer between coats if sanding, distressing, or using layered painting techniques.
Final cure takes days; allow 24–48 hours before light use and up to two weeks for full hardness.
Tools and Application: Brushes, Rollers, and Sprayers’ Effect on Drying
Once you’ve decided on coats and timing, the tools you use will directly affect how quickly chalk paint dries and how it feels under your hand.
You’ll find brushes lay paint thicker around strokes, so drying can be uneven; choose a high-quality synthetic brush and practice Brush cleaning to maintain smooth bristles.
Rollers give a more consistent texture and speed up tack-free time but can trap air if over-rolled.
HVLP sprayers atomize paint for the thinnest, fastest-drying film and help with fine Color mixing, though they need masking and careful thinning.
Match your tool to the piece and environment.
Coat Thickness: Why Thinner Coats Dry Faster on Wood
If you apply thinner coats of chalk paint, they’ll dry faster because less solvent and water have to evaporate and heat can penetrate the film more quickly. You’ll notice thinner layers cure to touch sooner, letting you sand, distress, or layer colors for color mixing without long waits.
Thinner coats also reduce drips and pooling on furniture restoration projects, giving a smoother, more predictable finish. Apply multiple thin passes rather than one heavy coat, keeping drying times consistent and avoiding tacky middles.
Use light brush strokes or a foam roller and allow recommended intervals between coats for best results.
Soft vs. Hard Chalk Paint: Drying and Durability Differences
You’ll notice soft and hard chalk paints have different binder mixes—soft formulas feel creamier while hard ones have more resin. That change in composition usually makes hard paints dry a bit faster to a touch and hold up better against wear.
Consider soft paint for easy distressing and hard paint when you need greater durability and abrasion resistance.
Soft Vs. Hard Composition
Although both are called chalk paint, soft and hard formulations behave quite differently on wood: soft chalk paint dries to a velvety, matte finish that’s more forgiving to brushstrokes and sanding.
Hard chalk paint sets firmer and resists dents, making it better for high-traffic pieces.
You’ll notice texture variation immediately: soft blends and cushions imperfections, while hard emphasizes surface details.
Color fading can occur differently; softer binders may hold pigments less rigidly, so UV and abrasion affect hue faster.
Choose soft for decorative, low-use items; pick hard for functional furniture where durability and long-term color retention matter.
Drying Time Differences
When comparing soft and hard chalk paints, expect notable differences in how fast they dry and how long the finish lasts. You’ll notice soft formulas dry quicker to the touch, letting you do color blending and light layering sooner. However, they remain slightly tacky longer before curing.
Hard chalk paints take more time to set initially yet form a firmer surface faster during handling. This helps with texture enhancement techniques like distressing.
Plan your workflow: use soft paints for rapid glazing and blending, and choose hard paints when you need stable, workable surfaces for shaping or adding pronounced texture details.
Durability And Wear
Having chosen between soft and hard chalk paints based on drying behavior, you’ll also want to weigh how each formula stands up to daily wear.
Soft chalk paint gives a matte, velvety finish that highlights wood texture but scuffs more easily; you’ll need frequent touch-ups or a protective wax.
Hard chalk paint cures tougher and resists dents, making it better for tabletops and high-traffic pieces, though it can mask some grain.
For longevity, pair soft paint with clear sealer or wax, and consider hard paint for surfaces that demand durability.
Test on scrap wood to confirm feel and appearance.
Chalk Paint vs. Latex and Oil: Drying on Wood Explained
If you’re comparing chalk paint to latex and oil on wood, the main differences come down to formulation and curing.
You’ll notice chalk paint dries fast to touch and offers matte finish sheen and easy color customization, but it cures slower beneath the surface.
Latex dries quickly by water evaporation and rehardens faster in typical conditions.
Oil dries by oxidation and can feel tacky for days.
- Chalk: quick to touch, needs sealing for durability.
- Latex: fast recoat times, flexible.
- Oil: deep adhesion, longest curing.
Choose based on project pace, desired look, and use conditions.
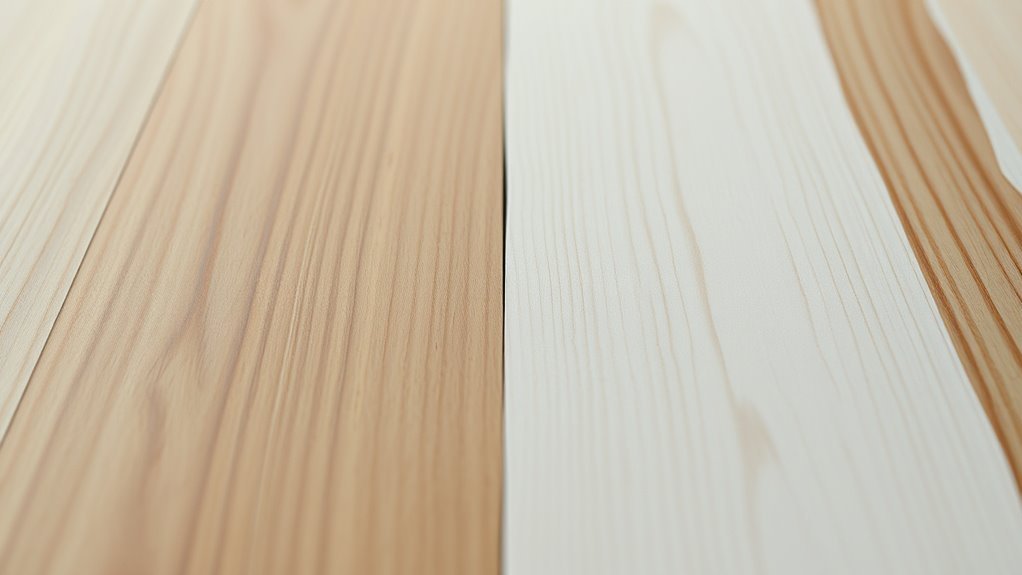
Wood Species and Porosity: What Speeds or Slows Drying
Different woods soak up chalk paint at different rates, so you’ll notice grain density affects how quickly a coat dries.
Open, porous surfaces like pine or oak can pull paint in and speed surface drying but may need more coats and longer cure times overall.
Tight-grained, less porous species such as maple or birch tend to keep paint on the surface, giving you a slower, more even dry.
Wood Grain Density
Because wood species vary in pore size and grain density, the type of wood you’re painting has a big impact on how fast chalk paint dries. You’ll notice open-grained woods soak paint, speeding initial set but risking longer cure, while tight-grained woods keep paint on the surface, slowing absorption and prolonging tackiness.
Consider grain when planning finish effects and drying time, especially if you want consistent color blending or texture enhancement.
Tips to manage drying:
- Sand lightly to moderate absorption without losing grain character
- Test a small area to gauge set and cure
- Use thin coats for even drying and finish control
Surface Porosity Levels
How quickly chalk paint dries on wood often comes down to surface porosity—how many microscopic channels the wood offers for moisture to travel. You’ll notice softwoods like pine soak paint faster, so the surface feels dry sooner but may need more coats to avoid blotching.
Dense hardwoods like maple slow evaporation, extending tack time and risking dust nibs. Sanding, sealing, or using a thinned primer evens absorption and supports consistent color blending and smooth layers.
For decorative techniques such as distressing or glazing, test small areas first; adjust drying expectations by species and prep to get predictable results.
Surface Condition: Raw, Sanded, or Sealed Wood and Drying Impact
When you’re deciding whether to paint raw, sanded, or sealed wood, the surface condition has a direct effect on how quickly chalk paint dries and how it cures. You’ll notice raw wood soaks paint, speeding initial dry but risking uneven finish. Sanding evens absorption for predictable cure times. Sealed wood repels, lengthening tack time and requiring thinner coats.
Consider how Color mixing affects consistency and how Shelf life influences performance—older paint may dry differently.
Tips:
- Test a small area to gauge absorption and final sheen.
- Use light sanding between coats on sealed surfaces.
- Allow extra cure time for dense woods.
Room Temperature: Ideal Ranges and How It Changes Drying Times
Surface temperature and finish prep affect drying, but room temperature plays a bigger role in how quickly chalk paint sets and cures. You’ll want a steady 65–75°F (18–24°C) for predictable touch-dry times and proper cure development.
Cooler rooms slow solvent evaporation, extending tackiness and recoat intervals, while hotter rooms speed surface dry but can trap solvents below the skin. Don’t buy into Chalk paint myths that claim extreme heat or cold won’t matter—temperature directly influences film formation and Color retention over time.
Aim for consistent moderate warmth to balance drying speed with durable finish performance.
Humidity and Ventilation: Controlling Curing and Tackiness
Although humidity and airflow often get overlooked, they directly control how tacky chalk paint feels and how fast it cures. High moisture slows solvent evaporation and keeps paint soft, while dry, well-ventilated air speeds drying but can cause the surface to skin over before solvents escape. You should manage humidity and ventilation to balance cure time and finish.
Consider:
- Use dehumidifiers or open windows to lower moisture for faster recoat and firming.
- Increase airflow with fans to prevent long tacky periods, but avoid direct blasts that cause skinning.
- Monitor conditions like a pro; historical techniques relied on timing and controlled environments.
Also think about color options when planning drying conditions.
Quick Chalk Paint Dry Tests You Can Do Now
If you need to know how quickly chalk paint will dry before committing to a full project, run a few simple tests on a scrap piece of wood. Try different Color options and Brush techniques to mirror your final look. Time thin vs. thick coats, note tackiness, and test drying in varied humidity or airflow. Record results and adjust your approach.
| Test | Result |
|---|---|
| Thin coat | 20–30 min |
| Thick coat | 1–2 hrs |
| Brushed stroke | 30–45 min |
| Layered coats | 2–4 hrs |
| High humidity | Slower drying |
When to Sand, Distress, or Wax After Painting
Once your chalk paint feels dry to the touch, you can lightly sand to smooth brush marks or refine edges—wait until it’s fully cured if you want deeper sanding.
If you’re aiming for a distressed look, sand after the paint is dry but before waxing so you can expose raw wood cleanly.
Apply wax only after sanding is finished and the paint has cured enough to resist tackiness, or it’ll trap grit and smear your finish.
When To Sand
Decide whether to sand only after the paint is fully dry to touch and no longer tacky—usually several hours for chalk paint, but up to 24 hours for heavier coatings—because sanding too soon can gum up your sandpaper and ruin the finish.
You’ll sand to refine edges, reveal layers for distressing, or prep for a topcoat. Consider testing a hidden area first.
Think about color mixing results and how sanding alters tones; plan texture enhancement where needed.
- Start with fine-grit for light smoothing.
- Use coarser grit for deliberate distressing.
- Clean dust thoroughly before next step.
When To Wax
After you’ve sanded and checked your distressing, plan waxing only when the paint is fully cured to the touch and any sanding dust is completely removed—typically several hours to 24 hours depending on thickness.
You’ll test small areas: press lightly to ensure no tackiness. If you want a matte or satin finish, choose a clear or tinted wax among color options to enhance depth.
Work thin, using circular motions and a soft cloth, buffing excess away. Wax seals, so address any future paint removal before applying.
Recoat only after manufacturer’s recommended cure time to avoid trapping solvents.
When to Apply a Topcoat or Sealer: Timing and Choices
When your chalk paint feels dry to the touch and has cured long enough to resist pressure, it’s time to plan a topcoat or sealer—waiting too little risks lifting or tackiness, while waiting too long can make adhesion harder.
You’ll choose based on desired sheen, durability, and whether you’ve done color mixing or furniture reshaping that affects texture. Consider these options:
- Wax for soft, low-sheen protection and easy spot repairs.
- Polyurethane (water-based) for clear, durable, non-yellowing finish.
- Polycrylic or lacquer for faster cure and harder surface.
Test your chosen sealer on an inconspicuous area before full application.
How Long Before Light Handling, Heavy Use, or Weight-Bearing
Once you’ve sealed your piece, plan how long to wait before light handling, heavy use, or putting weight on it—rushing can damage the finish, while waiting too long isn’t usually necessary.
After sealing, wait before handling—rushing can harm the finish; a short, mindful pause protects your work.
For light handling like rearranging or gentle dusting, wait 24–48 hours so the sealer bonds. Different color options or finishes don’t change this basic wait.
For regular use—drawer opening, occasional sitting—give at least 72 hours.
For heavy use or weight-bearing, wait a full week to allow initial hardness.
Use gentle cleaning methods initially, avoid harsh scrubs, and test a hidden spot before full use to ensure durability.
Full Cure Times: When Chalk Paint Reaches Peak Durability
Although the paint may feel dry to the touch within hours and handleable within days, chalk paint typically needs 2–4 weeks to reach full cure and peak durability. During this period, the binders continue cross-linking and the finish gradually hardens. You should avoid heavy use until cure completes, and remember that temperature and humidity affect timing.
Consider surface protection while waiting. Pay attention to Color options—darker pigments can show wear differently—and maintain brushes and rollers as part of Tool maintenance so future applications stay consistent.
- Expect gradual hardness increase
- Plan gentle use after one week
- Inspect before heavy duty use
Five Ways to Safely Speed Drying Without Harming the Finish
You can safely speed up chalk paint drying by improving air circulation and managing temperature and humidity.
Open windows or use a fan to move air across the piece, and keep the room warm but not hot.
Aim for stable, moderate humidity—too dry or too damp will hurt the finish.
Increase Air Circulation
If you want your chalk paint to dry faster without risking streaks or tackiness, boosting air circulation is one of the safest moves you can make. You’ll help solvents evaporate evenly, preserving color consistency and preventing tacky spots.
Use gentle airflow so brush techniques remain effective and texture isn’t disturbed. Try these simple steps:
- Position a fan to move air across, not directly onto, the painted surface.
- Open windows to create a cross-breeze when weather allows.
- Use a small, oscillating fan for larger pieces to maintain even drying.
Monitor the finish; adjust airflow if you notice dust or uneven sheen.
Control Temperature And Humidity
When you control temperature and humidity, chalk paint dries more predictably and finishes stay smooth, so it’s worth adjusting your environment before you start. Set a stable, moderate temperature (65–75°F) and keep humidity around 40–50% so paint cures evenly and sanding or distressing for furniture restoration won’t lift tacky layers.
Use a humidifier or dehumidifier, plus a heater or AC, to avoid rapid shifts. Avoid heat sources that create hotspots. Monitor with a thermometer/hygrometer and wait longer when conditions are outside range.
Proper climate control also preserves true Color mixing results and prevents bloom or blushing.
When to Avoid Heat, Dehumidifiers, or Rapid-Dry Tricks
Although speeding up drying seems tempting, there are clear situations where you shouldn’t use heat, dehumidifiers, or other rapid-dry tricks on chalk-painted wood. You risk trapping solvent, causing uneven cure, or causing finish failure if conditions aren’t right for the chalk paint drying process.
Resist forced drying—heat or dehumidifiers can trap solvents and ruin chalk-painted wood’s cure.
Avoid forced drying when:
- The piece has multiple thick coats that need gradual solvent release.
- You’re working with delicate joins, veneers, or old finish layers prone to cracking.
- Ambient temperature swings or direct heat sources could warp or blister the wood.
When in doubt, stick to stable, moderate conditions so the paint can cure evenly.
How Thinning Chalk Paint Changes Drying and Coverage
Thinning chalk paint with water or a commercial reducer changes both how it lays down and how fast it dries, so you’ll want to adjust your technique and expectations accordingly.
You’ll notice thinner paint levels smoother, flows into grain, and shows more subtle Color options—faded tints appear more transparent.
Dry time shortens on the surface but may feel tacky longer underneath.
Use softer Brush types to avoid streaks; foam or synthetic bristles work best for thinned mixes.
Thin cautiously: start with small ratios, test on scrap wood, and let altered drying behavior inform sanding, distressing, and topcoat timing without rushing.
Typical Number of Coats for Furniture and Timing Between Coats
If you want a smooth, durable finish on furniture, plan for two to three coats of chalk paint: one thin base coat to cover the wood and two slightly thicker coats to build opacity and even out brush marks.
Wait 30–60 minutes between thin coats at room temperature; longer if humid.
Lightly sand between coats only if you see brush texture.
For aged or reclaimed wood, allow extra drying time because wood aging can draw moisture.
- First coat: thin, quick coverage
- Second coat: build opacity
- Optional third coat: perfect for deep color
Finish with a protective wax or sealer.
Common Mistakes That Keep Chalk Paint Tacky Longer
If your wood isn’t cleaned and sanded first, the paint won’t adhere properly and can stay tacky.
Applying chalk paint in thick layers also traps moisture and greatly slows drying.
Fix the surface and use thinner coats so each layer dries on schedule.
Poor Surface Preparation
When you skip cleaning, sanding, or priming, chalk paint won’t stick or dry evenly and you’ll end up with tacky patches that linger; you must prepare the wood so paint bonds and cures. Remove grease, sand glossy finishes, and use a suitable primer for tricky surfaces.
Also consider factors like Color mixing ratios and Tool maintenance so application stays consistent.
- Clean surface thoroughly: no dust, wax, or oil.
- Sand and degloss: create tooth for adhesion.
- Prime when needed: seals porous or problematic wood.
Do the prep and you’ll avoid extended tackiness and inconsistent drying times.
Thick Paint Layers
Because thick layers trap solvent and slow curing, applying heavy coats of chalk paint will leave the surface sticky for much longer than thin, even applications. You’ll notice tacky spots and uneven finish when paint pools in crevices or overfills wood texture.
Avoid loading your brush or roller; instead, apply thin coats, let each dry to the touch, and sand lightly between layers if needed. Thin layers build opacity faster and cure fully, preventing prolonged tackiness.
If you already have thick buildup, remove excess, increase ventilation, and use a fan or dehumidifier to speed solvent release and encourage proper drying.
Troubleshooting Tacky Paint After the Recommended Time
Although you followed the recommended drying time, the paint still feels tacky, and you’ll want to pinpoint why before adding more coats or distressing the piece. Check humidity, ventilation, and temperature first—chalk paint cures slower in cool, damp spaces. Touch lightly in inconspicuous spots to assess cure depth. Consider previous finishes: wax or oil can slow drying and affect color blending and Decorative techniques.
- Poor airflow or high humidity prolongs tackiness.
- Undercoat contaminants (wax, grease) prevent proper cure.
- Excessive layer thickness traps solvents; thin layers dry faster.
Address the root cause before proceeding.
Fixes for Bubbles, Peeling, or Uneven Drying on Wood
If your chalk paint shows bubbles, starts peeling, or dries unevenly after you’ve ruled out tackiness causes, you can often fix these issues without stripping the entire piece.
Lightly sand bubbled areas with fine-grit paper, remove dust, and spot-prime peeling spots before repainting.
For uneven drying, thin new coats slightly and apply with even strokes, avoiding overworking wet edges. Test small patches first to avoid creating more problems.
Don’t fall for Chalk paint myths that propose heavy sanding or rapid recoat as cures.
When blending repairs, match tones carefully — proper color mixing prevents obvious touch-up patches.
Prep Checklist: Best Practices to Shorten Total Project Time
Before you paint, make sure you clean and degrease the wood so the chalk paint bonds properly.
Do a light sanding to knock down rough spots, then use a primer on bare or tricky areas to speed even drying.
These simple steps cut down on sanding and rework later, saving time overall.
Surface Cleaning And Degreasing
Want your chalk paint to grip and dry evenly? You need spotless, grease-free wood. Wipe surfaces with a microfiber cloth, then clean with a mild degreaser or TSP substitute; rinse and let fully dry.
Clean prep speeds drying and prevents tacky spots that ruin color mixing and brush techniques. Follow this quick checklist:
- Remove dust and cobwebs; vacuum crevices before wiping.
- Use a citrus or alkaline cleaner for oily residues; avoid soaking the wood.
- Rinse with clean water, dry with a lint-free cloth, and allow air drying 30–60 minutes in warm, ventilated conditions.
Do this before painting.
Light Sanding And Priming
Once the surface’s clean and dry, give the wood a light sanding to scuff the finish and create tooth for paint to cling to; use 120–220 grit depending on sheen. Wipe dust with a tack cloth, then spot-prime any bare or stained areas to seal and speed drying.
Choose a primer suited to your topcoat—latex or shellac-based—and apply thin, even coats. Primer evens absorption, helps with color blending when layering hues, and supports texture techniques like dry brushing or ragging.
Let primer fully cure per label instructions before chalk paint; this cuts rework and shortens overall project time.
Indoor vs. Outdoor Projects: Drying Time Differences
Because temperature, humidity, and airflow differ so much between indoors and outdoors, chalk paint will dry at noticeably different rates depending on where you’re working.
You’ll notice thicker chalk consistency and cooler paint container temps slow drying indoors with poor ventilation, while sun and breeze speed surface drying outdoors.
Adjust expectations: indoor pieces may feel dry to touch in 30–60 minutes but cure slower; outdoor projects can dry faster but risk dust or rapid skinning.
- Indoor: controlled climate, slower cure
- Outdoor: faster surface dry, variable conditions
Tip: test a small area before finishing
Product Checklist: Solvents, Sealers, Waxes, and Their Wait Times
Whether you’re finishing an indoor piece that dried slowly or an outdoor project that skinned over fast, the products you choose next will determine how long you need to wait before handling or sealing.
You’ll pick solvents (mineral spirits vs. water-based cleaners) to remove residue; wait 15–60 minutes.
Choose sealers: polycrylic dries to touch in 30–60 minutes, fully cures in days; oil-based polyurethane needs longer.
Waxes set in 24–72 hours before buffing; paste wax may require longer.
Consider your color palette and texture options when selecting sheen and application method so finish and wait times match your plan.
Sample Project Timeline: From Prep to Cured Furniture
If you want a clear schedule from sanding to a fully cured finish, this sample timeline maps each step and realistic wait times so you can plan work sessions and touch-ups.
You’ll prep, sand, and degrease (1–2 hours), then apply primer or base coat and wait 1–2 hours to recoat.
Chalk paint layers take 30–60 minutes between thin coats; plan 2–3 coats over a day.
Seal with wax or topcoat after 24 hours; curing completes in 7–30 days depending on product and humidity.
Remember small projects let you practice color mixing and basic furniture restoration.
- Prep & sand
- Paint coats
- Seal & cure
Maintenance After Curing: Care to Preserve the Finish
Once your chalk-painted piece has fully cured, you’ll keep it looking great with simple, regular care: dust it with a soft cloth, clean spills promptly with a damp (not wet) microfiber, and avoid abrasive cleaners that strip wax or topcoat. You should re-wax or recoat high-touch areas yearly, test products on an inconspicuous spot, and use felt pads to prevent scratches. For pieces with decorative color blending or texture enhancement, refresh gently to preserve depth.
| Task | Frequency | Tip |
|---|---|---|
| Dusting | Weekly | Soft cloth |
| Waxing | Annually | Thin coats |
| Spot-clean | As needed | Blot, don’t rub |
Brand Drying Charts and Manufacturer Resources (Links)
After you’ve learned how to care for cured chalk paint, check the manufacturers’ drying charts and resources before starting your next project. You’ll find precise cure times, recommended coats, and surface notes that prevent mistakes.
Use brand links for color matching guides and to confirm compatibility with sealers and eco-friendly finishes. Bookmark technical data sheets and FAQs, and contact support if unsure.
Useful resources typically include:
- Official drying and cure time charts
- Color matching tools and downloadable swatches
- Product safety data sheets and finish recommendations
Rely on manufacturers to save time and protect your results.
Frequently Asked Questions
Can Chalk Paint Be Used on Previously Painted Glossy Lacquer Without Sanding?
Yes—you can often use chalk paint on glossy lacquer without sanding, but you’ll need to guarantee chalk paint durability by cleaning and deglossing first; glossy lacquer adhesion improves with a liquid deglosser or light scuff before painting.
Will Chalk Paint Darken Wood Grain or Change Natural Wood Color?
Like a whispering veil, you’ll find chalk paint can slightly mute wood grain and shift natural color, often darkening or softening tones. You’ll still see texture beneath, though finish and stain can alter the extent noticeably.
Are Pigments in Chalk Paint Uv-Stable for Outdoor Sun Exposure?
Generally, no — you’ll find many chalk paint pigments lack strong UV resistance, so pigment stability outdoors is limited; you’ll want UV-stable paints, pigments, or clear UV-protective topcoats to avoid fading in sun exposure.
How Long Before Applying Upholstery or Fabric to a Painted Wood Frame?
You’ll wait 24–48 hours before upholstering a painted wood frame; if you’re doing faux finishing or furniture distressing, let paint cure a full 7 days for best adhesion and to avoid transfer or tackiness during reupholstery.
Can Food-Safe Sealers Be Used Over Chalk Paint for Cutting Boards?
Want a safe finish for food contact? You can use food safe sealers over chalk paint, but chalk paint safety matters—ensure non-toxic paint, fully cure it, then apply multiple approved sealer coats for a durable, food-safe cutting board.
Conclusion
Think of your project as a seed: chalk paint dries in stages — surface dry fast, ready for another coat in hours, fully cured in weeks — and each thin, patient layer is a root that steadies the finished plant. You’ll nurture it with proper prep, the right tools, and timely sealers or waxes, then wait as color hardens into protection. Care for it gently after curing, and your piece will blossom into lasting beauty.