How Long for Patio Paint to Dry
You can usually walk on a freshly painted patio within 24–48 hours, but full curing for maximum durability takes 7–30 days depending on paint type and conditions. Water-based acrylics dry to the touch in 1–4 hours and recoat in 4–6; oil-based paints feel dry in 6–24 hours and cure slower. Epoxy often cures in 3–7 days. Follow temps, humidity, and thin coats for best results — keep going for tips on timing and care.
Who This Guide Helps and When to Use It
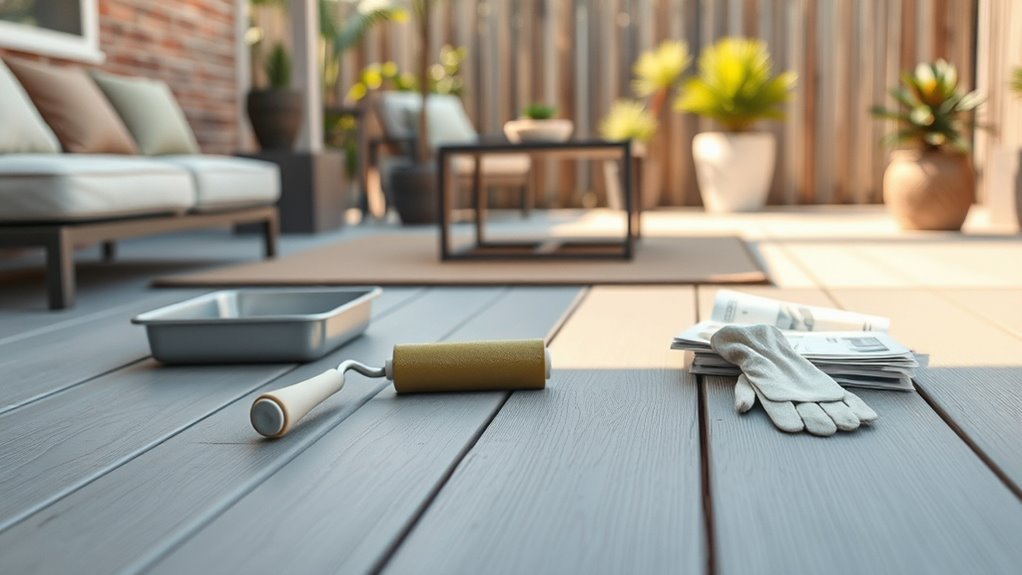
If you’re planning to refresh or refinish an outdoor concrete, wood, or metal patio surface, this guide helps you decide when to paint and what to expect during drying. You’ll find practical advice whether you’re updating patio design, protecting outdoor furniture, or prepping surfaces before seating and planters arrive.
Use this when scheduling a weekend project, coordinating weather windows, or choosing paints suited to your substrate. It’s aimed at DIYers and pros who want clear drying benchmarks, minimal downtime, and tips to avoid tacky finishes.
Skip it if you only need color ideas or layout inspiration; it’s about timing and technique.
Quick Answer: Typical Patio Paint Drying & Curing Times
Now that you know who this guide helps and when to use it, here’s a quick snapshot of how long patio paint takes to dry and cure.
Most latex patio paints feel dry to the touch in 1–2 hours and can handle light use after 24 hours.
Oil-based options often take 6–8 hours to be touch-dry and up to 48 hours before light use.
Full curing—resisting heavy foot traffic, furniture scrapes, and cleaning—usually takes 7–30 days depending on product and conditions.
Keep patio furniture off fresh paint and protect nearby garden plants from overspray until cured.
Drying vs Curing: What’s the Difference?
When you check a patio paint can, “dry” usually means the surface is touchable within hours.
While “cure” means the coating reaches its full hardness over days or weeks. You’ll need to respect both time frames because driving or placing furniture on a freshly cured surface can cause damage even after it feels dry.
Knowing the difference helps you plan painting, foot traffic, and furniture placement without risking scuffs or peeling.
Drying Time Frames
Although paint may feel dry to the touch within hours, curing takes much longer, and you’ll want to treat those timelines differently to avoid damage.
Generally, surface drying happens in 1–4 hours for acrylics and 6–24 hours for oils. Recoat windows recommend waiting per label.
Light foot traffic is usually safe after 24–48 hours, but full cure can take 7–30 days depending on temperature and humidity.
Protect freshly painted garden furniture from rain, heavy use, and pest control chemicals that can affect the finish during curing.
Plan projects to allow gradual use and avoid stressing the film until it’s fully cured.
Curing Versus Hardening
Because painting involves both evaporation and chemical change, drying and curing aren’t the same thing: drying means solvents have evaporated and the surface feels dry, while curing is the slower chemical process that strengthens and bonds the paint film.
You’ll notice a painted table seems ready after a few hours, but true hardness can take days or weeks depending on formula and conditions.
Don’t place patio furniture back or start garden planning until the paint has cured enough to resist scuffs and moisture.
Promote proper curing by allowing warm, dry airflow, avoiding heavy use, and following manufacturer cure-time recommendations for best durability.
Which Paints Are Best for Patios
If you want a patio that stands up to foot traffic, weather, and fading, choose paints formulated for exterior concrete or masonry—acrylic latex and epoxy are the top options.
You’ll prefer acrylic latex for its UV resistance, easy cleanup, and flexibility that prevents cracking near patio furniture.
Use epoxy when you need chemical and abrasion resistance in high-traffic zones, like around grills or storage.
Both accept sealers and textured additives to match garden landscaping while improving slip resistance.
Pick a product labeled for outdoor concrete, follow surface prep instructions, and test a small area to confirm adhesion and finish.
Dry Time: Acrylic Latex Patio Paint
Acrylic latex dries relatively quickly, but your actual drying time will depend on factors like temperature, humidity, and how thickly you apply it.
You can usually touch it within 1–2 hours and recoat after 4–6 hours under ideal conditions, though cooler or damp weather will extend those windows.
Keep in mind that environment affects both drying and final durability, so plan work times and ventilation accordingly.
Drying Time Factors
When you’re working with acrylic latex patio paint, several variables determine how quickly it dries: temperature, humidity, air circulation, coat thickness, and the surface’s porosity.
You’ll notice warm, low-humidity days speed evaporation, while cool, damp conditions slow film formation. Good cross-breeze or a fan helps solvents leave faster.
Thin, even coats dry quicker than heavy ones, and rough or porous concrete soaks up binder, shortening surface dry but lengthening full cure.
Avoid painting on hot afternoons that can skin over unevenly.
Consider surrounding elements like patio furniture placement and garden landscaping that affect airflow and shade.
Touch And Recoat
Having considered how temperature, humidity, airflow, coat thickness, and surface porosity affect drying, let’s look at how those factors inform when you can touch the paint and apply a second coat.
You can usually lightly touch acrylic latex patio paint after 1–2 hours in ideal warm, dry, breezy conditions; wait 4–6 hours before recoating for better adhesion. Cooler, humid, or thick coats extend times.
Test by pressing a fingertip in an inconspicuous spot—no tackiness means go ahead. Protect nearby patio furniture and garden landscaping while you wait, and avoid heavy use for 24–48 hours for full cure.
Environmental Impact
Because the solvents and additives in acrylic latex patio paint evaporate as it dries, you’ll want to take into account their local environmental effects—especially VOC emissions and runoff into soil or storm drains.
You should choose eco friendly materials and low-VOC formulas to reduce airborne pollutants and protect nearby plants and water.
Follow VOC regulations for your area when buying and applying paint, and avoid painting before rain to prevent wash-off.
Contain drips with tarps, capture excess for proper disposal, and clean tools into a sink connected to a sanitary sewer or collect wash water for hazardous-waste disposal.
Dry Time: Exterior Oil-Based Patio Paint
If you’re using an exterior oil-based patio paint, expect it to feel dry to the touch in about 6–8 hours under ideal conditions. Though it’ll take 24–48 hours to handle light foot traffic and up to a full week to reach near-full cure.
You’ll want to plan access and placement carefully so your patio furniture and garden lighting aren’t set down too soon.
Consider these quick tips:
- Wait full cure before moving heavy items.
- Avoid rain or high humidity during drying.
- Keep pets and kids off the surface for 48 hours.
- Test a small area before full use.
Dry Time: Epoxy Patio Floor Coatings
When you choose an epoxy coating for your patio floor, expect a quicker surface dry but a longer overall cure time than many paints. You’ll notice a tack-free feel in 6–12 hours, but full cure often requires 72 hours to seven days, depending on temperature and humidity.
Keep patio furniture off the surface until it’s fully cured to avoid impressions or bonding. Epoxy systems resist moisture and wear, enhancing garden aesthetics with a glossy, seamless finish that’s easy to clean.
Follow manufacturer’s pot-life and recoat windows, and avoid heavy traffic or rugs until the coating reaches its specified hardness.
Dry Time: Concrete Masonry Paints
Concrete masonry paints dry differently than latex or epoxy coatings, so you’ll want to plan accordingly. You’ll find they often feel dry in 1–4 hours but need longer to cure, especially on porous concrete. Consider when you’ll return patio furniture and set garden accessories.
- Temperature and humidity strongly affect surface dry time.
- Porous or previously unsealed concrete soaks paint, extending cure.
- Apply thin coats and wait the recommended interval between layers.
- Avoid heavy traffic and placing items until full cure per manufacturer.
Follow label directions for touch, foot, and full cure times to ensure durability and safety.
Dry Time: Water-Based Porch and Floor Enamels
Water-based porch and floor enamels dry faster than many oils, but you’ll still want to take into account temperature, humidity, and airflow when planning a project.
You can usually feel a light tack in 1–2 hours, but wait the manufacturer’s recommended touch and recoat times—often 4–6 hours for touch and 12–24 hours before a full recoat.
If conditions are cool or damp, expect those times to stretch and adjust your schedule accordingly.
Dry Time Factors
Although conditions vary, you’ll find that water-based porch and floor enamels generally dry faster than oil-based options.
However, several key factors still influence how quickly you can recoat or use the surface. Consider humidity, temperature, and airflow before planning plant placement or furniture arrangement; these affect surface and cure times.
Check manufacturer guidelines, but also watch real conditions.
- Humidity: higher moisture slows evaporation.
- Temperature: cold slows, hot speeds drying (avoid extremes).
- Airflow: steady circulation helps solvent escape.
- Surface porosity: rough or absorbent concrete soaks up more finish.
Adjust timing based on these variables to avoid problems.
Touch And Recoat
If you wait the manufacturer’s recommended time and the surface feels dry to the touch, you can usually recoat water-based porch and floor enamels within 2 to 4 hours under warm, low-humidity conditions; cooler or damper environments can extend that to 6–8 hours or more. Check adhesion by gently fingernailing a hidden spot; if paint lifts, wait longer. Protect patio furniture and move plants while recoating. Follow gardening tips to avoid runoff on soil. Use thin coats and proper ventilation to speed cure.
| Condition | Wait Time | Tip |
|---|---|---|
| Warm/dry | 2–4 hrs | Thin coats |
| Cool/damp | 6–8+ hrs | Ventilate |
| High traffic | 24 hrs | Protect surfaces |
| Full cure | 7 days | Avoid heavy use |
Patio Surface: Concrete vs Wood vs Pavers
When choosing patio paint, think about the material you’re covering—concrete, wood, and pavers each absorb, cure, and weather differently, and that affects drying times and the prep you’ll need. You’ll prep differently, choose specific primers, and plan for wear from patio furniture and landscaping design.
- Concrete soaks and often needs masonry primer; it can feel dry fast but cures longer.
- Wood requires sanding and a stain-blocking primer; moisture in grain slows curing.
- Pavers have joints and texture; pressurized spraying or brush coats help coverage.
- Consider slip resistance, flexible coatings for wood, and joint sealing for pavers.
How Does Temperature Affect Paint Drying?
You’ll get the best results when you paint within the manufacturer’s recommended temperature range—usually between about 50°F and 85°F—because too cold slows curing and too hot can make the paint skin over before it bonds.
Also watch humidity: high moisture slows evaporation and extends drying time, while very low humidity can cause blistering.
Adjust your schedule for both temperature and humidity to guarantee proper drying and adhesion.
Ideal Temperature Range
Because chemical reactions slow or speed up with temperature, patio paint dries best within a specific range: typically between 50°F and 85°F (10°C–29°C). You’ll get consistent curing, adhesion, and fewer defects when you paint in that window. Plan your project around daytime highs and lows, and check forecasts before you start.
- Cooler than 50°F: drying stalls, tacky finish, delayed recoats.
- Above 85°F: surface skin forms, trapping solvents, uneven sheen.
- Midrange days let you choose Color options confidently.
- Stay mindful of Budget considerations by avoiding wasted paint and rework.
Effects Of Humidity
Temperature sets the stage, but humidity often dictates how quickly patio paint actually dries. You’ll notice high humidity slows evaporation, so tack time lengthens and recoat windows widen.
If you’ve just painted garden furniture, keep pieces isolated to avoid sticking or smudging; don’t rush moving cushions back on.
Low humidity speeds curing but can cause surface skinning before deeper layers cure, risking cracking if disturbed.
During plant transplantation or watering nearby, avoid raising local moisture that prolongs drying.
Monitor weather, choose low-humidity windows, and wait longer after humid spells to ensure a durable, even finish.
How Does Humidity Affect Drying?
When humidity’s high, moisture in the air slows the solvent evaporation from patio paint, so it takes longer to dry and cure. You’ll notice Humidity effects quickly: tacky surfaces, extended recoat intervals, and softer finishes. Weather influence matters for scheduling; pick drier days when possible. Monitor relative humidity and adjust expectations.
- High humidity prolongs surface drying and cure times.
- Low humidity speeds evaporation but can cause blistering if too rapid.
- Aim for 40–60% RH for reliable results when following manufacturer times.
- Use dehumidifiers or heaters indoors; outdoors, wait for dryer conditions.
How Do Wind and Airflow Change Drying Times?
Humidity affects how quickly solvents leave paint, but air movement determines how fast that evaporated moisture is carried away. When you work on a windy day, airflow speeds surface drying, letting you recoat sooner.
However, too-strong gusts can cause skin to form while underlying layers stay tacky. Gentle, consistent breezes reduce drying time without risking adhesion, helping maintain paint durability.
Positioning furniture or using temporary windbreaks controls airflow so color options don’t force you into bad conditions. Indoors or calm evenings, use fans to mimic steady cross-ventilation.
Check touch and cure times rather than relying only on breeze.
How Do Coat Thickness and Number of Coats Affect Drying?
Although a thin, even coat dries faster on the surface, you’ll find that thicker applications and extra coats increase both surface and full-cure times because solvents and binders take longer to escape and crosslink.
You should aim for consistent layers to avoid problems like trapped moisture, uneven gloss, or delayed curing. Thicker film can also lead to color fading over time if it doesn’t cure properly, and texture change can occur as heavier coats sag or wrinkle.
Consider these effects when planning coats:
- One thin coat: fastest surface dry
- Multiple thin coats: best adhesion and cure
- One thick coat: slower full cure
- Too many coats: risk of defects
Surface Preparation That Speeds Adhesion and Drying
Because paint only performs as well as the surface beneath it, you’ll want to remove dirt, chalk, and loose old paint, sand glossy areas, and repair cracks or flaking before you apply anything.
Clean, dry surfaces let paint bond faster and dry more evenly, so pressure-wash patios, degrease stains, and vacuum dust from crevices.
Mask or tape edges and plan furniture arrangement and plant placement now so you won’t disturb drying zones later. Lift or cover pots and move chairs to avoid scuffs.
A tidy, smooth substrate reduces rework and helps coatings set on schedule for predictable drying times.
How Do Primers Affect Drying and Curing?
When you seal a patio surface with the right primer, it evens out porosity, blocks stains, and gives topcoats a consistent surface to grab onto, which speeds surface drying and promotes proper curing.
You’ll notice priming effects in how uniformly the topcoat dries and in reduced blotching. Primers also control absorption so the drying process is more predictable, especially on concrete or previously patched areas.
Choose a primer matched to your paint type and climate.
Key benefits you’ll get:
- more even sheen and color
- faster surface drying
- stronger adhesion
- reduced risk of premature peeling
How Do Additives and Extenders Change Drying Time?
If you add dryers, retarders, or extenders to patio paint, you’ll directly change how fast the film forms and cures. Dryer additives speed surface set and tack-free time, while retarders and extenders slow evaporation so the paint flows out longer and resists lap marks.
You’ll choose additives based on conditions: dryers help in high humidity, retarders help in hot, dry air to avoid brush marks. Extenders can enhance texture enhancement for decorative finishes and slightly alter sheen.
Note that strong additives may affect color options and durability, so test a small area and follow manufacturer ratios for predictable results.
When It’s Safe to Walk on Fresh Patio Paint
Additives and extenders can change how long paint takes to set, so you’ll want to factor them in before deciding when it’s safe to walk on a freshly painted patio.
You should wait for the paint to be dry-to-touch and slightly firm before stepping onto it. Check these points to decide:
- Wait at least 24 hours for light foot traffic in mild conditions.
- Extend drying time after rain, high humidity, or low temperatures.
- Use clean shoes or soft-soled slippers to avoid scuffs.
- Keep patio furniture off for the full cure time to prevent marks.
Keep decorative accents off until the surface fully cures.
When to Replace Furniture and Planters
Keep an eye out for peeling paint, rust, or wobbling legs—those signs of wear mean it’s time to act.
You’ll also want to schedule replacements around seasons: swap out fragile pieces before winter and refresh planters in spring.
Replacing worn items on a seasonal rhythm helps protect your newly painted patio and keeps it looking sharp.
Signs Of Wear
When cushions sag, wood splinters, or paint flakes off beyond small chips, it’s time to assess whether repair will save your patio pieces or if replacement is smarter. Inspect frames, joints, and finish closely. Look for permanent structural damage, rot, or insect tunnels that suggest failure.
- Loose joints or wobble you can’t tighten
- Deep rot, soft spots, or visible pest control evidence
- Rusted metal with compromised strength
- Persistent mold or staining after cleaning
If multiple items appear, prioritize safety and functionality. Replace planters or garden furniture when repairs won’t restore stability or appearance.
Seasonal Replacement Timing
If you plan ahead for seasonal changes, you’ll extend the life of your patio furniture and know exactly when replacement makes sense. Check cushions, frames, and finishes each season; if rust, splintering, or sagging recur despite repairs, replace garden furniture.
Rotate planters to prevent soil salt buildup and inspect drainage—cracks or persistent mold mean it’s time for new containers. Match replacements to expected weather: choose winter-hardy materials for cold months, UV-resistant finishes for summer.
Update patio lighting alongside furniture so wiring and fixtures meet needs. Plan gradual swaps rather than wholesale changes to spread cost and effort.
When to Put Heavy Items, Grills, or Vehicles Back
Although the paint may feel dry to the touch in a few hours, wait at least 48–72 hours before placing heavy items, grills, or vehicles back on your patio to avoid scuffing or indenting the finish. You’ll protect the coating and underlying substrate by delaying weight and heat.
Move lightweight garden furniture first, then heavier pieces once cured. Consider pest control access and position items for airflow to help final curing.
- Start with lightweight items only
- Lift rather than drag to prevent scratches
- Position grills on heat-resistant pads
- Recheck after 72 hours for firmness before parking vehicles
Simple Tackiness Tests You Can Do With Your Thumb
Because touch gives you useful feedback, try a simple thumb test to gauge patio paint tackiness. Lightly press your thumb into an inconspicuous spot for a second; if paint feels slightly tacky but doesn’t transfer, it’s curing and will accept light foot traffic soon.
If it leaves a mark or sticks, wait longer. Repeat across different areas—sun-exposed spots dry faster than shaded ones. Remember, color selection can affect perceived dryness; darker hues may feel warmer and seem tackier.
Use these quick checks to judge paint durability before heavy use, but avoid aggressive rubbing that could damage the finish.
Using Tack Cloths, Moisture Meters, and Quick Tools
Before you finish, use a tack cloth to wipe away dust and follow best practices like folding it to a clean section and replacing it when it gets dirty.
You’ll also want to check wood moisture with a meter—paint won’t dry properly if moisture levels are too high.
Finally, consider quick tools like a heat gun or fan to speed drying in small areas, but use them carefully to avoid blistering.
Tack Cloth Best Practices
When you’re prepping a patio surface for paint, using a tack cloth, a moisture meter, and a few quick tools will speed cleanup and help the finish adhere properly. Wipe slowly, fold cloth frequently, and avoid reusing a saturated cloth. Pay attention around garden furniture and patio lighting to remove dust and cobwebs without scratching.
- Lightly dab edges after sanding
- Fold to a clean face as you work
- Replace when tackiness picks up debris
- Store unopened cloths in a cool, dry spot
Use gentle pressure, change cloths often, and finish with a final wipe before painting.
Moisture Meter Usage
After you’ve wiped the surface with a tack cloth, grab a moisture meter to confirm the substrate’s readiness—paint won’t stick well to damp wood, concrete, or composite decking.
Place the probe gently, take multiple readings across high-traffic and shaded areas, and average them. Follow the paint maker’s recommended moisture threshold; painting too soon risks bubbling, poor adhesion, color fading, and reduced surface durability.
If levels are high, wait for drier conditions or use ventilation and fans to speed drying. Record readings so you can compare later and avoid rework.
A quick meter check prevents costly touch-ups and preserves finish longevity.
Quick-Tool Time Savings
Because prep sets the tone for the whole job, using tack cloths, moisture meters, and a few quick tools together will shave hours off your patio project while boosting the finish quality. You’ll move faster when surfaces are clean and dry, and small gadgets prevent rework that delays patio decor plans and landscaping integration.
Use these essentials to streamline each step:
- Tack cloth for dust-free surfaces before primer and paint
- Moisture meter to confirm drying conditions and avoid peeling
- Mini sander or scraper for quick edge cleanup
- Roller and extension for even coverage without repositioning
You’ll finish sooner with better results.
Interpreting Labels and Technical Data Sheets (TDS)
Although the label gives you quick answers, you’ll often need the Technical Data Sheet (TDS) to fully understand drying times, recoat windows, and surface prep requirements. The TDS spells out conditions—temperature, humidity, and film thickness—that determine those times and tells you how the manufacturer tested them.
You should read the TDS to match your garden furniture and plant placement plans: it lists substrate types, recommended primer, and minimum cure before putting cushions or pots back. Note required ventilation, tack-free times, and maximum film thickness per coat.
Follow those specs to avoid sticky finishes, bubbling, or premature wear.
Planning Painting Around the Weather Forecast
Check the forecast for several consecutive dry days before you start so the paint can cure without interruption.
Schedule your work to avoid large temperature swings that can slow drying or cause cracking.
If a sudden cold front or heat spike is predicted, postpone until conditions stay within the paint’s recommended range.
Check Forecasted Dry Days
When planning to paint your patio, consult the weather forecast to pick consecutive dry days so paint can cure properly. You’ll avoid tacky finishes and wasted effort by choosing a stretch with low humidity and no rain. Consider how your color options and texture enhancement will show once fully cured.
- Check 48–72 hour rain outlooks before starting.
- Note overnight dew chances that can re-wet paint.
- Confirm several dry days for primer and topcoat sequencing.
- Use reliable local forecasts and hourly predictions on painting days.
Scheduling around predicted dry days keeps the finish durable and consistent.
Plan For Temperature Swings
If temperatures are swinging between chilly nights and hot afternoons, plan your painting schedule so each coat cures during the warmest, most stable stretch of the day. Rapid drops or rises can cause paint to skin over, trap solvents, or prevent proper adhesion.
You’ll want to paint when humidity’s moderate and winds are low so solvents evaporate evenly and films cure fully. Adjust timing to avoid early-morning cold or late-afternoon heat spikes.
This protects your finish, eases patio maintenance, and preserves chosen tones—so color selection stays true. Check nightly lows and daytime highs, and postpone if swings threaten proper drying.
Fast-Dry Paint Options and When to Use Them
Because you might need your patio back in use quickly, fast-dry paints give you a practical way to cut downtime without sacrificing durability. You’ll choose by surface, traffic, and weather windows. For Garden furniture or painted concrete that ties into your Landscape design, pick formulations rated for outdoor abrasion and UV.
- Water-based acrylic: quick cure, low odor, good for low-traffic patios.
- Alkyd-modified: faster than traditional oil, tougher for chairs and tables.
- Epoxy topcoat: very fast tack-free, best where heavy use or spills occur.
- Fast-dry masonry paint: breathes but sets quickly for floors.
Follow manufacturer recoat times.
Common Mistakes That Prolong Drying or Ruin Finishes
Fast-dry paints can get your patio usable sooner, but common mistakes will still slow curing or leave you with a poor-looking finish. You rush coats, apply too-thick layers, or paint in high humidity and trap solvent, causing tacky surfaces.
Skipping surface prep leaves dust, old flaking paint, or oils that prevent adhesion. Using incompatible primers or mixing brands can blister finishes.
Don’t set garden furniture on wet paint or let pets walk through—both mar curing and finish. Neglecting ventilation and ignoring manufacturer drying times also prolongs cure.
Plan, prep, and protect to avoid costly touch-ups and preserve pest prevention measures.
Troubleshooting Slow-Drying Paint Problems
When paint’s still tacky long after the recommended time, you’ll want to methodically check the common culprits—humidity and temperature, overly thick coats, poor ventilation, surface contamination, and incompatible products—and then address them one by one.
Start by feeling the finish and smelling for solvents; that helps isolate curing vs contamination.
For garden furniture and patio furniture, remove cushions and check hidden areas.
Take these steps:
- Thin additional coats or strip excess and reapply thin layers.
- Improve airflow; use fans or wait for drier conditions.
- Clean and decontaminate surfaces before recoating.
- Confirm product compatibility; don’t mix oil and water-based paints.
Best Practices for Cool or Humid Conditions
If temperatures are cool or humidity’s high, slow drying is inevitable unless you adjust your approach—so plan around weather, thin coats, and boost ventilation to help paint cure properly. You’ll work steadily: schedule sunny periods, remove dew-prone items like cushions from garden furniture, and keep doors open for airflow. Use a dehumidifier or fans, apply thin, even coats, and wait longer between layers. Consider paint formulated for cool climates and align your timing with overall landscaping design to avoid rework. Monitor tackiness before sealing.
| Action | Why | Timing |
|---|---|---|
| Thin coats | Faster evaporation | Every coat |
| Fans/dehumidifier | Reduce moisture | During drying |
| Remove cushions | Prevent staining | Before painting |
| Cool-climate paint | Better cure | At purchase |
Best Practices for Hot or Windy Conditions
When it’s hot or windy, you should plan to paint during the cooler early morning or late afternoon hours to slow evaporation and improve adhesion.
Use temporary windbreaks and position tarps or screens to block gusts that can cause uneven drying or dust contamination.
If possible, work in shaded areas to keep the surface temperature lower and the paint curing steadily.
Paint During Cooler Hours
Although cooler hours slow drying, you’ll get smoother, more even coverage by painting in the early morning or late evening when temperatures are lower and wind has died down. You’ll still manage good adhesion and protect patio aesthetics while coordinating with gardening integration.
Plan shifts so dew isn’t heavy; check forecast for humidity. Use thin coats and allow extra cure time between layers. Keep tools covered.
- Start at first light or after sunset
- Wear layers and work quickly
- Avoid painting if frost or heavy dew is expected
- Test a small area overnight to confirm finish and drying time
Windbreaks And Shade
Because hot sun and strong gusts can ruin a fresh patio coat, set up temporary windbreaks and shade so paint cures evenly and doesn’t skin over or dry too fast. You’ll position umbrellas, tarps, or pop-up canopies to block direct sun and steady breezes, keeping temperature and humidity stable.
Anchor windbreaks so they won’t topple and disturb wet paint. Move garden furniture away or cover it to prevent overspray and accidental contact.
Use screened barriers or sealed containers for pest control so insects don’t stick to tacky surfaces. Check conditions periodically and remove protections once paint’s fully cured.
How Can You Speed Up Drying Safely?
If you want the paint to cure faster without risking adhesion or finish problems, focus on controlling temperature, airflow, and humidity while using gentle acceleration methods like fans, dehumidifiers, and thin, even coats.
You can speed drying safely by working smart: prep surfaces, remove dust, and keep pets and insects away from wet areas to protect both Garden furniture and Pest control concerns.
Try these steps:
- Use low-heat fans to boost airflow without overheating.
- Run a dehumidifier to lower humidity during damp days.
- Apply thin, even coats; wait recommended recoat times.
- Shield drying areas from rain and direct sun swings.
How Long Maintenance Coats and Touch-Ups Take
When you’re doing maintenance coats or touch-ups, expect them to dry noticeably faster than full repainting jobs because you’re working over cured paint and usually laying on thinner layers. Typically, touch-ups feel dry to the touch within 30 minutes to 2 hours and can handle light use in 4–6 hours.
With full cure in 24–48 hours depending on temperature and humidity. For patio furniture, choose quick-drying formulas and apply thin, even coats to avoid drips.
Plan touch-ups around your gardening tips schedule so plants and soil won’t get splattered, and let surfaces cure undisturbed for best results.
Safety, Ventilation, and Environmental Considerations
When you’re painting your patio, prioritize ventilation by opening windows and doors or using fans to keep fumes moving away from you.
Wear gloves, a respirator or mask rated for paint fumes, and eye protection to avoid skin contact and inhalation.
Also choose low-VOC paints, dispose of rags and leftover paint properly, and avoid painting on windy days to reduce environmental impact.
Ventilation Best Practices
Although patio paint dries faster with heat, proper ventilation is what keeps you safe and prevents lingering fumes, so make it a priority before you start painting. Open windows and doors to create cross-breezes that carry fumes away from you and nearby garden furniture.
Position fans to move air across the work area, not toward neighbors or patio landscaping. Work in stages so fresh air can replace contaminated air between coats.
- Open opposite doors/windows for cross-ventilation
- Use box or oscillating fans to direct airflow
- Avoid painting on still, humid days
- Keep pets and children away from fumes
Protective Gear Recommendations
Since fumes and splatter are the most immediate hazards, you should wear a respirator rated for organic vapors, safety goggles, and chemical-resistant gloves while painting the patio.
Add a disposable coverall and knee pads for prolonged work, and choose footwear that resists slick, wet surfaces.
Use a fan or open windows to keep air moving, but keep doors closed to avoid drafts that affect drying and paint durability.
Store rags in a sealed metal can to prevent ignition.
When you change color selection or switch primers, replace gloves and clean tools to avoid contamination and skin exposure.
Environmental Impact Tips
If you want to minimize your patio painting’s environmental and health impacts, plan for safe ventilation, low-toxicity products, and proper disposal from the start. You’ll reduce fumes, protect neighbors, and help the planet by choosing greener options and working smart.
- Paint with eco friendly pigments to cut hazardous heavy metals.
- Prefer biodegradable solvents and water-based formulas to limit VOCs.
- Ventilate thoroughly: open doors, use fans, and avoid painting on still, hot days.
- Dispose of leftovers at hazardous-waste sites or donate usable paint; never pour down drains.
Follow these steps to keep safety and sustainability central.
Sample Timelines: Small, Medium, and Large Patio Projects
When planning your patio paint job, think in terms of small, medium, and large projects so you can schedule prep, coats, and curing without unexpected issues. For a small area (under 100 sq ft), allow a day for cleaning and pest control around garden furniture, a day for two thin coats, and 24–48 hours light use. Medium patios (100–400 sq ft) need two days prep, two coats across two days, then 48–72 hours curing before moving furnishings. Large patios require three days prep, staggered coats over three days, and at least 5–7 days cure for full traffic.
Final Checklist to Confirm Your Patio Paint Is Fully Cured
Now that you’ve planned prep, coats, and curing times for small, medium, or large patios, use this concise checklist to confirm your paint has fully cured before returning furniture and heavy use.
Check visually for uniform sheen and no tackiness. Smell should be neutral. Test a corner with light foot traffic and a coin scrape; no marks should appear. Verify weather stayed within recommended temperature and humidity during curing to protect garden landscaping nearby.
Only move patio furniture after these checks. Follow the four quick steps below to finalize readiness.
- Visual sheen and tack test
- Smell and odor absence
- Light traffic/coin scrape
- Weather log review
Frequently Asked Questions
Can I Paint Over Existing Patio Paint Without Removing All Old Layers?
Yes — you can, but you’ll need proper surface preparation and check paint compatibility first. You’ll clean, sand, remove loose flakes, prime where needed, and use a compatible paint so the new coat bonds and lasts.
Will Sunlight (Uv Exposure) Change Curing or Cause Fading During Curing?
Yes — UV effects speed surface curing but can cause fading risks if paint hasn’t fully cured; you’ll see faster skin formation yet potential color loss or chalking, so shield fresh paint from intense sunlight until fully cured.
Are Low-Voc or Eco Paints Slower or Faster to Dry and Cure?
Ironically, eco friendly paints often dry faster but can cure slower; you’ll notice shorter drying times on the surface, yet full chemical curing can take longer, so expect quick tack-free feel but extended cure period.
Can Pets Contaminate Wet Paint and How to Prevent It?
Yes — pets can contaminate wet paint by touching or tracking it, risking pet safety and ruined finishes. You should block access, use barriers, supervise carefully, and keep pets away until paint fully cures to prevent contamination.
Does Paint Color (Dark Vs Light) Affect Drying and Heat Absorption?
Yes — darker paint increases heat absorption and dries differently; lighter hues boost color reflection, so you’ll see less heat buildup. Choose light colors for cooler surfaces and dark tones when warmth and faster surface evaporation matter.
Conclusion
You’ve got the timing down now: paint usually feels dry in hours but needs days or weeks to fully cure, depending on type, temp, and humidity. Ready to walk on it tomorrow or wait a week? If you’re dealing with acrylic latex, plan for light use after 24–48 hours and full curing in 7–30 days; maintenance coats and touch-ups dry faster. Follow ventilation and weather tips, and use the final checklist before heavy furniture or rugs return.