How Much Does It Cost to Paint a Bathroom Ceiling?
You can expect to pay about $80–$300 to paint a bathroom ceiling, roughly $1–$3 per square foot, with small DIY jobs near $100 and pro jobs or repairs pushing toward $300+. Materials typically run $20–$60 and labor $40–$100 for small jobs; higher ceilings, damage, or moisture‑resistant paint raise costs. DIY saves money but pros handle water damage and high ceilings faster. Keep reading for a step‑by‑step cost estimate and hiring tips.
Quick Answer How Much to Paint a Bathroom Ceiling
You can expect to pay roughly $80 to $300 nationwide in 2025 to paint a bathroom ceiling, with averages around $1 to $3 per square foot or $100 to $200 for a typical small bathroom.
Costs run higher if the ceiling needs repairs, has high ceilings, or requires moisture-resistant paint and ventilation work.
You’ll pay less for a simple, single-coat repaint in a small, easily accessed bathroom.
Typical national cost range (2025 estimates)
Although prices vary by region and job specifics, the typical national cost to paint a bathroom ceiling in 2025 runs about $75 to $250 for a small to mid-size bathroom when hiring a pro.
If you ask how much does it cost to paint a bathroom ceiling, expect factors like prep, ceiling height, moisture-resistant paint, and minor repairs to drive costs toward the top end.
Average cost per square foot and per room
On average, expect to pay about $0.50 to $2.00 per square foot to paint a bathroom ceiling, which typically translates to roughly $75 to $250 for most small to mid-size rooms.
Factors like ceiling height, prep work, and moisture-resistant paint can push the price toward the higher end.
You’ll pay less for quick touch-ups and more for full repainting with primer and mildew-resistant coatings.
When to expect higher or lower costs
When moisture, height, or damage come into play, expect costs to rise—higher ceilings, extensive prep (like repairing water stains or sanding popcorn texture), and mildew-resistant or specialized paints all add labor and materials.
Conversely, a straightforward repaint of a low, dry ceiling with minimal prep and standard flat paint will land you toward the lower end of the $0.50–$2.00 per square foot range.
You’ll also pay more for fast timelines, hard-to-reach fixtures, and detailed trim work; choose basic paint and plan during dry months to save.
What Affects the Cost of Painting a Bathroom Ceiling
How much you’ll pay depends on a few key things: the ceiling’s square footage and height, how easy it’s to reach (vaulted or with attic access), and the surface condition.
Expect higher costs if there’s damage, peeling, mold, or water stains that need repair and priming.
Also factor in paint type and finish—moisture- and mildew-resistant products cost more—and whether you hire pros or do it yourself.
Ceiling size and square footage
Because you pay by the square foot, the size of your bathroom ceiling directly drives labor and material costs — a larger ceiling needs more paint, more time to prep and apply, and sometimes different equipment like scaffolding or extension poles.
Measure length and width, calculate square footage, and share that with contractors. Bigger areas raise per-project totals; small ceilings often qualify for minimum fees.
Ceiling height and accessibility (vaulted, tray, attic access)
Ceiling height and accessibility have a big impact on cost: higher or oddly shaped ceilings—vaulted, tray, or those with attic access panels—take more time, special equipment, and safety measures, so you’ll pay more for labor and sometimes for rentals like scaffolding or longer extension poles.
You’ll also face longer setup and cleanup, plus possible hourly surcharges for confined or hard-to-reach spots.
Surface condition (damage, peeling, mold, water stains)
1 common or hidden issue that drives up cost is the ceiling’s surface condition—damage like peeling paint, mold, or water stains forces more prep work before any paint goes on.
You’ll pay more when contractors scrape loose paint, sand rough areas, treat mold, repair drywall, and apply sealer to stains.
Neglecting these steps risks poor adhesion and recurring problems, so expect higher labor and materials.
Paint type and finish (moisture-resistant, primer, mildew-resistant)
After addressing surface damage and stains, you’ll face choices about paint type and finish that can raise or lower the total cost.
Choosing moisture-resistant or mildew-resistant ceiling paint adds upfront material cost but reduces repainting frequency.
High-quality paints often include primer or need a separate primer coat; skipping primer can save money now but may cause adhesion issues and more expense later due to peeling or mold.
Labor vs. DIY cost components
When you weigh labor against DIY, the biggest drivers of cost are time, skill level, and prep work: hiring a pro adds hourly or flat rates but buys speed, expertise, and warranty, while doing it yourself saves money upfront yet can cost more if mistakes require rework or if you underestimate the time and tools needed.
Consider access, safety gear, and cleanup—these affect total cost.
Regional labor rate variations and seasonality
Because labor rates vary widely by location and season, the same bathroom ceiling job can cost very different amounts depending on where and when you hire help.
You’ll pay more in high-cost metro areas and during peak renovation months. Off-season or slower markets often bring discounts or more flexible scheduling.
Get local quotes and compare weekday versus weekend rates to find the best value.
Additional services (repair, priming, ventilation, masking)
One or more extra services—like patching water damage, priming bare drywall, improving ventilation, or carefully masking fixtures—can add to your total because they require extra materials, time, and sometimes specialized labor.
You’ll pay more for mold remediation, skim coats, rust treatment, or sealing stains.
Get written estimates detailing each add-on so you can compare costs and avoid surprise charges.
Cost Breakdown Materials, Labor, and Extras
You’ll get a clearer picture once you break costs into materials, labor rates with typical time estimates, and common add-ons like patching, texture work, or mold remediation.
We’ll list typical price ranges for each element and show example totals for small, medium, and large bathrooms.
That way you can budget realistically and compare DIY versus pro options.
Materials
Materials for painting a bathroom ceiling split into paint, tools, and prep supplies, and each affects your total cost. You’ll choose mildew-resistant ceiling paint, rollers, brushes, drop cloths, tape, and primer if needed. Budget for small repairs and caulk.
| Item | Purpose | Typical Cost |
|---|---|---|
| Paint | Moisture protection | $20–$60 |
| Tools | Application | $10–$40 |
| Prep | Surface readiness | $5–$25 |
Labor rates and typical time estimates
Labor rates for painting a bathroom ceiling typically run $25–$75 per hour depending on your region and the contractor’s experience, and most jobs take 1–3 hours for a standard 5×8 or 8×10 bathroom — so expect labor to make up roughly $50–$225 of the total cost.
| Role | Rate/hr | Time |
|---|---|---|
| DIY | $0–$25 | 2–4 hrs |
| Pro | $40–$75 | 1–3 hrs |
| Handyman | $30–$50 | 1.5–3 hrs |
Common add-ons and their price ranges (patching, texture, mold remediation)
Several common add-ons can push a simple ceiling paint job beyond the base quote — think patching small holes or water stains ($15–$150), matching or applying texture ($50–$300), and mold remediation for bathrooms with moisture issues ($150–$800+).
You’ll also factor primer for stains ($10–$50), minor drywall replacement ($50–$200), and ventilation upgrades if mold recurs (cost varies).
Example cost calculations for 3 common bathroom sizes
To make these estimates useful, we’ll walk through three typical bathroom sizes—small (30–50 sq ft), medium (50–100 sq ft), and large (100–150 sq ft)—and break each down into materials, labor, and likely extras so you can see where your money goes. You’ll get ballpark totals: small $60–$150, medium $150–$350, large $300–$600, depending on repairs and special finishes.
| Item | Cost |
|---|---|
| Small materials | $20–$50 |
| Small labor | $40–$100 |
| Medium total | $150–$350 |
| Large total | $300–$600 |
How to Estimate Your Exact Cost Step-by-Step
Start by measuring your ceiling and noting fixtures, vents, or slopes so you know the exact area to cover.
Inspect the surface for cracks, mold, or peeling that’ll require repairs, then pick the paint type and finish that suits moisture-prone bathrooms.
Finally, get multiple quotes to compare items line-by-line and add costs for permits, disposal, and a small contingency.
Step 1: Measure the ceiling area and note features
Begin by measuring the length and width of your bathroom ceiling to get the exact square footage.
Then note any features—vents, light fixtures, crown molding, or recessed shelves—that will affect paint quantity and labor.
Record dimensions and feature locations on a sketch, tally fixture areas to subtract or mask, and list hard-to-reach spots that may increase time or require scaffolding.
Step 2: Assess surface condition and necessary repairs
Now inspect the ceiling closely for peeling paint, stains, cracks, mold, and irregular texture—these issues determine how much prep and repair you’ll need and directly affect cost.
Note water damage, soft spots, or flaking texture.
You’ll factor in scraping, sanding, patching, mold remediation, and possible drywall replacement.
Estimate labor and materials for each repair to refine your total painting cost.
Step 3: Choose paint type and finish
Step 3 narrows your choices to paint types and finishes, since those selections drive both material cost and long-term performance; pick a mildew-resistant, washable ceiling paint for bathrooms because moisture and steam demand it.
Choose a flat or matte finish to hide imperfections, or an eggshell for slight sheen and easier cleaning. Higher-quality acrylic paints cost more but resist peeling and stains.
Step 4: Get multiple quotes and compare line items
Get at least three written quotes so you can compare prices and what’s actually included; you’ll spot big differences when you line up materials, labor hours, surface prep, and cleanup costs side by side.
Compare line items, ask about warranties, and confirm timelines.
- Materials — brands, quantities, upgrades
- Labor — hours, rates, crew size
- Prep/cleanup — patching, masking, disposal
Step 5: Factor in permits, disposal, and contingency
Because unexpected fees and paperwork can add up quickly, you should build permits, disposal, and a contingency into your ceiling-paint budget before hiring anyone.
Check local permit requirements—some cities require permits for electrical or ventilation work. Factor disposal fees for old materials and drop cloths.
Add a 10–15% contingency for surprises like water damage or mold remediation so your final estimate stays realistic.
DIY vs. Hiring a Pro Comparison and Decision Guide
You’ll weigh time, tools, and finish quality to compare DIY costs against hiring a pro.
DIY can save money on small, straightforward jobs if you’ve got the right equipment and time, but call a pro for high ceilings, water damage, or a flawless result.
When you decide to hire, get multiple estimates, check reviews and licenses, and ask for references.
Cost comparison: DIY vs. professional (time, tools, quality)
When weighing whether to paint your bathroom ceiling yourself or hire a pro, consider time, tools, and finish quality—DIY saves on labor costs but demands more prep, equipment, and patience, while a contractor brings speed, expertise, and a pricier invoice. You’ll trade lower cash cost for your time and risk; pros reduce mistakes and finish faster.
| Factor | Difference |
|---|---|
| Time | DIY slower |
| Tools | DIY buy/rent |
| Quality | Pro higher |
| Cost | DIY cheaper upfront |
| Risk | DIY higher |
When DIY makes sense and when to hire a pro
If your bathroom’s ceiling is small, in good condition, and you’re comfortable on a ladder, DIY can save you money and let you control timing; hire a pro if the job involves extensive prep (mildew, water damage, high ceilings), tricky ventilation, or you want a flawless, fast finish without the hassle.
You should DIY for simple repainting and minor touch-ups; hire pros for repairs, safety risks, or guaranteed results.
How to find and vet painters (estimates, reviews, licenses)
Because hiring the right painter affects cost, timeline, and the final look, start by gathering multiple bids, checking licenses and insurance, and reading recent reviews so you can compare price against reputation and experience.
Ask for itemized estimates, photos of past work, and references. Verify license status with your state, confirm liability and workers’ comp, and trust clear communication and punctuality.
Step-by-Step Guide to Painting a Bathroom Ceiling (for DIYers)
Ready to tackle the job yourself? Start by prepping and protecting the room, then fix any damage, sand, and clean the ceiling before priming for stains and moisture.
Finish with the right tools and techniques for your coats, then clean up and reinstall fixtures.
Step 1: Prepare the room and protect surfaces
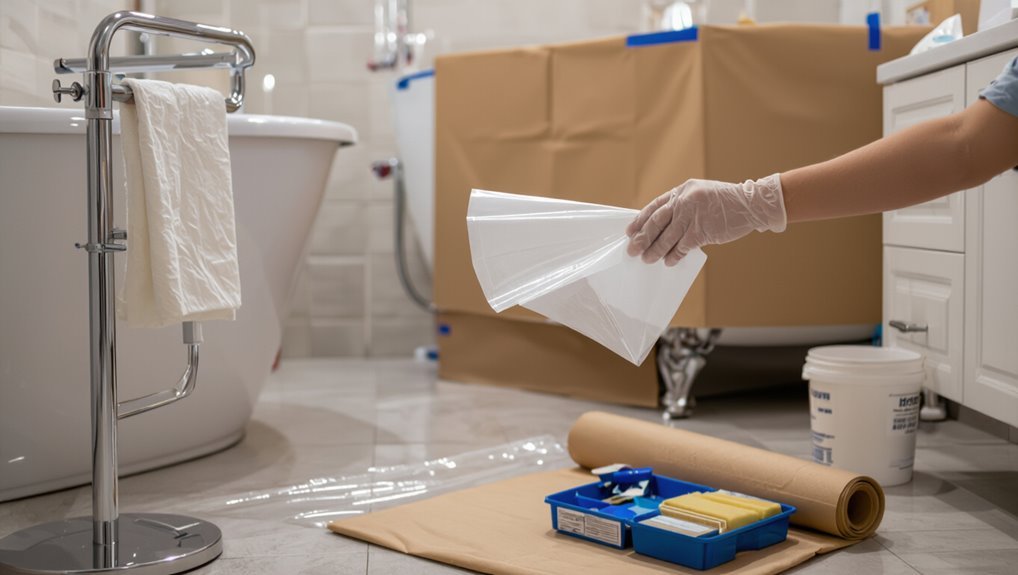
Start by clearing the room so you’ve got an open, safe workspace and nothing valuable can get splattered.
Then protect surfaces and fixtures precisely:
- Remove towels, shower curtains, and lightbulbs.
- Cover floors and fixtures with drop cloths and tape edges.
- Mask vents, mirrors, and trim with painter’s tape.
Wear goggles and a mask; ventilate the room before you paint.
Step 2: Repair damage, sand, and clean the ceiling
With the room cleared and surfaces protected, you’ll want to inspect the ceiling for water stains, cracks, peeling paint, or mold before you bring out the paint.
Patch cracks and holes with joint compound, scrape loose paint, and sand smooth.
Remove dust and cobwebs with a vacuum or damp cloth.
Let repairs fully dry before moving to priming or painting.
Step 3: Prime for stains and moisture
Because bathrooms get humidity and occasional leaks, you should always prime the ceiling before painting to block stains and resist moisture.
Choose a stain-blocking, mold-resistant primer labeled for bathrooms. Apply it evenly to repaired, dry surfaces with a brush for edges and a roller for flats.
Let the primer fully cure per manufacturer instructions before proceeding to paint.
Step 4: Apply paint tools, techniques, number of coats
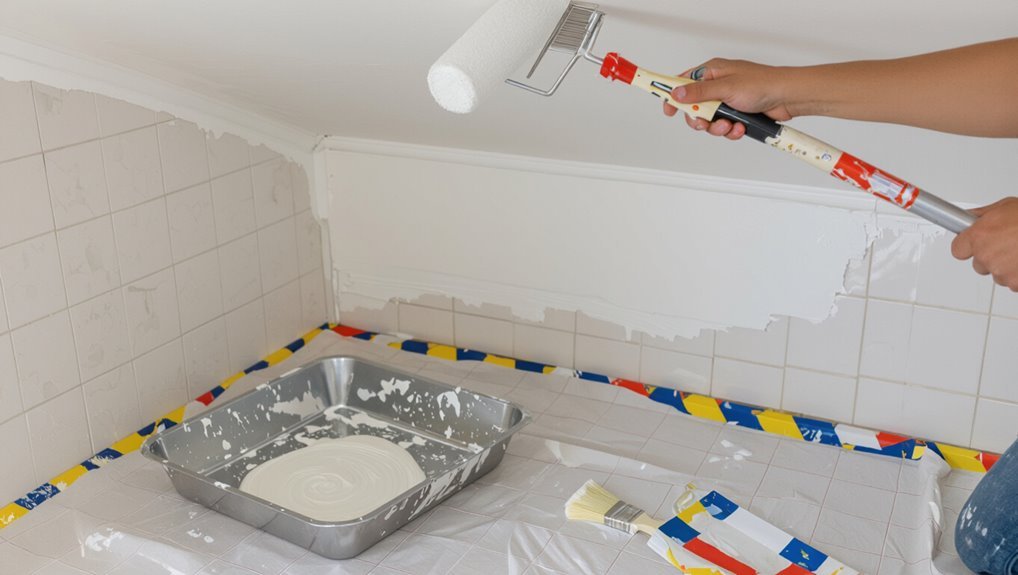
Now that the primer’s cured and the surface is sound, pick the right paint and tools for a smooth, durable finish.
Use a mildew-resistant, flat or eggshell bathroom ceiling paint.
Cut in with a 2–3″ angled brush, then roll with a 9–12″ nap roller on an extension pole.
Apply two thin coats, letting recommended dry time between each, for even coverage and longevity.
Step 5: Clean-up and reinstallation
Gather your tools and work methodically to make cleanup quick and protect your fresh paint.
Remove drop cloths carefully to avoid drips, wipe edges with a damp cloth, and clean brushes and rollers per paint type.
Reinstall fixtures and vent covers after the ceiling’s fully cured.
Check for touch-ups, dispose of waste properly, and store leftover paint labeled for future repairs.
Common Problems and Mistakes (and How to Avoid Them)
Before you start painting, make certain you fix any mold or water damage and fully dry the ceiling so new paint won’t peel.
Use a bathroom-rated, mildew-resistant paint and the right finish, and don’t skip primer on repaired or stained areas.
Also guarantee good ventilation during and after painting to prevent premature failure.
Failing to address mold or water damage first
If you skip treating mold or water damage and just paint over it, the stains and rot will return and spread, wasting your time and money.
You should locate the source—leaks, poor ventilation—and fix it first.
Remove moldy drywall or clean and sanitize affected areas, let them fully dry, then repair and prime.
Painting prematurely just hides problems temporarily.
Using wrong paint type or finish
When you pick the wrong paint type or finish for a bathroom ceiling, you’ll end up with peeling, mildew, or an uneven sheen that ruins your hard work.
Choose a mildew-resistant, moisture-rated ceiling or semi-gloss paint designed for bathrooms.
Test adhesion on a small patch, use primer for stained or porous surfaces, and follow manufacturer recommendations to guarantee durability and a consistent appearance.
Poor ventilation leading to paint failure
Because bathrooms trap moisture, poor ventilation lets steam and humidity linger on your ceiling and paint, promoting peeling, blistering, and mold growth.
You should run an exhaust fan during and after showers, open windows when possible, and consider a timer switch or humidity-sensing fan.
Proper airflow dries surfaces faster, extends paint life, prevents unsightly stains, and reduces health risks from mold buildup.
Inadequate surface preparation and skipping primer
Good ventilation helps prevent moisture damage, but it won’t save a paint job that starts on a dirty, glossy, or uneven ceiling.
You’ll get peeling, bubbling, or blotchy coverage if you skip cleaning, sanding, and priming. Remove grime, repair defects, sand smooth, then apply a stain-blocking primer.
Primer guarantees adhesion and uniform finish, saving time and repainting costs.
Best Practices and Cost-Saving Tips
Pick a mildew-resistant, semi-gloss or satin paint to make your ceiling last longer in a humid bathroom.
Schedule the job during slower contractor seasons or combine ceiling and wall painting to lower per-room labor costs.
Reuse quality tools and choose dependable, budget-friendly materials to cut waste and overall expenses.
Choosing the right paint for bathrooms to extend lifespan
When you choose paint made for high-moisture rooms, you’ll reduce peeling, mold growth, and frequent repainting.
Pick a mildew-resistant, semi-gloss or satin formula for ceilings — it tolerates moisture and wipes clean. Use high-quality acrylic or latex with mold inhibitors.
Proper priming on patched or stained areas boosts adhesion. That upfront choice extends finish life and cuts repaint frequency and material waste.
Timing the job to save on labor costs
Choosing the right paint gets you a longer-lasting finish, but timing the job can save the most on labor costs.
Schedule painting during your contractor’s slow season or midweek to get lower rates and quicker booking.
Be ready with prep done — cleared fixtures, cleaned ceiling, and any repairs — so painters work efficiently and finish faster, reducing total labor hours and cost.
Bundling projects (walls + ceiling) to reduce per-room cost
If you bundle ceiling and wall painting into one job, you’ll cut per-room costs by sharing setup time, materials, and contractor travel; painters charge less per square foot when they can work continuously rather than returning for a separate visit.
You’ll also simplify scheduling, reduce downtime, and get consistent color and finish.
Ask for a bundled quote and confirm whether trimming, patching, and cleanup are included.
Reusing tools and smart material choices
One smart way to cut ceiling-painting costs is to reuse good-quality tools and pick materials that give the best coverage for the price.
Keep a roller frame, extension pole, and quality brushes you can clean and store.
Choose a high-hide ceiling paint or tinted primer to reduce coats.
Reusing durable tools and buying better paint saves time, labor, and money.
Pricing Scenarios and Real-World Examples
To make the cost info practical, you’ll see three clear pricing scenarios: a low-cost DIY for a small half-bath, a mid-range pro-only paint job for a standard bathroom, and a high-end project that includes repairs, specialty paint, and textures.
You’ll also get sample contractor estimate breakdowns so you can compare labor, materials, and markups. Use these examples to gauge what your specific job will likely cost.
Low-cost scenario (small half-bath, DIY)
A small half-bath ceiling is the easiest place to start if you want to save money by doing the work yourself; you’ll typically spend $25–$75 on primer and paint, plus another $10–$30 for basic supplies like a roller, tray, and tape.
You’ll finish in an afternoon: prep (clean, sand, mask), two thin coats, and touch-ups.
Expect $35–$105 total.
Mid-range scenario (standard bathroom, professional paint-only)
For a standard full bathroom, expect to pay $150–$350 when you hire a pro just to paint the ceiling—this covers labor for ceiling prep and two coats plus basic materials like primer and mid-range paint.
You’ll get faster, neater coverage than DIY, with minor masking and ventilation handled.
Ask for a written estimate, confirm drying times, and verify paint brand and sheen.
High-end scenario (large bathroom, repairs, specialty paint, textures)
If you’re tackling a large bathroom that needs drywall repair, texture matching, and a specialty or mildew-resistant finish, expect the price to climb considerably—often $400–$1,200 or more—because pros charge more for patching, skim coats, intricate taping, and premium paints that require extra labor and drying time.
You’ll also pay more for scaffolding, multiple coats, extended curing, and careful masking of fixtures.
Sample contractor estimate breakdowns
1 contractor estimate will usually list labor, materials, surface prep, and extras so you can see exactly what you’re paying for; read the line items to compare scope and spot charges for patching, primer, specialty paint, masking, and disposal. You’ll spot budget, midrange, and premium totals, decide what’s essential, and avoid surprise fees.
| Scenario | Emotion |
|---|---|
| Budget | Relief |
| Premium | Confidence |
How to Get Accurate Quotes Checklist for Requesting Estimates
When asking for estimates, give contractors clear details—room dimensions, ceiling condition, any moisture or mold, and the type of paint or finish you want.
Ask about warranties, prep work, timelines, and watch for red flags like vague scopes or unusually low bids.
Compare proposals by scope, materials, and included prep, not just the bottom-line price.
What information to provide to contractors
Before you contact contractors, gather clear details so they can give accurate, comparable quotes:
- Room size, ceiling height, photo of current condition, and exact dimensions.
- Paint type (moisture/mold-resistant), finish, and brand preference plus desired color code.
- Access issues (scaffolding/ladder needs), ventilation, removal of fixtures, and timeline constraints.
Questions to ask and red flags to watch for
Curious what to ask so you don’t get surprised by the final bill?
Ask for a written breakdown: labor, materials, prep, cleanup, and permit costs.
Confirm paint brand, sheen, and number of coats.
Ask about moisture treatment and warranty.
Red flags: vague estimates, high upfront cash requests, no references or license, reluctance to sign a contract or provide insurance proof.
How to compare bids beyond price
Although price grabs your attention, the smartest comparisons look deeper: check scope clarity, included prep and cleanup, paint brand and coat count, timeline, warranty, licenses and insurance, and how unexpected problems are handled.
Ask each bidder for itemized estimates, written timelines, surface prep specifics, and warranty details. Confirm credentials, request photos of similar work, and compare total value—not just the bottom line.
Frequently Asked Questions (5)
You probably have questions about timing, materials, and maintenance, so let’s cover the essentials.
I’ll explain how long a ceiling job takes, whether you need special bathroom paint, and when you can paint over stains (and why fixing leaks first matters).
You’ll also get guidance on repainting frequency and whether paint helps prevent mold.
How long does it take to paint a bathroom ceiling?
How long will it take you to paint a bathroom ceiling?
Typically, a small bathroom ceiling takes 1–3 hours total: 30–60 minutes for prep (cover fixtures, tape, prime if needed) and 30–90 minutes for one coat of paint.
Allow drying time (usually 2–4 hours) before a second coat; larger bathrooms or textured ceilings add time.
Do I need a special paint for bathroom ceilings?
Knowing how long the job takes is helpful, but you’ll also want the right paint for a bathroom ceiling.
Use a moisture-resistant, mold- and mildew-inhibiting latex paint labeled for bathrooms or high-humidity spaces. Flat or low-sheen finishes hide imperfections, but satin or semi-gloss resists moisture better.
Primer with stain-blocking properties helps adhesion and durability, especially in steamy rooms.
Can I paint over water stains without repairing the leak?
Can you cover a water stain without fixing the leak first? You can temporarily paint over a stain, but that only hides the symptom.
Unless you stop the leak and let the ceiling dry, stain-blocking primer and paint will fail—stains will reappear, mold can grow, and paint may peel.
Fix the source, repair damage, then prime and repaint for a lasting result.
How often should a bathroom ceiling be repainted?
Wondering when to repaint your bathroom ceiling? Aim for every 3–5 years in high-moisture bathrooms; every 5–7 years in drier ones.
Repaint sooner if you see peeling, discoloration, or mildew spots. Choose mildew-resistant, semi-gloss or satin paint for durability, and address ventilation issues first so new paint lasts.
Regular inspections help you time touch-ups efficiently.
Will painting the ceiling help prevent mold?
If you keep humidity under control and use the right paint, repainting the ceiling can help deter mold growth.
Use a quality mold-resistant or mildew-resistant bathroom paint and prime any stained areas first.
Fix leaks, ventilate with an exhaust fan, and reduce condensation.
Painting alone won’t stop mold; it’s a protective measure that works best alongside moisture control and prompt repairs.