How to Paint Zebra Stripes on a Wall With Clean Sharp Lines
You can get clean, sharp zebra stripes by planning your pattern, repairing and priming the wall, and using a level, chalk lines, and a repeatable grid to mark stripes. Paint a fully cured base coat, apply high-quality painter’s tape, then seal tape edges with the base color before cutting in with an angled brush and rolling the stripe color. Remove tape at the right time and touch up lightly, and keep going for detailed tips and troubleshooting.
Quick Answer Can You Paint Clean Sharp Zebra Stripes on a Wall?
Yes—you can get clean, sharp zebra stripes with crisp edges and bold contrast.
Expect a few hours for a small wall if you’re comfortable with taping and steady brush or roller work, or plan a full day if you’re newer to painting.
At a glance you’ll need base and stripe paint, painter’s tape or stencil, a level or grid, angled brush/roller, and a sanding/primer kit.
Direct, concise outcome summary
You can paint clean, sharp zebra stripes on a wall if you plan carefully, use quality paint and tape, and follow proper masking and cutting techniques.
You’ll get crisp edges by measuring, sketching stripe shapes, applying high‑quality painter’s tape, sealing tape edges with the base color, then cutting in with a steady hand or edging tool.
Proper prep and patience guarantee striking results.
Time and skill level estimate
Plan on 4–8 hours for a simple room (including prep and drying) and 1–2 days for larger or more complex stripe patterns; you’ll need basic painting skills—measuring, steady cutting-in, and some patience—but a beginner can get crisp results by following careful masking and taping steps.
You’ll work faster with practice; allow extra time for touchups, multiple coats, and full paint cure before rehanging decor.
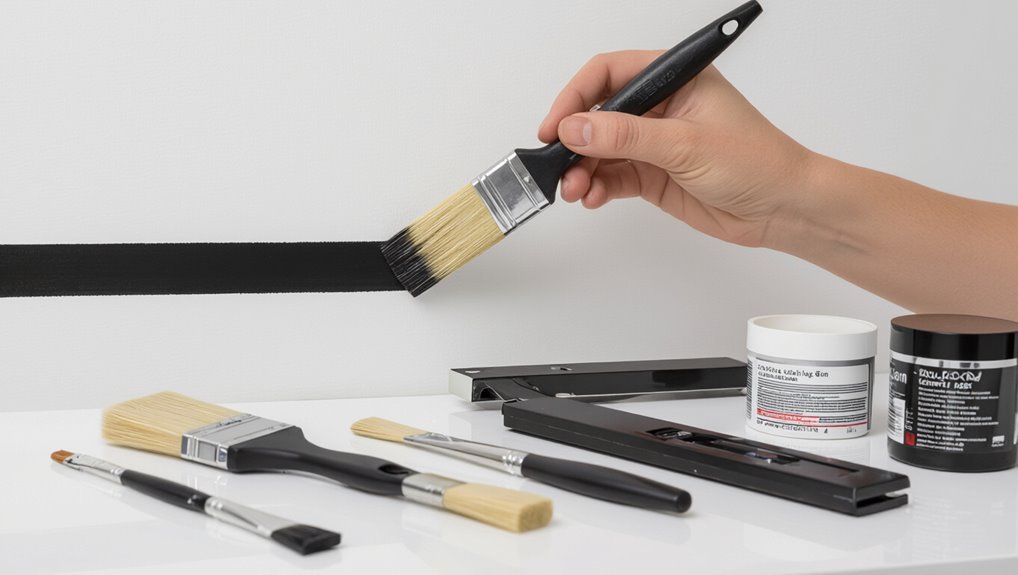
Materials and tools at a glance
After budgeting time and steady hands, gather the right kit so crisp zebra stripes don’t turn into ragged bands.
You’ll need quality paint, sharp-edged tape, and steady tools. Choose low-VOC satin black and a matching base; fine-edge painter’s tape; angled sash brush and small roller.
- Paints
- Tape
- Brushes/rollers
Understanding Zebra Stripes What, Why, and Design Choices
Think about zebra stripes as irregular, organic bands with high-contrast edges that mimic the animal’s pattern rather than regular, evenly spaced pinstripes.
You’ll decide where they work best by considering scale, orientation, and whether you want a single focal wall or a subtle accent.
Then pick colors and finishes that match the mood—strong contrast and gloss for drama, softer tones and matte for a more muted look.
What defines “zebra stripes” vs. other stripe patterns
Zebra stripes are bold alternating bands—usually high-contrast, irregular-width black and white—that mimic the animal’s pattern and create dynamic visual movement on a wall.
You’ll distinguish them by irregular, organic edges, varying stripe thickness, and high contrast.
Unlike regular pinstripes, candy stripes, or plaids, zebra stripes feel natural and kinetic, not mechanical or evenly repeated.
Where zebra stripes work best in a room (scale, orientation, focal wall)
When you choose scale, orientation, and a focal wall thoughtfully, zebra stripes can energize a space without overwhelming it.
Use large, horizontal stripes to widen short rooms; vertical bands to heighten low ceilings.
Reserve one focal wall—behind a bed, sofa, or fireplace—to keep pattern contained.
Match stripe size to furniture scale and traffic flow so the room feels intentional, not chaotic.
Choosing colors and finishes (contrast, sheen, and mood)
Color and finish choices will determine whether the stripes feel bold and dramatic or soft and sophisticated, so pick them with your room’s mood in mind.
Choose high-contrast colors for impact, muted tones for subtlety.
Match sheen to purpose: matte hides imperfections, satin adds depth, gloss sharpens edges.
Test swatches in different light, and coordinate with existing furnishings for cohesive results.
Preparation Surface, Safety, and Planning
Before you paint, inspect the wall for cracks, holes, or peeling and make any necessary repairs so the stripes sit smooth.
Clean and prime the surface for crisp edges, then tape and protect floors, trim, and furniture.
Keep the room ventilated, wear appropriate PPE, and use ladders safely while you work.
Wall inspection and repairs
Start by giving the wall a close, methodical inspection so you can spot cracks, holes, peeling paint, and any moisture issues that’ll affect adhesion. Address these problems with appropriate repairs—patching, sanding, and sealing—before you tape or prime.
Always plan for ventilation and safe ladder placement while you work. Check for loose drywall, hairline cracks, and mold; repair, sand smooth, fill gaps, and seal damp areas.
Cleaning and priming for sharp edges
Once you’ve fixed surface damage, clean the wall thoroughly so primer and tape grab firmly: wipe away dust and grease with a mild detergent solution, rinse with clean water, and let the wall dry completely.
Use a dry brush or vacuum to remove loose particles from corners and crevices, and degrease oily spots with a solvent recommended for your paint type.
Then apply a high-quality primer, smoothing with a roller for even coverage, and let it cure before taping.
Protecting floors, trim, and furniture
With primer dry and tape ready, protect the surrounding area so your zebra stripes stay the only thing that gets painted.
Cover floors, trim, and furniture methodically:
- Lay overlapping drop cloths, tape seams to avoid paint seep.
- Mask baseboards and window trim with low‑tack painter’s tape.
- Move small furniture to another room; wrap large pieces in plastic and tape edges securely.
Safety tips (ventilation, PPE, ladder use)
Because paint fumes can build up quickly and ladders can shift, prioritize ventilation, personal protective equipment, and secure ladder use before you paint.
Open windows, run fans, and take breaks to breathe fresh air.
Wear a respirator or mask, goggles, gloves, and old clothes.
Position the ladder on stable ground, lock spreaders, keep three points of contact, and avoid overreaching.
Tools, Materials, and Consumables Complete Checklist
You’ll want to choose the right paint and finish for durability and the look you want—matte hides imperfections while semi-gloss cleans easier.
Compare tapes, stencils, and edging tools to match your stripe scale and complexity so you don’t waste time or materials.
For razor-sharp lines, pick specialty cut-in brushes, edging tools, and clean blades and keep them handy during layout and painting.
Paint types and recommended finishes
When choosing paint for zebra stripes, pick a durable interior latex for the base and a high-quality acrylic or enamel for the stripes so colors stay crisp and resist scuffing; use eggshell or satin for low-sheen walls and semi-gloss for high-traffic areas or trims where you’ll want easier cleaning.
You’ll also consider:
- Colorfast acrylic for sharp contrast
- Low-VOC options for indoor air quality
- Durable semi-gloss for washability
Tapes, stencils, and edging tools comparison
1 essential set of tape, stencils, and edging tools will make painting zebra stripes clean and efficient: painter’s tape for crisp lines, adhesive-backed stencils or pre-cut templates for repeatable patterns, and angled brushes or trim edgers for touch-ups and hard-to-reach spots. Choose high-quality tape, durable stencils, and a firm edging brush for best results.
| Tool | Use | Tip |
|---|---|---|
| Painter’s tape | Masking edges | Press firmly |
| Stencils | Repeat patterns | Align carefully |
| Edging brush | Touch-ups | Keep bristles stiff |
Specialty tools for ultra-sharp lines (cut-in brushes, edging tools, razor blades)
If you want zebra stripes with razor-sharp edges, move beyond tape and stencils to a few specialty tools that handle the fine work: quality cut-in brushes for steady paint control, edging tools that ride the wall for consistent borders, and razor blades for cleaning stray paint and crisping corners.
Use angled sash brushes for tight curves, foam edgers for straight runs, and fresh blades for final crisping.
Measuring and Designing Your Zebra Pattern
Decide how wide and spaced you want each stripe and whether they’ll run vertical, horizontal, or angled to fit the room.
Lay out a repeatable grid or pattern so your stripes stay consistent across the wall.
For complex curves use templates, stencils, or a projector to transfer the design accurately.
Deciding stripe width, spacing, and orientation
Start by measuring the wall and sketching a simple grid so you can visualize how different stripe widths and spacing will read from across the room; you’ll avoid surprises when the pattern’s scaled to full height.
Decide if bold, wide stripes suit the room or slim, delicate lines.
Vary widths for natural zebra rhythm, choose vertical or diagonal orientation to alter perceived ceiling height and movement.
Creating a repeatable pattern and grid on the wall
1 simple, consistent grid will keep your zebra stripes even and repeatable across the whole wall, so measure the wall height and width, mark key reference lines with a level, and transfer your chosen stripe widths onto those lines before you paint.
Use vertical and horizontal guides, note seam or outlet locations, and label each band.
Double-check spacing, then snap chalk lines for accuracy.
Using templates, stencils, or projector for complex curves

Now that your grid and guide lines are laid out, use templates, stencils, or a projector to reproduce complex curves consistently across the wall.
Trace or project one stripe at a time, align edges to your guides, and mark registration points.
Clamp or tape templates securely, then paint within the cut edges.
Move the template methodically to maintain symmetry and rhythm across the mural.
Step-by-Step Painting Process
Now you’ll follow a clear sequence to transfer your zebra design to the wall, apply the base coat, and plan the taping so stripes come out crisp.
You’ll learn when to cut in versus use a roller for the stripe color and how to seal overlaps and angles for sharp edges.
Finally, you’ll remove the tape at the right time and touch up any imperfections for a clean finished look.
Step 1 Marking guidelines and transferring the design
Start by laying out clear guidelines so your zebra pattern stays balanced and bold; you’ll measure and mark key reference lines across the wall to transfer the design accurately.
Use a level and chalk line to draw horizontal and vertical reference grids, then sketch stripe shapes freehand or with a projector.
Number sections, step back to check spacing, and adjust marks before painting.
Step 2 Applying base coat and letting it cure
1. You’ll apply the base coat evenly, working top to bottom with smooth, overlapping strokes. Use a high-quality roller for flat coverage and a brush for edges.
Let the coat dry fully per paint instructions—usually several hours to a day—then inspect for drips or thin spots and touch up.
Allow full cure before any further work to prevent lifting or bleeding.
Step 3 Taping strategy for clean stripes (angles, overlaps, edge sealing)
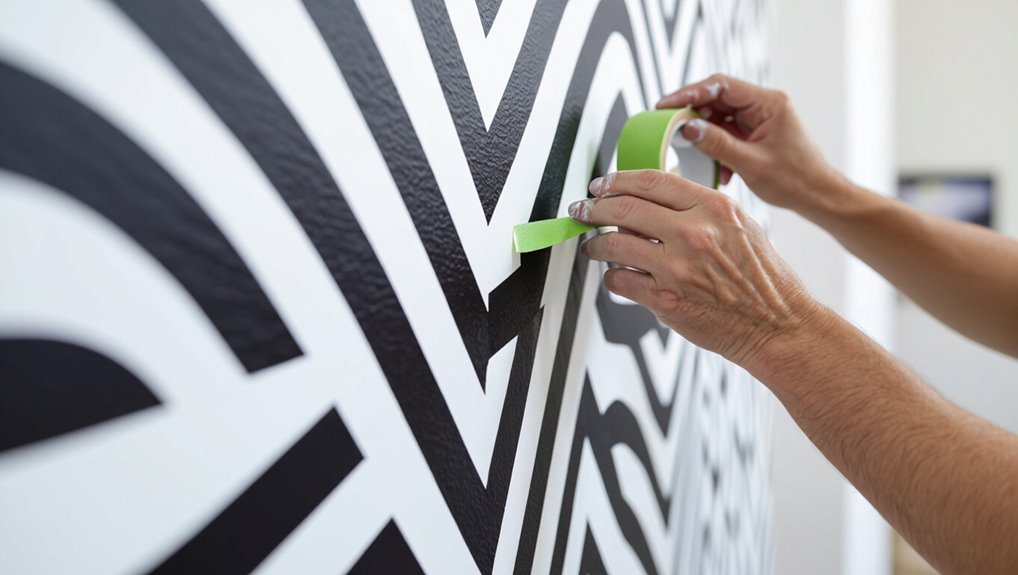
A crisp roll of painter’s tape and a straightedge will be your best tools for getting clean zebra stripes; plan your angles and overlaps before you stick anything so each stripe lines up and the tape seals against the wall.
Press tape edges firmly with a plastic card, stagger overlaps toward the darker stripe, and run a finger along seams to prevent bleed.
Step 4 Cutting in and painting the stripe color (brush vs. roller technique)
Grab your best angled brush for crisp edges and a small roller for filling large areas, then work each stripe in two passes: cut the edges first with the brush, keeping the brush angled toward the tape, and follow immediately with the roller to smooth and even the finish.
Use thin, even coats, reload the roller lightly, and maintain wet edges to avoid lap marks.
Step 5 Removing tape and touching up edges
Once the paint feels dry to the touch but not fully cured—usually after 20–30 minutes—carefully peel the tape back at a 45-degree angle to reveal crisp zebra stripes.
Do this slowly and keep the striping edge supported with your other hand to prevent the paint from lifting.
Inspect edges, use a fine angled brush for tiny corrections, feather any raised paint, and let repairs dry before evaluating overall appearance.
Step 6 Adding protective finishes and cleanup
6. After touch-ups dry, apply a clear protective coat—matte or satin for subtlety, gloss for sheen—using a high-quality brush or roller.
Work in thin, even layers, letting each dry fully before next.
Clean brushes and rollers with appropriate solvent, remove drop cloths, and ventilate.
Dispose of waste properly.
Inspect final stripes and address any minor flaws.
Advanced Techniques for Extra-Sharp Edges
When you want razor-sharp zebra stripes, consider using adhesive-backed vinyl or custom stencils for perfectly crisp edges.
Seal stencil edges with caulk or a paintable sealant to stop bleed before you roll.
For a bolder look, try two-tone feathering or subtle gradients to blend stripes without losing definition.
Painting with adhesive-backed vinyl or custom stencils

If you want razor-sharp zebra stripes, using adhesive-backed vinyl or a custom stencil gives you the cleanest edges and the most control over repeatable patterns.
Cut templates to your stripe widths, stick them firmly, and seal edges by pressing down with a squeegee.
Paint with thin coats, remove vinyl while paint’s tacky, and reposition templates to maintain consistent, crisp lines across the wall.
Using caulk or paintable sealants to prevent bleed
Vinyl or stencils give you crisp edges, but for freehand lines or imperfect tape seals you’ll want something that fills tiny gaps: paintable acrylic caulk or sealant.
Apply a thin bead along the edge, smooth with a damp finger or tool, let it skin over, then paint.
It seals pores and blocks bleed without raising texture if applied sparingly and sanded lightly.
Two-tone feathering and gradient zebra effects
Push your zebra design beyond stark black-and-white by blending two tones for feathered or gradient stripes that read crisp from a distance and soft up close.
Mask stripes sharply, then use a dry brush or sponge to feather a secondary tone inward from the edge. Work in thin layers, blend while paint’s tacky, and step back regularly to keep shifts subtle and controlled.
Common Problems and How to Fix Them
You’ll run into a few predictable issues when painting zebra stripes, so let’s tackle them head-on.
Learn why paint bleeds under tape and how to seal edges, how to realign or correct uneven stripes, and how to hide seams, fix texture mismatch, and balance color differences.
Follow the simple fixes and you’ll get crisp, consistent stripes every time.
Paint bleed under tape causes and fixes
When tape doesn’t seal perfectly, paint can seep underneath and ruin crisp zebra lines.
But most bleeds are preventable and fixable with the right steps. Press tape edges firmly, use high-quality painter’s tape, and seal with a thin coat of base color over the tape.
Remove tape at a 45° angle while paint’s tacky. For small bleeds, scrape and touch up carefully.
Uneven stripes or misaligned patterns correction steps
If paint bleeds or tape slips, uneven stripes or misaligned patterns can still show up—and they’re usually fixable without repainting the whole wall.
Use a small angled brush to clean edges, feather corrections into the stripe, and re-tape for a crisp follow-up coat.
Step back often, correct minor shifts immediately, and touch up thin areas with thin, controlled strokes for uniform lines.
Visible seams, texture mismatch, and color inconsistency
Although careful taping and layering prevent most problems, visible seams, texture mismatches, and color inconsistencies can still ruin the zebra effect and draw the eye to flaws rather than the pattern.
To fix them, sand and feather edges, skim with joint compound, retexture to match, prime patched areas, and repaint with the same batch or mix.
Blend edges with a fine brush.
Best Practices and Pro Tips
Plan your timing around paint drying windows and layer strategically so each stripe cures cleanly.
If you’ve got helpers, assign rotating work areas and clear roles to keep edges consistent.
Finish by using recommended sealants and simple cleaning routines to protect your stripes long-term.
Timing, paint drying windows, and layering
When you work in deliberate stages you’ll avoid smudges and uneven color — let each stripe reach its recommended dry-to-recoat window before masking or adding the next layer.
Check manufacturer times for temperature and humidity adjustments. Dry tests at edges confirm readiness.
Apply thin coats to prevent bleed and speed curing. Allow full cure before light sanding or topcoating to preserve crisp, durable zebra edges.
Working with assistants or rotating work areas
Assign clear roles before you start: have one person handle masking and taping, another cut in the stripe edges, and a third roll or fill in the stripe body so everyone’s movements are predictable and you avoid wet-on-wet smudges.
Rotate tasks every hour to prevent fatigue, communicate progress, keep a drying buffer between passes, and use a single person to inspect and touch up edges for consistency.
Long-term maintenance and cleaning of painted stripes
Though zebra stripes are bold, they’re easy to keep looking sharp with a simple maintenance routine you can follow every few months:
Dust or vacuum the area, gently wash scuffs with a mild detergent and soft sponge, and spot-touch any chips with matching paint.
Inspect seals and trim, avoid abrasive cleaners, and apply a clear matte sealer for extra protection in high-traffic zones.
Tools and Method Comparison When to DIY vs. Hire a Pro
Think about cost, time, and the skill needed before you start — simple stripe patterns with tape and a brush will save money, but they’ll take longer if you’re learning as you go.
If your design has complex curves or you’re planning a large mural, hire a pro to guarantee clean lines, proper scaling, and faster completion.
We’ll compare tools and methods next so you can pick the right approach for your budget and timeline.
Cost, time, and skill comparison
Deciding whether to DIY zebra stripes or hire a pro comes down to your budget, timeline, and comfort with tools and steady lines. DIY saves money but needs patience and steady hands; pros cost more but finish faster with crisp edges. Choose based on your schedule, skill, and willingness to practice.
| Item | Notes |
|---|---|
| Cost | DIY lower |
| Time | Pro faster |
| Skill | DIY learns |
| Finish | Pro cleaner |
When to choose professional services (complex curves, large murals)
If your zebra design includes sweeping, nested curves or covers an entire room, hire a pro — they’ve got the tools, scaffolding, and edge-control techniques to get crisp, consistent stripes quickly and safely.
You’ll save time and avoid costly mistakes.
Professionals handle complex masking, curvature shifts, and paint bleed prevention; they also manage cleanup and safety, so you get a flawless mural without stress.
Project Checklist and Estimated Timeline
Before you start, check your supplies—paint, primer, painter’s tape, brushes/rollers, drop cloths, and a level or laser for straight stripes.
I’ll walk you through a concise pre-paint checklist and then outline a typical timeline for a single accent wall, step by step.
That timeline will cover prep, priming, base coat, taping and stripe painting, touch-ups, and drying/cure times.
Pre-paint checklist
Usually, you’ll want to run through a quick project checklist and timeline so the zebra stripes go on smoothly and finish on schedule.
Check supplies, surface prep, and workspace before you start. Prioritize ventilation and lighting. Confirm paint compatibility and tester patch. Estimate cure times so you’re not rushed.
- Tape, primer, paints
- Sand, clean, repair
- Drop cloths, lights, fans
Typical timeline for a single accent wall (by step)
When you break the project into clear steps, a single zebra-stripe accent wall typically takes 1–3 days from prep to final touch-ups, depending on drying times and how detailed your stripe layout is.
Day 1: prep, patch, prime, base coat.
Day 2: measure, mark, apply painter’s tape, paint stripes.
Day 3: remove tape, touch up, seal, and clean.
FAQ Common Questions About Painting Zebra Stripes
You probably have a handful of practical questions before you start, like whether regular painter’s tape will work and how to get smooth, curved stripes.
You’ll also want tips on color combos for small rooms, drying times before rehanging decor, and how easy it is to remove or repaint the pattern later.
I’ll answer each of these so you can proceed with confidence.
Can I use regular painter’s tape for zebra stripes?
Curious if regular painter’s tape will cut it for zebra stripes? You can use it for straight, angular stripes, but choose high-quality, medium-adhesion tape and press edges firmly to prevent bleed.
For crisp results, seal tape edges with a thin clear coat or base color wash before applying stripe paint. Regular tape struggles with tight curves and complex shapes.
How do I get perfectly curved zebra stripes?
How do you get perfectly curved zebra stripes?
Use a flexible curve template or template made from craft foam or thin plywood, trace lightly with pencil, then apply low-tack tape following the curve.
Press edges firmly and seal with a thin coat of base color.
Paint stripe color with a small brush or roller, remove tape while wet for crisp, smooth curves.
What paint color combinations work best for small rooms?
When working in a small room, choose high-contrast zebra patterns sparingly so they add energy without overwhelming the space; pair a soft, light background (like warm white, pale gray, or creamy beige) with narrower dark stripes in charcoal, deep navy, or espresso to keep the room feeling open while still delivering bold contrast.
Add metallic accents sparingly, stick to two tones plus accent, and test samples.
How long before I can hang decor on the painted wall?
Want to hang decor without damaging your zebra stripes?
Wait at least 24 hours for latex paint to dry to the touch, but 72 hours for full cure before heavy items.
Use lightweight hooks or adhesive strips after 24–48 hours for minimal risk.
For nails or anchors, wait the full 72 hours, and test a small area first to guarantee paint won’t lift.
Can I remove or repaint the stripes easily later?
Curious whether you can change your zebra stripes later? Yes—you can remove or repaint them, but ease depends on prep and paint types.
Use primer and quality paints for cleaner shifts; low-VOC or water-based paints strip or paint over more easily than high-gloss oils.
For removal, gently sand or use a paint stripper on stubborn areas, then prime before repainting for best results.