How to Clean a Dried Paint Brush? Step-by-Step Guide
You can usually rescue a dried paint brush by first checking bristle flexibility and ferrule condition, then choosing the right cleaner—warm soapy water for latex, rubbing alcohol for acrylic, mineral spirits for oil-based paint. Comb or pick out crust, soak and gently agitate, rinse until runoff clears, then blot, reshape and dry flat or hanging. Wear gloves and ventilate. Tough buildup may need overnight soak or a commercial restorer; keep going to learn specific tips and troubleshooting.
Search Intent and Best Format for This Guide
Why are you looking up how to clean a dried paint brush—because you want to save money, salvage a favorite brush, or finish a project without buying new tools?
You’re seeking clear cleaning techniques, practical brush maintenance tips, and stepwise instructions.
This guide will use short steps, photos, and troubleshooting so you can follow easily, decide fast, and get brushes back to usable condition.
Quick Answer: Clean a Dried Paint Brush Fast
If you need a fast fix, reach for strong solvents like mineral spirits or acetone to soften oil- or enamel-based paint, and rubbing alcohol for some acrylics.
You can also use quick mechanical methods—scrubbing on a brush comb or twisting bristles with pliers—to loosen dried paint.
Combine solvent soaking for a few minutes with mechanical agitation to restore the brush as fast as possible.
Fast Solvent Options
When you need to clean a dried paint brush fast, reach for a strong solvent that matches the paint type: mineral spirits or paint thinner for oil-based paints, denatured alcohol for shellac, and acetone or lacquer thinner for lacquer-based coatings.
Choose solvent types that dissolve the binder quickly, work in a ventilated area, and monitor drying effects—some solvents evaporate fast and can harden bristles if overused.
Quick Mechanical Methods
Scrape off as much dried paint as you can with a putty knife or the edge of a metal comb.
Then work mechanically through the bristles—pinch near the ferrule and pull outward with a firm, steady motion to break up crusts and loosen hardened paint.
Use needle combs, wire brushes, or a rotary tool sparingly to finish.
These Mechanical Methods speed recovery and extend Brush Maintenance life.
Is the Brush Salvageable? (What to Inspect)
Before you start scrubbing, check the bristles by gently bending and running them between your fingers to see if they spring back or feel brittle.
Inspect the ferrule for rust or looseness and make sure the handle isn’t cracked or swollen from solvent exposure.
If the bristles still have flexibility and the ferrule and handle are sound, the brush is likely worth rescuing.
Bristle Flexibility And Feel
A quick squeeze between your fingers tells you more than looks alone: gently bend the bristles to check their flexibility and feel for stiffness, brittleness, or clumping.
You’ll judge salvageability by how springs back, whether bristle care seems possible, and if dried paint matches original paint consistency.
If bristles remain pliable and separate, you can attempt deep cleaning; if rigid or snapped, replace the brush.
Ferrule And Handle Integrity
If the bristles hold up, check the ferrule and handle next to decide whether it’s worth saving.
Inspect the ferrule for rust, loosening, or gaps; solid ferrule maintenance means the head stays secure.
Examine the handle for cracks, swelling, or rot. If the handle’s compromised, repair or replace it; otherwise, reinforce with epoxy or tape for handle protection and continued use.
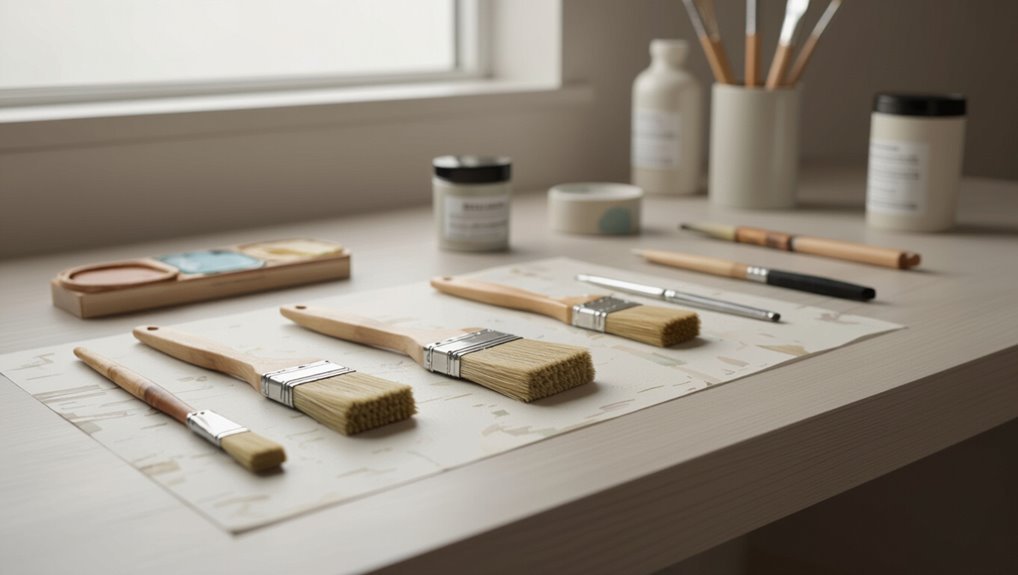
Tools and Cleaners You’ll Need
When tackling a dried paint brush, gather a few specific tools and cleaners so you can work efficiently and avoid damaging the bristles: a stiff nylon or brass brush comb, a putty knife or metal spoon for loosening clumps, a container for soaking, disposable gloves, and the right solvent for the paint type—warm soapy water for latex, mineral spirits or paint thinner for oil-based, and a commercial brush restorer for stubborn build-up.
Use appropriate cleaning techniques and match solvents to paint types.
Safety: Ventilation, Gloves, and Disposal
When you work with solvents or old paint, make sure you have good ventilation—open windows, run a fan, or work outdoors to keep fumes from building up.
Wear chemical-resistant gloves to protect your skin while you soften and clean the bristles.
Dispose of solvent, rags, and paint chips according to local hazardous-waste rules so you don’t contaminate drains or trash.
Proper Ventilation Practices
Good ventilation is essential for cleaning dried paint safely, so open windows and run a fan to move fumes away from your work area.
Use ventilation tips like positioning intake and exhaust fans for steady air circulation.
Work outdoors if possible, keep doors open to create cross-breeze, and avoid confined spaces.
Monitor scent levels and stop if you feel dizzy or nauseous.
Gloves And Safe Disposal
1 pair of chemical-resistant gloves will keep solvents and paint particles off your skin, so put them on before you touch dried bristles or cleaning agents. Choose glove types (nitrile for solvents, neoprene for stronger chemicals) and follow disposal methods for contaminated rags and jars. Ventilate, double-bag waste, and label containers.
| Gloves | Use | Disposal |
|---|---|---|
| Nitrile | Solvents | Double-bag |
| Neoprene | Strong chemicals | Hazard pickup |
Remove Loose Crusted Paint (Hand Methods)
Start by tapping the brush gently against a hard surface or rubbing the bristles between your fingers to knock off loose, crusty paint flakes—this quick hand method removes the bulk so more thorough cleaning works faster.
Tap the brush gently to loosen crusty paint, then rub the bristles to remove bulk before deeper cleaning.
Use knowledge of paint types and brush brands to choose grip and pressure.
- Frustration melts away
- Satisfaction with progress
- Hope for restoration
- Pride in care
Soften Water-Based Paint With Warm Water and Detergent
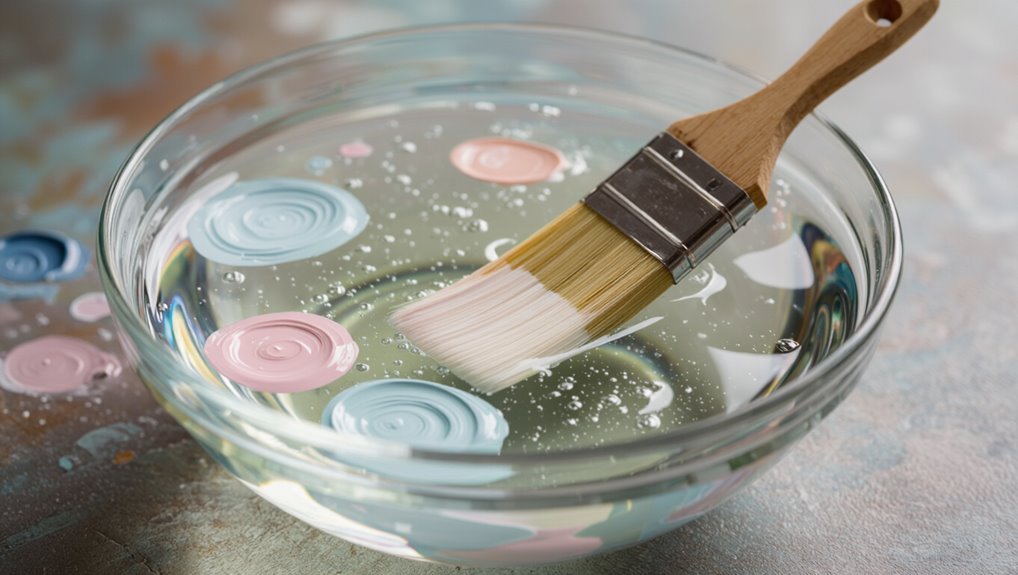
Start by filling a jar or sink with warm (not hot) water and a few drops of mild detergent so the bristles can soak without warping.
Place the brush tip-down and let it sit for 15–30 minutes, then use your fingers or a soft brush to gently agitate and loosen softened paint.
Repeat the soak-and-agitate cycle until the bristles move freely and most paint has lifted.
Warm Soak Preparation
If the paint is water-based and only partly dried, loosen it by soaking the brush in warm (not hot) water mixed with a few drops of dish detergent. The gentle heat and surfactant will soften the paint so you can work it free without damaging the bristles.
Prepare a shallow container with warm water and a mild detergent solution. Then:
- Relief as fibers loosen
- Confidence returning
- Calm in simple steps
- Satisfaction when softening
Gentle Agitation Technique
1. You’ll use gentle agitation methods to loosen softened water-based paint. After a warm detergent soak, hold the brush under running warm water and flick bristles with your thumb, working from ferrule to tip.
Rotate the brush and use a soft brush comb if needed. Repeat until paint removal is visible, then rinse thoroughly and reshape bristles before drying.
Dissolve Oil-Based Paint With Mineral Spirits or Turpentine
When oil-based paint has hardened on your brush, mineral spirits or turpentine will dissolve the residue and let you work the bristles back into shape; choose mineral spirits for a milder odor and turpentine for faster action.
You’ll soak briefly, agitate, rinse, and reshape.
Consider safety and ventilation, and explore turpentine alternatives if needed.
- Relief
- Confidence
- Satisfaction
- Renewal
Try a Brush Restorer for Stubborn Buildup
Reach for a commercial brush restorer to tackle stubborn, gummy paint that solvents alone won’t remove; these products are formulated to break down dried binders and soften bristles so you can restore shape and performance without excessive scrubbing. Use restoration products as directed, rinse, and repeat if needed to revive bristles and prolong brush care.
| Product | Action | Notes |
|---|---|---|
| Restorer A | Soften | Quick |
| Restorer B | Dissolve | Strong |
| Restorer C | Neutralize | Gentle |
Comb and Work the Bristles Safely
After using a restorer, you’ll want to comb and work the bristles to remove loosened paint and reshape the tip.
Use a wide-tooth comb or brush pick, gently teasing from heel to tip. Focus on bristle care and proper cleaning techniques without forcing.
Feel relieved as stiffness yields:
- Gentle strokes
- Patient rhythm
- Restored softness
- Ready for painting
Rinse and Neutralize Solvents Properly
Because solvents can linger in bristles and damage both brush and finish, you should rinse thoroughly with the appropriate liquid and neutralize residues before drying.
Rinse brushes thoroughly with the proper solvent and neutralize residues to protect bristles and finish before drying.
Identify solvent types (water, mineral spirits, turpentine) and flush until runoff clears.
Use mild detergent or a neutralizer for oil-based solvents to boost cleanup efficiency.
Dispose of waste per local rules; don’t pour solvents down drains.
Dry and Fully Remove Moisture or Solvent
Shake out excess liquid and blot the bristles with a clean, lint-free rag to remove as much moisture or solvent as possible before air drying.
You’ll speed drying and preserve solvent effectiveness by fanning bristles and tapping gently.
Focus on complete moisture removal; lingering dampness causes damage.
- Relief: brush feels ready
- Confidence: solvent effectiveness retained
- Urgency: don’t delay drying
- Satisfaction: bristles restored
Reshape and Store Your Brush Correctly
With the bristles dry and free of solvent, gently reshape them to their original profile so the brush performs correctly next time.
Use your fingers or a comb to align hairs, remove stray fibers, and tap out trapped dust.
For proper brush care, cover the ferrule with paper or a protector and store the brush flat or hanging using storage techniques that prevent bending and dust.
Restoration Timeline: How Long It Takes
How long restoration takes depends on how badly the paint’s set, the brush type, and the method you use; mild clogs can often be loosened and rinsed in an hour. Stubborn oil-based or enamel deposits may need overnight soaking in solvent, and full recovery—including drying and reshaping—usually runs from a few hours to 48 hours depending on drying conditions and repeated treatment.
- Frustration fades when progress shows.
- Relief arrives as bristles separate.
- Satisfaction hits with restored snap.
- Pride grows after you master restoration techniques and drying methods.
When to Repeat Steps or Try a Different Method
Once you’ve worked through the initial steps and assessed how the bristles respond, decide whether to repeat a step or switch tactics based on measurable cues: if stiffness, residue, or shape issues persist after one cycle, repeat methods like soaking or scrubbing once more.
If improvement stalls, try alternative solutions—different solvent, heat, or mechanical action—until bristles restore flexibility and clean appearance.
Natural-Hair vs. Synthetic Brushes: Specific Tips
Because natural-hair and synthetic brushes respond differently to solvents and agitation, you’ll want to tailor your cleaning approach to the brush type.
For natural hair care, be gentler with solvents and reshape while damp. For synthetic hair maintenance, you can be firmer and use stronger cleaners.
Choose methods that protect bristles and performance.
- Protect the texture
- Respect flexibility
- Save the finish
- Keep confidence
Troubleshooting and When Replacement Is Better
Even with the right care for natural or synthetic bristles, you’ll sometimes run into stubborn issues that cleaning can’t fix.
If bristles splay, feel brittle, or lose shape repeatedly, weigh replacement considerations: cost, brush quality, and frequency of use.
Don’t waste time on aggressive remedies; replace low-quality brushes promptly.
Skip harsh fixes—swap out cheap brushes quickly instead of wasting time on futile repairs.
For high-quality tools, consider professional restoration before buying new.
Frequently Asked Questions
Can Dried Paint Brushes Be Used for Different Paint Types Afterward?
Yes — you can often restore dried brushes for other paints, but you’ll need proper brush restoration techniques to confirm paint type compatibility, and you’ll want to clean, reshape, and test a small sample before full use.
How Should I Clean the Ferrule and Metal Parts Specifically?
You should scrub ferrule cleaning with a brass brush and solvent, testing whether rust-free metal maintenance really works; you’ll wipe, soak briefly in vinegar or mineral spirits, then dry and oil to prevent corrosion and loosen debris.
Are There Eco-Friendly Disposal Options for Used Solvents?
Yes — you can use biodegradable solvents and bring leftover solvent or paint waste to hazardous waste facilities or community collection events; you’ll also check local recycling programs and follow container labeling for safe, legal disposal to prevent contamination.
Will Paint Brush Cleaning Tools Damage Delicate Bristles?
Think of your brush as a sleeping fox; you’ll protect its fur. You won’t harm delicate bristles if you choose gentle bristle protection tools and appropriate cleaning techniques, rinsing softly and avoiding harsh scrubbing or stiff metal combs.
Can I Revive Brushes Stored Wet for Long Periods?
Yes — you can often revive brushes stored wet for long periods if you act promptly: soak gently in appropriate solvent, comb bristles, reshape and dry. Follow brush maintenance tips and consider better paint storage solutions to prevent recurrence.
Conclusion
You can often save a dried paint brush, but act fast and choose the right method. Studies show about 70% of brushes can be restored if cleaning starts within 24–48 hours, so don’t wait. Inspect bristles for hardness, use the appropriate solvent, and follow safety steps—ventilate and wear gloves. Synthetic and natural brushes need different care; repeat steps if bristles soften. If bristles stay misshapen or split, replacement is cheaper than wasting time.