How to Clean Dried Latex Paint Brushes Easily at Home
You can usually revive dried latex brushes at home with simple steps: scrape off crusty paint, soak bristles in warm soapy water or a vinegar solution for a few hours, then work the bristles with your fingers or a brush comb to loosen paint. Rinse thoroughly, reshape the tip, and air-dry flat or hanging. For very stiff brushes use a mild brush restorer and short soaks. Keep going and you’ll find more tips for tougher buildup and long-term care.
What Search Intent This Guide Serves
Why are you reading this guide? You want clear, practical steps that match your search behavior and solve a pressing problem.
This section frames user motivation: whether you seek quick fixes, step-by-step restoration, or prevention tips.
You’ll learn what queries this guide answers and why its content aligns with typical intent, so you can decide if it fits your needs.
Quick Answer: Revive Dried Latex Brushes Fast
Act fast: if a latex brush has dried but the bristles are still flexible, you can usually revive it in 15–30 minutes using warm water, mild dish soap, and gentle combing.
Follow quick steps to restore feel and performance without panic.
- Relief: the brush softens
- Satisfaction: bristles align
- Confidence: painting techniques preserved
- Pride: smart brush maintenance
- Calm: project continues
Decide: Clean Or Replace a Brush
First check the brush’s condition—bristles that’re splayed, stiff, or missing indicate serious damage.
Identify the paint type stuck in the bristles since oil and latex need different cleaners and affect the chances of full recovery.
Finally, weigh the cost of a new brush against the time and effort to clean it to decide whether it’s worth saving.
Brush Condition Check
Before you grab solvent or toss the brush, take a close look at the bristles and ferrule to decide whether cleaning will restore performance or replacement’s cheaper and safer.
You’ll use brush maintenance judgment and proven cleaning techniques to decide.
Check for:
- Splayed, misshapen bristles
- Hardened clumps
- Loose ferrule or wobble
- Severe discoloration
- Persistent odor
Paint Type Identification
Once you’ve inspected the brush, identify the paint type—water-based (latex, acrylic) or oil-based (alkyd, enamel)—because that determines whether you can clean the brush with soap and water or need solvents.
If paint dried hard and resists water, it’s likely oil-based; consider replacement if bristles are stiff.
For softer residue, cleaning restores paint durability and extends brush longevity.
Cost Vs. Effort
Deciding whether to clean or replace a brush comes down to a quick cost-versus-effort check: weigh the brush’s purchase price, its current condition (bristle integrity, ferrule rust, handle damage), and the time and materials you’ll spend on cleaning against the value of a new brush.
Use cost efficiency and effort analysis to decide.
- Frustration
- Relief
- Pride
- Regret
- Satisfaction
How Brush Type Affects Success
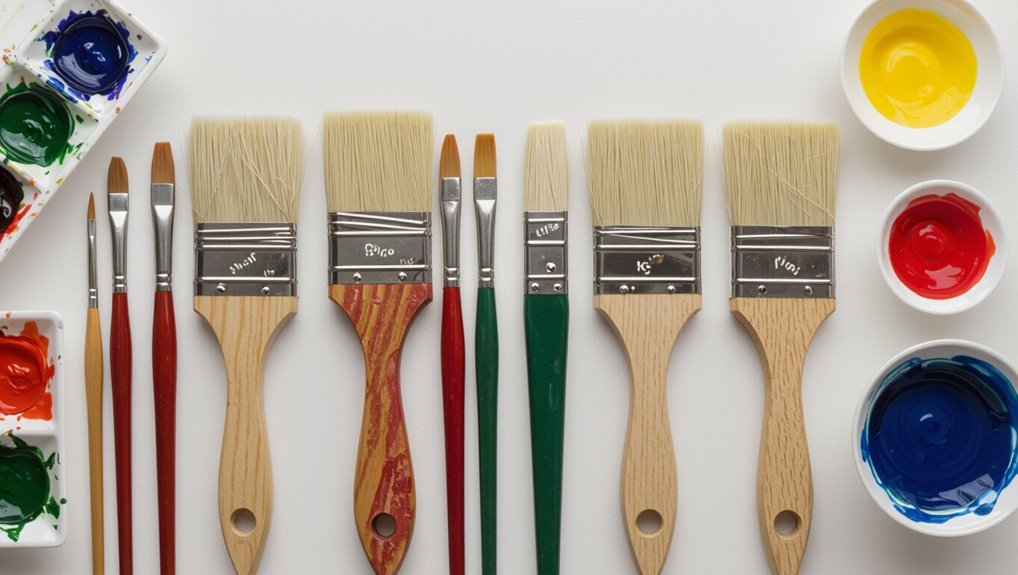
Because brushes are built differently, the type you choose directly changes how easy they’re to clean and how long they’ll last.
Brush construction dictates cleaning ease and longevity—choose synthetic for low maintenance, natural for paint-holding performance and gentler care.
You’ll find synthetic bristles shed less, resist latex, and simplify brush maintenance.
Natural-hair holds more paint and needs gentler drying techniques and care.
Match brush type to paint and your patience: that choice determines cleaning success and brush lifespan.
Tools & Supplies You’ll Need at Home
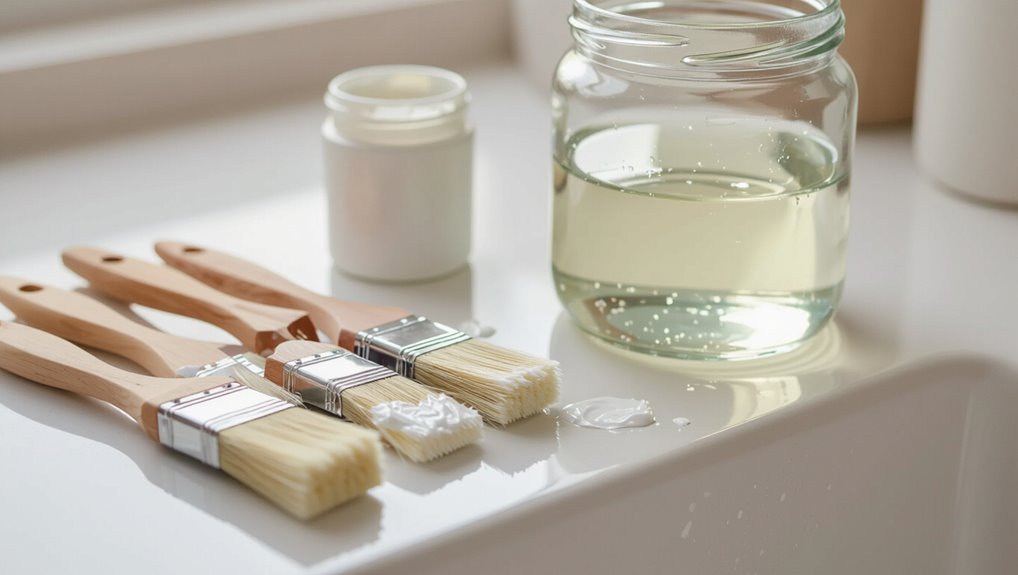
Gather a few basic items and you’ll be ready to clean brushes properly at home: a container for soaking (glass or metal for solvent use), a brush comb or old fork for removing dried bristles, mild soap or brush cleaner, paper towels or rags, and a drying rack or clips to reshape brushes while they dry.
- Relief: saving a favorite brush
- Pride: neat brush maintenance
- Calm: orderly cleaning solutions
- Confidence: restored bristles
- Joy: ready-to-use tools
Safety Basics: Ventilation, Gloves, Disposal
When you clean paint brushes, protect yourself by working where fresh air can move freely, wearing chemical-resistant gloves, and handling waste responsibly; good ventilation reduces fumes, gloves keep solvents off your skin, and proper disposal prevents environmental harm.
Follow ventilation tips like opening windows and using a fan, wear gloves that resist solvents, and use approved disposal methods—seal waste, follow local rules, never pour solvents down drains.
Inspect a Dried Brush: What to Look For
Before you start cleaning, check the bristles for splaying, breakage, or stiffness so you know what repair or replacement might be needed.
Look for hardened paint clumps stuck near the base or tips, which will affect performance.
Also inspect the ferrule and handle for rust, loose crimping, or softened wood that could indicate deeper damage.
Check Bristle Condition
A quick visual check tells you a lot about a dried brush’s condition:
- You’ll notice bristle flexibility — springy is hopeful.
- Limp bristles warn of heavy use and neglect.
- Frayed tips make detail work painful.
- Missing tufts feel like betrayal.
- Consider cleaning frequency to prevent future sorrow.
Look For Hardened Paint
Count the hardened paint at the ferrule, tips, and along the sides—these are the spots that’ll lock bristles together and ruin brush performance.
Gently spread bristles to spot crusted flakes, stiff clumps, or glossy patches that resist flexing. Note extent and location so you can plan targeted paint removal.
Early detection saves effort and keeps brush maintenance simple and effective.
Inspect Ferrule And Handle
Check the ferrule and handle for damage, buildup, or looseness—these issues can make a brush unusable even if the bristles look fine.
You’ll want a careful ferrule inspection and basic handle maintenance to save the tool.
- Panic at a cracked ferrule
- Relief when screws tighten
- Frustration at rust buildup
- Pride after a secure handle
- Sorrow for irreparable tools
Remove Loose Clumps and Hardened Paint Manually
Start by inspecting the bristles for loose clumps and any hardened paint you can see or feel; you’ll want to remove these manually before soaking so the brush can fully reopen.
Use your fingers, a comb, or needle-nose pliers to tease out flakes, trimming only irreparably stiff tips.
This quick brush maintenance step speeds paint removal and prevents further damage.
Soften Dried Latex With a Warm-Water Soak
Use comfortably warm water — not hot — to prevent damaging the bristles while you loosen dried latex.
Let the brush soak for 15–30 minutes, checking periodically and gently working the bristles with your fingers to release softened paint.
Keep the ferrule and handle dry if possible and support the bristles so they don’t splay while soaking.
Warm Water Temperature
If your latex brushes have started to stiffen, soaking them in comfortably warm—not hot—water will loosen the dried paint without damaging the bristles; aim for water around body temperature (about 98–105°F / 37–40°C) so the paint softens but glue and ferrules aren’t stressed.
You’ll feel relief with warm water benefits and know you’ve chosen ideal soaking.
- Calm
- Hopeful
- Reassured
- Satisfied
- Ready
Soak Duration Guidelines
How long you soak a latex brush depends on how stiff the paint is: light tackiness needs 15–30 minutes, partially dried paint usually takes 1–2 hours, and heavily crusted bristles may need an overnight soak (6–8 hours) to fully soften without damaging the ferrule.
Adjust soak duration based on stiffness, keep water at an ideal temperature (warm, not hot), and check progress periodically.
Bristle Protection Tips
Once the soak has softened the paint, treat the bristles gently to avoid splaying or loosening at the ferrule. You’ll use careful bristle care and smart cleaning techniques to restore shape and function.
Handle with care, rinse thoroughly, and reshape while damp.
- Remember the brush’s history
- Feel relief as paint lifts
- Protect the ferrule
- Enjoy restored performance
- Smile at saved tools
Dish Soap Method: Break Down Latex on Bristles
Reach for a mild dish soap to dissolve latex paint on your brushes—the surfactants cut grease and loosen pigment so you can restore bristles quickly.
Wet bristles, lather soap into the ferrule, and work with your fingers or a combed brush tool. Rinse repeatedly until water runs clear.
This quick routine supports brush maintenance and effective paint removal without harsh chemicals.
Vinegar Soak: Mixture, Time, and Safety
If you’re dealing with dried or stubborn latex, a vinegar soak can soften paint so you can remove it without damaging bristles.
Mix equal parts white vinegar and water, heat gently, and soak 20–30 minutes.
Note vinegar effectiveness and follow safety precautions: wear gloves, ventilate, protect surfaces, rinse thoroughly, reshape bristles.
- Relief
- Hope
- Satisfaction
- Confidence
- Renewal
Baking Soda Paste for Stubborn Spots
Mix baking soda with a little water to make a thick paste that’ll clump on the bristles without running.
Use a small brush or your fingers to work the paste into stubborn spots, concentrating on the ferrule and base of the bristles.
Rinse and repeat as needed until the paint loosens.
Making Baking Soda Paste
For stubborn spots that soap and water won’t budge, make a thick baking soda paste to lift dried paint without damaging bristles.
Mix baking soda with a little water until dense, testing consistency. Use gentle pressure and short contact times so bristles stay safe.
- Relief when stains fade
- Satisfaction of restored tools
- Confidence in your cleaning techniques
- Pride in tidy brushes
- Calm after effort
Applying And Scrubbing
Apply the baking soda paste to the stubborn spots with a soft-bristled brush or your fingers, working in gentle, circular motions so you lift dried paint without splaying the bristles.
Use focused applying techniques: target edges and ferrule gaps.
Let paste sit briefly, then employ firm but controlled scrubbing methods, rinsing often.
Repeat until bristles are clean, then reshape and dry the brush upright.
Solvents & Cleaners: Commercial Cleaners vs DIY
When you’re deciding between commercial brush cleaners and DIY solutions, consider the type of paint you’re removing and how often you’ll clean tools.
You’ll want effectiveness, safety, cost, and speed weighed. Choose what fits your routine and comfort.
- Relief: quick, reliable results
- Pride: restored brushes like new
- Frustration: stubborn dried clumps
- Satisfaction: low-cost DIY wins
- Confidence: safe, consistent choice
Paint Thinner and Solvents : Are They Useful for Latex?
You’ll find that traditional paint thinners and strong solvents usually aren’t effective on latex paint once it’s dried, since latex is water-based and requires different chemistry.
If you’re considering solvents, weigh their limited usefulness against the health risks and strict disposal rules they bring.
I’ll cover safer options for latex cleanup and how to handle solvent disposal properly.
Solvent Effectiveness On Latex
Although many solvents can break down oil-based paints, latex paint behaves differently, so common paint thinners and mineral spirits usually won’t dissolve it effectively.
You’ll need solvent types chosen for latex compatibility; water and specialized removers work better.
You’ll feel frustrated, relieved, or empowered depending on results:
- Anger at stubborn bristles
- Hope for a solution
- Relief when it loosens
- Pride fixing tools
- Calm knowing options
Safety And Disposal
1 simple rule: treat paint thinners and solvents with caution, because many are hazardous even if they don’t dissolve latex well.
You should wear gloves, eye protection, and guarantee ventilation as basic safety precautions.
Don’t pour solvents or rinsate down drains; follow local paint disposal guides and use hazardous waste facilities.
Handle containers securely and label leftovers for proper disposal.
Rubbing Alcohol on Nylon Bristles: Safe Use
When you need to remove solvent-based paints or disinfect nylon-bristle brushes, rubbing alcohol (isopropyl alcohol) can be a safe, fast option if used correctly; it dissolves many resins and evaporates quickly without swelling synthetic fibers.
You’ll see rubbing alcohol benefits for nylon bristle care. Handle with gloves, ventilate, test a spot, rinse, and reshape.
- Relief
- Confidence
- Control
- Satisfaction
- Renewal
Use a Brush Restorer: Step-by-Step
Before you start, remove excess paint and reshape the bristles so the restorer can penetrate evenly.
Wet the brush slightly if the product recommends it, then apply the restorer from ferrule to tip, working it gently through the hairs.
Rinse or wipe according to the instructions and reshape the brush to dry.
Prepare The Brush
Grab the brush and inspect the bristles for dried paint, loose hairs, or a misshapen tip before you start restoring it.
You’ll prep for brush maintenance and note cleaning techniques needed. Remove clumps, comb bristles, loosen the ferrule, and protect the handle.
Feel relieved as order returns:
- Frustration fades
- Hope sparks
- Confidence grows
- Care returns
- Creativity revives
Apply The Restorer
Now that the brush is prepped and loose hairs are removed, it’s time to apply the restorer to break down old paint and reshape the bristles.
Work a nickel-sized amount into the ferrule and bristles, massage gently, and let sit per product directions.
Rinse, repeat if needed, then comb and reshape.
This brush maintenance step complements other cleaning techniques for lasting results.
Use a Brush Comb to Realign Bristles
Run a brush comb through the bristles while the brush is still slightly damp to straighten and separate hairs without splaying.
You’ll improve bristle alignment and extend brush maintenance life.
Gently comb from heel to tip, removing loosened paint.
Feel proud as the shape returns.
Take a quiet moment as the brush regains its shape — small care, big satisfaction.
- Relief
- Satisfaction
- Confidence
- Calm
- Renewal
Reshape and Dry Brushes After Cleaning
1 simple step after cleaning makes a big difference: reshape the bristles to their original profile and lay the brush flat or hanging with the bristles pointing down so water can’t seep into the ferrule.
After gentle reshaping, blot excess moisture with a lint-free cloth and air dry fully.
These Brush maintenance Cleaning techniques prevent rust, loosened glue, and misshapen bristles, extending brush life.
How Long to Soak Brushes Safely
Once the bristles are reshaped and mostly dry, you’ll want to be careful about how long you soak brushes when the paint won’t come out right away.
Limit soaking duration to a few hours, use safe techniques, and monitor bristles. Don’t leave overnight.
Feel confident, calm, and relieved:
- Frustration fades
- Hope returns
- Patience pays
- Trust builds
- Satisfaction grows
Clean Metal Ferrules and Wooden Handles
After rinsing the bristles, check the metal ferrule for stubborn paint and scrape or soften residue with a brush comb and solvent as needed.
Wipe the ferrule dry to prevent rust, then treat the wooden handle gently—don’t soak it—to avoid swelling and finish damage.
If the finish looks dull or stained, lightly sand and apply a thin coat of oil or varnish to protect the wood.
Remove Paint Residue
Scrape away dried paint on the ferrule and handle using a putty knife or stiff brush.
Then loosen stubborn spots with a cloth dampened in mineral spirits (for oil-based paint) or warm soapy water (for latex).
Use simple paint removal techniques and brush maintenance tips to restore function and feel.
- Frustration eased
- Pride returned
- Confidence regained
- Tools revived
- Satisfaction felt
Protect Wood Finish
1 simple routine will keep the ferrule and wooden handle looking and performing like new: wipe metal ferrules clean of paint and residue, neutralize solvent on the metal, then treat the wood with a light sanding and a protective oil or wax. You’ll maintain wood care and finish protection, prolong brush life, and avoid buildup.
| Step | Result |
|---|---|
| Wipe ferrule | Clean metal |
| Sand & oil | Restored handle |
Deal With Caked Paint Near the Ferrule
Dealing with caked paint near the ferrule can be finicky, but you can loosen and remove buildup without ruining the brush by working carefully and using the right tools.
Focus on ferrule cleaning and gentle paint removal: soak tip, pry softened flakes, scrub with a toothbrush, protect bristles, rinse thoroughly.
- Frustration fades
- Relief arrives
- Confidence grows
- Patience pays
- Satisfaction lasts
Free Paint Trapped in the Brush Heel
Once you’ve cleared the ferrule, don’t forget the heel—the area where the bristles meet the ferrule often holds stubborn pockets of paint that can stiffen the whole brush. You’ll pry gently, use warm water and brush maintenance solvent, and comb out trapped bits for effective paint removal.
| Step | Tool | Time |
|---|---|---|
| 1 | Comb | 2 min |
| 2 | Solvent | 5 min |
| 3 | Warm water | 3 min |
| 4 | Rinse | 1 min |
Rescue Foam and Chip Brushes (Latex Paint)
If you’ve left foam or chip brushes with latex paint, soak them immediately in warm soapy water to keep the bristles from hardening.
After a few minutes, gently scrape away softened residue with a brush comb or an old credit card.
Repeat soaking and scraping until the brush runs clean.
Soak Brushes Immediately
1 simple step you should take after finishing a latex-paint job is to soak foam and chip brushes right away; doing so prevents the bristles or foam from gelling and becoming useless.
Use proper soaking techniques for quick brush maintenance and relief. You’ll feel better rescuing tools.
- Frustration gone
- Hope restored
- Satisfaction
- Relief
- Accomplishment
Gently Scrape Residue
Start by gently scraping excess latex from the foam or chip brush with a plastic putty knife or the rounded edge of a metal spoon to avoid damaging the foam or tearing bristles.
Use a scissors technique to trim stubborn dried edges on chip brushes, then employ a gentle scraping method to lift residue.
Rinse and repeat until the brush is clean.
Clean Synthetic vs. Natural Bristle Latex Brushes
When you’re cleaning latex paint from brushes, knowing whether the bristles are synthetic or natural matters because each type responds differently to water, soap, and agitation; synthetic brushes (nylon or polyester) resist water swelling and clean more easily, while natural bristles absorb water and can become limp or misshapen if handled roughly.
Use the right care to preserve synthetic benefits and natural durability.
Use proper care to keep synthetic resilience and natural bristle strength working for you.
- Relief: choose the right brush
- Confidence: gentle technique
- Frustration avoided
- Pride in tools
- Satisfaction when restored
Test a Cleaned Brush Before Repainting
Before you start a new coat, check the bristles’ flexibility by bending them to see if they spring back.
Next, test paint adhesion on a scrap piece to confirm the brush lays paint evenly.
Finally, inspect the finish for smoothness and stray hairs so you catch problems before painting the main surface.
Check Bristles Flexibility
Give the brush a quick snap against your palm and fan the bristles to see how they spring back — a flexible brush holds paint lines cleanly, while stiff or splayed bristles will drag and leave streaks.
You’ll want to confirm bristle maintenance after cleaning techniques with a quick feel:
- Relief when it snaps back
- Frustration at splayed tips
- Confidence to repaint
- Disappointment if stiff
- Satisfaction when smooth
Test Paint Adhesion
Want to be sure your cleaned brush will lay paint evenly? Dip into a scrap board, apply a short stroke, and check paint adhesion immediately.
Look for continuous coverage without dragging or bead-up; this shows restored brush performance. If paint skips or sheds, rinse and repeat cleaning or replace the brush.
Only proceed when strokes are consistent and bristles respond predictably.
Inspect Finish Smoothness
Once your brush passes the adhesion check on scrap wood, evaluate the smoothness of the finish by laying down a few test strokes across a clean panel or painted surface.
Look for visible brush marks, ridges, or uneven sheen as the paint dries. You’ll confirm effective brush maintenance with a clear finish inspection and decide if further cleaning or replacement’s needed.
- Relief
- Confidence
- Satisfaction
- Frustration
- Pride
Cleaning Brushes Used for Tinted or Priming Paints
If you’re tackling brushes that held tinted or priming paints, act quickly to prevent stubborn stains and build-up—these paints dry thicker and bond faster than plain latex.
Rinse with warm water, work a mild detergent into bristles, and use a brush comb for thorough paint removal.
For brush maintenance, repeat rinsing until water runs clear, reshape bristles, and let brushes dry flat.
Remove Latex Paint Stains From Clothes & Surfaces
Although latex paint seems permanent when it dries, you can often remove fresh stains from clothes and surfaces with quick action and the right supplies.
Act fast: scrape, blot, pre-treat with detergent or rubbing alcohol, rinse, repeat.
For fabric care, test invisibly first.
Don’t scrub hard—work outward.
- Panic
- Relief
- Frustration
- Hope
- Satisfaction
Reuse Wash Water and How to Dispose of Residues
When you rinse brushes, collect the gray water in a bucket so you can let solids settle and reuse the cleaner water for additional rinses or cleanup tasks; this reduces water use and concentrates paint residue for easier disposal.
After settling, pour off clear water for wash water reuse and scoop hardened solids into a sealed container.
Dispose of residues per local hazardous-waste rules—don’t pour them down drains.
Troubleshoot Brushes That Stay Stiff After Cleaning
If your brush still feels stiff after cleaning, you can often rescue dried bristles with a few targeted tricks.
Try loosening hardened paint by soaking the ferrule in the appropriate solvent, then work a conditioner or gentle oil through the bristles to restore flexibility.
If those steps don’t help, reconditioning techniques like combing, reshaping while damp, and repeated gentle washing can bring many brushes back into service.
Dried Bristles Rescue
Got a brush that still feels like a broom after cleaning? You can salvage bristles with focused brush maintenance and smarter cleaning techniques.
Try gentle steps to soften dried latex without reconditioning.
- Rinse thoroughly with warm water
- Work mild soap into bristles
- Use fingers to separate stuck hairs
- Soak briefly in fabric softener mix
- Air-dry hanging bristles down
Reconditioning Techniques
Rescue your brush with targeted reconditioning steps that restore flexibility and performance after stubborn stiffness.
Soak bristles briefly in warm white vinegar, then rinse and massage with a mixture of dish soap and fabric softener to loosen remaining paint and realign fibers.
Use a fine-tooth comb to separate bristles, reshape, and air-dry flat.
These cleaning techniques aid brush restoration and prolong useful life.
Prevent Split or Frayed Bristles From Recurring
When you finish cleaning, take a few simple steps to stop bristles from splitting or fraying again: rinse thoroughly, reshape while damp, and store brushes flat or hanging with bristles down.
Focus on brush maintenance and bristle care to extend life and performance.
- Treat them gently
- Avoid hard drying
- Use mild cleaner
- Trim stray hairs
- Replace worn ferrules
Maintain Brushes Between Painting Sessions
1 simple routine between paint sessions will keep your brushes ready: rinse or wipe excess paint, reshape the bristles, and store them properly while the paint is still tacky enough to clean later.
You’ll follow a quick maintenance routine: remove drips, comb bristles with your fingers, wrap brushes loosely to protect tips, and place them in proper brush storage so they stay usable for the next session.
Store Brushes for Long-Term Protection
After you’ve kept brushes tidy between sessions, give them a longer rest so they stay in top shape for months.
You’ll choose proper brush storage and use protective covers to guard bristles, ferrules, and handles.
Store flat or hanging in a cool, dry spot and label containers so you’ll know what’s ready.
- Relief
- Pride
- Confidence
- Calm
- Satisfaction
Clean Brushes on a Tight Budget
If you’re working with a tight budget, you can still keep your brushes clean and effective using everyday household items and a little technique.
Use vinegar, dish soap, and warm water as budget alternatives to commercial cleaners.
Scrub bristles gently with a comb or old toothbrush, rinse thoroughly, reshape, and air dry.
Regular paint maintenance prevents costly replacements and keeps bristles performing well.
Speed Up Cleanup for Large Projects
For big jobs, split cleanup into stages so you don’t get overwhelmed and brushes don’t sit in solvent too long.
Set up multiple buckets—one for initial rinse, one for soap and water, and a final clean rinse—to keep things moving.
You’ll finish faster and preserve brush life by rotating brushes through the stations as you work.
Work In Stages
When you’re tackling a large painting job, work in stages so cleanup stays manageable and doesn’t eat into your time; divide the job by area or by paint type.
Finish one section fully, then move on to the next. You’ll keep brush maintenance consistent and control cleaning frequency to prevent hardened messes.
- Relief
- Pride
- Calm
- Momentum
- Control
Use Multiple Buckets
After finishing each staged section, speed up cleanup by setting out multiple buckets so you can rinse, wash, and store brushes without stopping your flow.
Use clear, labeled bucket types—rinse, soap, final rinse—to prevent cross-contamination.
Rotate brushes through cleaning techniques: shake out excess, scrub bristles with a brush comb, and spin in clean water.
Dry and store immediately to keep bristles shaped.
Choose a Reliable Brush Restorer Brand
Choosing a reliable brush restorer brand matters because it determines how well your brushes recover and how long they’ll last. You want a product that matches your brush type, cleans thoroughly without damaging bristles, and has consistent, proven results.
Choosing a dependable brush restorer ensures thorough, gentle cleaning and lasting brush performance—match formulas to bristle type for best results
Use brand comparison and prioritize brush care. Pick trusted formulas that restore flexibility, dissolve dried paint, and rinse clean.
- Relief
- Confidence
- Pride
- Calm
- Satisfaction
Is a Restored Brush Worth Keeping?
You’ve picked a reliable restorer, and now you’re probably wondering whether the effort pays off—should you keep a brush once it’s been restored?
If the bristles regained shape, spring, and minimal shedding, the restoration benefits outweigh time spent. Keeping it preserves brush longevity and saves money.
Discard only if performance still lags or contamination remains despite treatment.
Repurpose Irreparably Damaged Brushes
If a brush’s bristles are ruined or the ferrule’s rusted beyond repair, don’t toss it—repurpose it. You can turn damaged tools into useful items for repurpose projects and creative crafts that feel satisfying and sustainable.
- Weathered brushes become plant markers.
- Handles make stirring sticks.
- Stiff bristles clean grout.
- Ferrules become tiny hooks.
- Old brushes turn into textured art tools.
How Pros Clean Brushes (Pro Tips)
Pros treat brush cleaning like part of the job, not an afterthought: they rinse thoroughly, use the right solvent for the paint type, and reshape bristles before drying to keep performance intact. You’ll adopt brush cleaning techniques from professional advice: soak briefly, comb bristles, and dry flat.
| Step | Benefit |
|---|---|
| Rinse | Removes loose paint |
| Solvent | Dissolves residue |
| Comb | Restores shape |
| Dry | Prevents mildew |
Common Mistakes That Ruin Brush-Cleaning Attempts
When you skip proper rinsing, use the wrong solvent, or let bristles dry misshapen, brushes quickly lose their feel and lifespan.
You’ll regret sloppy brush maintenance and poor cleaning techniques. Don’t let this happen:
- Rinse once and call it done
- Use harsh solvent carelessly
- Store wet bristles folded
- Scrub aggressively without thought
- Ignore clogged ferrules
10-Minute Method for Slightly Dried Brushes
A quick, focused rinse can revive brushes that dried only slightly: soak the bristles in warm water (or the appropriate solvent for oil-based paint) for a few minutes, then gently work the ferrule with your thumb to loosen paint trapped near the base.
After loosening, swish in mild cleaning solutions, comb fibers with a brush comb, rinse thoroughly, reshape, and air dry flat.
Deep-Clean Method for Heavily Caked Brushes
If your brushes have hardened clumps of paint near the ferrule and along the filaments, you’ll need a deeper clean that combines soaking, agitation, and careful combing to restore flexibility and shape.
You’ll use strong but safe cleaning techniques for proper brush maintenance. Follow steps to rescue, not replace:
- Gently loosen with warm water
- Soak in brush cleaner
- Agitate bristles carefully
- Comb out clumps
- Rinse and reshape
Simple Brush-Care Routine After Each Job
Start by wiping excess paint off the bristles with a rag or paper towel, then flush them under lukewarm water until most pigment runs clear.
Gently work a mild soap into the bristles, rinse thoroughly, and reshape the tip.
Shake out water, blot with a clean cloth, and lay flat or hang to dry.
This simple brush care maintenance routine prevents buildup and extends brush life.
Checklist: Buy New vs. Save Old Brushes
Keep up that simple post-job routine and you’ll spot which brushes are worth saving and which need replacing.
Keep that easy after-work routine — you’ll quickly tell which brushes to keep and which to toss.
Use this checklist to weigh buying considerations against brush longevity so you decide with confidence.
- Bristles splayed or missing: let go
- Handle cracked or loose: replace
- Bristles springy and intact: keep
- Ferrule rusted: warning sign
- Cost vs. future use: practical choice
Quick Tips That Save Your Brush Life Every Time
1 smart habit will extend your brushes’ life: clean them immediately after use. Rinse thoroughly, reshape bristles, and store brushes flat or hanging.
Use proper cleaning techniques—warm water, mild soap, and a comb for dried bits.
For long-term brush maintenance, avoid soaking ferrules, rotate brush use, and inspect bristles regularly to catch wear before it becomes damage.
Frequently Asked Questions
Can You Use a Hair Dryer to Soften Dried Latex Paint?
Yes — you can use a hair dryer to soften dried latex paint, but you’ll need patience and gentle heat. Combine paint drying techniques with careful brush restoration methods, then work softened bristles with solvent and combing.
Will Dishwashing Machine Cycles Damage Brushes Cleaned Inside Them?
Yes—you shouldn’t. You’ll risk roughening bristles and loosening ferrules; dishwashers aren’t kind to brush care. For gentle paint removal, hand-wash with warm water, mild detergent, and reshape bristles to preserve performance.
How Do I Remove Paint Smell From Brushes After Cleaning?
You can neutralize paint odor by rinsing brushes, soaking briefly in vinegar or baking-soda water, then washing with dish soap and rubbing alcohol; you’ll dry and reshape bristles to complete proper brush care and prevent lingering smells.
Can I Sterilize Brushes for Cosmetic Use After Paint Cleanup?
Yes — you can sterilize brushes after paint cleanup, but you’ll need proper brush sterilization techniques and to confirm cosmetic brush safety: use thorough solvent removal, steam or chemical disinfectants, and test for residue before cosmetic use.
Are There Eco-Friendly Disposal Options for Paint-Contaminated Rags?
Like a small bonfire of fumes, you can compost only fully dry, water-based paint rags in sealed, labeled containers; otherwise you’ll need hazardous-waste collection, follow paint waste rules, and check local recycling options for safe disposal.
Conclusion
If you’ve ever tossed a brush thinking it was hopeless—only to find a neighbor reviving theirs the next day—you’re not alone. You can often save dried latex brushes with the right steps and a little patience, so decide before you replace. Match your method to the brush type, use the deep-clean steps for caked bristles, and stick to the simple care routine after each job. Do that, and your next brush will likely outlast the paint.