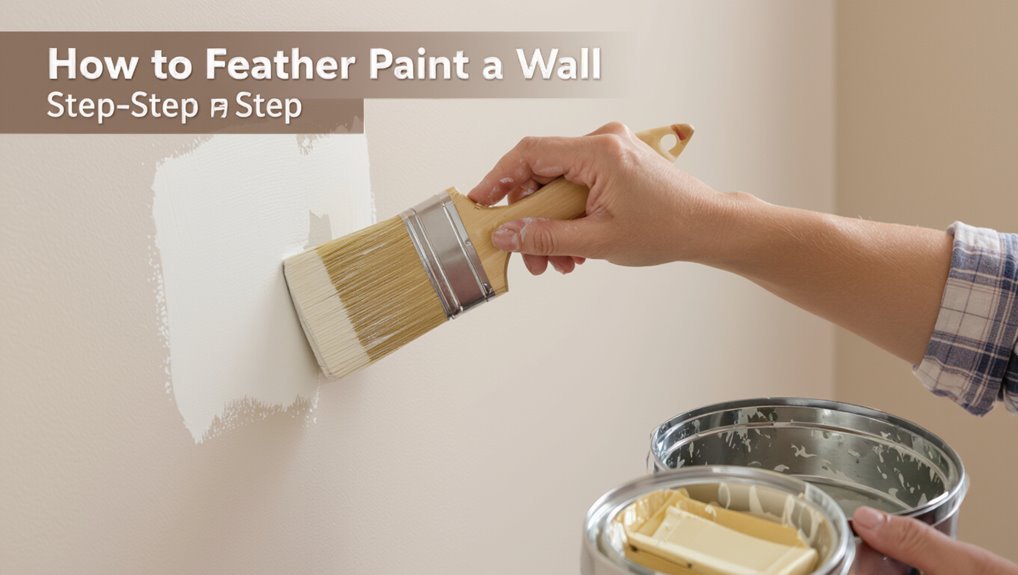
How to Feather Paint on a Wall for Smooth Blending
You’ll get smooth blends by prepping the wall, priming if needed, and working wet-on-wet in small sections with soft, sweeping feather strokes. Control paint load—less for crisp edges, more for soft fades—and overlap brush and roller passes while the paint’s still damp. Use angled brushes for corners and dry-brush or glaze to soften lines. Sand and re-feather any ridges once dry. Keep practicing on a test board and you’ll find step-by-step tips to refine technique.
How to Feather Paint a Wall: Step-by-Step
Start by preparing the wall and gathering your tools: clean the surface, sand any rough spots, tape off trim, and lay down drop cloths so paint won’t get where it shouldn’t.
You’ll follow feather painting techniques, apply color theory principles, control paint consistency, use blending methods, keep tool maintenance, draw design inspiration, and express artistic expression while following concise wall preparation tips.
Quick Overview: What Feather Painting Does
Feather painting is a soft, textured glazing technique that blends translucent colors with a feather or brush to create subtle depth.
You’ll find it works best on accent walls, entryways, or rooms where you want a gentle, sophisticated focal point rather than bold patterning.
Used sparingly, it produces wispy striations and soft gradients that enhance light and surface without overwhelming the space.
What Feather Painting Is
A soft, sweeping technique, feather painting lets you create delicate gradients, subtle texture, and lifelike detail on walls using lightly loaded brushes, feathers, or specialized tools.
You’ll use feather painting techniques to lift, soften, and merge edges while practicing controlled pressure and motion.
Follow pragmatic color blending tips to shift hues smoothly, remove brush marks, and preserve intentional highlights for natural results.
Where It’s Best Used
Now that you’ve practiced the soft strokes and blending that define this method, you’ll see where feather painting really shines: anywhere you want gentle gradients, subtle texture, or lifelike softness. You’ll use it for feature walls, nurseries, and accent areas to influence mood via color psychology and to follow current design trends.
| Space | Use |
|---|---|
| Living room | Feature wall |
| Nursery | Soft mood |
| Hallway | Subtle flow |
| Retail | Accent vibe |
| Bedroom | Calm ambiance |
Basic Visual Effects
Create soft gradients and delicate texture with feather painting, giving walls a lifelike softness that changes with light and distance.
You’ll use basic color theory and color psychology to guide color saturation and light effects, apply blending techniques and paint layering for smooth shifts, and exploit texture contrast and surface dynamics to achieve visual harmony and artistic expression.
- Mood control
- Depth cues
- Subtle highlights
- Seamless joins
When Feathering Is Worth the Effort
Wondering whether feathering that wall edge will actually make a visible difference? You’ll see value when subtle gradients, soft shifts, or light-sensitive rooms matter.
Use feathering techniques to reduce hard lines and highlight blending nuances between tones. It’s worth the effort when viewers notice edges up close, when lighting reveals seams, or when you want a polished, professional finish that flat brushing can’t achieve.
Projects Best Suited to Feather Painting
You’ll find feather painting really shines on accent walls and murals where the subtle texture can become a focal point.
It also works great for changing color schemes, letting you blend hues smoothly between adjacent rooms or within a single space.
Think about using it where you want controlled visual interest without overwhelming the room.
Accent Walls And Murals
One striking way to showcase feather painting is on an accent wall or mural, where the technique’s texture and delicate strokes become a room’s focal point. You can scale motifs from a single feather motif to a sweeping avian scene to suit the space and your style.
- accent wall inspiration: pick bold wall art concepts.
- mural design techniques: plan composition.
- color palette ideas & contrasting color schemes.
- feather paint styles, texture blending tips, artistic feathering methods.
Transitional Color Schemes
When you want a subtle shift between rooms or moods, transformative color schemes make feather painting shine by bridging bold and neutral tones seamlessly. You’ll use changing palettes and color psychology to plan mood enhancement, then apply blending techniques and color layering for smooth aesthetic changes.
You’ll create design harmony and visual balance, ensuring each feathered wall supports the home’s flow and feels intentional.
Tools You Need for Feather Painting
Before you start, gather a few essential tools that’ll make feather painting on a wall reliable and enjoyable:
- Quality paints and a tray for smooth mixing.
- Drop cloths and painter’s tape to protect areas.
- A range of feather painting tools for texture control.
- Clean rags and solvent for quick blending and cleanup.
Focus on brush types and handling for consistent feathered shifts.
Best Brushes for Feathering Edges
Pick brushes that give you control and a soft edge: a few angled sash brushes for precision, a couple of soft-bristle filberts for smooth shifts, and a fan brush or hake for subtle blending.
You’ll select brush types that suit paint viscosity and surface. Use gentle strokes, light pressure, and varied angles to practice feathering techniques, keeping edges soft and changes seamless without overworking the paint.
Best Rollers and Nap Choices for Blending
After you’ve practiced feathering with brushes, choosing the right rollers and nap will help you blend larger wall areas without losing those soft edges.
Use roller materials that suit finish types and control paint absorption. Consider nap length and roller texture for surface and roller application. Pick the right roller size.
Try these blending techniques:
- Short nap, smooth surfaces
- Medium nap, light texture
- Long nap, heavy texture
- Microfiber for low absorption
Paint Types That Feather Well (And Why)
When you’re aiming for soft, seamless feathering, choose paints with good open time and body—these let you blend edges before the film skins over and keep brush or roller marks from setting.
You’ll favor satin or eggshell paint finishes for forgiving color mixing and feathering techniques.
Match paint brands and feathering tools to wall textures, and practice blending methods during paint application for predictable results.
Choosing Base and Topcoat Colors for Smooth Fades
You’ll want to pick base and topcoat colors that share complementary undertones so the fade reads as a single, intentional change.
Adjust the lightness of each layer to control how soft or dramatic the shift will look.
Keep contrast moderate so the feathering blends smoothly without losing depth.
Choosing Complementary Undertones
If you want smooth feathered fades, pick base and topcoat colors that share a subtle undertone so they blend rather than clash.
Use color theory and color harmony to guide undertone selection for complementary shades and color combinations.
Consider mood influence, design principles, aesthetic balance, tonal relationships and visual impact.
- Test swatches
- Compare undertones
- Adjust intensity
- Observe in light
Balancing Lightness And Contrast
Because your feathered fades rely on gradual changes, pick a base and topcoat with a clear but manageable lightness difference so alterations read smooth rather than abrupt.
You’ll test swatches to confirm light balance, then adjust saturation slightly.
Use contrast techniques like glazing or feathered brushing to control edge sharpness.
Work in layers, step back often, and tweak values until shifts feel natural.
Mixing Paint for Gradual Transitions
When you’re mixing paints for gradual shifts, start by planning the exact middle tones you’ll need and mix them in small increments so you can match them on the wall; this lets you blend smoothly from one color to the next without running out of the right shade.
- Use color theory and color selection.
- Test paint ratios and paint consistency.
- Apply gradient techniques and blending methods.
- Employ layering strategies, changeover tips, shadow effects for visual harmony.
Prep: Clean and Repair the Wall
Before you start feathering, clean the wall thoroughly to remove dust, grease, and loose paint so your finish will stick.
Patch any holes or cracks with spackle, let it dry, then sand smooth to a seamless surface. A clean, even wall makes feathered connections look professional and lasts longer.
Surface Cleaning
Start by removing dust, grease, and loose paint so your feather design will stick and look crisp; use a mild detergent, a sponge, and a soft-bristled brush for stubborn grime.
Focus on surface preparation techniques and appropriate cleaning solutions so paint adheres.
Then:
- Wipe with detergent solution
- Rinse with clean water
- Dry thoroughly
- Inspect for residue
Patch And Sand
Patch any holes or cracks with a suitable spackling compound, let it dry, then sand smooth so your feather design sits on an even surface.
Use proper patch techniques for larger dents and quick fillers for hairline cracks. Choose sand types—medium then fine grit—so edges blend.
Wipe dust, inspect for imperfections, and repeat patching or sanding until the wall is uniformly smooth for painting.
Tape and Protect Trim for Feathered Edges
1 simple strip of painter’s tape can make the difference between a crisp feathered edge and a messy finish, so mask off all trim, baseboards, and adjacent surfaces you don’t want paint on.
Focus on tape application and trim protection; press edges firmly and overlap corners.
- Clean surfaces
- Use low-tack tape
- Seal edges with a fingertip
- Remove tape while wet
How to Prime for Even Feathering Results
Before you prime, you’ll want to clean the wall thoroughly—remove dust, grease, and any loose paint so the primer sticks evenly.
Choose a primer formulated for your surface and paint type—stain-blocking or high-adhesion primers work best for feathered blends.
Apply according to the label and let it dry fully to guarantee smooth, consistent feathering.
Surface Cleaning Basics
If you want even feathering, start by cleaning the wall thoroughly so primer and paint can bond uniformly; remove dust, grease, and loose particles with a mild detergent and a soft brush or sponge.
Then rinse and let the surface dry completely.
- Inspect wall materials and surface texture.
- Use appropriate cleaning solutions and tools.
- Address stain removal and environmental factors.
- Keep routine wall maintenance to improve paint adhesion.
Primer Selection Tips
With the wall clean and dry, pick a primer that promotes smooth feathering by matching it to your surface—use a high-adhesion primer for glossy or previously painted areas, a stain-blocking primer where discoloration remains, and a sanding-friendly primer on porous drywall.
Choose primer types that suit your topcoat; consider paint quality, dry time, and sanding ease so your feathering blends cleanly.
Set Up Your Workspace to Keep Blends Continuous
When you plan your workspace, arrange everything so your wet paints and tools stay within comfortable reach; that way you won’t break a blend hunting for a brush or palette.
You’ll focus on workspace organization and blending techniques by keeping supplies organized, lighting consistent, and surfaces protected.
- Group brushes by size
- Use a wet palette nearby
- Set directional lighting
- Clear traffic paths
How Much Paint to Load on Your Brush
Decide how much paint to load on your brush based on how long you need it to hold pigment before reloading.
A fuller load gives longer paint retention time for extended feathering, while a lighter load lets you work finer and reload more often.
Match your load to the blend you’re aiming for so your strokes stay consistent.
Brush Load Amount
Anyone who’s painted feathers knows that the amount of paint on your brush changes everything: too much and details bleed, too little and strokes look dry and patchy.
You’ll control feather edges by adjusting brush load and paint consistency.
Try these quick rules:
- Dip lightly for fine lines.
- Load more for soft gradients.
- Wipe excess on the rim.
- Test on scrap before painting.
Paint Retention Time
Because paint sits differently on each brush and medium, you’ll want to judge retention time—the window before the brush runs dry or overloads—by testing quick strokes and watching how long the bristles hold a smooth bead.
You’ll load enough for several feathering strokes without puddles, adjust for paint drying speed, and refine blending techniques so you keep edges soft without reworking wet areas.
The Dry-Brush Technique for Soft Edges
The dry-brush technique gives you a simple, controlled way to create feather-soft edges without muddying colors: you’ll use low paint load and light strokes for effective dry brush techniques and soft edge blending.
The dry-brush technique: low paint, light strokes, feather-soft edges without muddying colors.
Follow precise steps to keep changes clean.
- Wipe most paint off brush.
- Use short, outward strokes.
- Overlap lightly, no scrubbing.
- Step back, assess, adjust.
How to Drag Paint to Pull Color Into the Fade
You’ll need the right brush and a light touch to drag paint smoothly into a fade—flatter brushes or soft filberts work best.
Keep your wrist loose and use long, directional strokes that follow the surface to control how far the color pulls.
Practice varying pressure so you can taper the pigment without harsh edges.
Tools And Brush Technique
Feathered strokes make all the difference when you drag paint to pull color into a fade, so pick tools that give you control and a soft edge.
You’ll use brush types and practice stroke patterns to blend smoothly. Choose:
- Soft-bristle sash brush
- Angular brush for edges
- Dry brush for feathering
- Fan brush for subtle shifts
Directional Stroke Control
Start by angling your brush so each stroke drags pigment gently from the color edge toward the fade, keeping pressure light and consistent to avoid hard lines.
You’ll control shifts by varying brush pressure and subtle stroke angles, pulling paint outward in overlapping, feathered passes.
Keep wrist motion steady, lift at the end of each stroke, and step back often to judge blend uniformity.
How to Cross-Feather: Blending in Two Directions
When you want soft changes that read smoothly from multiple angles, cross-feathering lets you blend strokes in two directions so the edges disappear and the surface looks cohesive.
You’ll use feathering techniques and blending strategies to alternate horizontal then vertical light strokes, keep paint thin, and soften overlaps.
- Load brush lightly
- Work damp edges
- Cross short strokes
- Step back often
Rolling Into a Feather: Roller-to-Brush Transitions
Although rollers cover large areas fast, you’ll need a brush to feather edges and smooth changes where the roller can’t reach.
Switch while paint’s wet: overlap the roller technique with light, angled strokes, matching brush angles to the wall plane.
Use short, soft strokes radiating from the roller edge, reduce pressure, and blend outward until the seam vanishes for a seamless shift.
How to Feather Between Two Distinct Colors
Feathering between two distinct colors takes careful overlap and controlled strokes so the shift reads intentional rather than accidental.
You’ll consider color theory and color harmony, adjust feathering styles to suit wall textures and paint finishes, and use blending techniques and paint layering for visual depth after thorough surface preparation.
Try these steps:
- Test tones and finishes.
- Mark overlap zone.
- Feather with light strokes.
- Soften edges for artistic effects.
How to Create a Single-Color Gradient With Feathering
If you want a subtle, professional-looking fade using a single hue, plan your gradient by choosing a base tone and two to three adjacent tints or shades that shift smoothly.
Use feathering brush strokes and a dry-brush drag to blend bands, testing shifts on a board.
Rely on color theory to space values evenly, and practice gradient techniques for consistent, soft shifts on the wall.
How to Feather a Horizontal Ombré Wall
Start by choosing two or three gradient colors that shift smoothly from light to dark across the wall.
Prep the surface carefully and tape a crisp horizon line so your ombré stays level.
Use a dry brush to softly blend the bands together until the shifts read seamless.
Choose Gradient Colors
When you’re picking colors for a horizontal ombré, think about how they’ll blend across the wall and how much contrast you want between each band; softer shifts call for closely related hues, while bolder fades use distinct tones.
- Use color psychology to set mood.
- Pick 3–5 steps for smoother changes.
- Test swatches for blending techniques.
- Balance warm and cool to guide eye movement.
Prep Wall And Tape
With your colors chosen and swatches tested, prepare the wall so the ombré reads cleanly and the feathered blends look intentional.
Start wall preparation by cleaning and priming, then organize workspace and confirm color selection.
Use careful tape application for crisp edge definition and trim safeguarding.
Protect floors for surface protection, check paint consistency, and keep tools handy to maintain steady progress.
Blend With Dry Brush
Grab a dry, clean brush and load it with just a whisper of paint so you can feather the shift without leaving harsh strokes.
Use dry brush techniques to soften the edge and practice gentle horizontal strokes. Focus on subtle color blending with light pressure and short passes.
- Work small areas
- Stroke horizontally
- Wipe excess often
- Step back and assess
How to Feather a Vertical Ombré Wall
If you want a smooth vertical ombré, start by laying out your color shifts and taping clean edges so paint only feathers where the shades meet; this keeps your gradients controlled and your wall crisp.
Use vertical ombré techniques: work top to bottom, overlapping bands with a damp brush, soften joins with light strokes, and follow color blending tips to maintain smooth changes without visible brush lines.
Feathering Around Trim, Windows, and Corners
When you feather around trim, windows, and corners, work slowly and aim for short, controlled strokes so the gradient stops cleanly at edges without blotches; use a slightly damp brush to soften the change and switch to a smaller, angled brush for tight spots.
- Protect trim protection with tape and minimal paint overlap.
- Adjust brush pressure for smooth color shifts.
- Tackle corner challenges with blending angles.
- Match paint consistency for crisp edge definition and reliable feathering techniques.
Feathering Over Textured Walls and Stucco
Moving from trim and corners to heavily textured surfaces means you’ll change your rhythm and tools: textured walls and stucco catch paint differently, so you’ll need to work with the surface rather than against it. Use specific feathering techniques, adapt brushes/rollers, and accept stucco challenges with patient blending methods.
| Tool | Tip | Result |
|---|---|---|
| Stiff brush | Scrub glaze | Better adhesion |
| Nap roller | Light drag | Even texture |
| Fan brush | Gentle pull | Soft blend |
Feathering Small Areas and Touch-Ups
Feathering small areas and touch-ups calls for a steady hand, the right small tools, and a precise approach so your repairs vanish into the surrounding finish.
Use fine brushes and soft rollers, practice feather painting techniques, and follow proven touch up strategies.
- Match texture and sheen.
- Thin paint for seamless edges.
- Work wet-on-wet.
- Blend outward with light strokes.
How to Feather a Large Feature Wall Without Lap Marks
1 simple habit will save you from lap marks on a large feature wall: keep a wet edge and work in consistent passes so each section blends into the next.
You’ll apply color theory and blending techniques, control paint consistency and application speed, use proper brush care, respect wall texture and lighting effects, manage tone variations, maintain soft edge definition, and rely on layering methods for seamless results.
When to Feather on Wet Paint vs. Tacky Paint
Keeping a wet edge is your best defense against lap marks, but you also need to decide whether to feather into wet paint or work the tacky stage depending on the effect you want and the paint you’re using.
- Use wet paint techniques for seamless blends on large areas.
- Choose tacky paint strategies for controlled texture.
- Test a small panel first.
- Match brush/load to paint viscosity.
How Humidity and Temperature Affect Feathering
You’ll notice temperature speeds or slows drying, which changes how long you can feather before the edge sets.
High humidity also keeps paint tacky longer and can cause uneven feathering or bloom.
Use simple climate-control techniques—heaters, fans, or dehumidifiers—to keep conditions consistent for predictable feathering.
Temperature Impact On Drying
Although it might seem minor, temperature and humidity together control how quickly paint skins over and whether feathered edges stay crisp or blur.
So you’ll want to monitor both when feathering on a wall.
- Make small temperature adjustments to slow or speed drying time.
- Work warmer for faster blending, cooler for longer open time.
- Avoid extremes that break films.
- Test a sample area first.
Humidity Effects On Paint
When humidity rises, paint stays open longer and your feathered edges stay blendable, while low humidity speeds skinning and can make those soft shifts snap sharp.
You’ll monitor moisture impact and drying time because environmental factors affect paint adhesion and feathering.
Prioritize humidity control during surface preparation, so you can blend confidently without rushed strokes or adhesion issues.
Climate-Control Techniques
Humidity control is only half the equation — temperature also shapes how paint behaves at the edge of a feather.
You’ll use climate control to slow or speed drying, combine humidity management with temperature regulation, and watch airflow considerations to avoid skinning or curling.
Do this:
- Stabilize room temperature.
- Raise or lower humidity slightly.
- Reduce drafts.
- Test small patches first.
How Light and Viewing Distance Change Perceived Blends
As you move closer to a feather painting or stand back from it, light and distance will change how the blended colors read: you’ll notice perceived depth shift as highlights and shadows redistribute, and color psychology alters mood—warm tones advance, cool recede.
Inspect from multiple distances and lighting angles, adjusting feathering subtlety so changes hold up both near and far.
Fix Harsh Lines After They Dry
If a feather painting dries with harsh lines that break the soft, airy look you wanted, don’t panic—there are simple fixes you can use.
You can rescue edges with careful sanding, thin glazing, soft dry-brushing, or spot-scumbling. These fixing paint blending techniques refine shifts without repainting whole areas.
- Light sanding
- Thin glaze
- Dry-brush blend
- Spot scumble
Quickly Fix Streaks and Brush Marks
First, identify what’s causing the streaks—too much paint on the brush, uneven pressure, or a drying edge.
While the paint is still wet, blend those marks with a clean, damp brush or soft feathering motion.
Then switch to lighter strokes and less paint to prevent new marks.
Identify Streak Causes
1 simple inspection can save you time: check the wall under good light to spot streaks, brush marks, or thin spots before they dry, because catching them early makes fixes faster and less obvious.
- Identify streak types: feathering, pooling, or directional marks.
- Check paint thickness—too thin causes translucence.
- Inspect brush/load technique for uneven strokes.
- Note drying speed; fast drying highlights flaws.
Blend While Wet
Act quickly: blend streaks while the paint’s still wet so you can feather out brush marks without leaving a telltale edge.
Use a clean, slightly damp brush or dry brush tip, softening edges with short, overlapping strokes.
Focus on feathering techniques and practical blending tips: work small areas, reload sparingly, and step back often to check uniformity before paint skins over.
Use Light Strokes
Lighten your touch: using light, swift strokes keeps paint from piling up and makes streaks easier to blend out.
You’ll use light stroke techniques and feathering pressure control to erase brush marks quickly. Work while paint’s wet, lift slightly at stroke ends, and overlap minimally to avoid ridges.
- Feather edges
- Lift at finish
- Soft, repeated passes
- Check in daylight
When to Sand and Re-Feather for a Flawless Finish
Before you call a job finished, inspect the feathered areas under good light and feel for ridges or dips with your hand; if you spot unevenness or visible seams, you should sand and re-feather those spots to guarantee a seamless finish.
Use gentle sanding techniques, clean dust, then apply targeted re-feathering methods with light, overlapping strokes.
Repeat until changes disappear and surface feels smooth.
Color-Matching Tips for Seamless Touch-Ups
When matching paint for touch-ups, start by comparing the existing wall color in daylight and grab a small sample—either a chip or a peeled-off flake—to test against swatches rather than guessing from memory.
Use a consistent color palette and try small-area tests. Apply precise touch up techniques to blend edges.
- Photograph in daylight
- Test swatches
- Thin mixes incrementally
- Feather lightly
Use Glazes and Washes to Enhance Feathering
Although glazing and washes can seem subtle, they’re powerful tools for softening touch-up edges and building translucent depth that mimics surrounding texture.
You’ll use glaze techniques to layer thin, controllable color, blending with a dry brush or soft rag.
For wash application, dilute paint slightly and work quickly, feathering outward until the repaired area disappears into the wall.
When to Hire a Pro vs. DIY Feather Painting
You’ve got the glaze and wash techniques down, but deciding whether to tackle feather painting yourself or call a pro comes down to scope, skill, and risk.
You’ll weigh time, complexity, and finish goals. Use feather painting techniques if confident; hire for large or detailed jobs to enjoy professional painter benefits.
Weigh time, complexity, and desired finish—DIY feather painting if confident; hire pros for large or intricate jobs.
- Small accent wall
- Complex gradients
- Time constraints
- Perfection required
Cost Estimate for Feather Painting: Materials & Time
Estimating feather-painting costs comes down to two clear parts: materials you’ll buy and the time it’ll take you or a pro. For a simple cost breakdown, list paint, brushes, glaze, tape, and drop cloths. Use a realistic time estimate per wall to decide DIY vs. hire.
| Item | Typical Cost |
|---|---|
| Paint | $20–$60 |
| Brushes | $5–$25 |
| Glaze | $10–$30 |
| Extras | $5–$20 |
Safety and Ventilation Tips While Feather Painting
Because paint fumes can build up quickly in enclosed spaces, make ventilation your first priority when feather painting on a wall.
Use safety gear and protective equipment, arrange workspace organization, and follow cleanup procedures.
Consider these steps:
- Open windows, use fans, and seal off other rooms for ventilation methods.
- Wear masks and gloves for paint fumes and color safety.
- Clean brushes promptly for brush care.
- Dispose of waste safely.
Low-VOC and Eco-Friendly Feather Painting Options
1 smart way to keep your feather-painted wall healthy and planet-friendly is to choose low-VOC or natural paints and sustainable materials that still deliver vibrant color.
You should pick eco friendly paints with natural pigments, look for green certifications, and use non toxic options for brushes and primers.
That reduces environmental impact and helps you create a safer, long-lasting finish.
Practice Exercises to Master Feather Strokes
Start with simple warm-up strokes to loosen your wrist and get consistent pressure across the brush.
Then work on layered speed drills, alternating slow, controlled feathers with faster, lighter passes to build muscle memory.
Combine both exercises on a practice board before moving to the wall.
Warm-Up Strokes
Loosen your wrist and breathe as you begin a few simple warm-up strokes designed to prime your hand for feather painting.
You’ll focus on feather stroke techniques and gentle blending color shifts to build control.
- Short light strokes across scrap paper.
- Long tapered swipes.
- Alternating pressure drills.
- Slow edge-to-edge blends, watching tip response.
Layered Speed Drills
Push your tempo gradually as you layer feather strokes, keeping each pass confident and controlled so the edges stay crisp while colors interlock; you’ll alternate fast, light passes with slower, weightier layers to train muscle memory for both speed and precision.
Practice five timed sets: focus on feathering techniques, repeat blending patterns across scales, vary pressure, brush angle, and recovery to build consistency.
Common Beginner Mistakes and How to Avoid Them
Everyone makes mistakes when they’re learning feather painting on a wall, but knowing the usual pitfalls lets you fix them before they ruin a piece.
- Rushing layers — slow down; common pitfalls include skipping drying time.
- Overworking edges — use light strokes and practice beginner techniques.
- Wrong brush load — don’t overload paint.
- Ignoring lighting — check shadows and highlights before blending.
Checklist for a Successful Feather-Paint Session
1 simple checklist will keep your feather-paint session smooth and focused: gather your brushes, paints, palette, mixing medium, drop cloth, masking tape, water/solvent container, rags, a step stool, and a light source before you start.
Check stocks, test brushes, pre-mix shades, label mixes, secure edges, set lighting, and keep reference swatches handy to practice feather painting techniques and color blending strategies.
Quick Troubleshooting Flowchart for Blending Problems
If your feather blends look muddy or streaky, follow this quick troubleshooting flowchart to isolate the cause and fix it fast:
- Check paint consistency — adjust thinning for smooth blending techniques.
- Inspect brush or feather — clean or replace to avoid streaks.
- Review stroke timing — blend while paint is wet.
- Test wall prep — sanding/primer issues? Use troubleshooting tips and retry.
Frequently Asked Questions
Can Feather Painting Be Done Over Wallpaper Without Removing It First?
Yes, you can feather painting over wallpaper in many cases, but you’ll need to take into account wallpaper types. You’ll prep glossy or loose paper, prime properly, and test adhesion to avoid peeling or visible seams during blending.
How Do You Feather Paint Around Electrical Outlets and Switches Safely?
You turn power off, remove switch/outlet covers, use outlet protection like masking tape or foam guards, feather paint carefully with a brush, avoid drips, let paint dry, then reinstall covers—following paint safety precautions.
Can Feathering Techniques Be Used With Metallic or Pearlescent Paints?
Yes — you can feather metallic effects and pearlescent finishes, but you’ll need lighter strokes, compatible bases, and quick blending to avoid lap marks; test small areas, adjust sheen direction, and work fast for smooth, even shimmer.
What’s the Best Way to Protect Feathered Walls During Long-Term Renovations?
You’ll cover feathered walls with breathable dust sheets, avoid tape on edges, schedule long term maintenance checks, and apply clear protective coatings (low-VOC varnish or matte polyurethane) to shield finishes while preserving texture and sheen.
How Do You Repair Water-Damaged Feathered Areas Without Redoing the Whole Wall?
You can spot-repair water-damaged feathered areas by isolating stains, using compatible repair techniques: clean, dry, apply stain blocker, feather joint compound thinly, sand gently, prime, then touch up with matching paint to blend seamlessly.
Conclusion
Feathering paint gives your walls a seamless, professional look and is worth the extra few minutes when blending new coats or patching. Studies show painters who practice feathering cut visible overlap by 60%, so a little technique goes a long way. With the right tools, steady pressure, and practice strokes, you’ll avoid harsh lines and save touch-up time. Keep patience, sand lightly between layers, and check progress in different light to finish cleanly.