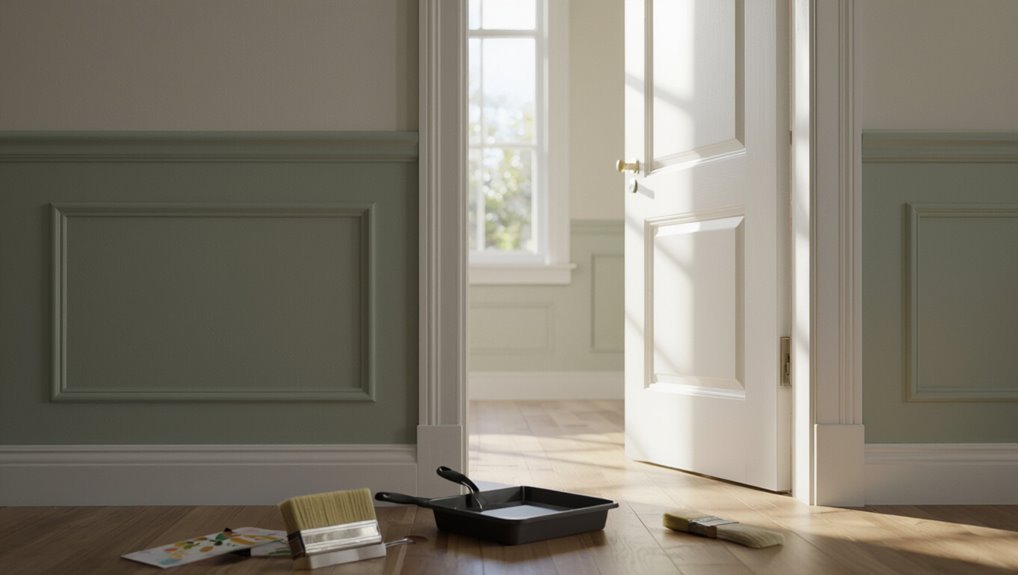
Can You Use Trim Paint on Walls? What You Should Know
You can use trim paint on walls for small areas or high-wear spots, but expect a higher gloss that highlights imperfections and shows brush or roller marks more than wall paint. Prep carefully—clean, sand, and prime as needed—and apply thin, even coats with the right tools to avoid lap marks and uneven sheen. It’s best for narrow hallways, backsplashes, or accents; keep expectations realistic and follow the tips below to get it to look right.
Quick Answer & Who Should Consider Trim Paint on Walls
Curious if you can use trim paint on walls? You can, but only in specific situations.
If you want a durable, high-sheen finish or need quick touch-ups, trim paint benefits include resilience and easy cleaning.
You’ll choose trim paint when wall paint alternatives don’t meet durability or sheen needs.
Consider surface prep, sheen preference, and room function before proceeding.
Can You Use Trim Paint on Walls?
You can use trim paint on walls, but you’ll want to think about finish and sheen differences since trim finishes are usually glossier and highlight imperfections.
Coverage and hide can be weaker with trim formulas, so expect more coats or primer to get even color.
For practical application, test a small area, use proper rollers or brushes, and adjust technique to reduce brush marks and streaks.
Finish And Sheen Differences
When you compare trim paint and wall paint, the biggest practical difference is sheen — trim typically uses higher-gloss formulas that highlight imperfections and resist scuffs, while wall paints favor flatter finishes to hide texture and reduce glare.
For a clear sheen comparison, consider finish types: higher gloss for durability and easy cleaning, flatter for forgiving appearance; choose based on room use and light.
Coverage And Hide Issues
Although trim paint is formulated for durability and a smooth, hard finish, it won’t always cover walls evenly the way wall paint does—especially over textured surfaces or in bold colors.
You’ll face coverage consistency and application challenges; expect more coats and careful inspection.
- More coats needed
- Visible roller marks
- Poor hide on dark hues
- Uneven sheen
- Texture amplification
Practical Application Tips
Start by testing a small, inconspicuous wall area so you can see how the trim paint adheres, covers, and sheens before committing to the whole room.
For practical application tips, focus on surface preparation, clean and sand lightly, then prime if needed.
Use proper rollers or brushes for even finish, consider color selection under room lighting, and apply thin, consistent coats.
What Is Trim Paint Versus Wall Paint?
You’ll notice trim paint usually has a higher sheen and smoother finish than wall paint, which affects light reflection and durability.
Its formula is tougher and more washable to resist scuffs, while wall paint is formulated for broader coverage and a softer, touchable surface.
Those differences also change how you apply each—trim often needs thinner coats and careful edging, whereas walls tolerate heavier rolling.
Finish And Sheen
One clear difference between trim paint and wall paint is the finish: trim usually has a higher sheen—like semi-gloss or gloss—to resist scuffs and highlight edges, while walls typically get matte or eggshell sheens to hide texture and diffuse light.
You’ll choose based on sheen variations and finish options:
- Trim: gloss/semi-gloss
- Walls: matte/eggshell
- Light reflection
- Texture concealment
- Visual contrast
Formula And Durability
Sheen differences also reflect how trim and wall paints are formulated and how tough they stand up to wear.
You’ll notice formula differences: trim paint often has higher resin content and harder binders for scuff resistance, while wall paint balances opacity and touch-up ease.
Consider durability factors like abrasion resistance and flexibility so you pick paint suited to traffic and surface movement.
Application Differences
Because trim and wall paints are designed for different jobs, you’ll notice clear differences in how you apply them and the techniques that work best.
You’ll adjust your application techniques and surface preparation depending on finish and tools. Consider:
- Brush vs roller choice
- Cutting-in precision
- Layer thickness
- Drying times
- Sanding between coats
How Paint Sheen Affects Wall Appearance
Although the finish might seem like a small choice, paint sheen has a big impact on how your walls look and feel: you’ll notice sheen variation changes perceived color, hides or highlights wall texture, and alters light reflection. Choose lower sheens to conceal flaws, higher sheens to make colors pop.
| Sheen | Effect |
|---|---|
| Flat | Hides texture |
| Eggshell | Subtle depth |
| Satin | Highlights light |
| Semi-gloss | Emphasizes flaws |
Why Trim Paint Has a Harder, More Durable Finish
When you run your hand along baseboards or window casings, you’ll feel the difference: trim paint dries harder and forms a tougher film than wall paint, so it’s made to resist scuffs, frequent cleaning, and the wear that comes from contact.
You’ll notice durability factors and finish characteristics driven by formulation:
- Higher resin content
- Stronger binders
- Thicker film build
- Tougher crosslinking
- Enhanced abrasion resistance
How Pigment Load Differs Between Trim and Wall Paints
You’ll notice trim paints usually have a higher pigment concentration than wall paints, which helps them produce a sharper, more opaque finish.
That higher pigment load affects coverage—trim paint can hide small marks with fewer coats but may not spread as far per gallon as wall paint.
Understanding this trade-off helps you decide whether using trim paint on walls makes sense for your project.
Pigment Concentration Differences
Because trim paint is formulated for durability and coverage on smaller, high-contact surfaces, it typically carries a higher pigment load than wall paint.
You’ll notice greater pigment intensity and improved color consistency, so consider these factors:
- richer hue saturation
- reduced need for multiple coats
- stronger lightfastness
- finer pigment dispersion
- tighter batching for uniformity
Choose accordingly for the finish you want.
Impact On Coverage
Those higher pigment levels do more than boost color intensity; they directly affect how much surface a given amount of paint will cover.
You’ll find trim paints lay down thicker, more opaque films, reducing spread compared with wall paints. That changes coverage consistency and can force extra coats.
Adjust your application techniques—thinner layers, slower strokes, or a brush-and-roller combo—to get even results without wasting product.
When Trim Paint Works on Walls (Small Areas & Accents)
When might trim paint be a smart choice for walls? You can use trim paint for focused accents and in small spaces where durability and sheen matter.
Consider:
- Narrow hallways
- Backsplashes
- Accent colors on single walls
- Alcoves and niches
- Stair risers
Trim paint adds contrast, cleans easily, and holds up to touch in tight or high-traffic spots without overwhelming the room.
When You Should Avoid Using Trim Paint on Full Walls
Don’t use trim paint on full walls if you care about a smooth, even finish—it’s prone to visible brush marks that stand out over large surfaces.
You’ll also notice poor color coverage because trim formulas are thicker and often designed for smaller areas, so you may need many coats to get uniform color.
For big walls, stick with wall or eggshell paints to avoid extra work and uneven results.
Visible Brush Marks
Although trim paint gives you a hard, durable finish, it’s formulated to be thicker and will often show brush strokes on large wall surfaces.
You’ll see visible brush marks if you roll or brush it over full walls. You’ll want to avoid trim paint when:
- poor brush techniques increase
- stroke visibility becomes obvious
- texture emphasizes flaws
- lighting highlights marks
- you need uniform finish
Poor Color Coverage
If you expect even, consistent color across large walls, trim paint can let you down because its thicker formulation and higher sheen often require extra coats to hide the previous color or surface imperfections.
You’ll face color consistency issues and application challenges: streaks, patchiness, and visible changes.
For whole walls, choose wall paint designed for uniform coverage to avoid rework and uneven finish.
How Surface Imperfections Show Up With High‑Sheen Trim Paint
When you brush high-sheen trim paint onto a surface, it highlights every bump, brushstroke, and ding instead of hiding them.
You’ll notice surface texture and sheen reflection exaggerate flaws, so inspect walls closely.
Watch for:
- Raised roller lines
- Nail dimples
- Uneven plaster
- Old patch edges
- Drippy spots
You’ll want smoothness before using high-sheen.
Preparing Walls: Sanding and Filling
Start by sanding glossy spots and rough patches so new paint can grip evenly; you’ll want a smooth, feathered changeover around any repaired areas. Use gentle sanding techniques, then apply filler for hairline and larger gaps, sanding flush when dry. Visualize the process:
| Step | Result |
|---|---|
| Sand | Smooth surface |
| Fill cracks | Even texture |
| Sand again | Feathered edges |
| Inspect | Ready for paint |
Priming Walls Before Using Trim Paint: When It’s Required
Although trim paint can offer tough, durable coverage, you should prime walls whenever they’re porous, stained, or patched so the finish adheres evenly and color reads true.
Even durable trim paint can’t replace priming porous, stained, or patched walls for true, even color and adhesion.
You’ll use priming techniques during wall preparation to seal and uniform the surface.
Consider these triggers:
- New drywall
- Water stains
- Bold existing color
- Patch repairs
- High-porosity plaster
How to Choose the Right Sheen If You Insist on Trim Paint
If you’ve decided to use trim paint on walls despite the usual recommendations to prime porous or patched surfaces, the next decision is sheen — and it matters for both look and wear.
You’ll weigh Sheen selection: eggshell or satin hides flaws better; semi-gloss adds durability but highlights imperfections.
Consider Texture considerations, Color matching, and Application techniques to minimize visible flaws and guarantee consistent finish.
Tinting Trim Paint for Walls: Is It Safe?
Curious whether you can safely tint trim paint for walls? You can, but watch tinting techniques and safety concerns: match base paint, test small areas, use compatible colorants, avoid heavy pigment loads, and consider professional mixing.
You can tint trim paint for walls—match the base, use compatible colorants, test small patches, and avoid over-tinting.
- Match base paint
- Test a patch
- Use proper colorants
- Avoid over-tinting
- Consider pro mixing
Coverage Expectations: Coats Needed With Trim Paint on Walls
Expect about 300–400 square feet of coverage per gallon with most trim paints, though that can vary by sheen and surface texture.
You’ll usually need a primer on raw or patched drywall to get true color and adhesion before topcoating.
Plan on several thin coats rather than one thick one to build even coverage and avoid drips.
Coverage Per Gallon
One gallon of trim paint typically covers about 300–400 square feet on smooth, primed walls, but you’ll often need two coats to get solid, even coverage—especially when you’re painting over darker colors or porous surfaces.
For coverage estimation and gallon efficiency, consider:
- surface texture
- wall color contrast
- paint type (sheen)
- application method
- drying time between coats
Primer Necessity
If you’re painting walls with trim paint, you’ll usually need a primer when covering a darker hue, raw drywall, or a porous surface to cut down on the number of finish coats and prevent bleed-through.
Choose primer types like bonding, stain-blocking, or high-build.
You’ll get primer benefits: improved adhesion, uniform sheen, and fewer finish coats—saving time and preventing patchy coverage.
Multiple Thin Coats
When you use trim paint on walls, plan on applying multiple thin coats rather than a single heavy one; thin layers level better, dry faster, and reduce visible brush or roller marks.
You’ll need patience: focus on Layering techniques and Application timing to build smooth coverage.
- Apply thin coats
- Let each dry fully
- Sand light between coats
- Use quality roller
- Expect 2–4 coats
Dry Time and Curing Differences to Expect
Because trim paint is formulated for thin, hard films, it’ll dry to the touch faster than most wall paints but take longer to fully cure.
Best Tools: Brush, Roller, or Sprayer?
Want crisp edges or fast coverage? You’ll choose tools based on finish application and paint layering needs.
Consider:
- Brush techniques for edges and detail
- Roller selection for even wall laydown
- Sprayer efficiency for speed and thin coats
- Cleanup methods for brushes, rollers, and guns
- Match tool to paint type to control sheen and coverage
Roller Nap and Technique for Avoiding Lap Marks With Trim Paint
Pick a roller nap that matches your wall texture—3/8″ for smooth surfaces and 1/2″–3/4″ for slight texture—to get even coverage with trim paint.
Work in small sections and keep a wet edge so each pass blends into the last and prevents lap marks.
If the nap starts to shed or the edge skins over, reload or back-roll immediately to maintain a smooth finish.
Choose Proper Roller Nap
Choosing the right roller nap makes a big difference when you use trim paint on walls, since nap thickness affects coverage, texture, and the risk of lap marks.
You’ll match nap to surface and paint viscosity for proper roller texture and smooth application technique.
- Smooth: 1/4″ for glossy trim
- Light orange peel: 3/8″
- Semi-rough: 1/2″
- Rough: 3/4″
- Test first
Maintain Wet Edge
Because trim paint dries quickly, you’ll need to maintain a wet edge as you roll so each pass blends seamlessly into the next; use a short-nap roller and load it evenly, overlap strokes by 50%, and work in consistent sections.
These wet edge techniques help you extend working time, avoid lap marks, and keep finish uniform—move steadily, don’t stop mid-panel, and feather edges.
Cutting In Around Trim When Using Trim Paint on Walls
When you cut in around trim with trim paint on walls, work slowly and steady to keep crisp edges—use a sharp angled brush, steady your hand against the trim, and load the brush with just enough paint to avoid drips.
Use proper cutting techniques for edge precision and follow these steps:
- Tape edges sparingly
- Feather paint outward
- Maintain consistent brush angle
- Remove excess immediately
- Inspect under good light
Touchups and Maintenance of Walls Painted With Trim Paint
When you need to touch up walls painted with trim paint, match the sheen of the original finish so patches don’t stand out.
For small-area touchups, feather the new paint into the surrounding surface with a fine brush or small roller and blend edges while the paint is wet.
Keep extra mixed paint from the original job for quick, seamless repairs later.
Matching Sheen Levels
If you touch up wall areas painted with trim paint, you’ll need to pay close attention to sheen differences so repairs don’t stand out; trim paint’s higher gloss can reflect light differently than wall paint, making even a well-matched color look wrong.
You should focus on sheen matching to preserve aesthetic cohesion.
- Compare gloss levels
- Test on scrap
- Use same finish paint
- Feather edges
- Inspect in daylight
Small-Area Touchup Technique
A small, careful approach will keep touchups of trim-painted walls from becoming obvious; start by cleaning, feathering edges, and using minimal paint.
You’ll test touchup techniques on hidden spots, apply thin coats with a small brush or sponge for small area applications, and let each layer fully dry.
Blend seams gently and step back to confirm uniform sheen before finishing.
How Lighting Changes the Look of Trim Paint on Walls
Because light shifts throughout the day, the same trim paint can read as crisp white, creamy, or even slightly gray depending on the source and angle.
Because light changes, the same trim paint can appear crisp white, creamy, or faintly gray throughout the day
So you’ll want to evaluate colors under the exact lighting they’ll face.
Consider these factors affecting Lighting effects and Color perception:
- Ambient influences
- Trim contrast
- Shade variations
- Reflection differences
- Directional bulbs
Cost Comparison: Trim Paint Versus Wall Paint Per Room
Lighting shifts will affect how much paint you need and where you’ll want it applied, but cost differences between trim and wall paint come down to coverage, finish, and labor. Do a price analysis and compare room estimates: cheaper wall paint covers more, gloss trim costs more per gallon but less area.
| Item | Trim | Wall |
|---|---|---|
| Coverage | Low | High |
| Cost/gal | Higher | Lower |
| Labor | Precise | Broad |
Durability Tradeoffs: Scuff Resistance Versus Visual Flaws
If you choose trim paint for walls, you’ll notice it usually resists scuffs better than typical wall paint, which is handy in high-traffic areas.
However, that tougher finish can show visible brushstrokes or roller marks more readily, especially on large flat surfaces.
You’ll need to weigh the benefit of extra durability against the risk of uneven texture and decide where each tradeoff makes sense.
Scuff Resistance Comparison
Scuff resistance matters when you’re weighing trim paint for walls because harder, more durable finishes resist marks but often highlight imperfections and brush strokes.
You’ll balance scuff resistance benefits against trim paint drawbacks; choose based on traffic and finish tolerance.
- Higher hardness = fewer scuffs
- Easier to clean
- More reflective surfaces
- More surface scrutiny
- Consider satin or eggshell tradeoffs
Visible Brushstroke Risks
While tougher trim paints will cut down on marks, they’ll also make brushstrokes more obvious—so you’ll have to weigh durability against appearance.
You’ll notice increased brushstroke visibility, especially under angled light or on smooth walls. That texture contrast can undermine a seamless finish.
If you prioritize scuff resistance, use careful application—thin coats, quality brushes, and light sanding between layers to minimize visible flaws.
Color Depth and Finish Uniformity Considerations
Because trim paints typically have higher pigment concentration and different binders than wall paints, they can alter color depth and sheen when you use them on large wall areas.
You’ll notice shifts in hue and uneven gloss that hurt finish uniformity. Consider these factors before proceeding:
- increased color depth
- patchy sheen
- light reflection variance
- touch-up visibility
- primer necessity
Room‑By‑Room Recommendations: Where Trim Paint Is Acceptable
If you want to use trim paint on walls, pick rooms where durability and easy cleaning matter more than perfect color matching—hallways, mudrooms, laundry rooms, and garages are good candidates.
You’ll accept shinier surfaces and stronger wear resistance.
Consider trim aesthetics versus wall texture, and keep color harmony in mind by testing swatches.
Weigh trim finish against wall texture, and test swatches to ensure the colors work together.
Small rooms tolerate contrast; prioritize function over match.
When Trim Paint Improves Performance: Bathrooms and Kitchens
In bathrooms and kitchens, you’ll notice trim paints often give better moisture resistance than flat wall paints, which helps protect surfaces from steam and splashes.
They also stand up to frequent cleaning and scrubbing without showing wear, making maintenance easier.
Plus, many trim formulations resist mold and mildew growth, so they’ll help keep humid rooms healthier.
Moisture Resistance Benefits
When you paint trim in bathrooms and kitchens with a moisture-resistant formula, it stands up better to steam, splashes, and frequent cleaning, protecting corners and edges that would otherwise absorb water and show wear.
You gain moisture barriers and improved surface protection.
Benefits include:
- Reduced water penetration
- Mold inhibition
- Sealed joints
- Easier spot repairs
- Longer edge life
Frequent Cleaning Durability
Bathrooms and kitchens see constant wiping, so choose a trim paint that resists scuffs, streaking, and breakdown from repeated cleaning.
You’ll want a semi-gloss or gloss formula that handles high cleaning frequency without losing sheen.
Consider durability concerns like abrasion resistance and easy stain removal.
Test a small area and clean it repeatedly to confirm the finish holds up before committing to full walls.
Mold And Mildew Prevention
Frequent cleaning helps remove grime, but it won’t stop mold if moisture and poor ventilation persist.
You should pick trim paint with strong mold resistance and use it sparingly on walls in bathrooms and kitchens to aid mildew prevention.
Also:
- Seal gaps and joints
- Improve ventilation
- Use exhaust fans
- Fix leaks promptly
- Dry surfaces after use
When to Choose Wall Paint Instead for Living Spaces and Ceilings
Although trim paint can look tempting for its durability and sheen, you should choose wall paint for living spaces and ceilings because it’s formulated to hide imperfections, resist scuffs without showing brush marks, and provide the flatter finish that reduces glare and makes rooms feel larger.
In a living room, pick wall paint to mask texture and keep visual balance; consider ceiling height when choosing sheen.
Real‑World Examples: Successful Uses of Trim Paint on Walls
When you want a crisp, durable look in high-traffic areas, trim paint can work surprisingly well on walls. Many homeowners use it on short accent walls, entryways, or behind stoves where a wipeable, semi-gloss finish makes maintenance easy and highlights architectural details.
You’ll see successful transformations and creative accents in real homes, such as:
- Kitchen backsplash strip
- Mudroom panels
- Stairwell risers
- Powder room nook
- Built-in bookcase backs
Common Mistakes Homeowners Make When Using Trim Paint on Walls
If you grab trim paint because it feels convenient, you’ll often run into problems like visible brush marks, poor adhesion, and finishes that highlight wall imperfections rather than hide them.
You should prioritize correct paint selection, thin coats, proper sanding, and compatible primers.
Avoid overbrushing, skipping prep, and ignoring sheen differences—these simple steps promote mistake avoidance and smoother, longer-lasting results.
Test Trim Paint on Your Wall First
Curious whether trim paint will work on your walls? You should test small, discreet test areas before committing, checking adhesion, sheen, and color shift.
Curious if trim paint suits your walls? Test small, discreet patches to check adhesion, sheen, and color shift.
Try these quick steps:
- Clean and dry the spot
- Apply primer options if surface is porous
- Paint a 4×4″ patch
- Let dry 24 hours
- Inspect under different light sources
VOC and Environmental Differences in Trim Versus Wall Paint
Because trim paint is formulated for durability and smoothness, it often contains higher levels of VOCs and different additives than wall paint.
So you should consider ventilation, indoor air quality, and local regulations before using it extensively on large wall areas.
Check VOC levels on labels, weigh Environmental impact, and prefer low-VOC Trim paint or Wall paint alternatives to reduce fumes and long-term exposure.
How Pros Choose Between Trim and Wall Paint
When pros choose between trim and wall paint, they weigh performance needs, surface type, and the room’s function—so you’ll hear them ask about durability, ease of cleaning, sheen preference, and how defects show up under different finishes.
Pros weigh durability, cleanability, sheen, and defect visibility when choosing trim versus wall paint for a room’s function.
You’ll balance trim paint benefits against wall paint drawbacks and consider maintenance, light, color, texture, and cost:
- Durability
- Cleanability
- Sheen choice
- Surface prep
- Budget
Alternatives to Using Trim Paint for Durable Walls
If you want walls that stand up to wear but don’t want to use trim paint, there are several practical alternatives to contemplate:
Choose high-quality eggshell or satin for resilience, durable alternatives like washable acrylics or enamel-based wall finishes, and consider protective topcoats or scuff-resistant additives.
You can also use washable wallpapers or vinyl panels for high-traffic areas that need long-lasting protection.
Decision Checklist: Steps Before Applying Trim Paint to Walls
You’ve considered sturdier wall options, so now check a few things before you grab trim paint for walls.
Confirm surface prep, finish compatibility, and test adhesion. Think about application techniques and small-area trials. Verify color matching under room light and evaluate durability expectations.
- clean, dry surface
- primer needed?
- sheen compatibility
- small test patch
- tools and technique plan
Pro Tips for Great Results With Trim Paint on Walls
Because trim paint behaves differently than wall paint, you’ll get better results by treating the job like trim work rather than a regular wall coat.
Use high-quality brushes, thin even coats, and sand lightly between layers.
Test small areas to check color contrast and sheen.
Match application to existing texture variations, feather edges, and allow proper drying to avoid lap marks and streaks.
Frequently Asked Questions
Will Trim Paint Yellow or Discolor Over Time on Interior Walls?
Yes — trim paint can yellow or discolor over time on interior walls. You’ll face yellowing factors like resin type, heat, sunlight, and nicotine; choosing high-quality formulations boosts paint durability and slows visible color change.
Can I Use Trim Paint Over Previously Wallpapered Walls?
Yes — you can use trim paint over previously wallpapered walls if you prep properly. You’ll guarantee trim paint application succeeds by removing loose paper, cleaning, sanding glossy spots, priming with a bonding primer to restore wallpaper adhesion and seal.
How Does Trim Paint Affect VOC Odors in Small Rooms?
Trim paint can raise VOC odors in small spaces, so you’ll want odor control measures like ventilation, low-VOC products, and air purifiers; you’ll reduce smell faster by opening windows, using fans, and allowing longer curing time.
Are There Fire‑Safety or Code Concerns Using Trim Paint on Walls?
Generally no, but you should check local fire regulations because trim paint isn’t formulated for fire resistance; you’ll want coatings meeting code in high‑risk areas. Trim paint’s paint durability won’t substitute required fire-rated finishes.
Can I Mix Trim Paint Brands or Sheens When Touching up Walls?
I wouldn’t. I once mixed two paints like mismatched puzzle pieces and got streaks; for reliable touch up techniques, stick to same brand and sheen for brand compatibility, or test small patch and blend carefully.
Conclusion
If you’re thinking about using trim paint on walls, remember it’s doable but not always ideal—trim paint’s higher sheen boosts durability and scrubbability. One striking stat: homes painted with semi-gloss or satin in high-traffic areas report 30% fewer touch-ups over five years, so that extra sheen can save time and money. Weigh durability against visible roller marks, test a patch, and choose a sheen that balances looks with wear resistance for your space.