How to Get a Smooth Finish on Wood With Paint Easily
Get a smooth painted wood finish fast by prepping and inspecting for damage, cleaning off grease or wax, filling holes and sealing knots, then sanding in progressive grits with the grain. Prime with an appropriate primer, thin paint if needed, and apply several thin coats using a high-density roller or quality brush, keeping a wet edge and light pressure. Lightly sand between coats and clean tools after use, and keep working for more tips on techniques and troubleshooting.
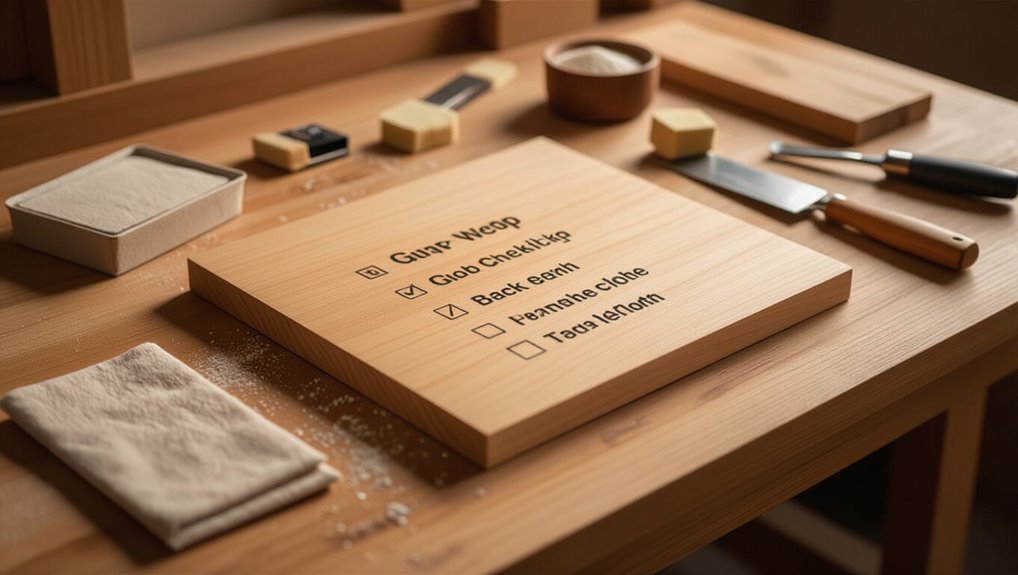
Quick Checklist: Get a Smooth Painted Wood Finish Fast
Start by gathering the essentials: sandpaper (120–220 grit), tack cloth, primer, high-quality paint, foam or high-density roller, a good brush for edges, and a respirator or mask.
Then pick color selection and finish sheen before painting.
Lay out drop cloths, stir paint, test a small swatch, and keep sanding supplies handy.
Work methodically, apply thin coats, and allow proper drying between layers.
Inspect and Prep Wood Before Painting
Before you touch a brush, thoroughly inspect the wood for damage, old finishes, dirt, and moisture so you know exactly what prep each piece needs. Check wood condition, note surface imperfections, and plan sanding, filling, and cleaning. Use this quick guide:
| Issue | Action |
|---|---|
| Dents | Fill |
| Gouges | Patch |
| Dirt | Clean |
| Moisture | Dry |
Remove Old Finish, Wax, and Grease Correctly
First, you’ll assess the existing finish to decide whether to strip, sand, or just spot-treat.
Next, remove wax residue with a solvent-safe cleaner or a dedicated wax remover so your new finish will adhere.
Finally, degrease the surface with a mild detergent or mineral spirits and let it dry completely before sanding or refinishing.
Assess Existing Finish
When you examine an existing finish, look for layers of varnish, shellac, wax, or grease and decide which need removal so your new finish can bond properly; different coatings demand different methods, so don’t treat them all the same. Do a quick wood finish assessment: note surface condition, adhesion, and contamination, then plan stripping, sanding, or cleaning.
| Issue | Action |
|---|---|
| Varnish | Test adhesion |
| Shellac | Solvent check |
| Wax | Identify source |
| Grease | Degrease |
Remove Wax Residue
Start by identifying where wax or polish remains and how deep it’s so you know whether you can wipe it away or must strip it back to bare wood.
Use wax identification techniques like solvent tests and fingernail checks.
Choose residue removal methods accordingly: gentle scraping, dedicated wax removers, or light sanding.
Test a small area, work with the grain, and wear gloves.
Degrease And Clean
One clear rule: remove every trace of old finish, wax, and grease before you refinish, because residues prevent new coatings from bonding and leave blotches.
For proper wood preparation, strip finishes with a solvent or stripper, then degrease with mineral spirits or trisodium phosphate solution.
Test a hidden spot, rinse, dry, and sand lightly.
Choose cleaning methods suited to the finish type.
Fill Cracks, Knots, and Nail Holes for a Flat Surface
Scan the surface for cracks, knots, and nail holes, then clean them so fillers bond properly.
Scan the surface for cracks, knots, and nail holes, and clean them so fillers will bond properly.
Use appropriate filling techniques: apply wood filler or epoxy with a putty knife, pressing into voids for solid crack repairs. Let cure fully, then shave high spots with a scraper.
For knots, seal to prevent bleed-through.
Repeat small touch-ups before priming and painting.
Selecting Sandpaper Grits for Each Stage
Now you’ll pick a grit progression that moves from coarse to fine without skipping too many steps.
Match the grit to the wood species and condition—open-grain hardwoods need different sanding than softwoods.
Finish with a fine grit appropriate for your topcoat (higher for paint, slightly lower for clear finishes) to guarantee proper adhesion and a smooth surface.
Choosing Grit Progression
Start with a clear plan for grit progression so you won’t overwork the wood or leave visible scratches; pick coarse grits to remove material and defects, move through medium grits to blend scratches, and finish with fine grits for a smooth surface ready for finish. Use proper grit selection and sanding techniques; follow table guidance:
| Stage | Grit |
|---|---|
| Remove | 80–120 |
| Blend | 150–220 |
| Finish | 320–400 |
Matching Grit To Wood
Once you’ve planned your grit progression, match those stages to the specific wood you’re working with so you won’t over- or under-sand.
Use sanding techniques that consider wood species, surface textures and grain direction to protect finish durability and paint compatibility. Choose grit types and sanding tools aligned with preparation methods and desired finish sheen.
- Softwood: coarser to finer
- Hardwood: moderate progression
- Veneer: gentle, fine grits
Final Sanding For Paint
Prepare your wood for paint by following a clear, staged grit progression that removes defects without leaving deep scratches; pick coarser grits to level imperfections, medium grits to refine the surface, and fine grits to create a smooth key for primer and paint.
For final sanding techniques, work progressively (80–120, 150–180, 220–320), use proper sanding tools, keep pressure even, and wipe dust between stages.
Sanding Technique: Level the Substrate Without Gouging
While you’re leveling the substrate, work with the grain and let the abrasive do the cutting so you don’t gouge the wood.
Keep sanding angles shallow and use controlled pressure techniques, moving evenly to avoid low spots.
Follow these tips:
- Use a sanding block for flatness and consistent angle.
- Sand progressively finer grits without skipping.
- Check frequently for level and uniform texture.
How to Vacuum, Tack, and Prep Between Coats
Before you wipe on the next coat, vacuum the workpiece and surrounding area thoroughly to pick up sanding dust and debris.
After vacuuming, run a tack cloth lightly over the surface to catch any remaining particles without leaving residue.
That prep keeps subsequent coats smooth and helps avoid trapped dust in the finish.
Vacuum Thoroughly First
Dust is the enemy of a flawless finish, so vacuum the piece thoroughly to remove sanding grit and loose debris before you tack and apply the next coat.
You’ll improve dust control and guarantee consistent paint application by removing particles from crevices and edges. Then inspect and tack lightly.
- Use a brush attachment for corners
- Vacuum before tack cloth
- Check under hardware
Tack Cloth Finish
1 simple step after vacuuming is to tack the surface to pick up the fine particles a vacuum misses. You’ll wipe lightly, replace tack cloth as needed, and sand between coats if required. Know tack cloth benefits and consider tack cloth alternatives for sticky residue or allergies.
| Task | Tool | Tip |
|---|---|---|
| Final wipe | Tack cloth | Light strokes |
| Alternative | Microfiber | Damp, not wet |
| Between coats | Sandpaper | 220 grit |
| Clean up | Vacuum | Repeat gently |
Choosing the Right Paint for a Smooth Wood Finish
When you want a truly smooth wood finish, choosing the right paint matters as much as your prep and technique.
You’ll pick by evaluating paint types and desired finish durability, sheen, and sanding tolerance. Match gloss level to use, prefer self-leveling formulas for visible surfaces, and test small areas first.
- Oil vs. waterborne
- High vs. low sheen
- Self-leveling formulas
Primer Choices: Which Primer Matters and When to Use It
You’ll want to pick a primer that matches your project: oil-based primers block stains and seal knots for a durable base, while water-based primers dry faster and clean up with soap and water.
Use oil-based primers on bare or tannin-rich woods and for high-moisture areas. For most interior furniture and trim, a water-based primer will give you a smooth, easy-to-sand surface.
Oil-Based Primer Benefits
Although oil-based primers take longer to dry than water-based options, they’ll give you superior adhesion, stain-blocking, and a harder base coat that’s ideal for bare wood, knotty pine, or surfaces with tannin bleed.
You’ll appreciate oil based advantages and primer durability when prepping; they level pores and resist bleed-through.
Benefits include:
- Strong adhesion for tough surfaces
- Enhanced stain blocking
- Durable base for smooth topcoats
Water-Based Primer Uses
1 clear advantage of water-based primers is their fast drying time and easy cleanup, making them ideal when you need to get a project recoated quickly or want low-VOC, user-friendly options for interior wood. You’ll appreciate water based primer advantages for sanding, adhesion, and stain blocking; follow proper application techniques for thin, even coats to avoid brush marks.
| Use | Benefit |
|---|---|
| Sanding | Smooth base |
| Recoat | Fast turnaround |
Thinning Paint: Adjust Viscosity for Smooth Application
When paint’s too thick it won’t level out smoothly, so thinning it to the right viscosity is key for an even, drip-free finish.
If paint’s too thick, thin it to the right viscosity so it levels smoothly for a drip‑free, even finish.
You’ll test, add small amounts, and stir thoroughly. Use recommended viscosity adjustments and approved paint additives only.
- Thin gradually and test on scrap wood
- Follow manufacturer ratios
- Stir and recheck before applying
Tools & Supplies Checklist: Sandpaper, Brushes, Rollers, Sprayers
Choose sandpaper grit based on how much material you need to remove and the level of smoothness you want, starting coarse and working finer.
Pick brushes, rollers, or a sprayer by matching the finish and project size—brushes for detail, rollers for flats, sprayers for fast, even coverage.
Have the right tools on hand so you can switch methods as needed for the smoothest result.
Choosing The Right Grit
Because the grit you pick determines how fast and how smooth the wood becomes, you should match sandpaper grades to each stage of the job.
Use coarse for shaping, medium for smoothing, fine for finish. Understand grit types and sanding techniques to avoid swirl marks and tear-out.
Pick progressively finer grits and clean between passes.
- 60–80 coarse
- 120–150 medium
- 220+ fine
Brushes Vs Rollers Vs Sprayers
After sanding to the right grit, you’ll need to decide how to apply your finish—brushes, rollers, and sprayers each suit different jobs and results.
For brush selection, pick high-quality bristles for detail; roller efficiency helps large flat panels; sprayer setup gives fast, even coats.
Learn application techniques, weigh finish comparison and method advantages, maintain tool maintenance for coverage consistency and longevity.
Best Brushes for a Brush‑Mark‑Free Finish
Wondering which brush will actually save you from brush marks? You’ll pick based on natural bristle for oil or synthetic fibers for water-based paints, matching brush shapes to finish types and paint compatibility.
Wondering which brush prevents brush marks? Choose natural bristles for oil, synthetics for water-based, and match shape to finish.
Prioritize handle comfort for control. Consider:
- Flat sash for panels and smooth strokes
- Angled trim for edges and accuracy
- Wide block for rapid, even coverage
Use Foam and Micro‑Nap Rollers for Ultra‑Smooth Paint
Pick a foam or micro‑nap roller sized to your project—foam for lacquer or water‑based finishes, micro‑nap for thin oil or latex—so you get even coverage without texture.
Load the roller evenly and use light, overlapping passes in a “W” pattern to avoid ridges and lap marks.
Finish each section with a few long, smooth strokes while the paint is still wet to blend and eliminate roller texture.
Choosing The Right Roller
Choosing the right roller makes a huge difference when you want an ultra-smooth finish on wood. Foam and micro-nap rollers minimize texture, reduce stippling, and lay down paint evenly so you spend less time sanding between coats.
Pick roller types by roller materials and density to balance paint application, coverage efficiency, roller length, and finish durability. Consider:
- Short nap micro‑fiber for enamel
- Foam for thin coats
- Mid-density for semi‑gloss
Proper Rolling Technique
1 simple change will up your finish: roll with foam or micro‑nap rollers and let the tool do the work. You’ll control rolling pressure for even coverage, avoid overloads, and finish with light, overlapping passes. Choose roller types suited to your paint and grain, maintain a wet edge, and don’t press hard—these habits give ultra‑smooth, professional results.
| Tool | Nap | Best Use |
|---|---|---|
| Foam | Smooth | Lacquers |
| Micro‑nap | 1/8″ | Trim |
| Micro‑nap | 3/16″ | Flat panels |
| Foam | Mini | Touchups |
When to Choose a Paint Sprayer (and Which Type)
Wondering whether a paint sprayer is right for your project? You should pick a sprayer based on scale, finish, and paint type, balancing speed with control.
Wondering if a paint sprayer fits your project? Match sprayer to scale, finish, and paint for speed versus control.
Consider paint sprayer types and plan simple sprayer maintenance. Decide if you want more coverage or precision, then choose accordingly.
- Large surfaces: HVLP or airless
- Detail work: LVLP or touch-up gun
- Budget: portable handheld units
Sprayer Basics: Overlap, Distance, and Pass Speed
Good spraying comes down to three simple habits: consistent overlap, the right nozzle-to-surface distance, and a steady pass speed.
You keep even coverage by overlapping each pass about 30–50%, holding the nozzle at manufacturer-recommended distance, and moving at uniform speed.
Adjust for paint viscosity and perform regular sprayer maintenance to prevent clogs and uneven atomization.
Practice on scrap before the final coat.
How to Apply Thin, Even Coats Without Brush Marks
When you want a flawless, brush-mark–free finish, apply multiple thin coats rather than one heavy layer; thin coats level out as they dry and reduce visible stroke edges.
Apply several thin coats instead of one heavy layer; thin coats level out as they dry for a brush-mark–free finish
You’ll control paint viscosity and use steady brush techniques to avoid dragging. Follow these steps:
- Thin the paint slightly for better flow.
- Wait full dry time between coats.
- Sand lightly with fine grit.
Brushing Technique: Strokes, Angle, and Pressure That Work
After you’ve built up thin, even coats and smoothed between them, focus on how you move the brush: stroke direction, angle, and pressure control how the finish lays down and levels.
Use proper brushing techniques: pick brush selection matched to finish types and paint consistency, hold the brush at shallow stroke angles, and apply light, steady pressure control so strokes blend without ridges or excess buildup.
Rolling Technique: Avoid Stipple and Lap Marks
Because a roller lays down more paint faster than a brush, you’ll need to control pressure, nap choice, and your rollout pattern to prevent stipple and lap marks.
Rollers apply paint faster than brushes—control pressure, nap choice, and rollout pattern to avoid stipple and lap marks.
Use a consistent rolling technique for even paint application, and keep a wet edge. Follow these tips:
- Maintain light, even pressure and long strokes
- Choose nap based on wood texture
- Overlap each pass by 50%
Sprayer Technique: Tips for Even Coverage
1 simple rule: keep the spray gun moving at a steady speed and distance to avoid buildup and run marks.
Adjust sprayer settings for material viscosity and nozzle size, test spray patterns on scrap, and overlap passes by about 50% for uniform coverage.
Hold the gun perpendicular, keep motion smooth, and maintain consistent speed to prevent heavy edges and thin spots.
Dry Times and Environment: Temperature, Humidity, and Airflow
You’ll get the smoothest results when you finish in the right temperature range—typically between 65–75°F (18–24°C).
Keep relative humidity around 40–50% so coatings cure evenly without trapping moisture.
Also guarantee gentle airflow to carry solvents away without creating dust or uneven drying.
Ideal Temperature Range
Temperature matters: aim for a consistent workshop temperature between 65–75°F (18–24°C) to get predictable dry times and a smooth finish.
You’ll control temperature effects without overworking the paint, and you’ll account for humidity impact separately. Maintain steady conditions; avoid drafts.
- Keep heaters steady
- Avoid sun/vehicle heat spikes
- Pause during extreme cold or heat
Optimal Humidity Levels
While temperature sets the pace, humidity controls how finishes cure and how dust, brush marks, and bubbles behave—so aim for 40–60% relative humidity for most oil- and water-based finishes.
You’ll monitor humidity control and adjust with dehumidifiers or humidifiers to stabilize moisture levels.
Consistent RH prevents tacky or blistered coats, speeds drying evenly, and reduces sanding problems for a smoother final finish.
How Many Coats for a Durable, Smooth Finish?
How many coats you need depends on the finish type, wood grain, and how much wear the piece will see.
How many coats you need depends on the finish, the wood grain, and expected wear.
You’ll weigh Durability factors and follow Coat recommendations: more coats for high-traffic surfaces, fewer for decorative pieces. Apply thin, even layers and let proper drying occur.
- Low traffic: 1–2 coats
- Moderate use: 2–3 coats
- High wear: 3–5 coats
Sanding Between Coats for a Mirror‑Like Result
If you want a truly mirror-like finish, sand lightly between coats to knock down dust nibs and level tiny ridges without cutting through the previous layer.
Use fine grit (320–400) or ultra-fine pad, clean dust thoroughly, then apply the next coat.
These sanding techniques improve leveling and adhesion when using quality finishing products, helping you achieve a smooth, reflective painted surface.
Topcoats and Sealers That Keep Painted Wood Smooth
After you’ve smoothed and sanded between coats, choosing the right topcoat or sealer will lock in that finish and protect it from wear, moisture, and yellowing.
Pick a product that suits your project and apply thin, even coats.
Consider topcoat types and sealer benefits to match sheen, durability, and compatibility.
- Waterborne polyurethane
- Alkyd varnish
- Clear shellac
Fixing Brush Marks, Particles, Runs, and Orange Peel
When you spot brush marks, dust nibs, runs, or orange peel in the finish, tackle them promptly with the right sanding and leveling techniques to restore a smooth surface.
Lightly sand high spots, feather edges, and remove particles before recoating. Use fine-grit sanding, clean the surface, and correct defects during paint application.
For persistent issues, wet-sand and buff for flawless brush mark removal.
Avoiding Drips, Sagging, and Other Common Failures
Start by getting the surface clean, sanded, and properly primed so paint will stick without pooling.
Check and thin your paint to the manufacturer’s recommended viscosity so it flows evenly instead of sagging.
Apply thin, controlled coats with the right brush or spray technique and you’ll greatly reduce drips and other failures.
Proper Surface Preparation
Proper surface preparation stops most finish failures before you even open the can: you’ll remove dust, fix surface imperfections, and use correct sanding techniques so paint adheres and won’t sag or drip.
Follow these quick steps:
- Sand progressively to smooth flaws and feather edges.
- Clean thoroughly to remove dust and oils.
- Repair dents and fill gaps; sand flush before priming.
Correct Paint Viscosity
If your paint’s too thick it’ll brush on unevenly and if it’s too thin it’ll run—so you need the right viscosity for a smooth, drip-free finish.
Check paint consistency before you start, thin gradually with the manufacturer’s recommended solvent, and stir thoroughly.
Use a viscosity measurement tool or cup to match label specs. Proper viscosity prevents drips, sagging, and uneven coverage.
Controlled Application Technique
With the right viscosity dialed in, focus next on how you apply the finish so it lays flat and even.
Use controlled brushstrokes and steady paint application to prevent runs. Work thin, overlap wet edges, and keep passes light. Adjust angle and load to avoid sagging.
Let each coat tack before recoat for a flawless surface.
- Load brush sparingly
- Smooth long strokes
- Check drip-prone edges
Troubleshoot Adhesion, Peeling, and Finish Failures
When your finish starts to lift, peel, or flake, don’t assume it’s just a bad coat — diagnose the cause so you can fix it correctly.
Check adhesion issues: contaminated or glossy surfaces, incompatible products, or moisture.
For peeling problems, remove loose finish, sand to sound wood, and use proper primer.
Address finish failures with troubleshooting tips: test adhesion, seal, and recoat under correct conditions.
Match Sheen and Color Without Redoing the Piece
If you’re blending a repair into an existing finish, start by matching the sheen so the light reads consistently across the piece.
You can tweak gloss level with clear coats or flatteners and adjust color tone with glazes, stains, or tinted topcoats until it visually disappears.
Test on an inconspicuous spot and make small adjustments rather than redoing the whole surface.
Match Existing Sheen
Matching an existing sheen takes careful observation and small, controlled tests before you touch the whole surface.
You’ll compare sheens, test mixes, and evaluate sheen consistency and finish durability on inconspicuous spots to avoid full redo.
Follow these quick steps:
- Test minimal coats to match gloss level.
- Sand between tests for repeatable results.
- Note product labels and ratios for future touch-ups.
Adjust Color Tone
After you’ve pinned down the sheen, shift focus to color tone so the repaired area blends seamlessly with the rest of the piece.
You’ll test small mixes on scrap wood, using subtle color mixing and careful tone adjustments to match warmth, depth, and saturation.
Layer thin glazes or tinted topcoat until the spot reads the same under the room’s light.
Working With Open‑Grain and Knotty Wood
Open-grain and knotty woods demand a slightly different approach because their texture and voids can trap finish or show irregularities.
You’ll need to fill, seal, and sand with care to get a truly smooth surface. Use open grain treatment and knotty wood preparation techniques to stabilize and hide defects.
- Fill voids with grain filler
- Seal knots with shellac
- Sand progressively to 220 grit
Painting Cabinet Doors and Drawer Fronts Smoothly
When you want cabinet doors and drawer fronts to look factory‑smooth, prep and technique matter more than pricey paint—strip or sand old finishes, fill seams and imperfections, and remove dust before you start.
Use proper cabinet refinishing techniques: degrease, sand between thin primer coats, and tack cloth before topcoat.
For drawer front preparation, remove hardware, label pieces, and work flat for even, smooth results.
Furniture Painting Tips for a Professional Result
Start by treating the piece like a blank canvas: clean, sand, and inspect every surface so you’ll catch old finish, dents, or glue squeeze‑out before you paint.
Choose primer, compatible paint finishes, and colors that suit furniture styles you’re replicating. Work in thin coats, sand between layers, and use proper brushes or a sprayer.
- Thin, even coats
- Light sanding between coats
- Match finish to style
Low‑Cost Options That Still Give a Smooth Finish
You don’t need expensive tools or premium brands to get a smooth finish—smart choices and careful technique go a long way.
Use quality sandpaper, tack cloths, and an inexpensive foam roller or angled brush for smooth application. Thin coats of budget water‑based paint, light sanding between layers, and patience deliver professional results.
Choose affordable finishes with good reviews to save money without sacrificing outcome.
Time‑Saving Hacks for a Fast, Smooth Project
Cutting corners doesn’t mean cutting quality—use a few targeted shortcuts to shave hours off your project while keeping the finish smooth.
You’ll focus on time saving techniques and efficient tools to speed prep and application without sacrificing results.
- Use a random-orbit sander and tack cloth for fast, consistent prep.
- Thin paint slightly for smoother flow and fewer brush marks.
- Work in sections with a mini roller for quick, even coverage.
Safety, Ventilation, and PPE Best Practices
Because finishes, solvents, and dust can harm your health and ruin a job, set up proper ventilation and wear the right PPE before you touch any tools or coatings.
Use ventilation methods like exhaust fans and open windows, keep workspace organization tight, and follow PPE guidelines for respirators, gloves, and eye protection.
Prioritize safety equipment, maintain hazard awareness, and respect paint toxicity.
Cleaning and Maintaining Brushes, Rollers, and Sprayers
When you’re done with a coating, clean tools immediately to prevent dried finish from ruining brushes, rollers, and sprayers—wet cleanup is far easier than scraping hardened material.
Use proper brush care and brush selection, roller maintenance for different roller types, and sprayer cleaning with recommended cleaning solvents.
Store tools for finish restoration and easy paint removal.
- sprayer tips and flushing
- bristle conditioning
- roller nap care
Final Checklist: Steps to a Smooth Painted Wood Surface
With your brushes, rollers, and sprayer cleaned and stored, you’re ready for the final checklist that makes the painted wood surface look professional. Check level, sand gloss, wipe dust, inspect edges, cure time. Apply final touches after full cure. Confirm uniform paint application and hardware fit.
| Item | Action |
|---|---|
| Level | Check |
| Sand | Light |
| Wipe | Dust |
| Inspect | Edges |
| Cure | Time |
Frequently Asked Questions
Can I Paint Over Previously Painted Laminate or Melamine Wood Surfaces?
Yes — you can paint over previously painted laminate or melamine; you’ll need strong prep techniques like cleaning, deglossing, sanding, and priming so surface adhesion improves, and then use a bonding primer and proper paint for durability.
Will Painted Wood Release Harmful VOCS After Fully Cured?
Once the paint’s fully cured, you shouldn’t worry — it’s water under the bridge; you’ll have minimal VOCs exposure. Follow painting safety, consider environmental impact, and let the curing process finish for safest indoor air quality.
Can I Use Colored Wood Stains Under Paint for Special Effects?
Yes — you can use colored wood stains under paint for special effects. You’ll blend hues with color blending techniques, layer glazes, and follow stain application tips like testing, wiping excess, and sealing before painting for controlled translucent effects.
How Do I Transport Large Painted Furniture Without Marring the Finish?
You’ll pad and wrap each piece securely, use moving blankets and corner protectors, and secure drawers. Hire pros for heavy items, label fragile spots, and carry with straps so furniture moving won’t damage your finish protection.
Are There Eco-Friendly Paint Alternatives That Still Give a Super-Smooth Finish?
About 60% of consumers prefer low‑VOC products, so you can choose eco friendly options like milk, clay, or water‑based acrylics that give a smooth application; you’ll get durable, super‑smooth results when you prep and sand properly.
Conclusion
You’ve got the steps to turn rough wood into a glass‑smooth painted surface—prep, fill, sand progressively, and use the right tools. Don’t skip cleaning and ventilation; they speed the job and protect you. Here’s a quick motivator: professionals report finishing prep properly cuts rework by about 60%, so the extra minutes you spend now save hours later. Follow the checklist and you’ll get a durable, flawless finish faster than you expect.