How to Get Rid of Orange Peel on Paint for a Smooth Finish
You can fix orange peel by wet-sanding and polishing or, for deep texture, by re-spraying with corrected technique. Start by evaluating how visible and tactile the texture is; minor peel needs 1000–2000 grit wet-sanding, then 1500–3000 grit and a fine polish. Wear a respirator and keep the area clean and cool. If you opt to re-spray, adjust gun settings, distance, and environment for consistent coverage — keep going to learn full steps and tips.
Quick Fix: Wet Sand and Polish Orange Peel
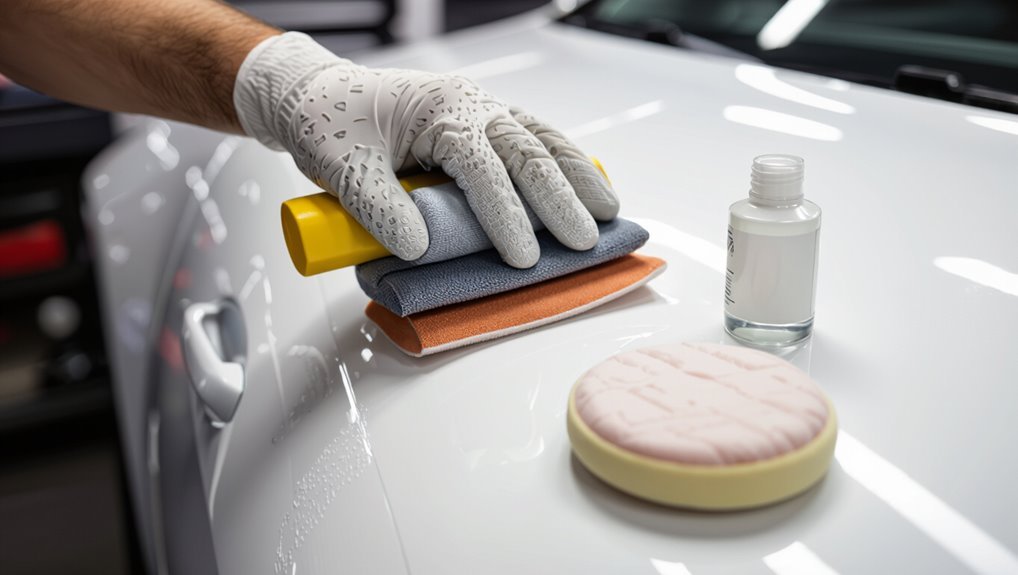
Start by evaluating the severity of the orange peel—run your hand and eye over the surface to see if the texture is light enough for sanding.
If it is, wet sand progressively with 1000–2000 grit, keep the area cool, then polish with a fine compound.
You’ll remove texture, restore gloss, and use proven orange peel remedies for professional paint finishing results.
What Causes Orange Peel on Paint
You’ll usually see orange peel when the prep or application wasn’t right.
Skipping proper surface cleaning or using the wrong paint viscosity can leave texture instead of a smooth film.
Poor spray technique—incorrect gun settings, distance, or speed—also creates that dimpled finish.
Improper Surface Prep
When paint doesn’t stick or flow smoothly, it’s usually because the surface wasn’t prepped right; dirt, wax, old gloss, or uneven sanding keeps the new coat from leveling and leads to that bumpy “orange peel” texture.
You should perform thorough surface cleaning and a careful substrate inspection so paint bonds evenly. Skipping degrease, dust removal, or feather sanding invites orange peel and adhesion problems.
Incorrect Paint Viscosity
Even with perfect prep, the paint can still show orange peel if its viscosity isn’t right. You should check viscosity measurements and adjust with recommended paint additives. Too thick causes texture; too thin runs. Match manufacturer specs, test with a cup or meter, and remeasure after additives. Consistent viscosity prevents surface defects and helps achieve a smooth finish.
| Issue | Fix |
|---|---|
| Too thick | Add reducer |
| Too thin | Add paint solids |
| Out of spec | Re-measure |
Spraying Technique Errors
Check your spraying technique next, because incorrect gun handling and setup are among the most common causes of orange peel.
You’ll reduce texture by holding the gun perpendicular, maintaining consistent distance and speed, and overlapping spray patterns.
Make precise nozzle adjustments and test on scrap; too-wide or uneven patterns cause dry edges.
Practice smooth motion to get an even, wet film for a smooth finish.
How to Tell If Orange Peel Needs Fixing
Wondering whether that textured finish really needs fixing? Do a focused surface inspection: run your hand and look at reflections to spot orange peel indicators like uneven texture or light scattering.
If the texture’s visible from normal viewing distance or bothers touch and reflections, it’s worth addressing. If it’s subtle and only seen up close, you can probably leave it alone.
When to Sand vs. When to Re-Spray
First check how thick the paint is so you know if you can sand through without exposing primer.
Then evaluate the surface damage—minor texture can be smoothed, but deep defects or runs often need a respray.
Finally, weigh time and cost: sanding and buffing is cheaper and quicker for small areas, while respraying gives a more reliable finish for extensive problems.
Assess Paint Thickness
Before you decide whether to sand or re-spray, measure the paint build-up so you know what you’re working with. Use paint measurement tools for thickness evaluation; thin layers usually sand, very thick layers need re-spray. Compare readings:
| Thickness (µm) | Action | Notes |
|---|---|---|
| <50 | Sand | Light smoothing |
| 50–120 | Sand or spot | Moderate |
| >120 | Re-spray | Heavy build-up |
Evaluate Surface Damage
Now that you’ve checked paint thickness and know whether the build-up favors sanding or a re-spray, inspect the surface for defects that change that plan.
For accurate surface assessment, look for runs, deep orange peel, scratches, or substrate exposure.
Your damage evaluation should dictate method: minor texture? Sanding and buffing. Extensive defects or adhesion failure? Re-spray to restore uniform coverage.
Consider Time And Cost
Deciding whether to sand or re-spray comes down to balancing time, cost, and the quality you want, so figure your priorities up front. You’ll weigh time management against budget considerations: sand for small areas, re-spray for full panels. Choose based on downtime, materials, and desired finish.
| Option | Time | Cost |
|---|---|---|
| Sand | Low | Low |
| Re-spray | High | High |
Safety Gear and Workspace Setup for Orange Peel Repair
Respirator, goggles, and nitrile gloves are must-haves when you sand or spray to remove orange peel—these processes kick up fine dust and solvent vapors that can irritate lungs, eyes, and skin.
Follow safety measures: ventilate, ground spray equipment, and keep a fire extinguisher nearby.
For workspace organization, clear clutter, use drop cloths, and arrange lighting so you can work cleanly and inspect the finish.
Tools and Materials You’ll Need
You’ll need a handful of specific tools and materials to remove orange peel effectively: fine- and medium-grit sandpaper (400–2000 grit), sanding blocks or a DA sander with appropriate pads, tack cloths, masking tape and paper, a quality solvent or wax remover, primer/filler (if low spots need correcting), paint and clearcoat compatible with your vehicle, spray gun or aerosol cans, and polishing compounds with a dual-action or rotary polisher and soft pads.
Gather compatible paint types, proper cleaning rags, respirator, gloves, mixing cups, filters, and replacement nozzle tips for spray guns.
Follow manufacturer specs for primers, basecoats, clears, and polish abrasives.
Test-Spraying and Troubleshooting on Sample Panels
Before you coat the car, set up a few practice panels so you can test-spray and troubleshoot without risking the actual finish.
Use identical panels, replicate booth conditions, and spray varying pressures, distances, and atomization.
Record test results, note orange peel, runs, or dry spray, then adjust gun settings and technique.
Repeat until panels match the smooth finish you want.
Choosing the Right Sandpaper Grit and Pads
Start with a handful of grits and pads that match each stage of the process: coarse for leveling orange peel, medium for blending, and fine for final smoothing.
Start with matching grits and pads—coarse to level orange peel, medium to blend, and fine to finish.
For effective sandpaper selection, pick 180–320 for leveling, 400–800 for blending, and 1000–2000 for final touch.
Use foam or interface pads to control pressure.
Do a grit comparison to confirm progression.
Wet Sanding: Flatten Orange Peel Step-by-Step
Before you start wet sanding, you’ll prep the surface thoroughly by washing, taping off trim, and leveling any high spots so you don’t sand through the clear coat.
You’ll then follow a step-by-step sanding technique—work progressively from finer to finer wet grits with light, even pressure and frequent checks.
Finally, you’ll finish by polishing and buffing to restore gloss and remove any micro-scratches.
Prep Surface Thoroughly
When the paint’s dry and cured, you’ll wet-sand to flatten the orange peel by working through progressively finer grits, keeping the surface lubricated and the scratches even so you don’t sand through the clear coat.
Before sanding, perform thorough surface cleaning to remove contaminants, wax, and grease.
Mask adjacent areas, inspect primer application for defects, and allow proper cure time to guarantee consistent sanding results.
Sanding Technique Steps
Put on your respirator and keep the surface wet as you work through the grit progression: begin with a conservative grit (usually 1000–1200) to level the orange peel, then move to 1500–2000 to refine the scratches, and finish with 2500–3000 before polishing.
Use light, even strokes, check progress frequently, rinse debris, and maintain proper surface preparation. These wet sanding techniques prevent gouges.
Finish Polishing Process
Although you’ve already leveled the peel, you’ll now use progressively finer wet sanding and polishing to flatten the finish and restore gloss without cutting through the clear coat.
Work 1500→2000→3000 grit, keep surfaces lubricated, and check frequently.
Use gentle polishing techniques, foam pads, and light pressure.
Finish with a fine polish and waxing as finishing touches to seal and protect the surface.
Dry Sanding: Level Orange Peel Without Scuffs
Start by dry sanding the orange peel with a light touch so you level the texture without cutting through the clear coat.
Use fine-grit paper and gentle, even strokes as part of sanding techniques and surface preparation. Keep sanding moves linear, check progress often, and wipe dust away.
Stop when texture evens; avoid aggressive pressure to prevent scuffs and clear-coat damage.
Using a Sanding Block Correctly
Grip the sanding block firmly and keep it flat to maintain an even, controlled pressure across the surface—this prevents low spots and preserves the clear coat while you knock down orange peel.
You’ll move in straight, overlapping passes using consistent sanding techniques, changing grit progressively.
Pay attention to block usage, avoid rocking, and inspect often so you stop as soon as the texture evens out.
Fill Deep Orange Peel With Glazing Putty or Spot Filler
When light sanding doesn’t flatten severe orange peel, use glazing putty or a spot filler to level the low areas before re-sanding and refinishing.
If light sanding won’t remove heavy orange peel, fill low spots with glazing putty, sand smooth, then refinish.
You’ll clean, mask, and apply thin layers, mastering filling techniques to avoid overbuild.
For precise putty application, press and smooth with a flexible spreader, let cure fully, then sand flat.
Repeat if needed before primer and topcoat.
Feathering and Blending Repaired Areas
Once the filler’s cured and sanded smooth, blend the repair into the surrounding paint by feathering the edges so changes disappear under primer and topcoat.
Use precise feathering techniques and subtle blending methods to hide shifts. Picture the process:
- Light sanding outward for a soft slope.
- Thin primer layers feathered beyond the repair.
- Final scuff and wipe before topcoat application.
Polish Paint With Rubbing Compound and Restore Shine
After feathering and priming, you’ll need to remove any remaining texture and bring the repaired area up to the same gloss as the surrounding paint; rubbing compound does that by cutting fine surface imperfections and smoothing the finish.
Use controlled polish techniques: apply compound application with a soft pad, low-speed polisher, light pressure, then wipe and inspect.
Follow with finer polish and sealant to restore consistent shine.
Correct Spray-Gun Settings (HVLP vs Airless)
Because orange peel often comes from wrong atomization and pressure, you’ll want to match your spray-gun type and settings to the paint and job:
- HVLP for control — lower pressure, softer atomization, steady spray technique.
- Airless for speed — higher pressure, finer fan at correct nozzle size.
- Test panels — adjust distance, overlap, and trigger rate until finish lays flat and consistent.
Thinning Paint and Viscosity Tips to Avoid Texture
If your spray pattern looks chunky or the paint won’t lay out, thin the material to the manufacturer’s recommended viscosity and test again—too thick paint causes large droplets that create orange peel, while over-thinning can run or sag.
Check paint consistency with a viscosity cup, follow thinning techniques listed by the maker, and make small adjustments until the finish levels smoothly without sagging or texture.
Spray Technique Adjustments That Reduce Orange Peel
When you adjust your spray technique, you’ll cut down on orange peel by controlling distance, speed, overlap, and trigger timing; hold the gun about 6–10 inches from the surface (or follow the gun maker’s recommendation). Move at a steady pace to let droplets flatten, overlap passes by about 50% to avoid ridges, and release the trigger between passes so paint doesn’t build up at the ends.
- Narrow spray pattern for detail
- Wide spray pattern for panels
- Fine nozzle adjustment for even mist
Check your spray pattern and nozzle adjustment frequently, maintain consistent gun motion, and feather starts and stops to minimize texture.
Environmental Controls: Temperature, Humidity, and Airflow
Adjusting your spray technique only gets you so far; the booth conditions play a big role in whether the paint lays out smooth or stubbornly peels.
You’ll monitor temperature control to keep solvents evaporating properly, gauge humidity effects to prevent blushing or rapid skinning, and use airflow management to remove overspray.
Control these environmental factors and you’ll see fewer orange peel problems.
Preventive Checklist for Future Flawless Spray Jobs
To prevent orange peel next time, make sure you set up the right equipment—nozzles, pressure, and gun settings tuned for your coating.
You’ll also want to control temperature, humidity, and airflow so the paint levels and cures evenly.
Follow this checklist before you spray and you’ll cut down on sanding and rework.
Proper Equipment Setup
A solid equipment setup stops orange peel before it starts, so gather and check your spray gun, needle/nozzle sizes, air pressure regulator, compressor, hoses, and filters before you mix paint.
Verify equipment calibration and consistent air pressure, clean tips, and secure fittings.
Picture your setup:
- Gun and needle aligned
- Hoses straight and clean
- Regulator showing steady PSI
Ideal Environmental Conditions
When you control the shop environment, you cut the chances of orange peel before you touch the gun—keep temperature, humidity, and airflow within the paint maker’s recommended ranges, avoid direct drafts on the panel, and block dust sources so coatings lay down smooth and consistent. You’ll monitor temperature control, maintain correct humidity levels, and schedule spraying during stable conditions.
| Item | Target | Action |
|---|---|---|
| Temp | 68–75°F | Heat/cool |
| Humidity | 40–60% | Dehumidify |
| Airflow | Low | Adjust vents |
| Cleanliness | High | Wipe down |
| Timing | Stable | Delay if needed |
When to Call a Pro: Signs You Need Professional Help
If you’ve tried sanding, re-spraying, and buffing without success, it’s time to contemplate a pro—especially when the orange peel covers large areas, affects multiple panels, or shows through new touch-ups.
Call for an expert assessment and project evaluation when:
- Texture persists after DIY corrections.
- Paint thickness or runs complicate repair.
- Budget or time constraints favor a shop solution.
Frequently Asked Questions
Can Orange Peel Affect Clear Coat Adhesion Over Time?
Yes — it can. If orange peel compromises paint surface preparation, you’ll reduce clear coat durability and adhesion over time; you’ll need proper sanding, cleaning, and possibly recoat to restore a smooth, well-prepared substrate for lasting protection.
Will Ceramic or Ceramic-Coated Paint Hide Orange Peel?
You won’t mysteriously erase orange peel with ceramic or ceramic-coated paint; it’ll gently disguise texture while offering ceramic benefits and boosting coating durability, but it won’t replace proper sanding and refinishing for a truly smooth finish.
How Do I Remove Orange Peel From Plastic Trim or Bumpers?
You should sand plastic trim wet with fine to ultra‑fine grits, then use plastic‑safe polishing methods and a rotary or DA with plastic polish or compound; finish with a fine polish and protectant to restore smooth, uniform texture.
Can Paint Additives Permanently Prevent Orange Peel?
No, additives can’t permanently prevent orange peel; you’ll reduce paint texture if you combine proper surface preparation, correct thinner, spray technique, and additives, but lasting smoothness depends on prep, application, and sometimes sanding afterward.
Is Orange Peel Removal Safe on Vintage or Thin Factory Paint?
Like walking on thin ice, you shouldn’t risk aggressive removal on vintage paint or thin factory paint; you’ll likely damage original layers. Start with gentle wet-sanding, test a small area, and consider a professional restorer.
Conclusion
Like buffing a rough sea into a glassy lake, you can smooth orange peel with the right tools, patience, and technique. If the texture’s light, wet sand and polish; if it’s deep or widespread, re-spray or call a pro. Control temperature, humidity, and spray style, wear proper safety gear, and double-check your prep. Follow the preventive checklist and your next finish will shine like a mirror, not ripple like a breeze.