How to Hang Posters on Textured Walls Without Them Falling Down
You can hang posters on textured walls without them falling by prepping the surface, choosing the right fixings, and distributing weight. Clean and flatten texture pockets, wipe with isopropyl alcohol, then use heavy-duty adhesive strips or mounting putty for light pieces, multiple Command picture-strip pairs for medium posters, or wall anchors/studs for framed art. Test the hold for 24–48 hours and protect edges with foam pads; follow these steps and you’ll find sturdier, longer-lasting results if you want more tips.
How to Hang Posters on Textured Walls Without Them Falling Down
Here’s a quick answer and a snapshot of the best methods at a glance so you can stop posters from slipping off textured walls.
I’ll outline when to use adhesive strips, mounting putty, picture hooks, or a simple frame based on wall texture and poster weight.
Use the short decision guide that follows to pick the easiest, most reliable option for your situation.
Quick Answer Best Methods at a Glance
Four reliable options will keep your posters up on textured walls without damage: heavy-duty adhesive strips, mounting putty, small picture hooks anchored into studs or with anchors, and poster rails or clips that clamp the edges.
Use these depending on weight and finish to learn how to hang posters on textured walls confidently.
- Adhesive strips
- Mounting putty
- Anchored hooks
- Poster rails
When to Use Which Method (short decision guide)
When do you pick strips, putty, hooks, or rails? Choose strips for smooth-ish textures and temporary hangs, putty for lightweight posters and uneven spots, hooks for heavier frames, and rails for gallery-style displays or frequent changes.
| Situation | Best method |
|---|---|
| Light, temporary | Strips |
| Uneven surface | Putty |
| Heavy or permanent | Hooks |
Understanding Textured Walls and Poster Challenges
You’ll first want to recognize common textured surfaces like stucco, popcorn, orange peel, knockdown, and plaster because each grabs adhesives differently.
Texture creates gaps and uneven contact that weaken tape, glue, and lightweight hooks, so stability becomes a real issue.
Also consider your poster’s size and frame weight—heavier pieces need more secure anchors or alternate hanging methods.
Common Types of Textured Wall Surfaces (stucco, popcorn, orange peel, knockdown, plaster)
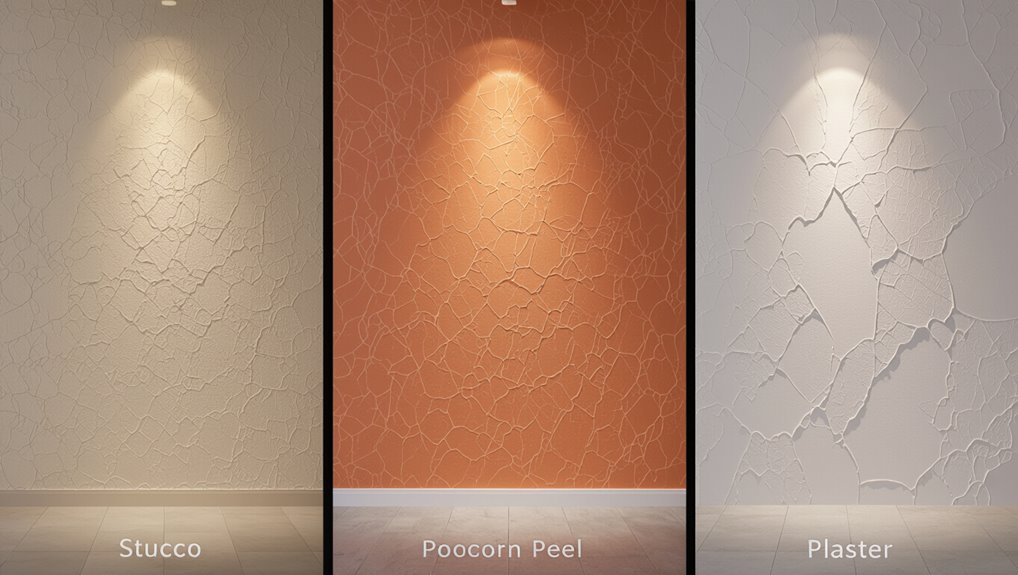
Textured walls come in several distinct finishes—stucco, popcorn, orange peel, knockdown, and traditional plaster—and each creates different challenges when hanging posters.
You’ll find stucco and plaster rough and uneven, popcorn deeply bumpy, orange peel fine-textured, and knockdown partially flattened peaks.
Knowing the surface helps you pick proper fasteners, mounting locations, and prep techniques so posters stay secure without damaging walls.
Why Texture Causes Adhesion and Stability Problems
Because rough or uneven surfaces reduce contact area, posters and adhesives can’t grip textured walls the way they do smooth drywall.
You’ll find gaps, air pockets, and irregular edges that weaken tape, strips, and glues. Texture also creates leverage points that cause corners to peel and mounts to pivot.
Expect less consistent adhesion and plan for anchors or surface preparation to improve stability.
Weight and Size Considerations for Posters and Frames
When choosing a poster or frame for a textured wall, consider both size and weight since uneven surfaces reduce how much adhesive and fasteners can hold; larger pieces exert more leverage and heavier frames can pull free over time.
Pick lighter materials, reinforce corners, use multiple anchors or a cleat, and test load ratings.
Balance aesthetics with secure mounting to prevent sagging or damage.
Tools and Materials You’ll Need
You’ll want to pick the right adhesive—tapes, strips, glue dots—or go with mechanical fasteners like nails, screws, anchors, or picture hangers depending on your wall and poster weight.
Consider alternative supports such as clips, rails, or freestanding poster stands if you want non-invasive options.
Have a few helpful tools on hand too: a level, stud finder, drill (with drywall anchors if needed), and a putty knife.
Adhesive Options (tapes, strips, adhesives, glue dots)
Choosing the right adhesive makes the difference between a poster that stays flat and one that peels off or damages your textured wall; you’ll want products that balance holding power with removability.
Use removable command strips for medium-weight posters, double-sided mounting tape for small prints, adhesive glue dots for corners, and poster putty for lightweight items.
Test a small spot first to avoid residue.
Mechanical Fasteners (nails, screws, anchors, picture hangers)
1 clear set of tools will make installing mechanical fasteners on textured walls faster and cleaner.
Gather a drill with masonry bits, screwdriver, hammer, level, pencil, tape measure, appropriate wall anchors, screws or nails, and picture hangers rated for your poster’s weight.
Use anchors for drywall or plaster, predrill pilot holes, and hang level to guarantee secure, long-lasting mounting.
Alternative Supports (clips, rails, poster rails, stands)
For alternative supports like clips, poster rails, picture rails, and freestanding stands, gather a compact set of tools and materials so installation stays quick and tidy:
clips or rail set, compatible screws or small adhesive pads, foam or felt pads to protect textured surfaces, a ruler or tape for alignment, replacement end caps or grips, and optional zip ties or mounting cord for securing lightweight posters.
Helpful Tools (level, stud finder, drywall anchors, drill, putty knife)
A few well-chosen tools will make hanging posters on textured walls faster and neater: grab a bubble level to align, a stud finder to locate solid support, and drywall anchors sized for your poster’s weight.
Use a drill for precise holes and a putty knife to smooth compound when patching. These items cut mistakes and keep your artwork secure and straight.
Step-by-Step Methods to Hang Posters
Now you’ll learn clear, step-by-step options for hanging posters on textured walls.
Start with removable adhesive strips or Command picture hanging strips for lightweight pieces.
Use adhesive hooks or poster putty for medium-weight posters, and switch to mechanical anchors for heavy frames.
If texture still causes trouble, you can mount the poster to a smooth backing board before hanging.
Method 1 Using Removable Adhesive Strips (for lightweight posters)
Start by cleaning the textured wall and the back of your poster so the strips can bond properly.
Decide where to place strips based on the poster’s weight and size, then attach them to the poster edges or corners.
Press firmly against the wall, allow the adhesive to cure for the recommended time, and give it a gentle pull to test the hold.
Step 1: Prepare the wall and poster surface
Clean the area and let it dry so the adhesive can grip properly: wipe textured walls with a damp cloth to remove dust and use a degreasing wipe on any spots with oils or fingerprints.
Then give the surface at least 10–15 minutes to fully air-dry.
Flatten your poster, remove dust or lint with a soft brush, and guarantee corners are crisp for secure adhesion.
Step 2: Choose strip placement and attach to poster
With the wall and poster prepped, decide where the adhesive strips will sit so the poster hangs flat and level.
Mark corners and midpoints lightly on the poster’s back. Use two to four strips depending on size; place strips evenly along top edge and lower corners for support.
Peel liners, press strips to poster, and align edges before final attachment to the wall.
Step 3: Press and cure time; test strength

Firmly press the poster against the wall, running your palm over each adhesive strip for about 30 seconds to guarantee full contact; apply extra pressure at the strip edges and any textured peaks.
Let the adhesive cure for at least one hour (follow package directions).
Gently test by tugging the bottom edge; if it holds, you’re set. If it shifts, reapply pressure or add another strip.
Method 2 Using Command Picture Hanging Strips for Textured Surfaces
For textured walls, start by cleaning out any dust from the texture pockets so the strips can make firm contact.
Use several small Command picture hanging strips placed where the poster will press most, rather than one large strip, for better grip on uneven surfaces.
When you need to take the poster down, follow the strips’ removal instructions to pull them off safely without damaging the wall.
Step 1: Clean texture pockets; create smooth contact points
Before you attach the strips, clean out the texture pockets and create small, smooth contact points so the adhesive can grip properly.
Use a soft brush or vacuum to remove dust, then press gently with a flat plastic card or sanding pad to flatten tiny peaks.
Wipe with isopropyl alcohol, let fully dry, and only then apply the adhesive for best hold.
Step 2: Use multiple small strips strategically
Start by planning a grid of small Command Picture Hanging Strips across the poster’s back so weight’s spread evenly and each strip makes solid contact with the wall texture.
Apply strips to poster edges and center, pressing firmly into texture pockets. Stagger placement so no single seam bears full load.
Test adhesion briefly, then hang and adjust positioning to guarantee level, even support.
Step 3: Remove safely without damage
When it’s time to take your poster down, pull slowly and steady so the strips release from the textured wall without tearing paint or paper.
Hold the frame close, support corners, and grasp the tab. Stretch the tab straight down along the wall—don’t yank outward.
If adhesive resists, warm it slightly with a hair dryer and continue stretching until the strip cleanly detaches.
Method 3 Adhesive Hooks or Poster Putty for Medium Weight
For medium-weight posters on textured walls, pick high-tack putty or an adhesive hook rated for the poster’s weight.
Apply it in several anchor points—corners and along the top—to spread the load.
Check the attachment periodically and replace or add putty/hooks if you notice sagging.
Step 1: Choose high-tack putty or hook rated for weight
Pick a high-tack poster putty or an adhesive hook that’s rated for at least the combined weight of your poster and any frame or backing, and you’ll avoid sagging or sudden falls.
Check product labels for weight capacity, factor in humidity and texture, and choose brands with strong reviews.
Prefer hooks with clear weight ratings or putty marketed for medium-weight items.
Step 2: Apply in multiple anchor points
Now that you’ve chosen a high‑tack putty or a hook rated for the load, plan multiple anchor points to spread the weight and prevent warping or peeling.
Mark corners and midpoints, press putty or attach hooks firmly into textured valleys, and use matching adhesive on top and bottom edges.
Check alignment, press for full contact, and leave undisturbed for the adhesive to set.
Step 3: Monitor over time and reapply if needed
Step 3: Check your poster regularly during the first week and then once a month—temperature shifts and humidity can loosen adhesive on textured surfaces.
You’ll notice early loosening or sagging; press edges and corners firmly, replace putty or hooks if tackiness fades, and swap to fresh adhesive every few months.
Keep a spare pack of putty/hooks handy so you can act fast and avoid damage.
Method 4 Mechanical Anchors for Heavy Posters and Frames
For heavy posters or framed art, you’ll start by locating studs or picking anchors rated for the load.
Next, you’ll drill pilot holes and install the anchors or screws securely.
Finally, hang the frame and check it’s level before calling the job done.
Step 1: Locate studs or choose appropriate anchors
Before you drill or push any hardware into a textured wall, figure out whether you can hit a stud or need a mechanical anchor. This decision tells you what kind of support your poster or frame will actually get.
Use a stud finder or knock to locate studs. If none align with your hanging point, pick anchors rated for wall type and expected weight.
Step 2: Drill pilot holes and install anchors/screws
Start by marking the exact spot where the anchor will go.
Hold the drill perpendicular, use a bit sized to the anchor, and drill a shallow pilot hole through the textured surface.
Gently clear debris, insert the anchor flush with the wall, and tap it lightly if needed.
Drive the screw until snug—don’t overtighten—to secure the anchor for your poster or frame.
Step 3: Hang frame and check level
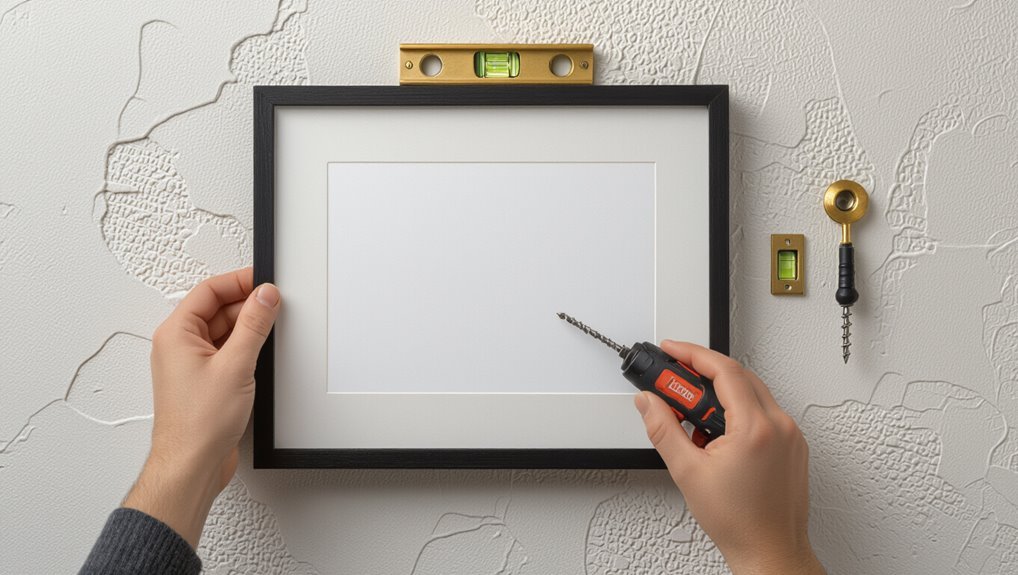
1. Hang the frame onto the installed anchors or screws, guiding the hanging hardware onto each fastener.
Step back and eyeball alignment, then use a level to confirm it’s straight. If it’s off, adjust by loosening one fastener slightly and nudging the frame until level, then tighten.
Recheck; verify the frame sits flush and securely against the textured wall.
Method 5 Build a Smooth Backing or Mounting Board
For textured walls, you can create a smooth backing by mounting your poster to foam board, plywood, or MDF so the image sits flat and even.
Then attach appropriate hanging hardware to the backing before you hang it.
Finally, secure the backing to the wall using strong adhesives or mechanical fixings for a stable, clean display.
Step 1: Mount poster to foam board, plywood, or MDF
Mount the poster onto a rigid backing like foam board, plywood, or MDF to create a flat, stable surface that hides wall texture and prevents sagging.
Center the poster, use archival double-sided tape, spray adhesive, or thin mounting adhesive evenly, and smooth from center outward to remove bubbles.
Trim excess board and let adhesive cure before handling to guarantee a secure, flat mount.
Step 2: Attach hanging hardware to the backing
Now attach the hanging hardware to the backing so your mounted poster stays level and secure: choose hardware rated for the weight of the board (D-rings, sawtooth hangers, French cleats, or wire), mark equal distances from the top edge, predrill small pilot holes to avoid splitting, and fasten each piece firmly, checking alignment with a straightedge before tightening.
Then test stability and adjust if needed.
Step 3: Use adhesives or mechanical fixings to secure backing to wall
Secure the mounted backing to the wall using either adhesives or mechanical fixings, choosing the option that matches your wall texture, poster weight, and permanence you want.
For light posters on mildly textured surfaces, use heavy-duty mounting tape or removable adhesive strips.
For heavier pieces or rough textures, drill and use anchors with screws or picture-hanger brackets.
Check alignment and level before final tightening.
Comparison of Methods (Strength, Damage Risk, Cost, Ease)
To help you choose, we’ll compare common hanging methods side-by-side in a simple table showing strength, risk of wall damage, cost, and ease of use.
You’ll see at a glance which options hold heavier posters, which might scuff textured paint, and which are budget- or DIY-friendly.
Use the table to pick the method that best fits your poster size and wall type.
Side-by-side Comparison Table of Common Methods
Below is a quick, side-by-side comparison of common hanging methods so you can pick the best balance of strength, damage risk, cost, and ease for your textured wall. Use this to choose what fits your poster size and wall type.
| Method | Strength | Damage Risk |
|---|---|---|
| Adhesive strips | Medium | Low |
| Picture hooks | High | Medium |
| Sticky tack | Low | Very low |
Common Mistakes and Why Posters Fall Down
You’ll often find posters fail because you underestimated the weight or didn’t match the mounting method to the textured surface.
Skipping proper prep—leaving dust or loose texture—and using the wrong or too little adhesive are other common culprits.
Also remember temperature and humidity can weaken bonds over time, so choose materials rated for your environment.
Underestimating Poster Weight and Surface Compatibility
When you skip matching your poster’s weight to the hold strength of your textured wall, the fastener will usually give out long before the adhesive or nail itself fails.
Check poster size, frame weight, and hanging hardware ratings. Use anchors or picture hooks rated above the expected load.
Test a small section if unsure, and redistribute weight with multiple supports to prevent stress concentration.
Poor Surface Preparation (dust, loose texture)
If you stick a poster to dusty, flaky, or uneven texture without prepping the wall, the adhesive never gets a solid bond and the paper will slide or peel off.
You need to clean loose dust, brush away flaky paint, and remove grease so the surface’s peaks and valleys won’t prevent contact.
Smooth edges and a dry, stable substrate prevent early failure.
Using Insufficient or Wrong Adhesives
Cleaning the wall only helps so much — the wrong tape or weak adhesive will still let your poster sag or fall.
You need adhesives rated for textured surfaces: heavy-duty mounting tape, foam pads, or removable wall hooks.
Don’t use cheap scotch tape, rubber cement, or adhesives meant for smooth walls.
Test a small spot and press firmly for full contact before hanging.
Ignoring Temperature and Humidity Effects
Because temperature and humidity change how adhesives behave and how paper expands, you’ll want to take into account your room’s climate before mounting a poster.
If it’s humid, adhesives can soften and lose grip; if it’s dry or hot, glue can become brittle or brittle edges curl.
Choose adhesives rated for that environment, allow acclimation, and avoid placing posters near vents or windows.
Prevention, Maintenance, and Best Practices
Before you hang anything, you’ll want to prep the textured surface so adhesives or hooks stick reliably.
Test the load with a temporary setup to confirm the mounting method holds under weight and over time.
Also check for humidity and sun exposure, and plan gentle removal methods to avoid tearing paint or texture.
How to Prepare Textured Walls Properly
When you plan to hang posters on textured walls, take a few preventive and maintenance steps so your mounts stay secure and your wall finish stays intact.
Clean surfaces with a mild detergent, dry completely, and remove loose texture. Lightly sand high peaks for better contact, patch holes, and prime raw areas.
Use adhesive-compatible backing or mounting strips and follow manufacturer cure times.
How to Test Load Before Final Installation
Test the load capacity of your chosen mounting method on the wall before committing to a permanent install: attach the hook, strip, or adhesive pad exactly where the poster will hang, then apply a measured weight equal to or slightly above the poster’s total load (frame, glass, and any backing).
Leave weight for 24–48 hours, check for slippage, repeat for multiple anchors, and adjust placement if needed.
Seasonal and Environmental Care (humidity, sunlight)
Because humidity and sunlight can quickly degrade posters, you’ll want to plan mounting and care around seasonal changes to keep them looking their best.
Place posters away from direct sun, use UV-protective frames or acrylic, and avoid exterior-facing walls that trap moisture.
Monitor indoor humidity, use a dehumidifier in damp seasons, and swap or rotate displays during peak summer and winter to prevent warping and fading.
How to Remove Posters Cleanly Without Damaging Texture
Seasonal care helps prevent damage before it happens, but you’ll still need to remove posters periodically without harming textured paint or wallpaper.
Gently peel from a corner, use heat for stubborn adhesive, and avoid metal scrapers. Clean residue with mild solvent on a cloth, testing discreetly first.
- Peel slowly at a shallow angle
- Use a hair dryer on low
- Test solvents out of sight
- Pat, don’t rub
Tools, Products, and Materials Recommendations
You’ll want the right adhesives, anchors, and hangers for your wall type and poster weight—I’ll recommend specific strips and putty by use case.
I’ll also cover which anchors work best on textured surfaces and when to choose budget versus premium options.
After that, you can pick the materials that match your poster, surface, and budget.
Recommended Adhesive Strips and Putty by Use Case
For hanging posters on textured walls, pick adhesive strips or putty that match the texture, poster weight, and how long you want the display to stay up; light removable strips or tacky putty work for thin posters on rough surfaces, while heavy-duty Velcro-style strips or poster-specific mounting tack fit thicker prints and longer-term displays.
Use foam-backed strips for deep texture, museum putty for collectibles, and reusable gel pads for temporary shows.
Best Anchors and Hangers for Textured Walls
Although textured walls can complicate hanging, choosing the right anchors and hangers makes the job straightforward: Use self-drilling drywall anchors for medium-weight posters, toggle bolts for heavier frames, and masonry anchors for brick or stucco.
Pair with small D-ring hangers or wire for stability. For fragile finishes, opt for adhesive-backed hooks rated for textured surfaces.
Always match anchor type to wall material and load.
Budget vs. Premium Options
After picking the right anchors and hangers, you’ll want to compare budget and premium options so you get reliable results without overspending.
Choose basic adhesive strips or lightweight wall hooks for small posters and temporary displays.
For larger or valuable prints, invest in heavy-duty anchors, metal picture hangers, or museum-grade tapes.
Balance cost with load capacity and wall texture for lasting hold.
Frequently Asked Questions
You probably have a few quick questions about what actually works on textured walls, like whether double-sided tape will stick or if adhesives will ruin painted surfaces.
You’ll also want safe options for heavy framed posters without studs and for rented rooms where damage isn’t allowed.
Finally, I’ll cover how to repair textured wall damage after removing a poster.
Can I use double-sided tape on textured walls?
Can double-sided tape hold posters on textured walls? You can, but success depends on texture, tape quality, and poster weight.
Press firmly onto a clean, dry surface and use multiple small strips at corners and edges.
For deeply textured or heavy posters, tape may fail; consider mounting strips designed for uneven surfaces or combine tape with other supports to avoid slipping.
Will adhesives damage painted textured walls?
If double-sided tape worked for your poster, you’ll still want to think about what it might do to painted textured walls when you remove it.
Adhesives can peel paint, lift texture, or leave residue. Test a small hidden spot first, wait 24 hours, then remove slowly at an angle.
Use low-residue strips or adhesive removers designed for painted surfaces to minimize damage.
How do I hang heavy framed posters without studs?
How do you support a heavy framed poster when there’s no stud behind the drywall?
Use proper drywall anchors sized for the frame weight: toggle bolts or heavy-duty molly anchors work best.
Mark level points, drill pilot holes, insert anchors, then hang with appropriate screws or D-rings.
For very heavy pieces, use two anchors spaced apart to distribute load and prevent wobble.
What’s the safest way to hang posters in rented rooms?
When you’re renting, protecting walls and avoiding security deposits is the top priority, so pick hanging methods that leave little or no damage.
Use removable adhesive hooks, poster putty, or command strips rated for your poster’s weight. Test adhesion on a hidden patch first.
For heavier pieces, lean framed posters on furniture or use a tension rod display to avoid penetrating textured surfaces and risking repair fees.
How do I repair textured wall damage after removing a poster?
Removing a poster can leave small tears, adhesive residue, or flattened texture, but you can usually fix those blemishes yourself with a few simple steps.
Gently remove residue with a damp cloth or adhesive remover, let dry, and lightly sand torn edges.
Use joint compound to fill and texture-match, feathering with a putty knife.
Prime, then touch up paint to blend.