
Creative Wall Painting Ideas You Can Actually Make at Home
You can create pro-looking wall paint designs at home by picking an accent color that pops, prepping walls (clean, patch, sand, prime), and planning a simple layout. Mask with quality tape, press edges firmly, and apply thin coats to avoid bleed. Try taped geometric stripes, ombré bands, soft sponge texture, faux marble, or a simple botanical mural. Choose the right finish (satin or matte) and seal textured areas for easy cleaning. Match colors with sample swatches—keep going and you’ll see more easy steps.
Pick an Accent Color That Pops on Your Wall
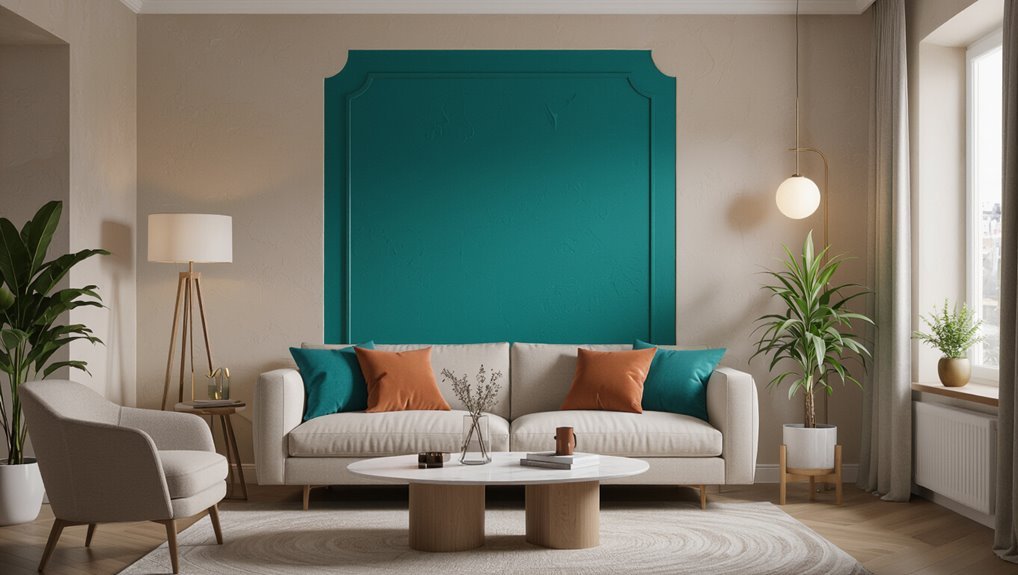
Choose an accent color that pops against your wall’s main tone—then commit to it in a focused way.
You use color psychology to shape mood: warm reds and oranges energize, cool blues and greens calm, and rich purples add depth.
Next, you create bold contrasts by pairing your accent with the dominant shade—light with dark, matte with glossy, or cool with warm.
Limit your accent to one clear focal area: an arched niche, a vertical stripe, or a geometric corner.
Step back often and trust the impact you planned, not what feels “almost right.”
Prep the Wall for Smooth, Long-Lasting Paint
Before you paint, prep makes the difference between a smooth finish and a wall that chips or peels later.
Start with wall cleaning: dust, grease, and scuffs block adhesion. Wipe with a degreasing cleaner, rinse, and let it dry fully.
Clean walls thoroughly—dust, grease, and scuffs block adhesion—wipe with degreaser, rinse, and let dry completely.
Next, focus on surface preparation—scrape loose paint, fill holes, and sand bumps until the wall texture feels even to your hand.
Dust thoroughly, then spot-prime repaired areas so paint durability stays strong. If you spot stains or water marks, seal them before rolling.
Finally, use a quality primer across bare spots only, not everywhere. Let everything cure before painting.
Mask Clean Lines With Tape-Proof Tips
Even the best paint job can look sloppy if tape slips or bleeds, so you’ll want to plan your masking before the first roll.
Choose the right tape types: use painter’s tape for most edges, and specialty thin-edge tape for tight stripes. Press the tape down with a plastic scraper, not your fingernail, and seal gaps along corners with a light brush stroke of paint matching the base color.
Apply paint in thin coats so it doesn’t creep under. When you finish, do tape removal while paint is still slightly tacky. Pull back at a low angle, slowly.
Plan Your Wall Layout Before You Paint
Start by sketching a simple wall layout on paper so you can see the design at scale and avoid last-minute surprises. Measure wall dimensions carefully, then mark key reference points like outlets, switches, vents, and trim.
Decide where each color block, stripe, or mural section will start and stop. Plan paint placement by drawing arrows for direction and spacing, not just the final shapes.
Tape the sketch to the wall and check proportions from different angles. If anything feels off, adjust now—before you open the paint.
Finally, label each section so you paint in the right order.
Choose the Right Wall Paint Finish
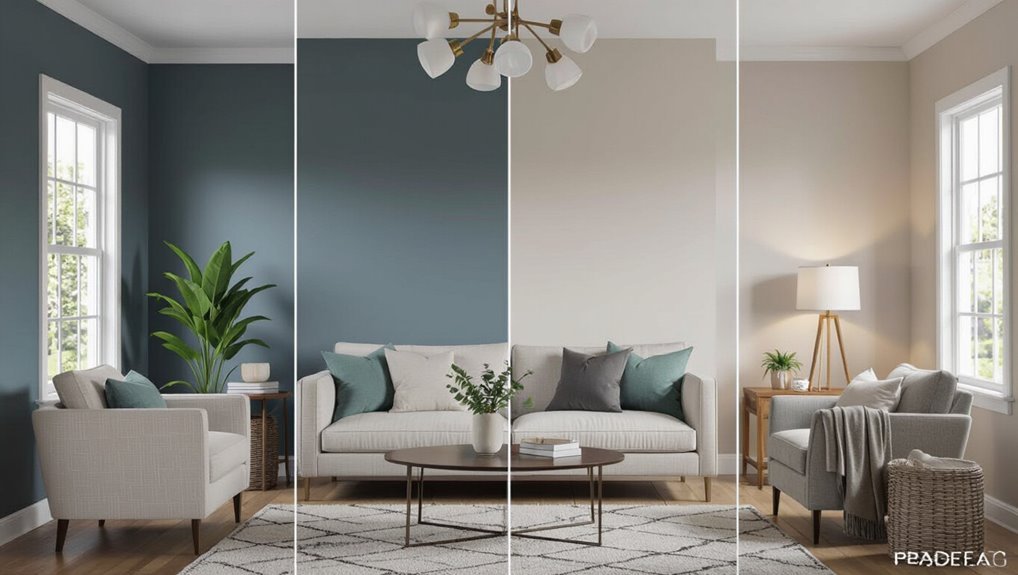
Pick a paint finish that matches how you use each room.
For most walls, go with matte to hide imperfections, satin for easy cleaning in busy spaces, and gloss to make accents pop.
Choose carefully so your walls look great and stand up to everyday life.
Match Finish To Room Use
Choosing the right wall paint finish helps your room look better and perform longer. Match the finish to room purpose so you get the durability you need.
In a high-traffic hallway or kid’s playroom, pick a more resilient sheen that resists scuffs and wipes clean.
For a bedroom, prioritize user comfort by choosing finishes that minimize glare and feel soothing in morning and evening light.
In kitchens and bathrooms, use moisture-tolerant, cleanable options so splashes and humidity don’t ruin your artwork.
Always test samples on your actual walls before committing.
Select Matte Satin Gloss
Matte, satin, and gloss finishes don’t just change your wall’s look—they change how it cleans, reflects light, and hides imperfections.
When you choose, think matte vs satin first, then decide if you need a subtle sheen. Matte absorbs light and masks flaws, but it stains easier. Satin bounces light gently, wipes cleaner, and holds up better—especially in high-traffic areas.
- Pick matte for ceilings or low-touch rooms where hiding texture matters.
- Pick satin for kitchens, halls, and family rooms to balance shine and finish durability.
- Skip gloss unless you want dramatic reflectivity and can manage highlights.
Create Easy Geometric Patterns With Painter’s Tape
Plan your geometric shapes and sizes first, then mark light guide lines so you know exactly where everything goes.
Apply the painter’s tape evenly, paint in your chosen colors, and peel the tape while the paint is still slightly tacky.
If any edges look rough, refine them with a small brush or touch-up roller for crisp lines.
Plan Shapes And Sizes
Geometric wall art becomes simple when you map your shapes before you tape. Start by sketching geometric shapes directly onto paper, then test creative layouts that match wall proportions.
Choose shape selection that creates design balance, mixing varied sizes for visual interest—large blocks anchor, small accents energize.
- Measure your wall and decide a grid so each section respects wall proportions.
- Pick a few geometric shapes, then vary sizes to control size impact.
- Lay out your shapes in pencil, aiming for symmetry or contrast, before any tape goes on.
Apply Tape Evenly
Once your layout looks right on paper, it’s time to make the lines real—apply painter’s tape so it stays straight, even, and easy to remove later.
For clean geometry, press the tape down firmly along the edges, smoothing from the center outward so bubbles don’t form. Line up each strip with a level or straightedge, then overlap lightly where corners meet.
Keep consistent pressure and spacing, especially on diagonals. As you tape application, avoid stretching the tape; it can pull off-center.
When you’re done painting, plan for tape removal by lifting slowly at a low angle while it’s still slightly tacky.
Paint, Peel, Refine Edges
Now paint over the taped lines in smooth, even coats—use a light hand so the color doesn’t bleed under the tape.
Work with steady strokes and dry time; you’re building crisp geometry, not filling gaps. When the paint turns tacky, start your peel application by pulling tape back at a low angle.
Then refine details: touch any micro-smudges with a small brush, and do edge finishing with a damp cloth or thin trim paint.
Use smart paint techniques—roll first, brush corners last—to keep lines sharp.
- Apply light, even coats.
- Peel at tacky stage, low angle.
- Refine details, finish edges carefully.
Make Color-Blocking Look Balanced and Modern
Color-blocking looks balanced and modern when you treat it like a composition, not a collage. Use color theory to pick shades that feel related, then apply color psychology to set the mood.
Choose one dominant color, one supporting color, and one accent; keep accents smaller to sharpen visual impact. Before you paint, sketch a grid and use balance techniques: mirror weight with bigger blocks or offset with contrasting tones.
Maintain wall harmony by matching block edges to architectural lines, and boost design cohesion with consistent brush opacity and crisp boundaries. Step back often, and trust your artistic expression.
Paint Stripes With a Simple Measuring Trick
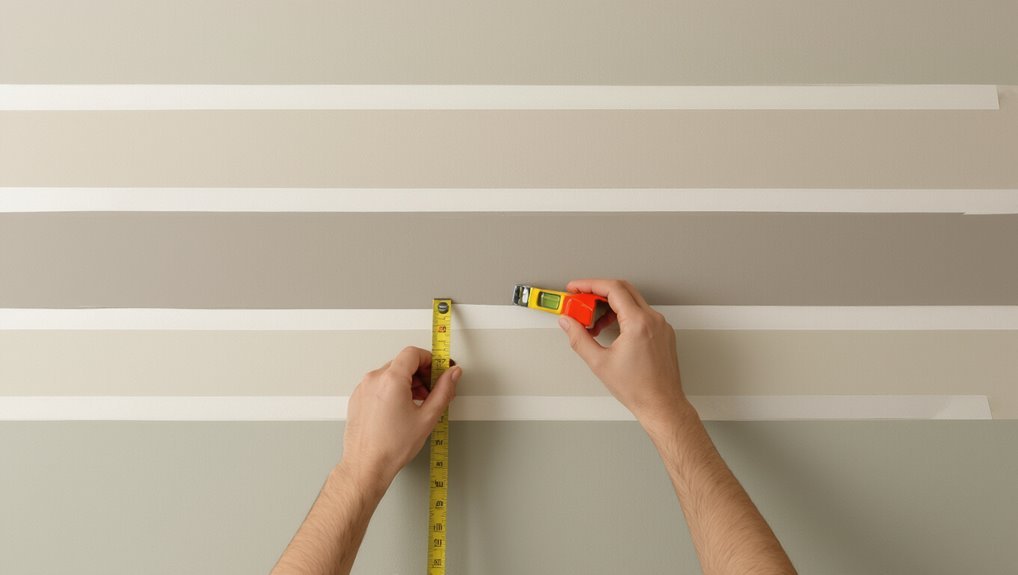
To keep your stripes looking sharp, measure a consistent stripe width first—then you’ll know exactly how far to space each band.
Use a simple measuring trick to mark points along the wall and connect them with a straight line so your edges stay even.
When you start painting, you’ll get clean, repeatable stripes without guessing.
Measure Consistent Stripe Width
When you plan stripes, you need consistency more than creativity—so measure first. Grab your measuring tools, decide on one stripe width, and stick to it across the whole wall.
Consistent width makes stripe variations look intentional, and it supports color harmony instead of randomness. Use simple design templates: mark a starting point, then measure the same distance repeatedly, checking corners and edges as you go.
If you want multiple stripe sizes, plan them on paper first and assign widths to each section.
- Measure and mark every repeat point
- Use design templates for quick spacing
- Confirm color harmony with taped swatches
Mark Straight Lines Easily
Mark straight stripes fast with a simple measuring trick: after you measure your stripe width, use a level and a long painter’s tape guide so each line stays true. You can set a straight edge against the tape, then lightly mark with a chalk line where paint will land. If you’re unsure, use wall stencils or an alignment guide to preview spacing before you roll. Check level lines often—your eyes will thank you.
| Step | Tool | Result |
|---|---|---|
| 1 | measuring tools | exact width |
| 2 | level | level lines |
| 3 | chalk line | crisp marks |
| 4 | straight edge | clean edges |
Try an Ombre Wall With Sponge Feathering
Skip the harsh color blocks and create a soft shift by painting an ombre wall, then blending the edges with sponge feathering.
Start by rolling your light base coat, then paint a darker band where you want depth. Use sponge techniques to tap and soften the blend, keeping the sponge just damp. Move upward in short passes, overlapping as you go for smooth color blending.
Start by rolling a light base coat, then tap in a darker band and feather upward in overlapping short sponge passes.
Work in small sections so the edges stay movable.
- Choose two or three shades, and map the gradient.
- Feather the boundary with a clean sponge.
- Let dry, then add another light pass.
Create Soft Texture With a DIY Wash
Mix your paint with water or a little glaze until it feels light and pourable for a gentle wash.
Apply it in thin layers, letting each coat dry before you add more to build soft texture.
You’ll get a smooth, airy finish that looks layered without getting heavy.
Mix Paint For Gentle Wash
A gentle paint wash starts with thinning your color so the wall shows through softly. Start by using good color selection; choose tones that support color harmony, then mix paint thinning with water or glaze until it flows like light cream.
- Pick your pigment and binder ratios, then stir slowly for smooth wash application.
- Test blending methods on scrap; adjust for opacity and streak control.
- Select a soft brush choice and keep tool maintenance by rinsing immediately.
Use layering techniques by loading lightly and mixing fresh batches as you go, so each wash stays consistent.
Apply Thin Layers For Soft Texture
Once your DIY wash flows smoothly, apply it in thin layers to build soft texture instead of thick spots.
Use a wide brush or sponge, lightly loading color so each pass barely covers the surface. Work in sections, letting one coat dull and settle before you add the next. This pause helps you achieve soft color blending without muddying edges.
To create textured layering, vary pressure: gentle strokes for misty shifts, dabs for subtle bumps. If it starts to streak, wipe your brush and feather outward.
Finish by sealing once fully dry.
Use a Rag-Roll Technique for Faux Plaster
Rag-roll technique lets you create convincing faux plaster texture with minimal tools and effort. You’ll start by mixing paint with a small amount of glazing medium until it spreads smoothly but doesn’t run.
Then you’ll dab and roll to build texture fast.
- Coat the wall with your base color using a roller, keeping it thin.
- Crumple a rag, dip it lightly, and roll upward in overlapping passes.
- Let it set, then mist a second tint to deepen the rag roll technique and highlight faux plaster ridges.
Add Faux Concrete Texture Without Special Tools
Skip special concrete molds and still get convincing faux concrete: you can build the look with paint, water, and a few everyday items.
Mix a gray base with a little water for a thin wash, then roll it on evenly. For easy texture applications, crumple plastic wrap or use a natural sponge, dab lightly, and keep lifting to expose “aggregate” highlights.
Blend darker and lighter grays with a dry brush, then mist water sparingly to soften edges. Use faux concrete techniques by varying pressure, letting areas dry between passes.
Finish with a matte sealer to lock in the texture.
Get DIY Spackle-and-Sand Texture
Mix spackle until it’s smooth enough to spread evenly, but not runny.
Let it dry completely, then sand it to create a fine texture that adds depth to your paint.
When you blend the roughness into the surface, you’ll get a finish that catches light and feels more dimensional.
Mix Spackle To Smooth
Blend spackle with water in a clean bucket until it reaches a smooth, peanut-butter consistency—thick enough to hold a line, but soft enough to spread.
You’ll nail spackle mixing by mixing steadily, scraping the sides, and re-checking the texture as you go. For wall smoothing, aim for a mix that feathers out without dragging.
- Mix, rest 5 minutes, then remix.
- Spot-check on a scrap: it should level fast.
- Apply thin coats with a putty knife, pressing firmly.
Sand Texture For Depth
Once your spackle sets just enough to hold its shape, you can sand for depth by lightly scuffing the surface with fine-grit sandpaper (120–220). You’re shaping shadows, so work in small arcs and wipe dust often.
| Step | What you notice |
|---|---|
| 1 | Soft ridges appear |
| 2 | Edges start blending |
| 3 | Sunlight shows depth |
Use sand applications to mimic plaster waves: press, drag, then lift. Keep passes light so the base stays intact. After your texture techniques dry, wipe again, prime, and paint over the raised micro-peaks for a dimensional finish.
Stencil a Statement Mural on a Budget
You can stencil a statement mural on a tight budget by leaning on repeatable shapes, simple color choices, and a reusable stencil system. Start with mural inspiration from magazines or photos, then sketch a bold word or icon. Use budget materials like cardboard, painter’s tape, and a small roller or sponge.
- Create a stencil from thick paper; cut clean edges for crisp lines.
- Tape guides to keep spacing; layer one color at a time.
- Build contrast with two paint tones, then seal for durability.
Move slowly, dab instead of flooding, and you’ll finish a striking mural fast.
Paint a Botanical Wall Scene in Quick Layers
Start with a lightly sketched layout, then build your botanical wall scene in quick, translucent layers. You’ll move fast by using a botanical color palette: sage, clay, and muted teal. First, block large shapes with thinned paint so the wall shows through. Next, add leaves and stems with layering techniques—wipe your brush for soft edges, then reload for crisp veins. Keep repeating: one layer dries, then you deepen shadows and brighten highlights.
| Tip | Result |
|---|---|
| Thin coats | Airy depth |
| Partial overlaps | Natural layering |
| Dry-brush veins | Texture |
| Swap greens | Living color |
| Let edges blur | Misty realism |
Use a Projector to Scale a Faux Mural
Using a projector, you can scale a faux mural precisely in minutes—no grid transfer required.
Start with your projector setup: mount it level, aim at the wall, and select the mural image you want. Lock focus, then test brightness so lines show clearly without washing out paint.
For clean mural scaling, outline the projected edges with a pencil or low-tack chalk, then paint over them confidently.
- Choose the right image size and distance.
- Trace only key contours before filling details.
- Recheck alignment as you move across the wall.
Create a Faux Wood Accent With Paint Glaze
Pick a faux wood base color that matches the look you want, then brush on your glaze in thin, even coats.
Let it dry, and use a drybrush to pull out highlights and grain-like texture.
You’ll see the accent come to life as the layers blend and the wood effect sharpens.
Choose Faux Wood Base Color
How do you choose a faux wood base color that still looks believable once the glaze hits? Start with warm undertones, not cool gray-browns, so the finish reads as wood.
Use color selection tips: pick a base two shades lighter than your final goal, then match it to your room’s trim. Test on scrap drywall or a hidden corner because lighting changes everything.
- Choose 1–2 warm browns as your foundation.
- Add subtle amber or honey highlights for realism.
- Stick to faux wood techniques: wipe, soften, and let variations show.
Finish by adjusting saturation—less red, more yellow if it looks muddy.
Apply Glaze And Drybrush
Once your faux wood base color feels right, you’ll start bringing it to life with paint glaze and a quick drybrush.
Stir your glaze, then use glaze application with a wide brush, working in thin coats. Keep paint consistency watery but not runny; adjust with water as needed.
After glazing tacks, switch to your drybrush technique: load almost-dry bristles, then lightly drag across edges for texture variation. Add a few direction changes to improve color blending.
Let each layer dry for layering effects, then finish selection—matte or satin—locks the look.
Use foam sponges and natural-bristle brushes for best tool recommendations.
Make Faux Marble With Two-Color Veins
To create faux marble with two-color veins, you start by mixing your base paint in a consistent, slightly translucent coat so the wall’s surface doesn’t look chalky.
Use faux marble techniques to plan two color combinations, then load your marbling tools with darker and lighter streaks. Next, follow paint layering methods: let each veil dry, then soften edges with a damp rag so veins look natural.
- Tape guides, mist lightly, and brush thin veins.
- Feather overlaps with a stipple or sponge for depth.
- Seal after full cure, then lightly sand high ridges.
Paint a Geometric Headboard Wall Behind the Bed
After you master two-color faux marble veining, you can switch to a bold geometric statement by painting a headboard wall behind the bed.
Use headboard inspiration from photos, then plan your layout with spatial planning: center the design, leave breathing room around nightstands, and choose a height that matches your mattress.
Use headboard inspiration from photos, center the design, leave breathing room for nightstands, and match the height to your mattress.
Start with solid blocks for geometric designs, then sharpen edges using painter’s tape and steady painting techniques.
Focus on color selection that supports wall aesthetics—two or three shades max.
Gather DIY tools: level, measuring tape, foam roller, small angled brush.
Finally, fill gaps, blend seams, and step back to admire your creative patterns.
Upgrade Your Entryway With a Simple Wall Frame
Why not give your entryway instant polish with a simple wall frame? You can boost your entryway decor in minutes by choosing a frame that matches your space and hanging it at eye level.
Pick a clean backdrop, then center your art, mirror, or print inside for an instant focal point.
- Choose wall frame styles: thin wood, black metal, or a distressed finish.
- Use strong spacing: leave about 60 inches from the floor to the frame’s center.
- Add one personal touch: family photo, small print, or a seasonal message.
Keep it simple, and it’ll look intentional.
Light Color-Blocking Refresh for Small Bedrooms
Light color-blocking can refresh a small bedroom fast, especially when you already gave your entryway that clean framed focal point. You’ll use pale blocks to guide eyes upward and outward, creating breathing room. Pick a warm off-white base, then add one soft tone band—sage, blush, or sky—at eye level for calm color psychology. Keep ceilings lighter than walls to lift the bedroom atmosphere.
| Block | Mood |
|---|---|
| Off-white | Clean rest |
| Sage strip | Quiet focus |
| Blush corner | Gentle comfort |
| Sky band | Fresh energy |
| Soft gray base | Balanced sleep |
Brighten a Living Room With an Oversized Stripe
If you want an instant focal point, paint an oversized vertical stripe that runs from near the ceiling down to the floor. In your living room, choose bold colors that match your sofa tones, then plan wall dimensions so the stripe lands center for visual balance.
Tape edges cleanly, prime if needed, and use a roller for smooth coverage; leave slight brush texture for texture play.
- Pick two bold colors for color harmony—one dominant, one accent.
- Vary width slightly to echo playful patterns in pillows or art.
- Step back every few minutes to confirm straight lines and pleasing visual balance.
Transform a Hallway With Repeating Stencil Panels
After you create that oversized stripe as your bold anchor, you can carry the momentum into the hallway with repeating stencil panels. Measure your hallway design wall length, then map a grid so each panel aligns with doorways and trim. Tape down a stencil and use your stencil techniques—dab, then lift cleanly—to keep edges crisp. Work in rows so color repeats rhythmically, not randomly.
| Panel 1 | Panel 2 | Panel 3 |
|---|---|---|
| A | B | C |
| D | E | F |
| G | H | I |
Step back, touch up, and let it dry fully.
Paint a Ceiling Accent for Instant Lift
Once you paint a ceiling accent, you instantly give the room more height and character.
Choose bold ceiling colors that echo your walls, then outline a thin border or sweeping half-moon pattern around the perimeter. You’ll create instant accent effects without major renovations.
For a clean look, use painter’s tape to mask edges, cut in with a brush, then roll the center for even coverage.
Try these steps:
- Pick two complementary ceiling colors for contrast.
- Sketch your shape lightly, then tape and paint.
- Let it cure fully, and check corners for crisp lines.
Stop Bleeds and Tape Marks With Quick Touch-Ups
With your ceiling accent in place, you’ll want to keep every edge looking sharp, especially where tape met the wall or where a brush slipped.
If you spot tiny bleeds, dab the spot with a little wall paint on a small brush, then feather outward to blend.
For tape marks, use touch up techniques: lightly sand the raised edge, wipe dust, and reapply paint in thin layers.
Keep a damp cloth nearby to erase overspray before it dries.
Keep a damp cloth nearby to erase overspray before it dries for a cleaner, sharper ceiling finish.
These quick fixes save the finish—just work small, let it dry, and repeat once if needed.
Prevent Drips and Uneven Coverage on Walls
To prevent drips and patchy coverage, you’ll want to choose the right roller cover for the wall texture and load it evenly.
For crisp edges, apply painter’s tape and press it down firmly before you start rolling.
When you lift the tape, do it at the right time so your lines stay sharp and smooth.
Choose The Right Roller Cover
Choosing the right roller cover keeps your paint from dripping and prevents patchy, uneven coverage on walls.
Match your roller cover materials to the paint and surface so you don’t overload it. A snug fit helps the shed stay consistent, and the right roller cover nap spreads evenly without leaving streaks.
For best results:
- Use a short nap on smooth walls for crisp, controlled coats.
- Choose a medium nap for textured drywall to fill gaps.
- Pick a thicker nap for stucco, then load lightly to avoid drips.
Use Painter’s Tape For Crisp Edges
Painter’s tape helps you draw clean lines and stop paint from creeping under the edge, so your walls look sharp instead of smudged.
Before you paint, clean the surface and press tape down firmly along your guide line. Use tape techniques like backing tape with a straight trim tool to prevent gaps.
Roll or brush paint in thin layers, letting each coat set before removing the tape. To boost edge precision, keep a damp rag ready to wipe any tiny squeeze-out.
Pull the tape back at a low angle while paint is still slightly tacky.
Make Your DIY Wall Painting Last Longer
Once your DIY wall painting is dry, your next job is protecting it from the everyday stuff that ruins color and finish—scratches, moisture, and harsh cleaners.
Use color preservation techniques and follow simple wall maintenance tips so your work stays sharp.
Use color preservation techniques and simple wall maintenance to keep your paint looking fresh, even after everyday wear.
- Apply a compatible interior topcoat to lock in pigments and resist scuffs.
- Keep humidity steady and wipe spills fast; don’t let water sit on painted spots.
- Clean gently with a soft cloth and mild soap—avoid abrasive pads, bleach, and strong degreasers.
Let touch-ups blend quickly after minor dings to prevent fading around damaged areas.
Seal Textured Finishes for Easy Cleaning
After you’ve set your DIY wall paint for long-lasting color, seal textured finishes so they stay easy to wipe down instead of trapping grime. Pick a clear, water-based sealer made for textured surfaces, then apply with a roller using light pressure; you don’t want to crush peaks. Let it cure fully before daily contact. Use these texture sealing and cleaning techniques to keep it fresh:
| Area | Action | Tool |
|---|---|---|
| Corners | Spot-clean | Soft cloth |
| High traffic | Gentle wipe | Microfiber |
| Stains | Dab, don’t scrub | Mild soap |
Match Paint Colors With Sample Pots and Swatches
Grab a few sample pots and swatches before you commit, because lighting changes everything.
Put swatches on the wall where you’ll paint, then step back in morning, afternoon, and night; light influences everything.
Use color theory to compare undertones, and test texture variations since matte and eggshell shift depth.
Build swatch combinations by pairing your main color with two neighbors from the same family, keeping harmony balance in mind.
Then you’ll spot mood effects: warm tones feel cozy, cool shades calm.
Finally, check seasonal trends—swap accent colors with the changing light.
- Label each test spot.
- Let patches dry fully.
- Photograph results for review.
Know When to Stop DIY and Call a Pro
Even with careful swatch testing for undertones, sheen, and mood, some projects still need a trained eye.
Do a real DIY Limits check: if your Skill Assessment shows weak prep, tricky masking, or uneven walls, stop.
Do a real DIY limits check—if prep is weak, masking is tricky, or walls are uneven, stop before starting.
When Project Complexity rises—multi-color gradients, limewash, or custom finishes—get Professional Help.
Weigh Cost Considerations against rework, rentals, and wasted paint.
Consider Time Investment too: pro crews finish faster.
Match Quality Expectations to your lifestyle, and plan for Future Maintenance.
Finally, don’t ignore Safety Concerns like lead, asbestos, or electrical near trims.
Follow Design Trends, but protect the room’s durability.
Frequently Asked Questions
How Do I Choose an Accent Color That Won’T Overwhelm the Room?
Choose an accent color by testing swatches in daylight and at night, then match it to your room size. Use color psychology: calmer hues feel balanced, bolder ones demand space. Limit accents to one wall, trim, or decor so it won’t overwhelm you.
Can I Paint Over Previously Painted Textured Walls Without Sanding?
Yes, you can paint over textured walls without sanding, like laying fresh snow on old footprints. Use strong paint adhesion tips: clean, dry, and prime with a bonding primer, then roll thickly to fill nooks for lasting textured wall techniques.
What’s the Best Way to Remove Painter’s Tape Without Peeling Fresh Paint?
To avoid peeling fresh paint, remove tape slowly at a low angle, pulling back on itself. Warm it slightly with a hairdryer. If paint tears, use tape removal techniques: cut the edge with a utility knife. Consider painter’s tape alternatives.
How Long Should I Wait Between Coats to Avoid Texture and Streaks?
Wait 2–4 hours between coats, depending on drying times and humidity. Keep paint thickness even; thick coats take longer and can streak. Lightly sand and wipe dust before the next coat if the surface feels tacky or uneven.
When Should I Use Primer for Dark Walls or Bold Color Changes?
You should use primer on dark walls before bold color changes, especially for color blocking and bold contrasts. It prevents bleed-through, improves paint adhesion, and keeps colors true. Let primer dry fully per label, then apply your first coat evenly.
Conclusion
If you follow these steps, you’ll create a wall that looks pro—and lasts. Quick reminder: only about 1 in 10 DIY paint jobs is done with proper surface prep, and skipping that “boring” work is why so many finishes peel or fade early. So take the time to prep, plan, and finish strong. When your lines stay crisp and your colors stay vibrant, you’ll feel proud every time you walk by your space.
