
How to Paint Rough Cedar Interior Walls for a Smooth Even Coat
Inspect your rough cedar for knots, cracks, and resin pockets, then clean it well: vacuum, wipe, scrape loose fibers, and degrease. Let the cedar dry completely using airflow and, if possible, a moisture meter. Fill dents and open grain, then sand until flat and remove all dust. Prime with a stain-blocking bonding primer, focusing on knots and end grain. Use eggshell or satin, apply thin coats, and feather edges to avoid flash lines—there’s more to know to get it flawless.
Inspect Cedar Walls for Knots and Defects
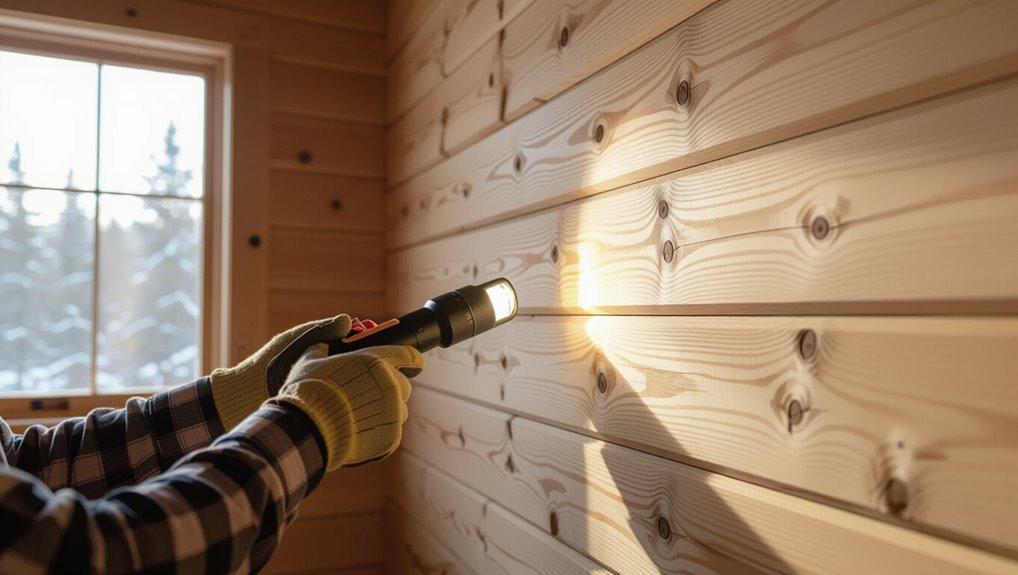
Before you pick up a brush, inspect your cedar walls closely for knots, resin pockets, cracks, and any spots where the wood looks raised, soft, or uneven.
Use your fingers and good light to guide your knot identification. Tap loose areas; look for hairline splits and gaps around seams. Check edges for splinters and verify corners stay true, not bowed.
Use your fingers and good light to find knots, tap loose spots, spot splits or gaps, and check edges for splinters and true corners.
For each issue, do a quick defect assessment: note size, depth, and location, then decide whether to spot-fill, scrape, or sand later.
Catching problems early prevents streaks, adhesion failures, and uneven sheen.
Clean Rough Cedar Walls Before You Paint
Before you paint, remove dust and debris so nothing keeps the finish from sticking.
Scrape loose wood fibers and then degrease and wash the surface to eliminate oils and grime.
Once it’s clean and fully dry, you’ll be ready for any sanding or priming steps that follow.
Remove Dust And Debris
Start by knocking off loose dirt, cobwebs, and wood chips with a stiff brush or vacuum with a brush attachment. You need dust removal techniques and smart surface preparation tips so paint sticks evenly.
Move top to bottom, then vacuum edges, corners, and any grooves where grit hides. Next, wipe the wall with a slightly damp microfiber cloth to lift fine particles, then let it dry fully.
Check for stubborn spots: lightly brush again, vacuum once more, and spot-wipe.
- Vacuum crevices
- Dry microfiber wipe
- Slightly damp wipe
- Final inspection for specks
Scrape Loose Wood Fibers
Scrape away loose wood fibers with a stiff brush or a plastic scraper, using light, even pressure so you don’t gouge the cedar.
Focus on knots, seams, and any raised grain where splinters cling. Work in the direction of the wood to lift loose fibers without tearing the surface.
As you scrape, pause and vacuum or wipe away the curls so they don’t mix back in. This step is key wood preparation: fewer stray fibers mean cleaner texture and better paint adhesion.
Afterward, run your hand over the wall; it should feel firm, not fuzzy.
Degrease And Wash Surface
Once you’ve removed the loose fibers, you need to clean the cedar so paint can grip the surface.
Start with surface preparation by degreasing any fingerprints, kitchen oils, or wood resins. Use cleaning techniques that match the mess: warm water and a mild detergent first, then a degreaser if the rag stays slick.
Rinse thoroughly and let it dry completely to prevent fisheyes. Protect nearby trim with tape, and keep a clean bucket to avoid re-depositing grime.
- Wipe with detergent solution
- Spot-treat oily areas
- Scrub along grain, not across
- Rinse, dry, then inspect
Dry Cedar Fully to Prevent Paint Failure
Before you paint, dry your cedar fully—wet or partially cured boards almost always lead to peeling, bubbling, or poor adhesion.
Check cedar moisture by using a moisture meter or weighing scrap pieces, then recheck after drying.
Let boards acclimate indoors for several days with steady airflow and stable temperature. If condensation forms, stop and dry longer.
Don’t trap moisture under plastic sheeting or thick primers. Keep humidity moderate and wait until cedar reads consistently low before you prime and paint.
When cedar moisture stays stable, your paint adhesion improves and the finish holds.
Sand Cedar to Smooth Grain and Ridges
Sand the cedar until the surface feels consistently smooth and you don’t catch your hand on ridges or raised grain.
Use sanding techniques that respect the wood: start with 80–100 grit to knock down high spots, then switch to 120–150 grit for grain smoothing.
Apply steady, even pressure and sand with the grain to prevent scratches. Wipe off loosened debris as you go so you can spot remaining ridges.
- Inspect under angled light
- Blend edges and knots
- Feather connections between boards
- Stop when scratches disappear
Remove Sanding Dust for Better Cedar Adhesion
After sanding, vacuum the cedar thoroughly so you remove all loose sanding dust.
Then wipe the surface with a tack cloth to catch what vacuuming misses.
Before you prime, confirm the surface is clean and dry so the paint can bond better.
Vacuum Thoroughly To Remove Dust
Grab a vacuum and thoroughly clean the cedar walls to remove every trace of sanding dust and debris. You’ll improve dust control so primer and paint grip evenly, not gritty.
Use the brush attachment along grooves, edges, and corners, then go over flat areas twice. Keep air circulation going with fans aimed away from the wall to reduce lingering particles.
Finally, vacuum the floor and baseboards too, since dust settles back.
- Vacuum slowly, overlapping passes.
- Reach crevices with a narrow nozzle.
- Check with a flashlight sweep.
- Vacuum again if you see haze.
Wipe Down With Tack Cloth
Once the wall is vacuumed, wipe it down with a tack cloth to lift the fine sanding dust your vacuum can’t catch. You get stronger surface preparation when you remove that residue—cedar can repel paint if dust lingers.
Unroll the tack cloth and gently drag it across rails, corners, and knots, using light pressure. Fold to a clean side as it loads, so you don’t redeposit debris.
Finish with one careful pass along the grain for consistent adhesion.
These tack cloth benefits include better primer and paint grip, fewer fisheyes, and a smoother, more even coat.
Confirm Clean Surface Before Priming
Confirm the surface stays truly clean before you prime—cedar dust and lingering residue can block primer from bonding.
After sanding, you do surface preparation that protects paint adhesion. Use a bright light and run your hand over the area; if it feels gritty, you haven’t removed everything.
- Vacuum seams and edges with a brush attachment.
- Wipe with a damp microfiber cloth, then dry completely.
- Tack-cloth once more, using light strokes.
- Inspect for stains, oils, or tannin bleed, and spot-clean.
When the surface looks uniform and feels smooth, you’re ready to prime.
Fill Rough Spots With Wood-Friendly Filler
Before you paint your cedar, inspect the surface closely and fill any rough spots with a wood-friendly filler. Do a quick texture assessment, then choose a filler that won’t react with wood. Lightly wipe off dust, and apply filler application only to low spots or open grain. Use a putty knife to press it in, then scrape flush. Let it cure fully per label, and sand smooth with fine grit until you feel no edges. Check again with your hand under raking light.
| Spot | Action | Goal |
|---|---|---|
| Dents | Fill, scrape | Flat surface |
| Checks | Seal with filler | Even grain |
| Knots | Thin coat | Smooth blend |
Seal Cedar to Block Tannins and Blotching
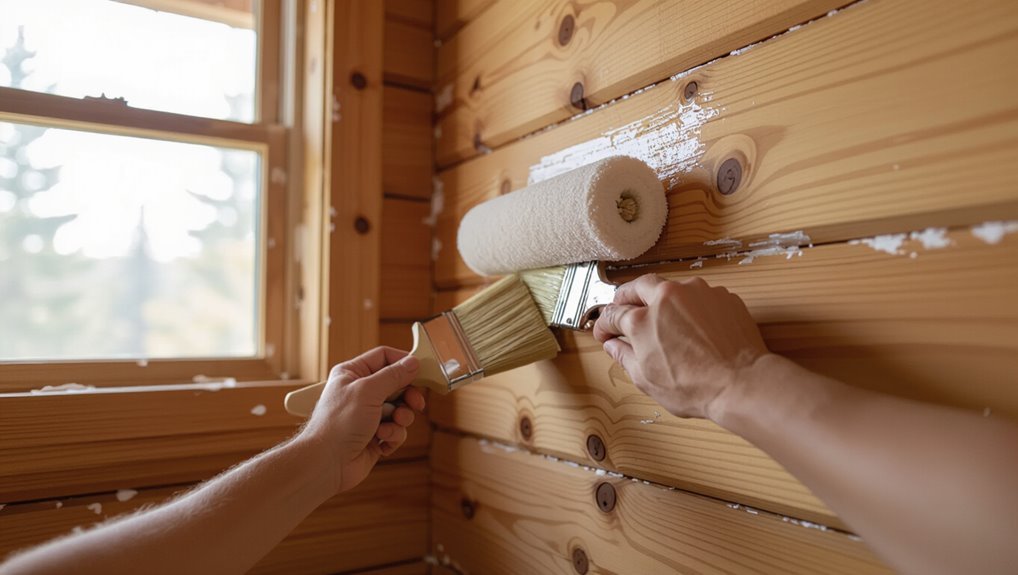
To prevent tannin bleed and blotchy patches, you need to seal cedar before you apply finish paint.
Start with clean, fully dry walls, then use an oil-based or stain-blocking sealer for tannin blocking. Apply a thin, even coat with a brush for grooves and a roller for flat areas, keeping edges wet to avoid lap marks.
Let it cure per label, not just overnight, so surface sealing truly locks in the resin.
- Degrease with TSP substitute if needed
- Light-sand after sealing, if rough
- Use two coats on darker boards
- Check for bleed before topcoat
Prime Rough Cedar Walls for Even Color
Before you prime, clean and deodorize the cedar so paint can grip evenly.
Repair knots and cracks, then let the repairs cure fully.
Next, use a bonding primer sealant to lock in rough areas and help prevent uneven color.
Clean And Deodorize Surface
Start by thoroughly cleaning the cedar so paint can grab evenly; vacuum loose dust, wash the walls with a mild detergent solution, and rinse well to remove residue.
Let the surface dry completely before you continue surface preparation. Use your chosen cleaning products carefully, since harsh solvents can leave slick films.
- Vacuum corners, seams, and grooves to lift hidden dust.
- Scrub with mild detergent; don’t soak seams or edges.
- Rinse until water sheets clear, then dry fast.
- Recheck for odors by wiping with a damp cloth; let it fully air out.
Repair Knots And Cracks
Once the cedar dries completely, inspect every panel for knots, cracks, and any raised grain that could telegraph through your finish. Mark defects with pencil, then sand ridges until flat. For knot repair, scrape loose resin, then apply a stainable filler or epoxy putty; feather edges so seams disappear. For crack filling, press filler into gaps, slightly overfill, and let it cure fully. Use this checklist:
| Area | Problem | Fix |
|---|---|---|
| Knot | Resin bleed | Scrape + filler |
| Joint | Hairline gap | Crack filling |
| Grain | Raised ridge | Sand flat |
| Edges | Rough seam | Feather patch |
Wipe dust before you paint.
Use Bonding Primer Sealant
Bonding primer sealant helps you prime rough cedar so your finish dries to an even, uniform color.
After you patch knots and cracks, you should seal the grain and lock down tannins; this is where bonding primer and sealant benefits really show. Work one thin, even coat with a brush and back-roll lightly, keeping a wet edge.
- Stir and strain primer to prevent clumps.
- Apply on dry, clean cedar; avoid dust.
- Focus on end grain, knots, and bleed-prone spots.
- Let it dry fully, then sand smooth before topcoat.
Choose Stain-Blocking Primer for Cedar Bleeding
If your cedar walls tend to bleed tannins, you need a stain-blocking primer before you roll on any color.
For clean results, focus on stain application and smart primer selection. Choose a high-quality stain-blocking (shellac or oil/latex-based) primer made for wood knots and tannin bleed.
For clean results, focus on smart primer selection: a high-quality stain-blocking primer made for cedar knots and tannin bleed.
Read the label for interior use and compatibility with your topcoat, and confirm it can cover cedar resin. Apply it evenly with proper dwell time, and don’t skip rough spots—cedar texture holds sap.
After it cures fully, you’ll prevent discoloration and get smoother paint coverage.
Match Paint Sheen to Hide Cedar Flash Lines
After you’ve sealed the tannins with a stain-blocking primer, you’ll want to manage how light reflects off the surface—cedar flash lines often show up as shiny streaks or dull patches.
Match your paint sheen so those differences disappear. Use these paint sheen options and flash line solutions:
- Stay with eggshell or satin for most walls; avoid glossy areas that magnify contrast.
- Test sheen on scraps and let it dry fully; light shifts as it cures.
- Apply thin, even coats with consistent pressure to prevent tape-like sheen bands.
- Spot-sand and recoat only the dull patches to blend the finish.
Pick the Right Paint Finish for Interior Cedar
Choosing the right paint finish for interior cedar helps you minimize flash lines and keep the grain looking even.
For rough boards, start with a finish selection that matches your lighting: satin or eggshell levels sheen without looking flat. If you expect heavy traffic, prioritize paint durability by picking a washable, scuff-resistant product; cedar needs protection from frequent cleaning.
Avoid high-gloss, which highlights ridges and contrast between knots and grain. If you want softer texture concealment, choose an eggshell, then apply consistent coats with proper drying time.
Choose Acrylic Latex or Oil Paint for Cedar
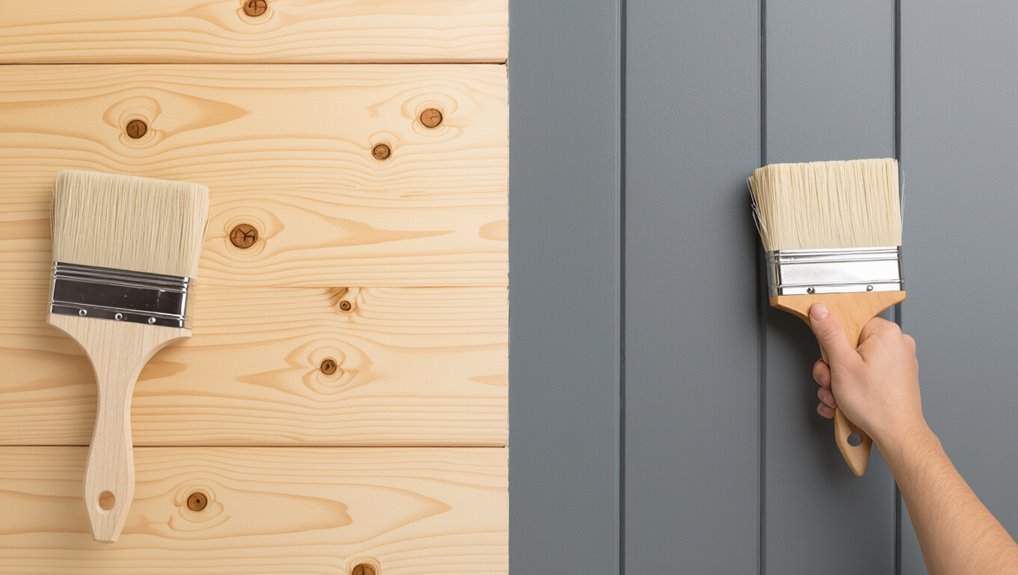
When you paint interior cedar, your biggest decision is whether to use acrylic latex or oil-based paint.
Acrylic latex cleans up fast and dries quickly, so you can recoat sooner on rough boards. Oil-based paint penetrates cedar well and can level during drying, which helps with patchy spots.
For paint durability, choose based on how often the room gets cleaned and exposed to humidity. For color selection, remember both types can yellow slightly over time, especially oils.
- Consider drying time.
- Match cleanup needs.
- Prioritize durability.
- Test color in a hidden corner first.
Thin Paint Correctly to Avoid Streaks and Globs
Thin your paint to the right consistency before you start rolling or brushing.
Check paint viscosity by stirring and lifting: it should flow off slowly, not run in sheets. If it feels thick, add the recommended thinning amount gradually, mixing until smooth.
Test paint application on a scrap of cedar or hidden spot, then watch for streaking or ridged edges. If you see dry, fast-tailing lines, thin slightly more. If you get globs, stops, or sagging, use less thinner and strain the mix.
Keep coats light, overlapping evenly.
Use the Best Brush for Cedar Texture
Once your paint is thinned to a smooth, workable flow, you’ll get cleaner coverage by using a brush that matches cedar’s grain.
Choose the right brush types: a sash brush for control, or a stain/trim brush for tight areas. Match bristle materials to your paint—natural bristles for oil, synthetic for latex.
Use brush sizes around 2–3 in. for walls, then smaller for corners. Apply techniques in long, light passes with the grain, keeping a wet edge.
Follow maintenance tips: rinse promptly, don’t let paint harden. Finish with a light skim coat for even finishing touches.
Roll Walls Smoothly Without Cedar Lap Marks
Roll the walls with steady, controlled strokes to prevent cedar lap marks and get a smooth finish.
Use a consistent roll technique: load your roller evenly, work wet-on-wet, and overlap each pass by a third.
Start at a corner, roll down, then cross-roll lightly to even the paint application.
Choose roller selection based on texture differences—use a short-nap cover for rough cedar.
Match paint types and finish options, and keep humidity control steady so drying times stay uniform.
Check color matching before fully curing.
Plan maintenance tips early by cleaning drips immediately.
Cut In Edges With Consistent Brush Pressure
When you cut in, keep steady brush pressure so the paint lays down evenly.
Hold the brush edge at a consistent angle and pace to avoid wavy lines or thin spots.
If your pressure changes, stop and reset your grip before you continue.
Maintain Steady Brush Pressure
Maintain steady brush pressure as you cut in along the cedar walls, because uneven force makes the paint thickness—and sheen—change from line to line.
Use a brush technique that keeps pressure control consistent: press lightly to load paint, then maintain that same force as you guide the bristles. Keep your wrist loose and let the brush glide, not dig. If you feel drag or streaking, stop and reset your pressure.
- Use the same angle each stroke
- Reload when fibers start to drag
- Watch for gaps or ridges
- Pause if your hand tires
Keep Brush Edge Consistent
Keeping your brush edge consistent starts with how you cut in along the cedar—hold the same bristle contact point at the wall as you move. Use your brush technique to maintain steady edge control: press, then match that pressure stroke to stroke.
When you dip, reload evenly so your paint application stays uniform. As you continue cutting in, keep consistent strokes that feather at the same speed; don’t pause or lift mid-edge.
Then perform edge blending right after each section, matching the wet paint line before it sets. This approach protects finish uniformity and avoids ridges.
Keep a Wet Edge to Avoid Cedar Overlap Lines
To avoid visible cedar overlap lines, you need to keep a wet edge as you work down the wall. Use wet edge techniques so each stroke touches fresh paint, not drying patches.
Start at one corner, load your brush or roller evenly, and paint in manageable sections you can finish before the surface tacks up. Maintain a consistent pace, feather lightly at the boundary, and reload as needed. This overlap prevention keeps grain-filled ridges from flashing.
- Work top to bottom in 2–3 ft bays.
- Maintain uniform thickness.
- Don’t stop mid-section.
- Blend edges immediately.
Paint in Order for Even Cedar Coverage
Prep your cedar thoroughly, then prime first so the finish bonds evenly.
Cut in ceilings and corners neatly before you roll, so you don’t leave thin edges or missed spots.
Roll your topcoats on evenly in smooth passes, maintaining consistent pressure to minimize lap marks.
Prep Then Prime First
Start by cleaning and drying your cedar walls, then tackle any surface problems before you open the primer.
Scrape loose fibers, fill dents, and sand until the grain feels consistent. Vacuum and wipe again so your paint application won’t drag.
Then prime every inch, using the right primer types for rough cedar—stain-blocking if knots bleed, and bonding primer if patches are slick.
Let primer cure fully before topcoating.
- Repair cracks and gouges
- Sand for uniform texture
- Remove dust, oils, and residue
- Prime and allow proper dry time
Cut In Ceilings And Corners
After the primer cures, you can cut in around the ceiling lines and corners so your brushwork lays a clean edge before the roller fills the field.
Load a 2–3 inch angled brush with steady paint, not drips. Use short, light brush techniques, keeping bristles nearly flat to avoid ridges.
Follow the ceiling edge in one continuous path, then stop and lift straight off. Maintain edge control by brushing slightly into the corner, filling it without overworking.
If you spot a gap, tap in paint right away, then feather the border for an even cedar finish.
Roll On Topcoats Evenly
Roll the topcoat evenly once your cutting-in has cured enough to stay smooth under the roller. You’ll get better results by planning your passes and using consistent pressure—this helps you achieve smoothness on rough cedar.
- Load the roller lightly, then roll off excess so drips don’t settle into grain.
- Use paint roller techniques: W pattern, then straighten with light vertical strokes.
- Work in 2–3 ft sections, keeping a wet edge to prevent lap marks.
- Back-roll gently to even thickness, watching seams and knots as they fill.
Let it dry fully before a second coat.
Control Temperature and Humidity for Cedar Cure
To help cedar cure evenly, you need to control temperature and humidity before you and after you paint.
Start with steady temperature control: keep the room around 65–75°F and avoid drafts.
Use humidity management to hold moisture near 40–55%. If the air is too damp, cedar curing slows and you risk uneven drying. If it’s too dry, the coating can set too fast, weakening paint adhesion.
After you finish, maintain the same conditions and don’t crank heaters or run dehumidifiers aggressively.
Let each coat cure fully before adding the next.
Spot Tannin Bleed, Blisters, or Peeling Early
Watch for early tannin bleed, and treat those spots right away so stains don’t ghost through your finish.
If you see blisters or peeling, scrape them back to solid wood and patch or prime before repainting.
Let the area dry fully, then spot-prime and coat to lock everything in.
Spot Tannin Bleed Early
Why let cedar tannins ruin your finish later when you can stop them early?
Spot tannin bleed starts fast once moisture dissolves extractives, so you must catch it during cedar preparation. Look for dark streaks or sticky spots after wiping or misting.
Act immediately by dry-brushing loose dust, then applying an appropriate shellac or tannin-blocking primer only where bleed appears.
Before coating, keep airflow steady and let the treated spots fully cure. Avoid over-wetting rough grain.
- Test a small area with primer
- Spot-prime only stained zones
- Manage humidity during cure
- Sand lightly to even sheen
Fix Blisters And Peeling
Even if you spot-prime tannin bleed, cedar can still blister or peel when moisture gets trapped under the finish or when the coating can’t grip the surface. Scrape loose paint, then sand glossy edges until they’re dull. Let the wall dry fully, and confirm no cool damp spots remain. Wipe dust, then spot-prime bare cedar with a stain-blocking primer before topcoating. Use these blister prevention and peeling solutions:
| Problem | Fix now | Cause |
|---|---|---|
| Blisters | Pop, sand, prime | trapped moisture |
| Peeling | Feather edges, recoat | weak bond |
| Stains | Spot-block, seal | tannin bleed |
| Roughness | Light sand, tack rag | poor grip |
Follow Cedar Dry and Recoat Times Exactly
To get the best finish, follow the cedar’s specified dry and recoat times exactly—don’t guess or rush.
For the best finish, follow cedar’s specified dry and recoat times exactly—no guessing, no rushing.
Watch your conditions and respect Cedar drying windows, because film formation needs time. Set a timer and plan your next coat around the manufacturer’s recoat timing, not your schedule.
- Check label notes for dry-to-touch and full cure.
- Measure humidity and temperature before starting.
- Don’t apply another coat until the first meets recoat timing.
- Record times so you can repeat the process confidently.
If you recoat early, you risk streaks and poor adhesion.
Sand Between Coats for a Glass-Smooth Look
Lightly sand between coats to get a glass-smooth finish and prevent bumps from showing through. Wait until the paint feels fully dry, then use fine-grit sandpaper (like 220) and steady pressure.
Apply sanding techniques that keep a uniform motion: sand in small sections, follow the wood grain, and don’t linger on edges or corners. After each pass, wipe dust with a damp cloth or tack rag so finish products bond well.
Spot any rough spots, feather them out, and only then apply the next coat for an even sheen.
Fix Cedar Sheen Mismatch and Patchiness Quickly
When cedar paint starts to look patchy or your sheen doesn’t match from board to board, you can fix it fast—before more coats lock in the uneven surface.
First, wipe dust and let the surface fully dry, because trapped grime ruins cedar sheen and color matching.
Next, lightly sand the shiny and dull spots with fine grit, then feather edges with a damp rag.
Spot-prime bare or uneven areas, then apply the same topcoat using a damp brush to blend.
Finish with a consistent roller nap pattern across boards.
- Clean, dry, and inspect.
- Feather-sand only problem zones.
- Spot-prime uneven areas.
- Blend with controlled strokes.
Avoid Common Cedar Painting Mistakes That Show
You can avoid most “why does this look so bad?” problems by steering clear of a few cedar-paint pitfalls that show up fast in the sheen.
First, don’t rush prep: dust, oil, and loose fibers ruin cedar paint application and amplify common mistakes. Scrape rough spots, then sand evenly and wipe clean.
Second, don’t overwork wet areas; it drags pigment and causes streaks.
Third, skip skipping primer—cedar tannins can bleed and telegraph through.
Finally, don’t thin randomly or load too much paint; both create runs and shiny patches. Keep a consistent pace and watch edges.
Do Light Touch-Ups for a Uniform Final Coat
After the main coats dry, you can perfect the surface with light touch-ups that blend seamlessly into the final coat.
Inspect the wall under bright, angled light, then use gentle touch up techniques only where needed. Dab, don’t swipe, using a small brush or foam pad; feather edges outward so they disappear.
Let the patched areas flash dry, then lightly sand any ridges. Finally, recoat the touched spots just enough to match sheen, color, and texture of the final coat.
- Check for drips and holidays
- Spot-prime bare cedar
- Feather edges for blend
- Recoat and let cure fully
Frequently Asked Questions
Should I Remove Cedar Resin Before Priming, Even if the Walls Look Clean?
Yes—if you don’t remove cedar resin, it can bleed through primer and cause uneven spots. Use cedar wall preparation: scrape loose pitch, then wipe with mineral spirits or a denatured-alcohol rag, repeating until tack-free. Prime with an oil-based stain-blocker.
How Long Should Cedar Primers Cure Before Adding the Final Paint Coat?
Let your primer cure like it’s paying rent—don’t rush. Typically wait 24–48 hours, then add final paint only after it’s dry and hard. Follow ideal drying conditions: warm, low humidity, good airflow.
Can I Paint Over Cedar Knots Without Sealing Them First?
Yes, but you shouldn’t. Seal cedar knots first with a knot sealing primer to prevent bleed-through and improve paint adhesion; otherwise stains can reappear. Apply the primer, let it dry per label, then paint your finish coat smoothly.
What’s the Safest Method to Stop Resin Bleed Through a Finished Coat?
Seal knots with a stain-blocking primer, then apply a shellac or epoxy sealer, and finish with two topcoats. How else will you stop resin bleed through? Use prevention techniques: clean, dry fully, and sand between coats.
Why Does My “smooth” Cedar Wall Still Show Grain Texture After Painting?
Your “smooth” cedar still shows grain visibility because the wood absorbs unevenly and you left too much paint thickness or skipped sanding/primer. You need thorough cleaning, stain-blocking primer, and light sanding between coats for an even surface.
Conclusion
Once you’ve prepped your rough cedar like a pro—clean, dry, sand, and re-sand—you’ll get that smooth, even finish that makes the grain look intentional, not stubborn. Don’t rush the details: wipe away dust, patch sheen spots, and sand between coats. If you skip steps, cedar can “push back” with patchiness. Finish with light touch-ups, and your walls will finally look as calm and clean as you imagined.
