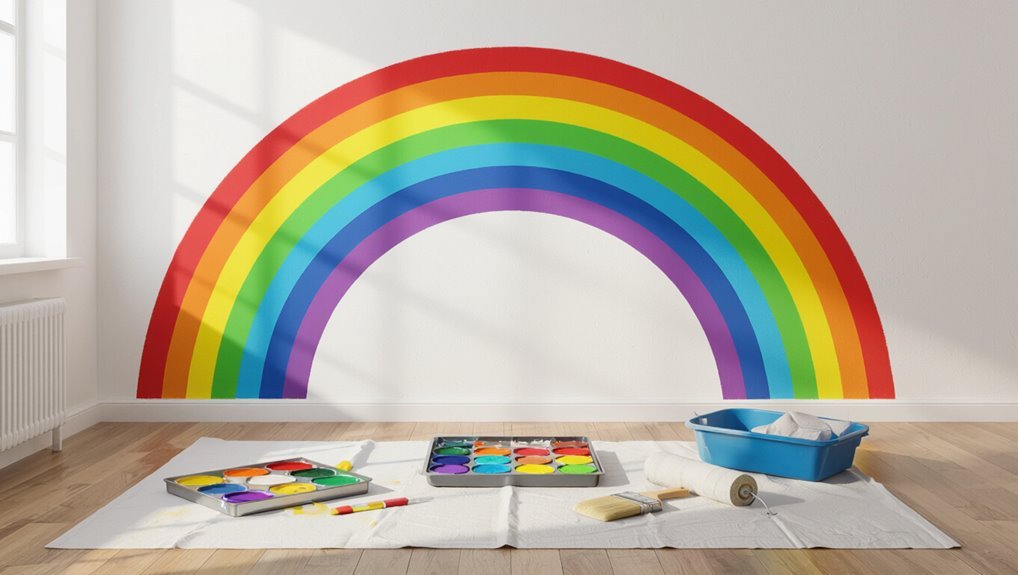
How to Paint a Rainbow on a Wall Step-By-Step Diy Guide
You can paint a rainbow on your wall in a day by prepping, measuring, taping, and painting in ordered arcs. Clean, sand, and prime the wall, then mark a centerline and baselines for each band. Use painter’s tape for crisp edges, start with the innermost color and work outward, feathering and back-rolling for smooth coverage. Finish with touch-ups and a clear topcoat for durability — keep going to get layout tips, color choices, and troubleshooting.
Quick Step-by-Step: Paint a Rainbow in a Day
Start by prepping your wall and gathering supplies so you can finish in a day: clean and prime the surface, tape guidelines, and lay out brushes, rollers, drop cloths, and your seven paint colors.
Measure arcs, mark centers, and paint each band wet‑edge to avoid overlaps.
Use rainbow symbolism to guide hues and color psychology to balance warmth and coolness for clear, joyful impact.
Where a Painted Rainbow Works in Your Home
Where should you paint a rainbow in your home?
Think about color psychology: use warm hues in living spaces to energize, cooler tones for calm bedrooms.
Rainbows suit children’s rooms as playful decor and can anchor room themes like nature or space.
You’ll also add creative expression to hallways, nurseries, or reading nooks—just match scale and palette to the room’s function.
Measure Your Wall and Pick a Rainbow Size
First, measure the wall’s height and width so you know the exact space you’re working with.
Then decide how big you want the rainbow to be—full-wall, half-wall, or a small accent—and keep the proportions in mind.
Use your measurements to scale the rainbow bands so they’ll fit cleanly and look balanced.
Measure Wall Dimensions
Take a measuring tape and note the wall’s width and height so you can choose a rainbow that fits proportionally and leaves room for trim, outlets, or furniture.
Use precise wall measurements to map centerlines and arc radii, ensuring correct rainbow proportions. Then mark start and end points, keeping symmetry and clearance in mind.
- centerline placement
- arc radius calculation
- outlet/trim offsets
- symmetry checks
Choose Rainbow Scale
Start by comparing your wall measurements to the rainbow size you want so you can pick proportions that fit without crowding trim, outlets, or furniture.
Decide arch height and band width so sightlines and furniture scale feel balanced.
Consider color psychology when selecting bold or soft bands, and check current design trends for placement.
Sketch to confirm scale before painting.
Choose a Rainbow Layout: Full, Half, Stripe, Mural
Now decide whether you want a full-arc centered on the wall, a half-rainbow tucked into a corner, or simple horizontal stripes.
Think about how each option fits furniture, windows, and sightlines so the colors complement the room.
You can also scale up to a mural that spreads across an accent wall for more drama.
Full-Arc Placement
One clear decision you’ll make before any painting is which rainbow layout suits the space and vibe: a full-arc spanning wall to wall, a half-arc above a bed or sofa, vertical stripes for a modern look, or a larger mural with clouds and details.
For full-arc placement, consider color psychology, artistic expression, wall dimensions, and current design trends.
- Center arc on focal wall
- Measure radius precisely
- Maintain even band spacing
- Use muted tones for calm spaces
Half-Rainbow Positioning
If you’re placing a half-rainbow, decide whether it will arch above a bed, sofa, or play area so the curve complements the furniture and sightlines; measure height and width, center the arc, and mark guidepoints.
Consider rainbow symbolism and color psychology when choosing scale and hue intensity to suit mood and room function.
Test paint swatches under lighting before committing.
Stripe And Mural Options
Moving from placement to style, you’ll want to pick the layout that best fits the room’s scale and your skill level: a full rainbow wraps the wall for a bold, immersive effect; a half-rainbow keeps focus above furniture; simple horizontal or vertical stripes give a modern, low-effort look; and a mural lets you combine rainbow bands with clouds, landscapes, or characters for a custom statement.
- Use clean stripe techniques: measure, tape, paint.
- Blend edges for soft mural shifts.
- Scale motifs to wall size for impact.
- Mix mural inspirations: stencils, freehand, decals, or scenic elements.
Pick Colors and Finishes for Room Light and Mood
Because the light in your room and the mood you want to create will change how each hue reads, pick paint colors and finishes with both factors in mind.
Use color psychology to choose tones that support room ambiance and mood enhancement—soft pastels for calm, vivid primaries for energy.
Prioritize finish selection: matte soaks light, satin reflects subtly; match sheen to desired vibe.
Best Paints & Tools for a Crisp, Lasting Rainbow
Tools and quality paints make the difference between a sloppy stripe and a crisp, lasting rainbow, so choose materials that give you control and durability.
You’ll focus on paint types and finish options, brush selection, application techniques, and color harmony within project planning.
Maintain tool maintenance for paint durability and clean edges.
- High-quality acrylic or latex paints
- Foam and angled brushes
- Painter’s tape and level
- Small roller for even coats
Prep the Wall: Clean, Patch, and Prime
Before you pick up a brush, make sure you clean the wall thoroughly to remove dust, grease, and cobwebs.
Patch any holes or cracks until the surface is smooth, then sand lightly for an even finish.
Finish by applying a quality primer so your rainbow colors go on true and last longer.
Clean Surface Thoroughly
Start by giving the wall a thorough cleaning so paint will stick and your rainbow looks crisp and even.
You’ll use basic cleaning techniques and careful surface preparation to remove dust, grease, and mildew before priming. Follow these steps:
- Wipe with mild detergent solution and microfiber cloth.
- Rinse with clean water; let dry completely.
- De-gloss glossy paint with light sanding.
- Remove loose debris with a vacuum.
Patch Holes Smoothly
Once the wall’s clean and dry, check for nail holes, cracks, and dents so you can fix them before priming.
Use a putty knife and lightweight spackle for small gaps, or joint compound for deeper repairs.
Sand each patch feathered to the surrounding surface.
Follow proper patching techniques to avoid overfilling, and aim for smooth finishes so your rainbow paints glide evenly.
Apply Quality Primer
3 things matter most when you’re ready to prime: coverage, adhesion, and stain-blocking—pick a quality primer that matches your wall type (latex for drywall, oil or shellac for heavy stains or tannin bleed).
You’ll choose primer types wisely, clean and sand, then use proper application techniques for even build and grip.
- Stir thoroughly
- Use a roller for flats
- Cut in with a brush
- Allow full dry time
Mark Centerline and Baseline for Accurate Arcs
Grab a pencil and level, because marking a clear centerline and baseline is the key to getting smooth, even arcs for your rainbow.
You’ll measure and snap light guide lines, noting centerline importance for symmetry and baseline accuracy for consistent height.
Work from the room’s focal point, double-check with a tape measure, and keep marks faint so they’re easy to paint over.
Map Arcs With String, a Compass, or Templates
Grab a length of string and a pencil to make a simple string compass for sweeping accurate arcs from your centerline.
For repeatable curves, cut sturdy cardboard or thin plywood templates to trace each band consistently.
You’ll save time and keep the rainbow’s spacing even by combining a string compass for large arcs with templates for touch-ups.
Using A String Compass
One simple way to lay out perfect rainbow arcs is to use a string compass: tie a string to a pencil, fix the other end at your wall’s center point, and swing the pencil to mark each radius.
Use the string compass technique for consistent arc accuracy.
- Measure and mark center clearly
- Adjust string length for each band
- Keep string taut while drawing
- Label radii for painting order
Creating Sturdy Templates
If you liked how the string compass gave you consistent arcs, you can use that same geometry to make solid templates for painting. Cut template materials (cardboard, foam, plastic), mark template measurements, and trace arcs. Clamp templates, test fit, and sand edges for smooth lines. Use reusable templates to speed painting and keep arcs uniform.
| Material | Thickness | Notes |
|---|---|---|
| Cardboard | 3–5 mm | Cheap |
| Foam | 5–10 mm | Lightweight |
| Plastic | 2–4 mm | Durable |
| Masonite | 3–6 mm | Stable |
| Plexi | 2–5 mm | Clear, precise |
Make Paint-Ready Masking Guides With Tape
Start by laying out your curved rainbow arcs with a light pencil or chalk. Then apply painter’s tape along those lines to create crisp, paint-ready guides. You’ll use masking techniques and choose tape types for curvature, adhesion, and paint bleed prevention. Press edges firmly and overlap ends neatly.
Start by sketching curved rainbow arcs, then apply flexible painter’s tape, sealing edges firmly for crisp, bleed-free lines.
- Use flexible tape for curves
- Test adhesion on scrap
- Seal edges with base color
- Remove tape slowly
Mix and Test Paints to Match Your Plan
Before you load a brush, mix small test batches of each rainbow hue so you can tweak tone and opacity without wasting paint. You’ll do paint mixing and color matching on a palette, apply test swatches to poster board, and compare paint samples under room light. Adjust ratios until hues align with your plan, then label mixes.
| Color | Ratio |
|---|---|
| Red | 1:0 |
| Orange | 3:1 |
| Yellow | 1:1 |
| Green | 2:1 |
Paint the Innermost Arc First, Then Work Outward
Start by marking the center line for the innermost arc so you have a clear guide.
Protect adjacent areas with painter’s tape and drop cloths before you paint that first band.
As you move outward, blend each edge smoothly into the next color for seamless shifts.
Start With Center Line
1. Start by drawing a clear center line; you’ll use center line techniques to anchor arcs and guarantee marking precision.
Place the innermost arc on that axis, then work outward steadily.
- Measure from ceiling to floor for symmetry
- Use a level or laser for straightness
- Lightly pencil guides before painting
- Check spacing between arcs as you proceed
Protect Adjacent Areas
Work from the innermost arc outward, painting one band at a time and taping off the adjacent areas so wet paint can’t bleed onto finished sections. You’ll protect edges, control drips, and maintain crisp lines while keeping color selection and wall preparation in mind. Clean tape, press edges, and remove tape slightly damp.
| Step | Purpose |
|---|---|
| 1 | Define arc |
| 2 | Protect |
| 3 | Paint |
| 4 | Inspect |
| 5 | Finish |
Blend Edges Smoothly
When you paint the innermost arc first and move outward, keep each band thin and tacky so you can feather the edge where colors meet; this lets you blend smoothly with a dry brush or soft sponge before the paint skins over.
Use controlled blending techniques and check edge finishes as you go.
- Work quickly, one arc at a time
- Light, sweeping strokes
- Clean tool between colors
- Step back and adjust
Get Clean Edges: Back-Rolling, Feathering, Cutting In
Getting crisp rainbow bands means mastering three finishing moves: cutting in your edges, feathering the paint for smooth shifts, and back-rolling to even out texture and remove roller marks. You’ll use paint techniques, blending tips, edge precision, color gradations, design strategies, tool selection, brush types, roller methods, masking techniques to refine seams.
| Tool | Purpose |
|---|---|
| Brush | Edge precision |
| Roller | Smooth texture |
Remove Tape Safely Without Tearing Paint
After you’ve feathered, cut in, and back-rolled each stripe, remove the tape carefully so your crisp edges stay crisp.
Peel slowly at a 45° angle while paint’s tacky-to-touch for best paint adhesion. If paint lifts, stop and score the edge.
- Pull tape back on itself, not away
- Work in short sections
- Keep a steady, slow pace
- Use a utility knife if needed
Touch-Ups and Fixing Color Bleed or Overlap
If paint bled under the tape or one stripe slightly overlapped another, don’t panic—quick, precise touch-ups will restore clean lines.
Use a fine brush, dampen edges, and feather corrections to match paint textures.
For color blending errors, lift excess with a clean brush, repaint thin layers, and let each dry before re-taping.
Keep scrap paper for testing hues and stroke pressure.
Add Clouds, Stars, or Metallic Highlights (Stencils)
Add simple stencils to elevate your rainbow—clouds, stars, or metallic accents add depth and personality without overwhelming the design.
Use light dabbing and painter’s tape for crisp edges, and layer subtly for artistic layering that complements your bands.
- cloud stencils for soft edges
- small star accents scattered sparingly
- metallic highlights on top arcs
- contrast checks before final placement
Seal and Protect Your Rainbow: Topcoats & Care
Once your stencils and highlights have dried, protect the artwork with a clear topcoat to lock in color and prevent scuffs. Choose topcoat options—matte for subtlety, satin for warmth, gloss for vibrancy—to boost paint durability. Clean gently, avoid harsh chemicals, and touch up chips promptly to keep the rainbow vivid and joyful.
| Mood | Care |
|---|---|
| Pride | Gentle wash |
| Joy | Soft cloth |
| Calm | Mild soap |
| Bright | Spot touch |
| Love | Regular checks |
Adapting Technique for Textured, Small, or Exterior Walls
Texture, size, and location demand tweaks to your approach, so plan accordingly before you paint:
You’ll adapt paint techniques and color selection to suit textured walls, exterior surfaces, small spaces, and varied wall materials.
Address design challenges directly, choosing brushes, rollers, or sprayers and durable exterior primers.
- Test adhesion on wall materials
- Use thicker nap rollers for texture
- Scale arcs for small spaces
- Pick weatherproof paints for exterior surfaces
Common Mistakes to Avoid When Painting Rainbows
While you can get excited about color choices, the biggest setbacks come from avoidable mistakes like poor surface prep, uneven arcs, and bleeding colors; catching these early saves time and frustration.
| Issue | Fix |
|---|---|
| preparation errors | sand, clean, prime |
| tool selection | use angled brushes, tapes |
| paint types | test opacity |
| edge techniques | steady hand, cleanup strategies |
Follow design tips, layout ideas, and focus finishing touches to avoid common pitfalls.
Time, Cost, and Full Materials Checklist
Now that you know which mistakes to avoid, let’s get practical about how long the project will take, what it’ll cost, and exactly what you’ll need.
Use clear time estimates and a simple budget breakdown so you can plan. Gather supplies, reserve time, and stick to costs.
Plan with clear timelines and a simple budget: gather supplies, block out time, and control costs.
- Primer, paints, brushes, rollers
- Painter’s tape, level, pencil
- Drop cloths, trays, sandpaper
- Cleaning rags, gloves, touch-up kit
Frequently Asked Questions
Can I Use Wallpaper Instead of Paint for a Rainbow Mural?
Yes—you can use wallpaper instead of paint for a rainbow mural. You’ll consider wallpaper types, installation complexity, and mural applications; removable or custom-printed vinyl work best, and you’ll guarantee proper surface prep and measuring for seamless results.
How Do I Remove a Painted Rainbow Later Without Damaging Drywall?
Think of turning a page: you’ll strip paint gently with mild stripper or sanding, spot-treat stains, then patch and sand for seamless drywall repair; you’ll finish with primer and repaint, prioritizing safe color removal methods.
Are There Non-Toxic, Child-Safe Alternatives to Standard Paints?
Yes — you can choose eco friendly paints and child safe options like zero-VOC latex, natural milk or clay paints, and plant-based pigments; they’re low-odor, non-toxic, washable, and safe for kids when used per instructions.
Can I Paint a Rainbow Over Existing Wallpaper or Murals?
Yes—you can, but you’ll prep carefully: test wallpaper durability, clean and prime, use color layering techniques with thin coats, and choose flexible, low-odor paints so your rainbow adheres without stripping or damaging the underlying mural.
How Do I Match Rainbow Colors to Existing Furniture and Decor?
Match hues to your furniture and decor by sampling swatches, testing color harmony with existing upholstery, and adjusting saturation; move furniture placement if needed to balance contrasts, and trust neutrals or accent repeats to unify the room.
Conclusion
You’ve turned a blank wall into a horizon—each arc a promise, each color a weathered memory made new. Keep tending the paint like you would a garden: gentle cleaning, a fresh touch-up when the light fades, and a clear coat to trap the moment. That rainbow will age with you, a reminder that small, deliberate strokes can brighten rooms and hearts alike—an everyday arch of hope you can pass under again and again.