How to Paint a Shiplap Wall for a Clean Modern Look
You can get a crisp, modern shiplap wall by prepping, repairing, and painting with the right tools. Clear the area, clean grooves, sand rough spots, re-nail loose boards, and caulk gaps. Prime bare or glossy wood, then cut edges with an angled brush and roll flat faces for even coverage. Choose a satin or semi-gloss for subtle reflection or matte to hide flaws. Follow with a second coat for durability — keep going to learn practical tips and tricks.
How to Paint Shiplap in 5 Quick Steps
Start by gathering your tools and prepping the room so you can work quickly: clear furniture, lay drop cloths, remove outlet covers, and clean the shiplap with a damp cloth to remove dust and grime.
Then sand lightly, apply primer, cut in along grooves, roll with even strokes, and finish with a second coat.
Choose shiplap color and painting techniques that suit light and texture.
Why Paint Shiplap? Benefits and When to Do It
Now that you’ve got the basics of prepping and painting shiplap, consider why you’d actually paint it: updating color can brighten a room, hide wear, and unify mismatched wood for a cleaner, more modern look.
You’ll use color psychology to set mood, follow shiplap trends and design styles, choose paint finishes for durability, play with texture contrasts, and apply simple maintenance tips to keep it fresh.
Inspect and Repair Shiplap Before Painting
Before you pick up a brush, walk the length of your shiplap and look closely for loose boards, gaps, rot, mildew, or nail pops—you’ll want to catch every issue now so the paint goes on smoothly and lasts. Assess shiplap condition and apply repair techniques: tighten, replace, fill, and seal before priming.
| Issue | Fix |
|---|---|
| Loose board | Re-nail |
| Gap | Caulk |
| Rot | Replace |
| Nail pop | Countersink |
Cleaning Shiplap: Best Cleaners and Techniques
Before you paint, you’ll want to remove grease with a gentle degreasing solution so the finish sticks properly.
Use a soft brush or toothbrush and a mild cleaner to get grime out of the deep grooves without damaging the wood.
Rinse, let dry, and check grooves again before priming.
Gentle Degreasing Solutions
A few gentle degreasers will lift kitchen grime and finger oils from shiplap without stripping paint or wood finish.
You’ll mix mild dish soap or a pH-neutral cleaner with warm water, test a hidden spot, and wipe with a soft cloth.
For stubborn spots, let the solution sit briefly, then rinse and dry.
These gentle degreasing effective solutions preserve finish and prep for painting.
Deep Groove Cleaning
Deep grooves between shiplap boards trap dust, grease, and paint flakes, so you’ll need targeted tools and cleaners to get them truly clean.
Use a stiff nylon brush, vacuum attachment, and cotton swabs with a mild detergent or trisodium phosphate substitute for shiplap maintenance. Rinse with a damp microfiber cloth and dry thoroughly.
Regular groove upkeep prevents buildup and guarantees a smooth, paint-ready surface.
Sanding Shiplap: Where and What Grit to Use
You’ll want to focus sanding on rough spots, joints, and any glossy finishes so paint adheres evenly.
Start with a coarser 80–120 grit for repairs and old finish removal, move to 150–180 grit for general smoothing, and finish with 220 grit for a paint-ready surface.
Use a sanding block or orbital sander with light, even pressure and sand with the grain to avoid gouges.
Where To Sand
Before you start sanding, identify the spots that actually need it: focus on seams, raised grain, chipped paint, and any glossy or rough patches that will prevent primer and paint from adhering evenly.
Use targeted sanding techniques for those areas to reap sanding benefits: less dust, better adhesion, and smoother finish.
- Seams and joints
- High spots and raised grain
- Flaking or glossy patches
Grits For Each Step
Now that you’ve pinpointed the seams, raised grain, and glossy spots that need attention, pick the right sandpaper grits for each task to get smooth, paint-ready shiplap.
Start with 80–100 grit for rough spots, 120–150 for general smoothing, and 220 for final touch-ups before priming.
These choices aid sanding techniques and guarantee even paint application without overworking the wood.
Sanding Techniques Guide
Start by working top to bottom and with the grain so dust falls away and you don’t rework areas you’ve already smoothed.
Use proper sanding methods and thoughtful grit selection:
- Begin 120–150 grit to remove imperfections.
- Smooth with 180–220 grit for paint-ready surface.
- Lightly hand-sand seams and edges with 220–320 grit for a flawless finish before priming and painting.
When to Fill Cracks and Nail Holes (Keep the Texture)
If your shiplap has obvious gaps or nail pops that will show through paint, go ahead and fill them—but leave shallow surface texture intact so the boards still read as individual planks.
Use spackling for small holes and flexible filler for gaps, focusing on filling gaps without smoothing away grain.
Lightly sand only what’s necessary, preserving texture so the planks remain distinct.
When to Skip Primer and When to Use Bonding Primer?
If your shiplap is already painted and in good shape, you can usually skip primer and go straight to paint.
Use a bonding primer when you’re covering raw wood, tannin-rich cedar, or glossy surfaces that won’t accept paint.
Apply primer thinly and evenly, sanding light between coats for the best adhesion.
When Primer Isn’t Needed
You can skip primer on shiplap in a few clear situations: when the boards are already painted with a compatible latex or oil-based finish in good condition, when you’re applying the same color and sheen, or when the wood is fresh, unstained, and the paint manufacturer’s instructions allow direct-to-wood application.
- when to skip: good existing finish
- same color/sheen
- follow manufacturer; use bonding primer only if needed
Surfaces Requiring Bonding
When surfaces are glossy, slick, stained, or previously finished with a product that repels new coatings, you’ll need a bonding primer to verify paint sticks.
Otherwise, skipping primer is only safe on compatible, well-adhered finishes or fresh, untreated wood per the paint maker’s guidance.
Assess surface preparation: sand or degloss, clean grime, then choose bonding agents for slick or stained shiplap to confirm adhesion.
Primer Application Tips
Decide whether to prime by checking the shiplap’s condition and the paint you plan to use: bare, untreated wood and well-sanded, properly cleaned surfaces that match the paint manufacturer’s compatibility often don’t need primer.
However, glossy, stained, previously coated, or repaired areas will benefit from a bonding primer to guarantee adhesion and uniform coverage.
- Choose primer types for surface and finish.
- Follow wet-edge application techniques.
- Spot-prime repaired seams, knots, and stains.
Priming Shiplap: Best Primer Types
Although shiplap’s grooves and texture can complicate paint adhesion, choosing the right primer makes a big difference in coverage and durability. You’ll pick primer types suited to wood condition; stain-blocking for knots, bonding primers for slick surfaces. Use proper application techniques—brush into grooves, back-roll panels.
| Primer Type | Best Use |
|---|---|
| Stain-blocking | Knots |
| Bonding | Smooth/finished |
Best Interior Paint Types for Shiplap (Latex vs. Oil)
If you’re weighing latex versus oil for interior shiplap, focus on durability, drying time, and cleanup—latex dries fast, resists yellowing, and cleans up with soap and water, while oil gives a smoother finish and better leveling but takes longer to dry and needs mineral spirits for cleanup.
You’ll choose based on maintenance, appearance, and room use:
- latex advantages: quick touch-ups
- oil durability: stands up to scuffs
Consider ventilation and cleanup materials.
Which Finish Is Best for Modern Shiplap?
For a modern shiplap look, you’ll choose between matte or satin depending on how much texture you want highlighted—matte keeps it soft, satin lets the grooves catch light.
If the wall needs to stand up to scrubbing, a durable semi-gloss on high-traffic areas is a smart option.
Use higher-sheen finishes for trim and accents to create crisp edges and subtle contrast.
Matte Vs. Satin
Which finish suits modern shiplap best: matte or satin? You’ll choose based on look and function: matte finish hides imperfections and boosts texture contrast, while satin sheen offers subtle durability and controlled light reflection.
Consider these points:
- Matte: soft, contemporary, low glare
- Satin: slight gloss, easy to clean
- Room lighting guides your final pick
Durable Semi-Gloss
When you want a finish that stands up to fingerprints, frequent cleaning, and brighter light without looking shiny, durable semi-gloss is the smart choice for modern shiplap.
You’ll appreciate its easy wipeability and resistance to scuffs; durability factors like film thickness and proper prep matter.
Among finish options, semi-gloss balances cleanability and subtle sheen for high-traffic walls.
Trim And Accent Finishes
1 simple rule helps you pick trim and accent finishes for modern shiplap: match the finish to the function.
You’ll choose trim styles that resist scuffs and highlight joints, and pick accent colors to frame focal areas.
Consider practical options:
- Semi-gloss for high-traffic trim
- Matte for broad boards
- Satin for subtle contrast
This keeps look and durability aligned.
Choosing a Color That Makes Shiplap Look Crisp
Because shiplap’s grooves and shadow lines already add texture, choosing the right paint color is the quickest way to make those details read crisp and intentional.
Pick high-contrast whites or soft grays to emphasize lines; consider color psychology to set mood—cool tones feel calm, warm tones feel cozy.
Test samples under varied light reflection, then choose a finish that highlights edges without glare.
Calculating How Much Paint You’ll Need for Shiplap
Estimate paint needs by measuring the wall area and accounting for shiplap grooves: multiply wall length by height to get square footage, subtract windows and doors, then add 10–15% for waste and touch-ups.
Measure wall area, subtract openings, account for shiplap grooves, then add 10–15% for waste and touch-ups.
Use paint coverage per gallon and actual shiplap dimensions to refine totals.
Check:
- Total wall square footage
- Openings to subtract
- Coverage per gallon and coats needed
Tools You Need: Brushes, Rollers, Sprayers, and Tape
You’ll want a few reliable tools before you start: a high-quality angled sash brush for corners and trim, a 3/8–1/2-inch nap roller for flat boards, a paint sprayer if you’re covering large areas quickly, and painter’s tape to protect trim and create clean lines.
Choose brush types suitable for your paint, compare roller sizes for texture, evaluate sprayer options for control, and confirm tape quality.
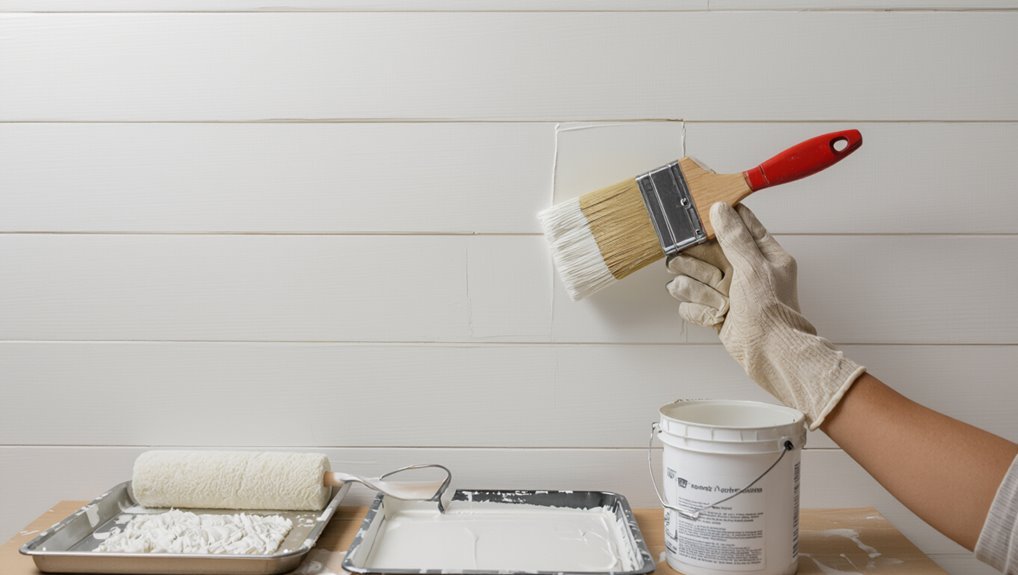
Brush-and-Roll Method for Painting Shiplap
Start by loading your angled sash brush with paint and cut in around the edges and inside the shiplap grooves.
Then follow with a nap roller to cover the flat faces. You’ll use proper brush selection and a steady roller technique to get neat results.
- Use an angled sash brush
- Choose a 3/8″ nap roller
- Work top to bottom for consistency
How to Paint Grooves vs. Faces for Even Coverage
After cutting in and rolling the flat faces, focus on the grooves to keep coverage even and avoid paint build-up.
Use a small angled brush for the groove technique, working top to bottom with short, controlled strokes.
Then lightly roll the face to blend brush marks, checking face coverage and wiping excess.
Repeat thin coats rather than heavy ones for a uniform finish.
How to Use a Paint Sprayer on Shiplap Safely
Before you spray, cover floors, trim, and furniture with drop cloths and plastic and seal off vents and doorways to keep overspray contained.
Wear a respirator, eye protection, and gloves, and follow the sprayer’s instructions for pressure and tip size to avoid runs and uneven coverage.
Hold the gun perpendicular to the boards, keep a consistent distance and overlap each pass by about 50% for smooth, safe results.
Prep And Protect Surroundings
1 key step in using a paint sprayer on shiplap is protecting the area: cover floors, trim, electrical outlets, and nearby furniture with drop cloths and plastic sheeting. Tape seams tightly, and mask off windows and fixtures so overspray won’t settle where it’s not wanted.
Do drop cloths placement and furniture moving, complete wall cleaning, then confirm surface protection:
- Secure seams and edges
- Remove or wrap furniture
- Clean and dry walls
Sprayer Technique And Safety
When you fire up the sprayer, keep a steady, controlled motion and a consistent distance—typically 6–12 inches—from the shiplap to avoid runs and uneven coverage.
Choose among sprayer types suited to latex or water-based finishes, adjust tip size, and practice on scrap.
Wear safety gear—respirator, goggles, gloves—and ventilate.
Move parallel to boards, overlap passes, and clean equipment after use.
Tackling Corners, End Caps, and Tricky Trim Details
Corners, end caps, and trim are where paint jobs either look professional or sloppy, so you’ll want to slow down and use targeted techniques to get clean lines and consistent coverage.
Use precise corner techniques and focus on trim details as you work.
Focus on crisp corners and careful trim work—precision here makes the whole paint job look professional.
Tips:
- Cut in edges with a sash brush.
- Feather paint away from seams.
- Backbrush end caps for even coverage.
Achieving a Crisp Gap Line Between Boards Without Caulk
After you’ve cleaned up corners and trim, focus on the gap lines between shiplap boards — they’re what give the wall that crisp, finished look.
Use consistent gap alignment techniques: shim or spacer every few feet, check with a straightedge, and adjust nails to pull boards tight.
Maintain even board spacing, sand edges lightly, and wipe dust before priming for a sharp, paint-ready seam.
When and How to Caulk Shiplap Joints Invisibly
You’ll want to caulk shiplap joints after priming but before your final coat so the sealant bonds and sands smoothly.
Choose a paintable, low-shrink acrylic latex caulk for flexibility and easy feathering.
Apply a thin bead, tool it with a wet finger or caulking tool, then sand lightly for an invisible seam.
Timing Before Painting
Before you brush the first coat, wait until the caulk and any primer are fully dry so joints stay invisible and paint doesn’t sink in or crack.
Plan your paint preparation and project timeline to allow full cure times.
Follow these quick checks:
- Verify caulk is tack-free and seams are smooth.
- Confirm primer shows no dampness.
- Paint only after recommended cure hours.
Caulk Type Selection
When you want seams to disappear, pick a paintable, flexible acrylic latex caulk with mold resistance so it moves with the boards and accepts finish coats without cracking or staining. You’ll choose among caulk types for durability, color match, and paintability. Proper caulk application guarantees invisible joints and longevity.
| Feature | Benefit | When |
|---|---|---|
| Acrylic latex | Paintable | Interior |
| Silicone blend | Flexible | High humidity |
| Hybrid | Durable | Trim work |
Seamless Application Technique
Start by running a clean bead of paintable acrylic latex along each seam, keeping the nozzle at a 45° angle and moving steadily so the caulk fills the gap without excess squeeze-out.
Then tool and wipe with a damp finger for invisible joints. Focus on seamless paint application and smooth finish techniques.
- Tool immediately
- Wipe excess
- Paint after cure
How Many Coats to Apply and Dry Times Between Coats
Most shiplap jobs need two coats of paint: a good primer (if you’re using one) plus a single full topcoat, though high-traffic areas or drastic color changes may call for a third.
For coat application, work in even passes, thin layers, and inspect coverage before adding another.
Follow manufacturer drying times—usually 2–4 hours between latex coats, longer for oil-based.
Protecting Floors, Trim, and Adjacent Surfaces
Before you lay down any paint, protect floors, trim, and nearby surfaces so accidental splatters won’t create extra work.
Use proper floor coverings and tape for clean lines, and set up barriers for surface protection.
Use quality floor coverings and painter’s tape for crisp lines, and add barriers to protect surfaces.
- Lay drop cloths or rosin paper secured with painter’s tape
- Mask trim edges and outlets carefully
- Use a low-profile tape for baseboards and flush surfaces
Protecting Painted Shiplap in High-Traffic Areas
Because high-traffic areas see more bumps, scuffs, and dirt, you’ll want to choose durable finishes and add protective measures right after painting, not later.
Use a tough satin or semi-gloss polyurethane, install chair rails or corner guards, and place washable rugs or runners.
Follow shiplap maintenance tips: clean gently with mild detergent and inspect finishes regularly to guarantee lasting high traffic protection.
Quick Fixes: Touching Up Chips, Drips, and Uneven Spots
Spot-treat chips, drips, and uneven spots as soon as you notice them to keep your shiplap looking crisp and prevent small flaws from getting worse.
Tackle chips, drips, and uneven spots immediately to keep shiplap crisp and prevent bigger problems.
Use quick touch up techniques and essential tools to blend repairs seamlessly. Prep, repair, and feather paint edges.
- Clean and sand
- Apply filler sparingly
- Match paint and blend gently
Common Mistakes to Avoid When Painting Shiplap
1 common mistake is rushing the prep; if you skip proper cleaning and sanding you’ll trap dust or old finish under the new paint and end up with peeling or uneven coverage.
Avoid inadequate prep, wrong tools, excess primer, paint pooling, uneven application, texture mismatch, poor ventilation, timing issues, neglecting details, and poor color selection so your shiplap looks smooth and durable.
Styling Painted Shiplap for a Modern Room Design
A painted shiplap can anchor a modern room by balancing clean lines with layered texture.
So start by choosing a finish and color that complement minimalist furnishings and bold accents.
You’ll style shiplap decor by layering pieces that echo its rhythm while adding contrast.
- Keep furniture streamlined
- Add sculptural lighting
- Use textured textiles and modern accents
Cost and Time Estimate: DIY vs Hiring a Pro
You can save considerably by doing the shiplap paint job yourself, so we’ll break down DIY costs like paint, primer, brushes, and prep materials.
I’ll also outline typical pro hiring expenses, including labor rates and any extra fees.
Finally, you’ll get a clear time comparison so you can decide whether the savings are worth the hours you’ll spend.
DIY Cost Breakdown
Deciding whether to tackle painting shiplap yourself or hire a pro comes down to comparing upfront costs, time investment, and the value of your effort.
You’ll save labor by choosing budget friendly options and smart material selection. Estimate supplies, prep time, and paint quantity, then decide if your schedule fits.
- Supplies and tools
- Prep and sanding time
- Paint and primer quantities
Pro Hiring Expenses
While hiring a pro costs more upfront, it can save you hours and reduce mistakes that add hidden expenses.
You’ll pay for labor, prep, materials, and cleanup, but pros often supply quality tools and faster results.
For a clear cost comparison, get multiple quotes and itemized estimates.
Factor budget considerations, warranties, and potential resale value when deciding between DIY and hiring.
Time Comparison Estimates
After weighing pro hiring expenses, it’s helpful to compare how much time and money you’ll spend on a shiplap paint job whether you do it yourself or hire a pro.
You can save hours or pay for speed; use time saving tips and efficiency hacks to decide.
Consider:
- DIY: prep + paint = longer, cheaper.
- Pro: faster, higher cost.
- Hybrid: you prep, pro finishes.
Final Checklist: Prep, Paint, and Finish Steps
Gather your tools, review the room, and walk the wall to confirm every prep, paint, and finish task is complete before calling the job done.
Check caulking, sanded seams, and dust removal. Inspect for even paint finishes, touch up runs or thin spots, and remove tape.
Note maintenance tips, cure time, and cleanup. Pack tools, store leftovers, and enjoy your clean modern shiplap.
Frequently Asked Questions
Can Shiplap Be Painted Outdoors, and Does Technique Differ for Exterior Use?
Yes—you can paint shiplap outdoors, and the technique changes: you’ll use exterior paint, prep and prime for moisture, seal gaps, and choose coatings for weather resistance so boards stay protected and finishes last longer.
Will Paint on Shiplap Emit Odors Harmful to Infants or Pets Long-Term?
Short-term paint odors can irritate, but you won’t typically face significant long term effects if you use low-VOC paints; prioritize odor safety, ventilate, and keep infants and pets away during application for infant health and pet safety.
Can I Wallpaper Over Painted Shiplap Instead of Repainting?
Can you wallpaper over painted shiplap? Yes—you can, but you’ll need proper shiplap preparation: clean, fill gaps, sand, and prime for wallpaper materials; use heavier adhesive or lining paper to bridge texture and guarantee adhesion.
How Does Humidity Affect Paint Adhesion on Shiplap Over Years?
Humidity impact is significant: you’ll see peeling, blistering, and mold in high moisture, and fast drying can cause chalking; managing humidity boosts long term durability by ensuring proper curing, priming, ventilation, and using moisture-resistant paints.
Are There Eco-Friendly or Low-Voc Paint Brands That Match Modern Finishes?
Yes — you’ll find eco friendly options like Benjamin Moore Natura, Sherwin-Williams Harmony, and Farrow & Ball that coincide with sleek aesthetics; they offer low VOC finishes, durable coverage, and satin or eggshell sheens that read modern and clean.
Conclusion
You’ve seen how simple prep, paint, and finish can transform shiplap into a clean, modern focal point—so here’s a quick truth to reflect on: painting shiplap doesn’t just change color, it changes perception. With the right prep and finish, those horizontal lines can make a room feel wider, brighter, and more contemporary. Tackle repairs, choose quality paint, and you’ll get lasting impact for modest time and cost—so go ahead, make that wall work for you.