How to Paint Latex Over Oil Base Paint Correctly
You can paint latex over oil‑based paint if you prepare the surface properly: clean off grease and dirt, sand or degloss glossy areas, repair cracks, then apply a high‑adhesion oil‑to‑latex bonding primer. Use thin, even latex topcoats, allow proper dry and recoat times, and test adhesion on a small patch first. If you hit problems, strip or sand to bare substrate and reprime; keep following these steps and you’ll learn the detailed checks and fixes next.
How to Use This Guide
Before you begin, skim the guide to get a quick sense of the steps and required tools so you know what to expect. Then follow each section in order for the best results. You’ll find clear stages: surface prep, adhesion strategies, priming, and finishing.
Read tips on color mixing to match existing tones and tips for choosing Eco friendly paints if sustainability matters. Use the checklist before you start each task. Follow safety and drying time notes closely.
Skip ahead only if you’re revisiting a specific step. This structure helps you avoid mistakes and achieve a durable, consistent latex-over-oil finish.
Quick Answer: Can You Paint Latex Over Oil?
Yes—you can usually paint latex over oil-based paint, but it takes preparation to stick and last. You’ll clean the surface, sand to scuff the gloss, and use a bonding primer formulated for oil-to-latex changeovers.
Apply thin, even coats so paint drying is uniform and reduces runs. Avoid heavy layers that trap solvents and cause adhesion issues.
After priming, use quality latex and mind color mixing choices: test small areas to confirm hue and opacity over the primer.
When you follow these steps, your latex topcoat will adhere, look consistent, and resist peeling over time.
How to Tell if Paint Is Oil‑Based (Quick Tests)
You’ll want to check a few quick clues to tell if paint is oil-based. Smell and gloss—oil paints often have a stronger solvent odor and a harder, shinier finish—are easy first checks.
You can confirm with a solvent rubbing test (acetone or rubbing alcohol). If oil is present, the paint will soften or leave a tacky residue.
Finally, look for a manufacturer label or the original can for definitive confirmation.
Smell And Gloss Clues
If a surface still gives off a strong, solventy odor or shows a deep, shiny gloss, it’s likely oil-based—these sensory clues are the quickest way to tell. You can rely on smell and sheen before testing: oil-based paints often retain that solvent scent and higher gloss, affecting color matching and paint durability expectations. Inspect in daylight, note lingering odors, and compare shine to nearby latex finishes.
| Clue | What to look for |
|---|---|
| Odor | Solventy, chemical smell |
| Gloss | Deep, reflective shine |
| Wear | Hard, chip-resistant |
| Color | Rich, consistent hue |
Solvent Rubbing Test
When smell and shine leave you unsure, try a quick solvent rubbing test to confirm whether the existing paint is oil-based.
Dampen a clean rag with denatured alcohol or lacquer thinner, rub a small hidden area firmly for several seconds, and watch for color blending or surface tack.
If pigment transfers or the finish softens, it’s likely latex; if nothing comes off and the surface resists, it’s oil-based.
Note texture smoothing: solvent may slightly alter cured latex, so test where imperfections won’t show.
Repeat in a couple spots for consistency, then decide on prep steps before repainting.
Manufacturer Label Check
Because manufacturers label their cans for a reason, the quickest way to know if paint is oil-based is to read the label—look for words like “alkyd,” “oil-based,” “enamel,” or solvent-based cleanup instructions (mineral spirits, turpentine). Check manufacturer details to confirm before sanding or priming; labels often note surface preparation, drying times, and compatibility with latex.
- Locate product name and base type.
- Scan cleanup and solvent recommendations.
- Note stated paint drying times and recoat windows.
- Look for color mixing or tinting restrictions.
If label confirms oil-based, use a bonding primer before applying latex.
When to Strip to Bare Substrate vs. Repair

If the old oil paint is flaking, chalking, or has multiple layers that won’t bond, you’ll need to strip to the bare substrate to guarantee a stable base.
If the surface is sound with minor adhesion spots or small imperfections, you can repair by sanding, filling, and priming those areas before latex.
We’ll compare the signs and methods so you can choose the safer, long‑term option.
When To Strip Completely
Although you can often repair spots of flaking or contaminated oil-based layers, you should strip to the bare substrate when adhesion failure is widespread, multiple paint layers are unstable, or the substrate has sustained damage like rot, rust, or deep chemical staining.
You’ll strip if structural integrity is compromised, previous coatings used historical techniques that trap moisture, or if severe contamination prevents bonding and accurate color matching.
Consider full stripping when you need a uniform primer bond or when restoration demands original substrate exposure.
- Widespread peeling
- Multiple unstable layers
- Rot, rust, chemical stains
- Restoration/color fidelity
When To Repair Surface
Having decided when full stripping is unavoidable, you now need to choose when a surface can be repaired instead of stripped to bare substrate. You’ll assess adhesion, localized damage, and paint compatibility. If oil paint adheres and damage is limited, you can spot-sand, clean, prime, and apply latex. Prioritize Surface preparation to remove grease and chalk. Use an appropriate bonding primer when oils remain.
| Condition | Action | Risk |
|---|---|---|
| Good adhesion | Repair/prime | Low |
| Localized failure | Patch/sand | Moderate |
| Flaking widespread | Strip | High |
| Unknown substrate | Test/strip | Variable |
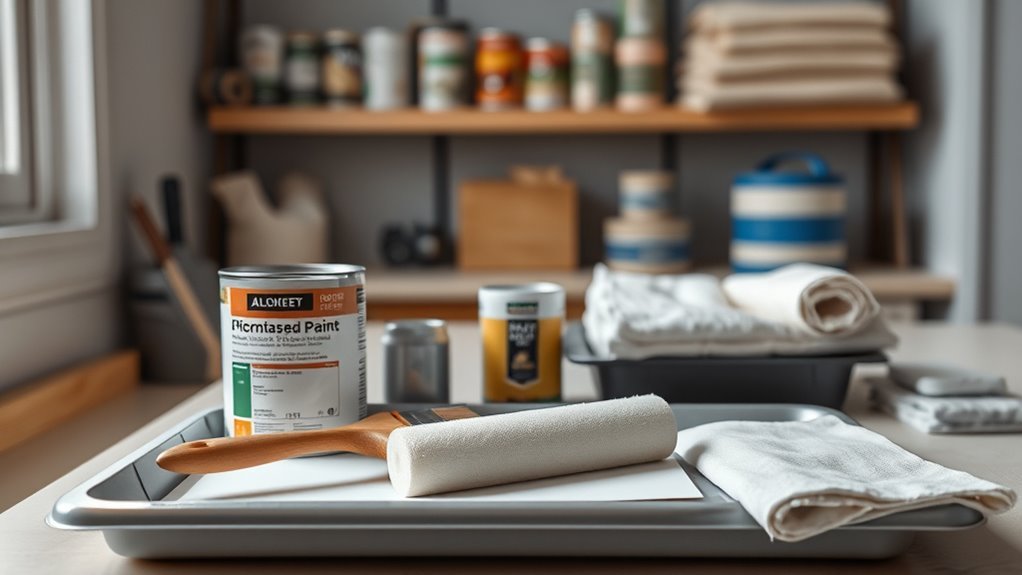
Tools and Materials to Have on Hand

Before you begin, gather a compact kit of reliable tools and quality materials so the job goes smoothly and lasts. You’ll need items for prepping, priming, and painting; focus on essentials to avoid delays. Include quality primer labeled for oil-to-latex, sandpaper, and tack cloths.
Before starting, assemble a compact kit of quality tools and materials for smooth, long-lasting painting results.
Think about color mixing and brush selection up front so shades match and strokes are smooth. Consider drop cloths, painter’s tape, and a respirator for ventilation.
- Oil-to-latex primer and latex paint
- Sandpaper (various grits) and tack cloths
- Brushes, rollers, trays, and extension pole
- Tape, drop cloths, gloves, respirator
Cleaning Greasy or Nicotine‑Stained Surfaces
Grease, nicotine, and other oily residues prevent primer and paint from bonding, so you’ll need to clean them thoroughly before sanding or priming. Start by wiping surfaces with a trisodium phosphate (TSP) solution or a heavy-duty degreaser, following label directions and wearing gloves. Rinse with clean water and let dry completely.
For stubborn nicotine, repeat the cleaning process or use a dedicated stain-blocking cleaner. Clean your brushes, rollers, and trays immediately—tool maintenance extends life and prevents contamination during color mixing or touch-ups.
Avoid oily solvents that lift old paint; aim for a neutral, residue-free surface before proceeding to primer.
Repair Cracks, Flaking, and Surface Defects First
Before you paint, knock off any loose or flaking oil-based paint with a scraper or wire brush.
Fill cracks and holes with a suitable exterior or interior filler. Let it cure, then sand smooth.
Properly prepared surfaces help latex topcoats adhere and last.
Assess And Remove Loose
When old paint is cracked, blistered, or flaking, you’ll need to remove the loose areas and repair underlying damage before applying latex over oil-based coats. Inspect the surface, tapping and probing to find soft spots. Pull or scrape away all loose paint until you reach firmly adhered layers. Note color mixing issues where multiple coats hide damage, and allow any damp areas full paint drying before proceeding.
- Score edges of blisters
- Use a scraper or wire brush
- Vacuum and wipe with solvent-safe cleaner
- Mark areas needing deeper repair and prime afterward
Fill Cracks And Sand
After removing loose paint, inspect for cracks, gouges, and uneven surfaces and mark any spots that need repair. You’ll scrape flaking areas, fill cracks with a suitable patching compound, and let it dry. Sand smooth, feathering edges so the latex bonds evenly. Test a small area for adhesion before full painting. Consider how color mixing and paint sheen will affect touch-ups and final appearance; match sheen to existing surfaces or resurface completely.
| Task | Tip |
|---|---|
| Fill | Use flexible filler |
| Sand | Start coarse, finish fine |
| Clean | Wipe dust before primer |
Which Sandpaper Grit to Use (And Why)
Choosing the right sandpaper grit makes the difference between a smooth, long-lasting finish and one that peels or shows through, so you’ll want to match grit to the job.
For surface preparation when painting latex over oil, sand to scuff and remove gloss without gouging. Use coarser grit for repairs, finer for final smoothing.
- 80–120 grit: remove old paint drips or heavy imperfections.
- 150–180 grit: smooth filler and level gradations.
- 220–320 grit: light scuffing before primer.
- 400+ grit: polishing metal or lacquered trims.
Choose grit by the condition; don’t oversand.
When to Use a Chemical Deglosser Instead of Sanding
If sanding would damage delicate trim, carvings, or thin veneers, use a chemical deglosser to dull the finish without abrasion.
You should also reach for a deglosser when sanding is impractical—tight corners, ornate details, or large fixed pieces make sanding slow or impossible.
Finally, consider a deglosser if you’re short on time or need to avoid the dust and extra odor that extensive sanding creates.
When Sanding Is Impractical
When sanding’s messy, slow, or risks damaging a delicate surface, reach for a chemical deglosser instead of abrasive sanding. You’ll clean and dull glossy oil paint quickly so latex will stick without aggressive abrasion.
Match your approach to the project scale and desired paint finish, and remember color mixing won’t hide adhesion problems.
- Use a compatible deglosser and follow label instructions.
- Work in a ventilated area and wear gloves.
- Test a small patch to confirm adhesion and finish appearance.
- Wipe residue thoroughly and let the surface dry before priming and painting.
Fragile Or Detailed Surfaces
Sanding’s great for flat, sturdy pieces, but you’ll want a chemical deglosser for surfaces with delicate trim, intricate moldings, or thin veneers that could chip or lose detail under abrasion. You’ll protect detail while improving surface preparation and paint compatibility by applying a deglosser per product directions, wiping residue, and testing a small area. Use gentle brushes and lint-free cloths. Choose a deglosser compatible with existing finish and the latex topcoat. If unsure, spot-prime with a bonding primer.
| Surface type | Risk with sanding | Deglosser benefit |
|---|---|---|
| Veneer | Chips | Cleans without abrasion |
| Molding | Detail loss | Preserves profile |
| Painted trim | Scratches | Improves bonding |
| Antique wood | Damage | Gentle prep |
Time Or Odor Constraints
Because you need to finish quickly or can’t tolerate strong fumes, reach for a chemical deglosser instead of sanding. It speeds prep by dissolving gloss and residue without the dust and lengthy cure times sanding and spot-priming can require. You’ll still need to work safely and test first.
Use a deglosser when:
- You’re on a tight schedule and need rapid turnaround.
- Occupants are sensitive to dust or can’t vacate the area.
- Substrate details demand texture matching without abrasion.
- You plan subtle color blending where sanding could alter edges.
Wipe thoroughly, allow recommended dwell time, then apply a bonding primer.
Scuff‑Sanding Glossy Oil Paint for Adhesion
Although glossy oil paint looks smooth, you’ll need to scuff-sand it to give latex something to grip; light abrasion removes the sheen and creates microscopic tooth that improves adhesion. For proper surface preparation, wipe, degrease, and sand with fine (220–320) grit. You’ll confirm paint compatibility by testing a small area. Sanding reduces peeling risk and helps latex bond without needing heavy stripping.
| Step | Action |
|---|---|
| Clean | Degrease with mild detergent |
| Sand | 220–320 grit, light passes |
| Wipe | Remove dust with tack cloth |
| Test | Apply small latex patch, inspect adherence |
Best Primers to Bond Latex to Oil (And Which to Avoid)
When you’re priming latex over oil, pick a high-bond primer designed to stick to slick surfaces so your topcoat won’t peel.
Don’t use water-based primers—they’re more likely to fail on oil-based paint.
Also check for adhesion promoters or oil-to-latex bonding primers if the surface seems especially stubborn.
Use a High-Bond Primer
Wondering which primer will actually make latex stick to oil-based paint? You’ll want a high-bond, solvent-based primer designed for adhesion. It locks into slick surfaces, aids color blending, and helps with texture matching so your finish looks seamless. Look for primers labeled “bonding” or “adhesion promoter.” Apply per instructions, degloss and clean first. Avoid guessing—test a small area.
- Prep surface: clean, sand, remove wax.
- Choose solvent-based high-bond primer.
- Apply thin, even coats; follow dry times.
- Spot-test for adhesion before full latex topcoat.
Avoid Water-Based Primers
Because water-based primers generally don’t grab slick, oil-based surfaces, you should skip them when bonding latex over oil; they dry too flexible and can lift or peel, especially on glossy finishes.
You’ll want priming techniques that prioritize adhesion: use an oil-based or high-bond alkyd primer after thorough surface preparation. Scuff sand glossy oil paint, clean off dust and grease, and let solvents evaporate fully before priming.
Avoid waterborne primers even for quick jobs — failures show later as bubbling or flaking.
Choose products labeled for adhesion to oil or vinyl, follow manufacturer instructions, and test a small area first.
Check Adhesion Promoters
If you want a reliable bond between new latex and old oil paint, check the label for adhesion-promoting primers designed specifically for oil-to-latex applications and skip anything that only lists compatibility with waterborne finishes.
You’ll want a primer that tolerates oil residues and creates a mechanical/chemical anchor. Test a small patch and note how it accepts color matching and the final paint sheen.
Consider these choices before committing:
- Oil-tolerant bonding primer (high adhesion)
- Shellac-based primer (quick sealer, good for stains)
- Universal primer labeled for oil-to-latex (laboratory-tested)
- Avoid standard waterborne primers or “multi-surface” claims without oil proof
Choosing Oil‑Based vs. Bonding (Latex) Primers
Which primer you pick will determine how well your new latex topcoat sticks, so it’s worth weighing oil‑based against bonding (latex) primers before you start. You’ll choose oil‑based when sealing porous, stained, or dark oil paint; it blocks bleed‑through and tolerates sanding.
Bonding latex primers adhere directly to glossy oil finishes and simplify prep, plus they dry faster and clean up with water. Consider color mixing only if tinting primer to match your topcoat—some oil primers won’t accept tints well.
Also compare drying times and recoating windows to match your schedule and ventilation for reliable adhesion.
Step‑By‑Step Priming for Strongest Adhesion
Now that you’ve picked the right primer, prepare the surface and work methodically to get the strongest bond between old oil paint and your new latex topcoat. Remove grease, sand glossy areas, and tack-cloth dust away.
Stir primer thoroughly—proper color mixing ensures consistent tone if you’ll tint for textured finishes. Apply thin, even coats; avoid overworking. Follow this sequence:
- Clean with degreaser and rinse.
- Sand gloss to dull sheen; vacuum.
- Wipe with solvent or tack cloth.
- Stir and apply primer in controlled strokes.
Inspect for full coverage, spot-prime missed areas, then let primer set before topcoating.
How Long to Wait Between Primer and Latex Topcoat
After the primer’s surface feels dry to the touch, wait the manufacturer’s recommended recoat window before applying your latex topcoat. Check the primer label for minimum and maximum recoat times; some primers need an hour, others need overnight. Temperature and humidity affect curing—work in recommended conditions for reliable results.
Use this waiting period to confirm surface preparation is clean, sanded, and free of dust. Make certain the primer and latex topcoat list paint compatibility; incompatible products can cause adhesion failure.
If you exceed the maximum recoat window, lightly scuff the surface before painting to restore mechanical adhesion.
Choosing Latex Topcoat: Sheens and Formulas
When choosing a latex topcoat over oil-based paint, you’ll want to weigh sheen benefits like hiding imperfections (matte) versus easy cleaning (semi-gloss or gloss).
Make sure the paint formula is compatible with your primer and substrate to prevent adhesion or finish issues.
Also consider durability and maintenance needs—higher sheen usually cleans better and resists wear.
Sheen Selection Benefits
Because sheen affects both appearance and performance, choosing the right latex topcoat matters more than you might think. You’ll control reflectivity, durability, and how touch-ups hide with proper sheen. Consider these benefits as you plan, keeping Color mixing and Paint drying in mind to predict final look.
- Higher sheen boosts scuff resistance and cleans easier.
- Lower sheen hides surface flaws and minimizes glare.
- Satin balances durability with subtle depth for trim and doors.
- Flat excels on textured walls, reducing visible imperfections.
Pick sheens based on room use, lighting, and maintenance needs for best results.
Paint Formula Compatibility
Sheen choices also intersect with formula compatibility, so you’ll want to match the latex topcoat’s chemistry to the underlying oil-based paint rather than rely on sheen alone.
Choose a high-quality acrylic latex primer first; it bonds to oil and creates a uniform surface for color mixing without bleeding.
Pick a latex topcoat labeled for adhesion over oil or for use with latex-over-oil systems.
Consider waterborne alkyds if you need oil-like flow and slower paint drying.
Test a small area to confirm adhesion and finish before committing.
Proper formulation prevents peeling, ensures even sheen, and preserves the new finish.
Durability And Maintenance
- High gloss: toughest cleanability, shows flaws.
- Semi-gloss: durable for trim, kitchens, bathrooms.
- Satin: balanced durability, hides minor flaws.
- Eggshell/flat: conceals texture, needs gentle maintenance.
Choose stain-blocking formulas and washable latex for longevity and easier upkeep.
Applying Latex Over Oil: Brush, Roller, or Spray
When you’re deciding whether to brush, roll, or spray latex over oil-based paint, consider surface texture, project size, and the finish you want; each method affects adhesion, coverage, and labor differently.
You’ll choose a brush for trim and decorative techniques where control and crisp edges matter; use a high-quality synthetic bristle.
Rollers work well on walls and ceilings for even coverage — pick nap length to match texture.
Spraying gives fastest, smoothest results for large areas or furniture, but needs masking.
For color matching, prime first to reveal true tones and guarantee the latex topcoat performs uniformly.
How to Avoid Peeling, Brush Marks, and Orange Peel
After you pick the application method, focus on surface prep and technique to prevent peeling, visible brush marks, and orange peel. Sand gloss to dullness, clean all residue, and use a quality bonding primer. Thin latex slightly for spraying; avoid over-thinning. Use compatible brushes or rollers, maintain wet edges, and consider Eco friendly paints with proper pigment load.
After choosing your application, prep well—sand, clean, prime, thin carefully, use proper tools, and apply light even coats.
- Sand, clean, prime thoroughly.
- Match viscosity; avoid excess thinning.
- Use correct nap or brush; keep wet edge.
- Light, even coats; inspect between passes.
Remember color mixing consistency and proper tools to ensure adhesion and a smooth finish.
Curing Times: When to Recoat and Return to Service
Although latex dries to the touch quickly, it needs substantially more time to cure fully—so don’t rush recoating or using the surface; follow the manufacturer’s recoat intervals and allow additional time for high humidity, low temperatures, or heavy films.
Check label times: typical recoat windows run from two to twenty-four hours, while full cure can take up to thirty days.
You should wait longer before heavy use or placing objects on floors.
Choose eco friendly options with faster cure formulations if needed, but test compatibility over historical paint layers first.
When in doubt, err on the side of patience.
How Temperature and Humidity Affect Adhesion
You’ve let the latex cure for the recommended time, but the surrounding temperature and humidity still play a big role in whether your new coat will stick to oil-based paint underneath. Temperature effects and humidity impact change drying speed, film formation, and adhesion strength. Work when conditions are stable.
- Low temps slow cure, increasing tack and poor bonding.
- High temps speed evaporation, risking skinning and pinholes.
- High humidity delays water loss, softening the film and promoting adhesion failure.
- Very low humidity causes rapid skin formation and solvent entrapment.
Adjust timing, ventilation, and use recommended temperature ranges for best results.
Test Adhesion Quickly Before Full Repaint
Before committing to a full repaint, do a quick adhesion test on a small, inconspicuous area so you can confirm the latex will stick to the oil-based surface.
Clean and sand the patch, then apply your primer and a small swatch of the latex topcoat. Let it cure per label instructions, then perform a tape test and a light scrape to check bond strength.
Observe how color mixing with primer and topcoat affects the final shade and whether texture blending reveals mismatched sheens or brush marks.
If adhesion or finish fails, address surface prep or primer choice before proceeding.
Touch‑Up Strategy: Small Spots vs. Full Repaint
After verifying adhesion on a small patch, decide whether spot repairs will blend well or if the whole surface needs repainting. You’ll use a clear touch-up strategy: prioritize matching sheen, feather edges, and prepping oil residues.
Test adhesion, choose spot repair or full repaint—match sheen, block oils, sand and feather edges for invisible touch-ups
For Small spots, you can spot-prime and apply latex carefully; larger flaws need full repainting after proper priming.
- Clean and sand the area until smooth.
- Apply an oil-blocking primer for consistent adhesion.
- Feather latex into surrounding paint to avoid hard edges.
- Inspect in different light; repaint if touch-ups remain visible.
Choose the least invasive option that gives seamless results.
Maintenance to Keep Latex Over Oil Looking Good
When you want latex over oil to keep looking its best, establish a simple maintenance routine. Wipe surfaces monthly with a soft cloth and mild detergent to remove dirt and oils that dull finish and affect color matching.
Inspect for scuffs, chips, or raised edges; address minor damage quickly to prevent moisture intrusion. Keep humidity and temperature stable to preserve paint film and avoid excessive paint thickness from repeated heavy touch-ups.
Store leftover latex from the original job sealed and labeled for true color matching later. Recoat sparingly—thin layers adhere better and look more uniform.
Troubleshooting Adhesion Failure and Fixes
If your latex topcoat starts peeling, blistering, or flaking over oil-based paint, don’t panic—most adhesion problems have specific causes you can diagnose and fix.
First, confirm the surface prep: oil residue, glossy finish, or poor sanding often causes failure.
Confirm proper surface prep—oil residue, high gloss, or inadequate sanding often leads to finish failure.
Check compatibility and avoid simple color mixing myths that mask primer needs.
Test patches help assess paint durability before full application.
Fix by stripping or sanding to bare gloss, degreasing, and applying a high-adhesion bonding primer.
Recoat only after proper cure.
If failures persist, consult a pro—substrate issues like moisture or contamination may be the culprit.
- Sand
- Clean
- Prime
- Test
Frequently Asked Questions
Can Oil-Based Paint Contain Lead, and How Does That Affect Repainting?
Yes—oil-based paint can contain lead, and it raises lead contamination risks; you should prioritize repainting safety, test or assume lead presence, use proper containment, PPE, and follow lead-safe renovation practices.
Can I Apply Latex Over Oil on Exterior Siding Without Special Primer?
No, you shouldn’t; latex adhesion is poor on old oil without primer. You’ll need thorough surface preparation—cleaning, sanding, and a bonding or oil-primer—so the new latex coat will stick and weather on exterior siding.
Will Existing Oil Gloss Show Through Light-Colored Latex Topcoats?
Testing proves oil based sheen can telegraph through thin coats, so you shouldn’t assume it won’t. You’ll need proper prep and primer to guarantee latex adhesion; otherwise glossy oil will show through lighter topcoats.
How Do I Dispose of Rags and Materials Contaminated With Oil-Based Paint?
You should treat contaminated rags as hazardous: follow paint removal steps, let solvents evaporate outdoors, store rags in a metal container with lid, and use local disposal methods or hazardous-waste facilities for proper disposal methods.
Can I Paint Latex Over Oil in Direct Sunlight or on Very Hot Surfaces?
You shouldn’t paint latex over oil in direct sunlight or on very hot surfaces because heat shortens drying time and hurts adhesion; do thorough surface preparation, cool the area, and wait for recommended drying time before painting.
Conclusion
You can often paint latex over oil, but prep matters: 92% of adhesion problems come from skipped cleaning or sanding, so don’t skip those steps. Clean, degloss, sand, and use a quality bonding primer on small areas; strip or repair when substrate’s compromised. Test a patch first, touch up small spots, and maintain by cleaning and repainting wear areas. If adhesion fails, remove loose paint and re-prime before repainting.