How to Prep a House for Exterior Paint – Full Guide
You’ll start by inspecting all surfaces, documenting repairs, and scheduling work during stable, dry weather. Clean thoroughly—power wash, remove mildew, and strip loose paint—then sand, prime, and spot-treat stains. Replace rotten wood, seal gaps with exterior caulk, and protect plants, fixtures, and walkways with tape and sheeting. Wear PPE, test for lead/asbestos, and hire pros for hazardous or extensive repairs. Follow a checklist and timeline, and keep going to learn detailed steps and tips.
Who This Exterior Paint Prep Guide Is For
Whether you’re a first-time DIYer tackling your own home or a seasoned pro brushing up on best practices, this guide is for you. You’ll get clear steps whether you’re prepping a small cottage, a rental, or a large family home.
You’ll learn to protect garden furniture, move items affected by work, and coordinate timing around weather and neighbors. You’ll also consider interior lighting needs when planning windows and trims so paint won’t cause glare or shadow issues inside.
This guide suits homeowners, landlords, contractors, and handy neighbors who want efficient, safe, and professional exterior prep results.
Why Exterior Paint Prep Matters
You’ve planned who’ll do the work and cleared the area; now understand why thorough prep matters. Prep guarantees paint adheres, so your chosen color selection looks consistent and vibrant instead of peeling or fading unevenly.
You’ll remove dirt, mildew, and loose material that can ruin finish and shorten lifespan. Proper sanding and priming hide stains and create a uniform base for the paint sheen you pick, whether matte or glossy, so light reflects as expected.
Prep saves time and money by preventing premature touch-ups and major repairs, and it makes the final job look professional and last longer.
When To Paint: Weather And Climate Windows
Pick a stretch of days when temperatures stay in the paint’s recommended range, usually between about 50–85°F, so the finish can cure properly.
Watch humidity and dew point—high moisture or overnight dew can ruin adhesion and cause streaking.
Plan around seasonal windows in your area to avoid rain, freeze-thaw cycles, and extreme heat.
Ideal Temperature Range
If temperatures dip below about 50°F (10°C) or climb above 90°F (32°C), paint won’t cure properly, so plan your exterior job for days that stay in that middle range and avoid extreme swings between day and night. Aim for consistent temps between 55–85°F (13–29°C). That keeps solvents off-gassing and film formation steady so your chosen color trends and exterior accents look true.
- Cool morning, warm afternoon — steady warmth aids curing.
- Avoid baking sun that overdries and causes brush marks.
- Gentle warmth prevents tacky finishes.
- Mild nights stop cold setbacks to drying.
Check forecasts before you roll.
Humidity And Dew Point
Temperature sets the stage, but humidity and dew point decide how well paint actually dries and bonds. You should monitor humidity control: aim for relative humidity below 85% during application and drying, ideally 40–70% for best curing.
Check the dew point — if surface temperature is within 5°F (3°C) of dew point, moisture will condense and ruin adhesion. Paint in the warmest, driest part of the day and avoid spraying or rolling when dew is likely overnight.
Use fans or temporary tarps to reduce localized humidity when possible. Pause if conditions approach saturation; wait for clear, stable readings.
Seasonal Timing Windows
When planning exterior painting, align your work with local climate windows so you paint during stretches of consistently dry, moderate weather rather than isolated good days. You’ll pick dates when temperatures stay within the paint’s recommended range and nights are frost-free.
Factor in humidity and forecast trends to avoid adhesion problems. Coordinate landscaping integration so plants aren’t stressed and color selection looks right in seasonal light. Plan buffer days for prep and unexpected rain.
- Early fall: stable temps, warm days, cool nights
- Late spring: greener backdrop, blooming context
- Summer: longer drying but watch heat spikes
- Winter: rare, only in mild climates
Scope The Job: Surfaces, Repairs, And Goals
Start by listing every exterior surface you’ll paint—siding, trim, fascia, doors, and any masonry or metal.
Inspect each area for damage and prioritize repairs that affect adhesion or structure, like rot, cracks, and rust.
Set clear goals for appearance and durability so your prep and repair plan matches the outcome you want.
Identify All Exterior Surfaces
Before you pick colors or order materials, walk the whole exterior and note every surface you’ll be painting—siding, trim, fascia, soffits, doors, shutters, porches, railings, and any masonry or metalwork—so you can size the job accurately and plan required repairs.
As you inventory, consider how garden landscaping will affect access and how exterior choices will relate to interior decor. Sketch or photo-document each area and mark condition: peeling, mildew, bare wood, or rust.
Visualize tasks with a simple list:
- Horizontal surfaces (decks, porches)
- Vertical planes (siding, walls)
- Trim and details
- Metal and masonry
Prioritize Repair Tasks
Because a clear repair priority keeps the paint job on schedule and within budget, list every defect you noted and rank them by safety, weather exposure, and visibility.
Start with structural hazards, rotten trim, and loose railings—these affect safety and timeline.
Next, fix water‑exposed areas, flashing, and siding gaps to prevent future failures.
Tackle visible blemishes that harm curb appeal but won’t halt work.
Coordinate garden landscaping removal and protective covers before scraping and power washing.
Schedule interior lighting adjustments if you’ll access soffits or eaves from inside.
Assign tasks, set deadlines, and estimate costs so you can proceed efficiently.
Exterior Paint Prep Checklist And Timeline
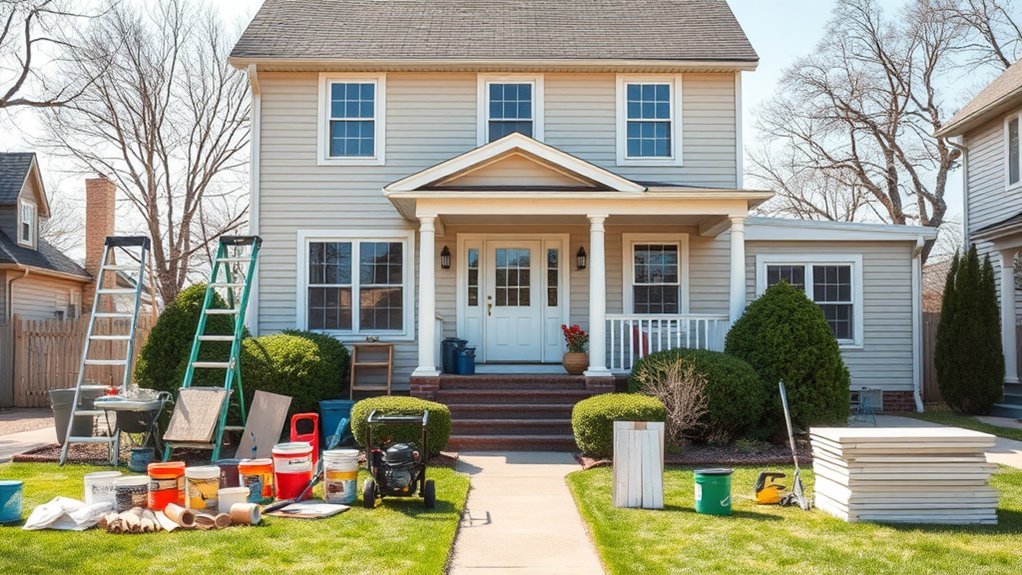
When you’re planning exterior paint work, a clear checklist and realistic timeline keep the job efficient and prevent costly rework. Prioritize inspections, surface repairs, and weather-dependent tasks so you know what to do and when.
Start by mapping zones, noting garden landscaping and exterior lighting to avoid damage.
Begin by mapping zones and marking garden beds and exterior lights to prevent accidental damage.
Sequence tasks: clean, repair, prime, paint, with contingency days for weather.
Use this visual checklist:
- Inspect siding, trim, gutters.
- Protect plants, fixtures, and exterior lighting.
- Patch, caulk, and sand surfaces.
- Schedule primer/paint on dry, mild days.
Stick to timeslots, document progress, and adjust for forecasts.
Estimate Paint, Primer, And Material Quantities
Start by measuring each wall, door, and trim to calculate the total surface area you’ll be painting.
Add 10–20% to that total to account for waste, overlaps, and absorption so you don’t run short.
Use the adjusted square footage with paint and primer coverage rates on the cans to determine how many gallons you’ll need.
Calculate Surface Area
How big is the area you’ll be painting, and how does that translate into paint, primer, and supplies? Measure walls, doors, and trim in feet, subtract windows and doors, total square footage, then divide by coverage per gallon on your chosen primer and paint.
Consider color selection and paint sheen—gloss needs fewer coats than flat.
Sketch sections and note textures (smooth, stucco).
Estimate rollers and brushes by area.
- Front wall: 400 sq ft
- Side wall: 350 sq ft
- Trim: 120 sq ft
- Doors/windows: -80 sq ft
Use these totals to buy gallons and materials.
Factor For Waste
Since no paint job goes exactly to plan, you should build waste into your estimates—add about 10–15% extra paint and primer for trimming, touch-ups, and absorption differences, plus more for textured surfaces or multiple coats.
Calculate total square footage, count doors, windows, and trim, then add your waste percentage. Factor primer separately for bare wood or patched areas.
Include caulk, tape, and drop cloths when budgeting; consider replacement bulbs or fixtures if you’ll move exterior lighting during prep.
Don’t forget landscaping protection—garden landscaping needs covers or stakes.
Order slightly more now to avoid mismatched batches later.
DIY Vs. Hiring Contractors: Decide What’s Best
When weighing whether you’ll tackle exterior painting yourself or hire pros, consider your skill level, available time, and the scope of the job—complex surfaces, tall ladders, or extensive prep usually favor contractors.
While straightforward siding and small areas can be good DIY projects, you should assess safety, tools, and finish expectations. Contractors speed work and handle permits; DIY gives control and learning.
Simple siding and small jobs suit DIYers, but weigh safety, tools, finish—and permits handled by contractors.
Think about nearby garden landscaping and exterior lighting to avoid damage. Visualize the project:
- A ladder beside trimmed shrubs.
- Paint cans near a spotless porch.
- Masked windows with precise edges.
- Clean exterior lighting fixtures.
Budgeting For Paint Prep And Painting Costs
You’ve decided whether to DIY or hire pros; now figure out what it will cost. List prep tasks—power washing, scraping, repairs, priming—and get itemized quotes or material estimates.
Factor labor hours, permit fees, and waste disposal. For paint, include color selection trials and extra for touch-ups; different paint sheen options change price and durability.
Compare mid- versus high-quality brands for coverage and longevity. Add a contingency (10–20%) for surprises like rot.
Track costs in a simple spreadsheet and prioritize repairs that affect structure or adhesion. This keeps your budget realistic and prevents last-minute overspend.
Stay Safe: Must-Have Gear And Precautions
You should gear up with gloves, eye protection, a respirator, and sturdy footwear to prevent injuries and limit chemical exposure.
Secure ladders, cordon off the work area, and watch for power lines to keep the jobsite safe.
Follow proper ladder angles, ventilation, and cleanup routines to reduce risks.
Personal Protective Equipment
Before you grab a brush, suit up with the right personal protective equipment so you can work safely and confidently. You’ll protect your skin, eyes, lungs, and hearing while prepping surfaces, masking plants for landscaping enhancements, and testing color selection in sunlight. Don’t skip proper gear:
- NIOSH-rated respirator and disposable filters.
- Safety goggles and a wide-brim hat.
- Nitrile gloves and coveralls.
- Ear protection and non-slip boots.
Check fit, replace worn items, and store PPE cleanly between tasks. Use disposable items when sanding lead-based paint, and follow label instructions for chemical safety.
Jobsite Safety Measures
When prepping a house for exterior paint, keep the jobsite secure and organized so everyone stays safe and work moves smoothly. Set clear barriers, post warning signs, and cordon off areas with drop cloths to protect landscaping enhancements.
Use sturdy ladders, scaffolding with guardrails, and harnesses when working at height. Keep a tidy tool staging area to prevent trips; store solvents in labeled, ventilated containers.
Guarantee exterior lighting for dusk work and inspect cords for damage. Have a first-aid kit, fire extinguisher, and emergency contacts on site.
Brief crew on procedures and enforce PPE use at all times.
Lead Paint, Asbestos, And When To Call A Pro
Although most homes built before 1978 may contain lead paint and some older materials can hide asbestos, you can take straightforward steps to identify hazards and decide if you should hire a professional. You should test suspect surfaces, avoid sanding, and contain dust.
If tests show lead hazards or asbestos, stop work and consult a licensed contractor.
Signs you need a pro:
- Peeling paint over large areas
- Friable insulation, shingles, or siding dust
- Interior demolition or extensive scraping
- Regulatory or disposal requirements
A pro handles safe asbestos removal, abatement, and required permits so you stay compliant.
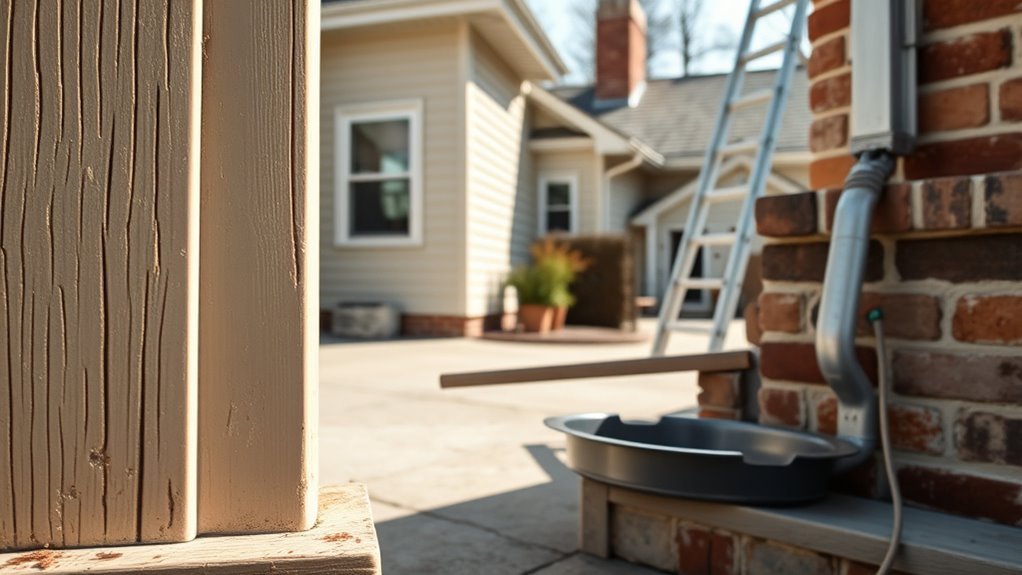
Inspect Siding: Damage, Rot, And Loose Boards
Start by walking the perimeter and closely inspecting each siding panel for cracks, soft spots, or gaps where water could get in. Probe suspect areas with a screwdriver to check for rot, tap boards to find hollow sounds, and look for nails that pulled free or warped seams.
Replace or firmly reattach loose boards, and cut out rotten sections before priming. Note existing color matching needs if repairs will be visible — pick primers that accept the final color and test paint sheen on a small patch to guarantee uniform finish.
Properly repaired siding prevents further damage and guarantees a clean paint job.
Document Problem Areas: Photos And Notes
Before you repair or paint, photograph every damaged spot and jot clear notes about size, location, and severity so you can prioritize work and order materials accurately. Walk the perimeter with a notebook or phone.
Before repairing or painting, photograph each damaged spot and note size, location, and severity to prioritize work.
Capture context shots showing nearby garden landscaping, fences, gutters, and driveway sealing areas so contractors see access and constraints. Label images and add short action tags: “clean,” “prime,” or “replace.” Use a simple checklist to track progress.
- Front porch column — 2ft crack, lower right
- East siding panel — peeling, 3ft
- Garage trim near driveway sealing — rot signs
- Backyard fence — loose board, 1 planks
Repair Wood Rot, Replace Trim, And Patch Siding
If you find soft spots, cracked trim, or peeling boards, tackle rot and damaged trim first so repairs hold paint and prevent further decay. Remove rotten wood, treat nearby areas, and fit new trim or patch siding with rot-resistant material. Sand, prime, and seal joints. Watch nearby garden furniture and exterior lighting while you work; protect them from dust and paint. Check flashing and caulking to stop moisture return.
| Task | Tip |
|---|---|
| Remove rot | Cut to sound wood |
| Replace trim | Use treated or composite |
| Patch siding | Match texture |
| Seal joints | Use paintable caulk |
| Protect fixtures | Cover before sanding |
Fix Stucco And Masonry Cracks Before Painting
When you’re preparing to paint stucco or masonry, repair hairline and larger cracks first so the finish bonds evenly and moisture can’t re-enter the wall. You’ll start by cleaning and widening cracks slightly, removing loose material so fillers adhere.
Match the Stucco texture when you skim patch to keep surfaces uniform. For deeper gaps, backer rod then a compatible Masonry sealant prevents water infiltration.
Finish with sand and texture blend before priming.
- Clean cracks
- Insert backer rod
- Apply masonry sealant or patch
- Texture to match surrounding stucco
Check cures before painting.
Prepare Metal Surfaces And Treat Rust Spots
Check metal areas for flaky paint and pitting so you can judge how bad the rust is.
Wire-brush or sand the spots to bare metal, then clean the surface of dust and grease.
Apply a rust-inhibiting primer before you topcoat to make sure the paint sticks and the rust won’t return.
Assess Rust Severity
Before you start scraping or sanding, take a close look to determine how deep the rust goes and whether it’s surface oxidation, pitting, or structural corrosion. You’ll perform a rust assessment and simple corrosion analysis to decide repair scope.
Inspect joints, fasteners, and panels; tap suspect areas to hear hollowness. Visualize damage:
- Flaking paint and orange powder on surface.
- Small pits or rough texture you can scrape away.
- Deep pits with thin metal showing through.
- Warped or weakened sections that flex under pressure.
Document findings and mark zones for patching or replacement before moving to cleaning and priming.
Clean And Prime
Wondering how to turn rusty metal into a paint-ready surface? You’ll start by scrubbing loose rust with a wire brush or sanding to bare metal where needed. Clean with a degreaser, rinse, and let dry completely.
Apply a rust converter on stubborn spots, then prime with a metal-specific, corrosion-inhibiting primer. Choose primer and topcoat compatible with your color selection and desired paint sheen to guarantee adhesion and uniform appearance.
Use thin, even coats, allowing proper drying between layers. Inspect for missed areas, touch up, and only then apply the final exterior topcoat for durable, long-lasting protection.
Seal Gaps And Holes With The Right Caulk
When you’re prepping for exterior paint, sealing gaps and holes with the right caulk keeps moisture, bugs, and drafts out and gives your paint a smooth, long-lasting finish. Choose a high-quality exterior caulk compatible with siding, trim, and windows, and match it to your Color selection so seams disappear.
Seal gaps before painting with a quality exterior caulk to keep out moisture, pests, and drafts and ensure a seamless finish.
Prep surfaces: clean, dry, and remove old caulk.
Apply steady beads, tool joints for adhesion, and trim excess.
Monitor conditions—don’t caulk when rain’s imminent; use Weather monitoring to pick a dry, mild day.
Visualize the job:
- Clean gap
- Cut tip
- Smooth bead
- Inspect seal
Choose The Proper Primer For Each Surface
Because different exterior materials absorb and bond differently, you’ll need a primer formulated for each surface—wood, masonry, metal, or previously painted siding—to guarantee adhesion and durability. Pick primers that suit your chosen exterior color and support weatherproofing techniques: oil-based for raw wood, masonry primer for stucco, rust-inhibiting for metal, and stain-blocking for aged siding. Apply per manufacturer specs and ensure clean, dry surfaces.
| Surface | Primer type |
|---|---|
| Wood | Oil or acrylic bonding |
| Masonry | Lime-resistant masonry |
| Metal | Rust-inhibiting epoxy |
| Painted siding | Stain-blocking acrylic |
Remove Flaking Paint: Scrape Or Chemically Strip?
If paint is flaking, you’ll need to remove loose material before priming or repainting to guarantee a lasting finish. Decide between scraping and chemical stripping based on surface, age, and lead risks.
Scraping’s precise for preserving architectural details; chemicals reach crevices and stubborn layers. Use PPE and test a small patch.
- Scrape loose chips with a sharp scraper.
- Sand edges smooth for clean color contrast.
- Apply chemical stripper where scraping won’t reach.
- Neutralize and clean residues thoroughly.
Prep dictates final adhesion; pick the method that protects substrate and details.
Power-Wash Safely: Pressure, Detergents, And Technique
After you’ve removed loose paint, give the exterior a thorough cleaning so primers and new paint stick properly. Use 1200–1500 psi on siding, lower for trim. Keep the nozzle 12–24 inches away and spray at a 45° angle. Choose a detergent labeled for exterior use; rinse thoroughly to avoid residue that can affect color selection and paint finish. Work top-to-bottom, overlapping passes. Protect plants and electrical fixtures.
| Pressure | Nozzle | Distance |
|---|---|---|
| 1200–1500 psi | 25° | 12–24″ |
| Lower for trim | 40° | 24+” |
Clean Mold, Mildew, And Stains Before Paint
While you prep for paint, tackle mold, mildew, and stains head-on so they won’t bleed through or prevent adhesion; use a mildew-killing cleaner, scrub stubborn spots, and rinse thoroughly before priming. You should spot-treat visible growth, protect plants, and wear gloves and a mask. Remove organic stains to guarantee uniform color selection and consistent paint finish later.
Tackle mold, mildew, and stains before priming—clean, scrub, rinse, protect plants, and spot-prime for a consistent finish.
- Scrub with a bleach-based or oxygen cleaner.
- Let solution dwell, then agitate stubborn patches.
- Rinse from top down, avoiding runoff into gardens.
- Repeat and spot-prime stained areas before painting.
Sand For Adhesion: Techniques And Grit Choices
You’ll want to pick the right grit—start with 80–120 for rough spots.
Finish with 150–220 for a smooth profile that paint can grip.
Use even pressure and long, overlapping strokes with a sanding block or orbital sander to avoid gouges.
After sanding, blow or brush off dust and wipe surfaces with a tack cloth so paint adheres cleanly.
Choosing Grit Levels
Because the grit you pick determines how well paint will stick, you should match abrasiveness to the surface and the job: coarser grits remove old finish and rough spots quickly, medium grits blend edges and feather repairs, and fine grits give a smooth profile for primer and topcoat.
Choose grit levels based on substrate hardness and damage. Use abrasive materials rated for exterior use.
Visualize the finish:
- Weathered wood with deep cracks — coarse, aggressive texture
- Flaking paint — medium-to-coarse to strip and level
- Minor scratches — medium to smooth gradations
- Bare wood before primer — fine finish
Proper Sanding Technique
When you sand for adhesion, focus on creating a consistent, slightly roughened surface that gives primer and paint something to grip onto. Use coarse grit (80–100) to remove failing paint, then shift to medium (120–150) to blend edges and smooth bare wood.
Finish with 180–220 for a toothy profile that still accepts primer. Sand with the grain, keep moving to avoid gouges, and check frequently for evenness.
Match sanding to your chosen color selection and planned paint finishes—satin hides less texture than gloss—so adjust final grit to suit the level of sheen you’ll apply.
Post-Sanding Cleanup
After sanding, clean-up is just as important as the grit choices you made—tackle dust and debris thoroughly so primer and paint can bond. You’ll remove particles, check for missed rough spots, and prep surfaces for your chosen Color selection and final paint finish. Follow this quick routine to visualize the job:
- Sweep loose dust into piles, then vacuum with a brush attachment.
- Wipe surfaces with a tack cloth or damp microfiber to lift fine grit.
- Rinse and let wood or siding dry completely before priming.
- Inspect under different light angles to ensure smooth adhesion and consistent paint finish.
Feather Edges And Blend Repairs For Even Finish
If you want an invisible repair line, feather the edges of filler and old paint so the new coat lays down smoothly. You’ll sand progressively finer and blend the repaired area into the surrounding surface until the shift is seamless. Work wet-sanding or fine-grit by hand, checking in natural light to catch low spots.
Match texture and profile before priming so color schemes read uniformly. Test small patches with chosen paint brands to confirm sheen and tint. Clean dust, apply thin primer, and re-sand any ridges.
When edges vanish and texture matches, you’re ready for the final finish coat.
Mask Windows, Doors, And Architectural Details
Before you paint, mask windows with low-tack tape and paper to keep glass clean and streak-free.
Tape or remove door hardware and cover hinges and knobs so paint won’t gum up moving parts.
Wrap or shield decorative trim and architectural details to preserve their finish and sharp lines.
Protecting Window Glass
Want your windows to stay glass-clean through the job? Cover glass before painting to avoid scratches, drips, and accidental overspray. Use low-tack masking tape and paper or plastic sheeting, press edges firmly, and protect nearby trim and sill. Remember nearby garden maintenance and exterior lighting—move pots, trim branches, and shield fixtures so debris or tape won’t damage them.
- Smooth pane, tape edges
- Plastic sheeting over frame
- Cardboard for corner protection
- Remove tape within 24 hours
Check seals after masking, replace torn coverings, and inspect glass for residue once paint’s dry.
Securing Door Hardware
When you’re prepping doors, remove or securely cover all hardware so paint won’t gum up locks, hinges, or handles. Take off knobs, deadbolts, and kick plates when possible; label screws and store them together.
For fixed items like mail slots or bolted knockers, mask tightly with low-tack tape and thin plastic, pressing edges to prevent seepage.
Protect nearby surfaces—thresholds, adjacent siding, and any exterior lighting fixtures—with drop cloths or painter’s film. Move garden furniture away from doors to avoid drips or dust contamination.
Work methodically, checking taped seams before you prime or paint to guarantee clean edges.
Covering Decorative Trim
After securing door hardware, move on to masking decorative trim so paint lines stay sharp and details stay clean. You’ll protect windows, doors, and architectural features while honoring each element’s surface texture.
Work systematically: clean, dry, and assess damage; choose low-tack painter’s tape for fragile finishes; use plastic sheeting or paper to cover large areas; and press tape edges firmly to prevent bleed.
Visualize placement:
- Tape narrow molding first, following contours.
- Cover glass with paper, tape edges.
- Shield door panels, accounting for knobs.
- Drape sheeting over porch columns and fixtures.
Remove tape at paint tack for crisp lines.
Protect Landscaping, Walkways, And Outdoor Fixtures
Because paint and primer can stain plants, hardscaping, and fixtures, you’ll want to shield everything before you start, using materials and methods that suit each item’s vulnerability.
Use breathable fabric or burlap to cover shrubs and trees during landscaping maintenance so moisture and air circulate.
Lay heavy-duty drop cloths or plastic sheeting over walkways, securing edges with tape or weights to prevent tripping.
Protect outdoor lighting bases and other fixtures with painter’s film or temporary covers, but don’t seal vents.
Keep irrigation heads clear and mark buried lines.
Check covers periodically for gaps and remove debris to avoid staining or damage.
Cover And Move Exterior Lights And Hardware
Now shift focus from plants and walkways to the fixtures that sit on your walls and eaves: exterior lights, house numbers, mailboxes, and door hardware can all interfere with painting and risk getting coated in paint. Turn off power, remove bulbs, and unscrew what you can; label pieces and store screws in bags. If removal isn’t possible, tape and cover with plastic or paper secured by painter’s tape.
Consider hardware finish and landscaping aesthetics when choosing protection. Consult your painter or a color consulting pro about coordinating new hardware with paint.
Visualize items to move or cover:
- Porch light fixtures
- Mailbox
- House numbers
- Door lockset
Prep Decks, Porches, And Handrails Near Walls
Prep decks, porches, and handrails close to exterior walls so paint jobs stay clean and lasting. Start by sweeping and power-washing surfaces, working away from the house to avoid splashback.
Cover railings and trim with plastic or painter’s tape; remove loose paint and sand rough spots where the wall meets decking. Protect joists and posts with drop cloths.
If you plan deck staining or porch sealing afterward, make certain wood is dry and clean; mask areas you’ll stain to prevent overlap.
Finish by checking for nails or screws that need countersinking before you paint adjacent walls.
Manage Gutters, Downspouts, And Roofline Areas
When you’re getting ready to paint, clear gutters, downspouts, and roofline areas so water and debris won’t interfere with primer or finish coats. You’ll do basic gutter maintenance and a quick roofline inspection before painting to prevent stains and moisture damage. Focus on clearing, repairing, and redirecting water away from painted surfaces.
- Scoop leaves and grit from gutters.
- Flush downspouts with a hose until water runs clear.
- Check seams, hangers, and end caps for leaks.
- Remove moss or loose debris from roofline and fascia.
Address minor repairs; note major issues for a pro.
Scaffolding And Ladders: Safe Access Setup
You’ll want to position scaffolding on firm, level ground and lock all braces before you start working.
Use ladders at the correct angle, secure their tops, and never stand above the recommended rung.
Always inspect equipment for damage and follow load and safety guidelines so you don’t create avoidable risks.
Proper Scaffolding Placement
Before you set up scaffolding, assess the ground and work area so the platforms sit level and clear of hazards. You’ll plan placement to protect exterior features and avoid disturbing interior décor by minimizing vibration near windows and doors.
Use landscaping tips to protect plants and sprinkler lines when positioning base plates. Visualize the setup:
- Base plates on firm, level soil or plywood pads.
- Frames aligned to avoid gutters and trim.
- Planked platforms at comfortable working height.
- Toe boards and guardrails installed continuous.
Check for overhead wires, maintain clear egress, and secure ties to the structure before you climb.
Ladder Safety Practices
Scaffolding gives you stable platforms, but ladders will still be needed for tight spots and quick jobs, so treat them with the same care. You check ladder stability before each use: level feet, locked spreaders, and secure top contact.
Angle ladders at roughly 75 degrees and tie or block bases to prevent slipping. Don’t overreach; move the ladder instead. Use ladders rated for your load and inspect for cracks or corrosion.
If you’ll work above 6–8 feet, wear safety harnesses tied to a certified anchor or use guardrails on scaffolds. Never climb with tools in hand; hoist them after you’re steady.
Tools For Prep: Brushes, Rollers, And Sprayers
Although the right tools won’t replace careful prep, choosing the proper brushes, rollers, and sprayers makes cleaning, scraping, and priming faster and yields a smoother finish.
The right tools won’t replace prep, but good brushes, rollers, and sprayers make priming faster and smoother.
You’ll pick synthetic brushes for latex, natural for oil, and angled sash brushes for trim; short-nap rollers for smooth siding, long-nap for textured surfaces.
HVLP sprayers give control on trim; airless sprayers speed large walls.
Consider how color trends or historical styles affect finish choice.
- Pointed brush for detail
- 3/8″ roller for smooth boards
- 1/2″ roller for rough siding
- Airless sprayer for broad coverage
Test Adhesion With A Simple Tape Test
When you’re ready to check whether old paint or primer will hold, a simple tape test gives a quick, reliable read on adhesion—press a piece of strong tape onto a cleaned, dry patch of painted surface, pull it off sharply, and inspect for flakes or film transfer.
Do several spots: trim, siding, and any patched areas. If paint lifts, you’ll need to sand or strip and re-prime before repainting.
Good adhesion guarantees chosen color selection and finish apply evenly across varied exterior styles. Record results and treat failing spots first so your final coat lasts and looks professional.
Masking And Taping Tips To Prevent Bleed
Before you paint, mask and tape precisely to stop bleed and save touch-ups later: clean surfaces, apply painter’s tape with a firm edge, and overlap paper or plastic to catch drips. You’ll protect trim, windows, and fixtures while considering color coordination and matching paint sheen for crisp lines. Follow these visual cues:
- Tape toward the surface you’ll keep, press the edge hard.
- Use a backer or folded paper at seams to block seepage.
- Remove tape when paint’s tacky, not fully cured, for clean edges.
- Replace tape if paint bridges or wrinkles to avoid bleed.
Select Exterior-Grade Caulk And Backers
Pick an exterior-grade, paintable caulk that matches the material you’re sealing and offers good UV and temperature resistance.
Use backer rod to fill wide gaps first so the caulk only bridges the surface and flexes properly.
You’ll get longer-lasting joints and cleaner paint lines when you pair the right caulk with correct backer-rod installation.
Choosing The Right Caulk
Because gaps and joints are the weak points in your siding and trim, choosing the right exterior-grade caulk and backer rod is critical to a long-lasting paint job. Pick a flexible, UV-resistant silicone or hybrid caulk rated for exterior use.
Match caulk color to trim for subtle seams or choose white/clear where you’ll rely on paint sheen to blend. Consider bead size and cure time for your climate.
- narrow hairline gap — precise tube tip
- wide joint — generous bead width
- vertical seam — faster skin time
- decorative trim — color coordination option
Using Backer Rod Properly
After sealing trim and joints with the right exterior caulk, you’ll want to use backer rod to control depth and shape of the bead so the caulk performs properly. Pick closed-cell foam rod sized slightly larger than the gap.
Compress it into joints with a blunt tool, leaving the correct depth—about half the joint width—to allow proper caulk flexing.
Keep the backer rod below the surface so caulk adheres to two sides only; that improves caulk adhesion and prevents three-sided bonding.
For uneven gaps, insert multiple layers.
Clean the rod and joint of dust before tooling the caulk for a neat finish.
Priming Strategy: Spot, Full, And Stain-Blocking
When you’re deciding how much priming to do, match the primer to the surface condition. You’ll choose spot priming for small repairs, full priming for raw or heavily patched areas, and stain-blocking where tannins, rust, or water marks threaten finish coat adhesion.
Consider your color schemes and texture options when picking primer sheen and thickness so the topcoat covers evenly.
- Spot: nail pops, small patches.
- Full: raw wood, new siding.
- Stain-blocking: knots, rust streaks.
- Blend: feather edges for smooth gradations.
Use compatible primers to avoid bleed-through and adhesion failures.
Timing Primer And Drying In Different Temps
If temperatures dip or soar, you’ll need to adjust how long you wait between priming and topcoating so the primer can dry and cure properly. Colder air slows solvent evaporation, and warmer, humid air slows curing even if the surface feels dry. Check the primer label for minimum recoat times at specific temperatures and humidity.
In cool conditions, allow extra hours or days. In hot, humid weather, extend wait times despite surface dryness. Keep tools and paint shaded to avoid skinning.
Consider how color selection and paint sheen affect coverage and hide—darker colors and lower sheens may need more careful application.
Final Pre-Paint Inspection Checklist
Before you start tapping brushes to the siding, walk the perimeter and inspect every surface, trim, and joint so you catch missed repairs, loose caulk, or hidden mildew now rather than mid-coat.
Check that surfaces are clean, dry, and sanded; confirm primer coverage where needed.
Verify color coordination samples in natural light and test paint sheen on trim versus siding.
Make certain gutters, fixtures, and landscaping are protected.
Finalize tools, ladders, and safety gear.
- Loose caulk or gaps
- Rot or damaged wood
- Test swatches in sun and shade
- Drop cloth and masking secure
Communicate Prep Expectations With Contractors
Although you’ve checked the property yourself, clearly telling contractors exactly what prep you expect prevents costly oversights. Outline required repairs, cleaning standards, caulking and priming needs, protection of fixtures and landscaping, and who’s responsible for debris removal so everyone knows the scope and avoids surprises.
Specify protection for garden landscaping and procedures around exterior lighting, including temporary removal or shielding. Get written agreements on prep tasks, materials, timeline, and inspection points. Ask contractors to confirm understanding and note exceptions.
Hold a short kickoff walk-through to mark sensitive areas and finalize responsibility for cleanup, damage repair, and final sign-off.
Handle Unexpected Issues During Prep
When unexpected issues pop up during prep—rotten siding, hidden rot, insect damage, or weather delays—address them quickly and communicate changes to scope, timeline, and cost to everyone involved. You’ll assess damage, prioritize fixes, and decide whether to proceed or pause while noting landscaping challenges and neighborhood regulations that affect access or work hours.
Visualize repairs:
- Cracked trim removed, framed, and primed.
- Rotten sheathing replaced, sealed, and dried.
- Insect treatment applied, inspected, and cleared.
- Temporary tarps up during storms; cleanup scheduled.
Get written change orders, update the schedule, and confirm costs before continuing.
How Prep Affects Paint Warranty And Lifespan
If you skip proper prep, expect shortened paint life and voided warranties; manufacturers and contractors tie coverage to surface readiness, correct materials, and documented procedures. You’ll protect paint durability and your chosen exterior color by following recommended steps: clean, repair, prime, and use specified primers and topcoats. Inspect and record conditions so claims aren’t rejected.
| Step | Benefit |
|---|---|
| Clean | Adhesion |
| Repair | Even finish |
| Prime | Bonding |
| Document | Warranty proof |
Do the prep, follow product specs, and you’ll extend lifespan, maintain finish, and keep warranty protection intact.
Cleanup, Disposal, And Eco-Friendly Practices
Before you put tools away, tackle cleanup and disposal thoughtfully to protect your property and the environment. Rinse brushes in a bucket, strain solids, and reuse or recycle leftover paint per local rules. Cover garden landscaping and exterior lighting while washing to prevent damage.
- Collect waste: lids, tape, used rags.
- Contain liquids: seal cans and absorb spills with kitty litter.
- Recycle: drop off hazardous paint at community centers.
- Restore: remove protective coverings and inspect plants, lights.
You’ll minimize contamination, avoid fines, and keep your yard and fixtures safe and tidy.
Common Prep Mistakes And How To Avoid Them
Once you’ve cleaned up and restored the yard, watch for common prep mistakes that can wreck your paint job and cost time to fix. Don’t skip surface inspection—peeling, mildew, or rotten wood ruins adhesion.
After cleanup, inspect surfaces—peeling, mildew, or rot will ruin adhesion and ruin your paint job.
Avoid pressure washing too aggressively; it can damage siding and displace soil near garden edging. Mask and protect windows, plants, and fixtures; paint overspray and drips are avoidable.
Don’t paint over damp surfaces or fresh stucco—let them cure. For fence staining, test a small area and prep with sanding and cleaning; inconsistent prep causes blotchy results.
Plan time for proper drying and touch-ups.
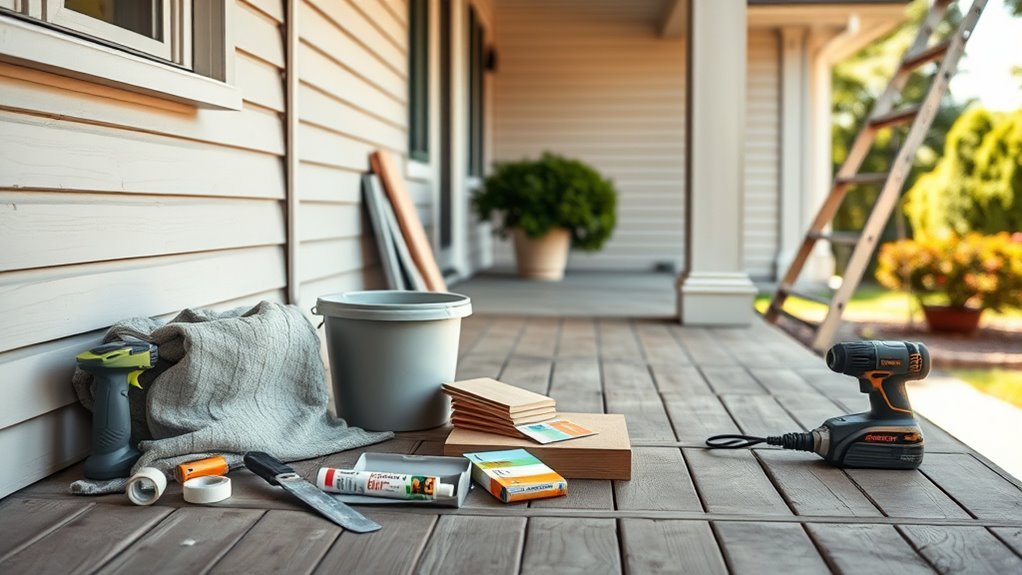
Quick Reference: Prep Supplies And Tool Checklist
Before you start painting, gather the essentials: paints, primers, brushes, rollers, and drop cloths.
Make sure you’ve got surface prep tools like scrapers, sanding blocks, caulk, and a pressure washer or wire brush for stubborn areas.
Don’t forget safety gear and cleanup supplies—gloves, goggles, masks, trash bags, and solvent for spills.
Essential Paint Supplies
When you’re gearing up to paint your house exterior, having the right supplies organized makes the whole process faster and cleaner. This checklist covers the essential prep tools—drop cloths, ladders, scrapers, sandpaper, caulk and a good caulking gun, masking tape, putty knives, a pressure washer or hose, safety gear, and containers for stirred paint—to make sure you can tackle surface repair, cleaning, and masking confidently.
Include materials that protect garden landscaping and won’t stain interior decor when moving gear through the house.
Picture the process:
- Rolled drop cloths shielding beds.
- Sturdy ladder at a corner.
- Trigger caulk gun ready.
- Tape outlining trim.
Keep supplies orderly for efficient work.
Surface Prep Tools
Although surface prep often feels tedious, getting it right makes the paint last and look professional. Gather a sturdy scraper, wire brush, sanding block or orbital sander, and a power washer for siding.
Use putty knives and exterior filler for holes, plus painter’s caulk and a caulking gun to seal gaps.
Have drop cloths, masking tape, extension poles, ladders, and sturdy gloves.
A stiff broom and shop vacuum remove dust; tack cloths pick up fine residue.
These tools help your exterior match interior decor standards and protect trim near landscaping—combine them with basic gardening tips to avoid damaging plants.
Safety And Cleanup
Now that you’ve gathered the right prep tools, keep safety and cleanup top of mind so work stays fast and hazard-free. Wear goggles, gloves, and a dust mask, and set up tarps to protect siding and garden integration beds.
Seal or remove plants, check for nests, and use traps for pest prevention before sanding.
Contain debris and old paint chips; bag waste and label hazardous materials.
Finish by rinsing tools and storing chemicals safely.
- Covered plants and mulch
- Lidded waste bags
- Tarped work zones
- Labeled hazardous storage
When To Start Painting After Prep Is Complete
If you’ve finished all prep work—cleaning, sanding, repairs, and priming—wait for the right conditions before you roll or spray. Check temperature and humidity: paint bonds best between 50–85°F and under 70% humidity. Avoid painting in direct midday sun or when rain’s forecast within 24–48 hours.
Consider surface temperature versus air temp; masonry and dark siding heat up faster. Match application pace to your exterior color and paint sheen—darker colors absorb heat and may dry too fast, high sheen shows flaws.
Start early in the day for longer open time, and monitor weather throughout the job.
Frequently Asked Questions
Can I Paint Over Vinyl Siding Without Priming?
You can, but you shouldn’t. You’ll risk poor adhesion and uneven Color matching; use proper Painting techniques: clean, scuff, apply a vinyl-specific primer or adhesion promoter, then paint with quality exterior acrylic for lasting results.
How Do I Protect Interior Rooms From Paint Dust During Exterior Prep?
You’ll seal openings, cover vents, and drift-proof doors and windows with plastic sheeting and tape so interior dust stays out; use drop cloths and negative-pressure fans for paint protection, and change filters frequently to reduce spread.
Will a Color Change Require Special Prep Beyond Standard Cleaning?
About 70% of homeowners notice color shifts after weathering, so yes — a color change needs extra prep. You’ll do more color matching, apply primer for adhesion, and boost paint durability to guarantee consistent, long-lasting coverage.
Can Pressure Washing Damage Older Wood Siding?
Yes — you can damage older wood siding with high-pressure washing; you should use gentler settings because aggressive blasting accelerates siding deterioration and undermines wood preservation, so test, lower pressure, and rinse carefully to protect fibers.
How Long After Rain Should I Wait Before Painting Exterior Surfaces?
Right after the sun dries everything and dew vanishes — you’ll wait 24–48 hours depending on temperature and humidity. Use proper surface preparation and painting techniques, and don’t rush or you’ll trap moisture under the paint.
Conclusion
You’ve prepped carefully, so take a breath — good work. Remember, “measure twice, cut once” applies to prep: thorough checks now save headaches later. Stick to your checklist, wait for suitable weather, and don’t rush repairs; paint lasts longer when the foundation’s right. Clean up responsibly and keep materials organized for touch-ups. When you start painting, you’ll see the payoff: a smoother job, fewer callbacks, and a house that truly shines.