What Do You Paint First Walls or Woodwork?
You’ll usually start with the trim (woodwork) first to get crisp edges and avoid wall paint splatter, especially if you’re not planning heavy masking; use a semi-gloss on trim and eggshell or satin on walls for contrast. If you’re set up with excellent tape or want faster rolling, paint walls first and carefully protect the trim. Consider texture, brushes, and rollers when choosing order, and keep going to see sequencing, finishes, and pro tips.
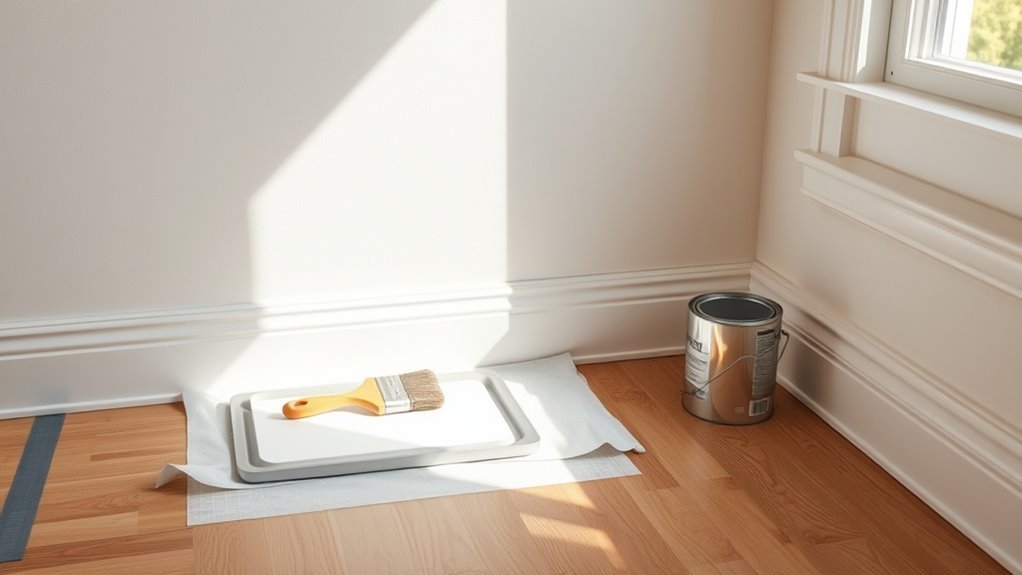
Quick Answer: Should You Paint Walls or Woodwork First?

While either order can work, most pros recommend painting the trim (woodwork) first so you can cut in clean edges and avoid splattering wall paint on freshly finished wood.
Paint the walls afterward with a roller and blend into the trim for a crisp, consistent look. You’ll save time touching up and protect detailed woodwork.
If your walls have heavy wall textures, consider heavier nap rollers and careful overlap to avoid gaps.
Pick paint brands you trust for adhesion and durability on both surfaces.
Ultimately, prioritize protection, steady technique, and consistent sheen to achieve a professional result.
Decision Checklist: How to Choose by Finish, Tools, and Room
Now that you know why many pros paint trim first, use a quick decision checklist to pick the right order, finish, and tools for your room. Consider paint durability, color psychology, and traffic when deciding. Choose satin or semi-gloss for easy cleaning; eggshell or matte for subtle walls. Match brushes to trim detail; rollers to wall texture. If ceilings are involved, plan sequence to avoid drips. Use the table below to visualize choices.
| Area | Finish | Tool |
|---|---|---|
| Trim | Semi-gloss | Angled brush |
| Walls | Eggshell | 9″ roller |
| High-traffic | Satin | Durable brush |
| Detail | Gloss | Small brush |
When Painting Walls First Makes Sense
You’ll often paint walls first when you can protect the trim with tape or a thin coat of masking fluid so you won’t worry about splash or overage.
With the trim shielded, you can use an efficient cut-in technique—steady brushwork and a steady hand—to create clean edges before rolling the main surfaces.
This approach saves time and reduces the need for touch-ups on woodwork.
Protecting Trim First
If you’re painting walls before trim, protect the woodwork first so you don’t have to correct drips or overspray later.
Start by taping clear lines with painter’s tape and covering baseboards, casings, and hardware with plastic or paper.
Use trim protection strategies like low-tack tape at joints and corner guards to shield edges.
Work in sections so coverings stay secure while paint dries.
When you remove protection, inspect for seepage and address it promptly with recommended trim painting techniques—small brushes and light strokes—to touch up without sanding or redoing large areas.
Efficient Cut-In Technique
Once the trim’s protected and coverings are secure, start your cut-in so wall paint never touches the woodwork. You’ll use steady wrist motion and proper cut in techniques to create a crisp edge. Work in short sections, load the brush lightly, and maintain consistent brush angles to control paint flow. Pause to smooth any overlap with the tip of the brush before it skins over. If you’ll roll after, feather the edge into the field to blend. Clean drips quickly and let the first coat dry before removing tape for a sharp finish.
| Step | Tip |
|---|---|
| 1 | Load brush lightly |
| 2 | Use steady wrist |
| 3 | Maintain angles |
When Painting Trim First Is Better
When a room’s walls are already in good shape or you’re aiming for a crisp, professional look, paint the trim first; doing so lets you focus on precise edges and saved time taping, especially around complex moldings and window casings.
When walls are sound or you want a crisp, professional finish, paint trim first for precise edges and less taping.
You’ll gain trim benefits like improved visual impact and color contrast while enhancing finish durability. Prioritize surface preparation and tool selection to boost painting efficiency and workflow optimization.
Plan the project so wet edges meet correctly and you avoid rework. Consider these steps:
- Clean, sand, and prime trim.
- Use angled brushes and steady strokes.
- Let cure before wall painting for aesthetic appeal and durability.
How Paint Finish (Sheen) Changes the Order

Because sheen affects contrast and cleanability, it can change whether you should paint walls or woodwork first: high-gloss or semi-gloss trim shows mistakes and dries faster, so you’d often tackle trim before walls to get crisp lines, while matte or eggshell walls forgive overlap and may be painted first to save time. Consider sheen impact and finish compatibility when planning. Match durability needs to room use and light. Use the table to weigh choices quickly.
| Situation | Recommendation |
|---|---|
| High-gloss trim | Paint trim first |
| Semi-gloss trim | Often trim first |
| Eggshell walls | Walls first OK |
| Matte walls | Walls first preferable |
Tools and Supplies That Shape Your Workflow
A few well-chosen tools and the right supplies will shape whether you work fastest and get the cleanest results; prioritize quality brushes, a good angled sash brush for trim, a 2–3″ roller with the correct nap for your wall texture, painter’s tape, drop cloths, and a sturdy edger or trim guide.
You’ll see workflow optimization when you focus on supply selection, workspace organization, and material sourcing. Keep tool maintenance simple to extend life.
Plan project planning around paint application and cleanup strategies. Balance time management with cost estimation.
Use:
- Proper brushes and rollers
- Tape, edgers, drop cloths
- Cleanup and storage kit
Protecting Newly Painted Trim After Painting Walls
Once your trim feels dry, let it fully cure before you handle it or rest furniture against it.
While it cures, cover the baseboards and corners with painter’s tape and thin craft paper or low-profile plastic to guard against scuffs and wall-touch ups.
Those simple protections keep fresh trim looking sharp while you finish the room.
Let Trim Fully Cure
While your walls may look finished, don’t rush using or touching the trim — it needs time to fully cure so the paint hardens and resists dents, scuffs, and fingerprints.
You’ll protect trim curing and guarantee paint adhesion by planning use and avoiding stress. Follow simple steps:
- Wait manufacturer-recommended cure times before heavy contact.
- Limit door and drawer use near fresh trim for several days.
- Keep humidity and temperature stable to promote proper paint adhesion and drying.
Check corners and high-contact areas; if tacky, extend waiting.
Patience preserves the finish and saves touch-ups.
Use Protective Coverings
1 simple step can save you a lot of touch-ups: cover newly painted trim before you paint the walls. You’ll protect fresh finish by choosing the right material selection—low-tack painter’s tape plus breathable cloth or paper drop cloths avoid pulling paint.
During surface preparation, remove dust and verify trim is fully cured so coverings adhere properly. Wear protective gear like gloves and goggles while taping and cutting coverings. Anchor edges tightly but gently to prevent paint bleed.
After wall painting, follow cleanup tips: remove tape at the recommended time, fold cloths to trap debris, and inspect trim for any minor fixes.
Protecting Newly Painted Walls After Painting Trim
After painting your trim, let the finish cure enough to resist nicks. Then protect newly painted walls with breathable coverings and careful taping so you don’t trap moisture or pull paint off when removing them.
After painting trim, let it cure, then shield nearby walls with breathable covers and gentle, low‑tack tape.
You’ll use simple trim protection strategies and focus on wall damage prevention while working. Follow these steps:
- Apply low-tack painter’s tape along edges, pressing gently to avoid peeling fresh trim.
- Drape breathable cloths over adjacent walls; avoid plastic that can trap humidity.
- Create temporary shields (cardboard or foam) when moving ladders or tools near trim.
Remove coverings slowly after full cure to preserve both surfaces.
Painting Walls First: Step-By-Step
Start by prepping the walls—clean, patch, and sand any imperfections so your paint goes on smooth.
Mask and cover the woodwork thoroughly to keep trim lines crisp and avoid accidental splatters.
Once the walls are primed and dry, you’ll be ready to paint confidently without compromising the woodwork.
Prep Walls First
Before you load your brush, clear and protect the room so you can work cleanly and fast.
Start wall preparation with surface cleaning to remove dust, grease, and residues that impair paint adhesion.
Inspect for wall damage and address cracks or holes; assess moisture control before applying products.
Do a texture assessment to decide sanding or skim-coating.
Consider color selection, lighting considerations, and pattern planning so your base coats suit final effects.
Apply primer application tailored to the wall type to improve adhesion and hide stains.
Finally, plan work sequence and drying times to keep edges crisp.
- Clean
- Repair
- Prime
Protect Woodwork
While you paint the walls first, protect your woodwork so trim, baseboards, and door frames stay clean and unscathed.
Start by taping edges with high-quality painter’s tape, pressing firmly to seal gaps. Use thin protective film or drop cloths over baseboards and hardware, securing with tape where needed.
If you’ll be cutting in with a brush, apply an angled sash brush and a steady hand to minimize splatter. For added woodwork protection, remove outlet covers and mask adjacent surfaces.
After painting, remove tape slowly at a 45° angle to preserve trim maintenance and crisp paint lines.
Painting Trim First: Step-By-Step
Paint trim first when you want crisp edges and faster touch-ups later; doing so lets you work around walls without worrying about accidental drips on newly finished woodwork.
Prepare by cleaning, sanding, and filling gaps so paint adheres and trim maintenance stays simple. Choose paint types suited to trim—usually semi-gloss or satin for durability.
Then follow these steps:
- Prime bare wood and let it cure.
- Apply two thin coats, sanding lightly between coats.
- Remove tape, inspect edges, and touch up any flaws.
Work methodically; letting trim dry fully makes wall painting quicker and neater.
Cutting In vs Rolling: Clean-Edge Techniques
Start by cutting in with a brush before you roll to get crisp edges along trim and corners.
Pay attention to brush angle and steady hand control so you can feather the paint out for a smooth blend into the rolled area.
If you don’t want to use tape, try shield tools, angled sash brushes, or the wet-edge method for clean results.
Brush First, Then Roll
Often the cleanest results come from brushing your edges first, then rolling the field, because that order lets you precisely define corners and trim before laying down broader coverage.
You’ll use proven brush techniques to cut in narrow lines and control paint near woodwork without bleeding. After cutting, switch to roller methods for even texture and speed across the wall.
Follow a simple routine to stay efficient:
- Load a quality angled brush, paint trim and corners.
- Smooth any visible brush strokes or excess.
- Roll the wall, blending the brushed edge into the rolled field.
This sequence minimizes touch-ups and speeds completion.
Angle And Paint Control
After you’ve cut in and rolled, focus on angle and control to keep that clean edge from bleeding into trim or the ceiling. You’ll hold the brush at a consistent angle, matching stroke direction to the edge.
Use short, deliberate passes and feather the paint toward the wall to avoid ridges. When rolling close, tip the roller slightly away from trim to prevent overlap. Maintain steady wrist pressure; changing angles causes uneven lines.
Practice angle techniques on scrap board to build muscle memory. Paint precision comes from slow, controlled movements and keeping a wet edge so seams blend seamlessly.
Tape Alternatives And Techniques
When you want crisp lines without the hassle of tape, several alternatives and techniques can give you clean edges whether you’re cutting in by hand or rolling close to trim.
You’ll choose methods based on trim finishes and wall textures, balancing paint application speed with surface protection. Consider these options:
- Use low-tack painter’s film for masking techniques where adhesive strengths vary.
- Employ an angled brush and steady cutting-in for precise clean edges without relying on tape types.
- Try a thin foam edger and quick tape removal when needed to protect moldings.
Match taping methods to the job for best results.
Using Painter’s Tape Without Damaging Finishes
1 simple rule will help protect your finishes: always test the tape and prep the surface before you stick it down.
You’ll choose tape types based on surface compatibility—low-tack for delicate trim, stronger for rough textures. For crisp edge protection, press edges firmly and remove tape at a 45° angle while paint is tacky to prevent paint bleed and ease adhesive removal.
Consider texture considerations: porous or fresh finishes may need longer cure time before taping.
Porous or newly applied finishes often need extra cure time before taping to avoid damage.
For finish preservation, avoid over-stretching tape and use a gentle solvent only if residue remains. Proper tape application saves time and prevents damage.
Drying and Recoat Times to Avoid Smudges
If you want clean, smudge-free paint, let each coat fully dry before you handle or recoat it—rushing returns to tacky paint and smeared edges.
You’ll follow drying times and recoat intervals on the label, adjust for humidity impact and temperature effects, and respect waiting periods between layers.
Proper surface preparation and correct application techniques help paint layering adhere without dragging.
Consider finish compatibility when switching between latex and oil; wrong pairing lengthens cure time.
For smudge prevention, remember:
- Test a small area for recoat intervals.
- Increase drying times in damp or cold rooms.
- Lightly sand between coats for grip.
Best Brushes and Rollers for Walls and Trim
You’ll want the right tools: natural-bristle or quality synthetic brushes for trim and polyester or nylon blends for walls.
Match roller nap to your wall texture—short nap for smooth surfaces, medium to long for textured walls—and pick sizes that fit the area you’re painting to reduce cutting in.
Also consider handle comfort and brush width: a narrower angled brush for detailed trim, wider roller frames for large walls, and ergonomic handles to cut fatigue.
Best Brush Types
Choosing the right brushes and rollers makes painting faster and gives neater results, so start by matching tools to the surface: use a high-quality synthetic sash brush for trim and detailed woodwork, a 2½–3 inch angled brush for cutting in, and a dense nap roller (¾ inch for eggshells, ½ inch for smooth finishes) for walls.
You’ll select by considering brush materials and brush shapes to suit paint type and surface. Consider these essentials:
- Sash/angled brushes for clean edges and trim.
- Flat or bright brushes for panels and doors.
- Small round or detail brushes for grooves and molding.
Roller Nap Selection
Texture matters: pick your roller nap to match the wall surface so paint lays down evenly and hides (or reveals) surface imperfections appropriately.
You’ll choose roller types based on surface texture and desired finish quality; smooth walls need short nap, textured walls need longer nap.
Consider nap length for paint absorption and even wall coverage—longer naps hold more paint but may splatter.
Match application technique to nap to avoid streaks and lap marks.
Assess roller durability for multiple coats and abrasive surfaces.
Balance paint absorption with finish quality and select the right roller to streamline work and achieve professional-looking results.
Handle And Size Choices
Picking the right handles and sizes for brushes and rollers makes the job faster and gives a cleaner finish. You’ll want comfortable handle materials—rubber for grip, wood for balance—matched to size dimensions suited to the task.
Choose smaller sizes for trim and larger for walls, and pick a roller nap that matches surface texture. Consider:
- 1–2″ angled brush for trim: precise control, firm handle materials.
- 2.5–3.5″ brush for corners and touch-ups: balanced size dimensions.
- 9″ roller for walls: faster coverage, longer handle for reach.
Match tools to scale and you’ll work neater, quicker.
Fixing Imperfect Trim: Repair, Sand, and Prime
Start by inspecting every length of trim for dents, gaps, and loose sections so you know what needs fixing before paint goes on.
You’ll address trim imperfections with simple repair methods: fill gaps with caulk, replace damaged pieces, and glue loose joints.
Use sanding techniques that progress from coarse to fine to achieve edge precision and proper surface preparation.
Match trim materials to appropriate primers to improve paint adhesion.
Once primed, check for seamless connections and color matching at corners.
Finish with final sanding and clean-up so your finishing touches look professional and durable.
Working Around Outlets, Switches, and Hardware
Once your trim is repaired, sanded, and primed, turn attention to outlets, switches, and hardware so paint lines stay clean and devices stay safe. You’ll assess outlet placement and switch accessibility, remove plates, and label them. Follow electrical safety: shut power before touching devices.
- Use painter’s tape and plastic to guarantee hardware protection and prevent paint seepage.
- Feather paint to match wall texture, avoiding bulky edges around boxes.
- Reinstall plates, adjusting for any slight trim shifts to maintain alignment.
Think about color coordination between plates, trim, and walls while prioritizing safe, neat installation.
Color Transitions and Edge-Detail Strategies
When you move from trim to wall, crisp color changes and careful edge details make the difference between a professional finish and a rushed job.
You’ll plan color shifts by testing swatches and evaluating light; color blending is useful only when a soft gradation is intentional. For sharp boundaries, mask with low-tack tape and cut in with a steady hand or an angled brush.
Maintain edge precision by keeping a wet edge, removing tape at the right moment, and touching up with an artist’s brush.
Seal shifts where needed with caulk before painting to prevent shadow lines and guarantee longevity.
Sequencing for Multi-Room and Whole-House Jobs
If you’re tackling multiple rooms or a whole house, plan a logical painting sequence that minimizes rework and traffic through wet areas.
You’ll adopt a multi room strategy that stages work by zone, drying time, and access. Prioritize high-traffic paths and finish trims last in each zone to protect woodwork.
Use teams or staggered shifts to boost workflow efficiency and keep wet areas contained.
Consider this sequence checklist:
- Block off and prep one zone, paint walls top-to-bottom.
- Move to adjacent zones, maintaining drying buffers.
- Return to trim and touch-ups after walls cure.
Pro vs DIY: What Professional Painters Recommend
Although hiring pros costs more upfront, they’ll save you time and prevent common mistakes that can wreck a finish, especially on larger jobs.
You’ll get professional tips and painter insights about surface preparation, finish choices, and tool recommendations so you avoid common mistakes.
Pros stress color considerations and workflow strategies that mesh with project timelines and efficiency methods; they’ll sequence walls and woodwork to minimize touchups.
Pros emphasize color planning and efficient sequencing—painting walls before trim and grouping tasks to cut touchups and time.
If you DIY, follow those same principles: prep thoroughly, choose compatible finishes, use recommended tools, and plan realistic timelines.
Knowing when to call a pro saves money and preserves the final result.
Choose the Right Approach for Your Room Type and Finish
Because room function and finish type dictate priorities, pick your sequencing based on both what the space gets used for and how durable you need the surfaces to be.
You’ll decide whether walls or woodwork go first by considering traffic, moisture, and style. Think about color coordination and how sheen will affect wear.
Follow a simple decision guide:
- High-traffic or wet rooms: paint durable finish types on woodwork first to protect trim.
- Living spaces with complex colors: paint walls first, then cut in trim to preserve crisp lines.
- Quick refreshes: choose matching finishes and paint the most visible surfaces first.
Frequently Asked Questions
Can I Paint Ceiling and Walls Before Trim in One Day?
Yes — you can, but it’s tight as juggling plates: do thorough ceiling preparation first, use efficient wall techniques, let coats dry fully, mask trim, and schedule enough drying time so paint won’t tack or smear.
How Do Pets Affect Paint Order and Drying Choices?
You should prioritize low-odor, pet friendly paints and adjust drying time adjustments by working in separate rooms, limiting pet access, using fans and slower-drying formulas, and scheduling trim work after walls fully cure to avoid contamination and harm.
Can Humidity or Season Change Whether I Paint Trim First?
Yes — humidity effects and seasonal considerations matter: you’ll delay trim or use fast-drying paints in high humidity or cold seasons, because moisture slows drying and adhesion; in dry, warm months you can paint trim first confidently.
Should I Prime New Drywall Separately From Trim Decisions?
Yes — you should prime new drywall regardless, because drywall preparation guarantees proper adhesion and uniform finish. While your trim selection can influence final colors and sheen, priming drywall first prevents problems later on.
Does Paint Color Curing Affect When Hardware Is Reinstalled?
Yes — wait for full cure, or you’ll risk damage. You’ll preserve paint adhesion and guarantee hardware compatibility. Patience pays: follow manufacturer cure times, test a hidden spot, then reinstall hinges and knobs confidently.
Conclusion
Quick Answer: paint trim first if you want cleaner edges without taping, but many pros paint walls first; either works if you prep and use proper tools. Notably, pros report cutting in trim first saves them about 30% time on average in rooms with lots of detail, so choosing trim-first can actually speed you up. Think about sheen, tools, and room complexity, then pick the order that fits your skill and desired finish.