Why Does Paint Crack When Drying And How to Prevent It
Paint cracks when drying because the outer skin shrinks or hardens faster than the layers beneath, or because coats are too thick, incompatible, or poorly adhered to the surface. You can prevent it by prepping and cleaning, sanding glossy areas, using proper primers, applying thin even coats, allowing full dry times, and choosing compatible, flexible paints or additives. Control temperature and humidity and test old/new paint combos; keep going to learn diagnosis and repair steps for specific cracking types.
Quick Answer Why Paint Cracks When Drying
When paint cracks as it dries, it’s usually because the surface, film thickness, or drying conditions cause the top layer to harden and shrink faster than the layer beneath.
You’ll see this with incompatible layers, overly thick coats, or rapid moisture loss that stress the film.
Understanding those causes helps you prevent cracking next time.
Short, direct explanation (one-paragraph summary)
Because paint loses solvent or water as it dries, the surface hardens and shrinks faster than the underlying layer, causing tension that makes the film crack.
Inadequate surface preparation, applying paint too thickly, extreme temperatures or humidity, or incompatible layers (like oil over latex) all increase that stress and lead to visible splitting.
You can prevent cracking by sanding, priming, using correct thickness, and matching products.
Basic Understanding How Paint Dries
You’ll want to know that paints dry by either evaporation of solvents or by chemical curing, and those mechanisms affect how stresses form.
The formulation—binders, solvents, pigments and various additives—controls flexibility, adhesion and drying speed.
Different paint types (latex, oil, acrylic, enamel) follow distinct drying/curing behaviors, so the same conditions can cause cracking in one but not another.
Evaporation vs. Chemical Curing: different drying mechanisms
Although both processes remove wetness, evaporation and chemical curing work very differently: evaporation lets solvents or water leave the film so solids harden physically, while chemical curing bonds molecules into a new, insoluble network through reactions like oxidation or polymerization.
You’ll notice evaporation is faster and reversible if recoated too soon, while curing creates durable, permanent films that resist redissolution and need conditions (time, temperature, catalysts) to complete.
Paint components that matter: binders, solvents, pigments, additives
Think of paint as a layered recipe: binders, solvents, pigments, and additives each play a specific role in how a coating flows, sets, and ultimately performs.
You rely on binders for film strength and flexibility, solvents for application and evaporation rate, pigments for color and hiding power, and additives to modify flow, drying speed, or mildew resistance—balance them to prevent cracking.
Types of paint and their typical drying/curing behavior (latex, oil, acrylic, enamel)
When you pick a paint type, you’re also choosing how it will dry and cure: latex (water-based) dries by water evaporation and forms a flexible film fairly quickly, oil-based paints cure more slowly through oxidation and crosslinking for a harder finish, acrylics—technically a subset of waterborne polymers—combine fast water evaporation with polymer coalescence for durable, flexible films, and enamels (often alkyd or acrylic formulations) aim for a tough, glossy surface with drying behavior that depends on their binder chemistry.
| Type | Drying/Curing | Typical Finish |
|---|---|---|
| Latex | Evaporation, film formation | Flexible, matte/satin |
| Oil | Oxidation, crosslinking | Hard, glossy |
| Acrylic/Enamel | Polymer coalescence or alkyd cure | Durable, glossy |
Root Causes Why Cracking Occurs During Drying
You’ll see cracking when the paint’s surface tension and film formation get out of balance or when solvents evaporate too fast and a skin forms atop wet layers.
Applying paint too thickly can cause sagging that then dries into cracks, and poor adhesion to the substrate makes the film prone to splitting.
Temperature, humidity, and airflow also change drying rates and stress the film, so controlling conditions helps prevent damage.
Surface tension and film formation imbalance
Although paint looks solid as it dries, its film is actually a fragile balance between surface tension pulling the liquid tight and the forming polymer network trying to lock pigment and binder in place.
If surface tension dominates, the film contracts unevenly, stressing the curing network and causing microcracks.
You can reduce imbalance by adjusting formulation, using leveling agents, and ensuring even application to relieve stress.
Rapid solvent loss and skinning
Surface tension imbalances often set the stage, but another common culprit is rapid solvent loss and the skinning that follows.
If solvents evaporate too fast, the surface forms a dry “skin” while underlying paint stays fluid. That trapped moisture and continued shrinkage stress the film, producing fissures.
You can slow evaporation and encourage uniform drying to prevent skinning and subsequent cracking.
Over-thick application and sagging-to-crack cycle
Applying paint too thickly causes a predictable sagging-to-crack cycle: the heavy film can’t support its own weight, so it sags and stretches as solvents evaporate.
Then the stretched areas lock into a brittle skin that eventually fractures when the underlying layer continues to shrink.
You’ll see long, irregular cracks where tension concentrates; sanding and recoating worsens it unless you strip and apply thinner, even coats.
Poor adhesion to the substrate
Sagging and brittle films aren’t the only way paint will crack; poor adhesion to the substrate creates its own failure modes.
If the surface is dirty, oily, glossy, or improperly primed, the film won’t bond and will lift, flake, or crack as it dries and shrinks.
You should prepare surfaces, choose compatible primers and paints, and test adhesion before full application.
Environmental factors: temperature, humidity, airflow
When paint dries in the wrong conditions, it can crack even if the formula and prep are sound. You need consistent temperature, moderate humidity, and controlled airflow.
Too-cold or too-hot settings alter drying rates, high humidity slows curing, and strong drafts cause skinning with trapped solvents.
Monitor conditions, adjust climate controls or timing, and avoid direct fans or sunlight to prevent stress-induced cracking.
Incompatible layers (old paint vs. new paint)
If you paint a new coat over an older layer that doesn’t chemically or physically bond, the two films can dry at different rates and stresses build up, causing the top layer to crack.
You should strip incompatible old finishes, sand to promote mechanical keying, use a compatible primer, and test a small area first so the new paint adheres uniformly and dries together without tension.
Substrate movement and structural stress
Because building materials expand, contract, and flex with temperature, humidity, and load, the substrate beneath your paint often moves more than the paint film can tolerate.
You’ll see cracks where stress concentrates; rigid coatings fail on flexible substrates.
Reduce movement, use flexible primers, and allow proper curing to prevent failure.
- thermal cycling
- moisture swelling
- structural settling
- vibration/load shifts
- joint movement
How to Diagnose the Specific Cause on Your Project
Look at the crack pattern and surface clues—crazing, long splits, or flaking each point to different problems.
Run a few simple tests you can repeat on-site, like a moisture check and a tape adhesion test, to recreate the failure conditions.
Then match those symptoms to likely causes using a quick reference table to pick the right fix.
Visual clues and crack patterns (crazing, long splits, flaking)
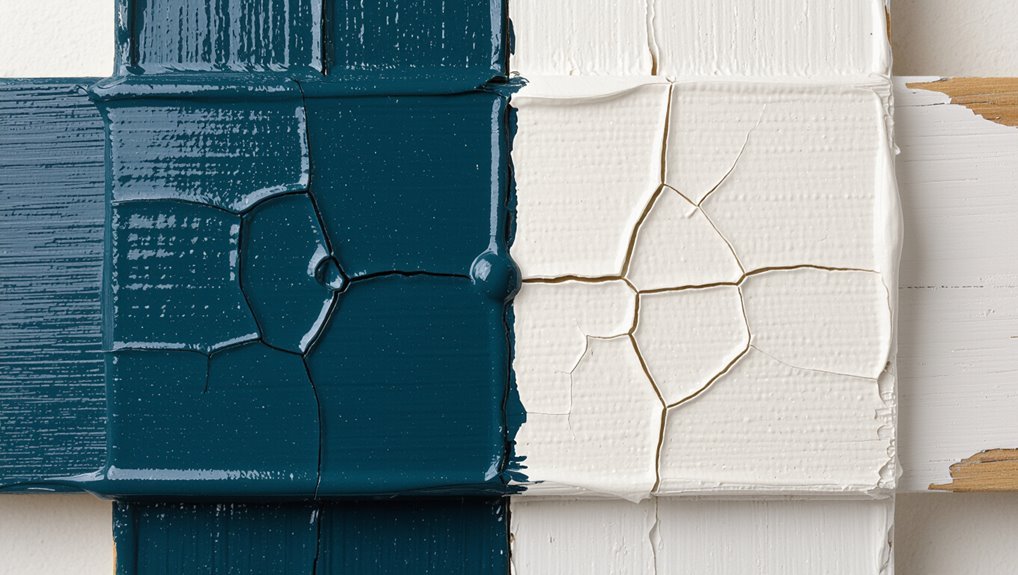
When paint dries it leaves behind telltale patterns—crazing (a network of fine cracks), long splits that run across a panel, or flaky patches where layers separate—and those visual clues help you pinpoint what went wrong on your project.
Crazing suggests rapid drying or brittle film; long splits point to substrate movement or heavy application; flaking shows poor adhesion or incompatible layers.
Simple tests to replicate conditions (moisture test, adhesion test)
If you’re trying to nail down why paint failed, run a couple simple tests that reproduce the conditions: tape a small square and peel to check adhesion; expose a scrap with the same substrate to a damp cloth or humidity for 24–48 hours to see if moisture lifts or wrinkles the film.
Note results, repeat in varied spots to confirm consistency.
Matching symptoms to causes (quick reference table)
Those quick tests give you real-world clues you can match to common failure patterns. Use this simple chart to diagnose and act fast—spot the symptom, read the likely cause, then fix it.
| Symptom | Likely Cause |
|---|---|
| Fine surface crazing | Fast drying / thin coat |
| Large cracks | Thick paint / poor flexibility |
| Flaking | Poor adhesion / dirty surface |
| Bubbling | Moisture or solvent entrapment |
Prevention Step-by-Step Best Practices Before Painting
Before you start, make sure you prepare the surface—clean, sand, and repair any damage so coatings adhere properly.
Pick the right primer and apply it correctly, choose a paint formulated for your substrate and conditions, and follow thinning and mixing guidelines.
Finally, apply the recommended film thickness using the proper technique to prevent stress that leads to cracking.
Step 1: Surface preparation (cleaning, sanding, repairing)
When you’re getting a surface ready to paint, thorough cleaning, proper sanding, and timely repairs are essential to prevent cracking later on.
Remove dirt, grease, and loose paint with appropriate cleaners. Sand glossy areas to promote adhesion and feather edges of peeling sections.
Fill holes and cracks, let patches cure, then sand smooth. Confirm the surface is dry and dust-free before proceeding.
Step 2: Primer selection and correct application
Because primers bridge old surfaces and new paint, choosing the right type and applying it correctly is one of the most effective ways you can prevent cracking.
Select a primer compatible with your substrate and the topcoat’s base, apply thin, even coats, allow full dry times between coats, and sand lightly if needed.
Avoid over-application and follow manufacturer instructions for best adhesion.
Step 3: Choosing the right paint type for substrate and conditions
To get durable, crack-resistant results you’ll pick a paint formulated for both the substrate and the conditions it’ll face.
Match paint chemistry—acrylic, alkyd, epoxy—to material flexibility and porosity. Choose exterior-grade for UV and moisture, low-VOC for indoor air quality, and temperature-tolerant formulas for seasonal swings.
Verify adhesion to your primer and confirm manufacturer recommendations for substrate type before proceeding.
Step 4: Proper thinning and mixing guidelines
If you want smooth, crack-free results, mix and thin your paint precisely to the manufacturer’s specs and the job’s conditions.
Measure thinner and paint by volume, add slowly, and stir thoroughly with a clean paddle to a uniform consistency.
Avoid over-thinning; too thin reduces film strength.
Let mixed paint rest briefly to release bubbles, then remix gently before application.
Step 5: Recommended film thickness and application technique
5 key factors determine a durable, crack-free paint film: target wet film thickness, number of coats, drying time between coats, application speed, and tool choice.
You should apply thin, even coats within the manufacturer’s wet film thickness range, letting each cure sufficiently.
Use consistent strokes with the right brush, roller, or spray tip, avoid overloading, and sand lightly between coats for proper adhesion and smoothness.
Step 6: Environmental control (temperature, humidity, ventilation)
Because paint cures by chemical and physical processes, controlling temperature, humidity, and ventilation is essential to prevent cracking and guarantee even drying. You should aim for the manufacturer’s recommended temperature range, keep relative humidity moderate (usually 40–60%), and provide steady airflow without creating drafts that skin the surface too quickly.
- Monitor conditions with a thermometer/hygrometer
- Avoid painting in extreme heat or cold
- Use fans for gentle circulation
- Delay work after rain or high humidity
- Allow longer drying between coats
Prevention During and After Application
While you’re painting, control drying time between coats and use retarders or accelerators only when the product and conditions call for them.
Don’t overwork the film—use the right tools and gentle techniques to lay an even coat.
After application, follow curing recommendations (temperature, humidity, and handling) to minimize stress and cracking.
Drying time management between coats
When you manage drying time between coats, you prevent trapped solvents and uneven curing that lead to cracking; check the product’s recommended recoat window, feel for tackiness, and don’t rush—apply the next coat only when the previous one has cured enough to support it.
Space coats evenly, maintain recommended temperature and humidity, thin coats if needed, and wait longer in cool or humid conditions to avoid stress.
When and how to use retarders or accelerators
Managing drying times between coats sets the stage for effective use of additives, so now you should consider whether a retarder or accelerator will help your job.
Use a retarder in hot, fast-drying conditions to reduce surface skinning and allow leveling.
Use an accelerator for cool, humid situations to speed cure and avoid sagging.
Always follow manufacturer dosage and test a small area first.
Tools and techniques to avoid overworking the film
Because overworking the paint weakens adhesion and creates texture flaws, use the right tools and deliberate motions to protect the film.
Choose high-quality brushes or rollers appropriate for your finish, keep tools clean and lightly loaded, and apply long, confident strokes.
Limit rebrushing; let layers level. If you need touch-ups, wait for tack-free set to avoid disturbing drying film.
Post-application curing tips to minimize stress
If you want paint to cure without added stress, control the environment and handle the surface gently after application. You’ll reduce cracking by managing temperature, humidity, and airflow, and by avoiding contact until film sets.
Follow these focused steps:
- Keep temperature steady and within manufacturer range
- Maintain moderate humidity
- Guarantee gentle, indirect airflow
- Avoid touching or leaning objects
- Wait full recommended cure time
Fixing Cracked Paint Repair Methods by Severity
When you encounter cracked paint, the fix depends on how severe the damage is.
For minor surface crazing you can clean and recoat, while localized cracking and flaking calls for stripping, sanding, priming, and repainting.
If cracking is widespread you’ll need full removal and substrate repair, and textured or decorative finishes may require special matching techniques.
Minor surface crazing: cleaning and recoating
Minor surface crazing looks like a fine network of hairline cracks that don’t penetrate the full paint film, and you can usually fix it without stripping everything back.
Clean the area thoroughly, remove dust and grease, and scuff-sand lightly to key the surface.
Apply a compatible primer if needed, then recoat with a thin, even topcoat. Allow proper drying between coats.
Localized cracking and flaking: strip, sand, prime, repaint
Deal with localized cracking and flaking by removing the loose paint back to a sound edge, then sand, prime, and repaint the area so new layers bond correctly and won’t lift.
Scrape or use a wire brush, feather edges, and sand smooth.
Clean dust, apply a compatible primer to seal and promote adhesion, then topcoat with matching paint in thin, even layers for durable results.
Extensive cracking across large areas: full removal and substrate repair
If cracking and flaking keep appearing over broad sections instead of isolated spots, you’ll need to remove all loose and compromised paint and repair the substrate before repainting.
Strip to sound material, inspect for rot, rust, or moisture damage, and replace or repair sheathing, drywall, or trim.
Restore structural integrity, allow complete drying, then prime and repaint with appropriate systems to prevent recurrence.
Special considerations for textured or decorative finishes
When working with textured or decorative finishes, you’ll need to match not just color but texture, sheen, and application technique to avoid obvious repairs; that means evaluating the existing pattern, testing small patches, and choosing compatible materials—think texture sprays, trowel compounds, or specialty rollers—so your repaired area blends seamlessly with the surrounding finish.
- Analyze pattern repeat
- Test adhesion first
- Match sheen precisely
- Use approved primers
- Feather edges carefully
Common Mistakes That Cause Cracking
You’ll often cause cracking by applying paint too thickly or in one heavy coat, or by painting in extreme temperature or humidity.
Skipping primer, using the wrong primer, or layering incompatible paint types also sets you up for failure.
And don’t ignore substrate issues like moisture, movement, or surface contamination—those problems will make even perfect application crack.
Applying paint too thickly or in one heavy coat
Several thin coats dry more flexibly than one thick layer, so applying paint too heavily often leads to surface tension that cracks as the underlying film continues to cure.
You should spread thinner, even coats and allow proper flash time between layers.
Thick applications trap solvents, skin over, and shrink unevenly, so sanding and multiple light coats prevent stress and yield a durable, crack-free finish.
Painting under extreme temperature or humidity
If paint’s applied in very hot, cold, or humid conditions, it can cure unevenly and crack as different layers dry at different rates.
You should check weather and don’t paint when temperatures or humidity are outside the product’s recommended range.
Work in shaded, ventilated areas, use slow-drying formulations if necessary, and allow extra drying time between coats to prevent surface tension and adhesion failures.
Skipping primer or using wrong primer
When you skip primer or pick the wrong one, the paint can’t bond properly to the surface and is far more likely to crack as it cures.
You should choose a primer matched to substrate and topcoat—stain-blocking for tannin-rich wood, adhesion primer for slick surfaces.
Proper priming seals porous materials, evens absorption, and creates a stable base so drying stresses don’t cause premature cracking.
Layering incompatible paint types
Because oil and water-based paints dry and flex differently, stacking them without proper preparation often leads to cracking as the topcoat moves independently from the layer beneath.
You should never paint water-based over oil without scuffing, deglossing, and using a compatible bonding primer.
Test a small area first, follow manufacturer guidance, and allow full cure between coats to guarantee adhesion and reduce stress-related fissures.
Ignoring substrate issues (moisture, movement, contamination)
Although paint can look fine on the surface, underlying substrate problems like moisture, structural movement, or contamination will cause it to crack as it cures and ages.
You need to assess and fix substrate issues before painting to guarantee adhesion and flexibility.
Check for:
- moisture intrusion
- loose plaster or flaking
- mold or salts
- structural movement
- grease or dirt contamination
Comparison Best Paints and Additives to Reduce Cracking
When you’re choosing paint to prevent cracking, weigh latex and oil-based options for flexibility, durability, and drying behavior.
Consider additives like flexibilizers, flow agents, and retarders to improve film elasticity and curing time.
Don’t forget primers—pick one formulated for strong adhesion and some flexibility to keep topcoats from pulling away.
Latex vs. oil-based: pros and cons for crack resistance
If you’re deciding between latex and oil-based paints to minimize cracking, weigh their fundamental differences in flexibility, adhesion, and curing:
Latex (water-based) stays more flexible, tolerates substrate movement, and resists hairline cracking; it dries faster and cleans easily.
Oil-based forms a harder film with superior adhesion on some surfaces but can become brittle and crack over time, especially with temperature or movement.
Additives and modifiers (flexibilizers, flow agents, retarders)
Additives and modifiers play a key role in preventing paint from cracking by tailoring drying, flow, and flexibility to the job at hand.
You can add flexibilizers to increase film elasticity for substrates that move. Flow agents improve leveling to avoid thin spots that crack. Retarders slow surface skinning, promoting uniform cure.
Choose compatible, manufacturer-recommended dosages to avoid softness or adhesion loss.
Primer types and their roles in adhesion and flexibility
You’ve learned how flexibilizers, flow agents, and retarders tweak drying and film properties; now look at primers, which set the foundation for adhesion and flexibility. Choose solvent-based for tough surfaces, water-based for pliable films, and specialty adhesion primers for plastics or metals to prevent cracking by matching substrate and topcoat elasticity.
| Primer type | Best use |
|---|---|
| Solvent | Tough substrates |
| Water | Flexible films |
Maintenance Tips to Prevent Future Cracking
Keep an eye on painted surfaces and make timely touch-ups to stop small chips or hairline cracks from spreading.
You’ll also want to control indoor humidity and temperature to prevent stress on interior finishes.
For exteriors, seal and caulk joints regularly so water and movement don’t lead to cracking.
Routine inspection and timely touch-ups
Although a small hairline crack might seem harmless at first, regular inspections and quick touch-ups stop minor flaws from becoming major repairs.
Walk perimeter areas quarterly, check corners, trim, and joints for hairlines or peeling. Clean and sand tiny defects, apply matching primer and paint, and monitor patched spots.
Prompt action keeps cracks from widening and extends the life of your finish.
Controlling indoor climate for interior paints
If you control temperature and humidity inside your home, you’ll prevent most interior paint from shrinking, swelling, or losing adhesion as it cures and ages.
Keep indoor temps steady (65–75°F) and humidity 40–50%. Use humidifiers or dehumidifiers, run exhaust fans when cooking or showering, and ventilate during painting and drying.
Monitor conditions with a hygrometer to catch swings early.
Exterior maintenance: sealing and caulking joints
When you seal and caulk exterior joints properly, you stop water and movement from stressing paint and causing cracks down the line.
You should inspect joints yearly, remove failed caulk, use compatible sealants, apply backer rod where gaps are deep, and tool joints for adhesion.
Properly sealed seams keep substrates stable and paint intact, reducing future cracking and costly repairs.
- Inspect yearly
- Remove old caulk
- Use compatible sealant
- Insert backer rod
- Tool for adhesion
FAQ
You probably have a few quick questions after reading about cracking, like why a fresh wall split overnight or whether you can paint over cracks.
You’ll also want to know how long to wait between coats, whether thinning paint with water helps for thicker applications, and if there are paints made for flexible surfaces.
Let’s answer these common FAQs so you can fix and prevent future problems.
Why did my freshly painted wall crack overnight?
Why did your freshly painted wall crack overnight?
You likely applied paint too thickly, painted over damp surfaces, or didn’t allow proper curing between coats.
Rapid temperature or humidity changes can cause the film to shrink and split.
Poor surface prep or incompatible primer/paint combinations also stress the drying film.
Fixing root causes prevents recurrence; address moisture, thinning, and proper application next.
Can I paint over cracked paint or must I remove it first?
Can you paint over cracked paint, or do you need to remove it first? You should remove loose, flaking paint before repainting; painting over unstable layers won’t adhere and will fail again.
Scrape, sand, and prime bare spots to create a sound surface.
For hairline cracks, clean and fill with flexible filler, sand smooth, prime, then repaint for a durable finish.
How long should I wait between coats to avoid cracking?
Although drying times vary by paint type and conditions, wait long enough that the first coat is fully dry to the touch and no longer tacky before applying the next one.
Check manufacturer’s recommended recoat interval—typically 2–24 hours for latex, longer for oil-based.
Cold, humid or thick coats extend cure time. If unsure, wait extra hours to prevent trapping solvents that cause cracking.
Will adding water to paint reduce cracking for thicker coats?
You’ve already learned that proper drying time prevents solvent entrapment between coats; now consider whether thinning a thick coat with water will stop cracking.
Thinning water-based paint can help by promoting faster, more even film formation and reducing thickness-related stress.
Use manufacturer-recommended ratios—overthinning weakens film and reduces adhesion, increasing risk of sagging or long-term failure.
Test on scrap first.
Are there paints designed specifically for flexible surfaces?
Looking for paint that bends with your project? Yes — flexible paints and elastomeric coatings exist for surfaces that stretch or move.
You’ll find flexible acrylics, polyurethane, and silicone-based formulations that resist cracking on vinyl, leather, rubber, or exterior siding.
Choose products labeled “flexible,” check elongation and adhesion specs, prep properly, and apply recommended film thickness for best durability and crack resistance.