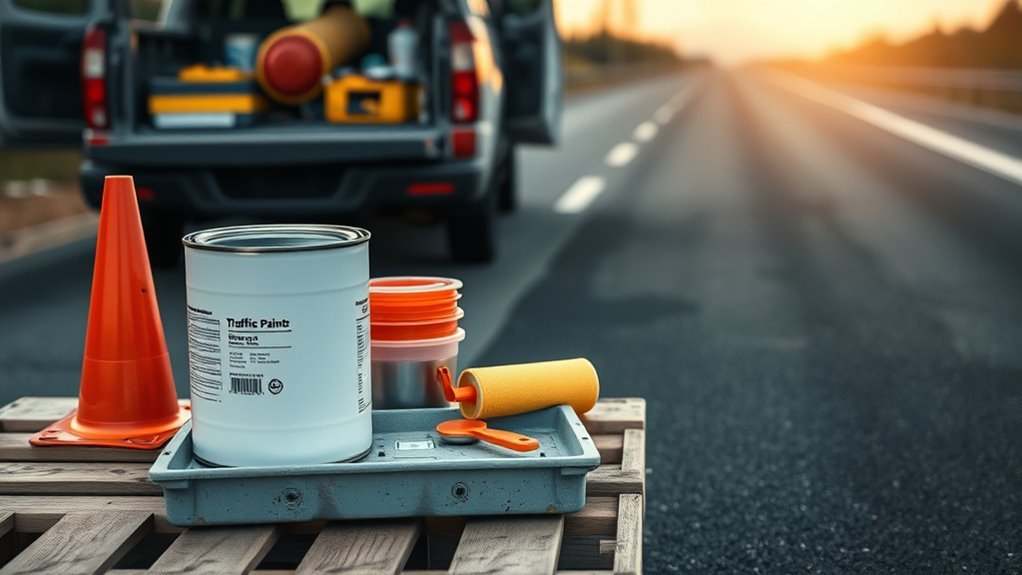
How Long Does Traffic Paint Take to Dry
You can expect most traffic paint to be touch-dry in about 15–60 minutes and ready for light traffic in 1–3 hours, though full cure for heavy traffic and peak durability often takes 24–72 hours depending on whether it’s waterborne, solvent-based, or thermoplastic and on temperature, humidity, surface porosity, and coat thickness. Cold, damp, or shaded conditions slow cure dramatically. Keep this in mind—and if you want specifics for each formulation and troubleshooting tips, more detail follows.
Who This Guide Is For and What You’ll Learn
If you’re painting or specifying road, parking-lot, or sports-surface markings, this guide is for you: it explains what affects traffic-paint drying times, how to speed curing, and which products suit different conditions so you can plan work and reopen areas safely.
You’ll get practical advice whether you’re a contractor, facilities manager, or involved in urban planning decisions that demand durable, visible markings.
Practical guidance for contractors, facilities managers, and planners seeking durable, highly visible roadway and lot markings
Learn how substrate, temperature, humidity, traffic type, and paint formulation interact, plus tips on color blending for visibility and longevity.
You’ll leave ready to choose materials, schedule crews, and minimize downtime with confidence.
Quick Answer: Traffic Paint Drying Times
Most traffic paints dry anywhere from a few minutes to several hours depending on the type. You’ll usually see water-based paints set faster than oil-based ones.
Weather, film thickness, and surface prep all affect drying, so you’ll want to check conditions before you start.
If you need faster results, choose quick-curing formulations, apply thinner coats, and work in warm, low-humidity conditions.
Drying Time Ranges
When you’re planning a striping job, know that traffic paint’s drying times typically span from about 15 minutes to 24 hours depending on type and conditions.
You’ll see quick-setting waterborne formulas dry to touch in 15–30 minutes and cure over hours, while solvent or epoxy variants can take several hours to a full day.
Historical trends show formulations have sped up, yet thicker coats and reflective beads extend time.
Color variations matter too: darker pigments absorb heat and may dry faster in sun, while whites often need more layers and longer handling times before reopening to traffic.
Factors That Affect
You’ve seen the broad drying ranges, but several variables actually determine where a job will fall on that 15-minute-to-24-hour spectrum.
You’ll consider temperature and humidity first: warmer, drier conditions speed evaporation and curing, while cold or damp air slows it.
Surface porosity and cleanliness matter—rough or oily pavement slows adhesion and drying.
Application thickness and coating type change cure times; some formulations and paint branding dry faster.
Wind helps solvent loss but can carry dust.
Finally, anticipated traffic flow dictates scheduling: heavier or immediate traffic needs quicker-drying products or longer protection before opening lanes.
Quick Curing Tips
Want paint to dry fast without risking adhesion or longevity? You can accelerate curing safely by controlling conditions and technique. Focus on surface prep, timing, and product choice to preserve color blending and reflective durability. Try these quick tips:
- Choose fast-curing formulations rated for traffic and climate.
- Prep and clean surfaces; remove oils, dust, and loose material.
- Apply thin, even coats; avoid heavy buildup that traps solvent.
- Work during warm, low-humidity windows and shield from wind or rain.
- Allow manufacturer-recommended flash and cure times between coats and before reopening.
Follow instructions and test small areas to ensure proper performance.
Traffic Paint Types: Waterborne, Solvent, Thermoplastic
You’ll see different drying and setting behaviors depending on the paint type: waterborne formulas typically dry to the touch fastest but need longer to fully cure.
Solvent-based paints take longer to cure and resist moisture during that period.
Thermoplastic isn’t really “paint” — it’s melted on and sets as it cools, so its usable time is tied to cooling rather than evaporation.
Waterborne Paint Dry Times
When temperatures are moderate and humidity’s low, waterborne traffic paint dries faster than most people expect. You’ll see surface dry times from 15 minutes to an hour, depending on temperature, humidity, and film thickness.
You should plan work to minimize disruption to traffic flow and consider paint pricing when budgeting for faster-drying formulations or additives.
- Surface dry: 15–60 minutes
- Tack-free: 1–2 hours
- Recoat window: 30 minutes–2 hours
- Light traffic return: 2–4 hours
- Full cure: 24–48 hours
Monitor conditions; cooler, humid weather slows all stages noticeably.
Solvent-Based Paint Cure
If waterborne paints dry quickly under warm, dry conditions, solvent-based traffic paints behave differently because they cure by solvent evaporation and chemical crosslinking. You’ll notice tack-free times vary with solvent type, temperature, and ventilation; full cure can take hours to days. You should plan traffic reopening accordingly and avoid traffic too soon.
Solvent systems offer strong adhesion and durability, and they allow controlled color blending on-site, but they release volatile organic compounds. Consider application methods, drying aids, and protective measures to manage environmental impact while achieving the needed performance and longevity for road markings.
Thermoplastic Melt And Set
Because thermoplastic markings are applied hot and set quickly as they cool, they behave very differently from waterborne or solvent paints. You’ll notice rapid bonding as the Thermoplastic melt flows, then solidifies once it reaches the proper Set temperature. That means traffic reopens sooner, but prep and equipment matter.
- Applied at high temperature for flow
- Cools to Set temperature to harden
- Rapid return-to-service compared to liquids
- Durable, resistant to scuffing and fuel
- Requires heated applicator and skilled crew
You’ll plan around cooling time, ambient temperature, and substrate to ensure consistent adhesion and longevity.
Dry-to-Touch vs Cure-to-Service: What They Mean
Although they sound similar, dry-to-touch and cure-to-service describe different milestones you’ll need to take into account when planning traffic control, maintenance, or reopening a surface.
Dry-to-touch means the surface no longer feels tacky and you can resume limited activity without disturbing paint color or minor markings; it helps you restore partial traffic flow.
Cure-to-service is when the coating reaches full mechanical strength and chemical resistance, so it withstands heavy vehicles, abrasion, and cleaning. You’ll schedule lanes, equipment, and inspections based on cure times, not just initial dryness, to avoid damage and guarantee long-term performance.
Typical Drying Times by Formulation (Summary Table)
Now you’ll see a compact summary of typical dry times by formulation so you can compare options quickly.
Water-based products usually dry to the touch in 15–60 minutes but need several hours to a day to cure.
Solvent-based paints often set faster (10–30 minutes touch) with full service in 12–24 hours.
Thermoplastic requires heat and cools to service in minutes but needs specialized application.
Water-Based Paint Times
When you’re choosing water-based traffic paints, knowing typical drying times by formulation helps you plan striping windows and traffic reopening. You’ll find formulations vary: quick-set for fast reopening, standard emulsions for general use, and high-solids for durability.
Consider color blending needs and reflective durability when selecting a product; additives and film thickness shift cure times.
- Quick-set emulsion: tack-free 10–30 minutes
- Standard waterborne: tack-free 30–60 minutes
- High-solids: tack-free 60–120 minutes
Thin film application: faster drying.
Cold or humid conditions: slower drying.
Solvent-Based Paint Times
Shifting from water-based options, solvent-based traffic paints behave differently because their carriers evaporate faster and they cure through coalescence of resins rather than water evaporation.
You’ll find touch-dry times often range from 10–30 minutes, with recoat or light-traffic readiness in 1–3 hours and full cure in 24–48 hours depending on formulation and temperature.
Fast solvents speed initial drying but humidity and heavy pigments slow coalescence.
Refer to a summary table to compare alkyds, acrylic solvents, and chlorinated rubbers by minutes/hours.
Choose formulations based on expected traffic symbols, desired paint colors, and site conditions for reliable results.
Thermoplastic Paint Times
Curious how thermoplastic traffic paints set up so fast? You’ll see how formulations, temperature, and application speed change cure times. Note historical paint trends that moved from slow‑drying oils to rapid molten thermoplastics, improving durability and traffic return times while reducing maintenance windows.
- Molten thermoplastic: sets in minutes at 200–260°C application
- Preformed tapes: immediate adhesion, usable once cooled
- Cold-applied thermoplastics: 30–60 minutes under optimal heat
- Additives & fillers: modify cooling and setting rates
- Environmental impact: newer formulations lower VOCs and leaching risks
Check local specs for exact cure windows.
Waterborne Paint: Dry and Traffic Windows
Although waterborne traffic paints dry faster than older solvent-based formulas, their drying and traffic windows still depend on temperature, humidity, and film thickness.
You’ll notice historical trends toward thinner films and faster-curing resins, motivated by regulatory shifts and environmental impacts that favor lower VOCs.
In typical conditions (50–75°F, moderate humidity), touch-dry can occur in 15–30 minutes, with light traffic allowed after 1–2 hours and full vehicle loads after 24 hours.
Cooler or wetter conditions extend those windows, while heavier application layers do too.
Always follow manufacturer guidelines and test a small area before reopening lanes.
Solvent-Based Paint: Dry and Traffic Windows
Because solvent-based traffic paints rely on evaporation of organic solvents and sometimes chemical curing, their drying and traffic windows differ from waterborne formulas and react more strongly to temperature, humidity, and film thickness. You’ll notice faster surface dry in warm, dry conditions but full cure can take hours to days. Plan traffic reopenings conservatively and monitor film hardness.
Solvent-based traffic paints dry faster on warm, dry days but fully cure over hours to days—plan reopenings conservatively.
Consider color blending effects when layering wet-on-wet and allow adequate flash time. Also weigh Environmental impact from solvent emissions and choose low-VOC options where possible.
- Surface dry: minutes to an hour
- Touch cure: 1–6 hours
- Full cure: up to 72 hours
- Layering: wait times vary
- Low-VOC: mitigates impact
Thermoplastic Markings: Cooling and Set Times
Shifting from solvent-based paints to thermoplastic markings brings a different set of timing concerns: instead of solvent evaporation and chemical cure, thermoplastic relies on melting, application, and rapid cooling to set.
You’ll watch molten beads fuse to pavement; cooling time depends on bead thickness and ambient conditions, but lines usually harden to traffic-ready strength within minutes to an hour.
You can control set times by adjusting layer thickness and using additives that improve color blending or reflectivity.
Thermoplastic minimizes volatile organic emissions, so its environmental impact is lower than many solvent paints, though proper handling still matters for sustainability.
How Temperature Affects Traffic Paint Drying
You’ll notice temperature has a big impact on how quickly traffic paint dries, with warmer conditions speeding evaporation and curing.
In cold weather the solvents take longer to evaporate and the paint can stay tacky, increasing cure times and the risk of scuffing.
We’ll look at specific temperature thresholds and practical steps to manage cold-weather challenges.
Temperature And Drying Speed
When temperatures rise, traffic paint dries faster because heat speeds the evaporation of solvents and helps thermoplastic binders set more quickly. You’ll notice quicker tack-free times and faster return-to-traffic windows, but color blending can shift if layers cure unevenly.
Consider surface texture—rough surfaces expose more area and accelerate drying, smooth surfaces slow it.
- Higher air temperature shortens solvent evaporation time
- Increased surface heat speeds binder fusion
- Humidity still modifies the rate
- Thin films dry much faster than thick applications
- Monitor for visual consistency and adhesion during warm conditions
Cold Weather Challenges
If temperatures drop below the paint’s ideal range, drying slows dramatically and you’ll face longer tack-free times, delayed return-to-traffic windows, and a higher risk of poor adhesion or incomplete cure.
You’ll need to adjust schedules, monitor ambient and surface temps, and consider additives or heaters to compensate. Cold air traps solvents, so films stay soft longer and tack attracts dirt, affecting striping quality and traffic flow.
You may also see higher labor costs and altered paint pricing to cover slower crews or specialty materials. Plan contingencies, test small patches, and avoid overnight applications when frost or rapid cooling is likely.
How Humidity Changes Drying Rates and Why
Because moisture in the air directly affects evaporation, higher humidity slows paint drying while lower humidity speeds it up. You’ll notice humidity fluctuations change surface tack time, curing depth, and adhesion, and they influence long-term paint weathering. Plan applications for steady, moderate humidity to reduce defects.
Humidity alters drying, tack, and adhesion—aim for steady, moderate humidity to ensure consistent, durable pavement markings.
- High humidity: slower evaporation, longer tack time
- Low humidity: faster drying, risk of skinning or cracking
- Sudden shifts: inconsistent cure across markings
- Dew risk: overnight moisture can ruin fresh lines
- Monitoring: use hygrometers to time applications
Control humidity for consistent, durable pavement markings and predictable project timelines.
Why Wind and Airflow Matter for Pavement Paint
Humidity affects how quickly solvents leave paint, but airflow determines how that evaporated moisture and solvent actually gets carried away from the line. You should watch wind influence because steady breezes speed drying by removing vapors, while gusts can distort wet edges or blow debris onto paint.
Consider airflow dynamics at the surface: laminar flow promotes uniform evaporation, turbulent flow creates uneven drying and may cause thin spots. Position crews relative to prevailing winds to balance faster cure with clean lines.
If wind is too light, solvent lingers; too strong, application quality suffers—plan timing and equipment to match conditions.
Surface Effects: Asphalt vs Concrete vs Sealed Surfaces
When you apply traffic paint, the surface type changes how quickly it soaks in and bonds. Porous asphalt can pull paint into pores and speed surface drying.
Curing concrete may still emit moisture that slows adhesion. Sealed surfaces repel paint and demand primers or longer cure times for a reliable bond.
Asphalt Porosity Effects
If you’re painting lines on asphalt, know that its open, porous texture soaks up solvents and binder faster than concrete or sealed surfaces, which speeds initial drying but can leave paint appearing matte and thinner.
You’ll notice traffic noise and pavement texture affect application and perceived dryness. Manage porosity to improve durability.
- Preclean to remove dust and oils
- Use higher-solid formulations for better coverage
- Apply thinner coats to promote cure
- Consider additives to improve film build
- Schedule traffic reopening based on tack tests and ambient conditions
Monitor absorption; porous asphalt demands different timing than sealed surfaces.
Concrete Curing Impact
Because concrete keeps curing long after it looks dry, you need to treat its surface differently than asphalt or a sealed pavement when planning line painting. You’ll wait longer before restriping to avoid trapping moisture, and you’ll pick paints mindful of alkalinity and surface texture so traffic flow isn’t disrupted. Choose pigments for paint color that resist fading on rough concrete. Test small areas to confirm adhesion and drying time under real conditions. Use this quick comparison to guide timing and strategy:
| Aspect | Concrete |
|---|---|
| Cure time | Extended |
| Surface pH | High |
| Texture | Rough |
| Drying wait | Longer |
Sealed Surface Adhesion
Although sealed pavements often look smooth, their nonporous finish can keep paint from bonding well, so you’ll need to adjust preparation and product choice. You should remove contaminants, abrade the surface, and pick coatings formulated for low porosity to preserve paint aesthetics and durability under Traffic flow.
- Clean with degreaser and pressure wash
- Lightly sand or shot-blast for mechanical keying
- Use a primer designed for sealed surfaces
- Choose fast-curing, high-adhesion traffic paint
- Allow extended cure before resuming heavy Traffic flow
These steps cut peeling risk and keep markings crisp and long-lasting.
Old Pavement vs New: Adhesion and Dry Time Impacts
When you’re comparing old pavement to new, surface condition and porosity mostly determine how well traffic paint sticks and how fast it dries. You’ll find old pavement often has cracks, dust, and oxidized binder that reduce adhesion and lengthen cure times.
While new pavement’s smooth, oily surface can repel paint until properly cleaned or abraded. You should consider innovative marking techniques like tack-coating or microsurfacing to improve bond on both types.
Also weigh environmental impact of prep and additives; waterborne paints and low-VOC primers often help.
Test small areas so you’re confident about adhesion and realistic drying expectations.
Film Thickness and Application Rate: Drying Tradeoffs
If you apply a thicker film or push paint out faster to cover more ground, drying times will rise and solvent or water must escape through a larger mass, which can trap moisture and slow cure. You’ll balance speed against performance: thicker films boost Color vibrancy and wear life but increase tack time and risk pooling.
Rapid application can cause uneven thickness and longer overall cure. Consider these tradeoffs when planning crews and equipment:
- Thicker film: better visibility, slower dry
- Faster application: more coverage, variable thickness
- Multiple thin coats: quicker cure overall
- Weather: affects solvent evaporation
- Environmental impact: solvent emissions vs reapplication
Primers and Tack Coats: Speed and Adhesion Effects
When you apply a primer at the right time, it speeds surface absorption and helps the topcoat set faster. You’ll want to wait for the primer to tack up but not fully cure to maximize bonding without trapping solvents.
Similarly, a tack coat improves adhesion between old and new layers, so timing and proper coverage are critical for durable paint.
Primer Application Timing
Because primers and tack coats set the stage for paint adhesion, you need to time their application carefully to get fast curing and durable bonds. You’ll plan primer timing around surface temperature, humidity, and traffic regulations to avoid rework and fines. You’ll also factor paint pricing when scheduling to minimize downtime.
- Apply primer when substrate is clean and dry.
- Wait manufacturer-specified flash time before painting.
- Avoid primer application in extreme humidity or cold.
- Coordinate with traffic control to meet regulations and reopen quickly.
- Budget for faster-curing primers if paint pricing allows to speed project completion.
Tack Coat Adhesion
Primer timing sets the stage, but tack coat adhesion determines whether your pavement paint will actually stick and survive traffic. You’ll want a clean, slightly tacky primer so the tack coat bonds to both substrate and fresh paint, preserving paint colors and edge definition.
Apply tack evenly; missed spots let paint lift under heavy traffic flow. Don’t overapply—excess can slow drying and cause tracking. Test adhesion with a small stripe before full application, and schedule painting when temperatures and humidity favor cure.
Proper tack technique reduces rework, extends marking life, and keeps lines crisp under constant vehicle wear.
Pigments, Binders, and Additives: Drying Impacts
Although pigments mostly determine color and opacity, they also influence how quickly traffic paint dries by affecting film formation and heat absorption. You’ll notice color blending alters pigment load, changing thermal gain and surface cure. Environmental noise like dust or exhaust can interfere with thin films.
Choose binders for desired open time and hardness—acrylics dry faster than alkyds. Additives modify flow, coalescence, and evaporation. Consider how each component interacts so you can predict drying under real conditions.
- Pigment concentration affects film thickness
- Binder type controls cure rate
- Additives speed or retard solvent loss
- UV stabilizers impact surface set
- Humidity-sensitive retarders raise open time
Glass Beads & Reflectives: When They Change Curing
When you embed glass beads or reflective elements into traffic paint, they change more than visibility—they alter how the coating dries by affecting film thickness, solvent evaporation pathways, and heat transfer at the surface.
You’ll notice beads increase localized thickness, slowing cure where clusters form, while isolated reflectives create micro‑venting paths that change solvent escape. Adjusting mix ratio and placement preserves color contrast and prevents mottling.
Use proper application tools—squeegees, hopper guns, bead dispensers—to control distribution and avoid excess burial or surfacing.
Inspect wet film thickness and allow longer set times in bead‑dense zones to ensure full coalescence and durable adhesion.
Solar Radiation and Ambient Light Effects on Set Time
When you’re timing traffic paint, sunlight intensity matters because brighter sun speeds surface drying and can warm the film.
UV-driven curing can trigger coatings that rely on photoinitiators, so exposure to direct sunlight may accelerate chemical set.
Also remember that daylight temperature interacts with radiation—higher temps plus strong sun shorten set time more than either factor alone.
Sunlight Intensity Effects
Because sunlight supplies both heat and UV energy, it speeds the chemical reactions that cure traffic paint, so stronger solar radiation shortens set time noticeably. You’ll notice drying accelerates on bright days, letting you reopen lanes sooner and restore traffic flow to maintain road safety.
Consider these practical effects:
- Faster tack-free time in direct sun
- Longer curing when clouds reduce intensity
- Surface temperature differences alter set rates
- Glare or reflections can mislead visual inspections
- Scheduling work for peak sunlight improves efficiency
Plan projects around forecasted solar intensity, monitor surface temps, and adjust coatings or timing to match conditions.
UV-Driven Curing
Although sunlight’s heat matters, UV photons play a distinct role in curing many traffic paints—initiating photochemical reactions in UV-sensitive binders and catalysts that let coatings harden faster under bright, clear skies.
You’ll notice UV-driven curing shortens tack time and reduces dust pickup, so you can reopen lanes sooner and restore traffic flow with less delay. When planning striping schedules, factor UV index and avoid overcast windows if rapid set is needed.
Also consider signage placement and temporary barriers so cured paint isn’t shadowed prematurely, which could slow the final cure. Always follow manufacturer UV-cure specifications for best results.
Daylight Temperature Interaction
If solar radiation warms the pavement, it speeds solvent evaporation and boosts molecular mobility in the binder, so you’ll see faster set times in direct sun than in shaded, cool conditions. You should plan applications around daylight and ambient temperature to balance curing speed and paint durability; high heat plus intense light can accelerate skin formation but risk solvent entrapment or premature wear under heavy traffic flow. Monitor conditions and adjust timing or formulation.
- Apply mid-morning for warming pavement
- Avoid peak heat with heavy vehicles
- Use UV-stable binders for longevity
- Allow longer cure in shade
- Measure surface temperature before starting
Seasonal Scheduling: Summer vs Winter Strategies
Planning your striping schedule around the seasons lets you minimize downtime and guarantee paint cures properly.
Plan striping by season to minimize downtime and ensure paint cures correctly.
In summer, you’ll favor early mornings or late afternoons when temperatures are high but dew’s low, so traffic safety and paint aesthetics stay intact. Use faster-drying formulas and schedule larger jobs to exploit long daylight.
In winter, work midday when pavement’s warmest, allow extended curing windows, and select cold-weather additives or thermoplastic options. You’ll limit lane closures and communicate timings to users.
Keep records of conditions and outcomes so your seasonal choices improve over time and reduce rework.
Simple On-Site Tests to Check Paint Dryness
After scheduling striping around seasonal conditions, you’ll want quick on-site checks to confirm paint has set before reopening lanes. You’ll assess surface tack, visual sheen, and how markings tolerate light foot traffic without smearing.
Consider paint pigmentation—darker pigments may hide wetness longer—so rely on tactile checks too. Also watch nearby traffic flow for dust or tire pickup risk.
- Light fingertip touch for tack
- Kleenex/blot test for transfer
- Fingernail scratch for adhesion
- Short walk/test tire roll at low speed
- Visual check under angled light for sheen and pigmentation uniformity
Tools and Sensors to Measure Paint Curing on Pavement
You can use infrared thermography to spot temperature differences that indicate curing progress across a pavement strip.
Pair that with surface moisture sensors to confirm the substrate and paint aren’t trapping water, and solvent vapor detectors to measure evaporation of volatile components.
Together these tools give you objective data to decide when lines are safe for traffic.
Infrared Thermography Use
When you need a fast, noncontact way to track how traffic paint cures on pavement, infrared thermography gives clear, real-time insight into surface temperature changes that correlate with solvent evaporation and film formation. You’ll use an IR camera to monitor cooling rates and hotspot patterns that indicate drying uniformity, helping optimize traffic safety and paint durability.
Benefits include portability, instant feedback, and minimal setup. Consider these practical uses:
- Spot uneven curing across a stripe
- Verify ambient influence on drying
- Time safe reopening to traffic
- Compare formulations under field conditions
- Document results for quality control and compliance
Surface Moisture Sensors
Although often overlooked, surface moisture sensors give you direct, on-site readings of residual moisture that can slow traffic paint curing; they measure film or substrate moisture quickly so you can decide if conditions will allow proper solvent evaporation and film formation. You’ll use compact probes or noncontact meters to check dew, recent rain, or substrate dampness before striping. That helps protect paint color integrity and prevents smearing when traffic flow resumes. Use sensors to time application windows, document conditions, and avoid rework.
| Sensor Type | Typical Use |
|---|---|
| Probe | Substrate moisture |
| Noncontact | Film surface |
| Data logger | Trend recording |
| Handheld | Quick checks |
Solvent Vapor Detectors
Because solvent vapors are the immediate byproduct of fresh traffic paint, using solvent vapor detectors lets you monitor curing in real time by measuring airborne volatile organic compounds above the film. You’ll get actionable data on evaporation rates, so you can judge when coating handles light traffic without guessing.
Detectors help correlate solvent loss with traffic color and paint sheen changes, informing recoat decisions and safety timelines.
- Portable PID or electrochemical sensors for spot checks
- Fixed detectors for continuous monitoring
- Data loggers to track evaporation curves
- Alarms for threshold exceedances
- Integration with weather sensors for context
Planning Timeline: Sample Schedule for a Lane-Marking Job
If you’re scheduling a lane-marking job, map out weather windows, traffic control, and curing times so each crew knows when to mobilize and when to clear the lane.
Start with a pre-job day: confirm paint type, traffic permits, and substrate prep.
Day one: layout and masking in low-traffic hours; allow ambient drying for recommended minutes.
Day two: apply base coats during ideal temperature, noting artistic techniques for durable edgework and color psychology when selecting high-visibility hues.
Include staged reopenings—short sections first—then full lane clearance after manufacturer cure times.
Build buffer days for delays and quick recoat windows.
Crew Checklist: Apply, Protect, Monitor, Reopen
When you start the marking phase, follow a tight checklist so crews apply paint correctly, protect freshly coated areas, monitor curing, and reopen lanes safely. You’ll guarantee compliance with traffic regulations and maintain paint aesthetics while minimizing downtime. Coordinate tasks, record temperatures, and use consistent application rates.
- Verify paint type, mix, and machine settings
- Establish protection barriers and signage
- Schedule periodic tack and drying checks
- Log cure times, ambient conditions, and deviations
- Reinspect lines before reopening to traffic
Keep clear roles, communicate status, and only reopen when tests confirm adequate drying and adherence to regulations and desired aesthetics.
Traffic Control Tactics to Protect Fresh Markings
When you need to protect fresh markings, start by planning temporary lane closures to keep traffic well away from the wet paint.
Use cones and barriers to create clear, visible buffers that prevent accidental wheel contact.
If closures aren’t practical, deploy trained flaggers to control flow and guide drivers safely around the work zone.
Temporary Lane Closures
Need a quick, reliable way to keep fresh traffic paint intact? You can use temporary lane closures to protect markings until they cure. Adjust closures based on traffic volume and consider how paint color visibility affects drivers. Plan short durations, clear signage, and quick deployment to minimize disruption.
- Close one lane at a time during off-peak hours
- Use flaggers or temporary signals to direct traffic
- Schedule closures to match rapid curing paints and weather
- Mark detours clearly so drivers anticipate lane changes
- Reopen lanes promptly once surface dry and paint color is stable
These tactics cut contact and preserve stripe quality.
Cones And Barriers
A few well-placed cones and barriers can keep fresh traffic paint protected while it cures, letting you control vehicle and pedestrian flow without heavy closures. You’ll set cones to create clear buffer zones, guiding traffic flow around wet markings and reducing accidental contact.
Use sturdier barriers where pedestrians congregate or vehicles might veer. Space devices based on vehicle speed and sightlines; higher speeds need longer tapers and more advance warning.
Maintain visibility with reflective materials and regular inspections. Remove equipment only after paint meets cure time and testing.
This approach minimizes disruption while protecting markings and maintaining safety.
Traffic Flagging Operations
Because flagging crews directly control vehicle flow near freshly painted pavement, you’ll rely on clear signals and strict positioning to shield wet markings without causing backups. You’ll coordinate to maintain Traffic flow while preserving signage visibility and worker safety.
Use short holds, alternating passes, and advance warning to prevent drivers from drifting over stripes. Communicate changes via radio and hand signals so crews adjust spacing fast.
- Position flaggers upstream to stop traffic smoothly
- Use high-visibility apparel and clear signs
- Schedule short closures during low volumes
- Rotate flaggers to maintain alertness
- Inspect painted lanes before reopening
How to Safely Speed Drying: Heat, Airflow, Formulation Tips
When you need traffic paint to dry faster without compromising durability, focus on controlled heat, directed airflow, and choosing the right formulation.
When faster traffic paint drying is needed, use gentle heat, directed airflow, and the right fast-dry formulation.
You can use low-intensity, evenly distributed heaters to gently raise surface temperature; avoid open flames.
Position fans to create steady, cross-ventilation that removes solvent vapors and speeds cure.
Pick fast-dry formulations rated for road use and compatible with color selection needs, since pigments affect drying time.
Always verify products meet environmental regulations and VOC limits in your area.
Test a small patch first, monitor adhesion, and follow manufacturer instructions to balance speed with long-term performance.
When Speeding Drying Backfires: Risks to Durability
You can speed drying with heat, airflow, and fast formulations, but pushing those methods too far will weaken the pavement marking. You risk surface brittleness, poor adhesion, and uneven curing that shortens lifespan.
Watch for softer binders and thinner films that invite mechanical wear and color fading. Maintain proper application rates and regular equipment maintenance to avoid compounding damage.
- Reduced adhesion to pavement
- Brittle films that crack under traffic
- Uneven gloss and pigment loss (color fading)
- Hidden solvent pockets causing later delamination
- Increased reapplication frequency and cost
Balance speed with durability to protect markings.
Common Mistakes That Cause Smudges or Early Wear
If you rush application, skip surface prep, or ignore weather windows, you’ll see smudges and premature wear far sooner than expected. You’ll also invite problems by applying over wet or oily patches, using wrong rollers, or re-coating too soon.
Traffic noise and vibrations can shift fresh paint, so keep lanes closed until films set. Vehicle emissions deposit grime that reduces adhesion; clean surfaces thoroughly.
Thin coats might dry fast but flake under tires, while thick ones can sag and peel. Follow manufacturer specs, monitor temperature and humidity, and use proper equipment to avoid costly touch-ups and shortened lifespan.
Estimating Drying for Short-Term vs Long-Term Markings
Although short-term markings aim for rapid return-to-service and long-term stripes prioritize durability, estimating their drying times relies on different priorities and testing methods. You’ll consider formulation, thickness, and curing vs surface dry.
Environmental impact and Cost analysis shape your choices: quick-dry formulations may cost more but reduce downtime; durable thermoplastic needs longer cure times.
- Measure surface dry vs full cure
- Account for temperature, humidity, wind
- Test thickness and bead embedment
- Include traffic reopening protocols
- Balance lifecycle cost vs immediate expense
Use controlled field tests to validate lab estimates before reuse.
Special Cases: Intersections, Crosswalks, and Ramps
When planning paint for intersections, crosswalks, and ramps, account for complex traffic patterns and heavier wear so you can choose formulations and reopening times that hold up where they’re most stressed.
Plan intersection, crosswalk, and ramp paint with traffic patterns and wear in mind for durable, properly timed reopenings
You’ll prioritize fast-set, high-build paints in high-traffic-flow zones and schedule work during low-demand windows.
Consider ramp angles, drainage, and urban landscaping that can channel runoff or shade surfaces, affecting drying.
Use thermoplastic or epoxy in stop bars and crosswalks for durability; temporary paints might suffice on low-priority ramps.
Always test a small area to confirm cure times under current conditions before fully reopening to vehicles and pedestrians.
Regulatory Limits That Affect Paint Choice and Drying
After you pick materials for high-wear areas like intersections and ramps, you’ll also have to match them to local and federal regulations that limit VOC content, reflectivity, slip resistance, and line width.
You’ll check traffic regulations and paint regulations to guarantee compliance, which affects available formulations and drying expectations. Regulations can require quicker-curing solvents or waterborne alternatives, higher glass bead content for reflectivity, and textured additives for skid resistance.
Consider these constraints when selecting products:
- VOC limits that restrict solvent-based fast-dry paints
- Reflectivity standards impacting bead and binder choice
- Slip-resistance requirements
- Maximum line widths
- Certification and labeling needed for approval
Repaint Timing: Maintenance Intervals and Recoats
Because traffic markings wear unevenly, you’ll set repaint intervals based on observed wear, traffic volume, and line function rather than a fixed calendar schedule.
Inspect lanes, crosswalks, and stop bars routinely, noting fading, loss of reflectivity, and paint pickup. Prioritize high-volume corridors, intersections with traffic signal control, and areas near road signage where legibility is critical.
Plan recoats when retroreflectivity or color contrast drops below standards, or when surface contamination prevents adhesion. Use quick-curing formulas for rapid reopenings and schedule full repaints during low-traffic windows.
Track outcomes to refine intervals and minimize disruption while maintaining safety.
Documenting Drying Conditions for QC and Claims
If you need to support quality control or resolve disputes, document drying conditions thoroughly and consistently. You should record ambient temperature, humidity, substrate temp, wind, and curing time so findings align with traffic regulations and paint formulations.
Note contractor, batch numbers, application method, and timestamps. Use photos, timestamps, and calibrated instruments to prove conditions for claims.
- Date and exact start/end times
- Ambient and substrate temperatures
- Relative humidity and wind speed
- Paint batch, sheen, and formulation notes
- Photos, observer name, and instrument IDs
Keep logs concise, legible, and stored securely to support QC and any claims.
Vendor Selection: Choose Products With Realistic Dry Times
When choosing a vendor, prioritize products whose advertised dry times match real-world conditions so you won’t be surprised on project day. You should request field data and references showing dry times under typical surface, temperature, and humidity ranges.
Ask how formulas perform under traffic signal staging and whether accelerated curing is realistic. Confirm consistency across paint colors, since pigments can alter drying.
Verify warranties and batch traceability, and require samples applied in situ before purchase. Favor vendors who provide clear application guidelines, safety data, and responsive technical support so you can plan closures and inspections without unexpected delays.
Troubleshooting: Tacky Paint, Delamination, and Fixes
Even with diligent vendor vetting, you’ll still encounter sticky paint, edge lift, or full delamination on-site, and knowing how to diagnose causes quickly saves time and money. You’ll troubleshoot by isolating variables: substrate prep, paint age, application thickness, traffic pattern, and curing conditions.
Use weather forecasting to avoid reapplication before rain or extreme humidity. Inspect adhesion, perform tape pulls, and document failures for vendor claims.
Quick fixes may include feathering edges, scarifying loose film, or spot priming and re-coating.
- Check substrate cleanliness
- Verify paint batch and age
- Consult weather forecasting
- Simulate traffic pattern effects
- Execute controlled recoat
Frequently Asked Questions
Can Traffic Paint Drying Times Differ for Bicycle Lanes Vs Vehicle Lanes?
Yes — you’ll see differences because application thickness, traffic type, and curing needs vary; for bicycle safety and lane visibility you’ll often use faster-drying, high-contrast paints on bike lanes, while vehicle lanes may need thicker, durable coatings.
How Do Anti-Skid Aggregates Affect Initial Tack and Curing?
About 65% of skid-related incidents involve poor surface grip, so you’ll notice anti-skid aggregates increase initial tack, improving surface adhesion while slowing curing slightly; they boost aggregate bonding into the paint, enhancing long-term friction and durability.
Are There Environmental Reporting Requirements for Paint VOCS During Drying?
Yes — you’ll need to follow environmental regulations requiring reporting or limits on VOC emissions during drying; you should track product VOCs, exposure limits, and submit notifications or records to authorities when thresholds or local rules demand it.
How Soon Can Snowplows Operate After Markings Are Applied?
You can usually let snowplows operate after markings set for 1–24 hours; you’ll depend on paint formulation and drying acceleration additives to guarantee rapid cure, and you’ll verify adhesion and tack-free surface first.
Does Overnight Dew Reverse Paint Cure or Just Surface Tack?
Overnight dew usually re-wets only the surface tack, it won’t reverse the paint chemical curing process if the coating already bonded; you’ll still see some softening, but deep cure progression continues beneath the moisture.
Conclusion
You’ve got the facts: drying times vary by type, weather, and traffic—so don’t guess. Measure and document conditions, pick vendors with realistic specs, and schedule repaints during ideal windows to avoid tacky messes and liability. Like a metronome keeping rhythm, consistent QC keeps lines crisp and roads safe. Follow the timelines here, watch the paint, and you’ll save time, money, and headaches while keeping traffic moving.