Can You Use Latex Paint Over Shellac Primer
Yes — you can apply latex paint over fully cured, well‑prepared shellac primer in most indoor situations. You should confirm the shellac is dry, lightly sand or degloss it, clean off dust and oils, and test a small patch for adhesion and color match. Use thin, even coats and allow proper drying between layers to avoid lifting or lap marks. Follow product instructions and warranty notes, and keep going to learn practical prep and troubleshooting steps.
Can Latex Paint Be Used Over Shellac Primer?
Can you use latex paint over a shellac primer? You can, but you’ll want to verify compatibility and prep first.
Shellac bonds well and blocks stains, yet its high gloss can reduce latex adhesion unless lightly scuffed. Test a small area, then apply a thin latex topcoat to check finish and color matching before committing.
Consider ventilation and cleanup: shellac uses solvents that raise environmental impact compared with water-based primers, so minimize waste and follow disposal rules.
If adhesion or hue shifts appear, sand and reapply or choose a bonding primer formulated for both types to ensure durable, accurate results.
Quick Answer: When Latex Over Shellac Is Safe
If you’ve tested a small spot and confirmed the shellac’s sheen and adhesion are acceptable, latex over shellac is safe in many situations—especially on interior surfaces that won’t get heavy wear.
You can proceed when the shellac is fully cured, lightly sanded to dull shine, and cleaned of dust and oils.
Use compatible latex formulated for adhesion, match color carefully since shellac can alter hue, and consider a primer-coat if color matching’s tricky.
Apply thin, even coats using proper brush techniques to avoid lap marks.
Expect best results on walls, ceilings, and trim with minimal traffic.
Why Homeowners Use Shellac Primer
You’ll often pick shellac primer because it blocks tough stains—like water marks, smoke, and tannins—better than most primers.
It also dries very fast, so you can sand and topcoat the same day. Those two benefits make it a go-to when you need reliable results quickly.
Strong Stain Blocking
Wondering how to stop old water stains, nicotine, or tannin bleed-through from ruining your fresh paint? You’ll choose shellac primer because it seals stubborn discoloration so your latex topcoat stays clean. It’s the go-to when you’re tackling decorative finishes or doing historical restoration that demands faithful, stain-free results.
Shellac blocks odors and inks, too, preventing dyes from seeping through glossy or matte paints. You’ll apply a thin, even coat and let it bond before painting; that barrier keeps contaminants locked away.
For reliable, long-lasting coverage over problem surfaces, shellac primer delivers unmatched stain blocking.
Fast Drying Time
Because shellac primer dries so quickly, you can move from priming to painting in a single day and keep your project on schedule. That fast drying time means less dust adhesion and fewer interruptions, so you’ll finish rooms faster and reduce labor costs.
You should still ventilate well because shellac toxicity can be an issue during application; wear a mask and open windows. Once dry, latex paint adheres smoothly and provides latex durability over the sealed surface.
Quick turnaround helps you test colors and make corrections fast, letting you enjoy the finished space sooner without compromising long-term performance.
How Shellac Bonds: Adhesion Basics That Matter
When you apply shellac primer, its resin particles latch onto the surface and form a thin, fast-drying film that creates an excellent bonding layer for latex paint. You’ll notice shellac’s tacky microfilm bonds mechanically to porous substrates and chemically interacts with stains and tannins, sealing them so latex won’t bleed through.
Because shellac dries quickly, you don’t wait long to topcoat, yet you should be aware of environmental impacts: shellac is solvent-based and releases more VOCs than waterborne primers. Still, its adhesion strength and stain-blocking make it a reliable base when you need dependable bonding.
When Latex Will Fail Over Shellac: Red Flags
Watch for telltale signs that latex won’t stick to shellac: peeling, flaking, or noticeable lifting are clear poor-adhesion signals.
If the surface has oily residue, dust, or old wax, you’ll see patchy coverage and premature failure.
Also, excess moisture or a flexible substrate will cause cracking or separation even when the primer looked fine initially.
Poor Adhesion Signals
If you see bubbling, peeling edges, or paint that flakes off with light scraping, those are clear signs latex won’t hold to shellac primer. You’ll notice uneven color matching where underlying primer shows through, and a mismatched finish sheen that looks patchy. Check for these visual cues and tactile warnings so you don’t waste effort.
- Small blisters that spread when pressed
- Jagged edges lifting away like paper
- Smooth areas suddenly dull or powdery under touch
- Thin spots revealing primer or previous colors
If you encounter these, stop and address adhesion before repainting.
Surface Contamination Presence
Because contaminants sit between coatings, they’ll stop latex from bonding to shellac and cause visible and tactile failures fast. You’ll notice chalky dust, grease smears, or sanding residue that won’t let paint compatibility save the job.
If latex beads, lifts, or peels shortly after drying, surface contamination is the likely culprit. Clean thoroughly with a degreaser, rinse, and dry; scuff-sand glossy shellac lightly and remove all particles before recoating.
Test a small area to confirm adhesion. Don’t assume primer alone guarantees success—proper surface prep determines whether latex will bond or fail over shellac.
Moisture And Flexibility
When humid conditions or moisture intrusion persist, latex paint can’t flex with the substrate over rigid shellac, and you’ll see cracking, alligatoring, or delamination along stress points. You’ll notice how humidity effects worsen adhesion; trapped moisture lifts latex where shellac won’t breathe. Primer color may hide early blisters, so inspect texture, not just hue. If you ignore moisture sources, repairs won’t last.
- Paint flaking in seams after a rainstorm
- Tiny alligator cracks radiating from nail heads
- Soft, spongy spots where moisture pooled
- Edges peeling where primer color seems intact
Surfaces Commonly Primed With Shellac
Although shellac primer isn’t the go-to for every job, you’ll see it used on specific surfaces where its odor-blocking and fast-drying properties really pay off.
You’ll apply it on nicotine- or smoke-stained walls, water-stained ceilings, painted trim with stubborn stains, and plywood or particleboard that bleed tannins. It’s common on metal and glossy surfaces after scuffing, and on antique furniture needing stain sealing before repainting.
Watch texture patterns—shellac fills fine textures but will highlight heavy stipple if you don’t sand. Use it when color matching matters, since it prevents underlying stains from altering your topcoat’s hue.
Types of Latex (Interior, Trim, Water‑Based Enamel) and Compatibility
When you choose a latex finish over shellac primer, consider how interior latex, trim paints, and water‑based enamels react to the sealed surface.
Interior latex generally bonds well to shellac, but trim paints and higher‑gloss water‑based enamels may need light sanding or a bonding additive for the best adhesion and durability.
Check manufacturer recommendations and test a small area to confirm compatibility before finishing the whole project.
Interior Latex Compatibility
Curious which interior latexes will stick over shellac primer? You’ll find most modern interior latexes bond well to shellac-sealed surfaces if the primer cured fully. Consider formulation: acrylic latex offers good adhesion, water-based enamel gives a tougher finish, and specialty vinyl-compatible blends help with adhesion to PVC trim. Outdoor durability isn’t a factor indoors, but knowing it hints at tougher resins. Test a small area first.
- Smooth acrylic wall paint drying to a matte finish
- Satin water-based enamel resisting scuffs
- Vinyl-compatible latex for plastic trims
- High-build interior latex for minor imperfections
Trim Paint Considerations
Want trim that stands up to wear and still looks smooth? You’ll choose between interior latex, trim-specific latex, and water‑based enamel alternatives based on durability and sheen.
Interior latex works for low-traffic trim, while trim latex offers tougher binders and better abrasion resistance. Consider compatibility with your shellac primer: adhesion’s generally solid, but test first.
Color mixing affects final hue and opacity, so match samples under room light.
Use proper brush techniques—thin, even strokes, minimal backbrushing—to avoid lap marks and brush strokes.
Seal with appropriate topcoat if extra hardness or washability is needed.
Water‑Based Enamel Interaction
Although water‑based enamels look and handle like latex, they use different resins and higher‑solids formulations that give you the toughness and leveling of an enamel with easier cleanup. You can often apply them over shellac primer, but watch for adhesion issues and possible subtle chemical reactions with certain primers.
Choose interior latex for walls, trim formulations for edges, or water‑based enamel for durability while considering environmental impacts like lower VOCs. Test a small area, sand if needed, and follow manufacturer recommendations.
- glossy trim catching light
- satin walls resisting scuffs
- brushstrokes leveling smoothly
- cleaned roller and pail
Oil vs. Latex Over Shellac: Quick Comparison
When you’re choosing between oil and latex paint over a shellac primer, think about durability, drying time, and compatibility.
You’ll find oil paint bonds well to shellac, offers tough, scuff‑resistant finishes, and has a long historical usage. However, it dries slowly and emits stronger fumes, raising environmental impact concerns.
Latex dries fast, cleans up with water, and generally adheres to shellac if the primer is fully cured. It’s lower‑odor and more eco‑friendly.
Choose oil for heavy‑wear surfaces where time and ventilation aren’t issues; choose latex for quicker projects and reduced environmental and health trade‑offs.
How Gloss and Sheen Affect Adhesion
If you’ve decided on oil or latex over shellac, the next thing to watch is gloss level, because sheen affects how paint sticks and wears. You’ll notice Gloss influence in surface smoothness: higher gloss hides imperfections but bonds differently.
Sheen effects change durability and cleaning — glossy finishes resist scuffs yet show adhesion flaws; flatter sheens grip porous spots better but mark easier. Choose based on use and substrate.
Imagine the finish:
- A shiny door reflecting light, revealing every seam.
- A satin cabinet that cleans up fingerprints.
- An eggshell wall that hides texture.
- A matte trim that feels velvety to touch.
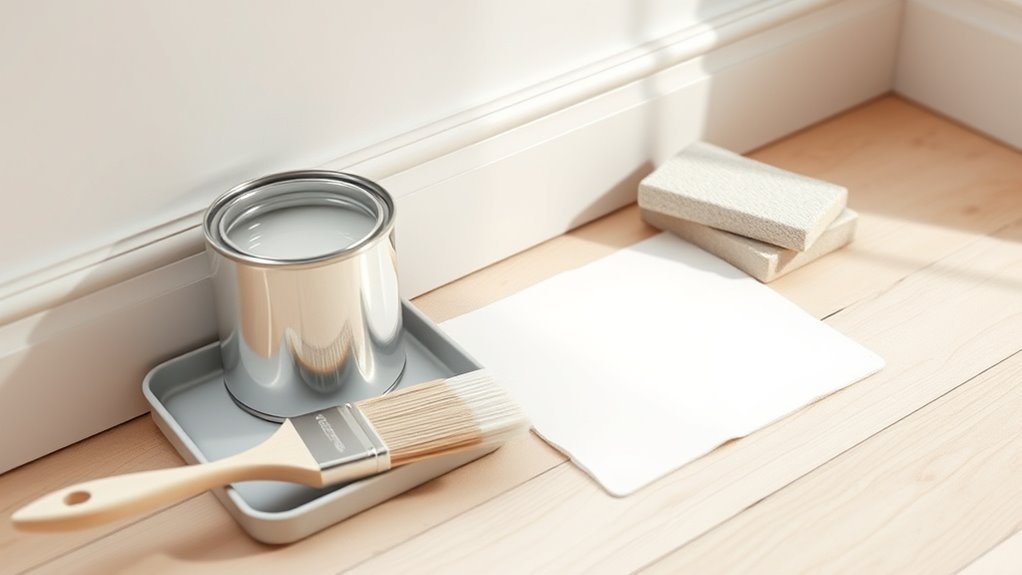
Tools and Materials You’ll Need
Gather a few key tools and materials before you start—having the right items on hand makes painting over shellac primer faster and guarantees a better finish. You’ll need quality angled and foam brushes, a roller with a smooth-nap cover, trays, drop cloths, painter’s tape, and a reliable stir stick.
Choose a latex paint formulated for adhesion; bring a small test can for color mixing and trial swatches. Keep rags and a mild solvent recommended for shellac cleanup nearby.
For organization, label cans and practice proper paint storage—tight lids, cool dry area—to preserve usability between coats.
Cleaning Shellac‑Primed Surfaces Before Painting
Before you apply any latex, clean the shellac‑primed surface so paint will adhere and the finish looks smooth. You’ll remove dust, grease, and loose particles that cause surface staining or interfere with primer removal efforts. Wipe with a mild detergent solution, then rinse and let dry.
For stubborn spots, use denatured alcohol—shellac dissolves—testing a hidden area first. Don’t overclean to avoid reactivating the primer.
- A soft cloth wiping away fingerprints
- A sponge rinsing suds into a bucket
- A small patch tested with alcohol
- A dry towel absorbing moisture
Now the surface’s ready for proper adhesion.
How Much to Sand Shellac Primer (And Where)
You’ll want to knock down the shellac primer with light sanding—start with 220–320 grit for smoothing and use 400 grit only for final feathering.
Focus on glossy spots, drips, and any raised edges where the primer pooled, and sand seams or patched areas a bit more aggressively.
Don’t over-sand flat, well-adhered primer; just create a uniform, slightly dull surface for the latex to bite.
Sanding Grit Recommendations
When prepping shellac primer for a latex topcoat, sand enough to knock down brush marks and high spots but keep the primer’s tooth so the paint can grip. Use 220–320 grit for a light scuff on cured primer; it evens sheen without glaze removal.
For stubborn ridges, start with 120–150 grit, then finish with 220. Match grit to surface: smooth trim needs finer grit than flat walls.
Consider how paint color and primer types interact—darker topcoats show imperfections more. Clean dust before recoating.
- light scuffing with 320 grit
- tackle ridges with 120 grit, then refine
- finish all with 220
- vacuum and tack cloth
Areas To Focus
Because different parts of a job take different kinds of abuse, sand where adhesion and appearance matter most. You’ll focus on edges, trim, and flat panels: edges need more bite for adhesion; trim needs smoothness for decorative techniques; panels need light scuffing to preserve historical uses. Targeted sanding prevents overwork and keeps primer effective.
| Area | Sand Level | Why it matters |
|---|---|---|
| Edges | Medium (120–150) | Grip for topcoat |
| Trim | Fine (180–220) | Smooth finish for detail |
| Panels | Light (220–320) | Preserve primer integrity |
How to Degloss Shellac Primer Without Sanding
Want to avoid sanding but still get good adhesion? You can degloss shellac primer chemically and prepare it for latex compatibility. Use a liquid deglosser or solvent sealer to break the sheen, follow label dwell times, and rinse or wipe thoroughly.
Want to skip sanding? Chemically degloss shellac primer with a liquid deglosser, then rinse and prime.
Test a small area to confirm shellac removal isn’t necessary; you’re just dulling the surface for primer bonding. After treating, let the surface fully dry and confirm no residue remains before applying latex primer or paint.
- wipe with microfiber soaked in deglosser
- observe a matte, even finish
- smell reduction as solvent evaporates
- spot-test for paint adhesion
Using Tack Cloths for a Dust‑Free Surface
You’ll want a tack cloth because it picks up fine dust and lint that sanding or wiping can miss, giving a cleaner surface for latex over shellac primer.
Use it by lightly dragging the cloth across the surface in one direction, folding and refolding as it gets loaded, and replacing it when it’s dirty.
Avoid pressing hard, rinsing the cloth, or reusing a saturated tack cloth—those mistakes can leave residue or smear dust back onto the primer.
Why Use Tack Cloths
Why bother with a tack cloth? You want smooth, professional results when applying latex over shellac primer, and tack cloths remove dust that ruins decorative techniques or interferes with color matching. Use one before painting to grab invisible particles and keep surfaces pristine.
- A featherlight dust film lifted before layering
- Tiny specks that would show as bumps after drying
- Soft fibers catching pet hair and lint
- A clean plane that makes glazes and faux finishes read correctly
You’ll protect sheen, guarantee true color, and reduce sanding touchups without altering the primer beneath.
How To Use
Before you paint, wipe the shellac‑primed surface with a tack cloth in long, overlapping strokes so you lift dust without reintroducing fibers. You’ll work section by section, folding the cloth when it mats, replacing it once it’s loaded.
Keep a gentle touch near edges and recessed details to avoid smearing primer. If you’ve seen historical applications, you’ll appreciate how tack cloths preserve fine finishes by removing microdebris.
Dispose used cloths properly—solvent‑saturated or heavily soiled ones can pose fire risks and environmental impact concerns. Store fresh cloths sealed to retain tack; don’t overuse or lint may transfer to your smooth, paint‑ready surface.
Common Mistakes To Avoid
When you grab a tack cloth, don’t assume any tackiness is harmless—overusing a dirty or solvent‑soaked cloth can leave streaks, lint, or contaminants that ruin your finish. You should gently wipe once, inspect the cloth, and replace it if it darkens or smells of solvent.
In Historical applications, pros used clean tack cloths to avoid embedding oils; you should too. For Exterior painting, don’t use tack cloth right after solvent cleaning—wait for evaporation. Handle cloths minimally, store them sealed, and never rinse with water.
- A gray, sticky rag smearing across primer
- Fibers clinging to edges
- Oil sheen appearing under light
- Dirt streaks cured into paint
Choosing a Latex Formula for Strong Adhesion
Although shellac primer gives you fast adhesion and stain-sealing power, picking the right latex paint matters if you want durable, long-lasting results. Choose a high-quality acrylic latex or a latex blend formulated for adhesion and flexibility.
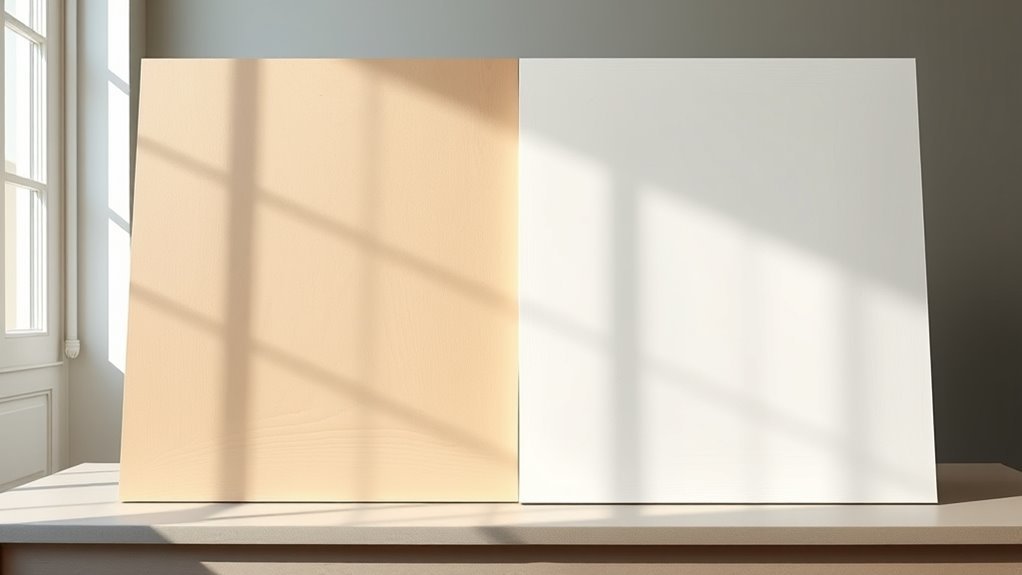
You’ll want a paint labeled for high adhesion and moderate elasticity so it moves with temperature changes without cracking. For visible surfaces, prioritize color matching and lightfast pigments to keep finishes consistent over primer repairs.
Check the label for scrub resistance and primer durability compatibility. Test a small area to confirm bond and appearance before committing to full coats to guarantee a reliable, long-lasting finish.
Additives and Primers That Improve Latex Bonding
If you want latex paint to stick better over shellac primer, use adhesion-promoting additives and the right bonding primers to bridge the materials and improve flexibility. You’ll choose products that enhance wetting, reduce surface tension, and accept latex’s film.
Look for eco-friendly options and primers that offer good color matching when tinted to your topcoat. Follow label instructions for dilution and dry time.
Visualize results:
- A smooth surface accepting a latex coat evenly
- Primer tinted to match your final hue
- Additive mixed into paint for better spread
- A durable, flexible finish resisting chips and peeling
Using a Bonding Agent Between Shellac and Latex
Because shellac and latex form very different films, you’ll usually need a dedicated bonding agent to get reliable adhesion between them. You’ll apply a thin, compatible bonding primer that accepts latex and seals the shellac. This helps paint hold, eases Decorative techniques, and keeps Color matching consistent across repairs. Choose a waterborne or solvent-based bonding product per manufacturer instructions; test a small area first.
| Product type | Surface prep | Dry time |
|---|---|---|
| Waterborne bond | Clean, scuff | 1–2 hrs |
| Solvent bond | Wipe solvent | 30–60 mins |
| Universal bond | Light sand | 1 hr |
Touch‑Up vs Full Repaint: Prep Differences
When you’re doing a touch-up rather than a full repaint, you’ll focus on targeted prep: clean and degloss the small repair area, feather the shellac edges, and spot-prime so the new latex blends without lifting the original finish.
For touch-ups, clean and degloss the small area, feather edges, and spot-prime for seamless blending.
You’ll pay extra attention to color matching and paint texture so the patch disappears. For full repaints, strip or scuff broadly, re-prime all surfaces, and plan consistent application.
Visualize the difference:
- A fingertip-sized scuff sanded and spot-primed
- A feathered edge blending into surrounding sheen
- A whole wall scuffed and wiped down
- Brush and roller strokes matching texture
Drying Times: How Long to Wait After Shellac Primer
After shellac primer, you’ll typically wait 30 minutes to an hour for it to dry enough for latex paint. Though full cure can take several hours.
Humidity, temperature, coat thickness, and ventilation will speed up or slow that window.
Test readiness by lightly touching an out‑of‑sight spot and doing an adhesion or tape test before you paint.
Recommended Drying Window
If you’ve applied a shellac primer, expect to wait relatively briefly before topcoating. You’ll typically be ready to apply latex paint within 1–2 hours under normal conditions; this window respects both latex chemistry and the primer shelf life guidance for fresh coatings. Don’t rush—touch tests matter.
- A light tack-free surface after 30–60 minutes
- Consistent, cool air keeps the window predictable
- Avoid heavy handling until at least 1 hour
- Plan for a second coat after full cure, often 24 hours
Follow product directions on the can for exact timing and compatibility.
Factors Affecting Drying
Because several variables influence how quickly shellac primer dries, you should consider temperature, humidity, ventilation, coat thickness, and the primer’s solvent blend. You’ll need to wait longer in cool, humid, or poorly ventilated spaces. Thicker coats trap solvent; faster blends evaporate sooner. Color matching and finish sheen can be affected if you rush topcoating.
| Factor | Effect | Action |
|---|---|---|
| Temperature | Faster when warm | Keep 65–75°F |
| Humidity | Slows drying | Use dehumidifier |
| Ventilation | Speeds evaporation | Increase airflow |
| Coat thickness | Prolongs cure | Apply thin coats |
| Solvent blend | Varies time | Check label recommendations |
How to Test Readiness
When the primer feels dry to the touch, don’t assume it’s ready for latex—perform a simple tack and solvent test to confirm the film has set through; you’ll avoid adhesion failures and reduce environmental impact from rework.
Lightly press a fingertip: no tack means surface-set. Dab a cotton swab with denatured alcohol in an inconspicuous spot—if finish softens, wait longer.
Consider historical uses of shellac as a fast sealant, but modern formulations vary, so rely on tests not time alone.
- A fingertip press on a corner
- Alcohol on a hidden edge
- Temperature and humidity gauge nearby
- Note curing over 24–72 hours
Temperature and Humidity Effects on Adhesion
Although you can apply latex paint over shellac primer in a wide range of conditions, temperature and humidity play a big role in how well the paint sticks and cures. You should heed Temperature considerations and Humidity impact: work between 50–85°F and 40–60% RH when possible. High humidity slows drying and weakens adhesion; extreme cold prevents proper film formation. Ventilate to lower moisture, and warm the room if needed. Use thin coats and allow full flash time between layers. Check manufacturer specs for both primer and paint to guarantee compatibility and ideal curing.
| Condition | Effect | Action |
|---|---|---|
| High humidity | Slower cure | Ventilate |
| Low temp | Poor film | Warm room |
| Rapid changes | Blistering | Stabilize environment |
| Ideal range | Best adhesion | Proceed |
Cabinets: Using Latex Over Shellac (Tips)
If you’re updating cabinets, latex paint can go over shellac primer successfully so long as you prep properly and choose compatible products. You’ll sand lightly, clean thoroughly, and verify the shellac has cured; that prevents lifting and gives a smooth base for latex.
Pick a high-quality latex designed for cabinets and test adhesion in an inconspicuous spot. You can still achieve decorative finishes and mimic historical techniques by layering glazes or antique-washing after latex cures.
Choose quality cabinet-grade latex, test adhesion discreetly, then layer glazes or antique washes after it fully cures.
Visualize the result:
- A distressed corner revealing warm wood tones
- Satin sheen reflecting soft kitchen light
- Subtle glaze settling into panel grooves
- Crisp, durable edges after topcoat
Trim and Baseboards: Best Practices
When working on trim and baseboards, you’ll start by sanding and cleaning to guarantee the surface is oil-free and smooth.
Check that the shellac primer is fully cured and compatible with the latex topcoat to avoid adhesion issues or peeling.
If you’re unsure, test a small area first to confirm proper bonding before painting the whole room.
Proper Surface Preparation
Before you apply latex paint over shellac-primed trim and baseboards, make sure the surfaces are clean, dry, and free of wax, dust, and gloss so the new paint can bond properly. You’ll sand lightly to dull sheen, wipe with a tack cloth, and degrease edges; this preserves color consistency and reduces rework.
Prime bare spots with shellac if needed, then allow full cure.
Consider low-VOC cleaners to limit environmental impact.
Mask floors and gaps, and use thin, even coats.
- Smooth sanded edges catching light
- Crisp caulked seams
- Dust-free wiped surfaces
- Even, thin paint film
Paint Compatibility Check
Because trim and baseboards get bumped and cleaned a lot, you’ll want to confirm that your latex paint will adhere to the existing shellac primer and any topcoats without peeling or discoloring. Test adhesion with a small patch, check for solvent reactions, and evaluate color matching under room light. Pick a durable finish sheen—semi-gloss or satin—for easy cleaning. Sand lightly if needed and use a bonding primer between shellac and latex when compatibility’s unsure. Label tests and wait full cure before heavy use. Use this simple emotional checklist to guide confident, lasting results:
| Test | Result |
|---|---|
| Patch | Hope |
| Solvent | Relief |
| Color | Joy |
| Sheen | Pride |
| Cure | Calm |
Walls and Ceilings: When Latex Over Shellac Makes Sense
If you’ve got shellac primer on interior walls or ceilings, you can often top it with latex paint without sacrificing adhesion or stain blocking — provided the shellac was applied correctly and has fully cured. You’ll want to check sheen and sanding; latex bonds better to a dull, clean surface.
Topcoat latex paint can work over properly cured shellac primer—just ensure a dull, clean surface for best adhesion.
Consider environmental impact when choosing low‑VOC latex, and pick a paint color that complements existing trim. For ceilings, use flatter sheens to hide imperfections.
Picture the finished room:
- Sunlit living room with smooth matte walls
- Crisp white ceiling framing crown molding
- Muted bedroom color soothing the space
- Fresh hallway reflecting soft light
Stain‑Blocking: Will Latex Keep Stains Sealed?
When you’re relying on shellac primer to seal tough stains, latex paint alone usually won’t keep them sealed long-term. Shellac provides the barrier, while latex serves as the finish.
You should trust shellac to lock in tannins, smoke, and water marks, then apply latex for durability and easy cleaning.
Test a small area to confirm adhesion and stain control before full coverage.
Think about color mixing if you need tinting—don’t overdo tint loads that might thin the seal.
Maintain brushes and rollers with proper tool maintenance so residue won’t reintroduce stains during repainting.
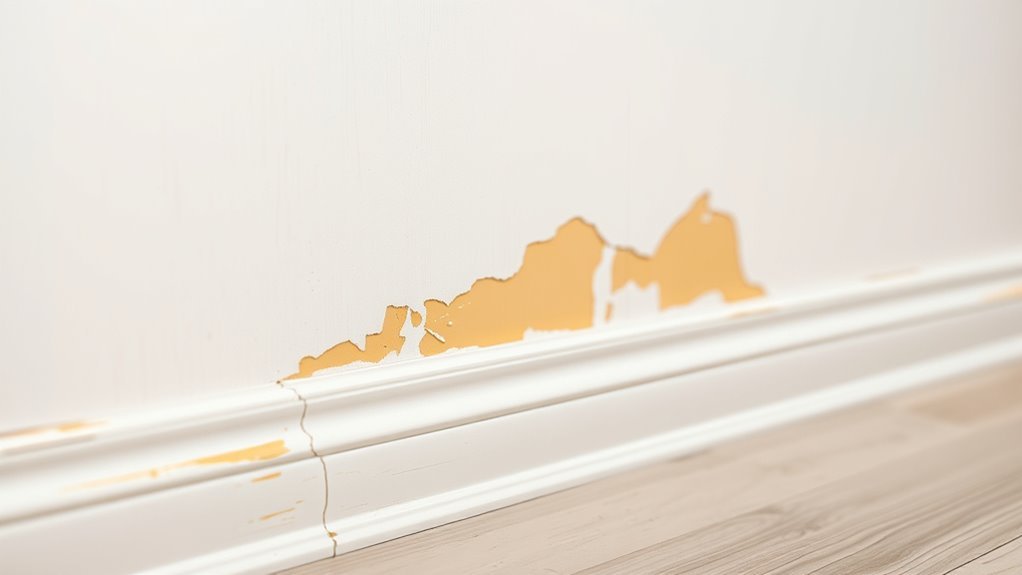
Common Mistakes That Cause Bubbling or Peeling
You’ll usually see bubbling or peeling when the surface wasn’t prepped properly. The shellac wasn’t fully cured, or the primer and latex paint aren’t compatible.
Skip cleaning, sanding, or allowing the shellac to dry, and adhesion will fail.
Check cure times and product labels so you don’t trap tacky primer under latex.
Inadequate Surface Preparation
Because surface prep determines how well latex paint bonds to shellac primer, skipping steps or doing them poorly almost always leads to bubbling or peeling. You must remove dust, grease, and loose primer, and address uneven surface texture so your chosen paint color lays flat.
Sand glossy spots, clean residues, and repair dents or flaking before you paint. If you rush, adhesion fails and moisture or air causes blisters.
- A rough patch where paint lifts like a scab
- Grease sheen making color look blotchy
- Flaky primer curling at edges
- Pitted wood telegraphing through finish
Painting Over Tacky Shellac
After you’ve prepped the surface, the next challenge is dealing with shellac that’s still tacky under fresh latex—paint applied too soon or over incompletely cured shellac will trap solvents and moisture, causing bubbling or peeling.
You’ll test tack by lightly touching inconspicuous areas; if it’s sticky, wait and recheck. Don’t rush decorative finishes or projects tied to historical restoration—timing matters.
If bubbling appears, strip and allow full cure before recoating. Sand glossy spots to promote adhesion. Use thin coats and proper drying times.
Patience prevents adhesion failure and preserves both finish and substrate.
Ignoring Primer Compatibility
When you skip checking primer compatibility, you risk trapping incompatible chemistry between layers and creating bubbling, peeling, or poor adhesion. You’ll notice paint texture flaking or pulling away where shellac and latex clash.
Don’t assume color matching hides damage; lap marks and blistering betray adhesion failure. Before painting, test a small patch and sand glossy shellac to dull it, or use a bonding primer made for both.
If you rush, you’ll recoat and scrape later. Visualize problems so you avoid them:
- Tiny bubbles rising like pinpricks across a panel
- Edges lifting in thin, curling strips
- Patchy, inconsistent paint texture
- Sharp contrast breaking color matching
How to Test Adhesion Before Committing to a Full Job
If you’re unsure how well latex paint will stick to a shellac-primed surface, run a quick adhesion test on a hidden area before you start the full job. Clean the spot, let it dry, then apply the latex as you would for the whole project.
After the recommended drying time, press clear tape firmly over the paint, pull sharply, and inspect for lifts. Try a small cross-hatch cut too if you want more certainty.
Note any failure patterns; they can reflect primer issues rather than color mixing or historical uses of shellac. Repeat the test in a few spots to confirm consistency before proceeding.
Spot Repairs: Blending Latex Into Shellac Areas
When you’re doing spot repairs over shellac-primed areas, start by cleaning and scuffing the surface so the latex will grab.
Feather the edges of the repair into the surrounding paint and sand lightly to blend the shift.
Use thin, even coats of latex and check each layer for a smooth, invisible finish.
Prep And Scuffing
Because shellac seals so aggressively, you’ll need to scuff and prep the spot repair carefully before you try blending latex over it. Use 220–320 grit sandpaper to dull the gloss, wipe with a tack cloth, and clean with a mild solvent.
Consider color mixing on a small test panel and keep ventilation tips in mind—open windows and a fan—to clear fumes. Mask surrounding areas to protect edges. Prime only the sanded spot with compatible primer if needed.
- Light sanding until tooth appears
- Solvent wipe to remove residue
- Test patch for color match
- Tape crisp edges before painting
Feathering And Blending
Although shellac creates a hard, distinct edge, you can feather latex seamlessly by sanding the repair to a gradual bevel, applying thin, overlapping coats, and smoothing each coat’s perimeter with a slightly damp brush or foam pad.
You’ll blend by working outward from the shellac edge, keeping coats thin to avoid ridges. Match sheen and use precise color matching before you start; test small areas and adjust tint if needed.
Use soft, high-quality brushes and light brush techniques—long, even strokes and a final light cross-brush—to eliminate lap marks. Let each thin coat dry thoroughly before the next.
When You Should Remove Shellac Primer Completely
If you’re dealing with severe adhesion problems, widespread bubbling, or a finish that keeps failing, you should remove the shellac primer completely before repainting. You’ll also pull it when contamination, odor, or visible breakdown suggests the coating’s beyond salvage.
Consider environmental impact and historical usage when deciding: older shellac layers can hide lead or vermin stains and release strong fumes when disturbed. Strip to sound substrate, then assess and prep before applying modern primers compatible with latex.
- Flaky primer curling at edges
- Dark staining bleeding through
- Persistent solvent smell in room
- Texture that won’t sand smooth
Safe Solvents and Cleaners for Shellac Residue
Before you repaint, you’ll want a simple solvent compatibility chart to pick cleaners that won’t damage the primer or substrate.
Use safe methods like mild solvent wipes, alcohol blends, or biodegradable citrus cleaners and test a small area first.
For stubborn residue, try gentle scrubbing with a non-abrasive pad and repeat solvent application rather than stronger chemicals.
Solvent Compatibility Chart
A simple solvent compatibility chart helps you pick cleaners that remove shellac residue without harming underlying latex finishes or modern primers. You’ll compare solvent strength, evaporation, and compatibility with shellac alternatives and latex formulations to decide what’s safe for your surface.
Note flash point and residue risk so you don’t damage primers or cause adhesion problems.
- Light solvent: denatured alcohol — fast, low residue
- Medium: isopropyl alcohol — gentler on painted surfaces
- Strong: lacquer thinner — effective but risky
- Mild: citrus-based cleaner — safe, slower action
Use the chart to match solvent to substrate and risk level.
Safe Cleaning Methods
When you need to remove shellac residue without harming a latex finish, choose cleaners that dissolve the shellac but dry cleanly and evaporate quickly. You’ll prefer denatured alcohol or isopropyl alcohol for light residue; they work fast, have known environmental impact profiles, and echo shellac’s historical uses in furniture restoration. Test an inconspicuous spot first. Avoid oily or sticky removers that leave film. Rinse lightly with water if compatible and dry immediately. Keep ventilation on, wear gloves, and dispose of waste per local regulations.
| Cleaner | Use | Notes |
|---|---|---|
| Denatured alcohol | Fast | Evaporates quickly |
| Isopropyl | Gentle | Readily available |
| Citrus solvent | Caution | Biodegradable option |
Residue Removal Techniques
You’ve already learned which cleaners won’t harm a latex finish; now let’s look at practical residue-removal techniques that use those solvents safely. You’ll want to test in an inconspicuous spot, wear gloves, and ventilate the area.
Mild ammonia solution or denatured alcohol often lifts shellac residue without attacking latex primers; follow with a clean, damp cloth. Consider color matching after cleaning if faint stains remain, and weigh budget considerations when choosing specialty cleaners versus DIY mixes.
- A soft cloth damp with denatured alcohol wiping in long strokes
- Small nylon brush loosening edges gently
- Rinse with clear water and blot dry
- Test spot for paint adhesion before full application
Sand‑Through and Scuff Methods for Stubborn Spots
If stubborn spots keep telegraphing through your latex topcoat, sand-through and scuffing are the targeted fixes that’ll let you get back to a smooth, uniform finish.
You’ll sand glossy or contaminated areas with fine 220–320 grit until the sheen breaks, then scuff-sand surrounding paint to promote adhesion. Target only the problem spots to avoid exposing underlying layers; test small areas to check shellac alternatives and paint compatibility before wider work.
Wipe dust with a tack cloth, feather edges to blend, and spot-prime if bare substrate appears. Let primer dry fully, then repaint with light, even coats for a consistent result.
Primer Layering: Shellac, Oil, Latex – What Order Works
When you’re layering primers, start with shellac for stubborn stains. Then follow with a latex primer if you need paint-ready adhesion.
You can put oil over shellac for added sealing, but you shouldn’t put latex directly over uncured oil.
If you need latex on top, make sure the oil is fully cured and sanded first so the layers bond properly.
Shellac Then Latex
Because shellac seals stains and blocks tannins so effectively, many pros apply it before switching to latex-based primers and paints. You’ll prep by sanding glossy spots, wipe dust, then spot-apply shellac where bleed-through or strong odors occur.
Once dry, scuff-sand and clean; shellac gives a reliable, non-porous base for latex. You’ll find color mixing remains predictable since shellac locks raw pigments, and you can choose synthetic brush types for smooth laydown with latex.
Expect quick turnaround and good adhesion when you follow proper cure times—shellac then latex is practical for challenging substrates.
- Stained knot sealed solid
- Clean, matte surface
- Smooth synthetic brush strokes
- Fast repaint schedule
Oil Over Shellac
Having used shellac to lock stains and odors, you might wonder whether an oil-based primer can go over it. You can apply oil over fully cured shellac, but you should verify the shellac is dry and any strong shellac odor has dissipated.
Lightly scuff the surface to promote adhesion and wipe away dust. Oil primers adhere well to sealed surfaces, yet remember oil lacks the latex flexibility you’ll get later from topcoats.
If you plan to finish with latex paint, oil over shellac is acceptable as an intermediate, but test a small area to confirm bonding and compatibility before committing.
Latex Over Oil
If you’re planning to apply latex paint over an oil-based primer, you can—provided the oil primer is fully cured, clean, and slightly scuffed to promote adhesion. You’ll sand lightly, remove dust, and wipe with a tack cloth.
Test a small area first to ensure no peeling. Use a high-quality latex for flexibility, consider eco-friendly options with low VOCs, and pick finishes that suit decorative techniques like glazing or stenciling.
Expect good durability if prep’s right.
- A satin wall reflecting soft light
- A sanded edge revealing primer beneath
- A crisp stenciled pattern on trim
- A low-VOC paint can on the floor
Long‑Term Durability: How Latex Holds Up Over Shellac
When you paint latex over a shellac-primed surface, the combination usually gives strong short-term adhesion and a smooth finish, but long-term durability depends on preparation, environmental stress, and the quality of both products. You’ll get better longevity when you handle primer removal carefully, guarantee proper curing, and address moisture and UV exposure. Color matching won’t affect adhesion but influences perceived aging; mismatched touch-ups stand out. Expect excellent wear indoors; outdoors, expect gradual chalking or cracking if conditions are harsh.
| Concern | Feeling |
|---|---|
| Peeling risk | Unease |
| Fading | Regret |
| Staining | Frustration |
| Stability | Relief |
| Maintenance | Resolve |
Touch‑Up and Maintenance After Painting
Because shellac primes tend to seal and dry quickly, you’ll want to plan touch-ups while the paint system is still stable—spot-sand any glossy edges, clean the area of dust and oils, and feather your latex into the surrounding finish to hide shifts.
Get a small sample to verify color matching under the room’s light, and choose the right brush selection — angled sash for trim, small synthetic for smooth blending.
Keep supplies handy and test on an inconspicuous patch first.
- A tiny, sanded spot ready for paint
- A well-lit swatch for checking color
- A steady hand guiding the brush
- A soft, lint-free rag for cleanup
Cost and Time: Prepping vs Stripping Primer
Although prepping usually costs less up front than stripping, you’ll need to weigh labor time and material quality against the long‑term risks of adhesion problems or staining if primer isn’t fully removed.
Prepping often saves money initially, but consider extra labor and adhesion or staining risks if primer isn’t fully removed.
You can save on materials by sanding, deglossing, and spot-priming, a clear cost comparison to full strip and re-prime.
Prepping often wins for Time efficiency on small jobs, but extensive flaking or contamination makes stripping quicker overall and reduces repaint cycles.
Factor your skill level, tool rental, and room access. Choose the option that minimizes repeat work and guarantees reliable adhesion for the life you expect from the finish.
Health and Ventilation Tips When Working With Shellac
If you’re working with shellac, prioritize ventilation and respiratory protection since its alcohol solvent fumes can irritate eyes, nose, and lungs and may trigger dizziness or headaches. You should treat shellac work as a task with real health hazards: wear an organic-vapor respirator, goggles, and gloves, and keep people and pets away.
Good ventilation practices reduce exposure—open windows, use cross-breezes, and run an exhaust fan to pull fumes outside. Clean spills promptly and store rags in a sealed metal container.
- Window open, fan blowing air outward
- Mask strapped, goggles sealed
- Gloves on, rags contained
- Room cleared of others
Environmental Pros and Cons: Shellac vs Latex Systems
When you weigh shellac against latex systems, you’ll see clear trade-offs: shellac uses denatured alcohol that evaporates quickly and breaks down naturally, but its strong VOCs and flammability raise indoor-air and disposal concerns.
You’ll find shellac’s VOC emissions spike during application, so ventilate and limit exposure; waste requires careful handling.
Latex systems emit fewer VOCs, often contain water-based binders, and simplify cleanup, reducing long-term environmental impact.
However, latex production and some additives still consume energy and resources, and old latex can persist in landfills.
Choose low-VOC products, minimize waste, and follow disposal rules to lower your footprint.
When to Hire a Pro vs DIY
Deciding whether to hire a pro or tackle a paint job yourself comes down to scope, skill, and the stakes involved. You should go DIY if the area’s small, surfaces are sound, and you’re comfortable with prep, color mixing, and brush selection.
Hire a pro for complex surfaces, high ceilings, strict timelines, or visible trim work where flaws stand out.
- A single bedroom with smooth walls and basic trim
- An ornate staircase with tricky angles and finishes
- A sunroom needing precise color mixing to match light
- Exterior siding requiring scaffolding and weatherproofing
Weigh cost, time, and finish quality before deciding.
Short Case Studies: Successful Latex Over Shellac Projects
Although shellac can seem like a stubborn base, several straightforward projects show you can successfully top it with quality latex paint after proper prep. You’ll read quick case studies: a bathroom vanity primed with shellac, sanded lightly, and sealed with a bonding primer before two coats of latex;
kitchen trim where you cleaned, scuff-sanded, and used a high-build latex for durability;
and a hallway refresh opting for shellac alternatives on knotty pine, then latex on top.
Each shows you can avoid common latex disadvantages by prepping, choosing compatible primers, and testing small areas first.
Troubleshooting Guide for Adhesion Problems
Struggling with latex paint peeling or flaking over shellac? You can diagnose and fix adhesion issues quickly by checking surface prep, humidity, and primer cure.
Sand glossy shellac lightly, remove dust, and ensure full cure time before topcoat. Watch for solvent sensitivity—latex may lift if shellac wasn’t sealed.
Also review color mixing and avoid over-thinning paint. Choose the right tools: proper brush or roller matters.
- Rough sanded edges and powdery residue
- Blistered paint after high humidity
- Visible streaks from wrong brush
- Patchy coverage from poor color mixing
Test a small area before full repaint.
Product Picks: Shellac Primers and Latex Paints That Pair Well
Now that you’ve ruled out prep or environmental causes for adhesion issues, let’s pick primers and latex topcoats that actually work together. Choose a shellac-based primer known for strong stain blocking and fast drying; brands with clear application notes for latex overcoat reduce guesswork.
With prep confirmed, use a shellac primer proven for stain blocking and fast-dry, then pair with compatible acrylic-latex topcoats.
Match primer types to project needs—kitchen stains, smoke, or tannin bleed need different formulations. For latex paints, pick high-quality acrylic-latex sheens labeled compatible with shellac primers.
Pay attention to color mixing: tinting shellac primers can alter blocking power, so tint sparingly and use factory-tinted latex topcoats for accurate final color.
Test a small patch before full application.
Step‑By‑Step Checklist for Painting Latex Over Shellac
When you’re ready to top a shellac primer with latex, follow a clear, step‑by‑step checklist to guarantee adhesion and a smooth finish. You’ll prep, test, paint, and cure, keeping environmental impact in mind and respecting shellac’s historical use as a fast‑sealing sealer. Work systematically:
- Clean surface: wash grime, remove loose finish, and dry thoroughly.
- Sand lightly: scuff primer for mechanical bite; wipe dust with tack cloth.
- Test adhesion: apply a small latex patch; wait and check for lifting.
- Paint and cure: apply recommended coats, keep ventilation good, and allow full cure time.
This sequence prevents failures and speeds reliable results.
Preventing Streaks, Lap Marks, and Brush Marks
To prevent streaks, lap marks, and brush marks, work methodically and keep a wet edge so each pass blends into the last. Use a high-quality nylon-poly brush or a short-nap roller and load it properly to avoid dry dragging. Maintain consistent pressure and overlap each stroke by 50% while feathering edges.
Match paint sheen and color matching carefully when cutting in or touching up to hide gradual shifts. Control temperature and humidity to reduce drying too fast; that also minimizes environmental impact from repainting.
If imperfections appear, sand lightly between coats and recoat before full cure for a smooth finish.
How Warranties and Product Instructions Affect Your Choice
Keeping a wet edge and sanding between coats will get you a smooth finish, but you also need to take into account how warranties and product instructions shape your choices. Read labels: some shellac primers void warranties if topcoated with certain latex formulas. Follow cure times and recommended sanding grit to keep coverage valid.
Note environmental impact statements and low-VOC certifications that may limit paint color options or formulations. If you ignore instructions you risk peeling, denied claims, and wasted labor.
Visualize outcomes:
- Flaking edges on a sunlit trim
- Gloss mismatch under bright light
- Warranty papers tucked away
- Brushes and sandpaper worn thin
Decision Flowchart: Should You Use Latex Over Shellac?
If you’re weighing whether to put latex over shellac, a simple decision flowchart can help you evaluate compatibility, surface condition, and warranty constraints step by step.
First, check product instructions and warranty—if the shellac says “latex suitable,” proceed; if not, stop or test.
Next, inspect adhesion: sand gloss, clean, and do a peel test.
Then consider porosity and odor; shellac seals well, so perform a small patch with your intended latex.
Finally, assess aesthetics: plan for color mixing and texture matching—use primer coats or additives as needed before committing to full application.
Frequently Asked Questions
Can Shellac Primer Cause Yellowing Under White Latex Paint?
Yes — if shellac primer isn’t fully cured or improperly applied, it can yellow under white latex paint. You’ll want to guarantee shellac adhesion and confirm paint compatibility so your finish stays bright and durable.
Will Latex Paint Block Shellac’s Odor After Application?
Yes — usually latex won’t fully mask shellac’s smell immediately; wait for curing. But when shellac’s fully dry and sealed, latex can aid odor sealing while maintaining paint adhesion, so odors fade as layers cure.
Are Waterborne Alkyds Better Than Latex Over Shellac?
Yes — you’ll often find waterborne alkyds outperform latex over shellac: they bond better, tolerate oil based primers, and reduce adhesion issues, so you’ll get tougher, smoother finishes where latex might lift or peel.
How Do Cured Shellac Layers Affect Future Repainting Cycles?
Like a stubborn glue, cured shellac can lock down future layers: you’ll get excellent surface adhesion and predictable paint compatibility, but you’ll need proper sanding and compatible primers to avoid peeling or uneven topcoat performance.
Can Moisture Vapor From Basements Lift Latex Over Shellac?
Yes — moisture migration from basements can lift latex over shellac if primer compatibility isn’t right; you’ll need a moisture-tolerant, compatible primer or breathable barrier to prevent vapor-induced adhesion failure and paint blistering or peeling.
Conclusion
You’re standing at a fork: shellac primer is a tight hug for stains and tannins, and latex paint can follow—but only when surfaces are clean, fully cured, and you’ve sanded or used a compatible bonding coat. If not, latex will slip and weep like oil on water. Trust product labels, test a small patch, and prep carefully. Do the homework now and your finish will sing instead of sigh.