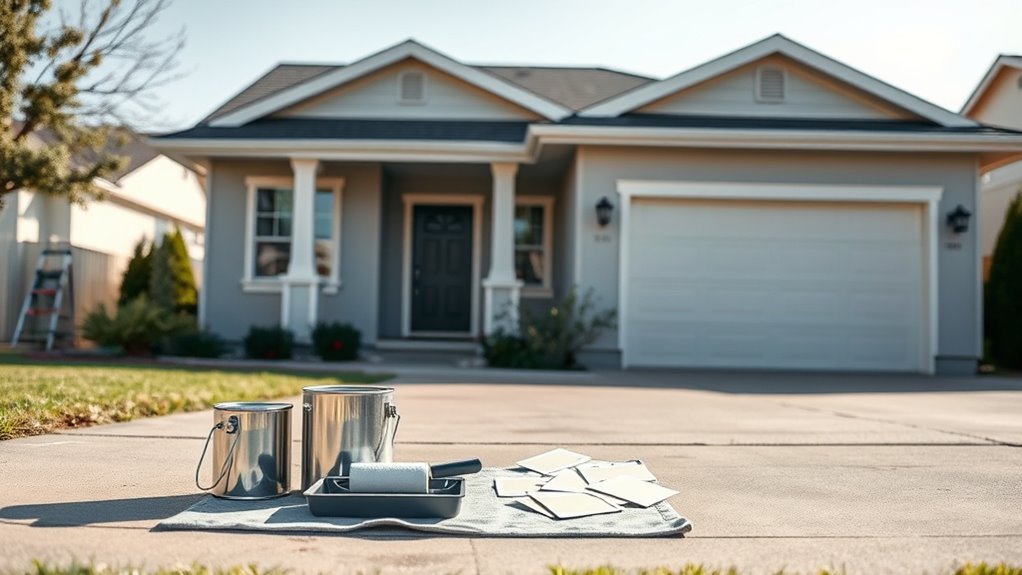
How Much to Paint 1200 Sq Ft House Exterior
You’ll typically need about 14–20 gallons of paint for two coats on a 1,200 sq ft house exterior, plus primer and touch‑up, depending on siding and texture. Measure wall areas (subtract windows/doors), add gables, soffits, eaves, and trim, and expect rough surfaces or big color changes to raise gallons and labor. Choose low‑VOC acrylics and factor in prep, repairs, and equipment or pro costs; keep going to see a simple worksheet and cost breakdown.
Quick Answer: Gallons for 1,200 Sq Ft
Wondering how much paint you’ll need? For a 1,200 sq ft exterior, you’ll typically need about 7–10 gallons per coat, assuming 250–400 sq ft coverage per gallon.
Most homes require two coats, so plan on 14–20 gallons total. If you’re changing color dramatically, factor extra for primer and touchups.
Most homes need two coats—estimate 14–20 gallons, plus extra primer and touch‑up paint for big color changes.
When choosing Color schemes, pick finishes that cover well to reduce gallons. Also consider Eco friendly options like low-VOC paints; they can offer similar coverage while cutting fumes.
Measure walls precisely and buy a little extra for mistakes and future repairs to avoid running out.
Simple Worksheet: Step‑By‑Step Paint Calculator
Now that you have a ballpark for gallons, use this simple worksheet to calculate exactly how much paint you’ll need for your 1,200 sq ft exterior.
Step 1: measure wall areas (length × height) and subtract windows/doors.
Step 2: add trim and accent areas separately.
Step 3: total square footage ÷ paint coverage per gallon (check label).
Step 4: factor coat count (usually two) and surface absorption—rough surfaces need extra.
Step 5: round up and consider primer.
Pick finishes with current color trends and eco-friendly paints if you want low VOCs and contemporary appeal.
How Exterior Square Footage Differs From Floor Area
Don’t assume your 1,200 sq ft floor plan equals the exterior paintable area — exterior square footage measures wall surface, not living space.
You’ll need to measure each wall’s height and length to get true wall surface area, then subtract windows and doors.
Also account for overhangs, soffits, and trim separately since they add surface area or create shaded sections you might still want to paint.
Exterior Surface Vs. Floor Area
Because exterior square footage measures the surface area you’ll actually paint—not the home’s interior floor area—you’ll usually get a much larger number when calculating paint needs for a 1,200 sq ft house.
You’ll need to account for walls, trim, soffits, and gables, so the exterior total can be two to three times the floor area. That affects paint quantity, cost, and color options since darker or glossier finishes may require more coats.
Don’t forget weather impact: wind, sun, and moisture can dictate primer choice and recoat timing. Knowing this helps you plan budget and schedule accurately.
Measuring Wall Surface Area
When you measure wall surface area for an exterior paint job, focus on the actual vertical surfaces you’ll coat—walls, gables, and exposed trim—rather than the home’s interior floor area.
You’ll measure each wall’s width times height, add gable triangles, and subtract large openings like doors and standard windows.
Record materials—brick, siding, stucco—since texture affects paint adhesion and coverage rates.
Factor in trim separately for color schemes and accent choices.
Tally total square footage to estimate gallons needed and labor.
Be precise: small errors change paint quantities and cost estimates, so double-check measurements before ordering.
Accounting For Overhangs
Now that you’ve measured wall surfaces and openings, account for rooflines and overhangs that change the exterior square footage compared with the interior floor area. Walk the perimeter, note eaves, soffits, and gables, and measure their lengths and projection depths. Add these areas to your wall totals since they need paint or trim.
Remember roofline complexity affects labor and paint quantity, which ties into color selection—darker tones may need more coats. Also consider environmental impact: wider overhangs reduce wall weathering and repaint frequency. Adjust estimates for pitched roofs and multi-level setbacks to avoid surprises.
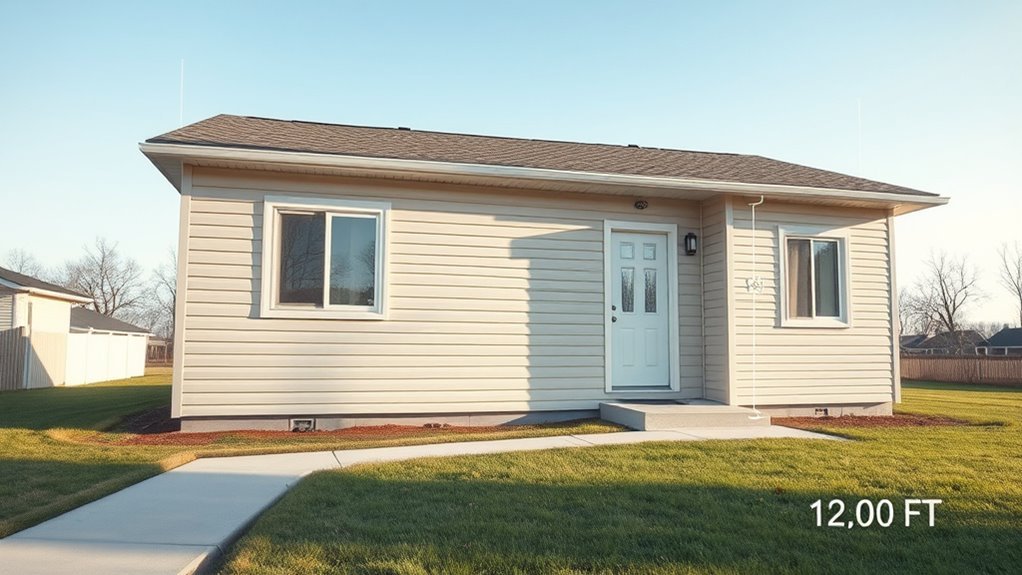
Calculate Wall Area for a 1,200 Sq Ft Home
To calculate wall area for your 1,200 sq ft home, start by measuring the exterior perimeter—walk each side and add the lengths together.
Multiply that perimeter by the wall height to get total wall square footage.
Then subtract the combined area of windows and doors so you only paint the actual wall surface.
Measure Exterior Wall Perimeter
Before you can estimate paint needs or costs, measure the exterior wall perimeter so you know the total wall area you’ll be covering. Start by walking the foundation, measuring each wall length and noting corners, bays, and offsets.
Multiply total perimeter by wall height to get gross wall area. Include gables or dormers separately.
While measuring, note roof maintenance access points and landscaping considerations that might affect scaffolding placement or paint staging.
Record measurements clearly and sketch the facade with dimensions. Accurate perimeter and height figures prevent material shortfalls and help you budget time, labor, and primer or finish coats precisely.
Account For Window Openings
When you subtract window and door openings from the gross wall area, you get the true paintable surface—so measure each opening and deduct their areas before ordering materials.
Measure width and height of every window, note fixed versus operable panes, and total their square footage. Subtract that from gross wall area to avoid overordering.
Remember trim and sills may need paint too, so add modest allowance.
Consider how color coordination affects perceived size of openings and whether paint texture will require extra coats.
Accurate counts save money and time, and guide primer and finish selections for a neat, durable exterior.
Add Gables, Eaves, Soffits, and Trim Area
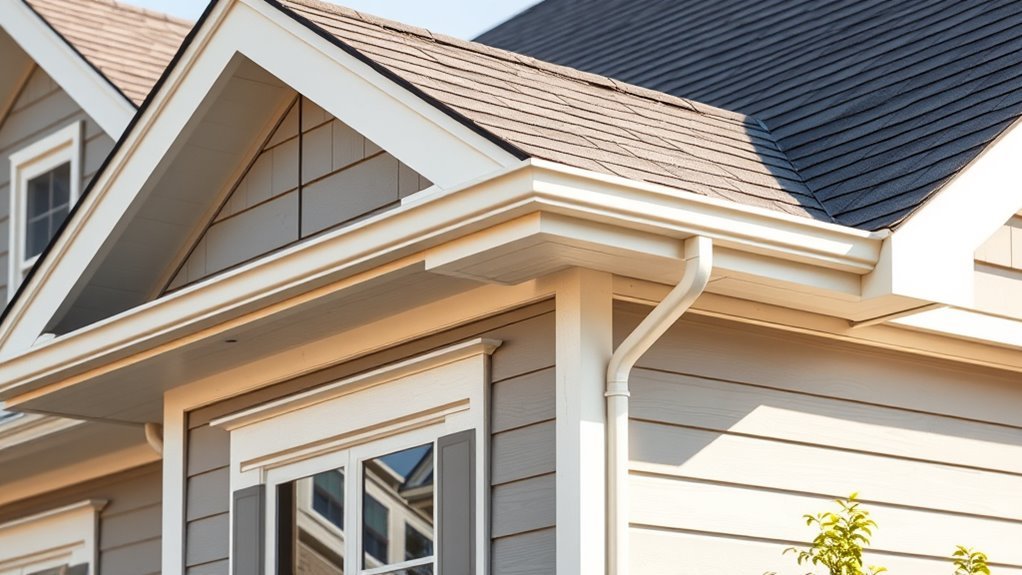
Although the main wall area gives you the bulk of the square footage, you’ve got to add the gables, eaves, soffits, and trim since they change both paint quantity and cost; measure each separately and include overhangs, exposed rafter tails, window and door trim, and fascia lengths so your totals reflect the actual surface area you’ll be painting. Include gable vents and note areas around them, and account for eaves insulation access panels. Calculate soffit linear feet and trim strip widths, then convert to square feet for paint coverage. Use the quick checklist below.
| Item | Measure |
|---|---|
| Gables | sq ft |
| Soffits | sq ft |
| Eaves | linear ft |
| Trim | linear ft |
| Vents/panels | each |
Subtract Windows and Doors From the Total
Measure the width and height of each window and door to get their square footage.
Subtract those opening areas from your house exterior total so you don’t overestimate coverage.
Use the adjusted wall area to calculate how much paint you’ll actually need.
Measure Window And Door Areas
Before you calculate paintable wall area, subtract the square footage occupied by windows and doors so your estimate reflects only surfaces that will get paint.
Measure each window and door height and width, multiply for area, and record totals per wall.
For irregular shapes, approximate with rectangles or triangles.
Don’t forget storm doors or sidelights.
Sum all window and door areas and subtract from gross wall area to find paintable square footage.
Keep measurements and paint storage notes—matching trim later requires precise color matching and leftover cans.
Accurate measuring prevents overbuying and ensures efficient use of stored paint for touch-ups.
Subtract Openings From Total
Now subtract the combined area of all windows and doors from your gross wall measurement to get the true paintable surface. After you’ve totaled openings, deduct that figure from your wall square footage so you won’t overbuy or misquote labor.
This step helps you plan for trims and accents influenced by color psychology without assuming those areas need full coverage. Note casement or multi-panel doors separately; they can alter trim paint amounts.
Use your adjusted surface to choose quantities of eco-friendly paints and to estimate cost. Keep records of each opening’s dimensions for accuracy and future touch-ups.
Adjust Paint Quantity Needed
Once you’ve deducted the gross wall area, subtract the combined square footage of windows and doors so your paint estimate reflects only true paintable surfaces. Measure each window and door, add them, then subtract from wall totals to avoid overbuying.
Divide the resulting paintable area by your paint’s coverage to get required gallons, rounding up for coats and trim. Factor in primer if needed and consider current color trends when choosing finishes—lighter shades often need fewer coats.
Also evaluate eco friendly options like low-VOC paints; they may cost more per gallon but reduce waste and improve indoor/outdoor air quality.
How Many Coats Will You Really Need?
If you want a durable, even finish, plan on at least two coats for most exterior surfaces—sometimes three for drastic color changes or heavily weathered siding.
You’ll start with primer when switching to a lighter or dramatically different hue to improve adhesion and minimize bleed-through; this ties into color psychology, since true tones need consistent underlayers to read correctly.
Two topcoats usually give weather resistance and uniform sheen. For rough or porous materials, add a third coat.
Also consider environmental impact: choose low-VOC products and apply during favorable weather to reduce waste and rework, saving materials and emissions.
Typical Coverage Rates: What 1 Gallon Covers
Because paint thickness, surface texture, and application method all affect yield, one gallon’s coverage can vary widely—you should treat manufacturer estimates as a starting point, not a guarantee.
Because thickness, texture, and application change coverage, manufacturer estimates are only rough starting points.
Typically, exterior latex covers about 250–400 sq ft per gallon on smooth surfaces; rough siding or stucco drops that to 150–250 sq ft.
Rollers lay thicker coats than sprayers, which may require fewer gallons but more overspray.
When planning, account for trim, doors, and color trends that might need extra coats for dramatic shifts.
Choose eco-friendly paints if preferred; they often match coverage but check the label for specific spread rates.
How Much Primer vs. Topcoat Will You Need?
You’ll usually need less primer than topcoat because primer covers well and soaks into bare wood or patched areas. Plan on primer coverage rates of about 200–400 sq ft per gallon.
Expect to buy more topcoat—typically two coats at 250–400 sq ft per gallon each.
Factors like siding type, color change, and surface porosity will raise or lower those quantities, so adjust estimates accordingly.
Primer Coverage Rates
Wondering how much primer you’ll need compared to your topcoat? Primer coverage varies by type: oil-based generally covers 250–400 sq ft per gallon, latex primers about 300–400 sq ft.
Rough or porous siding soaks more, so plan lower coverage. Factor in one coat for sound surfaces, two for stains or drastic color changes—color psychology matters when moving from dark to light; a high-hide primer saves topcoat.
Allow for trim and touch-ups, and check label-specific spread rates. Store unused primer properly—proper paint storage extends life and maintains consistency for later touch-ups.
Topcoat Quantity Estimates
How much topcoat you’ll actually need depends on a few clear factors: surface type, paint quality, color change, and the primer you used.
For a 1200 sq ft exterior, plan roughly 2 coats of topcoat after primer; many homeowners buy 2–3 gallons per coat, so 4–6 gallons total.
If you cover dark with light or vice versa, expect extra coats.
Choose higher-quality paint for better hide and less recoat.
Consider color psychology when selecting hues—bolder colors may need more layers.
Also weigh environmental impact: low-VOC topcoats reduce fumes, sometimes at slightly higher cost.
Factors Affecting Consumption
Because primer and topcoat serve different jobs, you’ll need to gauge each separately: primer bonds and seals porous surfaces and blocks stains, while topcoat provides color and weather protection.
Consider substrate porosity, previous coatings, and damage—rough wood or bare masonry soaks primer, boosting consumption, while smooth vinyl needs less. Dark-to-light or dramatic color shifts require extra topcoat and possibly stain-blocking primer; color psychology influences how many coats you accept for opacity.
Choose eco-friendly paints? They can differ in coverage, so check manufacturer spread rate. Factor in trim complexity, number of coats, and waste for touchups when estimating.
Pick the Right Finish: Coverage and Durability
When you pick a finish, think about how much coverage you need and how long you want the paint to last. You’ll balance appearance and performance: your color palette affects how many coats hide previous shades, and paint sheen impacts durability and washability. Higher sheen gives tougher surfaces but can highlight imperfections; flatter finishes hide flaws but need more maintenance. Choose premium acrylic for longevity and good coverage to cut coats. Compare options in the quick reference below to decide what fits your budget and aesthetic.
| Finish | Coverage | Durability |
|---|---|---|
| Flat | Moderate | Low |
| Eggshell | Good | Medium |
| Satin | Very Good | High |
| Semi-gloss | Excellent | Very High |
How Siding Type (Wood, Vinyl, Stucco, Brick) Changes Needs
Your choice of finish matters, but your siding material will dictate different prep, coverage, and paint types you’ll need.
If you have wood, expect scraping, priming, and more coats for grain absorption; plan for siding installation details like flashing.
Vinyl needs cleaning and specialized flexible acrylics—thin coats cover better than thick.
Stucco requires textured elastomeric paints and deeper penetration; repair hairline cracks first.
Brick often needs masonry primer and breathable masonry paint; expect higher coverage per coat but more labor for mortar joints.
Factor in access around exterior lighting and fixtures during prep so you don’t repaint around them later.
Trim, Fascia, and Soffit Paint for 1,200 Sq Ft Homes
When you tackle trim, fascia, and soffit paint on a 1,200 sq ft home, start by inspecting and repairing cracked caulk, rotted wood, or loose trim so the finish lasts.
Expect fascia painting to add cost for ladder work and scrap-and-prime steps, especially if gutters need removal.
And don’t forget soffit ventilation—paint around vents carefully to avoid clogging airflow while matching the home’s trim.
Trim Prep And Repair
Although trim, fascia, and soffit make up a small portion of your home’s surface area, they demand careful prep and timely repairs to keep the exterior looking sharp and to prevent water and insect damage.
You’ll inspect for rot, loose nails, and gaps, replacing or reinforcing wood and sealing joints. Sand and clean surfaces before priming; use caulk designed for exterior trim.
Consider color trends when picking trim to complement siding, and choose eco-friendly paints to reduce VOCs.
Protect landscaping, work from top down, and allow proper drying between coats to guarantee long-lasting results.
Fascia Paint Costs
If you’re budgeting for fascia, trim, and soffit painting on a 1,200 sq ft home, expect costs to reflect both material quality and access difficulty—higher-grade exterior paint and eco-friendly primers raise prices, while multi-story homes or tight eaves increase labor.
You’ll factor in fascia maintenance history and chosen fascia materials; rotten boards need replacement, which ups cost. Painters charge per linear foot or hour, and prep (scraping, caulking) matters.
- Weathered wood fascia stripped, sanded.
- New PVC fascia primed.
- Tall ladder setup on two-story section.
- Caulking seams and touch-up paint.
Soffit Ventilation Painting
Because soffit ventilation directly affects attic airflow and paint longevity, you’ll want to prioritize proper prep and paint choices for the soffits on a 1,200 sq ft home.
You’ll inspect vents for blockages, repair damaged panels, and confirm insect screens are intact so soffit ventilation stays effective.
Clean surfaces, sand flaking areas, and prime any bare wood or PVC before painting.
Use a breathable, exterior-grade paint compatible with roof insulation materials to avoid trapped moisture.
Paint during mild, dry weather and consider professional help if vents are high or hard to reach to ensure even coverage and long-term performance.
Does Changing Color Increase Paint Required?
Changing your home’s color can affect how much paint you need, especially when you go from a dark shade to a much lighter one or vice versa. You’ll often need extra coats to overcome strong color contrast, and primer improves coverage while protecting paint durability.
Plan for two coats plus primer if changing dramatically; subtle shifts may need only one topcoat. Visualize the work:
- Dark brown to white — expect heavy priming and 2–3 coats.
- Pale to darker — usually 1–2 coats, less primer.
- Accent trims — separate color, extra precision.
- Textured surfaces — absorb more paint, add a coat.
Measure Your House Quickly and Accurately
When you’re preparing to paint, measure the exterior quickly and accurately by dividing the house into simple shapes—rectangles for walls, triangles for gables, and circles for round features—then record width and height for each to calculate square footage.
Walk the perimeter with a tape, jot measurements for doors, windows, and porches, and subtract their areas. Photograph elevations to cross-check later; label shots so garden plants or exterior trim don’t get mistaken for wall area.
Note siding type and any overhangs that affect coverage. Keep measurements neat for contractors, and compare against interior decor plans to assure consistent proportions.
Materials List and Quantities for a 1,200 Sq Ft Exterior
Before you buy anything, take a clear inventory of materials and calculate exact quantities so you don’t overpay or run short.
For a 1,200 sq ft exterior, estimate two coats plus primer; typically 10–12 gallons of paint and 2–3 gallons of primer, adjusting for siding type and porosity.
Factor in caulk, masking materials, and cleanup supplies.
Consider color selection early — darker hues may need more coats — and weigh environmental impact by choosing low-VOC formulas and proper disposal.
- Paint: 10–12 gallons
- Primer: 2–3 gallons
- Caulk and sealant: 2–3 tubes
- Drop cloths and tape: adequate coverage
Tool Checklist: Brushes, Rollers, Ladders, Sprayer, Safety
Although you’ve already nailed down materials, you’ll need the right tools to apply them efficiently and safely. Grab angled sash brushes for trim and tight spots, 3/8–1/2″ nap rollers for siding texture, and extension poles to save steps.
Use a sturdy A-frame ladder plus a taller extension ladder for peaks; always stabilize and have a spotter. A quality HVLP or airless sprayer speeds coverage—match tip size to surface.
Carry drop cloths, painter’s tape, sanding blocks, and respirator masks. Choose tools that preserve your color contrast decisions and deliver the desired paint sheen consistently.
When Renting a Paint Sprayer Makes Sense
If your 1200 sq ft exterior is mainly smooth siding and you want to finish fast, renting a sprayer can cut hours off the job.
Weigh the rental and material costs against the time saved and the finish quality you need.
Remember that sprayers increase prep and cleanup work, so factor masking, tarps, and solvent cleanup into your decision.
Job Size And Speed
For most homeowners tackling a 1,200 sq ft exterior, the question isn’t whether you can paint by brush and roller but whether you should—renting a paint sprayer saves serious time on large, uninterrupted surfaces like siding and trim, letting you finish days of work in a few hours while keeping a more consistent finish than hand methods.
You’ll weigh job size and speed against prep time, masking, and cleanup; also consider color psychology when choosing fast recoat options and the environmental impact of overspray and thinner use.
- Long, flat siding swept quickly
- Intricate trim still needs detail
- Tall gables cut hours
- Multiple coats applied fast
Equipment Costs Versus Benefit
Speed gains are great, but you should weigh them against the cost and hassle of renting a sprayer. If your 1200 sq ft project is tight on time, a sprayer speeds coverage and handles siding grooves better.
However, rental fees and masking needs add up. You’ll save labor, yet spraying can alter paint texture and require practice to avoid orange peel or runs.
For complex trim, corners, or delicate color coordination between fascia and walls, brushes and rollers may be smarter.
Rent only if speed and consistent finish justify expense; otherwise stick with traditional tools for control.
Surface Prep And Cleanup
When you’re renting a paint sprayer, the prep and cleanup determine whether it saves you time or creates extra work; thorough masking, moving furniture, and protecting plants take more effort than brushing or rolling but prevent overspray headaches. You’ll plan prep like a pro: wash siding, scrape loose paint, sand rough spots, and choose eco friendly paints to reduce fumes.
After painting, finish cleanup promptly—flush the sprayer, remove masking, and dispose of waste responsibly. Think about color psychology when testing swatches; cleanup can reveal true tones. Prepare for extra time upfront to save hours overall.
- tarped furniture
- masked windows
- rinsed sprayer
- bundled debris
Prep Work: Cleaning, Scraping, Caulking, and Primer
Before you roll a single coat, prep the exterior thoroughly so paint will adhere and last. You’ll clean siding with a mild detergent, rinse, then scrub mildew. Scrape loose paint, sand edges, and use caulk on gaps to prevent moisture. Apply primer where bare wood or repairs appear. Consider color matching for touch-ups and paint recycling for leftovers to save money and reduce waste.
| Task | Tip |
|---|---|
| Cleaning | Pressure wash low, avoid damage |
| Scraping | Use proper blades |
| Caulking | Choose exterior grade |
| Primer | Oil or latex as needed |
| Finishing | Inspect before painting |
Dealing With Lead Paint and Safety Rules
If your home was built before 1978, you’ll need to follow federal and local lead paint regulations before you start scraping or sanding.
You should also use certified contractors or follow worker safety protocols like containment, HEPA vacuums, and proper PPE to protect yourself and others.
Check local rules and get testing or abatement if you suspect lead to avoid fines and health risks.
Lead Paint Regulations
Because homes built before 1978 often contain lead-based paint, you’ll need to follow strict federal and state rules whenever you disturb more than a small area of exterior paint. You must check regulations, notify tenants, and use approved methods to limit contamination; lead paint and environmental concerns drive these requirements.
If work triggers regulations, hire certified firms or get certified yourself. Keep records of testing, notifications, and disposal.
- Contain the work area with barriers and drop cloths.
- Use HEPA vacuums for cleanup.
- Bag and label debris securely.
- Dispose at approved facilities with manifests.
Worker Safety Protocols
When you’re working on an older exterior that may contain lead paint, follow strict worker safety protocols to protect yourself, others on site, and the environment. Wear proper safety gear—respirator, disposable suits, gloves—and post containment signs. Wet-scrape or use HEPA tools to minimize dust; never dry-sand. Practice Ladder safety: secure footing, maintain three points of contact, and avoid overreaching. Keep a decontamination station and bag waste per local rules. Train everyone on lead hazards and emergency procedures. Communicate with homeowners about timelines and cleanup to prevent exposure.
| Task | Tool | Risk |
|---|---|---|
| Containment | Plastic sheeting | High |
| Removal | HEPA sander | Medium |
| Disposal | Sealed bags | Medium |
| Access | Stabilized ladder | Low |
How Season and Weather Affect Scheduling and Paint Choice
Although paint can be applied year-round in many areas, you’ll get the best results by matching your schedule and product choice to the season and local weather patterns. Consider seasonal climate when choosing low-VOC formulations and fast-dry primers; avoid painting during high humidity or freezing nights.
Pick paints rated for your local temperature swings and UV exposure. Plan short windows of dry weather and monitor forecasts to protect fresh coats.
Visualize conditions:
- Morning dew lifting on a cool spring day.
- Hot, dry air in midsummer speeding cure time.
- Windy autumn afternoons carrying dust.
- Mild winter sun with stable temperatures.
How Long Will It Take: DIY vs. Professional Timelines
If you’re doing the job yourself, plan on several weekends—about 3–7 days of work depending on prep and experience.
Professionals typically finish a 1200 sq ft exterior in 1–3 days with a crew, or up to a week if there’s extensive prep or repairs.
Compare your available time and skill level to those ranges to decide what’s realistic.
DIY Time Estimate
Wondering how long it’ll take to paint a 1,200 sq ft house yourself versus hiring pros? You’ll likely spend weekends over two to three weeks, depending on prep and weather. You handle scraping, sanding, priming, and cutting in, plus cleanup. Think about coordinating colors with interior design and protecting plants — gardening tips help avoid paint splatters on shrubs.
- Morning: wash siding, let dry, inspect for repairs.
- Midday: scrape and sand peeled areas.
- Afternoon: prime damaged spots, tape trim.
- Weekend: roll main surfaces, apply second coat, touch up.
Plan breaks and realistic daily goals.
Professional Timeline Range
How long will pros take to paint a 1,200 sq ft house? You’ll typically see a 2–5 day window for a full exterior job:
day one for prep and repairs,
day two for priming and trim,
days three to four for main coats,
and a final day for touch-ups, color matching, and cleanup.
Weather and surface condition can shift that range. Pros work faster because they coordinate crews, use sprayers, and select the right paint sheen for durability and appearance.
If you want faster turnaround, ask about crew size, staging, and whether multiple coats can cure concurrently.
Labor Factors That Drive the Total Price
Because labor is the largest single component of an exterior paint job, you’ll want to understand the specific factors that drive hourly costs and total man-hours: crew size and experience, surface prep and repairs, the complexity of the home’s architecture, access and height, and local wage rates and labor regulations.
Labor typically dominates exterior paint costs—know crew size, prep needs, home complexity, access, and local wage factors.
You choose experienced crews for quality and faster turnaround; they factor in color psychology choices and environmental impact measures, which can increase prep time.
Consider these scenarios to visualize workload and cost:
- Two-person crew, simple siding, ground-level access.
- Four-person crew, lots of trim and detail.
- Scaffold needed for tall rooflines.
- Extensive patching and mildew remediation.
Typical Contractor Price Ranges for 1,200 Sq Ft Homes
When you’re budgeting for a 1,200 sq ft exterior paint job, you’ll see contractor quotes vary based on labor and materials.
Expect higher bids if you choose premium paints or specialized finishes, and lower ones with standard acrylics.
Also remember regional labor rates and supply costs can shift prices considerably from one area to another.
Labor And Materials
Although prices vary by region and finish level, you can expect most contractors to quote a range rather than a single flat rate for a 1,200 sq ft home’s exterior paint job. You’ll pay separately for labor and materials: skilled crews, prep work, and cleanup dominate costs, while paint, primers, caulk, and tape add material charges.
Consider color coordination choices and environmental impact when selecting supplies—low-VOC paints cost more but reduce fumes.
Typical breakdowns look like:
- Two-person crew for two days, prep and caulking.
- Primer and two coats of paint.
- Ladders, scaffolding rental.
- Disposal and cleanup fees.
Paint Type Differences
Having covered labor and materials, let’s look at how paint choices affect your overall price. You’ll pay more for premium acrylics or elastomeric coatings that last longer and resist mildew; budget options cut upfront costs but may need repainting sooner. Factor in color matching fees for custom shades and extra costs if contractors must maintain paint storage on-site. Below is a quick contractor price snapshot for a 1,200 sq ft home:
| Paint Type | Typical Range |
|---|---|
| Economy latex | $1,200–$2,000 |
| Mid-range acrylic | $2,000–$3,200 |
| Premium/elastomeric | $3,200–$5,000 |
Regional Price Variations
Because local labor rates, material availability, and permit requirements vary, you’ll see significant regional swings in contractor quotes for a 1,200 sq ft exterior—expect lower total costs in rural or lower-cost states and especially higher bids in big cities or high-cost coastal areas.
You’ll pay more where union crews, high rent, and strict codes exist; expect price jumps for complex access, historic-home rules, or eco-friendly paints. Consider color psychology choices that might demand extra coats.
Typical contractor ranges you might see:
- Rural/low-cost states: basic job, minimal prep.
- Suburban average: mid-range labor, standard paints.
- Metro areas: higher labor, permits.
- Coastal/high-cost: premium pricing, specialty coatings.
How to Get and Compare Reliable Contractor Quotes
When you’re ready to hire someone, get at least three written bids so you can compare scope, materials, timelines, and warranties side-by-side. Ask each contractor for references, proof of insurance, license, and a detailed breakdown: paint brand, primer, coats, and prep. Check reviews and photos to match their work to your interior design or landscaping ideas so exterior color ties to overall curb appeal. Use the table below to compare quickly.
| Item | Contractor A vs B |
|---|---|
| Price | $3,200 vs $3,800 |
| Timeline | 5 days vs 7 days |
| Warranty | 3 yrs vs 5 yrs |
Cost‑Saving Strategies That Don’t Cut Quality
If you want to trim costs without sacrificing a durable finish, prioritize smart prep and material choices: focus on thorough surface cleaning, targeted repairs, and high-quality primer. Then pick a mid‑price paint with strong reviews instead of the cheapest can on the shelf.
You can save by doing nontechnical tasks, planning color choices with color psychology to reduce repaint frequency, and preserving original trim in historical architecture.
Visualize savings and tasks:
- Scrub siding and remove loose paint for a clean canvas.
- Patch small cracks yourself with elastomeric filler.
- Tape and cover windows carefully to avoid rework.
- Reuse sound hardware and shutters after repainting.
How to Pick Long‑Lasting Exterior Paint Brands on a Budget
Saving on prep and selectively doing tasks yourself sets you up to spend on the one thing that really affects longevity: the paint itself. You should prioritize reputable brands with high acrylic content, good UV and mildew resistance, and solid warranty terms.
Compare coverage per gallon to reduce coats needed. Use color psychology to pick hues that hide dirt and fading—darker trims, lighter siding—to prolong perceived freshness.
Look for eco friendly options with low VOCs; they often perform well and reduce cleanup costs. Buy during sales, check pro lines at retail, and sample small areas before committing to full gallons.
Estimating Touch‑Ups and Future Maintenance Paint Needs
Because even the best exterior paint will wear unevenly, you should plan touch‑ups and periodic maintenance into your overall budget and timeline.
You’ll reserve extra paint based on coat count and paint color changes, plus a small allotment for trims and hidden spots.
Account for weather impact—UV, moisture, and freeze‑thaw cycles accelerate fading and peeling—so schedule inspections every 1–3 years.
Store leftovers properly and label cans with location and date.
- Small cans for trims and shutters.
- Match swatches for repaired panels.
- Brush and caulk kit on hand.
- Calendar reminders for inspections.
Track Paint Usage During the Job and Adjust on the Fly
When you track paint usage as you work, you’ll spot discrepancies between estimates and reality early and can reallocate cans, tools, or labor before they cause delays.
You should log gallons used per elevation, note areas needing extra coats, and mark leftover quantities after each day.
Check color matching as you open tins to avoid surprises and sample patched areas before committing.
Factor weather considerations into daily plans—humidity and temperature change drying times and coverage.
Update your materials list and crew assignments when consumption deviates from plan.
Frequent checks keep the project on schedule and prevent costly emergency runs.
Avoid Common Estimating Mistakes That Waste Money
If you want to keep costs down, start by double-checking your measurements, surface conditions, and paint coverage figures before you write a single estimate. You’ll avoid wasted trips, excess primer, and mismatched colors.
Check for hidden repairs, factor ladder time, and confirm whether the client prefers color psychology guidance or eco-friendly paints, since specialty options change price. Use clear notes and photos to justify choices.
- Peeling siding needing repair
- Trim detail and extra coats
- Access challenges and scaffolding
- Client requests for low-VOC, specialty hues
Sample Cost and Material Breakdown: Basic Scenario
Although every job has unique quirks, here’s a straightforward sample breakdown for painting a 1,200 sq ft house exterior using common materials and crew sizes so you can see typical costs and quantities at a glance.
Although every job varies, here’s a simple sample breakdown for painting a 1,200 sq ft exterior.
You’ll need about 10–12 gallons of standard exterior latex, primer included, plus caulk, tape, and minimal scaffolding.
Labor for a two‑person crew runs 2–3 days.
Estimate: materials $200–350, labor $800–1,200, equipment rental $50–150—total roughly $1,050–1,700.
Choose colors mindful of color psychology for curb appeal, and consider eco friendly paints if you want lower VOCs and longer-term value.
Sample Breakdown: Mid‑Range Materials and Labor
Because you’re upgrading materials and hiring more experienced painters, expect higher-quality primers, mid‑grade acrylic latex, and premium caulks to be used—typically 15–18 gallons total with better coverage—and a three‑person crew working 3–4 days.
Budget materials $350–550, labor $1,400–2,100, and equipment $100–250, for a total around $1,850–2,900.
You’ll get improved prep, consistent coats, and attention to trim. Choose colors with color psychology in mind to boost curb appeal. Consider eco-friendly paints to reduce VOCs.
Visualize the finished job:
- Smooth siding with even sheen
- Crisp, sealed trim lines
- Clean, ladder-free roof access
- Fresh, cohesive curb appeal
Sample Breakdown: Premium Paint and Pros
When you want the very best finish, expect top-tier acrylics and specialty primers—often 16–20 gallons total—and a skilled four‑person crew spending 4–6 days on prep, caulking, and multiple finish coats. You’ll choose refined color schemes, durable coatings, and eco friendly paints that resist fading. Labor focuses on meticulous surface repair, two finish coats, and trim detail. Pricing reflects premium materials and experienced pros who guarantee uniform coverage.
| Item | Quantity | Notes |
|---|---|---|
| Paint & Primer | 16–20 gal | High-build acrylics |
| Crew | 4 people | 4–6 days |
| Warranty | 5–10 yrs | Includes touch-ups |
Scaling These Calculations for Two‑Story or Irregular Homes
If your home has two stories or an irregular layout, you’ll need to adjust paint, labor, and access costs to match the added surface area, elevation work, and complexity of details. You’ll estimate extra gallons for higher walls, factor scaffold or lift rental, and allow longer labor hours for trim, dormers, and odd angles.
Protecting house foundation and nearby plants changes prep time, so include Landscaping considerations when planning.
Visualize the work:
- Scaffold reaching second-story eaves.
- Tight gables and multiple rooflines.
- Trim around bay windows and porches.
- Ground protection for foundation and beds.
Quick Checklist to Verify Your Paint Order Before Buying
After you’ve adjusted estimates for taller walls and tricky angles, double-checking your paint order will keep the job on schedule and avoid last‑minute runs. Verify gallons per coat, primer needs, and extra for trim. Match samples to your color schemes and confirm finish sheens. Check paint durability ratings for exterior conditions and ask about UV and mildew resistance. Note delivery dates and return policies. Use this quick reference:
| Item | Confirm | Quantity |
|---|---|---|
| Base color | Sample match | Gallons |
| Trim | Sheen & durability | Gallons |
| Primer | Type & coverage | Gallons |
Count cans, keep receipts, and adjust before checkout.
When to Call a Pro: Signs the Job Is Beyond DIY
Because exterior painting can hide structural or safety issues, call a pro if you spot extensive rot, loose siding, severe peeling, or anything that needs structural repair.
If you find extensive rot, loose siding, or severe peeling, hire a pro to handle structural repairs safely.
You should also hire pros if the job requires tall ladders, scaffolding, or specialized equipment you aren’t comfortable using.
You should also hire pros when color psychology choices affect resale, when detailed trim or multiple finishes demand precision, or when you want certified prep for warranty-covered eco-friendly paints.
Consider professionals if timelines, permits, or lead-paint concerns complicate work.
Visualize scenarios:
- Workers replacing rotten fascia.
- Scaffolding around a two-story gable.
- Intricate trim requiring steady hands.
- Lead-abatement prep and containment.
Frequently Asked Questions
Can I Paint Exterior Siding Over Existing Mildew Without Replacement?
Yes—you can, but you’ll need mildew removal first and thorough siding preparation. You’ll scrub, treat with a fungicide, rinse, repair damaged areas, allow drying, then prime and paint so the finish adheres and lasts.
How Do Warranties or Guarantees Affect Contractor Selection and Cost?
Imagine a rainproof umbrella shielding fresh paint; you’ll pick contractors whose warranty coverage is clear and whose contractor reputation shines. That’ll raise bids slightly, but protects your investment and gives you leverage if problems arise.
Will New Paint Change Homeowners Insurance or Resale Value?
Yes — new paint can boost resale value and might lower homeowner insurance risk perceptions, though policies usually won’t change solely for paint; you’ll increase curb appeal, potentially attracting buyers and modestly improving insurance impressions.
Can Solar-Reflective or Heat-Reducing Paints Lower Energy Bills?
Yes — you can save energy: solar paint and heat-reducing coatings reflect sunlight, lowering cooling loads, so you’ll see energy savings in summer. Results vary by climate, insulation, and application quality, so expect modest reductions overall.
How to Handle Painting Around Outdoor Electrical Fixtures Safely?
You’ll guarantee electrical safety by turning off power at the breaker, testing with a voltage tester, and performing fixture removal when safe; cap wires, label breakers, and consult an electrician if unsure before painting around outdoor fixtures.
Conclusion
So you think painting a 1,200 sq ft house is just slapping on color and calling it modern art? Cute. You’ll measure, multiply, and buy gallons like a responsible adult—then discover trim eats paint like a teenager eats pizza. Still, you’ll learn square footage actually means work, not just ego. If your ladder becomes a sculpture, maybe call a pro. At least you’ll have strong arms, a brighter house, and a great story.