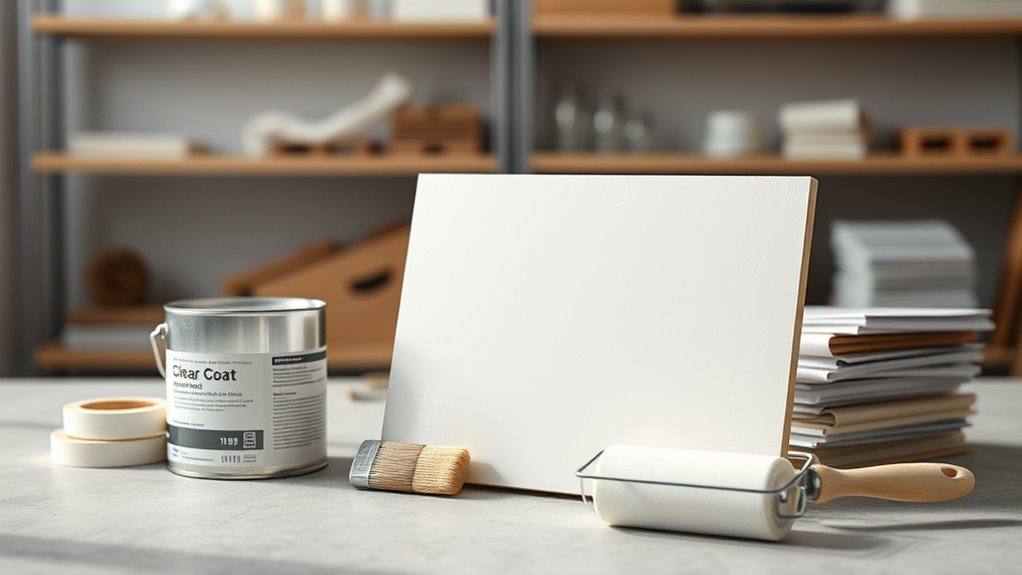
Can You Put Clear Coat Over Latex Paint
Yes—you can put a clear coat over latex paint as long as the paint is fully cured, clean, and lightly sanded for adhesion. Choose a compatible water-based finish like polyurethane, acrylic, or polycrylic to avoid yellowing. Apply thin, even coats with proper drying between layers, and do a small tape or patch test first to confirm adhesion. Don’t seal tacky paint or skip prep, and keep temperature and humidity in mind—keep going to see which finishes suit specific projects.
Quick Guide: What This How‑To Covers
Wondering whether you can put clear coat over latex paint? You’ll get a concise roadmap: when to use a clear coat, surface prep steps, compatible clear finishes, and quick tests for paint adhesion.
Wondering if you can clear coat latex paint? Get a quick roadmap: when, how, and what to test.
You’ll learn how latex durability affects whether a topcoat’s worth it, and what to watch for—peeling, gloss mismatch, or tackiness.
You’ll follow a short sequence: clean, sand lightly, prime if needed, and apply thin coats.
You’ll also see brief troubleshooting tips and safety reminders.
This guide keeps things practical so you can decide fast and proceed with confidence.
Can You Put Clear Coat Over Latex Paint?
Check compatibility—use a clear formulated for water‑based paints or an appropriate primer to guarantee adhesion and avoid clouding.
The choice of clear (matte, satin, gloss) will determine the final sheen and durability.
Surface Preparation Needed
How should you prep latex-painted surfaces before applying a clear coat? You’ll remove surface contamination, wash with mild detergent, and rinse thoroughly. Dry fully and inspect for dust, grease, or mildew. Sand glossy areas with fine-grit paper to promote adhesion, then tack-cloth to lift particles. Address chips or uneven spots with compatible filler and spot-prime. Consider environmental factors: temperature, humidity, and dust during curing. Do a small test area to confirm adhesion. Follow manufacturer drying times between steps. Use clean tools and lint-free cloths to avoid recontamination.
| Step | Action |
|---|---|
| 1 | Clean |
| 2 | Dry |
| 3 | Sand |
| 4 | Tack |
| 5 | Repair |
Compatibility And Finish
After prepping the surface properly, check whether your latex paint and chosen clear coat are chemically compatible and will produce the finish you want. You’ll want to verify the clear coat adheres to latex without softening or wrinkling; test a small area.
Consider sheen: gloss boosts color depth, satin mutes it, matte flattens reflections.
Compatibility affects latex durability and long-term paint adhesion, so follow manufacturer recommendations and use primers when advised.
For exterior jobs pick UV-resistant, flexible clears; indoors choose low-VOC options.
Let each layer cure fully before light sanding and recoat to ensure a uniform, lasting finish.
Quick Answer and Fast Steps
Although acrylic latex accepts clear coats, you’ll want to confirm the paint is fully cured and clean before you start.
Quick answer: yes, you can, but prep matters.
Fast steps: sand lightly with fine grit, remove dust, degrease, test adhesion with a small patch, then choose a compatible clear—waterbased for eco friendly finishes or solvent-based if needed.
Apply thin, even coats, allowing recommended dry time between coats, and inspect for runs.
For historical restoration, match sheen and use reversible or conservation-grade products when required.
Cure fully before regular use to guarantee durability and appearance.
Why Add a Clear Coat to Latex Paint?
Because a clear coat shields your latex paint from wear, UV fading, stains, and moisture, it’s often worth applying to high-traffic or exterior surfaces; you protect color and extend finish life. You’ll find improved scratch and chemical resistance, easier cleaning, and reduced chalking outdoors.
A proper clear coat supports latex adhesion when surfaces are prepped correctly, preventing peeling. It also preserves paint flexibility so expansion and contraction won’t crack the finish.
Choose a compatible water-based or solvent-based sealer to match your paint type, and test a small area to confirm adhesion, appearance, and retained flexibility before sealing the whole project.
When You Shouldn’t Seal Latex Paint
If you’re working on a project where the original finish benefits from breathability or a naturally worn look, don’t seal the latex paint—adding a clear coat can trap moisture, alter texture, or produce an unwanted sheen. You shouldn’t seal when you want vintage patina, on surfaces needing vapor exchange, or when frequent Latex cleaning is required; a clear coat hides subtle distressing and complicates future Paint mixing touch-ups. Consider these scenarios:
| Situation | Why avoid sealing |
|---|---|
| Antique wood | Preserves patina |
| Chalk finishes | Maintains matte feel |
| Outdoor porous surfaces | Allows breathability |
| Frequent cleaning | Easier maintenance |
| Color blending | Simplifies touch-ups |
How Long to Wait Before Clear Coating Latex Paint
When you’re ready to seal latex paint, wait until the paint is fully dry to the touch and cured enough to resist tackiness—typically 24 to 48 hours for most interior latex paints.
Though, cooler temperatures or thick coats can extend that to 72 hours or more. You should also consider humidity and ventilation, since they affect curing time.
If you’re matching a specific color, allow full cure before comparing or applying clear coat to avoid shifts.
For outdoor jobs, give extra time for solvents to off-gas to reduce environmental impact.
When in doubt, err on the side of longer drying.
Testing Whether Latex Paint Is Fully Cured
Before you seal your work, verify the paint’s full cure with a few simple tests to avoid trapping tackiness under clear coat.
Check appearance: fully cured latex has even sheen and no sticky spots. Do a gentle fingernail press in an inconspicuous area—no impression or tackiness should remain.
Perform an adhesion tape test: press painter’s tape, remove sharply; paint shouldn’t lift.
Smell can indicate incomplete curing—strong solvent or fresh paint odor means keep waiting.
These quick checks confirm the curing process completed and assure latex compatibility with topcoats, preventing adhesion failures or trapped moisture.
Choose the Right Clear Coat for Your Project
You’ll want to pick a clear coat that matches the sheen of your latex paint so the finish looks uniform. Make sure the surface is clean, dry, and lightly sanded before you start.
Then choose an application method—spray, brush, or roller—that suits the size and texture of your project.
Matching Sheen Levels
If you want your finished surface to look intentional, match the clear coat’s sheen to the existing latex paint rather than guessing. You’ll preserve sheen consistency by comparing samples in the same light, using swatches of satin, semi-gloss, or gloss clear coats.
For furniture or trim, choose a sheen that complements the base paint and aids color matching across panels. Matte or flat clears can mute vibrancy; gloss heightens it.
Test a small area to confirm appearance and durability. Pick a clear coat formulated for latex—waterborne clears usually blend best and keep the original paint’s look intact.
Surface Preparation Steps
Matching sheen helps you predict the final look, but proper surface prep makes that look last. You’ll clean the latex-painted surface with mild detergent, rinse, and let it dry fully to avoid trapping moisture.
Lightly scuff glossy areas with fine-grit sandpaper for adhesion, then remove dust with a tack cloth.
Repair chips or uneven texture with a suitable filler, sand smooth, and spot-prime bare areas so color matching stays consistent under the clear coat.
Test a small patch to confirm adhesion and texture enhancement before proceeding.
Proper prep prevents peeling, blotches, and finish failure.
Application Method Options
How should you apply clear coat over latex paint? Choose application by project size and latex paint compatibility: spray for even coverage on furniture and intricate pieces, brush or roller for small flat areas where control matters.
Test a small section to confirm adhesion and finish; that prevents costly clear coat removal if compatibility fails. Sand between coats lightly for smoothness, and follow manufacturer recoat times.
For outdoor jobs, pick UV-resistant clears and apply in suitable temperature/humidity. Wear proper PPE, keep coats thin to avoid runs, and allow full cure before heavy use to guarantee durable protection and a consistent sheen.
Water‑ vs Solvent‑Based Clear Coats: Which to Pick?
When deciding which clear coat to use over latex paint, you’ll weigh durability, appearance, and environmental concerns—water‑based formulas dry faster, have lower odor, and keep colors truer.
While solvent‑based options give tougher chemical and abrasion resistance for high‑traffic or exterior projects.
You’ll consider color matching—water‑based keeps original hues; solvent can amber slightly.
If previous layers need removal, paint stripping matters: solvent systems may react with underlying finishes.
Choose based on location and maintenance.
- Indoor, low‑odor: water‑based.
- Exterior, heavy wear: solvent‑based.
- Mixed substrates: test first for compatibility.
Polyurethane Over Latex Paint: Pros & Cons
If you decided solvent‑based clear coats for durability, polyurethane is likely what you’re picturing—it’s one of the toughest finishes you can apply over latex paint. You’ll get superior latex durability, resisting scratches, chemicals, and yellowing better than many alternatives.
Apply thin, even coats and sand between layers for adhesion; oil‑based formulas give more robustness but can amber and affect color matching, so test first. Fast‑dry water‑based poly reduces ambering but sacrifices a bit of hardness.
Remember ventilation and proper solvent cleanup. Overall, polyurethane protects well but demands attention to prep and trial patches to secure desired results.
Polycrylic Over Latex Paint: Pros & Cons
If you’re considering polycrylic over latex, know it gives good scratch resistance and protection without the ambering you get from oil-based polyurethane.
Apply thin, even coats with a synthetic brush or foam roller, sanding lightly between coats to avoid cloudiness.
Keep in mind polycrylic stays clearer but can be less durable than polyurethane on high-traffic surfaces.
Durability And Protection
Although polycrylic dries clear and feels tougher than latex alone, it doesn’t make your painted surface invincible—you’re adding a protective layer that resists scratches, moisture, and yellowing better than unsealed latex. You’ll preserve color matching by preventing fading and protect texture enhancement achieved with brush or roller techniques.
Still, expect wear at high-contact points; polycrylic helps but won’t stop heavy abrasion forever. Consider where protection matters most and whether periodic recoats are acceptable for longevity.
- Scratch resistance: improves surface durability.
- Moisture barrier: reduces water damage.
- UV protection: slows color shift and yellowing.
Application Tips
When you’re ready to seal latex paint with polycrylic, prep and technique matter more than brand names—clean the surface thoroughly, sand lightly to dull high gloss, and remove dust before you start.
Work in thin, even coats with a synthetic brush or foam applicator, keeping a wet edge to avoid lap marks.
Sand between coats with fine grit for better adhesion and subtle texture enhancement.
Test a small area first to confirm sheen and color matching, since clear coats can slightly alter appearance.
Allow full cure time, and avoid heavy use until the finish hardens for best results.
Appearance And Yellowing
After you’ve sealed your latex paint, appearance becomes the next big consideration—polycrylic gives a clear, durable finish but can slightly alter sheen and color. You’ll notice subtle changes; glossy areas may deepen, and light tones can warm.
Yellowing is rare with water-based polycrylic, but exposure to UV and heat increases risk. To avoid surprises, test a small hidden patch and evaluate color matching before finishing.
Also check for existing paint peeling; if paint’s failing, seal won’t fix adhesion.
- Test sheen and hue on scrap.
- Avoid direct sun to limit yellowing.
- Repair peeling before sealing.
Lacquer and Spray Clears: Pros & Cons
If you want a fast, high-gloss finish that dries almost instantly, lacquer and spray clears are appealing choices, but they come with trade-offs you should know.
You’ll get quick recoat times and a smooth sheen that can enhance clear coat color, yet lacquer’s ambering may alter pigments over time.
Quick recoat and smooth sheen boost finish, but lacquer’s ambering can shift pigments over time.
Spray clears are easy for even coverage but can raise concerns about adhesion to latex, affecting latex longevity unless you prep properly.
They’re best for small projects where speed matters.
Use light coats, good ventilation, and test a hidden area to confirm adhesion and final appearance.
When to Use Epoxy Clear Coats on Latex Paint
If your painted surface gets constant wear—like floors, tabletops, or busy trim—you’ll want the extra toughness epoxy provides.
Use epoxy clear coats when the project faces outdoor weather or prolonged sun and moisture exposure.
Also choose epoxy if the area will contact harsh cleaners, solvents, or chemicals that could break down ordinary latex finishes.
High-Traffic Surfaces
When surfaces get constant use—like kitchen island tops, children’s play tables, or shop benches—you’ll want a tougher finish than standard latex provides. That’s where epoxy clear coats earn their keep. You’ll preserve latex durability while improving coating aesthetics, resisting scuffs, stains, and repeated cleaning.
Apply epoxy over well-cured, sanded latex for best adhesion and avoid trapping moisture. Consider maintenance, yellowing risk, and VOCs when choosing products. Use primer if needed and follow cure times.
- Cut-resistant: protects against knives and tools.
- Impact-resistant: reduces dents and chips.
- Easy-clean: withstands repeated wiping and spills.
Outdoor Durability Needs
Because outdoor surfaces face UV, moisture, and temperature swings, you’ll want an epoxy clear coat over latex only where extra protection outweighs its drawbacks.
You should choose epoxy for porch floors, outdoor furniture, and trim that endure heavy wear, standing water, or frequent temperature cycling. Epoxy adds robust moisture resistance and harder abrasion protection, and it can provide color enhancement and boost aesthetic appeal by deepening sheen.
Don’t use it everywhere: epoxy can yellow slightly and is harder to repair than latex. Assess exposure, maintenance willingness, and visual priorities before committing to epoxy for outdoor latex-painted items.
Chemical Or Solvent Exposure
Outdoor spots exposed to chemicals or solvents need a different level of protection than areas facing only weather and wear. You’ll want epoxy clear coats when chemical exposure is likely, since they resist staining and breakdown better than typical acrylics. Check solvent compatibility before applying: some clear coats soften or cloud with certain cleaners or fuels.
- Assess the chemicals used nearby and frequency of contact.
- Verify solvent compatibility between your latex base and chosen epoxy topcoat.
- Test a small area to confirm adhesion and appearance under real conditions.
Choose epoxy when durability against chemicals matters most.
How Gloss Level Changes Appearance
Though you might not notice it at first, gloss level dramatically changes how a painted surface looks. You’ll see gloss impact in color depth, reflected light, and perceived texture; a sheen change can hide flaws or highlight them. Choose high gloss to amplify color and make wiping easier, or pick matte to mask imperfections and soften tones. Below is a quick comparison to guide choices:
| Gloss Type | Visual Effect | Common Use |
|---|---|---|
| Matte | Diffuses light | Walls, art |
| Satin | Soft glow | Trim, doors |
| Gloss | Sharp reflections | Cabinets, metal |
Matching Clear Coat to Indoor vs Outdoor Use
When you’re choosing a clear coat, think about whether the piece will live indoors or outdoors.
Indoor clear coats can focus on appearance and easy cleaning.
Outdoor formulas need extra UV and moisture resistance for long-term durability.
Pick a product labeled for exterior use if the project will face sun, rain, or temperature swings.
Indoor Clear Coat Types
Because indoor conditions are more stable and ventilation matters, you’ll want clear coats formulated for low-VOC, low-odor performance and good hardness without the heavy solvents used outdoors. You’ll pick a product that protects latex durability while keeping fumes down and allowing future clear coat removal if needed.
Consider these common indoor types and when to use them:
- Water-based polyurethane — fast-drying, low odor, clear finish that preserves latex durability and sands between coats.
- Acrylic lacquer — thin, smooth, good for trim; easier clear coat removal than some catalyzed systems.
- Waterborne alkyd — tougher finish, moderate odor, resists scuffs indoors.
Outdoor Durability Needs
Indoor clear coats focus on low odor and easy workability, but outdoor projects demand a different set of priorities. You’ll choose clear coats that resist abrasion, temperature swings, and staining while preserving color matching and offering eco friendly options when possible. Pick products formulated for exterior exposure and follow surface prep instructions so adhesion lasts.
| Property | Indoor Priority | Outdoor Priority |
|---|---|---|
| Durability | Moderate | High |
| Breathability | Important | Critical |
| Finish Consistency | Color matching focus | UV/moisture stamina |
Match formulation to location, and test a small area before committing.
UV And Moisture Resistance
Curious how UV and moisture change the game for clear coats? You’ll pick coatings by location: outdoor needs UV blockers and moisture seals, indoor needs low-VOC clarity. Consider color matching when sheen alters perceived hue; test samples under real light. Eco friendly options exist—water-based urethanes and acrylics—so you can protect without heavy solvents.
- For exteriors: choose UV-resistant, mildew-inhibiting clear coats and verify adhesion to latex.
- For interiors: pick low-VOC, non-yellowing finishes that preserve color matching.
- Prep and test: sand, clean, and apply sample panels to confirm performance.
Indoor Ventilation and VOC Tips for Clear Coating
When you apply a clear coat over latex paint, make certain you have strong ventilation so fumes don’t build up and you can dry the finish properly. Open windows and run fans to move air out, protecting indoor air quality and reducing VOC emissions.
Choose low-VOC or water-based clear coats to limit odor and health risks.
Choose low-VOC or water-based clear coats to reduce odors and health risks while maintaining a great finish.
Wear a properly rated respirator if ventilation is limited.
Keep doors closed to prevent household cross-contamination and post warning signs if others share the space.
Allow full curing time per product instructions before reoccupying to ensure vapors have dissipated and the finish has hardened.
Tools and Equipment You’ll Need
You’ll need the right protective gear—gloves, goggles, and a respirator—before you start.
Prepare the surface with sandpaper, tack cloths, and a degreaser so the clear coat bonds properly.
Then pick application equipment that suits your project, like a brush, roller, or spray gun.
Essential Protective Gear
Ready to protect yourself and your workspace? You’ll need basic protective gear before applying clear coat over latex paint, especially if you use eco friendly solvents or aim for decorative effects—safety keeps your finish flawless.
Wear a respirator rated for organic vapors to avoid fumes. Use nitrile gloves to prevent skin contact and keep fingerprints off wet clear coat. Protect surfaces with drop cloths and tack cloths to trap dust.
- Respirator with organic vapor cartridges
- Nitrile or solvent-resistant gloves
- Drop cloths and tack cloths
Surface Preparation Tools
Before you lay down any clear coat, gather a few key surface-prep tools so the paint has a clean, smooth base to bond to. You’ll need fine-grit sandpaper (120–220) and sanding blocks to scuff gloss and feather edges, plus tack cloths to remove dust.
A mild degreaser or trisodium phosphate substitute removes oils; use clean rags. Have a scraper or putty knife for loose paint and a lightweight filler for small gouges.
For checking consistency, keep a small swatch board to test color matching and verify stain compatibility before committing to the full clear coat.
Application Equipment Choices
Having prepped the surface, pick the right application gear to get an even, durable clear coat over latex paint. You’ll want tools that suit scale and finish: brushes for edges, rollers for flats, and sprayers for smooth, thin films.
Consider how decorative techniques or color matching affect tool choice—sprayers preserve subtle textures, while fine brushes help trim matched accents. Keep equipment clean and use compatible materials to avoid adhesion issues.
- High-density foam roller — smooth coverage, minimal texture.
- Nylon/polyester angled brush — precise edges, trim work.
- HVLP sprayer — uniform film, best for decorative techniques and large areas.
Brush vs Roller vs Spray: Which to Use?
Wondering which application method will give you the smoothest, most durable clear coat over latex paint? You’ll choose based on surface size and finish goals.
Brush works for small trim and touch-ups but can leave strokes affecting paint sheen and subtle color matching perception.
Roller’s good for walls—use a fine-nap roller for even coverage without texture—but it risks orange peel on glossy surfaces.
Spray gives the flattest, most uniform film and best clarity for true color matching and consistent sheen, but needs masking and ventilation.
Pick spray for large or high-gloss jobs, roller for midsize, brush for detail.
How to Thin and Mix Clear Coat Products
You’ll want clear guidance on thinning ratios, since the wrong mix can ruin sprayability or coverage. Follow proper mixing procedures step by step and measure by volume to keep the finish consistent.
Also check solvent compatibility to avoid clouding or adhesion problems between the clear coat and your latex paint.
Thinning Ratios Guide
When you’re preparing to thin a clear coat, getting the ratio right matters more than you might think: too thin and you’ll get runs and poor coverage, too thick and you’ll see orange peel and solvent popping. You’ll aim for balance to preserve color blending and support texture enhancement without compromising adhesion.
Typical guidance varies by product—follow manufacturer specs—but common starting points help you judge adjustments quickly.
- 4:1 clear to reducer for standard conditions.
- 3:1 for cooler temps or heavier application.
- 5:1 for fast flashes or sprayable gloss finishes.
Mixing Procedures Explained
Because proper mixing determines how the clear coat sprays and cures, get your ratios, reducers, and mixers ready before you open the can. You’ll measure by volume, follow manufacturer ratios for clear coat types, and check latex compatibility when overcoating. Stir gently to avoid bubbles, add reducer in small increments, and test viscosity with a cup or viscosity cup. Work quickly within pot life, and keep notes so you can reproduce results.
| Step | Tool | Tip |
|---|---|---|
| Measure | Graduated cup | Follow ratio |
| Stir | Mixing stick | Avoid bubbles |
| Thin | Reducer | Add slowly |
| Test | Viscosity cup | Adjust as needed |
Solvent Compatibility Tips
If you’re planning to thin or mix a clear coat over latex paint, confirm solvent compatibility first so you don’t soften or lift the underlying finish. You’ll protect latex chemistry and preserve paint color by testing and choosing solvents wisely. Follow these steps before full application:
- Test a small area: apply thinned clear coat over cured latex, watch for tackiness or color shift.
- Match solvent types: use waterborne reducers for acrylic latex systems; avoid strong aromatics that attack binders.
- Mix gradually: add solvent in small increments, stir thoroughly, and re-test until flow and gloss meet specs.
Surface Cleaning for Adhesion
Before you roll or spray clear coat, wipe the surface down and remove any dust, grease, or chalky residue so the finish can bond properly. You’ll start with a mild detergent and warm water, rinsing thoroughly and letting the latex cure completely.
Use a solvent-free cleaner for stubborn grease; test a small area first. Remove any wax or silicone contaminants to prevent fish-eyes.
For surfaces where color matching matters, clean edges and seams meticulously so the clear coat won’t highlight imperfections. Finally, dry with lint-free cloths and avoid touching the surface—cleaning sets the stage for consistent texture enhancement and adhesion.
Deglossing and Light Sanding Explained
Though latex paint can look smooth, you’ll need to degloss and lightly sand it so the clear coat can bond mechanically rather than just sit on the surface. You remove sheen, promote adhesion, and avoid trapped moisture by deglossing with a scuff pad or liquid deglosser, then follow with light sanding.
Degloss latex with a scuff pad or liquid deglosser, then lightly sand for reliable clear-coat adhesion.
Aim for uniform dullness; don’t sand through the finish. After dust removal, apply clear protection per product directions.
- Scuff with a non-woven pad or 400–600 grit sandpaper.
- Clean thoroughly to remove residues.
- Test a small area to confirm adhesion before full application.
Repairing Chips and Imperfections Before Sealing
Before you apply clear coat, you should inspect and sand any chips or rough spots so the surface is smooth.
Use a lightweight filler on deeper nicks, sand it flush, and then apply a compatible primer to seal the repair.
Doing this guarantees the clear coat adheres evenly and hides imperfections.
Assess And Sand Imperfections
Start by closely inspecting the painted surface under good light to spot chips, drips, or uneven texture that will telegraph through any clear coat. You’ll evaluate areas needing touch-up versus full repair, considering whether latex removal or paint mixing errors caused defects.
Use fine grit sandpaper to feather edges and level drips; don’t oversand into raw substrate. Clean dust thoroughly before proceeding.
Then follow this brief sanding checklist:
- Sand high spots and edges with 220–320 grit for smooth transitions.
- Blend feathered areas with light cross-sanding for uniform texture.
- Wipe with tack cloth and inspect under light before sealing.
Fill And Prime Chips
When you find chips or exposed substrate, repair them now so the clear coat lays down smoothly and adheres properly. You’ll scrape loose paint, clean the area, and sand feathered edges.
Fill chips with a compatible acrylic wood or plastic filler, compacting it so you don’t trap air. After curing, sand flush and remove dust.
Apply a quality primer matched to latex flexibility to avoid cracking under movement. Let the primer dry fully; it guarantees clear coat compatibility and promotes adhesion.
Test a small patch of clear coat over the repaired spot before finishing the entire surface.
Application: Brush or Roller Step‑by‑Step
If you’re working with a brush or roller, apply the clear coat in thin, even passes to avoid drips and visible overlap marks. Start by sanding lightly and wiping dust; you want a smooth base for any color matching and to guarantee adhesion. Choose an eco friendly option if ventilation is limited.
- Load a good-quality brush or a low-nap roller, work along the grain or stroke direction.
- Lay down one thin coat, watch for runs, feather edges to hide lap lines.
- Wait recommended cure time, sand very lightly between coats, then apply a second thin coat.
Application: Spray Step‑by‑Step
Because spray application atomizes the clear coat, you’ll get a smoother, more even finish faster than brushing or rolling—just maintain consistent motion, proper overlap, and the right tip pressure to avoid runs and orange peel.
Prep by cleaning, sanding lightly, and removing dust; if old latex lifts, consider latex removal and recoat before spraying.
Mask areas and test spray to confirm paint matching and sheen.
Hold the gun 6–10 inches away, use steady, parallel passes with 50% overlap, and keep moving to prevent buildup.
Allow recommended flash times between coats, inspect under good light, and cure fully before handling.
Avoid Runs: Wet Film Thickness & Coverage
Although clear coat looks great when applied generously, you’ll get runs if you lay down too much wet film at once. You must control wet film thickness to prevent sagging and preserve color matching and texture matching with the underlying latex. Work in thin, even passes and inspect edges for pooling.
- Measure coverage: follow manufacturer mil recommendations to avoid overapplication.
- Adjust technique: keep spray distance and speed steady to maintain uniform film.
- Feather and overlap: use light overlaps to blend without building ridges that cause runs.
Careful handling keeps appearance consistent and durable.
How Many Clear Coat Coats Over Latex Paint?
How many clear coats you need depends on the look and durability you want: usually two thin coats provide good protection and gloss over latex paint, while three coats give extra abrasion and UV resistance for high-traffic or exterior surfaces.
You’ll choose based on surface use, sheen preference, and whether you plan color matching or layered effects that alter reflectivity. Two coats keep environmental impact lower and dry time shorter; three offers longer lifespan but uses more product.
For trim or furniture, stick with two; for floors, doors, or outdoor items, three gives better protection without sacrificing appearance.
How Long to Wait Between Coats
After deciding whether to apply two or three clear coats, you’ll need to plan the timing between each layer to get a smooth, durable finish.
Typically wait 1–2 hours for water-based clear coats over latex in warm, dry weather conditions; cooler or humid days can double that. Test by touch—no tack means you can recoat.
Also consider paint color: darker tones absorb heat and may cure faster, while pale shades reflect it.
- Quick recoat: 1–2 hours (ideal conditions)
- Standard: 4–6 hours (common scenarios)
- Extended: 24 hours (cold or humid)
Sanding Between Coats Without Scuffing Paint
When you sand between latex coats, use a very light touch and fine-grit paper (220–320) to knock down dust nibs without cutting into the paint.
Keep the pad flat and use even, gentle strokes so you only scuff the surface enough for adhesion.
If you feel resistance or see shiny spots, stop and switch to a softer approach to avoid scuffing through the finish.
Light Sanding Technique
Light sanding between coats keeps your finish smooth without cutting through the latex paint. You’ll use fine grit (320–400) and light pressure, moving with the grain or in circular motions on flat surfaces. This avoids disturbing color mixing layers or creating uneven sheens that affect final clear coat adhesion and environmental impact from extra recoats.
- Dry thoroughly before sanding to prevent clogging.
- Use a soft sanding block to distribute pressure evenly.
- Wipe with a tack cloth to remove dust before recoating.
Sand gently, check frequently, and don’t overwork a single spot to preserve the base coat.
Avoiding Paint Scuffing
If you want to sand between coats without scuffing the latex paint, use the gentlest approach that still creates tooth. Lightly sand with fine 320–400 grit, move with the brush strokes, and keep pressure even so you don’t remove paint or distort color blending.
Use a soft sanding block or abrasive pad, and wipe dust with a tack cloth before recoating. For artistic techniques that rely on subtle gradations, test on a scrap first to verify texture matches.
Work patiently; multiple gentle passes beat aggressive sanding. Replace pads when clogged to avoid gouging and maintain consistent results.
How to Blend Clear Coat Edges on Furniture & Trim
Because clear coat tends to build up at edges, you’ll want to feather and blend those ridges so the finish looks smooth and seamless across furniture and trim. You’ll prep by light sanding the edge buildup with fine grit, removing gloss without cutting into underlying latex. Use a tack cloth, then apply thin glazes or a light mist of clear to even thickness.
For precise edge blending in furniture finishing, work quickly and keep strokes continuous.
- Sand lightly (320–400) along edges.
- Mist or thin coats, overlapping onto flat surfaces.
- Buff gently after cure to marry the sheen.
Achieving an Ultra‑Smooth Professional Finish
When you want a truly professional, ultra‑smooth finish, focus on surface prep, application control, and proper curing—those three areas determine whether the clear coat will look factory‑fresh or show flaws. You’ll sand progressively, remove dust, and guarantee the latex base has cured. Use consistent spray technique or thin brush coats, control temperature/humidity, and choose clear coats that suit color matching needs and eco friendly options if desired. Let proper cure times prevent tackiness. Small test panels help.
| Step | Purpose |
|---|---|
| Sand | Smooth surface |
| Clean | Remove contaminants |
| Prime | Improve adhesion |
| Spray | Even laydown |
| Cure | Harden finish |
Fixing Mistakes After Clear Coat Application
Although a smooth clear coat is the goal, mistakes happen — runs, orange peel, dust nibs, or tacky spots — and you’ll need a clear, stepwise approach to fix them without making things worse. Assess severity, note finish gloss, and consider color matching if you’ll blend repaired areas. Factor budget considerations before buying materials or hiring pros.
- Sand gently with fine grit, clean, then recoat thinly to level runs or peel.
- Wet-sand orange peel, compound, and polish to restore gloss; spot-test first.
- For heavy flaws, strip to base, touch up latex, then re-clearcoat for uniform results.
Troubleshooting: Adhesion, Bubbling, Peeling
If your clear coat is lifting, bubbling, or peeling over latex paint, start by identifying the root cause—poor surface prep, incompatible products, trapped moisture, or painting over uncured latex are common culprits—and then choose the correct repair path.
You’ll strip failed areas, sand to feather edges, and test adhesion with a small patch. Use primers or adhesion promoters if compatibility’s the issue, and wait for full cure to avoid rework.
Match sheen and color matching when repainting to hide repairs.
Consider environmental impact: use low-VOC products and proper disposal.
Recoat only after confirming dry, stable substrate.
Durability Expectations by Clear Coat Type
After you’ve ruled out adhesion or curing problems, understand that clear coats vary widely in durability depending on their chemistry and designed use. You’ll choose based on exposure, sheen, and whether you need UV resistance or flexible protection over latex. Consider how color matching beneath the clear coat affects perceived finish, and pick application tools that suit the product.
- Acrylic/polyurethane: durable for interiors, resists yellowing; brush, roller, or spray depending on viscosity.
- Spar urethane: flexible and UV-stable for sun-exposed areas; best applied with a high-quality brush or spray.
- Epoxy/topcoat: extremely tough for floors; requires careful spraying or roller technique and proper thinning.
Cleaning and Maintenance for Clear‑Coated Latex Surfaces
To keep clear-coated latex looking its best, you should clean it regularly with a soft cloth, mild soap, and water. Avoid using abrasive pads or harsh chemicals.
Wipe up spills quickly and use gentle circular motions to prevent scratching the clear coat.
For tougher grime, test a mild cleaner in an inconspicuous spot first so you don’t accidentally damage the finish.
Routine Cleaning Tips
When you clean clear‑coated latex surfaces regularly, you’ll keep the finish looking fresh and prevent grime from bonding to the sealer. Use mild detergent and warm water, rinsing thoroughly so residues don’t dull sheen.
For painted trim, consider color matching when spot-cleaning to avoid visible streaks or uneven gloss. Factor in budget considerations when choosing cleaners—gentle household solutions usually work better than expensive specialty products.
- Wipe spills immediately with a soft cloth and mild soap.
- Use a non-abrasive sponge for routine washing, rinse well.
- Dry with a microfiber cloth to prevent water spots.
Preventing Surface Damage
If you want your clear‑coated latex surfaces to stay durable and glossy, a simple routine of gentle cleaning, prompt spot treatment, and occasional resealing will prevent most damage. Wipe spills quickly with a soft cloth and mild detergent, avoid abrasive pads, and rinse thoroughly.
For scuffs, gently buff with a nonabrasive cleaner and retouch with compatible clear coat or thin latex where needed—test for color matching first.
Inspect annually for wear; recoat high‑traffic areas based on condition and budget considerations. Store cleaners safely, avoid harsh chemicals, and address chips immediately to stop moisture and UV breakdown.
Removing or Stripping Clear Coat From Latex Paint
Although clear coat can protect a latex-painted surface, you may need to remove it when it peels, yellows, or interferes with refinishing. Stripping it takes patience and the right approach. You’ll assess adhesion, test a small area, and choose a method that preserves underlying paint and improves future latex adhesion.
For safe clear coat removal:
- Start with gentle methods: sanding with fine grit or chemical strippers rated for latex.
- Use plastic scrapers and soft cloths to avoid gouging the paint.
- Rinse, neutralize chemicals, and let the surface dry before further work.
Painting Over an Existing Clear Coat: How to Prep
If you’re painting over an existing clear coat, start by scuffing the surface with fine-grit sandpaper to create tooth for the new finish.
Wipe away dust and then clean the area with a degreasing solution so the new coat will adhere properly.
Let the surface dry completely before applying primer or paint.
Surface Scuffing And Sanding
When you’re painting over an existing clear coat, you’ll need to scuff and sand the surface to guarantee proper adhesion; a smooth, glossy finish won’t let new paint or clear coat bond well. You’ll remove gloss, expose a tooth for the new layer, and reduce risks like surface cracking or unforeseen chemical reactions between old and new products.
Use progressive grits and steady pressure to avoid gouging or heat buildup. Follow this simple sanding sequence:
- Start with 320–400 grit for light scuffing.
- Move to 600–800 grit for feathering edges.
- Finish with 1000–1500 grit for a fine key.
Cleaning And Degreasing
Before you apply any new paint or clear coat, thoroughly clean and degrease the surface so nothing prevents adhesion. Use a mild detergent rinse, then a dedicated degreaser or wax-and-grease remover to eliminate oils, silicone, and residues.
Work small sections with microfiber cloths, changing pads when they pick up contaminants. Rinse and let the surface dry completely.
Check under good light for spots that could interfere with color matching or compromise the final finish. Proper cleaning guarantees the clear coat bonds evenly and supports aesthetic enhancement, avoiding fish-eyes, lifting, or uneven gloss after topcoating.
Color Change and Yellowing Risks
Although clear coats can protect latex paint, they can also alter its appearance over time, and you should know how and why that happens. You’ll notice two main issues: color fading when UV exposure breaks down pigments, and surface yellowing from some ambering varnishes or trapped contaminants. To minimize risk, choose appropriately formulated clears and apply correctly.
- UV exposure accelerates color fading; use UV-resistant clears and limit sunlight.
- Incompatible solvents or additives can cause surface yellowing; test first.
- Poor curing or dust entrapment worsens both; follow dry times and clean conditions.
Best Clear Coat Products for Latex Paint (Use Cases)
Now that you know how UV, yellowing, and curing issues can affect a latex finish, pick a clear coat that matches your project’s exposure, substrate, and desired sheen.
For indoor trim and furniture, water-based polycrylic offers good latex compatibility, low odor, and quick drying, preserving color.
For high-traffic floors or exterior trim, choose exterior-grade polyurethane (oil- or water-based) for superior abrasion resistance and better clear coat longevity.
Spar urethane or marine varnish suits outdoor wood exposed to sun and moisture.
For delicate or vintage pieces, a conservation-grade acrylic spray provides thin, even protection without altering texture.
Always test first.
Cost Comparison: Polycrylic vs Polyurethane vs Lacquer
You’ll want to compare upfront material costs for polycrylic, polyurethane, and lacquer because prices can vary widely by brand and finish.
Consider application and labor too—some products need more coats, longer dry times, or special equipment, which adds to the total.
Finally, weigh long-term value like durability and maintenance to see which clear coat gives you the best return on investment.
Material Cost Comparison
Comparing material costs for clear coats is straightforward: polycrylic, polyurethane, and lacquer each come at different price points and performance trade-offs that affect your budget. For Material sourcing and Cost analysis, you’ll weigh retail brand premiums, available sizes, and local availability. Choose based on project scale and expected lifespan.
- Polycrylic — usually cheapest per quart, water-based, low odor, good for indoor use; buy more for multiple coats.
- Polyurethane — mid to high cost, oil- or water-based options, better durability; budget for fewer coats but pricier product.
- Lacquer — often most expensive, fast-drying, professional-grade; factor in ventilation supplies.
Application And Labor
Because application method and drying time directly affect labor costs, you should factor in prep, number of coats, and ventilation needs when choosing between polycrylic, polyurethane, and lacquer.
You’ll spend less time with fast-drying polycrylic and water-based polyurethane, reducing labor and avoiding extensive ventilation. Lacquer sprays quickly but needs masking and strong exhaust.
Polyurethane often requires more coats and longer cure times, raising labor hours.
Consider color matching efforts when coating stained or tinted latex—some clear coats alter tone, adding touch-ups.
If eco-friendly options matter, pick water-based polycrylic or low-VOC polyurethanes to balance cost and worker safety.
Long-Term Value
How will your choice of clear coat affect costs over time? You’ll weigh upfront price, maintenance, and resale value. Polycrylic is cheap, easy to touch up, and minimizes color shifting—good if color matching matters.
Oil-based polyurethane lasts longer, reducing recoat frequency but raises Environmental impact and may yellow.
Water-based polyurethane balances durability with lower emissions.
Lacquer gives quick cure and high gloss but demands skilled application and frequent refinishing.
- Polycrylic: low cost, easy repairs, best for color matching.
- Polyurethane (oil/water): higher durability, variable environmental footprint.
- Lacquer: premium finish, higher labor and recurring costs.
Outdoor Considerations: UV and Moisture Protection
When you plan to put clear coat over latex paint outdoors, remember sunlight and moisture are the biggest threats to the finish; UV rays can yellow or break down clear coats while water can cause peeling or mildew if the film isn’t continuous. You should choose a UV-resistant product and guarantee full coverage to maximize weather resistance and minimize environmental impact. Prep, dry conditions, and compatible clear coat chemistry matter. Monitor and recoat before failure.
| Concern | Action | Result |
|---|---|---|
| UV | Use UV-stable clear | Less yellowing |
| Moisture | Guarantee seal | Prevents peeling |
| Durability | Recoat timely | Longer life |
Kitchen & Bathroom Considerations: Heat and Humidity
If you’re planning to clear coat latex-painted cabinets or trim in kitchens and bathrooms, remember that repeated heat and high humidity stress finishes differently than outdoor weather.
You should select a clear coat that resists moisture, allows some breathability, and won’t amber under Indoor lighting. Consider surface prep and ventilation to minimize trapped moisture and adhesion problems from weather fluctuations.
- Use a water-resistant, flexible clear coat rated for humid rooms.
- Sand and clean thoroughly; trapped grime or moisture causes failures.
- Guarantee good ventilation and curing time to prevent clouding or soft spots.
Child‑ and Pet‑Safe Clear Coat Options
Choosing a child- and pet-safe clear coat means prioritizing low-toxicity, low-VOC formulations and products that cure hard without off-gassing harmful fumes. You’ll want water-based polyurethane or acrylic seals labeled non-toxic once cured; they give durable protection while supporting childproof finishes.
Look for certifications (GreenGuard, low-VOC) and product data sheets confirming minimal odor and safe curing times. For floors and toys, choose pet safe coatings specifically tested for abrasion and chew resistance.
Always ventilate during application, allow full cure per manufacturer instructions, and keep children and pets away until the finish is fully inert and odor-free.
How Different Latex Paint Finishes Interact With Clears
After you’ve picked a child- and pet-safe clear, it helps to understand how the sheen of your latex paint will affect adhesion, appearance, and durability of that clear coat. You’ll notice differences between flat, eggshell, satin, semi-gloss, and gloss: flatter finishes have less tooth so you’ll want light sanding; glossier surfaces resist scuffs but can highlight brush marks.
If you’re doing paint mixing to match sheen, test first. For problem surfaces consider latex removal before refinishing.
Typical interactions:
- Flat/eggshell — smoother look, needs prep.
- Satin — balanced sheen, good adhesion.
- Semi-gloss/gloss — durable, shows flaws.
Quick Guide: Choose the Right Clear Coat in 3 Steps
When you’re ready to protect your latex paint, follow three clear steps to pick a finish that matches durability, appearance, and application method.
Step 1: Assess use — choose waterborne polyurethane for high-traffic areas, acrylic clear for moderate use, or satin for subtle sheen.
Step 2: Test appearance — spray or brush a small patch to confirm color matching and sheen before committing.
Step 3: Consider function — select clears with low VOC for indoor spaces and specialized products for Acoustic treatments where sound absorption matters.
Always sand and clean between coats for adhesion and a uniform finish.
Project Capsules: Furniture, Trim, and Walls
Whether you’re revitalizing a dining table, sealing trim, or protecting painted walls, each project calls for a slightly different clear coat and prep routine. You’ll choose based on use, sheen, and latex compatibility—furniture needs abrasion resistance, trim demands crisp edges, walls tolerate easier maintenance.
Sand lightly, clean, and test in a hidden spot to guarantee finish matching with existing sheen.
- Furniture: durable polyurethane, thin coats, sand between layers.
- Trim: fast-drying acrylic enamel, precise edges, light sanding.
- Walls: water-based clear, roll for even coverage, touch-up as needed.
Final Decision Flowchart: Should You Clear Coat Your Latex Paint?
You’ve reviewed the options for furniture, trim, and walls—now decide if a clear coat is right for your latex paint project.
Start: Is the surface durable or high-touch? If yes, proceed.
Start: Is the surface durable or high-touch? If so, consider a clear coat to protect and finish the paint.
Is the finish matte and do you want sheen or aesthetic enhancement? Yes → choose polyurethane or water-based clear coat.
Concerned about color contrast or darkening? Test a swatch.
Need UV or moisture protection? Opt for a clear coat with the appropriate rating.
Prefer easy future repainting? Skip heavy clear coats.
Final step: test compatibility and cure times. If tests pass, apply thin, even coats for best results.
Frequently Asked Questions
Can Clear Coat Trap Moisture Under Latex Paint?
Yes — clear coat can trap moisture under latex paint if the paint wasn’t fully dry or the surface was damp. You’ll risk moisture entrapment, which undermines paint adhesion and causes bubbling, peeling, or discoloration over time.
Will Clear Coating Affect Fire-Retardant Properties of Treated Wood?
About 70% of treated wood retains full performance if coatings are compatible; you’ll usually maintain fire retardant integrity if coatings bond well. Choose tested systems so coating adhesion won’t compromise treated wood’s flame resistance.
Can I Clear Coat Over Wallpapered Surfaces Painted With Latex?
Yes—you can clear coat over wallpapered surfaces painted with latex if the wallpaper’s secure and the paint’s fully cured. Make certain wallpaper adhesion is strong; choose a compatible clear coat to protect latex paint durability and avoid peeling.
Does Clear Coat Change VOC Emissions Over Time?
Yes — clear coats can lower initial VOC emissions by sealing solvents, but they can also trap or slowly release VOCs over time; you’ll see VOC reduction initially, though long-term environmental impact depends on product chemistry and degradation.
Are Clear Coats Compatible With Chalk or Milk Paints?
Yes — you can, but finish compatibility varies: you’ll need proper surface preparation like sanding and deglossing. Test small areas and use compatible sealers designed for chalk or milk paints to guarantee adhesion and durable finish.
Conclusion
Yes — you can clear coat latex paint, and it’ll protect and deepen the finish when done right. Like putting a raincoat over your favorite jacket, a clear coat shields against wear, spills, and UV fading. Prep by cleaning and lightly sanding, pick a compatible water‑ or solvent‑based clear based on the paint sheen and project, and test first. Skip sealing newly cured or flexible paints. Done properly, a clear coat extends both beauty and life.