Does Paint Get Lighter as It Dries
Yes — paint usually looks lighter as it dries because solvents evaporate and the wet, glossy film that absorbs and reflects light changes to a drier, more diffuse surface. You’ll see gloss and saturation drop as binder coalesces and pigment concentration shifts, and thin coats, surface texture, humidity and temperature all affect how much lighter it gets. Troubleshooting common causes can help you predict results, and the following tips explain what to check next.
Short Answer: Does Paint Get Lighter as It Dries?
Yes—most water-based and many alkyd paints dry slightly lighter than they look wet, so expect a small shift in shade as the solvent evaporates and the binder cures.
Yes — expect most water-based and many alkyd paints to dry slightly lighter than they appear when wet.
You’ll notice this because color chemistry means wet films reflect light differently than dry films. Minor haze from moisture and gloss change alters your perception, so plan samples and wait for full cure before deciding.
Pigment stability matters: high-quality pigments resist fading and color shifts, so choose formulations with tested stability.
In short, anticipate a subtle lightening, verify with swatches, and don’t finalize choices until the paint’s fully dried and cured.
Why Wet Paint Looks Different From Dry Paint
Because wet paint still holds solvent and has a glossy, uneven surface, it reflects light differently than a dry film and consequently appears darker, glossier, or more saturated to your eye. You’ll notice texture, sheen, and surface tension change as solvents evaporate, revealing true pigment dispersion and hiding micro-variations that caught highlights.
Lighting, application thickness, and substrate influence what you see, so sample patches and let them cure before deciding.
Color psychology can make you prefer the bold wet look, but don’t judge final mood until dry.
Store leftovers properly; proper paint storage preserves tint and prevents misleading trials.
How Light Scattering Makes Wet Paint Darker and Glossier
When you’ve watched a freshly painted patch go from bold and glossy to muted, that change comes down largely to how the wet surface scatters light.
You see a glossy, darker appearance because a smooth liquid film reflects light specularly and concentrates wavelengths, boosting color saturation. As solvents evaporate, surface texture and refractive index vary; micro-roughness and pigment exposure increase diffuse scattering, reducing specular highlights and perceived depth.
Paint consistency affects how long that glossy, dark phase lasts—thicker mixes hold a continuous film longer, thinner ones break up sooner. Understanding scattering helps predict how wet sheen shifts to a flatter, lighter look.
Why Binder and Pigment Amounts Change the Dry Color
Although you might not notice it at first, the ratio of binder to pigment strongly determines how the paint will look once it dries. You’ll see that higher binder can reduce opacity and slightly mute hue, while more pigment increases tint strength and color consistency. Pigment stability affects settling and final shade, so manufacturers balance both for reliable results. Use the table to compare typical effects:
| Binder % | Pigment % | Dry Color Effect |
|---|---|---|
| High | Low | Muted, less opaque |
| Medium | Medium | Balanced, stable |
| Low | High | Vibrant, opaque |
How Solvent Evaporation Shifts Paint Tone During Curing
As the solvents evaporate you’ll notice the gloss and sheen change, which affects how light reflects off the surface.
That loss of solvent also concentrates pigments, subtly shifting the perceived tone.
Meanwhile, the binder coalesces into a clear film, locking in the new pigment distribution and final color.
Solvent Loss And Gloss
If you watch paint while it cures, you’ll notice it often lightens—this happens because solvents evaporate, changing how light interacts with the film and increasing perceived gloss.
As solvent leaves, the surface tightens and smooths, so more specular reflection reaches your eye; that boosts apparent brightness without altering pigment stability. You’ll also see improved color consistency as the wet sheen fades into the film’s true finish.
Drying speed and ambient conditions control how quickly gloss rises, so you can alter perceived tone by adjusting ventilation or temperature. Manage these factors to predict final appearance during curing.
Pigment Concentration Shift
When solvents evaporate and the surface gloss changes, you also get a microscopic rearrangement of the paint film: pigments end up closer together as the liquid carrier thins out.
You’ll notice subtle shifts in tone because pigment migration alters local concentration—denser regions reflect light differently, so wet and dry samples can read as different shades.
That doesn’t always mean permanent change: color stability depends on pigment type and how evenly particles redistribute during curing.
If migration is uneven, you’ll see blotches or streaks; if it’s minimal, tone stays consistent.
Controlling application and drying conditions reduces unwanted migration and preserves final color.
Binder Film Formation
Why does paint look different as it cures? You’ll notice binder film formation changes tone as solvents evaporate and binders coalesce into a continuous layer.
As the liquid leaves, refractive index contrasts shift, light scatters less, and the surface often appears glossier and slightly darker or lighter depending on pigment and binder interactions.
Your perception also depends on paint formulation: solvent type, binder chemistry, and solids content set how rapidly films form.
Environmental factors like humidity and temperature alter evaporation rate, pore structure, and coalescence, producing faster or slower tonal shifts.
Watch curing conditions to predict final color accurately.
How Sheen (Flat vs. Gloss) Changes Perceived Color
Because finish sheen changes how light reflects off a surface, the same paint color can look noticeably different in flat versus gloss. You’ll see flatter sheens scatter light, softening highlights and muting contrast, which can make hues appear deeper or less vivid.
Gloss concentrates reflections, boosting perceived saturation and brightness where light hits.
When judging dried color, consider color permanence and pigment stability—high-quality pigments retain their original hue across sheens, while weaker pigments may shift or fade differently with gloss level.
Choose sheen based on desired visual effect and room lighting, and test samples under real conditions before committing.
How Primers and Undercoats Affect the Paint’s Dry Shade
The primer’s tint can push your topcoat a shade warmer or cooler as it dries, so pick one that complements the final color.
A well-covered undercoat prevents uneven absorption and keeps the dried hue consistent across the surface.
If coverage is thin or mismatched, you’ll see shifts in the finished shade once the paint cures.
Primer Tint Influence
When you apply paint over a primer, that undercoat can shift the final shade more than you might expect, especially with pale or translucent colors. You’ll notice tinted primers alter hue subtly; they help color consistency and improve paint adhesion, so choose a tint that complements your topcoat. Test swatches over the primer and let them dry fully. Small shifts can be corrected with a different primer tint rather than extra topcoat layers.
| Primer Type | Typical Effect | Best Use |
|---|---|---|
| White | Lightens hue | Bright colors |
| Gray | Deepens tone | Muted palettes |
Undercoat Coverage Effects
If you’re covering a dark or uneven surface, the undercoat’s coverage level will strongly determine the paint’s final dry shade, since thin undercoats let more of the substrate show through and shift the hue darker or muddier. You should pick a primer with appropriate tint and opacity to control how pigments interact during drying.
Proper undercoat choice affects color mixing perception and even long-term paint durability. Consider these practical points:
- High-hide primer reduces substrate influence
- Tinted undercoats minimize opacity gaps
- Multiple thin coats beat one heavy coat
- Surface prep improves adhesion
- Check manufacturer recommendations for compatibility
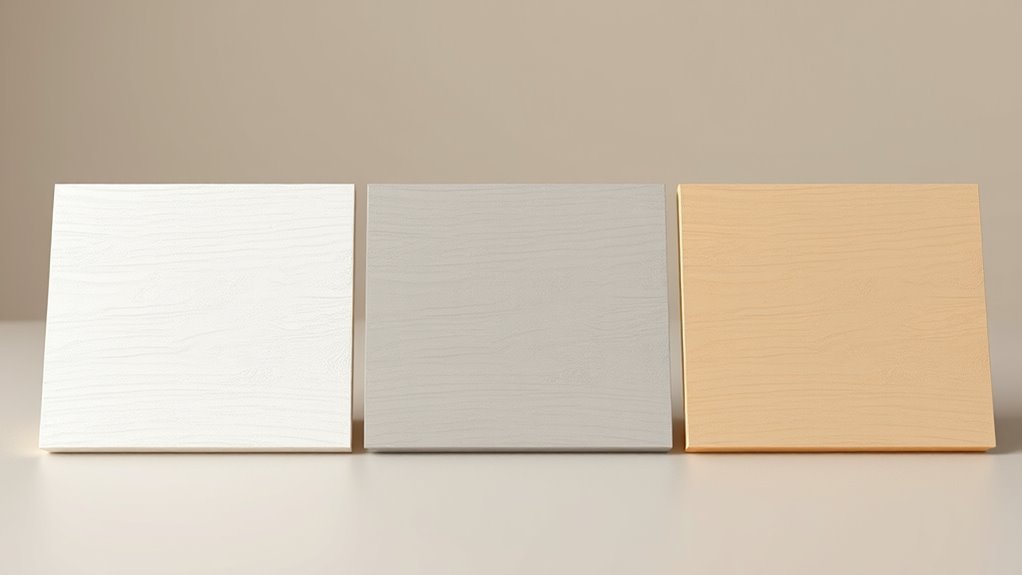
How Surface Texture and Porosity Alter Final Color
Because surface texture and porosity change how light interacts with paint, you’ll often see a noticeable shift in color as the coating dries and cures.
You’ll notice surface gloss varies: smooth, low-porosity surfaces reflect more specular light, boosting perceived brightness, while matte, porous ones scatter light and appear darker or muddier.
Texture variation—brushstrokes, wood grain, or masonry—creates microshadows that alter hue and saturation across the finish.
You should prime porous substrates to even absorption, and consider sheens to control reflectance.
Temperature and Humidity: Effects on Color While Curing
Although you mightn’t notice it at first, temperature and humidity strongly influence how paint cures and consequently how its color reads — higher temperatures speed solvent evaporation and can make colors look brighter and thinner.
Meanwhile, cool, damp conditions slow curing, deepen hues, and can leave a blotchy, uneven tone. You’ll want to control conditions to protect color consistency and pigment stability.
Rapid drying can lock in streaks; slow drying can promote settling. Monitor environment and adjust technique.
Key actions to manage curing:
- Keep temperature within manufacturer range
- Use dehumidifiers or ventilation
- Avoid painting in rain or high humidity
- Stir thoroughly before use
- Apply consistent thin coats
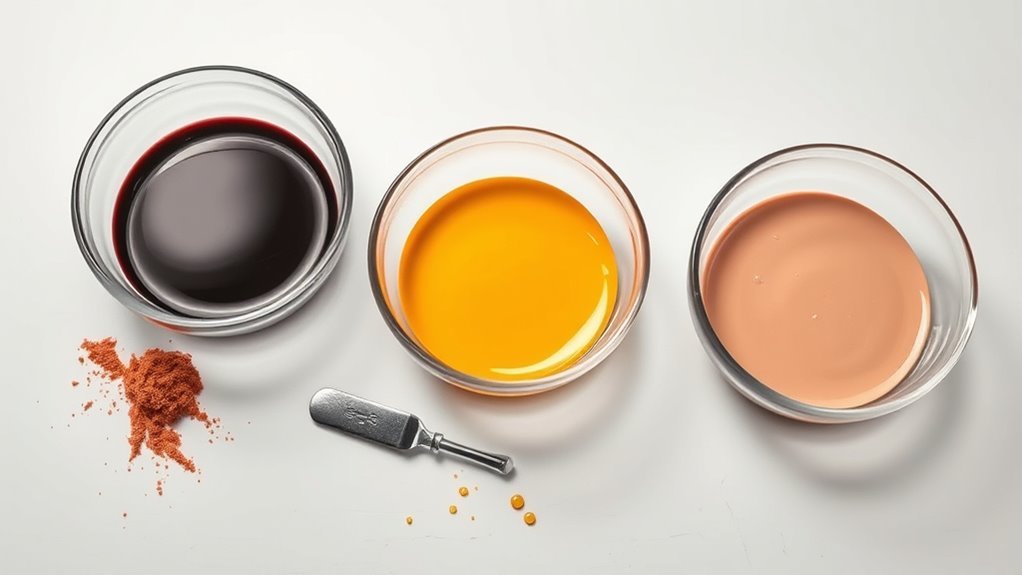
Organic vs. Inorganic Pigments: Drying Color Effects
When you compare organic and inorganic pigments, you’ll notice they behave differently as paint dries: organics often give brighter, more translucent hues that can fade or shift slightly during curing.
Inorganics tend to dry to more stable, opaque tones that resist dramatic color change. You’ll see color transparency affect perceived depth—organics let binder and substrate show through, altering appearance as solvents evaporate.
Inorganics, with higher pigment stability, maintain consistent reflectance and hue. When choosing paints, consider whether you want vivid, shifting finishes or predictable, durable color; formulation and lightfastness will determine final results.
Why White and Pastels Often Look Lighter as They Dry
You’ll notice white and pastel paints often look lighter as they dry because the sheen changes and they reflect light differently once the surface film forms.
As water or solvent evaporates, pigment concentration and spacing shift, which alters how much pigment versus clear binder you’re seeing.
Understanding those two effects helps you predict final appearance and adjust mix or finish if you want a truer wet-to-dry match.
Sheen And Light Reflection
Because paint’s surface and its microscopic texture change as it cures, white and pastel colors often look lighter once they’re dry. You’ll notice sheen alters how light scatters; glossier finishes reflect more, while matte finishes diffuse light, making tones appear softer.
Understanding color theory and paint formulation helps you predict these effects. Pay attention to surface and finish when choosing paint.
- Gloss increases specular reflection
- Matte increases diffuse reflection
- Microtexture controls scattering
- Light angle changes perceived value
- Sheen interacts with pigments
Adjust sheen to control perceived lightness without changing color.
Pigment Concentration Changes
Although pigment particles stay the same chemically, they can spread out as the solvent evaporates, so white and pastel paints often look lighter once they dry. You’ll notice pigment concentration drops near the surface as binder and solvent redistribute, creating a thinner, more translucent layer that scatters more light. That optical change, not pigment loss, alters perceived tint.
To preserve color permanence you’ll want proper mixing and application thickness; pigment stability matters for long-term hue retention. If pigments agglomerate or settle unevenly, shadows or streaks appear. Control application technique and formulation to minimize visible lightening in light shades.
When Paints Get Darker or More Saturated on Drying
When paint dries, it often looks darker or richer than when it was wet, and that shift can catch you off guard when you’re matching colors or judging a finish. You’ll notice color consistency changes as drying pigments concentrate and refractive index shifts occur, making hues appear deeper.
Factors include binder clarity, pigment type, and film thickness. Consider these effects when planning coats or choosing sheens:
- High pigment load can deepen tone
- Clear binders may yellow slightly
- Thicker films wet-look longer
- Solvent evaporation alters gloss
- Ambient humidity shifts dry time
Watch samples under actual lighting before final decisions.
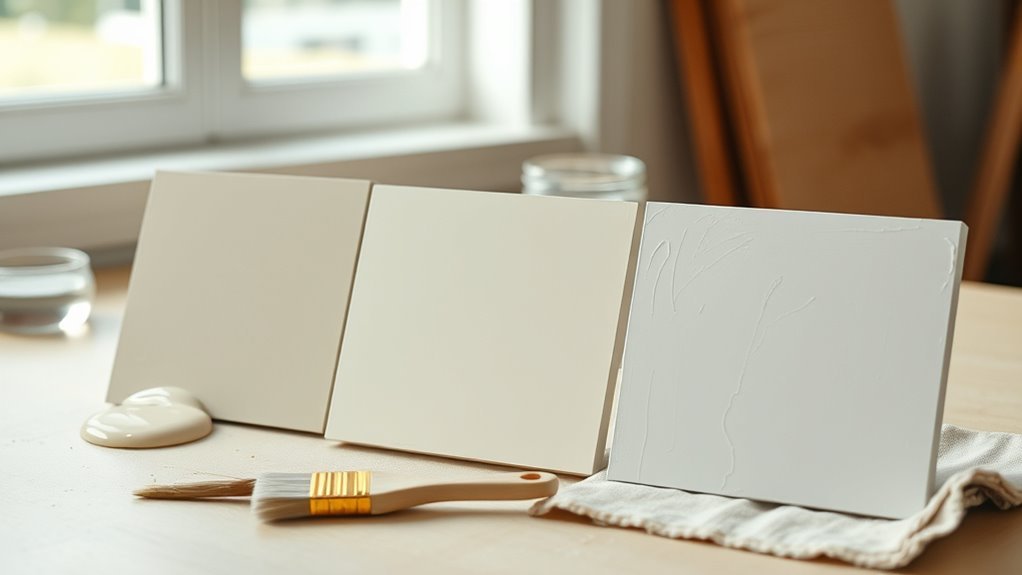
Practical Test: Using Sample Swatches and Test Patches
Pick well-lit, representative spots around the room for your sample swatches so you see how light and shadow affect the color.
Apply even, uniform test patches with the same tools and number of coats you’ll use on the walls.
Check the patches as they dry over several hours to note any shift toward a lighter, less saturated finish.
Choosing Test Swatch Locations
Since lighting, surface texture, and viewing angles change how a color reads, choose several test swatch spots that reflect the room’s typical conditions—near windows, on an interior wall away from direct light, and on areas that get both morning and evening sun.
You’ll test Color consistency and observe Paint chemistry effects across surfaces. Pick spots that vary in texture, exposure, and proximity to fixtures. Use small swatches that you can monitor over days.
- Near a north-facing window
- Interior wall in hallway
- Sunlit east wall
- Behind furniture or appliances
- On textured vs. smooth drywall
Applying Even Test Patches
Before you apply any swatches, gather your supplies and plan a consistent method so each patch is comparable. You’ll use identical brushes, apply same stroke count, and note drying conditions. Keep patches uniform in size and thickness to isolate differences from color theory or paint formulations. Label each swatch with paint name, sheen, and mix ratio. Photograph immediately and after set intervals under consistent light.
| Patch ID | Brush/Strokes | Notes |
|---|---|---|
| A | 3 | Matte, base mix |
| B | 3 | Satin, tint added |
| C | 3 | Gloss, manufacturer A |
| D | 3 | Gloss, manufacturer B |
Observing Drying Color Shift
When you watch your swatches over the first 24–72 hours, note how each patch lightens or deepens as solvents evaporate and binders cure. This change can be subtle at first but often accelerates within the initial hours.
You’ll compare identical mixes applied with varying brush technique to isolate effects on color saturation and sheen. Photograph patches under consistent light, record times, and feel dried films for uniformity.
Use this simple checklist to stay systematic:
- Label each swatch with mix ratio and application method
- Note ambient temperature and humidity
- Capture photos at set intervals
- Compare wet vs. dry saturation
- Record tactile differences
Use Wet-Film Thickness to Predict Final Dry Color
If you want a reliable estimate of the final dry color, measure the wet-film thickness right after application and compare it to the paint’s recommended wet-to-dry reduction ratio. Thicker wet films dry to darker, more saturated hues than thinner ones.
You’ll use a wet-film comb or gauge to record thickness, then consult manufacturer charts to predict percent reduction. This helps you anticipate shifts and choose application methods that protect color permanence and paint durability.
Best Practices for Precise Color Matching When Painting
Start by testing swatches on the actual surface and letting them fully dry so you see the true color.
Check swatches under the same lighting conditions the room will have, and compare them at different times of day.
If a shade isn’t right, adjust the tint gradually and retest until you get a precise match.
Test Swatches Thoroughly
Want your chosen shade to look the same on the wall as it does on the sample card? Test swatches thoroughly to guarantee color consistency and evaluate paint durability before committing.
Apply multiple swatches on different walls and surfaces. Note how sheen and base affect appearance, and let each dry fully. Record results and number swatches so you can compare later.
- Apply two coats to each swatch
- Test on primer and unprimed areas
- Use 12×12″ swatches for accuracy
- Observe over 24–72 hours
- Photograph under neutral conditions
This method prevents surprises and helps you pick confidently.
Match Under Proper Lighting
Because lighting changes how color reads, always check paint samples under the same light conditions they’ll be viewed in; natural daylight, warm incandescent, and cool LED each shift hue and value, so review swatches at different times of day and with the fixtures you’ll use.
You’ll hold samples on the wall, view them from typical angles, and note how color perception varies near windows, in shade, and under artificial bulbs.
Photograph swatches under each lighting conditions setup for reference.
Compare painted sections once dry, and avoid choosing based on a single momentary glance—consistent viewing guarantees the match holds.
Adjust Tint Gradually
When you’re matching paint, add tint in small increments and test as you go so you don’t overshoot the color you want. You’ll preserve color consistency by mixing cautiously, recording measurements, and sampling in the room’s lighting.
Remember the drying process can shift tones, so compare fully cured swatches before deciding. Use controlled steps:
- Add tint dropwise, stir thoroughly.
- Label mixes with ratios and dates.
- Test on drywall or sample card.
- Wait for complete dry time before final judgment.
- Keep original base paint for touch-ups.
This method keeps adjustments reversible and yields precise, repeatable matches.
Troubleshooting Unexpected Color Shifts (Common Causes)
If your paint dries lighter than expected, start by checking the common culprits: surface porosity, thinning or over-brushing, pigment settling, and lighting differences between application and viewing.
Inspect substrate absorption—porous walls can leach binder and mute pigments. Verify you didn’t over-thin or use excessive solvent; that reduces pigment load. Stir thoroughly to re-suspend settled pigment before use.
Compare colors under the desired lighting; daylight versus incandescent shifts perception.
Also consider broader influences like historical color trends shaping expectations and cultural color symbolism affecting how you interpret hue changes.
Document conditions so you can reproduce accurate results next time.
Common Mistakes That Cause Color Surprises: And Fixes
Although you’ve checked lighting and pigment settling, several everyday mistakes still cause paint to dry looking off — and most are easy to fix. You’ll avoid surprises by addressing prep, mixing, and application errors that harm color consistency and paint durability. Check these common slip-ups and fixes:
- Skipping primer: prime porous surfaces to prevent uneven absorption.
- Not stirring: mix thoroughly to redistribute pigment.
- Thin coats: apply recommended thickness for true color and longevity.
- Wrong roller/brush: use the tool matching finish for even coverage.
- Painting in poor conditions: control temperature and humidity for proper cure.
When to Contact the Manufacturer or Hire a Pro
Wondering whether you can troubleshoot a paint problem yourself or need outside help? If your finish shows uneven color consistency after proper drying time, or bubbling, cracking, or rapid wear that threatens paint durability, contact the manufacturer first. They can confirm batch issues, offer touch-up instructions, or authorize replacements.
Hire a pro when problems span large areas, involve structural moisture, or require surface prep and repainting beyond your skill set. A contractor can diagnose substrate issues, ensure color matching, and apply corrective systems that preserve longevity.
Keep receipts and photos to streamline claims and contractor estimates.
Quick Checklist to Ensure the Color You Expect When Paint Dries
Before you open the can, run through a short checklist so the color you expect is the color that actually dries. Check lighting at different times, test small swatches, and note sheen—gloss reflects more light and can read lighter. Consider substrate color and primer choice, and remember color psychology influences mood so confirm hue under desired conditions. Think about historical pigments if matching vintage finishes. Paint one coat, wait fully dry, then evaluate.
- Test swatches in room lighting
- Use correct primer/base
- Match sheen to project
- Let samples cure completely
- Review color under evening light
Frequently Asked Questions
Will VOCS or Paint Additives Change Color as Paint Cures?
Yes — additives or VOCs can alter tint slightly as paint cures; you’ll notice paint odor and VOC emissions fading while solvents evaporate, and some chemical reactions or UV exposure can shift pigments subtly during drying.
Can Lighting Temperature in a Room Alter Perceived Dry Color Over Time?
Yes — lighting temperature can alter perceived dry color over time. If you change warm versus cool lighting, lighting effects shift color perception, so your paint will look different even though its pigment stays the same.
Do Primers With Different Tints Affect Final Sheen or Gloss Change?
Yes — tinted primers can affect final sheen and gloss change. You’ll want consistent tint consistency so pigments won’t alter sheen stability; uneven tints can cause patchy gloss, so match primer and topcoat tint carefully for uniform results.
Will Repainting Over Aged Paint Produce Color Mismatch?
Like a patchy sunrise, yes—you’ll likely see mismatch when repainting aged paint. You’ll notice differences from faded pigments, paint odor, and varied drying time; you’ll need proper prep, primer, and color matching to minimize contrast.
How Do Metallic or Pearlescent Paints Shift During Drying?
Metallic sheen and pearlescent shift both change as solvents evaporate; you’ll see reflections deepen and flakes align, causing subtle color shifts and increased sparkle, so you’ll expect slight hue and intensity variation while drying.
Conclusion
Yes — paint often lightens as it dries, so expect change. Curiously, up to 30% of people report being surprised by paint’s final shade more than once, so it’s common. To avoid surprises, test samples, let them fully cure, and consider sheen and lighting. If color still looks off, check for uneven application, wrong primer, or faded samples; contact the manufacturer or a pro for stubborn issues.