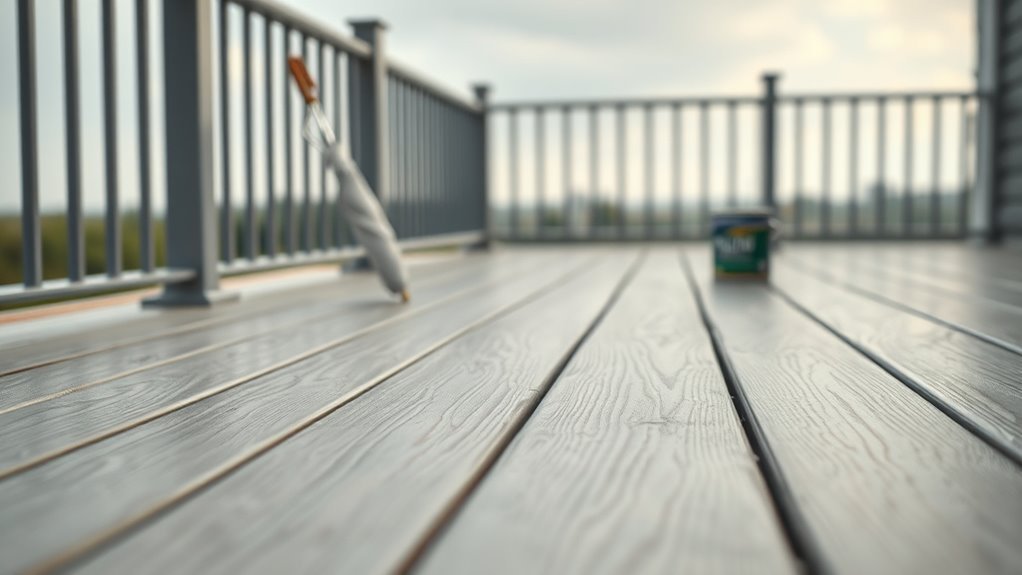
How Long Should Deck Paint Dry Before Rain
You should keep fresh deck paint dry at least 24 hours before light rain and about 48 hours or more before heavy or prolonged showers, and longer in cool, humid conditions. Water‑based paints can feel dry in 1–2 hours but need 24–48 hours to resist moisture; oil‑based types often need a day or several days for real protection. Check the product label, avoid traffic until cured, and keep going for tips on timing, prep, and weather fixes.
Quick Answer: When Is Deck Paint Rain‑Safe?
If you need a quick rule of thumb, wait at least 24 hours after painting for light rain and 48 hours for heavy or prolonged showers. You’ll also check the paint label—some formulations need longer—so plan around forecasted weather.
Keep outdoor furniture off the deck until it’s fully set to avoid marks, and avoid walking on wet areas.
Keep outdoor furniture off the deck until paint is fully set, and avoid walking on wet areas.
After rain, inspect for soft spots or patchy finish; light watering after full cure is fine but heavy soaking can reveal flaws.
Include deck cleaning before painting to guarantee proper adhesion, and schedule jobs when a dry window comfortably exceeds those minimum times.
How Long Water‑Based Deck Paint Needs to Dry
Because water‑based deck paints dry by evaporation and film formation, they usually feel dry to the touch within 1–2 hours and can handle light use after 4–6 hours.
However, you should wait at least 24–48 hours before heavy traffic or exposure to rain—longer in cool, humid, or shaded conditions.
You’ll want to avoid early moisture that can interrupt curing, cause tackiness, or lead to texture peeling.
Check the label for recoat and rain‑safe times, consider temperature and humidity, and delay heavy use until the recommended cure time passes.
Proper drying reduces risks like color fading and surface failure.
How Long Oil‑Based Deck Paint Needs to Dry
When you use oil‑based deck paint, expect much longer drying and curing than with water‑based products. You’ll usually need 24–48 hours before light exposure and several days to a week before heavy use; full resistance to rain can take longer in cool or humid conditions. Protect freshly painted surfaces to prevent paint peeling and uneven finish. Proper prep and thin, even coats reduce runs and help resist color fading over time. Check product labels for specific recoating and rain‑safe times.
| Condition | Typical Wait |
|---|---|
| Light exposure | 24–48 hours |
| Heavy use/rain | 3–7+ days |
Dry to Touch vs Fully Cured: What It Means

Although paint might feel dry to touch within hours, that doesn’t mean it’s fully cured or ready for regular use; you need to wait longer for full chemical bonding. Touch-dry stops tackiness; cured means durability against traffic and weather.
Even if paint feels dry in hours, full curing takes longer—wait for true durability before regular use.
You’ll choose Color options and Brush types knowing drying stage affects appearance and texture. Don’t walk on the deck or place furniture until curing is complete.
- Touch-dry: surface feels dry, light contact ok
- Handle with care: partial hardness, avoid heavy items
- Fully cured: maximum resistance, normal use allowed
- Cosmetic check: final sheen and color stability revealed
How Humidity Slows or Speeds Drying
If humidity’s high, paint dries more slowly because the moisture in the air slows solvent evaporation and delays chemical curing, so you’ll need to allow extra dry time.
You should monitor relative humidity: above about 70% drying stalls, so postpone exposure to rain or dew.
Lower humidity speeds surface tack loss but can trap solvent below the skin if too quick, so balance matters.
Protect freshly painted areas—cover garden furniture and shield patio lighting—to prevent moisture contact that causes blistering or streaks.
Use a hygrometer, follow manufacturer dry-time ranges, and extend waiting periods when humidity forecasts predict damp conditions.
How Temperature Affects Paint Drying
Because temperature controls the rate at which solvents evaporate and polymers cross-link, it directly determines how fast your deck paint loses tack and gains hardness. You’ll notice cooler conditions slow curing, increasing vulnerability to water and debris, while extreme heat can force rapid skinning that traps solvents, risking adhesion problems later.
Aim for the manufacturer’s recommended range to avoid premature color fading or paint peeling. Consider these practical effects:
- Lower temps lengthen dry time and extend recoat intervals.
- Higher temps accelerate surface cure but can trap solvents.
- Mid-range temps balance evaporation and film formation.
- Nighttime chills can reverse daytime gains.
How Wind and Sun Change Drying Times
Temperature isn’t the only weather factor that changes how your deck paint dries — wind and sun can speed up or undermine the process in different ways. You should watch wind: brisk breezes evaporate solvents faster, risking surface cure before underlying layers set, which can cause texture peeling. Strong sun heats the surface, accelerating drying but increasing UV exposure that leads to color fading over time. Plan work during mild, low-wind periods and avoid peak midday sun. Compare effects quickly:
| Factor | Effect |
|---|---|
| Wind | Faster surface drying |
| Sun | Increased UV exposure |
| Combined | Faster cure, more fading |
| Mild conditions | Best for even drying |
How Coat Thickness Affects Drying and Curing
If you apply a very thin coat, it’ll tack up quickly but may not build enough protection. A thick coat takes longer to dry and can trap solvents, risking tackiness or wrinkling.
You should aim for the paint’s recommended ideal film thickness to balance coverage and curing time. That thickness helps the deck resist rain sooner while ensuring the paint fully cures underneath.
Thin Vs. Thick Coats
When you apply a thin coat of deck paint, it dries faster and lets solvents evaporate evenly.
While a thick coat traps moisture and prolongs both drying and curing times. You’ll notice thin coats reduce tackiness, resist cracking, and make recoat windows predictable.
Thick layers can sag, blister, or remain soft long after surface dryness. Choose thin coats especially with waterborne or eco-friendly paints, and consider color options that need fewer layers.
Follow label guidance for dry and cure times, and test a small area if humidity is high.
- Faster evaporation
- Lower blister risk
- Easier touch-ups
- Predictable recoating
Optimal Film Thickness
Having established that thin coats dry faster and handle better than thick ones, consider how the actual film thickness you leave on the deck controls both drying speed and long-term curing. You’ll aim for a uniform, moderate film: thin enough to let solvents evaporate and crosslink efficiently, but thick enough to provide coverage and abrasion resistance.
Excess thickness traps solvents, prolongs tackiness, and risks wrinkling or sagging. Maintain consistency to avoid color blending issues or uneven sheen. Adjust for texture variation—rough boards need slightly more build.
Follow manufacturer wet-film thickness guidelines and measure with a comb gauge for reliable results.
Does Primer Choice Change Rain Readiness?
Choosing the right primer can change how soon your deck paint can handle rain, because primers control adhesion, sealing, and drying behavior. You’ll pick a fast-drying, water-resistant primer if you need quicker rain readiness, especially around garden furniture and outdoor lighting where splash and contact occur.
Choosing a fast‑drying, water‑resistant primer speeds rain readiness by improving adhesion, sealing, and drying behavior.
Oil- and acrylic-based primers differ in cure time and moisture tolerance, so match primer type to paint and conditions. Apply correct film thickness and follow manufacturer recoat times; don’t shortcut drying.
- Use stain-blocking primers for tannin-rich areas
- Prefer breathable primers on older decks
- Spot-prime repairs
- Thin coats dry faster
How Wood Species Affects Drying and Adhesion
Because different woods absorb moisture and hold oils differently, the species you’ve got will directly affect how fast paint dries and how well it sticks.
You’ll notice porous softwoods like pine soak primer and may speed drying but reduce adhesion unless sealed.
Dense woods such as cedar or oak resist penetration; natural oils can inhibit bonding, so you’ll need proper cleaning or a bonding primer.
Pay attention to wood grain direction when sanding and coating to guarantee even absorption.
Finish sheen choice also matters: high-gloss shows imperfections and may feel slick when wet, while satin grips better and hides texture.
New vs Old Decks: Drying and Adhesion Differences
When you’re working on a new deck, paint soaks and cures differently than on an older surface, so you’ll need to adjust expectations and prep accordingly. New wood absorbs primers and can pull solvents faster, so you’ll let base coats flash longer.
New wood soaks up primers and solvents faster—expect different cure times and let base coats flash longer.
Older decks may need more sanding and a stronger adhesion promoter. You’ll choose Color options and texture finishes based on surface age and intended wear. Prep, dry times, and inspection matter.
- New wood: lighter sanding, longer initial cure
- Old wood: remove loose fibers, use bonding primer
Test a small area first.
Use breathable coatings for longevity.
How Many Coats Before Light Rain Is Safe?
You’ll usually need at least two coats for good coverage, with the first coat allowed to dry fully before the second goes on.
Wait the manufacturer’s recommended dry time between coats—often a few hours—to build proper film thickness.
After the final coat, give the paint its advised initial cure time so light rain won’t soften or wash it.
Number Of Coats
If you’re wondering how many coats will stand up to a light shower, the short answer is usually two. You’ll want a base coat for adhesion and a topcoat for protection; two coats balance coverage and drying risk before rain.
Thicker single coats can trap solvent and worsen color fading, so avoid overloading. Choose proper brush selection to guarantee even film and fewer touch-ups.
Consider these factors when planning coats:
- Product label recommendations and manufacturer’s warranty
- Surface porosity and existing finish condition
- Weather forecast within 24 hours of painting
- Coverage rate per coat and planned traffic
Dry Time Between
Because paint needs time to form a protective film, plan on at least 24 hours between coats before any chance of light rain.
Though some fast-dry products may be safe after 4–8 hours once the surface feels dry to the touch. You should check the label and test a small area; tacky spots mean wait longer.
Consider deck design and furniture placement when scheduling coats so you’re not moving wet pieces.
If rain’s forecast, finish earlier in the day to maximize drying time.
Two thin coats with proper spacing beat one thick coat, reducing risk from unexpected showers.
First Rain Resistance
When light rain’s possible, aim for at least two full coats before trusting the weather—most deck paints need that second coat to form a continuous, water-resistant film so light showers won’t penetrate fresh coverage. You’ll let the first coat dry per label times, then apply the second; that’s the minimal defense against mist and brief showers.
Consider surface temperature and humidity; cooler, humid conditions slow curing. Protect newly painted areas from sprinkler splash and garden furniture placement until the second coat sets.
Quick checklist:
- Check label dry and recoat times
- Monitor forecast for drizzle
- Shield from lawn irrigation
- Avoid placing furniture prematurely
When a Single Coat Becomes Water‑Resistant
Although a single coat can start shedding light moisture within a few hours, it usually won’t be fully water-resistant until the paint has set and cured beyond surface dryness. You’ll notice initial resistance on low‑traffic areas like garden furniture and faded roof shingles exposed to light mist, but true short‑term protection needs longer. Temperature, humidity, and paint type dictate timing; warmer, drier conditions speed curing. Test by sprinkling a few drops after 24–48 hours—be gentle. Use the table below to compare quick checks:
| Condition | Timeframe | Check |
|---|---|---|
| Warm & dry | 24–48 hrs | Beading |
| Cool & humid | 72+ hrs | Soft spot |
| Recent rain | 0–24 hrs | Streaking |
When Multi‑Coat Systems Resist Moisture
When you apply multiple coats, the cure time between each one matters because it lets the new layer form a stronger film. Proper film formation increases resistance to water.
Each coat needs to bond well to the one below. You’ll want to check adhesion and follow the manufacturer’s recoat window so the layers hold up under moisture.
Cure Time Between Coats
If you’re applying a multi-coat deck paint system, you’ll need to let each coat cure long enough that it can shed moisture and bond to the next layer; that means following the manufacturer’s minimum recoat window and extending it when humidity or low temperatures slow curing.
You’ll check tack, solvent odor, and surface hardness before recoating.
Rushing risks color fading and texture peeling because trapped solvents or moisture compromise adhesion.
- Wait the stated recoat time, then add extra hours in damp conditions.
- Test a small patch for proper bonding.
- Avoid recoating overnight when dew forms.
- Record temperature and humidity during curing.
Film Formation Strength
Because a multi‑coat paint system builds up protective layers, film formation strength determines how well those layers actually resist moisture and stand up to weathering. You’ll want films that cure uniformly so rain won’t soften them or cause streaking, and you’ll balance color options with functional needs. Thicker films aren’t always better; flexible, well‑crosslinked films shed water and hide defects. Choose paint sheen for desired durability and maintenance ease. Check manufacturer data for film hardness and moisture resistance before raining.
| Property | Impact |
|---|---|
| Hardness | Scratch/wear resistance |
| Flexibility | Crack prevention |
Layer Adhesion Under Moisture
Although moisture can undermine a paint job, good layer adhesion keeps a multi‑coat system intact by preventing water from delaminating successive films. You’ll want properly cured base coats and compatible topcoats so moisture won’t creep between layers, and you’ll choose primers that bond to wood while supporting decorative patterns without trapping vapor.
Use eco friendly pigments to minimize reaction issues and maintain flexibility. Inspect edges and joints after rain; early signs of lifting mean recoat timing or product mismatch.
- Guarantee full cure before next coat
- Match chemistry between coats
- Pay attention to edge sealing
- Test small areas after rain
Where to Find Drying Specs on Paint Labels
When you’re checking a can of deck paint for drying information, look directly on the label’s technical panel or near the instructions—manufacturers list “dry to touch,” “recoat,” and “full cure” times there. You’ll also find warnings about temperature and humidity that affect those times.
Scan for application thickness and recommended ventilation. Check the ingredients section for eco friendly ingredients if that matters, and the color options chart for tinting effects that can change drying.
If label details seem sparse, note the manufacturer website or datasheet reference printed on the can; those sources usually provide extended drying and performance specifications.
How to Read “Recoat” and “Rain” Times on Cans
Check the can for the “recoat” time to know when it’s safe to apply another layer without lifting the first coat.
Note the “rain” or “safe-to-rain” window so you can avoid washing or softening the finish. Remember that both times assume ideal conditions.
If it’s cooler or more humid than the label’s specs, you’ll need to add extra drying time before recoating or expecting dry-to-rain protection.
Understanding “Recoat” Time
If you want accurate guidance from a paint can, learn to read the “Recoat” and “Rain” times as two separate instructions. Recoat time tells you when the first layer is dry enough to accept another without trapping solvents or causing texture alteration. Follow it to avoid lifts, poor adhesion, and premature color fading. Check label specifics—temperature and humidity change times. If you rush, coats can sag or fail.
- Wait full recoat interval before sanding or recoating
- Note surface temperature and humidity factors
- Use recommended thin coats for proper cure
- Test a small area if unsure
Interpreting “Rain” Window
Because weather can wreck a fresh finish, you’ll want to read the “Rain” window on the can as a hard-safe period that tells you how long the paint needs to withstand moisture before it’s safe from rain-related damage. Treat that time as non-negotiable: if it says 24 hours, don’t expect light drizzle to be harmless after 12.
The label differs from “recoat” time, which guides when you can apply another layer.
Match your deck stain or paint color choice with the manufacturer’s rain guidance; darker pigments may heat faster but still need the full rain window to cure properly.
Temperature And Humidity Effects
While the label gives a baseline, temperature and humidity actually control how long those “recoat” and “rain” times take in real conditions. You should check forecasted lows, highs, and relative humidity before painting.
Cold slows curing and high humidity extends tackiness, raising rain risk. Warmer, drier air speeds solvent evaporation but can worsen color fading if UV exposure is high. Choose eco friendly paints with clear drying specs.
If conditions aren’t ideal, delay painting or use additives designed for slower cures.
- Watch overnight lows and daytime humidity
- Avoid painting before humid fronts
- Use fan or heat when safe
- Prefer low-VOC, UV-resistant formulas
Quick Field Test: Is Deck Paint Dry Enough?
When you’re unsure whether a freshly painted deck can handle an unexpected shower, do a quick field test to check dryness and adhesion.
Lightly press a finger on an inconspicuous spot; if paint sticks or feels tacky, it needs more time.
Press a fingertip on an out-of-sight spot—if it sticks or feels tacky, let the paint cure longer.
Try lifting a strip of painter’s tape applied earlier—clean removal means good adhesion.
Place a small section of deck furniture or set low-weight outdoor lighting on the wettest-looking area for a few minutes, then check for impressions or transfer.
Repeat tests in shaded and sun-exposed areas.
If everything stays put and shows no smudge, your paint’s likely ready for weather.
Tools to Predict Drying: Moisture Meter, Thermometer
Field tests are handy, but tools like a moisture meter and an outdoor thermometer give more reliable predictions about how fast your deck paint will dry. You’ll check substrate moisture for deck stain compatibility, and air temperature for curing time. Lower moisture and warmer temps speed drying, while high humidity slows it.
Also note paint sheen affects drying perception—glossier sheens often feel dry sooner. Use readings to adjust wait time rather than guess.
- Use a pinless moisture meter for surface readings.
- Measure wood depth moisture for porous decks.
- Track ambient temperature and humidity.
- Record readings before and during drying.
Protecting a Freshly Painted Deck From Surprise Showers
Because sudden showers can ruin hours of work, you should shield a freshly painted deck as soon as the paint’s tack starts to fade. Move garden furniture off the surface or cover legs to avoid sticking and dents. Calmly clear paths so runoff won’t pool against fresh paint.
Check weather updates frequently and have clamps, tarps, and breathable drop cloths ready for quick deployment. Protect edges near outdoor lighting without pressing coverings onto wet surfaces.
If a sudden shower hits, set up barriers to divert water rather than pressing coverings on paint. Then inspect the finish once dry and touch up any affected spots promptly.
Temporary Covers That Won’t Ruin Wet Paint
You’ll want covers that protect without trapping moisture or sticking to wet paint. Breathable drop cloths let air circulate and help paint cure.
While lightweight plastic sheeting works for short, rapid showers if you elevate it so it doesn’t touch the wet surface. I’ll explain when to use each and how to secure them without damaging the finish.
Breathable Drop Cloths
When rain’s a possibility after you paint the deck, choose breathable drop cloths so trapped moisture won’t soften or streak the finish; they let air and moisture escape while shielding the surface from direct wetting, debris, and light drizzle. You’ll protect fresh deck stain or painted surfaces without risking paint removal from sticking plastic.
Pick cotton or woven canvas blends, secure edges to prevent wind lift, and avoid heavy weights that press wet paint. Use breathable cloths as temporary cover during short showers, not long-term waterproofing.
- Cotton canvas for absorption
- Tied edges to stop flapping
- Lightweight for airflow
- Clean to prevent transfer
Lightweight Plastic Sheeting
Although lightweight plastic sheeting won’t breathe like canvas, it can still protect fresh deck paint during brief, light showers if you use it carefully. You’ll drape plastic sheeting loosely over a temporary frame or lightweight supports so the cover doesn’t touch wet surfaces.
Secure edges with weights or tape to prevent wind lift, but avoid sealing directly to damp paint. Check paint tackiness before covering; if it’s still very wet, wait.
Use this as a short-term weatherproofing technique only—remove the sheeting as soon as rain stops and paint firms to prevent trapped moisture from ruining the finish.
If Rain Interrupts Painting: Immediate Steps
Caught in a sudden shower? Stop painting immediately, cover wet sections, and move tools and garden furniture to shelter. Protect exposed deck lighting and electrical fixtures; avoid contact with pooled water. Assess which areas stayed tacky versus fully soaked.
- Gently blot excess water with clean rags; don’t rub paint.
- Cover the deck with breathable tarps to prevent trapping moisture.
- Elevate moved pieces to speed drying and prevent staining.
- Let paint dry naturally; don’t apply heat or rush recoats.
Document damage with photos for later repairs, and wait until the surface is completely dry before resuming work.
Fixing Brush Marks, Streaks, and Water Spots After Rain
If rain left brush marks, streaks, or water spots on your deck, you can usually correct them without stripping all the paint—start by identifying whether the blemishes are surface-level (tacky or milky) or have bonded to the finish.
For surface issues, blot excess moisture, let the coat fully dry, then smooth with a soft nylon brush or light buffing pad.
For bonded blemishes, feather the edges with a fine synthetic brush and touch up with matching paint.
Clean tools promptly and practice proper deck cleaning to avoid contaminants.
Store leftover material correctly—good paint storage prevents future problems.
When to Sand and Recoat After Rain Damage
Start by inspecting the deck for any structural damage like soft boards, loose nails, or deep cracking before you think about refinishing. If the wood is sound, wait until the surface is fully dry and follow the paint maker’s recoat window—usually 24–48 hours for touch-ups and longer for full recoats.
Sand only where paint has lifted or the surface is rough, then clean thoroughly before applying a new coat.
Assess Structural Damage
Even when rain seems minor, you should inspect boards, fasteners, and railings for soft spots, warping, or lifted paint that signal deeper moisture damage. Check joists and posts for rot, probe suspicious areas with a screwdriver, and note where paint removal or deck stain failure exposes raw wood.
If structural members are compromised, plan immediate repairs rather than cosmetic recoating. Prioritize safety: unstable railings or sagging sections need replacement. Document affected areas for repair or contractor estimates.
- Probe for softness and splitting
- Inspect fasteners for corrosion or movement
- Look for hidden rot under peeled paint
- Measure deflection or sagging areas
Recoat Timing Guidelines
Once you’ve documented damage and prioritized repairs, you’ll need clear timing for sanding and recoating to avoid trapping moisture or causing poor adhesion.
First, let the deck fully dry—often 48–72 hours in warm, dry conditions; longer after heavy rain. Sand only when wood feels dry to the touch and moisture meter reads below manufacturer limits. Remove loose finish with gentle sanding or a paint remover for stubborn spots, then clean and rinse.
Apply primer or deck stain in recommended temperature and humidity ranges. Recoat intervals depend on product instructions—wait the minimum cure time, then inspect adhesion before proceeding.
Preventing Mold and Mildew After Rain on New Paint
If rain hits a freshly painted deck, you’re not powerless—act quickly to reduce the chance of mold and mildew by ensuring the surface dries thoroughly, removing standing water, and promoting airflow.
Move deck furniture and any wet cushions out to speed drying; don’t leave damp items that trap moisture. Use towels or a squeegee to clear puddles, then set up fans or open nearby windows and doors to boost ventilation.
Consider solar energy–powered fans for off-grid circulation. Check paint for soft spots and touch up if needed. Monitor daily and clean with a mild fungicidal solution if mildew appears.
- Remove standing water immediately
- Move deck furniture and fabrics
- Increase airflow with fans or vents
- Inspect and treat soft or stained areas
Best Weather Windows for Painting a Deck
Pick a day when temperatures stay in the paint’s recommended range—usually between about 50°F and 85°F—so the finish cures properly.
Watch humidity and aim for lower-moisture days, since high humidity slows drying and can trap moisture under the coat.
Also consider wind and sun: a light breeze helps drying, but strong winds or intense afternoon sun can cause uneven drying or blowing debris onto wet paint.
Optimal Temperature Range
When you’re planning to paint your deck, aim for temperatures between 50°F and 85°F (10°C–29°C). That range lets paint flow, level, and cure properly without drying too fast or failing to bond.
You should pick dry days within that window and avoid early-morning cold snaps or hot afternoons that accelerate solvent loss.
Lower temps can slow cure and risk poor adhesion; higher temps may trap solvents and cause color fading or texture peeling later.
Check forecast lows and highs for the full drying period, and schedule work when conditions stay steady for at least 24–48 hours.
- Stable daytime temps
- Avoid rapid swings
- Follow manufacturer range
- Consider surface temp
Humidity And Drying
Humidity plays a big role in how paint dries on your deck, so after checking temperature you should factor in moisture levels too. You’ll want relative humidity below about 70% for most paints; higher moisture slows curing, attracts dust, and can cause tacky spots.
Wait longer between coats when humidity’s high, and plan exterior painting for mornings when dew’s evaporated but humidity hasn’t peaked. Pick color options and texture finishes knowing darker or thicker applications can take even longer to dry in humid air.
Monitor forecasts for consistently low humidity windows to reduce rain risk and guarantee proper adhesion.
Wind And Sun Exposure
Even if temperature and humidity are ideal, strong wind or relentless sun can ruin a paint job, so aim for calm, partly sunny conditions when you paint your deck. You should avoid painting during high winds that blow debris or speed evaporation, and steer clear of midday sun that makes paint skin over before it levels.
Consider local bird migration seasons—droppings increase during peaks—and use tree shading to slow curing and protect the fresh finish. Check the forecast for steady light breeze and mild sun, and shelter the area if conditions change.
- Avoid gusts over 10 mph
- Paint in the morning or late afternoon
- Watch migration timing
- Use temporary shade
Seasonal Tips: Spring, Summer, and Fall Painting
Because each season changes how paint cures, you’ll want to choose your timing, products, and prep accordingly to avoid problems like poor adhesion or long dry times.
In spring, remove pollen and bird droppings, dry thoroughly, and use milder-temperature formulas so deck staining or paint bonds.
Summer offers fastest cure—plan early morning or late afternoon to avoid extreme heat that traps solvents.
In fall, pick fast-dry paints and watch overnight lows; humid evenings extend tackiness.
Always follow manufacturer temperature and humidity limits, allow recommended dry times before rain, and do spot tests on an inconspicuous area to confirm proper adhesion.
Using Short‑Term Forecasts to Schedule Work
If you check short‑term forecasts before you start, you can pick windows of dry, low‑dew‑point weather that let paint cure properly and reduce the risk of rain ruining fresh work. You’ll plan tasks around reliable 24–72 hour outlooks, move deck furniture and cover outdoor lighting, and schedule primer, paint, and recoat intervals when humidity stays low.
Use hourly radar and precipitation probability to avoid surprises. Keep an eye on wind, temperature swings, and sunset times so dew won’t form. Quick adjustments save time and materials.
- Monitor hourly radar
- Note dew point trends
- Protect furniture and fixtures
- Schedule recoat windows
How Forecast Accuracy Affects Risk Planning
When you rely on weather forecasts to plan deck painting, the accuracy of those predictions directly determines how much risk you’re taking with wet paint, recoat timing, and material waste. You should check multiple reliable sources and radar updates so you can decide whether to delay or proceed.
Higher confidence reduces contingency time and limits wasted Color options or excess primer. Lower confidence means you’ll build buffer hours into curing windows and pick application methods that tolerate brief moisture.
Also consider Eco friendly paints’ longer tack times; when forecasts wobble, prioritize strategies that minimize rework and protect finish integrity.
Choosing Fast‑Drying Deck Paints for Shaky Weather
When rain’s likely, you’ll want paints that dry fast and still resist moisture.
Compare advertised drying times and look for weather-resistant formulations with added mildewcides and UV blockers.
That way you’ll pick a product that sets quickly without sacrificing long-term protection.
Drying Time Comparison
Because weather can turn fast, you’ll want to compare deck paints by their dry and recoat times before you buy. You’ll avoid color fading and surface peeling by choosing formulas that set quickly and reach usable hardness within hours, not days. Check manufacturer specs, but also factor temperature, humidity, and coat thickness.
Faster dry times reduce rain risk, yet extremely fast films can trap solvents—balance matters.
- Note initial tack-free time and full cure time.
- Compare recoat windows to avoid lifting.
- Prefer products with tested lab data.
- Read real user reports for wet-weather performance.
Weather-Resistant Formulations
You’ve already looked at dry and recoat times; now focus on formulations engineered for wet-weather resilience and faster surface set. Choose paints labeled quick‑dry, water‑repellent, or moisture‑tolerant so a surprise shower won’t ruin fresh coats.
Look for acrylic‑alkyd blends or advanced polyurethanes that film fast yet stay flexible for temperature swings.
Prep matters: thorough deck cleaning removes contaminants that compromise adhesion. Test a small patch under typical conditions, and protect garden furniture until the paint’s surface set.
Follow manufacturer minimum rain‑safe intervals; choosing the right formulation reduces downtime and preserves finish when weather turns shaky.
Pros and Cons of Quick‑Dry Deck Coatings
If you need a fast turnaround, quick‑dry deck coatings can be a huge time‑saver, but they trade off longer-term benefits for speed. You’ll appreciate rapid recoat windows and minimal weather delay, though deck color may shift slightly and paint texture can feel thinner.
Choose fast cures when schedules demand it, but test a small area first.
- Fast recoat times reduce rain risk during projects
- Shorter tack window can limit dirt pickup
- Often less durable than slower cures
- Can alter sheen and color stability over time
Weigh convenience against longevity for your project needs.
Cost vs Performance: Budget Paints and Rain Tolerance
You can save up front with budget deck paints, but they often trade shorter drying times for weaker durability. That means you might be tempted to paint before a forecast clears.
Yet the faster dry doesn’t always resist rain or wear, increasing long-term maintenance. We’ll compare upfront cost, drying-time tradeoffs, and expected upkeep so you can pick the smartest option for your deck.
Cost Vs Durability
While cheaper deck paints may let you tackle the job without breaking the bank, they usually trade off faster wear and lower rain tolerance for that upfront savings. You’ll balance cost against longevity: higher-quality formulations resist moisture, hide imperfections, and preserve color schemes or decorative patterns longer.
Choose based on traffic, exposure, and maintenance willingness. Consider lifecycle cost, not just sticker price.
- Initial purchase: low
- Recoats frequency: higher with budget options
- Moisture resistance: improves with quality
- Long-term upkeep: cheaper paints demand more
Spend a bit more if you want durable protection and fewer surprises.
Drying Time Tradeoffs
Because quicker-drying, budget-friendly deck paints let you finish a project sooner, they often sacrifice rain tolerance and long-term performance. So you’ll face more frequent touch-ups and a higher chance of early peeling or staining after unexpected showers.
You’ll weigh upfront savings against shorter protection: cheaper formulas cure fast but may not repel moisture well, accelerating color fading and wear. If you prioritize appearance and fewer interruptions, choose higher-performance or specially formulated rain-tolerant coatings.
Also consider eco-friendly options that balance cure time and durability—you can find low-VOC paints engineered for better moisture resistance without sacrificing environmental concerns.
Long-Term Maintenance Costs
If you pick budget paint to save upfront, be ready for higher long-term maintenance costs because lower-quality formulas usually need more frequent recoating and repairs after rain-related damage.
You’ll spend more time sanding, scraping, and touching up spots where rain peeled or blistered the finish. That increases labor, material costs, and disruptions to garden furniture use and patio plants nearby.
- More frequent recoats shorten intervals between full jobs
- Repairs risk staining cushions and plant pots
- Cheap paints may trap moisture, causing rot
- Higher lifecycle cost often outweighs initial savings
When to Hire a Pro in Rainy Climates
When your region gets frequent showers or unpredictable storms, consider hiring a pro to guarantee your deck paint job holds up—professionals can better time work around weather windows, use fast-curing products, and apply coatings under controlled conditions to reduce the risk of ruined paint and wasted time.
You should hire a pro if you lack reliable dry days, if large or elevated decks make access and curing tricky, or if wildlife interference and pest control concerns could disrupt drying.
Pros also spot hidden moisture, choose appropriate primers, and provide warranties so your paint investment isn’t lost to one rainy season.
Pre‑Painting Checklist: What to Check First
Before you open cans of paint, walk the deck and run a quick checklist to spot issues that’ll sabotage the job. Check board integrity, loose nails, and rot; replace or repair as needed. Clear garden furniture and move planters so you can paint edges. Trim overhanging branches and coordinate lawn care to reduce debris during drying.
Before painting, inspect boards, clear furniture, trim branches, and confirm drainage and dry weather windows.
- Inspect surface for peeling or old coatings
- Test drainage and slope for pooled water
- Note shaded vs. sunny zones for drying times
- Confirm weather window and extended dry forecast
Document problems, gather tools, and only start when the deck’s prepped.
Common Mistakes That Cause Paint Failures After Rain
Because paint needs a clean, dry surface to bond, a few avoidable errors are responsible for most post‑rain paint failures. You skip proper drying time, trap moisture under new coats, or paint right before a storm and wonder why it wrinkles or peels.
You neglect surface prep—dirt, mildew, or old loose paint prevents adhesion. You use incompatible products or thin coats to save effort, which invites washout and accelerated color fading.
You ignore tool care: poor brush cleaning leaves hardened bristles that lay paint unevenly, creating weak spots. Fix these habits to reduce rain‑related failures.
Simple Maintenance to Protect Painted Decks in Wet Weather
If you want your painted deck to withstand wet weather, a few quick, regular maintenance tasks will go a long way. You’ll inspect painted surfaces monthly, touch up chips, and clear debris so water won’t pool.
Choose color options that resist fading and recoat worn areas before the rainy season.
Use proper safety gear when scraping or sanding to avoid injury.
Keep gutters and downspouts clear so water drains away from the deck.
Reseal joints and fasteners annually to block moisture.
Small, consistent actions prevent peeling and prolong finish life, saving time and costly repairs later.
Frequently Asked Questions
Can I Paint My Deck Right After Power Washing or Does It Need to Dry?
You shouldn’t paint immediately; you’ll need the deck surface fully dry for proper paint adhesion. Wait at least 24–48 hours depending on weather, ensuring no moisture remains so the paint bonds correctly.
Will Dew Overnight Ruin a Freshly Painted Deck?
Like a whisper on fresh varnish, no — light dew usually won’t ruin a freshly painted deck if you’ve practiced good deck maintenance and guaranteed proper paint compatibility; heavier moisture can mar the finish before it fully cures, though.
Can Painted Deck Steps Be Walked on Before Full Cure?
You can step on painted deck steps after they’re dry to the touch, but you shouldn’t until they’ve cured enough for deck maintenance and paint longevity; use caution, avoid heavy traffic, and follow the paint’s cure time.
Does Paint Color (Dark Vs Light) Change Drying Time?
Yes — darker colors usually dry faster than lighter ones because they absorb more heat, so you’ll notice color contrast affects drying duration; you’ll see quicker surface set with dark shades, though humidity and coating type still matter.
How Long After Rain Should I Wait Before Repainting Affected Areas?
Coincidentally, when sun returns you should wait 24–48 hours after rain before repainting affected areas. You’ll guarantee the deck surface is fully dry and promote proper paint adhesion, so your work won’t peel prematurely.
Conclusion
You’ll want to wait at least 24–48 hours before exposing water‑based deck paint to rain and 48–72 hours for oil‑based—though full curing can take weeks. Notably, about 40% of paint failures on decks are due to moisture issues like premature rain exposure, so timing matters. Check the forecast, aim for several dry days, and don’t rely on “dry to touch.” If you’re unsure in a rainy climate, call a pro to avoid costly rework.