How to Dry a Paint Brush Without Ruining It
Remove excess paint, rinse thoroughly with the right solvent for the paint type, then blot and reshape the tip. Lay the brush flat with the ferrule just off the edge or hang bristle-down so water drains away; use a brush spinner or towel to speed drying if needed. Don’t use high heat or store damp in sealed containers. Let it fully dry before storing upright, and keep going to learn tips for specific paints and revival tricks.
How to Dry a Paint Brush Fast Without Ruining the Bristles
When you need to dry a paint brush fast without ruining the bristles, act quickly but gently: remove excess paint or solvent by wiping on a rag or spinning the brush against a paper towel, then reshape the bristles and blot again to pull out moisture.
You’ll choose technique based on paint color and brush types: water-based paints let you rinse and shake; oil-based require solvent and more blotting.
Hold the ferrule downward, flick gently to shed droplets, then lay the brush flat on absorbent paper, bristles overhanging the edge. Don’t dry upright—doing so warps bristles and loosens the ferrule.
When Should You Dry a Brush vs. Store It Wet?
If you’re switching paints or won’t use the brush for more than a day, dry it completely before storing to prevent bristle damage, rust, and residual tackiness.
Otherwise, you can store a clean brush wet short-term if you’ll resume work within the same day; wrap the ferrule in plastic and keep bristles suspended to avoid bending.
If returning the same day, keep a clean brush wet: wrap the ferrule in plastic and suspend bristles.
Use simple drying techniques—blot, spin, air—then reshape bristles.
For overnight breaks when solvents or oils remain, follow brush conditioning steps first to protect fibers.
Evaluate paint type, time between uses, and tool value to decide whether immediate drying or wet storage fits your workflow.
Drying Differences: Latex vs. Oil vs. Acrylic Brushes
Because each paint type dries and interacts with bristles differently, you’ll need to adjust your drying routine for latex, oil, and acrylic brushes.
For latex (water-based), rinse thoroughly, shake out excess, reshape bristles, and let brushes air dry flat or hanging to protect paint texture and avoid water pooling in the ferrule.
For oil-based brushes, use solvent to clean completely, then wash with soap and water. Dry gently with a cloth, and hang to preserve bristle integrity and color retention.
Acrylic dries fast; clean immediately, remove all residue, reshape, and dry flat to prevent stiff bristles and faded color.
Remove Excess Paint in 3 Simple Moves
Before you start drying, wipe off excess paint with a rag or paper towel so the bristles don’t clump.
Then tap the brush gently on the rim of the can or a scrap board to knock out lingering drips.
Those two simple moves cut drying time and protect the brush shape.
Wipe Off Excess
Once you’ve pulled the brush from the paint, quickly wipe the bristles to remove excess in three simple moves that’ll keep the brush’s shape and drying time down. Hold the handle near the ferrule, glance at paint color to spot heavy build-up, and choose a cloth suited to your brush material.
Then:
- Sweep the bristles along the cloth’s edge, keeping pressure even.
- Fold the cloth and pull through the bristles to lift trapped paint.
- Finish by lightly combing with your thumb to realign tips.
Do this between coats to prevent clogging and speed up drying without deforming bristles.
Tap Out Drips
Want to keep drips from ruining your finish? Tap out drips gently against the rim of the paint can or a scrap board to remove excess paint without splaying bristles. Hold the brush near the ferrule, angle it slightly, and deliver three controlled taps—no swinging. After each tap, inspect the tip for runs and wipe once with a rag if needed.
This quick routine helps with drip control by preventing blobs from forming on edges or floors. Finish by combing bristles with a brush comb or your fingers to realign fibers before drying. Repeat as you switch colors or pause.
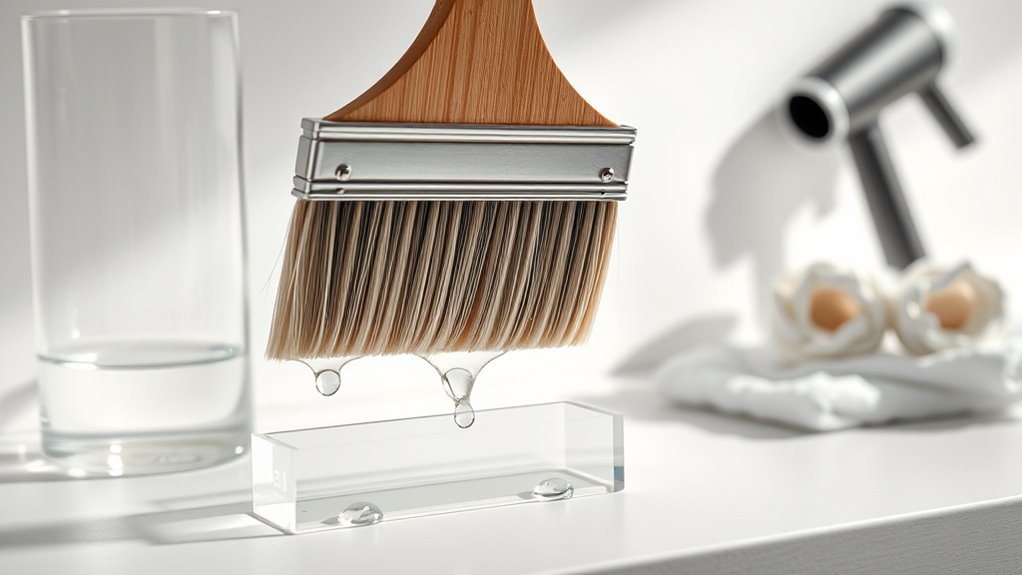
Rinse Methods That Protect Brush Shape
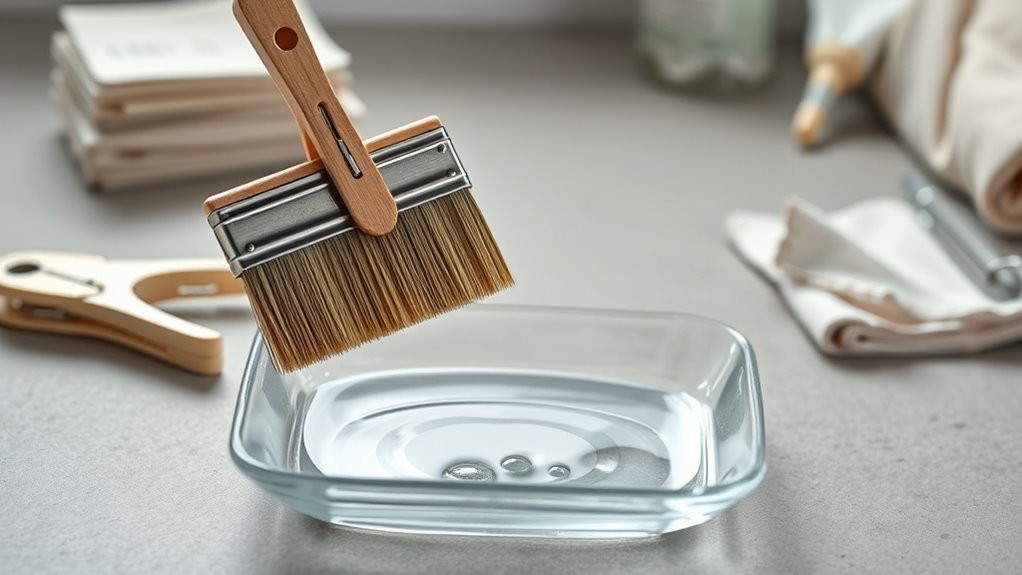
Rinse brushes under a gentle stream of cold water to flush out paint without splaying the bristles.
For oil-based paints, you’ll use a solvent swirling technique to dissolve residue while keeping the ferrule area clean.
Pat excess moisture with a towel and comb the bristles into shape before drying to preserve the brush profile.
Gentle Cold Water Rinse
Although you’ll be tempted to rush, a gentle cold-water rinse preserves the brush’s shape and bristle integrity better than hot or forceful washing. You’ll use a cold rinse for gentle cleaning: hold the ferrule downward, run cool water over the bristles, and avoid splaying.
Work paint out by combing with your fingers, not scrubbing.
- Rinse until water runs clear.
- Gently reshape bristles with your fingers.
- Shake excess water and blot with a lint-free cloth.
Finish by laying the brush flat or hanging it handle-up to dry. This method minimizes heat damage and keeps the tip precise.
Solvent Swirling Technique
When alcohol or mineral spirits are needed to remove stubborn paint, swirl the brush gently in the solvent rather than scrubbing it, so the liquid flushes paint from the ferrule without bending the bristles.
Use a shallow container and keep the ferrule submerged while the handle stays up.
Maintain controlled solvent swirling and slow brush rotation to coax paint out along the bristles’ grain.
Pause to inspect and repeat if traces remain, avoiding forceful pressing that deforms tips.
After cleaning, tap the ferrule lightly to shed excess solvent and set the brush upright to drain before proceeding to final drying steps.
Towel And Comb Drying
Once you’ve loosened and drained most of the solvent, grab a lint-free towel and a brush comb to finish drying without distorting the bristles. You’ll pat the ferrule gently, work from heel to tip, and avoid twisting to preserve shape and brush ergonomics.
Use the comb to realign bristles and remove trapped pigment from color mixing. Follow these quick steps:
- Pat dry along bristles’ length, never rub circularly.
- Comb gently from ferrule to tip to realign and separate.
- Reshape tip with fingers, then hang or lay flat to finish drying, bristles supported and untwisted.
Best Way to Reshape Bristles After Washing
If you want your brush to perform like new, reshape the bristles right after rinsing while they’re still wet and pliable. Gently run your fingers along the hairs to align tips and remove stray strands, keeping the ferrule free of splayed fibers.
For synthetic or natural brushes, check paint compatibility before reshaping—some solvents swell bristles differently. Use a gentle round or flat profile to match the brush’s original shape, and compress lightly toward the ferrule to remove excess water.
Secure with a paper towel or reusable band to hold the form while you finish drying, then store properly for long-term brush maintenance.
Best Air-Drying Positions to Prevent Bristle Splaying
When you air-dry your brush, the position matters to keep the bristles sharp. Hang it vertically, lay it flat on its edge, or suspend it bristles-down to prevent splaying and water pooling.
Try each method to see which suits your brush type and workspace.
Hang Brush Vertically
Because gravity helps keep the bristles aligned, hang your brush vertically with the bristles pointing down after rinsing. This simple position lets water drain away from the ferrule and prevents splaying and rust.
You’ll use vertical hanging for reliable drying and safer brush suspension, keeping ferrules dry and bristles neat. Hang from a rack, nail, or clip so the handle is secure and the head clears surfaces.
Pay attention to airflow and avoid crowded spots.
Quick checklist:
- Secure handle to prevent slipping
- Make certain bristles clear edges and won’t touch surfaces
- Allow full air circulation around brush head
Lay Flat On Edge
While hanging works well, laying a brush flat on its edge gives another reliable way to keep bristles aligned and the ferrule dry. You’ll use edge placement and flat positioning to prevent splaying: lay the brush on a clean surface so only the very edge of the ferrule touches, bristles slightly elevated. Rotate occasionally for even airflow and don’t let wet paint pool near the handle. This method’s stable, simple, and great for multiple brushes.
| Surface | Angle | Benefit |
|---|---|---|
| Tray | 0° | Stability |
| Rack | slight | Airflow |
| Towel | 0° | Cushion |
Suspend Bristles Down
If you hang the brush with the bristles pointing down, gravity helps keep fibers aligned and lets water drip away from the ferrule, so you avoid splaying and rust. You’ll preserve bristle flexibility and speed drying by suspending brushes rather than leaning them.
Use simple clips or a rack so air circulates around the head and handle.
Consider these tips:
- Hang by the handle or a hooked ferrule to let water escape.
- Keep brushes separated to prevent misshaping and maintain Brush storage order.
- Avoid enclosed containers until fully dry to protect bristle flexibility and prevent mildew.
Use a Brush Spinner vs. Towel: Pros and Cons
When you’re deciding between a brush spinner and a towel, think about speed, paint type, and bristle care—spinners fling out water quickly and keep bristles aligned, while towels absorb moisture more slowly and risk splaying or snagging delicate fibers. For brush cleaning and efficient drying techniques, choose a spinner for oil or latex, or a towel for light touch-ups. Consider convenience, cost, and bristle wear.
| Method | Speed | Bristle Care |
|---|---|---|
| Spinner | Fast | Aligns, gentle if used properly |
| Towel | Slow | Risk splaying, snagging |
| Combination | Moderate | Balanced control |
Safely Use Heat to Speed Brush Drying
After you’ve wrung or spun most of the water out, you can cautiously use heat to finish drying a paint brush faster. Position the bristles away from the ferrule and use low, even Heat application—hair dryer on low or warm air—keeping the tool moving to avoid scorching.
Short bursts prevent damage and won’t warp synthetic or natural hairs. Heat also reduces microbial growth, aiding basic Brush sterilization, though it’s not a substitute for proper cleaning.
- Keep distance: 6–12 inches.
- Use low setting only.
- Rotate brush constantly to dry evenly.
How to Prevent Ferrule Rust While Brushes Dry
Don’t let water sit against the ferrule—wipe it dry after rinsing and stand brushes bristle-up so moisture drains away.
You can also apply a light rust inhibitor or a drop of machine oil to the ferrule’s edge to block corrosion.
These small steps will keep metal parts sound while the bristles finish drying.
Keep Ferrule Dry
If you want your brush to last, keep the ferrule—the metal band that holds bristles—tooth-dry while it dries, because trapped moisture invites rust and loosens the glue. You’ll focus on Ferrule protection and Bristle preservation by positioning, timing, and simple barriers.
After rinsing, shake excess water and blot bristles; don’t let water pool at the ferrule. Prop the brush so bristles point downward or hang by the handle to pull moisture away.
Use quick, soft taps and a clean cloth to finish. Simple steps prevent corrosion and keep bristles flexible and secure.
- Hang brushes by handles
- Point bristles down
- Blot ferrule area
Use Rust Inhibitors
Keeping the ferrule dry goes a long way, but adding a rust inhibitor gives extra protection while brushes dry. You can apply a thin film of light oil, silicone spray, or commercially labeled rust prevention products to the ferrule before storing the brush upright. Wipe off excess so bristles don’t get oily.
For water-based paint, a quick alcohol wipe helps drying techniques and boosts inhibitor adherence. If you rotate brushes, reapply sparingly after cleaning.
These small steps prevent corrosion, extend brush life, and maintain shape. Use products made for metal to avoid residue that could affect future paint jobs.
How Long a Brush Needs to Dry Before Reuse
Although drying time varies with paint type, temperature, and humidity, most synthetic brushes used with water-based paints are touch-dry within an hour and ready for light reuse after 2–4 hours. You’ll still check bristles and avoid heavy pressure if paint color or residue remains. Rotate tasks so brushes rest between coats.
Most synthetic brushes with water-based paint are touch-dry in an hour and usable lightly after 2–4 hours.
Faster drying needs good airflow and moderate heat; slow drying happens in cool, humid rooms. Watch the brush grip—if ferrule or handle feels tacky, wait longer.
- Light reuse: 2–4 hours
- Full cure for heavy coats: 24 hours
- Oil-based paints: 24–48 hours
How to Store a Dried Brush to Keep It Like New
Once your brush is fully dry, make sure you clean it one more time so no residue sets in the ferrule.
Store brushes flat or hung bristles-down in a protective case to preserve their shape.
Keep them in a cool, dry place with stable humidity to prevent mold and warping.
Clean Before Storage
Before you put a dried brush away, make sure it’s completely clean and shaped so it stays like new. Rinse until water runs clear, removing paint color residue from the ferrule and bristles.
Separate brushes by brush types and designed use so oils or stains don’t transfer.
- Remove excess paint and check for trapped debris.
- Store handles down or flat in a clean, dry container.
- Use breathable covers or wrap in paper to prevent dust.
Label containers with paint color or project notes.
Let brushes air fully before closing storage to avoid mildew and preserve bristle condition.
Protect Bristle Shape
If you want your brush to keep its original tip, store it so the bristles aren’t crushed or misshapen; use upright holders, protective caps, or gentle wraps that maintain the natural taper without squeezing the ferrule. You’ll preserve brush stiffness and bristle color by avoiding tight containers and stacking. Label holders by use and clean type so you grab the right tool. Visualize storage:
| Upright Holder | Cap On Tip | Loose Wrap |
|---|---|---|
| Bristles free | Protects tip | Gentle support |
| Taper preserved | Prevents dust | Maintains shape |
Rotate brushes occasionally and test tips before painting.
Control Humidity Levels
When you store a dried brush in a stable, moderate-humidity spot, you’ll prevent bristles from becoming brittle or moldy; prioritize humidity control to extend life and maintain shape.
Choose a ventilated cabinet away from direct heat or damp basements. Use simple moisture regulation tactics so you don’t overcompensate.
- Keep brushes upright in a breathable container
- Add a small desiccant or humidity pack if air is humid
- Avoid sealed plastic that traps residual moisture
Check periodically and rotate storage location seasonally. With consistent moisture regulation and sensible placement, your brushes will stay flexible, clean, and ready for the next job.
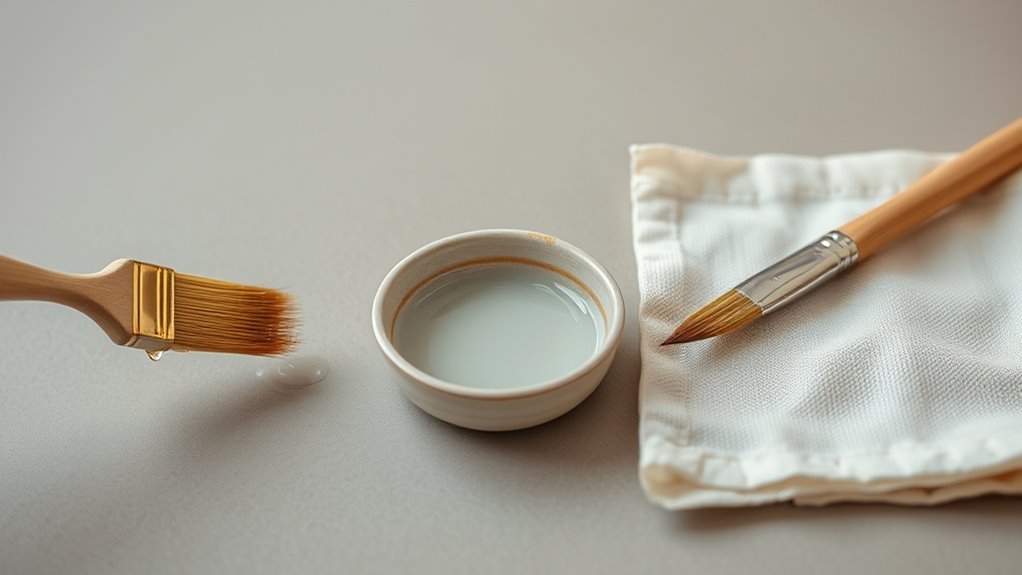
Revive a Brush That Dried Hard With Paint Residue
Although it’s frustrating to find a brush stiff with dried paint, you can usually restore the bristles to usable condition with the right solvents and a bit of elbow grease.
Start by loosening paint residue removal with warm water and dish soap for water-based paints, or mineral spirits for oils.
Gently work the solvent through the bristles, using a brush comb or old fork to separate fibers.
Rinse and repeat until softened.
After cleaning, apply a small amount of brush conditioning product or hair conditioner to rehydrate and align bristles.
Rinse, reshape, and let the brush dry flat before reuse.
When Drying Damage Means Replacing a Brush
Even with vigorous cleaning, some brushes stay misshapen, shed bristles, or have irreparably hardened tips, and you’ll need to replace them rather than keep struggling. You can’t salvage every tool; recognizing permanent damage saves time and prevents ruined finishes.
Even with vigorous cleaning, some brushes remain misshapen or hardened—replace them to avoid ruined finishes.
After attempted brush maintenance and thorough paint removal, inspect ferrule tightness, bristle alignment, and tip spring. If performance is degraded, replace the brush.
- Loose ferrule or constant shedding
- Split, splayed, or permanently misshapen bristles
- Hardened tips that resist reshaping
Choose a new brush rather than forcing repairs that compromise your work.
Best Tools and Cleaners to Dry Brushes Faster
If you want brushes to dry faster without warping or shedding, use the right tools and cleaners to speed evaporation and maintain bristle shape. You’ll rinse with eco friendly solvents or water-based cleaners, then shake gently and blot with lint-free cloths. Use a brush comb to realign bristles and a spinner or air-drying rack to reduce drip time. Painter’s tools like silicone wringers and microfiber towels speed drying while protecting ferrules. Avoid crushing bristles; let air circulate. The right combo cuts downtime and extends brush life.
| Tool | Benefit |
|---|---|
| Brush comb | Realigns bristles |
| Spinner | Removes excess water |
| Microfiber towel | Absorbs quickly |
| Silicone wringer | Protects ferrule |
Common Mistakes That Ruin Brushes While Drying
When you rush the drying process or use the wrong tools, you’ll quickly damage bristles, loosen the ferrule, and shorten the brush’s life. You’ll want to avoid these common errors to protect your investment and practice good brush maintenance and drying techniques. Don’t let heat, pressure, or neglect ruin quality.
- Leaving brushes propped bristle-down, which bends and frays fibers
- Using direct heat or hair dryers, which warps synthetic and natural hairs
- Storing damp brushes in sealed containers, which promotes rust and mildew
Catch these mistakes early, correct your routine, and your brushes will last longer.
Quick Checklist for Drying Any Paint Brush Correctly
Because proper drying keeps bristles aligned and ferrules secure, follow this quick checklist every time you finish cleaning a brush: remove excess moisture, reshape the bristles, lay or hang brushes so water drains away from the ferrule, air-dry in a well-ventilated spot out of direct heat, and store only once fully dry.
After cleaning, squeeze gently and blot with a lint-free cloth, comb bristles straight, and use a brush guard or hanging hook to maintain shape. Rotate brushes for even airflow, avoid enclosed containers until fully dry, and label storage locations.
These drying techniques protect performance and guarantee reliable brush storage.
Troubleshooting: My Brush Still Sheds After Drying
Even after following the checklist, you may notice loose hairs shedding as the brush dries or later during use. Check construction first: cheap brushes shed because staples loosen or glue fails, causing paint peeling at the ferrule.
Even well-cared-for brushes can shed—check the ferrule and construction, and replace if staples or glue fail.
Improve brush durability by rinsing thoroughly, reshaping bristles, and drying combed-down. If shedding continues, try these fixes:
- Remove remaining loose hairs with tweezers and test on scrap.
- Soak ferrule briefly in hot water to soften old glue, then let dry upright.
- Replace the brush if bristles keep falling out or if paint peeling from the handle appears.
Frequently Asked Questions
Can I Dry Brushes in Direct Sunlight Without Damaging Bristles?
Don’t; sunlight exposure can cause bristle damage, warping natural fibers and fading synthetic ones. You’ll speed drying safely by blotting, reshaping, and air-drying brushes in shade or indoors with good airflow to preserve bristles.
How Long Can a Brush Remain Wet Between Coats Without Mildew?
You can generally leave a brush wet between coats for up to 24–48 hours before mildew becomes a real threat; you’ll want brush preservation and mildew prevention measures, so wrap in plastic and refrigerate if you’ll exceed that.
Does Drying Method Differ for Synthetic vs. Natural-Hair Brushes?
Yes — you’ll treat synthetic vs. natural brushes differently: synthetic tolerates faster air drying and gentle heat, while natural-hair needs slower, shaded drying and reshaping. Use appropriate drying techniques to preserve bristle shape and longevity.
Can I Use Hair Conditioner to Soften Paint-Hardened Bristles?
Yes — you can try hair conditioner to help bristle softening, but it’s not ideal; you’ll get better brush cleaning and restore natural oils using specialist brush cleaner or mild solvent, then condition gently and reshape.
Will Paint Thinner Fumes Linger in a Stored Dry Brush?
Yes — paint thinner fumes can linger in a stored dry brush, so you’ll smell paint odor and risk harming brush preservation; you should air it thoroughly, use sealed solvent-free storage, and ventilate the area well.
Conclusion
You’ve learned quick, careful steps to dry your brush without wrecking it — a tiny routine that saves expensive tools. Yet neglect can erase that effort: one forgotten drip, one crushed bristle, and hours of care unravel. Choose right cleaning, gentle drying, and proper storage, and your brush stays ready; skip them, and it becomes disposable. Small habits make the difference between a lifetime tool and a ruined one — handle it accordingly.