Do You Have to Paint the Whole Wall After Patching? Expert Answer
You don’t have to paint the whole wall after patching if the damage is small and you use proper techniques. For nail holes or tiny dents under about 2–3 inches, you can spackle, sand, and touch up with matching paint and sheen so the repair blends. Match paint type and sheen, feather thin coats, and check in natural light to avoid visible edges. For larger patches, glossy finishes, or textured walls, a full repaint or pro help is usually best—keep reading for tips.
Do You Have to Repaint the Whole Wall?
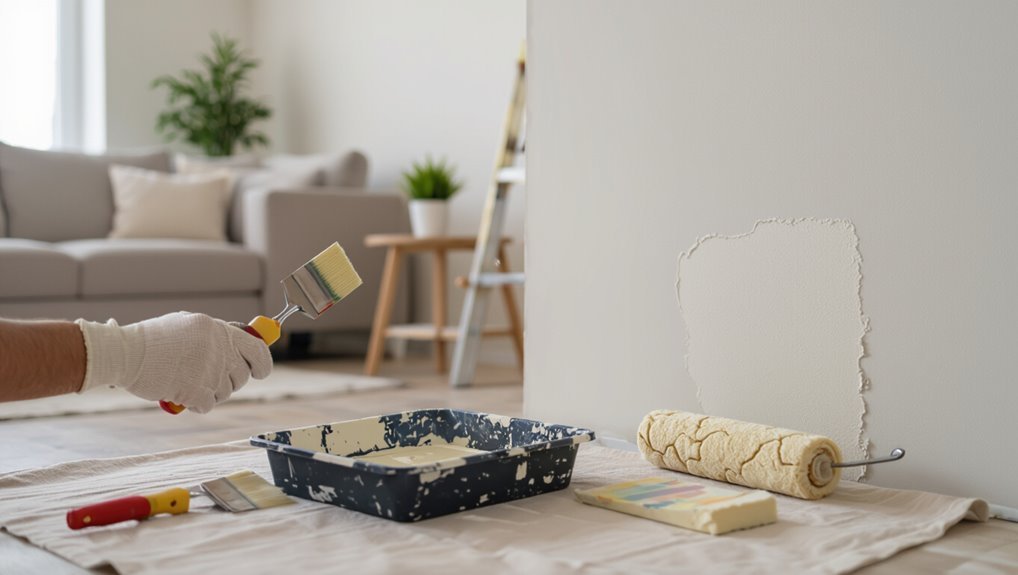
Do you have to repaint the whole wall after patching a small hole? You don’t always.
With proper patching techniques and feathered sanding, you can spot-paint if texture and sheen match. Use paint blending and thin layers to avoid visible edges.
Prime the repair when needed, let coats dry, and compare in different light to confirm the patch disappears without repainting the entire wall.
When Is a Touch-Up Enough: Patch Size & Visibility
If the patch is small—think nail holes or tiny dents—you’ll often be fine with a quick touch-up.
You should also consider visibility factors like lighting, texture, and how close people will get to the wall.
Bigger patches, rough blends, or glossy finishes usually mean you’ll need more than a spot repair.
Patch Size Thresholds
Sometimes a small repair is all you need: patches under about 2–3 inches are often easy to blend with a careful touch-up, while larger holes usually call for more extensive work or full-wall repainting to avoid visible seams. You’ll judge patch size and visibility impact; use this quick guide to decide whether to spot-paint or repaint.
| Size | Recommended action |
|---|---|
| <2" | Spot patch & touch-up |
| 2–6″ | Blend and feather paint |
| >6″ | Repaint area or full wall |
Patch Visibility Factors
While patch size matters, visibility depends more on location, texture, paint age, and light — so you’ll want to weigh all four before deciding whether a touch-up will disappear or stand out.
Consider patch visibility against surrounding texture: smooth walls hide small repairs better.
Check lighting conditions from windows and fixtures; raking light reveals flaws.
If paint faded or texture mismatches, repainting the whole wall.
Which Paint Type Matters Most for a Patch (Latex vs. Oil)
Which paint type you choose—latex or oil—can make or break how a patch blends with the rest of the wall, because they differ in adhesion, sheen, and drying behavior.
You’ll prefer latex for quick curing and latex durability on interior drywall; choose oil when you need oil longevity, stain-blocking, or smoother leveling on trim.
Match type to existing paint for best adhesion.
Why Finish (Sheen) Beats Color for Seamless Patches
When you patch a wall, matching the paint sheen matters more than matching the exact color because gloss level controls how light reflects and hides texture.
Higher gloss will highlight imperfections while a flatter finish helps the repair disappear, so check your existing sheen before you paint.
Use feathering and light sanding to blend the finish smoothly rather than trying to tweak color alone.
Match Paint Sheen
Even if you nail the color, a different sheen will make a patch jump out at eye level, so match the finish first. You should check sheen types before touching up: sheen comparison reveals why light reflects differently, sheen impact guides placement, and sheen maintenance keeps repairs invisible. Use this quick reference:
| Attribute | Note |
|---|---|
| Gloss level | Identify existing finish |
| Texture | Match surface prep |
| Durability | Choose same sheen |
| Touch-up tips | Feather edges gently |
How Gloss Affects Look
Anyone can match paint color perfectly and still see a patch because gloss controls how light reflects off the wall; if the repair has a different sheen, it will catch light differently and stand out.
You’ll notice gloss impact immediately: even slight sheen variations make patched spots obvious.
To hide repairs, prioritize matching the original finish so reflections remain uniform across the wall.
Blending Techniques For Finish
Because finish controls how light behaves on a surface, matching sheen matters more than matching color for invisible patches: you’ll conceal repairs by blending gloss levels so reflections read the same across the wall.
Use feathering, thin coats, and satin-to-flat shifts to blend edges. Test in natural light, sand between coats, and aim for seamless integration with proven blending techniques to avoid patchy spots.
How Sunlight and Fading Affect Your Color Match
If you’ve matched the paint color perfectly indoors, don’t assume it’ll look the same once it’s on the wall—sunlight and fading change how pigment appears over time.
Check how sunlight impact varies by room orientation and window treatments.
Expect fading effects on exposed surfaces; test a patched swatch in natural light across several days.
Adjust sheen or tint slightly to maintain a consistent visual match.
How to Match Paint When You Don’t Have the Can
Wondering how to get a seamless patch without the original can? Use focused steps to reduce patch visibility and match finish consistency.
- Compare paint types and sheen comparison under different lighting effects.
- Test paint samples and note texture assessment for blending techniques.
- Try small mixes to copy color matching, keeping repair strategies minimal.
- Evaluate results, adjust for finish consistency and final patch visibility.
What Feathering Is and How to Feather a Patch
When you feather a patch, you blend the new joint compound or paint into the surrounding wall so the repair fades gradually instead of forming a hard edge; this makes the patch much less visible once it’s primed and painted. You’ll use a feathering technique for smooth patch blending: skim thin layers, sand lightly, widen edges, and finish with primer.
| Step | Tool | Tip |
|---|---|---|
| 1 | Knife | Thin layer |
| 2 | Trowel | Widen edge |
| 3 | Sanding | Light strokes |
| 4 | Primer | Seal |
| 5 | Paint | Blend edges |
How to Match Wall Textures (Skim Coat, Orange Peel)
First, you’ll assess the existing texture—skim coat, orange peel, or something else—to know what you’re matching.
Then mix your joint compound or texture product to the same consistency as the wall so the pattern applies correctly.
Finally, feather and blend the edges into the surrounding surface so the repair disappears once painted.
Assess Existing Texture
Texture matters: before you patch, closely inspect the existing wall finish so you can match it.
Use texture assessment and surface evaluation to note pattern, depth, and sheen for accurate texture matching of the existing finish.
Then follow these steps:
- Photograph the area.
- Feel the texture.
- Measure pattern scale.
- Note paint sheen and age.
Match Compound Consistency
Because compound thickness and working properties determine the final look, you’ll need to match the consistency of the existing skim coat or orange-peel texture before you apply any patching compound. You’ll check patch consistency and adjust compound ratios for flow and hold. Test small areas, note drying time, and repeat until texture blends.
| Test | Ratio | Result |
|---|---|---|
| A | 3:1 | Thin |
| B | 2:1 | Medium |
| C | 1:1 | Thick |
Feather And Blend Edges
When you feather and blend edges, work from the surrounding texture into the patch so the shift disappears; use feathering techniques and blending strategies to match skim coat or orange peel.
Follow steps:
- Clean and dampen surface.
- Apply thin feathered coat.
- Texture-match with tool or spray.
- Sand lightly, prime, paint for seamless finish.
Tools and Materials for an Invisible Touch-Up
Anyone can get a near-invisible patch if you’ve got the right tools and materials on hand.
You’ll need fine-grit sandpaper, a quality putty knife, lightweight spackling, a small angled brush, and matching paint.
Learn touch up techniques and blending methods: mix tiny paint batches, feather edges, and use stippling for texture.
Keep lighting consistent and clean tools between coats.
Step-by-Step Small-Patch Touch-Up Workflow
Start by prepping the surface: clean, sand, and remove loose material so the patch adheres.
Apply the patching compound smoothly and let it cure before sanding to shape it flush with the wall.
Finish by feathering the edges and blending the paint so the repair disappears.
Surface Preparation Steps
Before you patch, clear and prep the area so the repair blends seamlessly: remove loose paint and debris with a putty knife or sanding block, wipe the surface with a damp cloth to remove dust and grease, and let it dry completely—this gives the compound a clean, keyed surface to adhere to and prevents future lifting or visible edges.
- Do wall inspection for damage.
- Use surface cleaning.
- Gather prep tools and patching materials.
- Perform texture assessment before filling.
Patch Application Technique
Apply the patch compound in thin, controlled layers so each pass dries uniformly and you can feather the edges into the surrounding paint.
Use a flexible putty knife, press firmly, and smooth each coat. Let drying time complete between layers, sand lightly when dry, and repeat until level.
These patch techniques and application tips help you achieve a durable, inconspicuous repair without overbuilding.
Feathering And Blending
Feathering and blending are what make a small patch disappear into the surrounding wall, and you’ll do this by gradually tapering the repair and matching texture and sheen.
Use these feathering techniques and blending tips to finish cleanly.
- Sand edges thinly.
- Thin compound at edges.
- Match texture with tool.
- Feather paint outward for sheen continuity.
When and How to Prime a Patched Area
If the patch soaks up primer or has a different texture than the surrounding wall, you’ll need to prime it before painting to guarantee even color and adhesion.
For patch preparation, sand smooth, remove dust, and apply a stain-blocking or bonding primer.
Use targeted priming techniques—brush or small roller—and let the primer cure fully before painting for consistent coverage and adhesion.
Blend a Larger Repair Without Repainting the Whole Wall
When a repair covers a larger area but you don’t want to repaint the whole wall, you can blend the new paint into the old by matching sheen, using gradual overlap, and working outward from the patch with a small roller and cutting brush.
Take care to match the original texture and let each coat dry fully before evaluating coverage so you avoid obvious seams.
- Clean and sand.
- Prime edges.
- Use patching techniques.
- Apply blending strategies.
When You Should Repaint the Entire Wall
If the patched area doesn’t match the existing color, you’ll notice it immediately and should consider repainting the whole wall.
When the repair covers a large area, a full repaint is often the simplest way to get a uniform look.
Also repaint if the patch’s texture stands out against the surrounding wall, since matching texture across a wide surface is hard to hide.
Color Match Issues
You’ll notice color mismatch the moment patched areas stand out against the surrounding paint, and that contrast tells you whether a full-wall repaint is needed.
- Check lighting — tones shift with light.
- Consider color psychology — mismatches affect mood.
- Test small blends before committing.
- Factor paint durability differences; old finish may never match.
Repaint the whole wall if blends fail or mood and longevity suffer.
Large Patch Areas
Although small touch-ups can disappear with a careful hand, large patched areas change a wall’s texture and reflectivity enough that you’ll often need to repaint the entire surface to get a uniform look.
You should evaluate large patch techniques and use deliberate patch blending strategies, then prime and repaint the whole wall so color, sheen, and finish match across the entire surface for a consistent result.
Visible Texture Differences
Large patched areas often match color after priming, but they can still stand out because their texture and light reflection differ from the surrounding wall.
You’ll want to repaint the whole surface when patch blending fails your eye. Consider these cues:
- Texture perception changes under varied light.
- Patch edges remain visible.
- Repairs attract attention from certain angles.
- Matte sheen differs across sections.
How Lighting and Viewing Distance Reveal Patches
When light hits a patched area at an angle or you’re standing farther away, differences in texture and sheen become much easier to spot.
Spot Touch-Up vs. Whole-Wall Repaint: Cost & Time
How much will it cost and how long will it take to fix a small patch versus repainting the whole wall? You weigh cost efficiency and time management when choosing.
- Spot touch-up: minimal paint, low cost.
- Prep time: cleaning and sanding matters.
- Whole-wall: higher material and labor cost.
- Whole-wall: longer downtime but uniform finish.
Will a Visible Patch Hurt Resale Value?
Could a small, visible patch hurt your home’s resale value? You should address resale concerns early: buyers notice patch aesthetics and may infer poor maintenance. Fixing or camouflaging patches boosts perceived care and can prevent negotiation leverage. Below is a quick comparison to grab attention.
| Visibility | Buyer Impression | Action |
|---|---|---|
| None | Neutral | No action |
| Subtle | Minor | Blend |
| Obvious | Negative | Repaint |
Common Mistakes That Make Touch-Ups Obvious
Although you can patch a hole quickly, several common missteps will make that repair stand out instead of blend in. You should avoid sloppy patching techniques and mismatched paint.
Typical errors:
- Overfilling without sanding.
- Using wrong texture tools.
- Poor color blending at edges.
- Skipping primer.
Fix these to keep touch-ups subtle and professional-looking.
When to Call a Pro: Size, Texture, and Finish Rules
If a patch is bigger than a few inches, the wall has a complex texture, or the paint finish is glossy, call a pro—these factors make blending and matching much harder and mistakes more obvious.
You should seek pro consultation when size, texture matching, or finish issues risk visible seams. A pro will assess repair scope, match texture precisely, and advise whether full-wall repainting’s necessary.
Seasonal and Humidity Considerations for Painting
Beyond size and texture, timing matters: seasonal temperature and humidity affect drying, adhesion, and how well a patched area blends with surrounding paint.
You should consider humidity effects and seasonal timing to get consistent results.
- Paint in moderate temps.
- Avoid high humidity.
- Allow extra dry time in cold.
- Match season for final coat.
How to Test a Touch-Up Before You Commit
Want to be sure your patch will disappear before you commit to painting the whole wall? Try simple test methods: apply patch, sand, then use small color sampling swatches; view in varied light. Record results and adjust blend technique. Use this quick table to track attempts and note which approach matched best.
| Attempt | Light | Result |
|---|---|---|
| 1 | Day | |
| 2 | Night | |
| 3 | Lamp |
Quick Checklist: Touch Up or Repaint Decision Guide
Now that you’ve tested touch-ups under different lights and recorded which methods blended best, use this quick checklist to decide whether to spot-repair or repaint the whole wall.
- Size: tiny dents → try touch up techniques first.
- Texture: matchable grain → spot repair; mismatched → repaint.
- Color: close match after patch assessment → touch up; obvious difference → repaint.
- Coverage: multiple patches across wall → repaint for uniformity.
Frequently Asked Questions
Can I Patch and Touch up Trim Without Repainting the Wall?
Yes — you can patch and trim touch up without repainting the whole wall. Use proper patching techniques, feather edges, match sheen and color, prime spot repairs, and blend carefully so the trim touch up looks seamless.
How Long Should Patched Areas Cure Before Painting?
Patched parts should cure 24–72 hours before painting for proper paint adhesion. Patience promotes permanence: if you’re using fast-setting compounds you’ll wait less, slower spackles or deep fills need longer to fully harden.
Will Odor From Oil-Based Paint Linger After a Touch-Up?
Yes — oil based paint can leave a noticeable odor after a touch-up; you’ll likely detect fumes for days to weeks depending on ventilation, temperature, and product, so improve airflow to shorten odor duration and aid curing.
Can Textured Patches Be Painted With a Sprayer for Better Blend?
Absolutely — you can spray textured patches to blend like a pro; sprayers mimic textured finishes and blending techniques, but you’ll need matching texture, light passes, and feathering so the patch disappears instead of shouting for attention.
Do Patching Compounds Shrink or Expand Over Time?
Yes — patching compounds can shrink or expand over time. You’ll notice shrinkage effects as they dry and cure, while expansion factors like moisture, temperature, and improper mix can cause swelling or delayed settlement.
Conclusion
You don’t always have to repaint the whole wall—sometimes a careful touch-up will vanish if the patch is small, the sheen matches, and the paint hasn’t faded. But here’s the catch: if texture, finish, or sunlight have altered the surface, a quick fix can stand out. Test a small swatch, wait for it to dry, and inspect in different light. If it betrays you, repainting the whole wall is the safer, cleaner choice.