How to Fix Dry Paint Without Repainting
If your paint is dry but dull, scuffed, or slightly flaking, you can often revive it without a full repaint: clean the area, sand lightly to feather edges, use a compatible reactivator or very fine abrasive to blend sheen, spot-prime bare spots, then apply thin touch-up coats or a glaze and finish with a protective topcoat. Work in small patches, test solvents first, and guarantee good ventilation—keep going and you’ll find step-by-step fixes and tips for tougher cases.
Quick Check: Is Paint Tacky or Fully Dry?
Wondering whether the paint is tacky or fully dry? You’ll check surface feel first: gently press a clean fingertip to an inconspicuous spot. If it sticks or leaves a print, it’s tacky. No tackiness and no residue means dry.
Next, assess color consistency—uneven sheen or darker patches can signal incomplete curing even if touch feels dry.
Smell helps too: lingering solvent odor suggests more time is needed.
Consider paint durability: light abrasion with a fingertip or tissue reveals whether the finish resists scuffs. If durability seems lacking, avoid heavy use until curing completes to prevent damage.
Quick Triage: Revive or Repaint?
So, can you save the finish or is a repaint the safer bet? You’ll assess damage, consider color consistency, and judge surface preparation. If flaws are minor and color matches, you can often revive the area; if large chips, deep scratches, or mismatched sheen appear, repaint. Check adhesion, texture, and surrounding edges. Choose revive when fixing won’t expose substrate or worsen appearance. Opt for repaint when patching creates visible transitions or adhesion is poor. Below is a quick decision guide to help you decide efficiently.
| Condition | Action |
|---|---|
| Minor scuff | Revive |
| Fading | Revive |
| Chip exposing substrate | Repaint |
| Sheen mismatch | Repaint |
| Poor adhesion | Repaint |
Tools and Materials to Revive Dry Paint
When you’re ready to revive dry paint, gather a few essential tools and materials so the repair goes quickly and cleanly.
You’ll need a fine-grit sandpaper or sanding sponge, a soft cloth, a quality paint reactivator or compatible thinner, and a small plastic scraper.
Keep a clean mixing cup, stir sticks, and a disposable brush or foam applicator handy for touch-ups.
Use a tester patch to check color consistency before broader application.
Choose products that match the original finish to preserve paint durability.
Have cotton swabs and a mild solvent for spot work and precise blends.
Safety and Ventilation When Reviving Paint
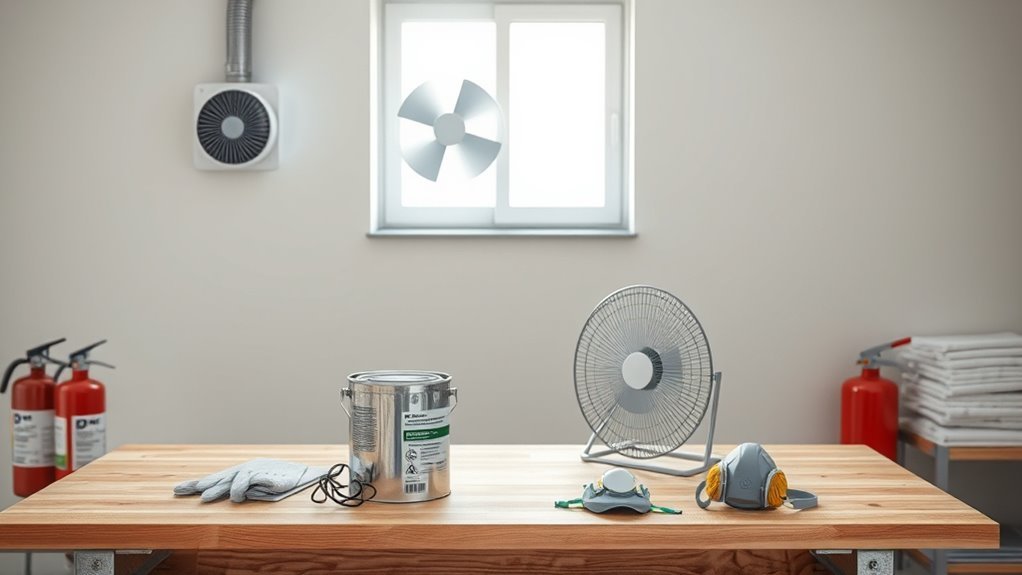
Because solvents and paint particles can build up quickly, make sure you work in a well-ventilated area and wear appropriate PPE: gloves, eye protection, and a respirator rated for organic vapors or particulates as needed.
Work where air flows—open windows, use fans, and wear gloves, eye protection, and a respirator for solvents and paint.
You should also protect skin and avoid open flames; turn off pilot lights and smoking sources. Follow safety precautions by reading product labels, keeping a fire extinguisher handy, and storing chemicals sealed when not in use.
Ventilation tips: open windows, use box or exhaust fans to direct air outside, and run HVAC exhaust if possible.
Take breaks outdoors to avoid prolonged exposure and monitor symptoms closely.
Prep: Remove Flaky or Peeling Dried Paint First
Before you revive dried paint, remove any flaky or peeling sections so the repaired area will bond and look smooth. Use a putty knife or paint scraper at a low angle to lift loose bits, working from intact paint toward the damaged spot.
Collect debris and vacuum the area to avoid contamination. For tight spots, use a stiff brush or a detail scraper.
Follow with surface cleaning: wipe with a damp cloth or mild detergent solution, then rinse and let dry.
This paint preparation step guarantees adhesion and prevents trapped particles from causing future lifting or visible defects.
Sand and Feather Edges for a Seamless Finish
Now that you’ve cleared loose paint and cleaned the surface, sand the repair area to blend the edges with the surrounding finish. You’ll use progressive grits and light pressure for edge smoothing so transitions disappear. Feathering creates a gentle slope from old paint to bare spots, aiding finish blending.
Keep strokes consistent and check under angled light. When dust is gone, test a small patch to ensure the texture matches.
- Start with 120-grit to remove high ridges.
- Move to 180-grit for smoothing.
- Finish with 220-grit for feathered edges.
- Wipe and inspect before touching up.
Revive Dried Latex Paint With Water

If your latex paint has started to dry in the can or on a brush, you can often restore it with a little water and gentle stirring. Start by adding small amounts—about a tablespoon at a time for a quart—until the consistency loosens.
If latex paint begins to dry, add small amounts of water and gently stir until it softens.
You’ll want to strain the paint through a fine mesh to remove skin or clumps, then test a small patch.
For brushes, soak bristles in warm water, work the softened paint out, then reshape and dry.
This revive dried latex approach is a simple water-based restoration method that saves materials and avoids unnecessary repainting.
Soften Dried Oil-Based Paint Safely
Before you try to soften dried oil-based paint, check how old and hard it is—older films may be brittle and less likely to respond.
If the paint’s relatively recent, you’ll want to use a mild, paint-compatible solvent like mineral spirits or a commercial paint restorer, applied sparingly and with good ventilation.
Always test a small area first and wear gloves and eye protection to keep the process safe.
Assess Paint Age
When evaluating how long oil-based paint’s been dry, check both the surface hardness and any known application date so you can decide whether softening is safe and effective. You’ll inspect paint texture and color consistency to judge age: brittle, chalky, or deeply yellowed finishes are older; flexible, even surfaces are fresher.
Probe discreetly with a fingernail or gentle scraper to test cure. Note environmental history — warm, ventilated areas cure faster. Record findings before any treatment so you choose appropriate methods and avoid damaging the substrate.
- Flaky edges
- Smooth gloss
- Yellowing patches
- Hard, brittle spots
Use Safe Solvents
Having assessed the paint’s age and condition, you can now approach softening with safe solvents that minimize substrate damage. Choose eco friendly solvents or gentle commercial removers; test a hidden spot first. Apply solvent with a soft cloth, let it penetrate, then gently lift softened paint with a plastic scraper. If you prefer natural remedies, try citrus-based cleaners or a small amount of white vinegar diluted in water for mild spots. Work slowly, ventilate, and wear gloves.
| Solvent Type | Best Use |
|---|---|
| Eco friendly solvent | Tough spots |
| Natural remedy | Light softening |
Rehydrate Paint on Furniture and Cabinets
If paint on your furniture or cabinets has dried out but the finish is still intact, you can often revive it without stripping or repainting. Gently clean surfaces, then use a few drops of mineral spirits or paint rejuvenator on a cloth to rehydrate dried film; test hidden areas first.
Lightly buff with a microfiber pad to blend sheen for paint preservation and subtle color correction. Finish with a thin coat of furniture wax or clear topcoat to lock in results.
Lightly buff to even the sheen and gently finish with a thin wax or clear topcoat to protect and unify color
- Wipe dust away
- Test solvent spot
- Rehydrate and buff
- Seal gently
Fix Dry Paint on Trim and Baseboards
Because trim and baseboards take more bumps and scuffs than other surfaces, you’ll want a targeted approach that revives dried paint without sanding or full repainting. You’ll clean, spot-treat chips, and use thin touch-up coats. Focus on Color matching with small test swatches and finish with Texture blending tools like soft brushes or stipple sponges to mimic existing sheen.
| Step | Tool/Action |
|---|---|
| Clean | Mild detergent, cloth |
| Assess | Test swatch for Color matching |
| Rehydrate | Mineral spirits (small area) |
| Touch-up | Thin coats, sable brush |
| Blend | Stipple sponge for Texture blending |
Work patiently; feather edges to hide gradual change.
Repair Dry Paint on Drywall and Plaster
Start by inspecting the drywall or plaster for common paint flaws like cracking, flaking, or texture differences.
You’ll want to patch any holes or raised areas with a suitable filler and sand smooth once it’s dry.
Finally, blend the repaired spot into the surrounding surface so the finish looks uniform without repainting.
Identify Paint Flaws
When you inspect dried paint on drywall or plaster, look for common flaws like cracking, peeling, bubbles, or uneven sheen so you can target the right fix. You’ll assess damage, note surface texture, and decide if simple touch-ups or surface prep will help. Keep Paint mixing and color matching notes if you’ll blend later. Photograph areas and mark boundaries with painter’s tape for reference.
- Hairline cracks radiating from corners or seams.
- Peeling edges revealing substrate or old paint layers.
- Raised blisters indicating trapped moisture or poor adhesion.
- Patchy gloss differences from uneven application or drying.
Patch And Blend
Now that you’ve identified the defects and marked the trouble spots, patching and blending is where you repair the surface and make the fix invisible. You’ll remove loose paint, sand edges, and fill holes with joint compound or spackle, matching surrounding paint texture as you work.
Feather the filler thinly, sand smooth, and apply a thin skim coat if needed to mimic original paint texture. Use a small brush or roller and blend edges to minimize color fading contrasts.
Finish with a compatible primer and lightly tint if necessary so repaired areas harmonize with the rest of the wall.
Loosen Stubborn Dry Paint With a Heat Gun
If you’re dealing with stubborn, flaky paint that won’t scrape off, a heat gun can soften the finish so you can lift it away cleanly. You’ll hold the gun 6–8 inches away, sweep steadily, and watch the paint bubble.
Use gloves, eye protection, and a respirator; ventilate the area.
After softening, gently lift with a putty knife, keeping the blade shallow to protect the substrate.
Good surface prep after removal means sanding feathered edges and cleaning dust before filling or blending.
- bubbling paint
- gentle scraping
- feathered edges
- cleaned surface
Use Mineral Spirits and Solvents Correctly
Choose the right solvent for the paint type—mineral spirits for oil-based paints, and a water-based cleaner for latex.
Always test the solvent on a scrap piece or hidden area to make sure it won’t damage the finish. If the test works, proceed cautiously and wipe up excess solvent promptly.
Choose The Right Solvent
Because solvents can both fix and damage old paint, you should pick the right one for the job and use it correctly. When choosing paint repairs, think about cleaning without stripping pigment — mineral spirits work on oil-based finishes; denatured alcohol targets shellac. Match solvent strength to the surface to preserve color consistency and sheen.
Work in a ventilated area, wear gloves, and apply sparingly with a soft cloth. Visualize the process:
- A cotton rag soaked lightly, blotting a stained spot.
- Soft swirls revealing underlying hue.
- Damp edges blending sheen.
- A wiped, even finish without repainting.
Test Solvent On Scrap
Want to be sure your solvent won’t ruin the finish? Test solvent on scrap first. Use a piece of the same material or an inconspicuous trim offcut, apply mineral spirits or your chosen solvent, and rub gently.
Watch for softening, discoloration, or finish clouding. Time how long it takes to affect the surface so you can limit exposure during real work.
Record results and note if agitation or dwell time improves paint removal without damage. This small step protects the piece, guides surface preparation, and prevents costly mistakes when you move to the actual repair.
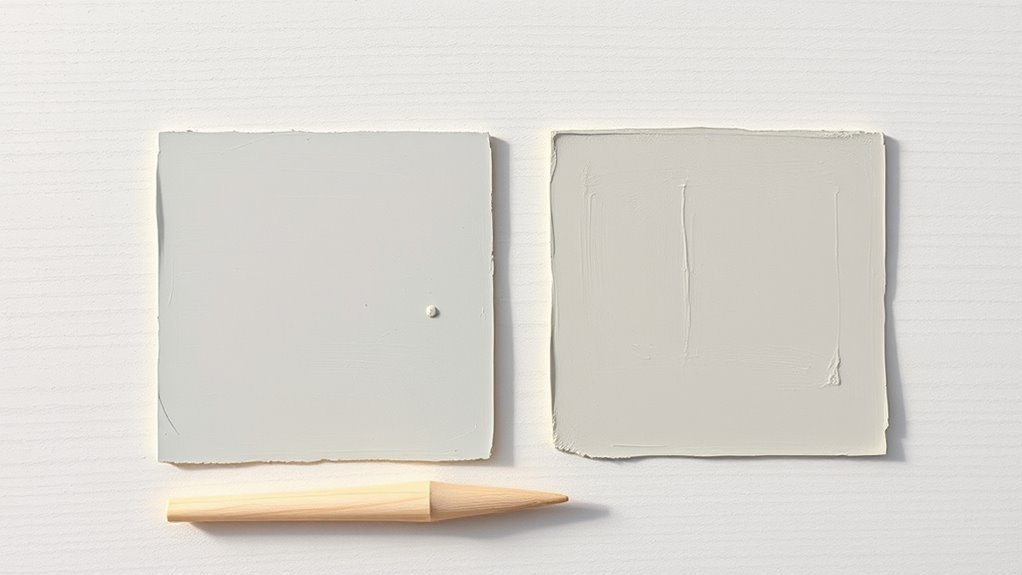
Blend Touch-Ups: Color Matching, Feathering, and Glazing
When your repair area dries differently than the surrounding wall, you’ll need to match color, feather the edges, and glaze sparingly to blend the touch-up seamlessly into the original finish.
You’ll start by testing small swatches to achieve color blending, then apply thin coats to avoid visible buildup.
Use a soft brush or sponge to create feathered edges so the new paint diffuses into the old.
Finish with a light glaze if sheen differs, wiping excess immediately.
- tiny swatch samples
- thin layered coats
- soft brush feathering
- light glaze wipe-down
Refresh Small Painted Areas With Touch-Up Techniques
Need a quick fix for a scuffed or chipped spot without repainting the whole wall? You can refresh small painted areas with targeted touch-up techniques.
Start with surface preparation: clean, sand lightly, and remove loose paint so the patch bonds.
Test color matching by comparing samples in natural light; adjust mixes on a scrap card until it blends.
Use a fine brush or a small roller for controlled application, feathering edges to avoid hard lines.
Allow proper drying between thin coats.
Finish by gently buffing once cured to equalize texture.
These steps save time and keep repairs discreet.
Match Sheen and Color for Invisible Repairs
Start by matching the sheen so the repaired spot reflects light like the surrounding paint.
Then tweak the color tint in small increments until the hue blends seamlessly.
Test on a hidden area and let it dry before you call the repair finished.
Match Sheen First
How glossy should the repair be? You’ll check sheen consistency before color so your patch blends under light. Hold a sample next to the wall, view at different angles, and choose a finish matching the original: flat, eggshell, satin, or semi-gloss.
- Dull wall with soft light, low reflectivity.
- Eggshell with gentle glow on curves.
- Satin showing subtle highlights on trim.
- Semi-gloss brightening edges and corners.
Work on small test spots, let them fully dry, and compare under natural and artificial light to confirm finish matching before final touch-ups.
Adjust Color Tint
Once you’ve matched the sheen, fine-tune the tint so your patch disappears against the surrounding paint; small shifts in warm or cool tones make the biggest difference. You’ll inspect the area under natural and artificial light, comparing undertones.
Use tiny amounts of universal tint or artist pigments, testing on a scrap card. Practice color correction by layering thin glazes rather than heavy coats, letting each dry before evaluating.
For stubborn mismatches, photograph the repair and adjust based on the image under consistent lighting. Keep notes of ratios once you nail the mix—those records speed future tint matching and guarantee invisible repairs.
Seal and Protect Revived Paint for Durability
After you’ve smoothed and revitalized the dry paint, seal it to lock in the repair and extend durability. A proper topcoat or clear sealer will protect against moisture, UV, and abrasion while blending the finish.
You’ll choose sealing techniques and protective coatings suited to the surface—water-based varnish for interiors, satin polyurethane for trim, or UV-stable clear coats for exteriors.
Apply thin, even layers, sanding lightly between coats, and allow full cure time.
Visualize the result:
- Smooth satin sheen like polished wood
- Invisible barrier against water droplets
- Matte finish that scatters sunlight evenly
- Tough surface resisting scuffs
Prevent Dry Paint Problems in Future Projects
Sealing your repaired paint helps, but preventing the problem in the first place saves time and money; start by controlling the environment, materials, and application techniques so paint can cure properly.
You should prioritize surface preparation—clean, sand, and prime to guarantee adhesion. Choose quality paints and compatible primers to boost paint durability, and store them at recommended temperatures.
Apply thin, even coats and allow full drying between layers. Control humidity and ventilation during and after application.
Use proper tools and avoid rushing jobs. Regular maintenance and prompt touch-ups will extend finish life and reduce recurrence of dry, failing paint.
When Repainting Beats Reviving
If the paint’s too far gone or the surface is badly damaged, you’ll waste time trying to revive it.
You should also consider repainting when the patched area would still show a clear color mismatch.
Repainting is the practical choice when repair won’t give a durable, seamless result.
When Revival Isn’t Practical
When is it worth scrubbing and spot-treating a wall versus stripping it and starting fresh? You’ll weigh Revival techniques against Dry paint durability. If the finish flakes, peels extensively, or solvents don’t budge stains, repainting usually wins. You want stable substrate, predictable color match, and time economy.
- Patchy peeling like curled map edges under your fingertips.
- Hard, brittle paint that flakes with a light scrape.
- Large, discolored swaths where stain penetrated past the surface.
- Multiple previous coats creating uneven texture and adhesion loss.
Choose repainting when fixes are temporary or labor exceeds benefit.
Extensive Surface Damage
Although you can salvage minor blemishes, extensive surface damage usually calls for repainting because the underlying problems—deep cracks, widespread peeling, or compromised substrate—won’t hold a durable patch.
You should choose repainting when damage exposes substrate, spans large areas, or causes loose flakes that resist spot repairs.
Proper surface preparation matters: strip loose material, sand edges, and repair substrate defects before priming. That prep ensures paint adhesion and prevents future failure.
Trying quick fixes on severely damaged areas wastes time and materials. Repainting gives a dependable, long-lasting result when structural integrity and uniform coverage are at stake.
Severe Color Mismatch
Wondering whether you can blend a bold new patch into old paint? If the hue gap is wide, color correction won’t save you. You’ll struggle matching sheen, undertone, and paint consistency, so repainting is often faster and cleaner. Consider scope, cost, and surface uniformity before deciding.
- Faded wall next to fresh swatch — undertone clash.
- Small spot with glossy finish amid matte surroundings.
- Sun‑bleached trim versus newly mixed pigment.
- Textured surface where brushstrokes reveal mismatch.
When uniform appearance matters, choose full repainting; it guarantees consistent color correction and finish across the area.
Fix Dry Paint Outdoors on Siding and Trim
If your exterior siding or trim shows dry, flaky paint but the underlying surface is sound, you can often restore it without a full repaint by focusing on targeted prep and compatible touch-up materials.
Start by cleaning dirt, mildew, and chalk with a mild detergent and rinse; let surfaces dry fully so outdoor weather won’t trap moisture.
Lightly sand loose edges and feather gradations to improve paint adhesion.
Prime bare spots with a compatible exterior primer, then use matching exterior paint—apply thin coats and inspect between layers.
Work on cool, dry days and follow manufacturer cure times for lasting results.
Quick Troubleshooting: Common Issues and Fixes
When touch-ups don’t go as planned, start by identifying the symptom—cracking, flaking, poor adhesion, or color mismatch—so you can apply the right fix quickly. You’ll assess cause, pick tools, and use historical techniques adapted with modern, eco-friendly solvents. Test a small area, then proceed: sand or scrape loose bits, clean, feather edges, and blend color.
If adhesion fails, use a suitable primer; for cracks, fill and sand; for flakes, remove to sound paint; for mismatched color, glaze or tint the edge. Quick, methodical steps save time and avoid full repainting.
- Cracking: hairline repair with filler
- Flaking: scrape to solid paint
- Adhesion: prime before recoat
- Color mismatch: blend with glaze
Frequently Asked Questions
Can Revived Paint Be Used on Food-Contact Surfaces Like Countertops and Cutting Boards?
No — you shouldn’t use revived paint on food-contact surfaces; food safety and surface compatibility matter. You’ll need FDA-approved, food-safe finishes for countertops or cutting boards to avoid contamination and guarantee the coating bonds properly.
Will Reviving Paint Affect VOC Levels or Indoor Air Quality Long-Term?
Absolutely — reviving paint can raise VOC levels and Indoor air concerns, but you’ll usually see only a small, temporary uptick; proper ventilation and low-VOC additives keep long-term indoor air impact minimal and manageable.
Can I Revive Paint on Surfaces Previously Painted With Lead-Based Paint?
You shouldn’t revive paint on surfaces with lead paint; you’ll increase health risks by disturbing it. Call certified professionals for testing and safe stabilization or encapsulation, and avoid DIY scraping or solvents that can release toxic dust.
How Does Humidity Affect the Long-Term Adhesion of Revived Paint?
“Don’t count your chickens before they hatch.” You’ll see humidity impact adhesion: high moisture weakens bonds, causing adhesion concerns like blistering and peeling, while fluctuating humidity stresses revived paint, so you’ll need proper drying and moisture control to preserve it.
Are There Eco-Friendly Solvents or DIY Alternatives for Reviving Paint?
Yes — you can use eco-friendly solvents like citrus-based cleaners and low-VOC mineral spirits, and DIY alternatives such as diluted vinegar, rubbing alcohol, or linseed oil; you’ll test a hidden spot first to guarantee compatibility.
Conclusion
You can often save partially dried paint without starting over—inspect whether it’s tacky or fully cured, remove any loose flakes, thin and rework small areas, and sand or blend edges. Use proper tools, ventilation, and compatible products, and prevent future issues by controlling temperature and stirring paint. Remember, “measure twice, cut once”: a little prep prevents a lot of hassle. If repair won’t blend or adhesion fails, repainting is the smarter choice.