How to Fix Latex Paint Over Oil Paint Issues
You can fix latex over oil by testing adhesion, deglossing or removing loose oil paint, and using the right primer before topcoating. Clean and sand glossy areas, do a tape adhesion test in several spots, then apply a bonding or shellac primer where needed. Feather repairs with thin latex coats, light sanding between layers, and match sheen for invisible touch‑ups. Follow humidity and cure recommendations to avoid peeling or yellowing, and keep going to learn practical step‑by‑step fixes.
Can You Paint Latex Over Oil Paint? Quick Verdict and Options

Can you paint latex over oil paint? You can, but you’ll need the right prep and choices.
If the oil surface is clean, sound, and scuffed, you can apply a bonding primer that accepts latex. Test adhesion in an inconspicuous spot first.
Choose primer and latex designed for problem surfaces rather than relying on brute force. Consider color matching so the new latex covers without multiple coats; a primer tinted toward your topcoat helps.
Also match paint sheen to avoid obvious contrast between old and new areas.
If adhesion fails, you’ll need to remove or fully sand the oil layer first.
Why Latex Fails Over Oil : The Science in Plain Terms
You’ll notice latex often peels or flakes off oil-based surfaces because it just won’t grip the smooth, glossy film—poor adhesion is the main culprit.
On top of that, the polymers in latex and oil paints don’t chemically bond, so they can repel each other and cause premature failure.
Understanding those two issues helps you pick the right prep or primer before recoating.
Poor Adhesion Mechanism
Because oil paint forms a hard, nonporous film as it dries, latex has trouble grabbing onto it and sticks poorly unless you intervene. You’ll see adhesion failure when latex beads, flakes, or peels from that slick surface. Mechanical keying, cleaning, and compatible primers create grip. Surface energy, gloss level, and contamination affect results; addressing those stops coating incompatibility problems without touching chemistry. Use sanding to roughen, solvent wipe to clean, and a high-adhesion primer to bridge the layers.
| Problem | Cause | Fix |
|---|---|---|
| Beading | High gloss | Sand+clean |
| Peeling | Poor keying | Primer |
| Flaking | Contamination | Solvent clean |
Chemical Incompatibility
While mechanical fixes help, chemical incompatibility is why latex paint can still fail over oil. You need to know that oil and latex dry differently; oil cures by oxidation, latex films form by coalescence. Those differing chemical reactions create weak bonding and incompatibility issues, so latex can blister, peel, or crack even on sanded oil surfaces.
- You’ll feel frustrated when paint bubbles appear.
- You’ll worry about wasted effort and cost.
- You’ll want a reliable, lasting solution.
Understanding the science helps you choose primers or stripping methods that prevent future failure and protect your work.
How to Test Adhesion Before You Start (Tape Test + Checklist)
Wondering if the new latex will stick to your old oil finish? Do a simple adhesion testing routine before you paint.
Wondering if latex will bond to old oil finishes? Do a quick adhesion test first.
Clean the area, sand lightly, and note Surface preparation steps you’ve completed.
Apply a 2-inch strip of high-quality tape, press firmly, then rip it off quickly. Inspect for lifting or flakes.
Repeat in several spots and on trim, corners, and glossy areas.
Use a checklist: clean, sand, degrease, dry, tape test result, and note next action (scuff, prime, or strip).
If paint lifts, don’t proceed—address the bond before applying latex.
When Can You Get Away With Spot Repairs? Guidelines and Limits
If your tape tests and prep show mostly good adhesion, you can often get away with spot repairs instead of repainting the whole surface. You should limit repairs to small, isolated failures: chips, small flaking areas, or trim touch-ups where adhesion and substrate are sound.
Match color matching precisely and consider paint sheen differences that reveal repairs. Don’t try spot fixes when failure is widespread, bubbling, or loose substrate.
- Relief when a quick fix restores the look
- Frustration if mismatched sheen ruins the repair
- Satisfaction when a discreet patch disappears
Keep repairs local, honest, and well-prepared.
Tools & Materials for Repairs (Small Fixes to Full Rooms)
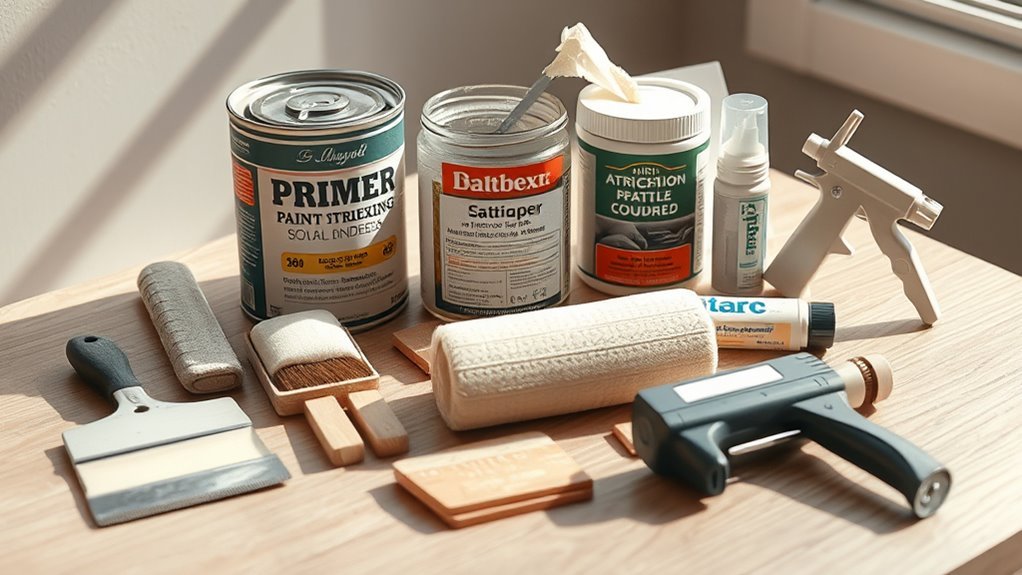
Before you start, gather the right tools and materials so the job goes smoothly from a tiny spot repair to a full-room repaint.
You’ll need sanding blocks, synthetic-bristle brushes, high-quality rollers, tack cloths, a good primer (bonding if needed), spackle, scraper, and respirator.
For color matching, bring samples and use color mixing tools or a spectrophotometer for accuracy.
Buy compatible latex topcoat and keep leftovers in labeled containers; proper paint storage extends usability and keeps mixes consistent.
Have drop cloths, painter’s tape, stir sticks, and a small clean tray for blends.
Plan quantities before you begin.
Removing Loose or Flaking Latex From Oil‑Painted Surfaces
With your tools assembled, it’s time to remove any loose or flaking latex from surfaces that were previously painted with oil-based paint. You’ll work carefully: scrape loose paint, sand feathered edges, and vacuum dust so repairs bond. Keep old paint chips for color matching later and note label info for proper paint storage.
- You’ll feel relief as damaged areas clear.
- You’ll gain confidence seeing smooth, stable substrate.
- You’ll anticipate final results when prep is perfect.
Finish by wiping residue with a tack cloth, inspect for remaining lifts, and repeat spot sanding until the surface’s edges are solid and clean.
Clean and Degloss Oil‑Painted Surfaces Correctly
Before you repaint, wipe the surface with a degreasing cleaner to remove oils, dirt, and other contaminants that prevent adhesion.
Then degloss the oil paint with an appropriate solvent or liquid deglosser, following product instructions and ventilating the area.
Once the surface is clean and dull, it’s ready for primer and latex topcoat.
Remove Grease And Contaminants
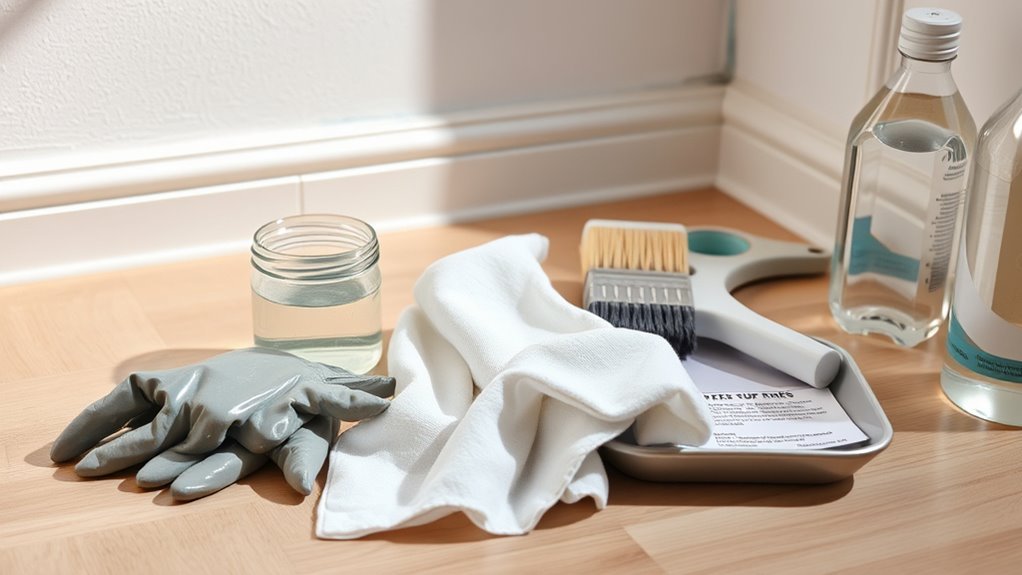
If oil paint’s surface is greasy or dirty, you won’t get reliable adhesion from new latex without cleaning and deglossing it first. Start by wiping with a mild detergent solution, focusing on fingerprints, smoke residue, and kitchen oils. Rinse thoroughly and let dry.
Use a grease-cutting cleaner for stubborn spots, avoiding heavy solvents (that’s for the next section). Keep cleaning brushes and paint mixing tools spotless to prevent contaminant transfer.
Finish by scuff-sanding lightly to remove surface sheen and residue, then vacuum and tack-cloth the area.
- You’ll feel relief seeing a clean surface.
- You’ll gain confidence.
- You’ll avoid costly failures.
Properly Degloss With Solvent
1. You’ll need a solvent like mineral spirits to degloss oil‑painted surfaces before applying latex. Work in a well‑ventilated area—follow ventilation tips: open windows, use fans, and wear a respirator.
Test a small hidden spot to make sure the solvent won’t harm underlying finish or fabric. Dampen a clean cloth, wipe firmly to remove surface sheen and residual contaminants, and change cloths often.
After deglossing, rinse with clean water and let dry thoroughly. Proper deglossing improves adhesion and reduces color matching issues later, so take your time and inspect the surface before priming.
Sanding Oil Paint for Better Latex Adhesion : Grit & Technique
When you sand oil paint to help latex stick, focus on removing gloss and creating a consistent, slightly-abrasive surface rather than stripping down to bare wood. Use 120–220 grit for general scuffing; go finer only to smooth edges. Sand with the grain, keep pressure even, and wipe dust before priming.
Remember how color theory affects perception—surface texture and paint sheen change contrast and depth, so smooth progressions matter.
- You’ll feel confidence as dulling reveals a ready surface.
- You’ll notice imperfections that demand attention.
- You’ll appreciate a clean, uniform base for latex.
Using Chemical Deglossers: When, How, and Safety Tips
If your oil finish is glossy or you can’t sand properly, you’ll want to use a chemical deglosser to promote latex adhesion. Apply it with a clean rag following the product instructions.
Work in small sections, and wipe away residue before painting.
Wear chemical-resistant gloves and eye protection, guarantee good ventilation, and dispose of rags and containers per local hazardous-waste rules.
When To Use
Although sanding and primer are often the first fixes you’ll try, chemical deglossers are the fastest option when you need to dull shiny oil-based finishes without aggressive abrasion. Use them when surface preparation is limited, tight spaces prevent sanding, or paint compatibility between old oil and new latex is uncertain. You’ll act quickly, but safely.
- Relief when sanding feels impossible
- Confidence that adhesion will improve
- Respect for your time and energy
Wear gloves, eye protection, and ventilate well. Test a small area first to confirm compatibility, then proceed only if the deglosser dulls the sheen and the surface feels ready.
How To Apply
Before you start, gather the deglosser, compatible rags or pads, clean water, gloves, eye protection, and a respirator or good ventilation, then read the product label so you know dwell time and any surface limits.
Apply deglosser in small sections, working with the grain and briskly wiping residue away; don’t let it dry on the surface. Rinse with clean water if the product requires.
Test a hidden spot to confirm adhesion and to see how the original sheen responds before choosing finish options.
After deglossing, allow proper cure time, then proceed to prime and paint, considering color mixing for final tones.
Safety And Disposal
When you use a chemical deglosser, treat it like a hazardous tool: wear chemical-resistant gloves, eye protection, and a respirator or guarantee strong ventilation, and keep kids and pets well away from the work area.
You’ll confront Safety hazards like fumes, skin burns, and flammable residues; follow label instructions and avoid smoking.
Use proper Disposal methods: seal rags in metal cans, label waste, and take leftovers to a hazardous-waste facility. If unsure, contact local authorities.
Trust your instincts—stop if you feel dizzy or notice irritation.
- Stay cautious
- Respect the chemicals
- Protect loved ones
Best Primers for Latex Over Oil (Bonding, Shellac, Oil‑Based)
If you’re covering oil-based paint with latex, choosing the right primer matters more than how many coats you plan to apply; the wrong primer can let the new paint peel or yellow. You’ll pick bonding primers for adhesion, shellac for stain blocking, or oil‑based for durability. Think about color matching and paint sheen when selecting finish and topcoat; primers can affect final appearance. Use this quick comparison:
| Primer Type | Best For |
|---|---|
| Bonding | Smooth adhesion to glossy oil |
| Shellac | Blocking stains, tannins |
| Oil‑based | Durable, easy to sand |
| Latex Primer | Light-duty, low odor |
How to Apply a Bonding Primer Step by Step
Ready to get a bonding primer on properly? You’ll prep the surface: clean, degloss with sandpaper, and wipe dust. Mask edges and ventilate the room. Stir primer per label; think of color theory and paint mixing principles to predict final tones if tinting.
- Anticipation — the transformation feels reassuring.
- Confidence — each even stroke proves progress.
- Relief — durable adhesion ends peeling worries.
Roll or brush thin, even coats; avoid drips. Allow full cure between coats, sand light if needed, then inspect.
Once cured, you can topcoat with latex confidently.
When to Strip Oil Paint (Trim, Cabinets, or Walls) Instead of Priming
Because a primer can’t fix every adhesion or finish problem, you’ll want to strip oil paint when the existing coating is compromised beyond simple sealing.
When paint adhesion or finish is seriously compromised, strip the oil paint—primers can’t always save it.
Strip if paint flakes, has multiple incompatible layers, heavy yellowing, or lead concerns—especially on trim, cabinets, or walls that need smooth, durable finishes.
Assess substrate and choose primer selection only after stripping and proper cleaning; some surfaces still need a bonding primer, others a stain-blocking latex.
Use safe stripping techniques: chemical strippers for intricate trim, heat or sanding for flat panels, and vacuum/containment for lead.
Test a small area before committing to a full strip.
Fixing Primer Problems: Blooming, Streaks, and Fisheye
Before you paint, you’ll want to identify what’s causing primer bloom so you can address moisture or solvent issues.
If coverage looks streaky, correct it by sanding lightly, re-priming thin coats, and improving application technique.
To eliminate fisheyes, clean the substrate of contaminants and use a fisheye eliminator or compatible primer before topcoating.
Identify Primer Bloom Causes
When primer blooms—showing a fuzzy, powdery haze or greasy-looking spots after it dries—it usually means contamination or a reaction under the coat, and you’ll need to pinpoint the cause before recoating.
Inspect the area: oil residue, wax, or silicone can cause primer bloom and poor adhesion. Test suspect spots with solvent; if blemishes smear, it’s surface contamination.
Also consider humidity, temperature, or incompatible coatings beneath. You’ll feel frustrated, but systematic checks help.
- Shock: you trusted the prep.
- Relief: identifying the culprit.
- Determination: ready to fix it right.
Correcting Streaky Coverage
If streaks or thin spots keep showing after you prime, don’t assume another coat will magically fix it—you’ve got to diagnose and correct the underlying issues. Check primer coverage: uneven drying, wrong thinning, or poor adhesion cause streaks.
Sand glossy oil surfaces, clean thoroughly, and use a bonding primer applied uniformly with full overlap. Avoid overworking edges; maintain wet edges to prevent lap marks.
For color mixing, verify consistent tinting and shake cans well so pigment disperses evenly. Finish with light sanding between coats for texture smoothing, then recoat only when the primer’s fully cured to ensure uniform coverage.
Eliminating Fisheye Defects
Although small and circular, fisheyes can ruin an otherwise smooth primer coat, so you need to identify and eliminate their causes quickly. You’ll tackle Fisheye correction by removing Surface contamination, sanding glossy spots, and ensuring proper adhesion.
Clean the area with a solvent, wipe with a tack cloth, and sand feathered edges. If fisheyes persist, use a compatible adhesion promoter or sand and re-prime.
- Frustration when defects reappear
- Relief after a smooth, solid coat
- Pride in a professional finish
Work methodically, test a small patch, and don’t skip cleaning—prevention beats correction.
Repainting With Latex for a Durable Finish: Coats, Drying, Tools
Before you start, gather the right tools and plan your coats so the latex finish bonds well and lasts: sand the oil-painted surface smooth, apply a high-quality oil-to-latex bonding primer, then lay down two thin, even latex coats—allowing each to dry fully and scuff-sanding lightly between coats for proper adhesion and a durable, uniform finish.
Before you start, prep tools and sand the oil paint, prime for oil-to-latex bonding, then apply two thin, scuff-sanded latex coats for lasting finish.
Use quality brushes, a mini-roller for smooth coverage, and a respirator. Monitor drying times per label and temperature/humidity.
Match sheen and color matching so touch-ups blend. Test adhesion on a small area.
Proper technique maximizes paint durability and reduces future peeling or failure.
How to Blend and Feather Edges for Invisible Touch‑Ups
Start by prepping the edges carefully—clean, sand, and remove any loose paint so the new latex will adhere smoothly.
Use a light, overlapping brush or roller stroke to feather the paint outward from the repair, keeping pressure even to blend the edge.
Finish by smoothing with a dry brush or light sanding between coats until the touch-up disappears into the surrounding finish.
Prep Edges Carefully
When you’re prepping edges for a latex-over-oil touch-up, carefully feathering and blending the paint is what keeps repairs invisible. You’ll start with solid edge preparation: clean, sand to dull gloss, and wipe residue. Check for proper surface sealing over oil to prevent lift and staining.
Tape sparingly, lift it while paint’s tacky, and work in thin layers so edges vanish.
- Relief when seams disappear.
- Confidence that nobody will notice.
- Satisfaction of a job done right.
Keep tools clean, use minimal product, and match the surrounding sheen for seamless results.
Smooth Feathering Technique
Although feathering sounds simple, getting a seamless shift between latex and oil requires a controlled touch. You’ll start by ensuring Color matching is exact and the oil surface is scuffed. Use thin layers of latex, brushing outward from the repair, and choose Brush selection carefully—soft, angled brushes work best. Feather each pass, wiping excess and letting thin coats dry before the next. Work small, compare under consistent light, and stop when edges vanish. Use mineral spirits sparingly to soften boundaries on oil areas if needed.
| Step | Tool/Tip |
|---|---|
| Prep | Scuff, clean |
| Paint | Thin coats, match |
Troubleshooting Paint Failures After Repainting (Peel, Blister, Yellow)
If your latex topcoat is peeling, blistering, or yellowing over oil paint, you’re dealing with adhesion and compatibility failures that are usually fixable with the right diagnosis and prep.
First, isolate cause: poor surface cleaning, remaining alkyd sheen, or trapped moisture.
Strip loose paint, sand to dullness, degloss, and use a solvent-cleaning step.
Prime with a high-bond or shellac primer; test a small area.
When repairing, consider color matching and texture blending so patchwork disappears.
Check humidity and cure times before recoating.
- Frustration at sight
- Relief when fixed
- Confidence to repaint
Preventing Mildew, Yellowing, and Blistering on New Latex Coats
Because mildew, yellowing, and blistering usually come from moisture, poor ventilation, or surface contamination, you can prevent them by controlling the environment and preparing properly before you paint.
Before coating, wash surfaces with a mildew-killing cleaner, rinse thoroughly, and let them dry completely.
Sand glossy oil residue, degloss, and prime with a bonding primer labeled for oil-to-latex conversions.
Maintain humidity below 50% and guarantee airflow while drying to aid mildew prevention and Yellowing control.
Apply thin, even latex coats at recommended temperatures and avoid painting before rain or in direct sun.
Inspect and touch up any flaws promptly.
Cost, Time, and DIY vs Pro: Quick Checklist to Finish It Right
When you’re weighing cost, time, and whether to DIY or hire a pro, focus first on the scope: factor in surface prep (cleaning, sanding, priming), materials (bonding primer, high-quality latex), tools (rollers, brushes, respirator), and potential repairs—these determine most of your budget and schedule.
Decide if you can handle sanding and spot repairs; pros reduce risk of adhesion failure and handle precise color matching and consistent paint sheen.
Estimate hours, not days, and get quotes.
Quick checklist to finish it right:
- You’re confident, ready, and patient — do it yourself.
- You’re stressed by detail — hire a pro.
- You’re on a tight deadline — hybrid approach.
Frequently Asked Questions
Will Oil Paint Bleed Through Fresh Latex Over Time?
Yes — oil can bleed through fresh latex over time if surface preparation was poor and paint absorption varies; you’ll need proper cleaning, deglossing, and a suitable primer to block oils and guarantee durable adhesion and coverage.
Can Heat or Sunlight Cause Latex to Fail Over Oil-Painted Trim?
Yes — you’ll see paint blistering like burnt paper when heat damage and sunlight exposure weaken latex over oil; the finish can peel or crack, so you’ll need proper prep, priming, or recoating to prevent failure.
Are Water-Based Primers Compatible With All Oil-Topcoats?
No, water-based primers aren’t compatible with all oil-topcoats; you’ll check primer compatibility and confirm paint adhesion by selecting a recommended primer-for-oil finish or using an alkyd-based primer to guarantee proper bonding and durability.
How Do Humidity and Temperature During Cure Affect Adhesion Long-Term?
Want reliable adhesion long-term? You’ll see Humidity impact adhesion by slowing curing and trapping moisture, while Temperature influence alters film formation and hardness; you’ll need controlled drying conditions to prevent peeling, blistering, or reduced durability.
Can Previously Painted Metal Surfaces Be Treated the Same as Wood?
No, you can’t treat previously painted metal like wood; metal preparation matters more. You’ll strip, clean, etch or sand, then prime for durable surface adhesion, and you’ll use metal-specific primers and coatings for best results.
Conclusion
You can paint latex over oil, but you’ll want to test adhesion and prep properly — otherwise peeling’s likely. About 30% of DIY repaint jobs report adhesion problems when skipping primer, so don’t gamble on looks or longevity. Grab a solvent wipe, sand, or use a bonding primer for full coverage; for small spots, feather and blend carefully. If issues persist, call a pro to avoid repeated fixes and extra cost.