How to Paint a House Exterior Stucco (Complete Guide)
You’ll start by evaluating and cleaning stucco, remove loose material, and note cracks or moisture. Repair holes with appropriate patch, match texture, then let everything fully dry. Prime with a breathable masonry primer, choose a durable acrylic or elastomeric paint suited to texture and climate, and apply with brush, roller, and/or sprayer for even coverage. Finish with caulking, touch‑ups, and landscape protection, and keep going to learn timing, costs, and hiring tips.
Who This Stucco Painting Guide Is For
Whether you’re a DIY homeowner tackling touch-ups or a contractor prepping for a full repaint, this guide is for you. You’ll find clear steps if you handle basic repairs, choose paint, or hire pros.
If you care about curb appeal, the techniques here connect to interior design harmony so your exterior complements rooms inside. Homeowners who enjoy weekend projects will get practical methods; busy contractors will appreciate efficient sequences.
Even gardeners benefit: simple gardening tips about plant protection and cleanup around stucco work are included so landscaping won’t suffer during painting. This guide suits varied skill levels and goals.
How to Paint Exterior Stucco: 5‑Step Overview
Before you start, understand the five essential steps—you’ll prepare the surface, make repairs, prime, paint, and finish with cleanup and protection.
Before you begin, follow five essential steps: prep, repair, prime, paint, and finish with cleanup and protection
First, clean and remove loose stucco, mildew, and dirt so coatings adhere.
Next, repair cracks and damaged sections using compatible patching compounds.
Then apply a quality masonry primer to seal porous surfaces and improve coverage.
When you paint, choose breathable elastomeric or acrylic paint and consider color psychology—pick hues that suit mood, climate, and curb appeal while respecting historical styles of your neighborhood.
Finally, inspect, caulk trim, clean tools, and protect nearby landscaping and walkways.
When to Repaint Stucco: Signs You Shouldn’t Ignore
You should watch for cracking or flaking in your stucco, since those signs let moisture get in and cause bigger damage.
If the texture is breaking away or powdering under your touch, it’s time to plan repairs and a fresh coat.
Also keep an eye on faded or uneven color—discoloration can mean UV breakdown or moisture stains that paint won’t hide.
Cracking And Flaking
When stucco starts cracking and flaking, it’s a clear sign the surface isn’t protecting your home like it should, and you shouldn’t delay addressing it.
You need to inspect the extent—hairline cracks versus deep splits—and prioritize repairs to stop moisture intrusion. For cracking prevention, seal joints, fix structural movement, and maintain proper drainage so stress won’t reopen repairs.
For flaking remedies, remove loose material, apply bonding primer, and patch with compatible stucco mix before repainting.
Addressing issues promptly saves bigger repairs later. If cracking or flaking is widespread, call a pro to assess underlying causes and recommend solutions.
Faded Or Discolored
If sunlight and pollutants have dulled your stucco’s color or caused uneven patches, it’s a sign the protective finish has lost effectiveness and you shouldn’t wait to assess the damage. You’ll spot color fading, chalky residue, or blotches from weathering effects. Test by rubbing a damp cloth—if pigment comes off, repainting’s due. Address underlying stains or mildew before priming. Choose breathable, elastomeric coatings to resist future weathering effects and restore uniform appearance. Use a professional if large areas show deterioration.
| Sign | Action |
|---|---|
| Color fading | Clean, prime, repaint |
| Chalky surface | Test, remove, reseal |
Stucco Types and Textures You’ll Encounter
Although stucco comes in many finishes, most exterior jobs fall into a few common types you’ll recognize quickly. You’ll spot variations shaped by Stucco artistry and distinct Texture patterns—knockdown, sand, dash, Spanish lace, and smooth. Know which texture you’re painting so preparation and technique match the surface.
- Smooth: flat, modern, easy to roll.
- Sand: fine grit, hides minor flaws.
- Knockdown: flattened peaks, subtle shadowing.
- Dash (roughcast): coarse, high profile.
- Spanish lace (Spanish): decorative, irregular ridges.
Identify the texture, adjust tools and primer, and you’ll respect the finish while achieving even coverage and durability.
How Climate Affects Stucco Paint Choices
You’ll need to match paint type to your local temperature range so coatings won’t crack or fail in heat or cold.
Also consider humidity, since high moisture slows drying and can affect adhesion and mildew resistance.
Pick products and timing that suit both temperature and humidity for a durable finish.
Temperature And Paint Type
Because stucco reacts differently in varied climates, choosing the right paint and timing your work matters as much as the color you pick. You’ll match paint chemistry to seasonal temperature ranges and local weather patterns to preserve paint durability.
Pick elastomeric or acrylic formulations for wide thermal swings; use low-VOC options in moderate zones. Avoid painting when frost, heat above manufacturer limits, or rapid temperature shifts are forecast.
- Check daytime and nighttime temps for a 24–48 hour window
- Choose paints rated for your temperature range
- Prefer flexible coatings where freeze/thaw occurs
- Follow manufacturer temperature guidelines
- Plan for cool curing nights
Humidity And Drying Time
When humidity stays high, paint takes longer to dry and can trap moisture in stucco, so you should schedule work for drier stretches to avoid blistering, poor adhesion, or mildew growth. You’ll monitor humidity effects and expect a drying delay when dew points rise. Pick breathable acrylics, apply during mid-day warmth, and avoid painting before rain. Use fans or heaters cautiously to speed cure without forcing skinning.
| Condition | Risk | Action |
|---|---|---|
| High humidity | Drying delay, mildew | Wait for drier weather |
| Low humidity | Fast skinning | Mist substrate if needed |
| Variable | Adhesion issues | Choose flexible paint |
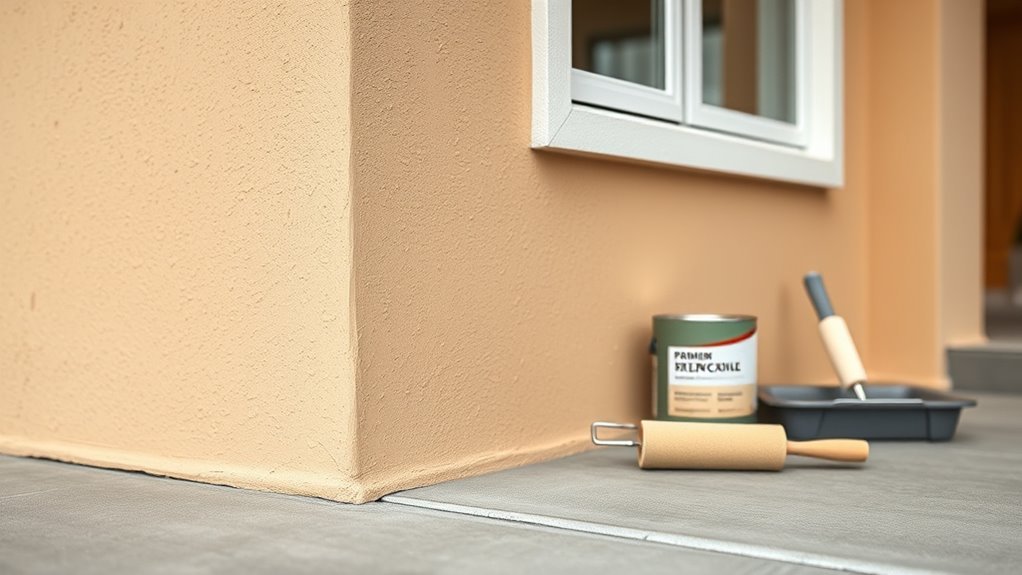
Tools and Equipment Checklist for Painting Stucco
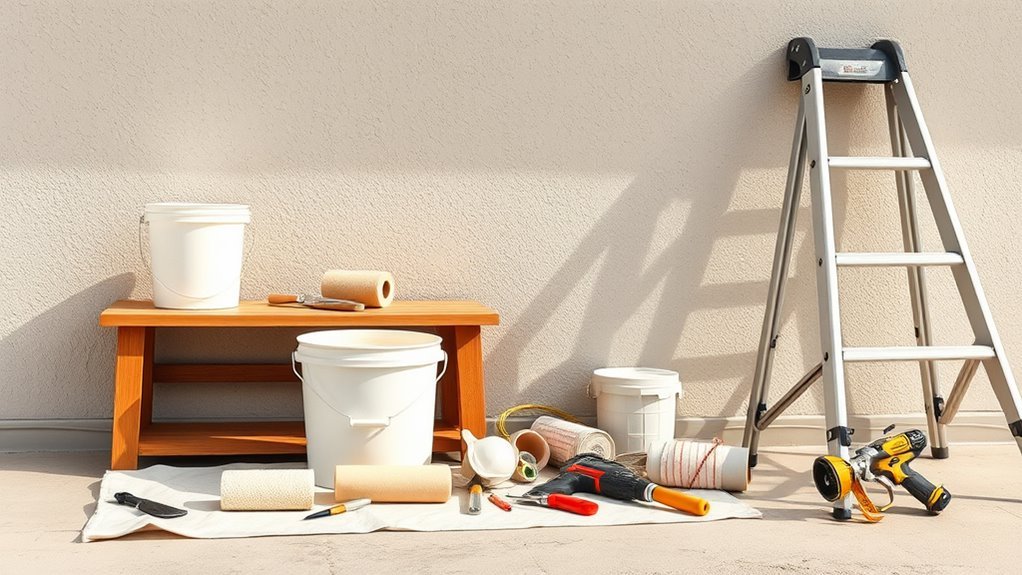
Before you start painting stucco, gather the right tools so the job goes smoothly and safely. You’ll want quality brushes and rollers suited for textured surfaces, extension poles, and a sprayer if you plan to match historical styles or use eco-friendly paints.
Before painting stucco, gather quality textured brushes, high-nap rollers, extension poles, and consider a sprayer for best results
Include cleaners and mild patching compounds for prep. Choose durable drop cloths and painter’s tape for crisp edges. Check equipment condition before you begin so you don’t interrupt drying schedules.
- Stiff-bristle brushes and high-nap rollers
- Airless or HVLP sprayer (optional)
- Extension poles and ladders
- Surface cleaner and patching kit
- Drop cloths and painter’s tape
Safety Gear and Job‑Site Precautions
Now that you’ve got the right tools, make sure you protect yourself and others on the job site. Wear respirators, eye protection, gloves, and non‑slip shoes; cordon off work areas, post warnings, and monitor weather for environmental considerations. Identify safety hazards like falls, dust, and ladders; secure scaffolding and use fall arrest. Dispose of waste responsibly and avoid runoff.
| Protect | Warn | Care |
|---|---|---|
| Respirator | Signs | Neighbors |
| Harness | Barriers | Wildlife |
Stay alert, brief helpers on risks, and follow local regulations to keep everyone safe.
Estimating Paint, Primer, and Materials for Stucco
Start by measuring and calculating the total stucco surface area so you know how much product you’ll need.
Pick a primer formulated for stucco and your existing substrate—breathable acrylic primers work for most exterior stucco, while specialty primers suit heavy stains or oil-based finishes.
Then estimate paint, primer, caulk, tape, brushes, rollers, and drop cloths using manufacturers’ coverage rates plus a 10–20% allowance for waste and touch-ups.
Calculate Surface Area
Accurately calculating the surface area of your stucco determines how much paint, primer, and supplies you’ll need, so measure carefully and account for texture and architectural details. You’ll measure wall widths and heights, subtract windows and doors, and add areas for trim and uneven texture. Remember texture increases material per square foot.
Consider how color psychology and historical styles affect coverage needs—lighter colors may need more coats. Use a tape, sketch, and simple math or a digital tool to total square footage, then apply manufacturer coverage rates plus 10–15% waste.
- Measure each wall separately
- Subtract openings
- Add trim/soffits
- Adjust for texture
- Include waste buffer
Choose Primer Type
Because stucco’s porous, textured surface soaks up primer differently than smooth siding, choose a primer formulated for masonry or cement-based substrates to guarantee good adhesion and uniform coverage.
Pick an acrylic or elastomeric masonry primer for flexibility and water resistance; use a bonding primer if the stucco is repaired or chalky.
Match primer tint to your topcoat to reduce coats—light primers for pale colors, tinted primers for deep hues.
Consider color psychology when deciding undertones; historical styles may call for specific bases.
Read product data sheets for VOC, drying time, and coverage to assure proper performance.
Estimate Material Quantities
Estimate materials by measuring surface area, evaluating texture, and factoring porosity so you buy the right amounts of primer, paint, and supplies. You’ll calculate square footage, adjust for deep texture, and pick primer and paint based on porosity and weather exposure. Consider color palettes early so you know coverage differences between hues, and plan texture matching for touch-ups. Order extra for mistakes and future repairs. Use manufacturer coverage rates, then add 10–20% waste for rollers and rough stucco.
- Measure walls, windows, and trim
- Note coarse vs. smooth texture
- Choose primer type and amount
- Select paint sheen and color palettes
- Buy extra for touch-ups and repairs
Test Existing Paint Adhesion Before Choosing Primer
Before you pick a primer, test the existing paint’s adhesion so you know whether to strip, sand, or just clean and prime. Use a simple tape test: press strong tape to multiple spots, pull sharply—if paint flakes, adhesion’s poor and you’ll need to remove loose material.
Scrape and sand failed areas, then retest. Note underlying colors; color psychology matters when deciding if a full repaint will change curb appeal.
Also consider eco friendly paints for final coats if you want low-VOC options. Document results and photographed spots to guide primer choice and scope of prep work.
Choosing a Primer for Porous, Textured Stucco
After testing how much water and primer the stucco soaks up, you’ll pick a primer that matches that absorption level.
Choose a breathable primer with a high perm rating so trapped moisture can escape through the textured surface. That combination helps adhesion and prevents peeling or blistering over time.
Surface Absorption Testing
Wondering how to pick the right primer for porous, textured stucco? You’ll test surface absorption to match primer type and application.
Small water drops show quick soak on high-absorption areas; slow bead indicates low absorption. Record results across texture patterns to verify even coverage and anticipate color blending behavior.
Use tests to decide dilution and coat count.
- Choose test spots on varied textures
- Time water soak and note rates
- Compare results to primer specs
- Adjust primer viscosity or tack for porous zones
- Recheck after cleaning and patching
These steps help you select a primer that performs reliably.
Primer Breathability Rating
Because stucco needs to transmit moisture while keeping paint adhered, you’ll want a primer whose breathability matches the substrate’s porosity; pick one rated for vapor permeability so trapped moisture can escape without blistering or failure. You’ll check primer breathability ratings (perms) and choose a breathable acrylic or silicate primer for textured stucco. That prevents stucco moisture from causing delamination and mold. Apply according to absorption testing and environmental conditions. Compare options:
| Primer Type | Best For |
|---|---|
| Breathable acrylic | Most textured stucco |
| Silicate | High-alkali, historic stucco |
| Non-breathable | Avoid on porous stucco |
Best Exterior Paints for Stucco Surfaces
When choosing paint for stucco, pick products that balance breathability, durability, and UV resistance so your finish lasts without trapping moisture. You’ll favor masonry or elastomeric acrylics that let vapor escape, resist cracking, and stand up to sun.
Think about color psychology when selecting hues—lighter tones reflect heat, darker ones add contrast.
Look for eco friendly options with low VOCs and strong warranties. Test samples on textured areas and inspect adhesion.
- Elastomeric acrylic for large cracks
- Breathable masonry paint for standard stucco
- Low-VOC, eco-friendly latex
- UV-resistant pigmented coating
- Manufacturer-backed warranty and samples
Which Paint Finish Works Best on Stucco?
Choosing the right paint finish for stucco affects both appearance and long-term performance. After picking the right product type, you’ll want to match the finish to the texture and exposure.
For rough or heavily textured stucco texture, use flat or low-luster matte finishes; they hide imperfections and reduce glare.
For smoother stucco or trim, an eggshell or satin offers slight sheen and easier cleaning without highlighting flaws.
Avoid high-gloss on broad stucco walls—it’s prone to showing unevenness.
Prioritize paint durability: choose breathable, acrylic formulations with mildew resistance to maintain adhesion and finish integrity in varying weather.
Color Selection Tips and Curb Appeal for Stucco
Think about how your climate and the way sunlight hits your stucco will shift colors throughout the day and across seasons.
Match your choice to the neighborhood and architectural style so the house feels cohesive, not out of place.
Use contrasty accents and trim to highlight features and boost curb appeal.
Climate And Light Effects
Because climate and light dramatically change how stucco color reads, you should pick shades with both local weather and sun exposure in mind. Consider sunlight reflection and shadow effects when testing swatches at different times.
Cooler climates favor warmer tones to offset gray skies; hot, sunny regions need colors that resist fading. Humidity and salt air affect finish choice, too. You’ll want samples on large panels, viewed morning and afternoon.
- Test swatches on all elevations
- Observe colors at sunrise and dusk
- Pick UV-resistant pigments
- Factor in seasonal cloud cover
- Choose finishes suited for humidity and salt
Neighborhood And Style
Want your stucco to fit the street and still stand out? Consider neighborhood aesthetics first: walk the block, note common palettes, materials, and landscaping so your choice complements rather than clashes.
Prioritize style compatibility with your home’s architecture—Mediterranean, modern, craftsman—so colors reinforce character. Pick a primary tone that ties to nearby hues, then test it on a small wall in different light.
Think long-term curb appeal: timeless, restrained choices age better and boost resale. Avoid flashy contrasts here; you’ll handle accents and trim later.
Document samples and get feedback from neighbors before committing.
Accent And Trim Choices
Once you’ve settled on a main stucco tone that respects the block, focus on accents and trim to give the facade personality and depth.
You’ll want Accent colors that complement, not clash, with roof and landscaping.
Choose Trim options—wood, PVC, or fiber cement—based on durability and profile.
Test samples at different times of day.
Keep contrast balanced: high contrast for bold, low for subtle.
Consider hardware and front door as mini-focal points.
- Pick two accent colors maximum
- Match trim material to climate
- Sample swatches on multiple walls
- Use matte finishes for texture
- Coordinate with neighborhood palette
Prepare Area: Landscaping, Windows, and Fixtures
Before you pull out ladders and rollers, clear and protect the surrounding landscape, windows, and fixtures so paint doesn’t create extra work or damage. Move potted plants, cover beds with breathable drop cloths to preserve garden design, and stake shrubs so covers don’t crush foliage.
Remove or mask exterior lighting, address delicate fixtures, and label electrical covers to avoid confusion. Tape glass, frames, and hardware with painter’s tape; use plastic sheeting for large windows and vents.
Secure loose trim and shield HVAC units. Plan access routes to avoid trampling beds and keep tools off protected surfaces.
Cleaning Stucco: Pressure Wash vs. Soft Wash
Although stucco can look sturdy, cleaning it properly makes the paint stick and last longer, so you’ll need to choose the right method: pressure washing for tough dirt and loose paint, or soft washing for fragile surfaces and mildew.
You’ll assess stucco texture—rough areas tolerate low-pressure rinses; delicates need soft wash. Consider how cleaning affects color matching later: wet stucco may look darker, so let it dry before sampling.
Use protective gear and test a small patch. Choose equipment and cleaners that won’t erode texture or alter pigments.
- Inspect surface first
- Test small area
- Use correct pressure
- Protect plants
- Allow full drying
Remove Dirt, Mildew, Efflorescence, and Salt Stains
When you tackle dirt, mildew, efflorescence, and salt stains, start by identifying each problem so you use the right cleaner and technique.
For dirt and grime, scrub with a mild detergent and soft brush, rinsing thoroughly.
Treat mildew with a bleach solution or commercial mildew remover, letting it dwell before rinsing.
For efflorescence and salt stains, use a diluted muriatic acid wash or specialized efflorescence cleaner, neutralize afterward, and rinse well.
Test cleaners on a small area first.
Removing these blemishes preserves finish and ensures paint adhesion, maintaining color psychology choices that suit historical styles and curb appeal.
Inspect Stucco for Cracks, Delamination, and Moisture
Start by visually scanning the stucco for hairline and wider cracks, noting their length and whether they run along seams or around openings.
Tap or press suspicious areas to check for delamination—hollow sounds or movement mean the finish may be separating from the substrate.
Use a moisture meter or check for damp spots and efflorescence to confirm wetness before you paint.
Visual Crack Assessment
Before you touch paint, walk the entire exterior and look closely for cracks, delamination, and signs of moisture so you know what repairs are needed. You’ll visually map hairline vs. structural cracks, note areas where moisture stains or mold appear, and mark spots needing filler or further testing.
Keep future finish choices—Color psychology and Eco friendly paints—in mind so repairs suit final appearance and materials. Photograph each issue, label locations, and prioritize fixes by severity. Use a checklist to track progress and communicate clearly with contractors.
- Hairline cracks
- Wide or jagged cracks
- Stained or soft areas
- Corner and trim junctions
- Photos and notes
Check For Delamination
Although stucco can look solid from a distance, check closely for delamination by tapping suspect areas with a screwdriver or small hammer and listening for hollow sounds. These indicate the render has pulled away from the substrate and needs repair.
When you do a delamination check, focus on corners, window heads, and areas beneath eaves where movement or flashing troubles occur.
Look for surface peeling, flaking, or discoloration that accompanies hollowness. Mark affected spots, avoid aggressive probing that enlarges damage, and plan for patching or reattachment before painting.
Document locations and sizes so repairs and priming restore a stable surface.
Moisture Detection Methods
When you’re inspecting stucco for cracks, delamination, and moisture, use a combination of visual checks, simple tools, and moisture meters to pinpoint problems early. You’ll look for soft spots, staining, and blistering that indicate failed moisture barrier or excessive vapor transmission.
Probe suspicious areas gently and record moisture readings. Open trim or joints where necessary to confirm delamination; repair before painting. Prioritize drying and ventilation to control vapor transmission.
- Scan for hairline cracks and stains
- Tap for hollow sounds (delamination)
- Use a pin or noninvasive moisture meter
- Check flashing and seals
- Verify ventilation paths
Repair Hairline and Non‑Structural Stucco Cracks
Because hairline and other non‑structural stucco cracks let moisture and dirt in, you should repair them before painting to guarantee a smooth, long‑lasting finish. Clean cracks, remove loose material, and use a high-quality acrylic or elastomeric caulk. Feather the repair to match stucco texture and test color blending after primer. Sand lightly and prime patched areas.
| Step | Material | Tip |
|---|---|---|
| 1 | Brush, water | Clean debris |
| 2 | Caulk/patch | Fill thin cracks |
| 3 | Trowel/finger | Match texture |
| 4 | Sand | Smooth edges |
Allow full cure before painting.
Repair Large Stucco Cracks and Patch Techniques
Small cracks are simple to patch, but larger stucco damage needs a different approach to keep moisture out and prevent future spreading. You’ll remove loose material, widen the crack slightly, and install backing or mesh for strength. Use a cement-based patch, press firmly, and cure per instructions. Recreate the stucco texture while it’s workable so the repair blends. Seal the edges and prime before painting.
- Clean and assess extent
- Install mesh or backing
- Apply cement patch in layers
- Match stucco texture with tools
- Prime and seal for paint
This method guarantees lasting crack repair and protection.
Address Delaminated or Blown Stucco Sections Safely
If stucco is delaminating or has blown off, act quickly to expose and remove loose material so you can evaluate the underlying lath and sheathing for damage. Wear eye protection, gloves, and a dust mask, then chip away only loose stucco and clean the substrate.
Check for rusted lath, wet sheathing, or mold; those issues need repair before you proceed. Match replacement stucco texture to the existing finish to keep appearance consistent.
Confirm surfaces are dry and primed to maximize paint durability. Keep edges feathered and sound; avoid overworking the area so future coats adhere properly.
Replaster or Rebuild Badly Damaged Stucco Areas
Start by inspecting the damaged stucco to determine whether the problem is superficial or structural. If the substrate is compromised or moisture has penetrated, you’ll likely need to rebuild the area rather than just skim-coat it.
Choose a repair method that matches the extent of damage—patch and replaster for localized failures, full removal and reapply for widespread or deep deterioration.
Assess Damage Thoroughly
Because stucco hides water damage until it’s serious, you’ll need to inspect the surface and underlying lath closely to decide whether to replaster patches or rebuild whole sections. Check for soft spots, loose stucco, mold, and rusted lath; document extent and patterns. Note substrate issues that affect finish and color choices—remember color psychology when planning visual repairs and consider eco-friendly paints for long-term durability and environmental impact. Photograph damage, mark perimeter, and estimate material needs. Consult a pro if structural rot appears. Use findings to plan repairs without jumping to conclusions.
- Soft or crumbling areas
- Visible lath corrosion
- Mold or staining
- Cracks and delamination
- Water intrusion paths
Choose Repair Method
When you’ve documented the damage, decide whether to replaster or rebuild based on how deep and widespread the failure is. If cracks are surface-level or limited, you can replaster patches to match texture and finish; that’s quicker and preserves existing color psychology if you’re keeping the hue.
Rebuild sections when lath, sheathing, or insulation are compromised or moisture caused delamination. Rebuilding lets you correct structural issues and update wall profiles for historical styles or modern looks.
Always match materials, curing times, and bonding agents. Consult a pro for large areas to ensure adhesion, weatherproofing, and long-term performance.
Fix Underlying Moisture Issues Before Painting
If you don’t address moisture problems first, new paint will peel, blister, or trap water and make repairs more expensive down the line. You should find leaks, test dampness with a meter, and stop sources before painting.
Install or repair moisture barriers at wall penetrations and add drainage solutions around grade and rooflines. Fix gutters, downspouts, and soil slope; replace failed sealants and cracked stucco patches.
Dry surfaces fully and recheck moisture readings before priming. Follow a routine inspection to prevent recurrence.
- Locate leaks and damp spots
- Repair or replace moisture barriers
- Improve drainage solutions
- Clean and dry surfaces
- Recheck moisture levels
When to Call a Pro: Structural Damage or Flashing Issues
If you spot visible cracks, bulging stucco, or warped siding you should call a pro—those are signs of structural issues.
Compromised or missing flashing around windows, doors, and rooflines also needs professional attention to prevent leaks.
And if water keeps getting in despite patching, don’t wait—get an expert to diagnose and repair the source.
Visible Cracks Or Bulging
Though small hairline cracks are normal, visible cracks that widen or areas of bulging stucco signal deeper problems you shouldn’t ignore—these can indicate structural movement, water intrusion behind the stucco, or failing flashing that’s letting moisture in.
You should inspect and document size, location, and progression, and avoid painting until a pro verifies substrate integrity.
Bulging stucco often means trapped moisture or delamination, which paint will hide but not fix.
- Note crack width and length with photos
- Tap bulging areas for hollow sound
- Check for nearby settling or cracks in trim
- Avoid painting affected zones
- Contact a qualified stucco contractor promptly
Compromised Flashing Lines
When flashing around windows, doors, rooflines, or where stucco meets other materials has failed, you’ll often see water stains, peeling paint, or soft siding that signal moisture is getting behind the stucco. If you spot those signs, don’t assume a paint job will fix it.
You should schedule a flashing inspection to confirm integrity and locate gaps or improper overlaps. If flashing repair is needed, hire a pro—improper fixes can trap moisture and cause rot or mold.
A contractor will replace or reseal flashings, address any underlying structural issues, and advise when it’s safe to repaint.
Persistent Water Intrusion
Because persistent water intrusion can quietly undermine your home’s structure, call a professional as soon as you suspect ongoing leaks or see recurring stains, soft sheathing, or mold behind the stucco.
You need an expert to diagnose flashing failures, check waterproof barriers, and assess rot or hidden framing damage. A pro will open sections, test for moisture, and recommend repairs or replacement rather than cosmetic paint.
They’ll also suggest ventilation improvements and proper drainage details to prevent recurrence. Don’t paint over active leaks.
- Flashing inspection and repair
- Moisture meter diagnostics
- Sheathing and framing evaluation
- Waterproof barriers replacement
- Ventilation improvements and drainage fixes
Prime the Surface for Maximum Adhesion
Want your paint to stick and last? You’ll prep stucco by cleaning, repairing cracks, and ensuring it’s fully dry before priming.
Want paint to stick and last? Clean, repair, and fully dry stucco before priming for lasting results.
Choose a high-quality masonry or acrylic primer that bonds to porous surfaces and resists alkali. Apply evenly with a roller or sprayer, working in consistent sections and maintaining wet edges.
Primer evens absorption so topcoat color matches your color psychology goals and respects historical styles if you’re restoring period charm. Let primer cure per manufacturer instructions, then inspect for missed spots.
Proper priming prevents peeling, improves coverage, and extends the life of your exterior finish.
Mask and Protect Trim, Windows, and Landscaping
After priming, you’ll need to shield trim, windows, and landscaping before you start rolling on color. You’ll tape edges precisely to preserve color harmony between stucco and trim, cover windows with plastic, and protect plants and walkways from drips.
Respect texture contrast by keeping tape tight against rough stucco and using flexible paint guards on uneven profiles.
- Use high-quality painter’s tape rated for exterior use
- Drape drop cloths over shrubs and mulch
- Seal window plastic with low-tack tape to avoid residue
- Protect fixtures and hardware with masking film
- Anchor coverings against wind
Choose Between Brush, Roller, or Sprayer for Stucco
When choosing between a brush, roller, or sprayer for stucco, match the tool to the texture and size of the job so you get even coverage without clogging pores or wasting material.
You’ll use a brush for tight corners, trim, and repair spots where texture matching is critical; pick a stiff, high-quality masonry brush.
Use a thick-nap roller on larger flat areas to maintain texture and aid color blending between passes.
Reserve a sprayer for expansive, consistent surfaces when you want speed, but be mindful of overspray and masking.
Combine tools for best results and efficient, uniform coverage.
Sprayer Setup and Technique for Even Stucco Coverage
If you’re tackling large stucco expanses with a sprayer, set up carefully to get even coverage and avoid runs or heavy spots. You’ll prep by choosing the right tip and pressure for your stucco texture, testing on scrap, and adjusting spray width to match surface contours.
Maintain a consistent distance and overlap passes by about 50%. Move steadily, keeping the gun perpendicular to the wall.
Check color matching frequently and blend wet edges to avoid lap marks.
- Pick tip size for texture depth
- Adjust PSI and flow for even atomization
- Hold consistent distance
- Overlap passes 50%
- Inspect color matching often
Rolling and Brushing Techniques for Textured Stucco
Because textured stucco holds paint differently than smooth surfaces, you’ll need the right rollers and brushes plus a steady hand to get full coverage without flattening the texture. Choose a thick-nap roller to follow the textured pattern and a stiff nylon brush for crevices. Load tools evenly—proper paint mixing guarantees consistent color and viscosity. Work top to bottom, blending overlap while keeping strokes light to preserve peaks. Check edges with a brush, not a roller. Pause to step back, assess coverage, and touch high-relief areas gently.
| Tool | Feeling |
|---|---|
| Thick-nap roller | Confidence |
| Stiff brush | Control |
| Paint tray | Readiness |
| Towel | Calm |
Drying Times and Recoat Limits for Stucco Paint
Expect stucco paint to dry to the touch in 1–4 hours and to cure more fully in 24–48 hours, depending on temperature and humidity.
You’ll need to follow the manufacturer’s recoat window—usually between 4 hours and 48 hours—to avoid adhesion problems.
If you miss that window, wait the full cure time before sanding or applying another coat.
Drying Time Ranges
When you’re timing your project, know that stucco paint dries in stages—surface dry, tack-free, and fully cured—and each stage has its own typical window depending on product and conditions. You’ll factor temperature, humidity, ventilation, and coating type; choose eco friendly paints and consider color psychology since darker hues absorb heat and speed drying.
Typical ranges vary by brand:
- Surface dry: 30 minutes–2 hours
- Tack-free: 2–6 hours
- Recoat eligibility (general guideline): 4–24 hours
- Full cure: 7–30 days
Cold/wet conditions: expect at least 50% longer times
Recoat Window Limits
If you plan your timing carefully, you’ll hit the ideal recoat window and avoid adhesion problems or uneven texture. Check the paint can for specific dry-to-recoat times—many acrylic stucco paints let you recoat in 2–4 hours under warm, dry conditions; some require 8–24 hours.
Don’t exceed paint limits: waiting too long can cause poor intercoat bonding and flashing. Cooler, humid, or shaded areas extend drying and narrow your window.
For best results, test a small section: if the underlying coat resists thumb pressure but isn’t fully cured, you’re in the window for a successful window recoat.
How Many Coats of Paint Does Stucco Need?
Because stucco is porous and textured, you’ll usually need two coats of paint for durable, even coverage. You’ll apply a quality primer then two finish coats, but some repairs or very dark-to-light color changes might require a third.
Choose colors considering color psychology for curb appeal and energy implications. Use eco-friendly paints when possible to reduce VOCs and environmental impact.
Apply consistently with the right tools and drying times.
- Prime thoroughly to seal pores
- Use a roller and brush for texture
- Allow full dry time between coats
- Inspect for missed spots after first coat
- Consider third coat for drastic color shifts
Work Around Edges, Corners, and Architectural Details
As you tackle edges, corners, and architectural details, slow down and use the right tools so paint stays neat and coverage stays even. Work with angled brushes for tight seams and small rollers for recesses; use painter’s tape sparingly to protect trim without sealing texture.
For edge detailing, cut in first, feathering strokes toward the field to avoid ridges. Pay attention to window sills, eaves, and decorative moldings—these architectural embellishments need thinner coats and steady hands to prevent drips.
Inspect joints and shadow lines as you go, touch up thin spots, and remove tape while paint is tacky for crisp lines.
Manage Texture Variation to Avoid Lap Marks
You’ll need to match the stucco texture you’re painting so new areas don’t stand out. Work wet edges into the surrounding dry surface to blend fresh material seamlessly.
Use the same tools and motions across sections to keep texture consistent and avoid lap marks.
Match Texture Consistently
When you’re painting stucco, keep your texture uniform so lap marks don’t show. Inconsistent spray patterns, roller pressure, or drying times create visible seams.
You’ll match texture by testing on scrap, keeping tools consistent, and working in manageable sections.
Consider color psychology when choosing tones that hide subtle texture shifts, and pick eco-friendly paints to reduce glare and uneven sheen.
- Use same spray tip or roller nap throughout
- Maintain constant pressure and speed
- Feather edges while material stays wet
- Work with similar ambient temperature and humidity
- Inspect from different angles before finishing
Blend Fresh Into Dry
Although fresh stucco dries quickly at the edges, blend new material into the dry surface immediately so lap marks won’t form. You should feather each pass with a damp sponge or trowel, matching the surrounding texture and avoiding visible seams.
Work in manageable sections, checking light angles to catch subtle variation. If you’re repainting, consider how color psychology affects perceived uniformity—lighter tones reveal flaws more readily.
For period homes, match historical styles and mortar profiles to keep repairs invisible. Finish with a broom or stipple to replicate texture, then let it cure before priming and painting.
Temperature and Humidity Guidelines for Painting Stucco
Because stucco cures and paint binds best within a specific climate window, you should check temperature and humidity before you start painting. You’ll want consistent, moderate conditions; extreme heat or cold and high humidity ruin adhesion and drying.
Consider local weather patterns when scheduling, and time surface preparation to match drying forecasts. Aim to paint when temperatures stay between 50–90°F (10–32°C) and relative humidity is under 85%, ideally 40–70%. Protect fresh work from dew and rain, and avoid midday sun that dries too fast.
- Check hourly forecasts before work
- Delay after rain for full cure
- Avoid painting in high humidity
- Protect from direct sun
- Use heaters or fans if needed
Final Inspection Checklist Before You Call It Done
Before you declare the job finished, walk the exterior with a systematic checklist to catch missed spots, surface defects, or protection failures that could shorten the paint’s life. Check for uniform coverage, feathered edges at trim, and consistent texture on stucco.
Inspect flashings, caulking, and vents for gaps or paint blockage. Verify gutters and downspouts aren’t fouled by overspray. Confirm color matches sample in varied light.
Note any substrate cracks needing repair. If you’re working on older homes, consider historical preservation guidelines and confirm primers and eco-friendly paints were used where required.
Document issues for touchups.
Clean‑Up, Tool Care, and Proper Paint Disposal
When you finish painting, tackle cleanup and tool care methodically so your work lasts and you avoid hazardous waste. Start by wiping excess paint from brushes and rollers, pouring leftover latex paint into sealed containers, and stripping drop cloths of debris before laundering or disposing them properly.
Rinse tools with minimal water, use a comb or brush to restore bristles, and store rollers upright to retain shape. Consider eco-friendly formulations for future jobs to reduce environmental impact.
Dispose of unwanted paint at municipal hazardous-waste sites or through community collection events.
- Clean brushes promptly
- Reclaim excess paint
- Label stored containers
- Recycle plastic sheeting
- Follow local disposal rules
Routine Maintenance to Extend Painted Stucco Life
If you want your painted stucco to keep looking fresh and protect your home, set up a simple routine of inspections and minor repairs every spring and fall. Walk the perimeter, note hairline cracks, peeling, or mold, and address issues promptly to prevent moisture intrusion.
Clean gently with a soft brush and mild detergent, rinse thoroughly, and let dry before spot-priming and repainting.
Reevaluate choices: Color psychology affects heat absorption and curb appeal, so pick hues that suit climate and mood. When repainting, favor Eco friendly paints to reduce VOCs and improve long-term performance while protecting the environment.
Troubleshooting Common Problems After Painting Stucco
Although stucco usually holds up well, you may still run into issues like peeling, efflorescence, or uneven color after painting. You’ll want to diagnose quickly to protect paint durability and preserve your color palette choices. Check for moisture sources, poor adhesion, or improper priming. Test small areas before repair.
- Inspect for peeling and scrape loose paint.
- Treat efflorescence with a masonry cleaner and seal afterward.
- Address mildew with a biocide wash.
- Feather and spot-prime uneven color, then blend with matching paint.
- Re-evaluate caulking and trim to prevent recurring problems.
Cost Breakdown: Painting Stucco DIY vs. Hiring Pros
Fixing those post-paint issues can change your cost picture, so it helps to compare DIY versus pro approaches before you commit. If you DIY, you’ll save labor but pay for scaffolding, patching, primer, high-quality stucco paint and tools; factor time, mistakes, and learning.
Pros charge for prep, specialized application, warranties and disposal, but they finish faster and may reduce repaint frequency. Choose eco friendly paints to lower VOCs; that can raise material costs but may save health and resale value via color psychology benefits.
Tally materials, time, risk and warranty to decide what’s truly cheaper.
How to Vet and Hire a Stucco Painting Contractor
When hiring someone to paint your stucco, start by checking their experience with textured exteriors and request references or photos of recent jobs so you can verify workmanship and color consistency.
Interview candidates about prepping techniques for stucco texture, ask what primers and coatings they prefer for paint durability, and confirm they inspect for cracks or moisture first.
Get written estimates, timelines, and payment terms.
- Verify license and insurance
- Check references and recent project photos
- Ask about surface prep and repair methods
- Confirm products used and expected paint durability
- Compare written bids and timelines before deciding
Warranties, Guarantees, and Record‑Keeping for Stucco Paint
After you’ve compared bids and confirmed materials and prep plans, turn your attention to warranties, guarantees, and record-keeping so you’ll protect your investment and make future maintenance easier.
Ask contractors for written Warranty documentation detailing coverage periods, exclusions, and required maintenance.
Compare manufacturer warranties for paint and primer; get product names and lot numbers in writing.
Clarify Guarantee policies for workmanship—what’s fixed, timelines for repairs, and response expectations.
Keep a binder or digital folder with contracts, invoices, photos before/after, and inspection notes.
That organized record makes warranty claims smoother and helps you track when touch-ups or full repainting are due.
Best Months to Paint Exterior Stucco
Because stucco needs steady, moderate temperatures and low humidity to cure and adhere properly, you’ll get the best results by scheduling exterior painting during your region’s dry, mild months—typically spring or early fall in temperate climates and late winter to early spring in milder, Mediterranean areas.
Schedule stucco painting for dry, mild months—spring or early fall in temperate areas, late winter to early spring in Mediterranean climates.
Plan around forecasted lows above freezing and daytime temps between 50–85°F. Consider historical preservation rules for older homes and choose eco-friendly paints to protect masonry and surroundings.
Time coats to avoid rain and strong sun. Monitor humidity, surface temperature, and manufacturer cure times for ideal adhesion.
- Spring, temperate zones
- Early fall windows
- Late winter, Mediterranean
- After inspection for repairs
- When forecasts are stable
Frequently Asked Questions
Can I Paint Stucco Over Masonry or Brick Additions?
Yes — you can paint stucco over masonry or brick additions, but you’ll need thorough surface preparation and color matching. You’ll clean, repair, prime disparate surfaces, and use compatible masonry primer and paint so finishes bond and look uniform.
How Do Paint Warranties Transfer With Home Ownership?
Paint warranty transfer depends on the manufacturer; you’ll need to register the transfer, provide proof of purchase, and meet maintenance terms. You’ll retain some coverage, but homeownership responsibilities like proper upkeep can affect remaining warranty validity.
Will Oil‑Based Stains Interfere With Stucco Paint Adhesion?
Yes — oil stains can interfere with stucco paint adhesion, so you’ll need to clean, degrease, and use a solvent wash or primer designed for oil-contaminated surfaces before painting to guarantee proper bond and long-lasting finish.
Can Exterior Stucco Be Safely Painted With Low‑Voc Tint Bases?
Yes — you can safely paint exterior stucco with low‑VOC tint bases if you verify stain compatibility and perform color matching under real light. Test adhesion and coverage on a small patch before doing the whole surface.
How Do Solar Panels or Satellite Dishes Affect Stucco Painting?
Solar panel impact: you’ll need to remove panels or mask around mounts; satellite dish installation: you’ll seal and paint around brackets. You’ll prevent stains, protect flashings, preserve sealants, and avoid peeling by prepping carefully.
Conclusion
You’ve got the roadmap to tackle exterior stucco painting with confidence. Whether you DIY or hire pros, follow the steps, watch for trouble signs, and match materials to climate and texture. Keep estimates, warranties, and records tidy — a stitch in time saves nine. With proper timing and care, your stucco will stay durable and attractive for years. Now pick a weekend, gather supplies, and get started.