How to Get Hairspray Off Painted Walls the Easy Way
Act fast: blot loose hairspray with a dry microfiber, mist the spot with warm water, then gently wipe with a soft cloth and mild dish soap solution. Rinse with plain water and pat dry. For stubborn residue, test a cotton-swab of isopropyl alcohol or a 50/50 vinegar mix in a hidden spot, work gently, and avoid scrubbing to protect matte finishes. If you keep going, you’ll find step-by-step tips, safer solvent choices, and prevention hacks.
Quick Answer Fast Way to Remove Hairspray from Painted Walls
If you catch hairspray on painted walls, wipe up any excess with a dry cloth.
Then gently blot the area with a damp sponge and mild dish soap.
If the paint looks fragile or the stain’s old, stop and test your cleaner on an inconspicuous spot first to make sure it won’t strip the finish.
Proceed only after the test shows no damage, working from the outside of the stain inward.
Immediate steps to take right now
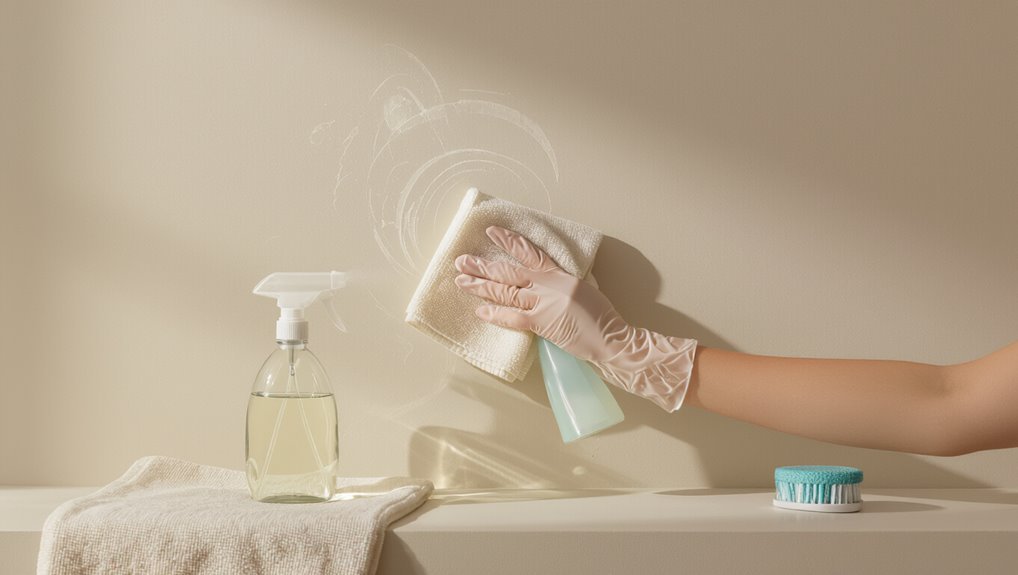
Grab a soft cloth and a spray bottle of warm water, and act quickly to prevent the hairspray from setting into the paint.
Lightly mist the area, blot with the cloth, and avoid rubbing.
If residue remains, dampen a microfiber with mild dish soap solution and dab gently.
Repeat until clean.
Remember to rinse with plain water and pat dry.
How do you get hairspray off painted walls?
When to stop and test first
Once you’ve blotted and rinsed, stop before scrubbing any harder and test a hidden spot first to avoid damaging the paint.
You’ll check how the cleaner reacts and whether paint softens or color shifts.
Apply your chosen solution to a concealed area, wait a minute, then inspect.
If it’s fine, proceed gently; if not, switch to milder methods or consult a pro.
How Hairspray Affects Painted Walls (Basic Understanding)
Hairspray contains resins, alcohols, and oils that form a sticky film on surfaces.
You’ll find it bonds to paint because the resins cling and the solvents can soften some finishes, which raises the risk of smudging, discoloration, or surface damage if you scrub too hard.
Matte and eggshell finishes tend to show residue and can be more delicate, while satin, semi-gloss, and gloss resist residue better but can still be dulled or streaked.
What hairspray is made of (resins, alcohols, oils)
Many common hairsprays combine resins, alcohols, and oils to give hair hold, sprayability, and shine.
You’ll find polymers (resins) form a film, solvents like ethanol evaporate quickly, and lightweight oils or silicones add sheen.
Fragrances and propellants may be present too. Knowing these ingredients helps you choose cleaning approaches that dissolve or lift specific components without overworking painted surfaces.
Why hairspray sticks to paint and potential damage risks
Because paint surfaces are porous and coated with binder, hairspray’s resins and oils bond to them and form a thin, often sticky film that clings until it’s dissolved or physically removed.
You may notice discoloration, dulling, or slight tackiness; prolonged residue can attract dirt or degrade clearcoat.
Aggressive scrubbing or harsh solvents can remove paint finish, so you should test cleaners and act promptly.
Differences by paint finish (matte, eggshell, satin, semi-gloss, gloss)
Different paint sheens react differently to hairspray residue, so what you use to clean them — and how visible the damage will be — depends on the finish.
Matte/flat hides imperfections but absorbs oils, so stains set.
Eggshell and satin resist staining better yet can dull if scrubbed hard.
Semi-gloss and gloss repel residue but show streaks; they tolerate gentler cleaners and light scrubbing.
Tools and Materials You’ll Need
You’ll want a few safe household cleaners and solvents on hand, plus microfiber cloths, a soft sponge, gloves, a bucket, and painter’s tape to protect trim.
Use commercial paint-safe cleaners when stains are stubborn or paint is delicate, and simple DIY mixes (like mild dish soap and water) for light residue.
I’ll explain how to choose between them and how to use each tool safely.
Safe household cleaners and solvents
When cleaning hairspray off walls, pick mild, safe cleaners first so you won’t damage paint or wallpaper.
You’ll want gentle options that dissolve residue without stripping finish. Test in an inconspicuous spot before full use.
- Dish soap diluted with warm water
- White vinegar solution (50/50 with water)
- Rubbing alcohol for stubborn spots (spot test first)
Tools and protective items (microfiber cloths, sponge, gloves, bucket, painter’s tape)
Gather a few basic tools before you start: microfiber cloths, a soft sponge, a bucket of warm water, disposable gloves, and painter’s tape to protect trim and outlets.
You’ll work methodically, avoiding damage. Prepare:
- Microfiber for gentle wiping.
- Sponge for light scrubbing.
- Tape to mask edges.
Keep gloves on, wring the sponge well, and change water as needed.
When to use commercial paint-safe cleaners vs DIY solutions
Although DIY mixes can tackle light, fresh hairspray spots, choose a commercial paint-safe cleaner for stubborn buildup, delicate finishes, or textured surfaces where DIY solutions might strip paint.
You’ll use DIY (mild soap, vinegar, baking soda) for quick, small areas on durable latex.
Pick commercial cleaners when labels promise paint safety, for large stains, or if test patches show fading.
Step-by-Step Cleaning Method
Start by clearing the area and covering nearby surfaces so you won’t spread residue or damage paint.
Test a small, hidden spot to check for color change or finish damage before proceeding.
Then follow a staged approach: dry removal, a mild soap-and-water wash (about a teaspoon of dish soap per cup of warm water), and only if needed move to stronger cleaners like isopropyl alcohol, vinegar, or a commercial degreaser in that order.
Step 1 Prepare the area and protect surrounding surfaces
Before you clean, clear the area and move any furniture or decorations at least a few feet away so you won’t smear spray residue or damage items.
Use drop cloths and painter’s tape to protect trim, floors, and outlets. Wear gloves and a mask if using cleaners.
- Lay drop cloths
- Tape edges
- Remove small items
Step 2 Test a small inconspicuous spot (what to look for)
With the area prepped, pick a hidden spot—inside a closet, behind furniture, or a corner along trim—and apply your chosen cleaner or solvent sparingly.
Watch for paint softening, discoloration, bubbling, or sheen loss over a few minutes. If nothing changes, extend testing to a slightly larger area.
If you see damage, stop and choose a milder solution or consult the paint manufacturer.
Step 3 Dry removal: blotting and gentle brushing techniques
Begin by gently blotting the affected area with a dry microfiber cloth or paper towel to lift loose hairspray residue without rubbing it deeper into the paint.
After blotting, use a soft-bristle brush or clean toothbrush to loosen stubborn crusts, brushing lightly in one direction.
Wipe away lifted particles with fresh cloths, repeating until no more residue transfers and paint remains intact.
Step 4 Mild cleaning solution: soap and water method (mix ratios + technique)
Once you’ve removed loose flakes, it’s time to tackle remaining residue with a mild soap-and-water solution that won’t harm paint.
Mix a teaspoon of liquid dish soap into a pint (about 500 ml) of warm water.
Dip a soft sponge, wring well, and gently wipe in circular motions.
Rinse sponge often and pat dry with a microfiber cloth to prevent streaks.
Step 5 Stronger cleaners: isopropyl alcohol, vinegar, or commercial degreasers (order of use, application tips)
Although mild soap worked for light residue, tougher hairspray buildup calls for stronger cleaners you can try in a specific order—start with isopropyl alcohol, move to white vinegar if needed, and reserve commercial degreasers for stubborn spots.
Apply each with a soft cloth, testing a hidden area first, and rinsing thoroughly between steps. Use small circular motions, avoid soaking paint, and dry promptly to prevent streaks.
Step 6 Treating stubborn or stained residue (repeat applications, soft scrub)
Work stubborn hairspray spots by repeating treatments and using a gentle scrubbing action: reapply your chosen cleaner (isopropyl alcohol, vinegar solution, or a commercial degreaser) to the affected area, let it sit briefly to loosen residue, then rub with a soft-bristled brush or nonabrasive pad in small circular motions until the film lifts.
Repeat as needed, blotting excess cleaner between attempts to avoid over-wetting.
Step 7 Rinse, neutralize, and dry the wall properly
1. After removing residues, rinse the wall with a clean sponge and plain water to remove cleaner traces.
If you used a mild acid or alkaline solution, neutralize it—wipe with a diluted baking soda solution for acids or a vinegar solution for bases—then rinse again.
Pat the area dry with a microfiber cloth and let it air-dry fully before replacing items.
Step 8 When to stop and call a professional
If stains persist after repeated gentle cleaning, or if the paint softens, bubbles, or discolors as you work, stop and call a professional—continuing could make the damage worse and increase repair costs.
Don’t risk stripping finish or causing moisture damage. A pro can assess adhesion, match paint, and recommend safe remediation or spot repainting.
Save time, avoid costly fixes, and get dependable results.
Comparison of Cleaning Options and When to Use Each
You’ll weigh DIY household solutions against store-bought cleaners based on how stubborn the hairspray is and what you have on hand.
Consider solvent strength versus paint safety—stronger solvents remove residue faster but can strip or dull finishes.
Match your choice to the paint finish (flat, eggshell, satin, semi-gloss) to avoid damage.
DIY household solutions vs store-bought cleaners
When deciding whether to reach for a homemade mix or a commercial cleaner, consider the surface, the stain’s severity, and how quickly you need results; you’ll often try mild DIY first for light residue, then upgrade to store-bought for stubborn buildup. Compare options below:
| DIY | Store-bought |
|---|---|
| Gentle | Stronger |
| Cheap | Faster |
| Easy ingredients | Formulated |
| Low odor | Consistent |
| Test first | Read label |
Solvent strength vs paint-safety tradeoffs
Because stronger solvents remove hairspray faster, they also raise the risk of damaging paint finishes.
So pick cleaners that balance solvency with gentleness for your wall type. Start with mild options—dish soap, diluted vinegar—or a melamine sponge.
Reserve stronger solvents—rubbing alcohol, commercial cleaners—only for stubborn spots, testing hidden areas first and using minimal contact to avoid stripping or discoloring paint.
Best choices by paint finish
Although stronger cleaners can speed removal, the safest choice depends on your wall’s paint finish, so match the cleaner to the surface: flat and matte paints are porous and need the gentlest touch (mild soap, a damp microfiber, or a melamine sponge used sparingly).
Satin and eggshell tolerate slightly more agitation and diluted rubbing alcohol for stubborn spots, and semi-gloss or gloss are the most resilient—so you can try stronger solvents or commercial cleaners but still test an inconspicuous area first and wipe gently to avoid streaks.
- Flat/matte: mild soap, light dabbing.
- Satin/eggshell: diluted alcohol, soft cloth.
- Semi-gloss/gloss: commercial cleaner, test first.
Common Problems and Mistakes to Avoid
Don’t rush into scrubbing with abrasive pads or strong solvents, because you can easily remove or discolor paint.
You’ll want to avoid over-scrubbing, which wears down finish and leaves visible abrasion.
Also don’t use harsh solvents on delicate or porous paints—match the cleaner to the paint type to prevent damage.
Mistakes that cause paint discoloration or removal
When you try quick fixes or grab the first cleaner you see, you can easily strip or stain paint instead of removing hairspray.
Don’t let impatience ruin finish—test first, use gentle cleaners, and avoid solvents that dissolve binders.
- Skip harsh chemicals without a spot test.
- Avoid colored cleaners that stain.
- Don’t apply concentrated products directly; dilute and retest.
Over-scrubbing and abrasion issues
If you scrub too hard trying to erase every sticky streak, you’ll abrade the paint and leave visible wear or dull spots.
You should use gentle pressure, soft cloths or sponges, and short, controlled strokes. Test a small hidden area first, stop at the first sign of finish loss, and switch to milder methods like dampening and blotting to protect texture and sheen.
Using wrong solvents for specific paint types
Because different paints react to different chemicals, using the wrong solvent can strip finish, cause discoloration, or leave a greasy residue that’s harder to fix than the original hairspray.
Check paint type first—flat, eggshell, satin, or semi-gloss—then test solvent in an inconspicuous spot.
Don’t use strong solvents on flat or colored finishes; opt for mild detergent, rubbing alcohol, or a dedicated cleaner suited to your paint.
Prevention and Best Practices
Before hairspray has a chance to stick, you can protect walls with a simple drop cloth or by angling yourself and the spray away from painted surfaces.
Wipe overspray off right after styling to stop buildup and make future cleaning easier.
Set a quick weekly wipe-down routine for walls near bathrooms or styling stations to keep paint looking fresh.
How to protect walls before styling (drop cloths, positioning)
1 simple step can save you hours of cleanup: cover the area and control spray direction.
Lay a lightweight drop cloth or old sheet against the wall and floor, tape edges with painter’s tape, and position your chair so spray points away from walls.
Use a small handheld shield or cardboard for targeted work.
Replace covers each session to prevent unseen residue buildup.
Quick-clean habits to prevent build-up
Anyone can keep hairspray from turning into a chore by adopting a few quick-clean habits you do right after styling.
Wipe nearby walls with a microfiber cloth to catch overspray, air the room to dry residual mist, and rinse the cloth between passes.
Spot-check corners and light switches weekly, and keep a small spray bottle of diluted dish soap handy for immediate touch-ups.
Routine maintenance tips for painted walls near bathrooms or styling areas
When you style hair near painted walls, make routine maintenance part of your process so overspray never has a chance to set—the habit saves time and preserves paint finish.
Wipe surfaces weekly with a microfiber cloth and mild detergent, ventilate to reduce residue, use a washable or semi-gloss paint near styling zones, keep a small cleaning kit handy, and spot-clean fresh overspray immediately.
Short Repair Options if Cleaning Damages Paint
If cleaning strips or discolors your paint, you can try touch-up painting and focus on color matching and smooth feathering.
Decide whether a spot repair will blend in or if you need to repaint the whole section based on texture, finish, and visibility.
For a quick fix while you plan, use wall decals or artwork to conceal the damaged area.
Touch-up painting: color matching and technique
Although cleaning usually preserves paint, sometimes you’ll spot faded spots or small scuffs where the hairspray lifted color—so you’ll want a quick touch-up plan.
Match color by using leftover paint or a small sample and test in an inconspicuous spot.
Follow these steps:
- Clean and sand lightly.
- Apply thin coats with a small brush.
- Feather edges for a seamless blend.
When to repaint an entire section vs spot repair
Decide between spot repairs and repainting a whole section by evaluating damage size, finish match, and visibility: small scuffs or isolated faded patches usually call for touch-ups, but peeling, widespread color loss, or mismatched sheen from cleaning means you’ll get a more consistent result by repainting the entire wall or section.
If texture or sheen differs noticeably, repaint the full panel; otherwise touch up carefully.
Temporary concealment hacks (wall decals, artwork)
When cleaning has dulled or nicked paint and you don’t want to repaint right away, temporary concealments like removable wall decals, framed art, or strategic shelving let you hide damage quickly and neatly.
Choose low-tack adhesives to avoid further harm, match colors or patterns to distract the eye, and arrange pieces to cover blemishes.
These quick fixes buy time before repainting.
FAQ Hairspray on Painted Walls (3 5 Common Questions)
You’ll want clear answers to common concerns like whether hairspray will permanently stain your paint and how long to wait before cleaning.
Learn which solvents—like nail polish remover or acetone—are too harsh and safer alternatives for old, baked-on residue.
You’ll also find guidance on using steam cleaners and the best methods for removing set-in hairspray without damaging the finish.
Will hairspray permanently stain my paint?
Wondering if hairspray will leave a permanent mark on your paint? Usually it won’t if you act quickly.
Water-based or low-residue sprays often wipe off with mild soap and a soft cloth. Stronger, alcohol-heavy formulas can dull or discolor sensitive finishes if left too long.
Test a hidden spot, blot gently, and clean promptly to reduce risk of lasting damage.
Can I use nail polish remover or acetone safely?
Curious if nail polish remover or acetone will get hairspray off your painted walls? You can, but cautiously.
Test a hidden spot first; acetone dissolves some paint finishes and glossy or enamel surfaces are most at risk.
Use a cotton swab, dab briefly, then blot. If paint softens or color lifts, stop immediately and switch to a milder cleaner like soapy water or isopropyl alcohol.
How do I remove old, baked-on hairspray?
Scrape gently to loosen the crusted layer, then tackle remaining residue with progressively stronger cleaners so you don’t damage the paint.
Start with warm soapy water and a soft sponge, then try a baking soda paste.
If needed, use a diluted vinegar solution or a mild commercial citrus cleaner.
Rinse, blot dry, and test any stronger product on an inconspicuous spot first.
Is it safe to use steam cleaners on painted walls?
If you’re dealing with hairspray buildup, steam cleaners can help loosen and lift residue, but they’re not always safe for painted walls—high heat and moisture can soften paint, strip gloss, or cause bubbling on older or water-sensitive finishes.
Test a hidden spot first, use low steam and distance, keep sessions brief, and dry quickly.
Avoid steam on flat or chalky paints.
How long should I wait to clean after hairspray application?
Because steam can both help and harm painted finishes, you’ll want to time your cleaning to avoid making residue harder to remove or damaging the paint.
Wait at least 30 minutes after application so solvents evaporate and hairspray sets. For heavy buildup, wait 24 hours before aggressive cleaning.
Always test a small area first, then use gentle methods and short steam bursts if needed.
Visual Guide and Quick Reference
You’ll find a step-by-step photo checklist showing each cleaning stage so you can match your wall to the right technique.
Use the quick decision flowchart to pick which cleaner to try first based on paint type and stain severity.
Follow the visuals in order and you’ll save time and avoid damage.
Step-by-step photo checklist for cleaning
1 clear checklist will make the job quicker: follow these step-by-step photos to identify the stain type, prep the area, apply the right cleaner, gently scrub, and finish with a rinse and dry.
Then, use paired photos showing: stain close-up, tested cleaner spot, scrubbing motion, wiped result, and fully dry wall.
Keep notes and time each step for consistency.
Quick decision flowchart: Which cleaner to try first
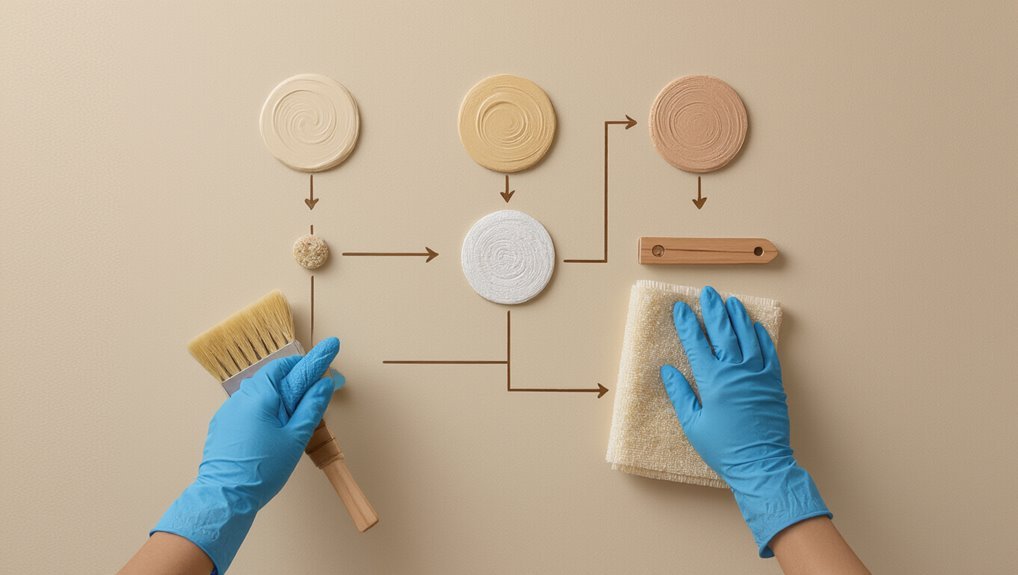
Now that you’ve followed the photo checklist to identify the stain and test a small spot, use this quick decision flowchart to pick the right cleaner fast.
If paint is latex and stain is fresh, start with mild dish soap and water.
If residue persists or finish is gloss, try rubbing alcohol on a cloth.
For stubborn buildup, use a diluted commercial citrus cleaner, then rinse.