How to Paint Knotty Pine Walls the Right Way
Knotty pine isn’t like drywall — it has deep grain, knots and resin that can bleed through paint — so clean, sand lightly, and repair any damaged boards first. Seal prominent knots with shellac or an oil-based blocker, then prime the whole surface with a compatible oil or high-quality bonding primer. Paint with a low-sheen latex or oil finish, sanding between coats for smoothness. Follow proper temps and cure times, and keep going for detailed tips and troubleshooting.
Why Knotty Pine Is Different From Drywall
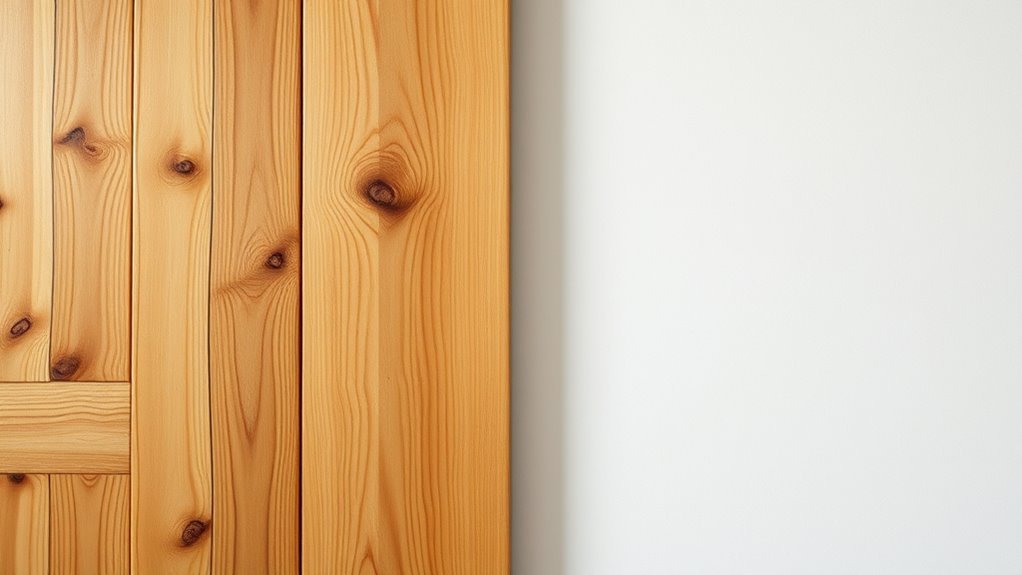
Because knotty pine has deep grain, visible knots, and resin-rich sap, it behaves differently than drywall when you paint it. You’ll notice texture and tannin bleed that drywall never shows, so you’ll prep and prime with that in mind.
You’ll also respect its historical significance: older boards absorb finishes unevenly and may need sealing to prevent stains.
Knotty pine aesthetics demand decisions about whether to highlight knots or cover them; your choice affects primer type and sheen.
You’ll avoid heavy sanding that removes character, instead cleaning, sealing knot areas, and selecting products meant for natural wood surfaces.
Quick: 8-Step Plan to Paint Knotty Pine
Now that you know how knotty pine differs from drywall, here’s a concise eight-step plan to get the job done right.
1) Clear the room and protect floors.
2) Clean the pine with a mild degreaser.
3) Sand lightly to remove sheen and smooth knots.
4) Fill large holes and knot holes with wood filler.
5) Prime with a stain-blocking primer, focusing on knots.
6) Sand primer lightly.
7) Choose color palettes that suit grain and light; apply two thin coats of quality paint.
8) Finish with texture techniques or a smooth topcoat as desired.
Should You Paint or Refinish Knotty Pine?
Wondering whether to paint or refinish your knotty pine? You’ll weigh aesthetics, budget, and room function.
Refinish to highlight grain, preserve historical significance, and keep rustic warmth; it’s quicker and suits period homes.
Paint if you want modern brightness, uniform color, or to apply color psychology—soft neutrals calm, bold hues energize.
Consider resale and maintenance: painted surfaces hide imperfections but need touch-ups; refinished wood shows wear but can be rejuvenated with stain and sealer.
Test small areas, factor lighting and décor, and choose the option that aligns with style goals and long-term upkeep.
Tools & Materials Checklist for Painting Knotty Pine
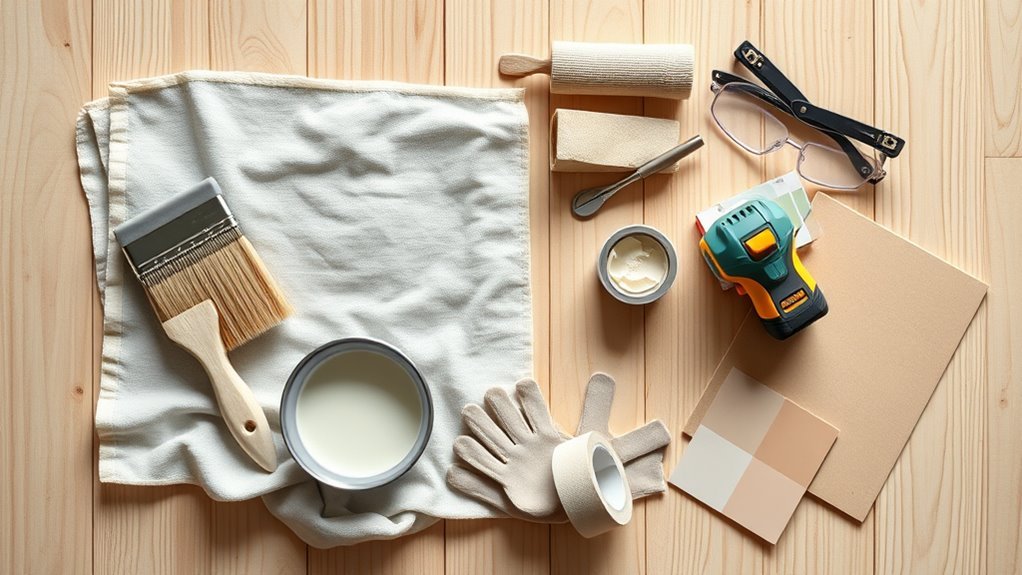
Before you start, gather the right tools and materials so the job goes smoothly. You’ll need brushes, rollers, sandpaper, tack cloths, caulk, primer, and a stain-blocking topcoat suited for knotty pine.
With the proper checklist, you’ll save time and get a professional-looking finish.
Essential Painting Tools
Because knotty pine has unique grain and texture, you’ll want the right tools to get a smooth, lasting finish. Start with quality brushes: angled sash brushes for cutting in and natural-bristle or nylon for sealing knots.
Use a foam roller for flat sections and a short-nap roller for subtle texture techniques. Have a high-density foam pad or mini-roller for tight spots.
Bring sanding blocks (120–220 grit), tack cloths, and liquid deglosser. Include a dual-compartment tray, stir sticks for color mixing, painter’s tape, drop cloths, respirator, and gloves.
These tools keep work efficient and prep thorough without overspending.
Recommended Paint Materials
When you’re ready to tackle knotty pine, arm yourself with a focused materials list so you won’t be interrupted mid-job. Choose a high-adhesion primer, a durable satin or eggshell latex paint, and quality brushes/rollers sized for grooves. Consider cost comparison between brand and contractor-grade products; sometimes mid-range delivers best value.
- Primer: stain-blocking, shellac or oil-based for knots
- Paint: 100% acrylic latex for flexibility and easy cleanup
- Tools: angled sash brush, 3/8″ nap roller, sanding sponge, tack cloth
Also think about color psychology—lighter neutrals open space, while warm tones keep pine’s character.
How to Inspect Your Knotty Pine Walls
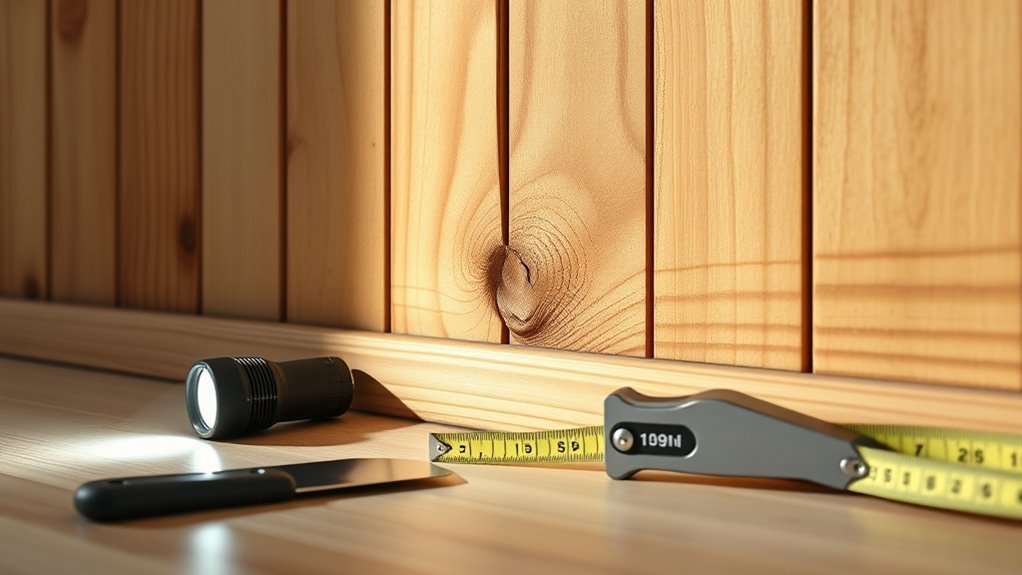
Before you start painting, walk the room and check for damage like cracks, loose boards, or water stains that need repair.
Look closely at each board to identify prominent knots and how the grain runs, since those affect stain absorption and fill choices.
Note and mark any areas that will need filling, sanding, or extra primer so your prep stays organized.
Check For Damage
How do you spot problems that will affect paint adhesion or finish? Start by scanning the surface for soft spots, stains, and gaps that compromise your knotty texture and wood grain. Address issues before painting.
- Press firmly to find soft or spongy areas from rot or moisture.
- Look for dark stains, mold, or old finish blisters that repel new paint.
- Check seams, nail holes, and gaps where caulk or filler is needed.
Mark repairs, remove damaged boards, and let the wood dry. Fixing these defects now guarantees a smooth, lasting finish and prevents costly touch-ups later.
Identify Knots And Grain
Because knots and grain dictate how stain and paint behave, you should study each board closely before you start prepping. Walk the room, note dark knots, pitch pockets, and raised grain.
Use knot identification to mark which knots need sealing or extra primer; some will bleed tannins through paint. Rub a damp cloth to reveal grain direction and rough spots.
Decide whether you want grain enhancement or a smooth painted finish—sanding with the grain smooths, while a light stain or glaze emphasizes pattern. Record trouble spots, then plan sanding, sealing, and priming steps so your final coat performs evenly.
Remove Dirt, Grease & Old Finish for Adhesion
When you’re preparing knotty pine for paint, removing dirt, grease and any existing finish is essential for proper adhesion. You’ll clean surfaces so your decorative accents and chosen paint color stay true and don’t peel. Work methodically: wipe down, degrease, and strip old polyurethane or shellac where needed.
When prepping knotty pine for paint, clean, degrease, and strip old finish for lasting adhesion and true color
- Use a mild degreaser or TSP substitute, rinse thoroughly.
- Apply a chemical stripper sparingly on glossy finishes, then neutralize per instructions.
- Clean grooves and knot crevices with a nylon brush and lint-free cloth.
Allow full drying before priming; good prep prevents lifting and guarantees an even topcoat.
How to Sand Knotty Pine Without Harming the Grain
Before sanding, inspect the boards and mark any deep knots or raised grain so you can address them gently; you’ll keep the wood’s character by using the right grit progression and light pressure. You’ll preserve knotty pine history and knotty pine symbolism by sanding with the grain, starting 120 grit, moving to 180, then 220, and using a sanding block near knots. Avoid aggressive power sanding on knot areas. Clean dust between grits and test a small patch. Use the table below to reflect stages and intent.
| Stage | Grit | Purpose |
|---|---|---|
| 1 | 120 | Remove finish |
| 2 | 180 | Smooth fiber |
| 3 | 220 | Final prep |
| 4 | Test | Preserve grain |
Fix Loose, Warped, or Split Boards Before Painting
If a board’s loose, warped, or split, you should repair it before painting so the finish lasts and looks professional. You’ll secure loose boards with trim screws and adhesive, clamp warped boards flat while glue cures, and fill splits with epoxy or wood filler. That preserves knotty pine’s historical significance and honors its cultural symbolism in rustic interiors.
- Drive screws into studs, countersink, and plug holes.
- Use moisture-balanced glue and cauls to flatten warps.
- Choose flexible filler for moving areas, sand smooth.
Finish priming only after repairs are fully cured and sanded.
Why Knots and Resin Bleed Through Paint
Because knots are denser and resin-rich than surrounding pine, they often leach tannins and sap that break down paint binders and cause yellow or brown stains to bleed through. You’ll notice knots and resin push oily compounds to the surface, especially with temperature changes or humidity.
Those compounds prevent proper adhesion and alter pigment appearance, so even fresh paint can show discolored spots. Stain bleeding is more likely where cuts expose heartwood or resin pockets.
When you prep, expect to clean, sand, and dry affected areas thoroughly so subsequent coatings can sit on a stable, cleaner surface without hidden contaminants.
How to Stop Knot Bleed: Product Options
Now that you know why knots and resin bleed through paint, you can choose products that block those oils and seal the wood. For knot bleed and resin prevention, pick a reliable barrier product and follow label instructions.
Now that you understand knot and resin bleed, choose a reliable barrier sealer and follow label instructions.
Options include shellac-based sealers for fast blocking, oil-based primers for deep penetration, and specialty knot blockers for stubborn resin. Each has pros: quick drying, strong adhesion, or targeted formulation.
Consider ventilation, odor, and compatibility with your paint. Use a test board to confirm effectiveness before committing to whole walls.
- Shellac-based sealer
- Oil-based primer
- Specialty knot blocker
Apply Shellac Knot Sealer (Step-by-Step)
When you’re ready to stop knot bleed for good, apply a shellac-based knot sealer in small, controlled sections so you can work wet edge to wet edge and avoid lap marks. You’ll prep by cleaning and sanding knots lightly, then use a quality shellac and a fine brush to seal each knot. Work systematically across the wall, allowing fast flash time before proceeding. Check for missed spots and recoat sparingly. These sealing techniques keep knotty pine from staining primer and paint, giving you a stable base for finish coats.
| Step | Action |
|---|---|
| 1 | Clean/sand knots |
| 2 | Brush shellac |
| 3 | Flash time |
| 4 | Inspect/recoat |
Oil- vs. Shellac-Based Primers: When to Use Each
When you’re sealing knotty pine, an oil-based primer gives good adhesion and stain-blocking with easier sanding and longer open time.
A shellac-based primer is stronger at stopping severe knots and tannin bleed-through and dries very fast for quick recoating.
Choose oil for general prep and ease, and shellac when knots are heavy or bleeding is a serious concern.
Oil Primer Benefits
Although both oil- and shellac-based primers block tannin bleed and adhesion problems, oil primers are your best first choice for knotty pine when you want longer open time, easier sanding, and broader topcoat compatibility.
You’ll find oil primers let you adjust finishes to match color schemes and decorating styles without rushing. Benefits include:
- Smoother sanding for a flatter, more professional base.
- Greater working time so you can correct imperfections and blend seams.
- Wide compatibility with latex or oil topcoats, reducing finish conflicts.
Use oil primer when you need forgiving application, consistent sealing, and reliable adhesion before painting.
Shellac Primer Strengths
If you need the fastest, most reliable way to block heavy knot tannins and odors, reach for a shellac-based primer—it seals better and dries far quicker than oil options.
You’ll appreciate how shellac handles stubborn resin bleeding in knotty pine textures, stopping discoloration before it wrecks your topcoat.
Shellac vs. oil isn’t about one always beating the other; shellac wins for rapid sealing and strong odor control, while oil can smooth grain and give longer open time.
Use shellac when you need immediate, robust stain blocking and quick recoats; it’s the go-to for problematic knots and lingering smells.
When To Choose
Because knotty pine varies so widely in resin content and surface condition, pick the primer that matches the specific problem you’re facing rather than defaulting to one type. You’ll choose shellac when knots bleed or odors persist; use oil when tannin blocking and adhesion on old finishes matter.
Consider lighting considerations—bright light shows flaws, so prime for smoothness. Think about furniture placement; high-traffic walls need tougher primers.
- Use shellac for severe bleed-through and fast sealing.
- Use oil for longer open time and stain blocking.
When in doubt, test a small area under your room’s lighting first.
Picking a Primer That Blocks Resin Stains
When resin bleeds through paint, you’ll need a primer formulated to seal tannins and sap so your finish stays clean and even. Choose a shellac- or oil-based stain-blocking primer rated for knotty pine to stop yellowing and sticky spots before you paint.
You’ll pick a primer based on resin-blocking power, adhesion, and compatibility with your topcoat. Consider color theory when selecting primer tint to reduce the number of finish coats and achieve true hue.
Test paint texture with a small sample to ensure the primer doesn’t exacerbate grain. Follow manufacturer cure times; don’t skip sanding between coats for best results.
How to Prime Knotty Pine for Even Coverage
Before you prime, clean the surface and degloss it so the primer can stick evenly.
Next, seal any knots with a shellac- or oil‑based knot sealer to stop resin bleed-through.
Finally, pick a primer formulated for knotty pine and apply it smoothly for uniform coverage.
Surface Cleaning And Deglossing
Although knotty pine has a warm, rustic look, you’ll need to clean and degloss the surface so primer and paint will stick evenly. You’ll remove dust, oils, and old sheen so the new finish respects the wood’s color psychology and historical significance while delivering even coverage.
Follow these clear steps before priming:
- Wipe walls with a mild TSP substitute, rinse, and let dry.
- Lightly scuff with fine-grit sandpaper or liquid deglosser, then clean residue.
- Vacuum and tack cloth to remove particles, checking for remaining gloss.
Once clean and dull, apply a stain-blocking primer per manufacturer instructions.
Knot Sealing Techniques
Because knot resin can bleed through paint and yellow over time, you’ll need to secure knots with the right products before priming the whole wall.
Start by sanding knots smooth and cleaning dust.
Use a dedicated knot sealing product or a shellac-based resin blocking solution applied with a brush or cotton swab; let it dry fully.
For large knots, apply two thin coats, sanding lightly between.
Test a small area to confirm no bleed-through.
After sealing, wipe away residue and inspect for missed spots.
Proper knot sealing prevents discoloration and guarantees even coverage when you move on to priming.
Choosing The Right Primer
When you’re priming knotty pine, pick a primer that blocks tannins and promotes adhesion so your topcoat goes on smoothly and stays true. You’ll choose between oil-based, shellac, or high-quality acrylic stains blockers; each handles resin bleed differently.
Consider color coordination with your final shade and test small panels under the room’s lighting effects before committing.
Prep includes sanding, cleaning, and sealing knots with a stain-blocking product. Use even strokes and thin coats to avoid lap marks.
- Test primers on scrap knots
- Match primer tint to paint
- Allow full cure between coats
How Many Primer Coats Do You Really Need?
Deciding how many primer coats you need depends on the condition and knot density of your pine. You’ll often use one coat for light knotting; heavy knots or tannin bleed require two. Primer improves color matching and enhances paint durability, so err on the side of an extra coat when in doubt. Sand between coats for smoothness and inspect for stain-through. Use a stain-blocking primer if knots leak. Allow full drying before topcoat. Refer to the simple guide below to choose one or two coats based on surface condition.
| Surface Condition | Recommended Coats |
|---|---|
| New, light knots | 1 |
| Sanded, stained | 2 |
| Heavy knots | 2 |
| Sealed previously | 1 |
Best Paint Types & Sheens for Knotty Pine
You’ll want to pick paints that hide knots and resist tannin bleed-through, like alkyds or high-quality acrylic latex paired with a stain-blocking primer.
Choose a satin or eggshell sheen for walls to balance durability and light reflectance, and reserve semi-gloss for trim where scrubability matters.
Don’t skip a dedicated primer and, for extra protection, a sealer over problem knots before painting.
Best Paint Types
Although knotty pine has a strong grain and resinous knots, you can get excellent results by choosing the right paint type and sheen for your goals. You’ll pick between oil-modified primers and water-based topcoats depending on durability, yellowing risk, and odor.
Consider how color psychology and historical significance influence your choices: lighter hues modernize, while warm tones honor rustic roots. Match product to use—high-traffic rooms need tougher finishes; bedrooms can be softer.
Think long-term: stain-blocking primers prevent bleed-through from knots.
- Oil-based primer for knot bleed control
- Acrylic latex for easy cleanup and flexibility
- Alkyd hybrid for hardness and reduced yellowing
Recommended Sheen Levels
When you pick a sheen for knotty pine, think about how much texture and imperfection you want to show. You’ll usually choose between flat, satin, semi-gloss, and high-gloss; each reflects light differently and affects how knots and grain read.
Flat minimizes glare and masks flaws but isn’t as durable in high-traffic areas.
Satin balances concealment and cleanability—great for living spaces.
Semi-gloss boosts durability and highlights texture, so use it where you want contrast.
Save high-gloss for trim or accents.
Compare sheen levels and gloss options to match durability, style, and how much wood character you want visible.
Primer And Sealers
Sheen choices affect how much of the wood’s color and resin show through, so you’ll want a primer that blocks tannins and sap while bonding to the pine’s knotty texture. Choose a shellac- or oil-based stain blocker for heavy sap; water-based adhesion primers work if knots are sealed first.
Consider Color psychology when picking primer tint to influence final warmth. Acknowledge the historical significance of pine interiors when deciding to hide or celebrate grain.
- Use shellac for tough tannin bleed.
- Try bonding primers for slick, resinous spots.
- Tint primer slightly toward your topcoat for truer color.
Choose Color & Sheen to Hide Grain and Knots
If you want to minimize the look of grain and knots, pick a mid- to dark-toned, low-sheen paint—matte or eggshell will diffuse light and make imperfections less noticeable.
You’ll lean on color chemistry to choose pigments that reduce contrast between knots and surrounding wood; cooler neutrals and muted tones help mask warm knot colors.
For sheen selection, avoid gloss and semi-gloss; they highlight texture.
Test samples on primed panels and view at different times of day.
Once you settle on tone and sheen, note that proper priming and sanding remain essential to guarantee the finish looks uniform.
Brush, Roll, or Spray: Pick the Right Method
You’ll choose between brush, roller, or sprayer based on the look and pace you want. Use a brush for tight detail around knots and trim. A roller is ideal for even coverage on flat planks. A sprayer is best when you need fast, uniform results.
I’ll walk you through the pros and cons of each so you can pick the right method.
Brush For Detail
When you’re working the nooks and grooves of knotty pine, choosing between brush, roll, or spray determines how much control and texture you’ll get.
Use a high-quality angled sash brush to push paint into grain and around knots; you’ll get precise edges and consistent sheen. Keep small jars for color mixing and label them, and follow paint storage best practices to preserve leftover tint.
Work section by section, brushing along the grain and smoothing drips immediately.
- Use a 2–2.5″ angled brush for control
- Keep a brush washer nearby to avoid buildup
- Touch up knots with a small round brush
Roll For Coverage
Looking for fast, even coverage on knotty pine? Use a high-quality nap roller to lay down consistent paint over boards and grooves. Roll with the grain and overlap each pass to avoid striping.
Rollers tame texture without losing wood character, and you can follow up with your brush-for-detail work at edges.
Keep color mixing uniform—stir combined cans together and test a small area before committing.
Clean rollers promptly and seal leftover paint tightly to maintain color and viscosity during paint storage.
With the right roller and disciplined technique, you’ll get efficient, attractive coverage without resorting to spraying.
Spray For Speed
If speed and a smooth, factory-like finish matter most, choose spraying—but don’t dismiss brush or roller for tighter control and easier touch-ups.
Spraying covers knots and grooves fast, giving you an even base for color psychology to sing through, and it pairs well with eco friendly paints when you ventilate properly.
You’ll need masking, a quality HVLP or airless sprayer, and practice on scrap pine.
Consider these quick tips:
- Test spray pattern and thinnest recommended viscosity first.
- Mask thoroughly to protect trim, floors, and fixtures.
- Keep a brush handy for edges and stubborn knots.
Get Smooth Roller Coverage Over Wood Grain
Because knotty pine has deep grain and raised knots, you’ll need a few specific roller techniques to get an even, smooth finish. You’ll choose rollers with a 3/8–1/2″ nap to push paint into grooves, practice light, overlapping passes, and keep a wet edge. Use brush selection for trim touch-ups and color matching near knots to avoid contrasts. Work from top down, reloading often to avoid drag. Check for missed grain with raking light and back-roll to level.
| Tool | Purpose |
|---|---|
| 3/8–1/2″ roller | Fill grain |
| Foam brush | Trim |
| Angled brush | Detail |
| Tray | Load paint |
| Rag | Wipe excess |
Spray Painting Knotty Pine: Setup & Technique
When you switch from rollers to a sprayer, set up carefully to avoid overspray and guarantee even penetration into the grain; that means masking thoroughly, ventilating the room, and choosing the right tip and pressure for thin, consistent coats.
You’ll work faster, but you must control distance and overlap to avoid runs and blotches. Test on scrap pine, thin coats, and sand lightly between passes.
Think about color psychology when selecting tones and how they affect light on knots, and plan furniture coordination so painted walls harmonize with existing pieces.
- Mask edges and cover floors
- Use 10–12″ overlap
- Keep 8–12″ distance
Paint Trim, Corners, and Inside Paneling Edges
After spraying or rolling the main panels, focus on trim, corners, and the inside edges of paneling to get crisp lines and full coverage where coatings tend to thin out.
Use a small angled brush for trims and an artist brush or foam tool for inside grooves so you control paint without overloading grain.
Feather edges into the panel surface for invisible blends.
Consider color mixing trials on scrap to match adjacent surfaces and plan furniture matching by sampling against sofas or cabinets.
Paint in consistent, overlapping strokes and remove drips immediately.
Inspect under good light and touch up any missed spots for a seamless finish.
Drying Times for Knotty Pine Paint & Avoiding Tackiness
Although knotty pine soaks up primer and paint unevenly, you’ll get predictable drying times if you control temperature, humidity, and coat thickness. Aim for 50–70°F and 40–60% humidity; cooler or damp air extends tackiness. Thin, even coats dry faster than heavy globs. Mind pigment-rich areas after color mixing—they can stay tacky longer.
- Wait to touch: press lightly in an inconspicuous spot.
- Ventilate: fans and open windows speed solvent off-gassing.
- Check storage: proper paint storage keeps binders stable and avoids odd tacky behavior.
If tackiness persists beyond 48–72 hours, reassess environment and coat weight.
When to Apply a Second Coat for Durability
Wait until the paint feels dry to the touch and follow the manufacturer’s recommended recoat time before you start a second coat.
Check the surface for tackiness, uneven coverage, or raised grain that needs sanding.
If the finish looks smooth and dry, you can apply the second coat for lasting durability.
Drying Time Before Recoat
When you’re ready to apply a second coat, make sure the first coat is fully dry to the touch and has cured enough to support another layer without lifting or streaking.
Drying time varies with temperature, humidity, and paint type; latex usually needs 2–4 hours, oil-based 24 hours. For knotty texture and potential resin bleed, wait longer near knots and wipe any exudate before recoating. Check edges and low spots for tackiness.
- Warm, dry conditions speed cure.
- High humidity or cool temps delay recoat.
- Thin, even coats reduce lifting and visible seams.
Surface Condition Check
Before you lay down a second coat, inspect the surface for uniform dryness, proper adhesion, and any raised grain or tacky spots that could trap brush marks or cause peeling. Run your hand gently to gauge surface texture; rough or raised areas need light sanding and dust removal.
Press a fingernail to test adhesion; paint that chips means more prep. Spot-tack any thin areas to match opacity before full recoating. Confirm lighting reveals streaks or missed knots.
Waiting until the substrate is stable and smooth maximizes paint durability, preventing future flaking and ensuring an even, long-lasting finish.
Sanding Between Coats for a Factory-Smooth Finish
Although the first coat may look fine, sanding between coats is the step that turns a good paint job into a factory-smooth finish. You’ll lightly sand to remove dust nibs, level brush marks, and harmonize paint texture so subsequent coats sit evenly.
Use fine-grit sandpaper (220) and a clean tack cloth. Focus on areas with raised knots or drips.
- Check for raised grain and feather edges gently.
- Keep sanding light to avoid removing color mixing work or weakening coverage.
- Wipe frequently to prevent grit embedding.
Finish coats will glide on smoother, giving you a professional, consistent surface.
Finish Options for High-Traffic Painted Knotty Pine
For high-traffic knotty pine, you’ll want to pick a durable sheen like satin or semi-gloss that hides wear and cleans easily.
Consider a tough clear topcoat—polyurethane or water-based polycrylic—over your paint for extra abrasion resistance.
I’ll explain pros and application tips so you can choose the best finish for your space.
Durable Sheen Choices
When you’re choosing a finish for high-traffic knotty pine, pick a sheen that balances durability with appearance—satin and semi-gloss are the most practical because they resist scuffs and clean easily.
While eggshell hides imperfections better, it won’t stand up as well to heavy wear. You’ll consider color mixing and paint durability when matching sheen to room use. Choose what fits traffic, cleaning habits, and look.
- Satin: durable, subtle sheen, easier to touch up.
- Semi-gloss: toughest for trim and busy areas, shows flaws more.
- Eggshell: softer look, best for low-traffic rooms.
Tough Clear Topcoats
Because knotty pine gets knocked around in busy rooms, you’ll want a tough clear topcoat to protect your paint and keep the finish looking fresh. Choose a durable polyurethane or water-based acrylic topcoat for abrasion resistance and easy maintenance.
Apply thin, even coats and sand lightly between layers for adhesion. A satin or semi-gloss finish hides scuffs better than flat, and clear coats preserve color choices influenced by color psychology while honoring wood grain.
Consider UV-resistant formulas to prevent fading and maintain historical significance in period homes. Test in an inconspicuous spot before committing to full application.
Common Painting Mistakes and How to Avoid Them
Although knotty pine can be charming, it also tempts a few predictable painting mistakes that will cost you time and a less-than-professional finish. You’ll want to plan around grain bleed, poor adhesion, and mismatched hues. Consider color psychology to pick tones that suit the room, and choose eco-friendly paints to reduce fumes and improve drying.
Prep thoroughly: sand, degloss, and prime with a stain-blocking product. Avoid rushing coats; dry times matter.
Common pitfalls include:
- Skipping stain-blocking primer
- Using low-quality rollers or brushes
- Choosing colors without testing samples
Troubleshooting: Brown Knots Reappearing After Paint
If brown knots are reappearing, you’ll want to identify the bleed‑through cause—usually resin or extractives seeping through the paint.
Once you know the source, stop further staining by sanding and cleaning the area.
Then apply a stain‑blocking shellac or oil‑based primer before repainting to prevent knots from coming back.
Identify Bleed-Through Causes
When brown knots reappear after you paint knotty pine, it’s usually because resin or tannins are bleeding through the finish; identifying the specific cause lets you choose the right fix. Check these common bleed through causes related to knotty grain so you can diagnose quickly:
- Fresh knots with sap pockets: resin can migrate through paint over time.
- Old tannin staining: dark streaks from wood extractives may leach up, especially on vertical boards.
- Incomplete sealing or damaged finish: gaps let oil-based compounds push through.
You’ll inspect knot sections, test with denatured alcohol, and note whether stains darken after moisture exposure.
Fix With Proper Priming
Once you’ve identified whether sap, tannins, or a compromised finish is causing the stain, the next step is to stop the bleed-through at the source by using the right primer. Choose a high-quality shellac- or oil-based stain-blocking primer; shellac works fastest, oil is more forgiving on porous wood grain.
Sand lightly to smooth knotty textures but don’t erase character. Apply primer over knots and surrounding grain, feathering to blend. Let it dry fully, then inspect for any shadowing. If brown shows through, add a second targeted coat before topcoating.
Proper priming prevents reappearance and guarantees an even final finish.
Fixing Peeling, Blistering, or Poor Adhesion
Although peeling, blistering, or poor adhesion can look discouraging, you can repair the wood and create a solid surface for paint to stick to. Sand away loose finish to expose raw wood, smooth knotty pine texture, and remove any resin bleed with a solvent-safe cleaner.
Patch blisters, let wood dry, then sand feathered edges.
- Scrape and sand damaged areas until firm substrate shows.
- Clean with mineral spirits where resin bleed occurred; allow to evaporate.
- Prime with a stain-blocking primer designed for wood.
Follow with proper primer and paint; test a small area before full repainting.
How Humidity & Temperature Affect Knotty Pine Painting
Because knotty pine absorbs and releases moisture readily, temperature and humidity have a big impact on how paint adheres and cures, so you should control both to avoid problems like blistering, poor adhesion, or long dry times.
You’ll monitor Humidity impact: high humidity slows drying, raises blister risk, and can trap moisture in knots; low humidity may cause rapid drying and poor flow.
Watch Temperature effects: cold slows curing and adhesion, hot speeds skinning and brush marks.
Aim for moderate, stable conditions (typically 50–70°F and 40–60% RH), ventilate, and delay painting after humidity or temperature extremes.
Painting Over Varnished or Stained Pine: Step-by-Step
Controlling temperature and humidity sets you up for success, but painting over varnished or stained knotty pine requires a few additional prep steps to guarantee adhesion and a smooth finish.
First, examine the surface; knotty pine history explains why older finishes may be brittle. Sand glossy varnish and feather edges, then clean dust and grease.
If knots bleed, apply a shellac-based primer. Use a primer suited to wood grain patterns to seal and hide stains.
Finally, topcoat with your chosen paint.
- Sand to dull sheen
- Prime knots and resin spots
- Apply two thin, even coats
Budget-Friendly Alternatives to Full Repainting
If you want to freshen knotty pine without the cost and labor of a full repaint, there are several effective, budget-friendly options you can try first. You can whitewash to soften grain while honoring historical significance and retain rustic charm tied to cultural symbolism. Try tinted poly, furniture wax, or accent panels to change mood without full paint. Patch knots and brighten with oil-based cleaners for a subtle lift.
| Option | Cost | Effect |
|---|---|---|
| Whitewash | Low | Softens grain |
| Tinted poly | Low-Med | Enhances tone |
| Wax | Low | Adds sheen |
| Panels | Med | Accent change |
Maintenance Tips to Keep Painted Knotty Pine Looking New
When you finish painting knotty pine, set a simple routine to keep the finish looking fresh. You’ll want gentle cleaning, timely touch-ups, and mindful environmental control to preserve color and sheen while honoring the wood’s historical context and any color psychology you used to set a mood.
- Dust weekly with a microfiber cloth and a soft brush attachment.
- Spot-clean scuffs with diluted dish soap; rinse and dry immediately.
- Inspect annually for chips; keep matched paint for quick repairs.
Stick to mild cleaners, avoid harsh abrasives, and maintain stable humidity to extend the life of your paint.
When to Call a Pro and What a Pro Will Do
Although you can handle most touch-ups yourself, call a pro if the pine has widespread discoloration, deep gouges, active mold, severe cupping, or if you want a major color change or finish upgrade.
A pro assesses structural issues, remediates mold safely, repairs or replaces damaged boards, and sands or strips finishes to prep for your chosen look.
They’ll advise on paint types, stains, and primers that respect the wood’s historical significance while applying techniques that prevent bleed-through and knot resin bleed.
They’ll also consult on color psychology to match mood and light, ensuring a durable, attractive result you’ll enjoy.
Quick Project Checklist: Prep, Prime, Paint, Finish
Before you pick up a brush, run through a short, focused checklist so the job goes smoothly. You’ll prep surfaces, pick primer, test color matching, and decide between budget options or premium products. Tackle knots with shellac, sand lightly, and clean dust before priming. Keep tools and drop cloths handy.
Run a quick prep checklist: repair, sand, shellac knots, prime with stain-blocker, test swatches, then apply two thin coats.
- Clear the room, repair holes, sand knots, and vacuum.
- Prime with stain-blocking primer; test color matching with small swatches.
- Paint two thin coats, inspect for bleed-through, and finish with protective topcoat.
Follow this order and you’ll save time, avoid stain bleed, and get lasting results.
Frequently Asked Questions
Will Priming Knotty Pine Hide Smell From Old Resin?
Priming knotty pine can’t fully hide old resin smell, but you’ll reduce odor masking by using a quality stain-blocking primer designed for resin sealing; it’ll seal fumes and improve topcoat adhesion for long-term control.
Can I Paint Knotty Pine Ceilings With the Same Method as Walls?
Yes, you can; you’ll follow similar steps but adjust technique for ceilings. You’ll sand and prime for knotty pine texture, use thinner coats to avoid drips, and choose finishes that offer wood grain enhancement and durability.
How Do Painted Knotty Pine Walls Affect Indoor Air Quality?
Like a fresh breeze through a cabin, painted knotty pine can lower airborne particles by sealing dust and tannins, but it can boost VOC emissions during and shortly after painting, so you’ll ventilate well and choose low-VOC paint.
Is It Necessary to Remove Nails and Fill Holes Before Priming?
Yes — you should remove nails and fill holes before priming. You’ll do sanding preparation afterward to smooth repairs, which helps paint adhere and shows true paint color choices; it prevents flaws and improves the final finish.
Can I Paint Over Knotty Pine With Wallpaper Adhesive Later?
“Measure twice, cut once.” You can paint over knotty pine and still do wallpaper application later, but surface preparation matters: seal knots, use proper primer, sand smooth, and choose adhesive compatible with your painted finish.
Conclusion
Painting knotty pine can totally transform your space without losing character. You’ll worry it won’t cover well, but with sanding, the right stain-blocking primer, and 2–3 thin coats of paint, those knots won’t bleed through. Follow the prep steps, use quality brushes/rollers, and let proper dry times do the work. If it still feels intimidating, hire a pro for just the prep or final coat—handy help can save time and guarantee smooth, lasting results.