How to Paint Latex Over Enamel (Step-by-Step)
You can paint latex over enamel if you prep properly: clean grease and chalk, sand or degloss glossy enamel with 220–320 grit, remove loose paint, and fill dents. Use a true bonding primer designed for enamel-to-latex adhesion, let it cure fully, then apply thin, even latex coats with a good brush or short-nap roller, maintaining a wet edge and proper temperature/humidity. Follow troubleshooting tips below to avoid peeling and achieve a durable finish.
Can You Paint Latex Over Enamel? Quick Answer

Can you paint latex over enamel? Yes — you can, but success hinges on preparation. You’ll clean, sand, and degloss the enamel so the latex adheres; otherwise adhesion fails and finish peels.
Use a bonding primer formulated for slick surfaces to bridge enamel and latex. Expect slight shifts in paint sheen and potential color consistency changes; test a small area first. Matte latex can look different over glossy enamel even with primer.
After priming, apply thin, even latex coats, allowing full drying between layers. When done right, you’ll get a durable, uniform finish without stripping the enamel.
When to Paint Over Enamel: and When to Strip It
Now that you know how to get latex to stick to enamel, decide whether painting over or stripping the old finish makes more sense. If the enamel is sound and you just need a new color, paint over after sanding and prime for good adhesion and color matching. Strip when there’s peeling, thick buildup, or incompatible layers that affect the new paint finish. Consider durability, time, and cost.
| Situation | Action | Reason |
|---|---|---|
| Sound enamel | Paint over | Easier, faster |
| Peeling | Strip | Prevent failure |
| Many layers | Strip | Avoid adhesion issues |
| Minor wear | Paint over | Good finish |
Identify the Enamel: Oil, Water‑Based, or Lacquer
How do you tell what kind of enamel you’re dealing with before you strip or paint over it? Start by inspecting sheen and smell, then test a hidden spot with solvent to distinguish oil, water‑based, or lacquer.
Recognizing the base helps you choose primers and consider color psychology when planning finish and coordinating eco friendly paints.
Knowing the finish base guides primer choice, color effects, and selecting eco-friendly paints for cohesive, lasting results.
- Smell: strong solvent hints lacquer or oil
- Water bead test: beads mean oil or lacquer; wets means water‑based
- Solvent wipe: lacquer dissolves with lacquer thinner
- Age: older finishes often oil
- Manufacturer label or sanding reveal: lacquer sands to powder
Record findings before proceeding.
Tools and Materials You’ll Actually Need
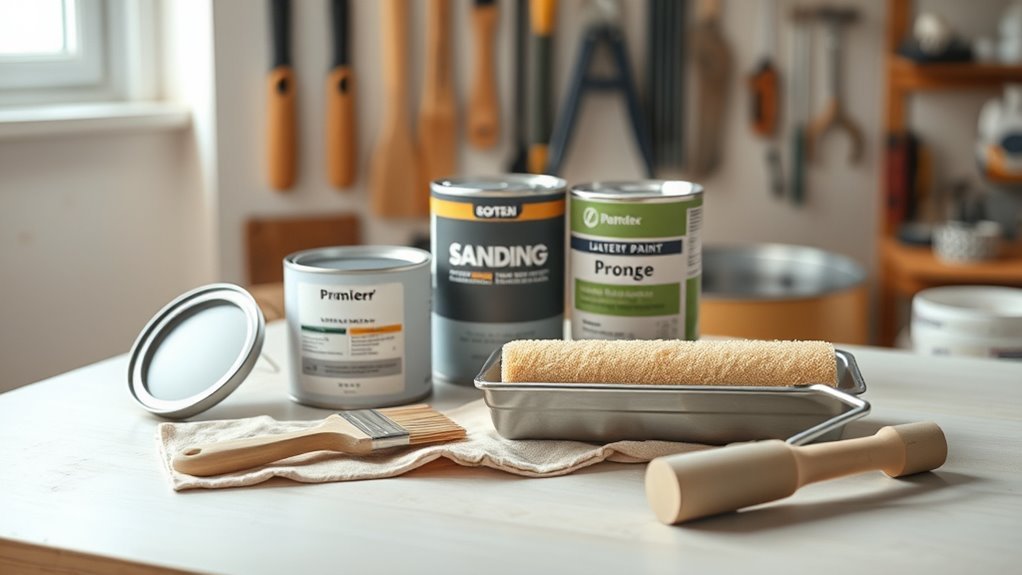
Before you start, gather the right tools and materials so you won’t be halfway through and discover you’re missing something essential. You’ll need fine‑grit sandpaper, a deglosser, tack cloths, quality latex primer, and a stain‑blocking topcoat.
Get angled brushes for trim, a short‑nap roller for smooth finishes, and a paint tray with liners. Keep painter’s tape, drop cloths, and a putty knife for repairs.
Include a small mixing stick and a bucket for color mixing and tint adjustments. Buy clean containers and labels for proper paint storage, plus a good set of replacement roller covers.
Safety: PPE and Ventilation Tips
You’ll want to wear proper PPE—an N95 or respirator rated for paint fumes, gloves, and eye protection—when sanding or priming enamel.
Keep windows and doors open and use a box or oscillating fan to create steady airflow away from your work area.
If you’re working in a confined space, run a HEPA-capable air scrubber or use an exhaust fan to remove fumes.
Proper Respiratory Protection
Because solvent fumes and fine paint mist can overwhelm the lungs even in short sessions, pick respirators and ventilation that match the job’s hazards. You’ll want gear that protects while preserving paint adhesion and avoiding contaminants that harm latex compatibility. Choose based on particle vs. vapor exposure, session length, and product labels.
- Use NIOSH-rated N95 or P100 for sanding and mist.
- Use organic vapor cartridges for solvent-based primers.
- Match cartridge threads to your mask model.
- Replace filters after heavy use or contamination.
- Fit-test every time; hair or glasses can break the seal.
Stay safe and don’t skip inspection.
Ventilation And Airflow
Good respiratory gear matters, but ventilation and managing airflow do most of the work keeping solvent fumes and paint mist from building up. You’ll open windows and doors opposite each other and use box or inline fans to push fresh air through the room.
Set up a fan to blow toward an exterior exit; position your work so overspray and odor travel away from you. When you’re doing color mixing or practicing brush techniques nearby, keep containers closed and mix outdoors if possible.
Change filters on HVAC intakes, block door gaps to avoid spreading fumes, and take regular fresh-air breaks.
Inspecting the Surface: Adhesion, Damage, and Contamination
How well the old enamel is sticking will determine everything that follows, so start by testing adhesion across the whole surface. Check surface texture and paint layering visually; note gloss, cracks, and flakes. Look for chips, bubbled areas, and contamination like grease or mildew. Clean and repair before priming.
Test adhesion across the surface; note gloss, cracks, flakes, contamination, and repair before priming.
Consider these inspection steps:
- Identify glossy vs. dull zones affecting adhesion
- Find soft or powdery spots that indicate failure
- Locate physical damage: chips, deep scratches
- Detect contamination: oils, smoke residue, mold
- Map areas needing sanding, filling, or degreasing
Document findings to plan appropriate prep and materials.
How to Test Adhesion on a Small Patch
Before you commit to the whole job, prepare a small area by cleaning, sanding lightly, and wiping away dust so the test mimics the real prep.
Apply a thin coat of latex (use primer if you’re planning one), let it fully cure, then score the patch with a crosshatch and press tape over it.
Peel the tape and inspect for lifting to judge how well the paint bonded and whether you need additional prep or primer.
Surface Prep Essentials
When you want to be sure latex will stick to existing enamel, do a small adhesion test first: sand a 1–2 inch square to scuff the gloss, clean the area with a degreaser, apply primer and a single coat of latex, then let it cure 24–48 hours to check for lifting, peeling, or fish-eyes.
Then follow these surface prep essentials before painting larger areas:
- Remove loose paint and flaking enamel.
- Degrease thoroughly; oils ruin adhesion.
- Sand edges smooth and wipe dust away.
- Choose primer compatible with both finishes.
- Consider color mixing and brush selection to match finish and application.
Performing The Patch
Because adhesion can vary across surfaces, you should start by scuffing a 1–2 inch square, degreasing it, applying a primer compatible with both enamel and latex, then brushing on a single coat of latex to let it cure for 24–48 hours.
After curing, try simple patch techniques: press a fingernail or use low-tack tape, then attempt a small cross hatch pull. If the latex lifts, sand back, clean, and switch primer or adjust Repair materials like bonding primers or adhesion promoters.
Document results and location so you can scale the successful method across the rest of the surface.
Assessing Paint Bond
After you’ve documented the results of your test patch and noted which primer and prep worked best, it’s time to assess the paint bond more formally on a small area. You’ll check adhesion, paint durability, and color matching before committing to the full job.
Use a discreet corner or behind trim, apply the chosen system, and let it cure per label instructions. Then perform these quick checks:
- Visual inspection for lifting or wrinkling
- Fingernail scrape to test adhesion
- Tape pull test for edge hold
- Flex test if substrate moves
- Wear rub for surface durability
If any fail, adjust prep or primer.
Cleaning Greasy, Grimy, or Chalky Enamel Properly
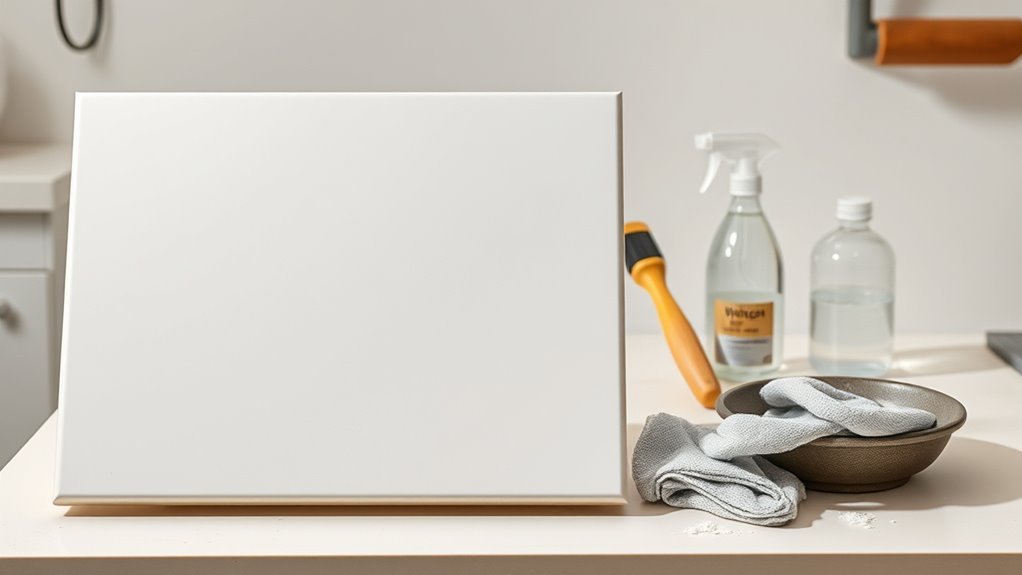
If your enamel is greasy, grimy, or chalky, you’ll need to strip surface contaminants before painting so the latex can bond and dry evenly. Start by washing with trisodium phosphate (TSP) or a milder TSP substitute, following label directions and wearing gloves. Rinse thoroughly and let dry.
For chalky surfaces, scrub with a stiff brush and a vinegar-water solution, then neutralize and rinse.
Remove wax or polish with mineral spirits sparingly, ventilating the area. After cleaning, sand lightly to degloss.
Remember color theory and paint mixing won’t fix adhesion issues—cleaning and proper prep will.
Removing Loose or Peeling Enamel Safely
Start by evaluating the surface to find areas where the enamel is loose, bubbled, or separating from the substrate.
Use a putty knife or scraper to remove flaking paint until you reach a firm edge, working gently to avoid damaging the underlying material.
Collect and dispose of paint chips safely and wipe the area clean before proceeding.
Assess Surface Condition
When you inspect the enamel, look for flaking, bubbling, or raised edges that indicate it’s loose—these areas won’t hold latex paint and must be removed before you proceed. You’ll evaluate surface texture and note any chips or gloss differences that affect adhesion and color matching. Check substrate firmness and signs of moisture or rust. Record problem zones to prioritize repairs and estimate materials.
- Tap for hollow sounds
- Run a fingernail over edges
- Note sheen contrast
- Photograph trouble spots
- Measure affected area
This assessment guides safe removal and guarantees a reliable, uniform finish.
Remove Flaking Paint
How do you safely get rid of flaking enamel without damaging the underlying surface? Scrape loose paint with a putty knife at a low angle, keeping pressure light to avoid gouging.
Sand feathered edges with fine-grit paper until smooth.
Clean dust with a tack cloth and degreaser; rinse and dry.
If lead is possible, follow safety protocols and use a HEPA vacuum, respirator, and disposable coverings.
Fill gaps with a compatible filler, sand again, then prime with a bonding primer.
Note how color mixing affects final hue—test small areas—and use proper brush techniques when applying primer and latex topcoat for even coverage.
Sanding Enamel So Primer Really Sticks
Before you prime, you’ll need to scuff the enamel so the primer can grip; light abrasion removes the glossy finish that repels new coatings. Use 220–320 grit sandpaper, an abrasive pad, and steady pressure.
Clean dust before priming. Keep your workspace organized—good color mixing habits and proper paint storage prevent contamination.
- Wear a dust mask and goggles.
- Sand with the grain or along contours.
- Replace paper when clogged.
- Wipe with a tack cloth before primer.
- Inspect for bare spots and repeat if needed.
Sanding creates a microscopic tooth so primer bonds firmly to enamel.
When to Use a Liquid Deglosser vs. Sanding
After you’ve scuffed enamel and cleared the dust, decide whether to sand further or use a liquid deglosser based on the piece’s condition and your tools.
If the finish is intact with light gloss, a deglosser saves time and preserves delicate details; it readies the surface while letting you focus on color options and finish choices.
If there’s peeling, heavy gloss, or repairs, sand to remove loose coating and feather edges for a stable bond. Use finer grit near edges to avoid gouges.
Either method aims to maximize paint durability; pick the approach that matches wear and your skill set.
Choosing a Bonding Primer (vs. Stain‑Blocking)
When you’re painting latex over enamel, pick a true bonding primer—not just a stain‑blocker—so the new paint grips glossy surfaces and resists peeling. You’ll want to understand primer comparison: bonding primers create mechanical and chemical adhesion; stain‑blockers only hide stains.
Consider color matching if you’re covering a dark enamel with fewer coats. Check label claims for “bonding” and read application limits.
If you’re covering dark enamel, plan color matching and verify the label says “bonding” and lists application limits.
- Designed substrate adhesion
- Dry time and recoat window
- Tinting options for color matching
- VOC and cleanup
- Manufacturer warranty for adhesion
Choose bonding primer when adhesion matters; reserve stain‑blockers for isolated stains.
Primer Selection for Different Substrates
Think about what the surface is made of before you pick a primer, since metal, wood, and glossy enamel all need different chemistry for proper adhesion.
If you’re covering oil-based enamel, choose a bonding primer formulated to stick to alkyds rather than a standard latex primer.
Also match primer porosity to the substrate—use a sealing, low-porosity primer on nonporous surfaces and a more absorbent primer on raw or porous materials.
Surface Material Compatibility
Which primer you pick depends on what you’re painting over; different substrates demand specific adhesion and stain-blocking properties. You’ll assess surface type, porosity, and existing finish before choosing primer, and remember basic color mixing principles to anticipate final hue shifts. Keep paint storage guidelines in mind so primers stay usable.
- Bare wood: stain-blocking, oil-based or shellac primer.
- Drywall: high-coverage latex primer.
- Metal: rust-inhibiting, etch primer.
- Glossy enamel: bonding primer or degloss and use adhesion primer.
- Masonry: alkali-resistant masonry primer.
Match primer to substrate for lasting adhesion and uniform latex topcoat.
Oil-Based Enamel Bonding
If you’re painting latex over old oil-based enamel, you’ll need a primer that actively bridges the two chemistries: an oil-based or bonding primer formulated for glossy finishes. Choose a primer rated for latex compatibility to guarantee topcoat adhesion and flexibility.
On metal, wood, or trim, pick a bonding formula labeled for enamel-to-latex applications. If you can’t remove all gloss with sanding or enamel removal solvents, the bonding primer will adhere where conventional primers won’t.
Apply per manufacturer directions, allowing full cure before latex. Test a small area first to confirm adhesion and finish uniformity before proceeding to the entire surface.
Porous Vs Nonporous Primers
Wondering which primer to use on different surfaces? You’ll choose between porous primer and nonporous primer based on the substrate.
Porous primer soaks into wood, drywall, or chalky surfaces to seal and improve adhesion.
Nonporous primer bonds to glossy enamel, metal, or laminate, providing a keyed surface.
Match primer type to material for durable latex over enamel results.
- Use porous primer on raw or friable surfaces
- Use nonporous primer on glossy, sealed substrates
- Sand glossy enamel before priming
- Clean surfaces thoroughly first
- Follow manufacturer recoat times and instructions
Spot‑Repair Dents, Chips, and Gouges Before Priming
Before you prime, take care of any dents, chips, or gouges so the finish will look smooth and last longer. Inspect surfaces, sand edges to feather, and clean dust.
Fill shallow imperfections with lightweight spackling; use a two-part epoxy or wood filler for deeper gouges. Once cured, sand flat and wipe clean.
Test small areas to confirm adhesion before full priming. If you’re planning decorative techniques later, blend repairs carefully so texture doesn’t show through.
Match filler and putty to the existing color for easier color matching under primer, reducing visible seams after topcoats.
Applying Bonding Primer for Full, Even Coverage
When you’re ready to prime, choose a high‑quality bonding primer and apply it evenly so the latex has a reliable surface to grip. You’ll prep, work methodically, and avoid overloading the brush or roller to guarantee full, even coverage. Focus on surface adhesion and uniform texture before painting.
When priming, use a quality bonding primer and apply evenly for reliable adhesion and a smooth, uniform surface
- Stir primer gently; don’t whip in air.
- Use a dense brush for edges and a short‑nap roller for flats.
- Work in sections, maintaining a wet edge.
- Check for missed spots and feather out thick areas.
- Clean tools immediately to prevent dried residue.
These steps give consistent adhesion and a smooth base.
How Long Primer Must Cure Before Painting
After the primer’s dry surface looks uniform and you’ve checked for missed spots, give it time to cure so the latex paint bonds properly. Primer curing isn’t just surface dryness; wait the manufacturer’s recommended drying time—usually 24–48 hours—to reach full adhesion. Cooler or humid conditions lengthen drying time, so you’ll want to wait longer. Lightly tack-test before painting; if it lifts, keep waiting. Patience prevents peeling and ensures smooth latex finish. Use the table below to feel calm about the wait.
| Day | Feeling | Result |
|---|---|---|
| 1 | anxious | surface dry |
| 2 | hopeful | tack-test |
| 3 | relieved | cured |
| 4 | confident | paint-ready |
Cut In and Roll Without Lap Marks
Once you’ve got a clean, cured primer and the room’s temperature is stable, cut in the edges with a steady hand and immediately roll the adjacent area while the cut-in paint is still wet to prevent lap marks. You’ll focus on seamless color blending between cut edge and rolled field.
Use smooth brush techniques for straight, thin beads of paint, work in manageable sections, and keep a wet edge.
Follow this checklist:
- Load brush lightly to avoid drips
- Cut tight lines with steady pressure
- Roll with even overlap and consistent speed
- Feather edges to blend
- Maintain wet edge until dry
Brush and Roll Techniques for a Smooth Finish
While you’re still keeping a wet edge from cutting in, use a high-quality nylon/polyester brush for trim and a 3/8″ nap roller for walls to get a smooth, even finish.
Work in small sections, loading the brush moderately and feathering edges with light strokes.
Roll in a “W” pattern, then fill without overworking to avoid texture. Keep consistent pressure and overlap each pass slightly to prevent lap marks.
If you mix color remix or touch up, keep sampled paint sealed and labeled for color mixing consistency; practice proper paint storage to preserve finish and reuse leftover batches.
Best Latex Paints and Sheens to Use Over Primer
Which latex paint and sheen you choose will shape the look, durability, and cleanability of your finished job, so pick with purpose. You’ll want paints that bond to primer, resist yellowing, and suit your room’s use. Consider color theory when selecting pigments and plan basic paint mixing only if tinting small batches. Good choices balance hide, flow, and maintenance.
Choose acrylic latex that bonds, resists yellowing, and pair sheens to room function for lasting results.
- High-quality acrylic latex for durability
- Satin for kitchens and moderate-traffic areas
- Semi-gloss for trim needing washability
- Eggshell for living spaces with low sheen
- Matte for hiding imperfections but easier to mark
Match sheen to function, not trend.
Match Finish and Durability to Cabinets, Trim, Furniture
When painting cabinets, trim, or furniture, match the sheen to the piece so wear and appearance stay consistent.
Make sure you prep properly—clean, sand, and prime—to help the latex stick to enamel.
Finally, pick a durable finish and plan for maintenance so high-touch areas hold up over time.
Match Sheen To Surface
Because different rooms and pieces get different wear, pick a sheen that matches the surface’s use and look. You’ll want sheen consistency across similar pieces and careful surface matching to avoid odd contrasts. Consider function and aesthetics: higher sheen hides wear and cleans easier; lower sheen hides imperfections.
- Cabinets: semi-gloss for durability and wipeability
- Trim: gloss or semi-gloss for crisp lines
- Furniture: satin for warmth and moderate wear resistance
- High-traffic doors: gloss for easy cleaning
- Decorative pieces: eggshell or matte for subtlety
Choose the highest sheen the surface tolerates without highlighting flaws.
Prep For Adhesion
Before you paint, get the surface ready so the latex will actually stick and the finish will hold up to the wear the piece sees. Sand glossy enamel lightly, clean all dust and grease, and fill chips so adhesion isn’t compromised.
Use a quality deglosser or bond-promoting primer suited to cabinets, trim, or furniture.
Match the sheen you want for function and style—flat for low-traffic, semi-gloss for easy cleaning.
Consider color theory when choosing hue and how light affects perceived finish.
If tinting primer, practice paint mixing to guarantee consistent batches for a uniform, professional result.
Durability And Maintenance
After you’ve prepped and chosen a primer and sheen, think about how the finished surface will stand up to daily use. You’ll match finish and durability to cabinets, trim, or furniture by considering traffic, cleaning, and desired look.
Use color theory when selecting hues so reflections and wear read consistently. If you’re doing custom tones, plan paint mixing for batch consistency.
Maintain surfaces with gentle cleaners and touch-up kits. Consider reinstalling hardware or adding protective coatings for high-use areas.
- Choose semi-gloss for trim, satin for cabinets
- Use microfiller for dents
- Test a wear patch
- Keep extra mixed paint
- Clean with mild detergent
How Many Latex Coats You Need and When to Stop
When you’re switching from enamel to latex, plan on at least two thin, even coats to achieve full coverage and a uniform finish. You’ll assess coverage after the second coat: if color matching is perfect and no brush marks show, stop.
Add a third coat only when needed for depth or to hide stubborn stains. Let each coat dry per paint instructions before adding another.
Avoid overcoating — excess layers can sag or obscure detail. Aim for consistent, thin applications that enhance texture smoothing and finish uniformity.
Trust visual inspection and touch to determine when you’re done.
Sanding Between Coats for Pro Results
If your coats look even but still feel slightly rough or show minor brush lines, sanding between coats will clean up the surface and help the next layer bond.
You’ll lightly scuff dried latex with fine-grit sandpaper (220–320) to remove imperfections and promote adhesion without cutting through to enamel.
Wipe dust with a tack cloth, check edges, and avoid over-sanding.
Keep any color mixing records and proper paint storage to match touch-ups later.
Follow this quick checklist before applying the next coat:
- Use 220–320 grit sandpaper
- Sand with light pressure
- Remove dust thoroughly
- Inspect edges and corners
- Label mixed colors and store paint
Drying, Temperature, and Humidity Tips for Adhesion
You’ll get the best adhesion when you paint in a steady, moderate temperature—typically between 50°F and 85°F.
Allow each coat to dry the manufacturer’s recommended time before recoating, and don’t rush the process.
Keep humidity low (ideally under 50%) or use fans/dehumidifiers to prevent slow drying and poor bonding.
Ideal Temperature Range
Because paint chemistry reacts to air conditions, keeping the work area within the right temperature range is essential for adhesion and drying times. You’ll want consistent, moderate warmth so latex bonds to enamel without blistering or extended tackiness.
Think about color theory and paint mixing—temperature can subtly shift hue and viscosity, so keep conditions steady for predictable results.
Aim for:
- Work between 50°F and 85°F (10°C–29°C)
- Avoid rapid swings above or below that range
- Keep drafts and direct sunlight off painted surfaces
- Use heaters or fans cautiously to maintain steady temps
- Monitor with a reliable thermometer
Optimal Drying Time
Drying time depends on three variables—temperature, humidity, and film thickness—so plan your schedule around the slowest of the three to guarantee proper adhesion. You’ll wait longer for thicker coats; apply thin, even layers using proper brush techniques and avoid recoat until surface cure. Keep temperature steady within the ideal range and note that color mixing can slightly alter drying speed. Check tackiness before sanding or recoating.
| Condition | Thin Coat | Thick Coat |
|---|---|---|
| Fast | 1–2 hrs | 4–6 hrs |
| Slow | 3–6 hrs | 8–12 hrs |
Manage Humidity Levels
If humidity’s high, latex paint will take longer to set and it’s more likely to trap moisture under the film, so control moisture levels before you start. You should monitor temperature and relative humidity to guarantee proper adhesion when painting over enamel.
Use climate control to keep conditions stable, ventilate the room, and avoid painting during storms or extreme humidity. Check dehumidifier maintenance before work to confirm capacity.
Follow these quick steps:
- Aim for 40–50% relative humidity
- Keep temperature between 50–85°F (10–29°C)
- Run fans for airflow
- Service dehumidifier filters
- Delay recoating until fully dry
Protect High‑Wear Latex‑Over‑Enamel Areas With Topcoats
When you expect heavy traffic or frequent cleaning, add a clear topcoat over the latex to shield the surface and extend its life. Choose a durable water‑based polyurethane or acrylic topcoat compatible with latex paint; satin or semi‑gloss finish resists scuffs and cleans easily.
Test a small area to confirm adhesion and color matching, especially over decorative accents or trim. Apply thin, even coats with a high‑quality synthetic brush or foam roller, sanding lightly between coats with fine grit.
Allow full cure time before heavy use. Recoat as needed when wear appears to maintain protection and appearance.
Troubleshooting: Peeling, Bubbling, Brush Marks
If your new latex coat starts peeling, bubbling, or shows brush marks, you’ll want to address each issue quickly to avoid bigger repairs. I’ll show you simple peel-prevention tips, how to pop and repair paint bubbles, and techniques to eliminate brush marks for a smooth finish.
Follow these steps and you’ll save time and get a professional-looking result.
Peel Prevention Tips
Because adhesion problems usually show up as peeling, bubbling, or visible brush marks, you’ll want to diagnose the specific cause before repainting. Prevent peeling by prepping and controlling variables: clean, degloss, sand, prime, and follow drying times. Also mind color mixing and paint storage to preserve consistency and adhesion.
- Clean surfaces thoroughly; remove oils and cleaners.
- Sand glossy enamel to dull the surface for better bite.
- Use a quality bonding primer compatible with both finishes.
- Keep temperature and humidity within paint label recommendations.
- Stir thoroughly; avoid overthinning and respect shelf-life in paint storage.
Fixing Paint Bubbles
Peeling often starts as small bubbles, so spotting and fixing them early saves time and prevents larger repairs. When you find bubbles, score the film with a utility knife, lift and remove loose paint, and sand edges smooth.
Clean the area with mineral spirits, let it dry, and apply a quality primer made for enamel-to-latex conversions. Match any visible areas by careful color mixing so touch-ups blend.
Use appropriate brush techniques for the primer and final coat—short, even strokes and light pressure—to avoid reintroducing trapped air. Allow full cure between coats and monitor for recurrence.
Eliminating Brush Marks
When you see brush marks in a freshly painted latex-over-enamel surface, don’t panic—most are fixable with the right technique and timing. You’ll need patience and steady hands: sand lightly with fine grit, remove dust, then feather at edges so the repair blends.
Match sheen and use color matching if touch-ups expose underlying tones. Apply thin coats, keeping a wet edge to avoid lap marks. Consider a high-quality synthetic brush or short-nap roller for final finish.
- Sand smooth with 220 grit
- Clean surface thoroughly
- Feather edges before repainting
- Use thin, even coats
- Finish with paint blending for seamless look
Touching Up Chips Later Without Redoing the Job
After the main coat cures, you can fix small chips without stripping or repainting the whole surface by cleaning the spot, feathering the edges, and applying a matching latex touch-up.
Scrub gently, let dry, then scuff the chip perimeter with fine sandpaper so the patch blends. Use proper color mixing to match sheen and tint; test on a hidden area.
Pick a small, high-quality brush—angled or round depending on chip shape—for precise application. Apply thin layers, letting each dry, then lightly sand between coats.
Finish by blending edges and removing dust so the repair disappears into the surrounding finish.
Fast Proven Shortcuts That Save Time Without Hurting Quality
Although it feels counterintuitive, small shortcuts can shave hours off a latex-over-enamel job without compromising finish quality if you stick to proven techniques and good materials. You’ll work smarter, not harder: prep efficiently, choose quality primers compatible with eco friendly paints, and use tools that cut labor.
For delicate projects like historical restorations, prioritize reversible steps and test spots.
- Use a tack cloth instead of repeated sanding.
- Roll small areas with a short-nap roller for speed.
- Thin coats slightly for faster drying.
- Mask precisely with painter’s tape for fewer touchups.
- Work in logical, continuous sections.
When to Hire a Pro: Lead, Complex Surfaces, Persistent Failure
If you suspect lead paint, face unusually shaped or heavily damaged surfaces, or keep hitting dead ends despite careful prep, call a professional—these situations raise safety, legal, and quality concerns that DIY fixes can’t reliably resolve.
You should hire pros when lead hazards are possible; certified abatement crews test, contain, and remove safely. Also bring in specialists for complex surfaces like ornate trim, curved cabinetry, or water-damaged walls where adhesion and finish demand advanced techniques.
If repeated sanding, priming, or touch-ups fail, a pro will diagnose root causes and deliver durable results, saving time, money, and future headaches.
Frequently Asked Questions
Will Latex Paint Yellow Over Time on Dark Enamel Colors?
Yes — latex paint can yellow over time on dark enamel colors, especially if Latex durability is poor and Enamel aging releases residues; you should prep thoroughly, use high-quality latex with UV inhibitors, and apply a proper primer.
Can I Use Tinted Primer From a Paint Store for Color Matching?
Yes — you can use tinted primer from a paint store for color matching; it helps bridge stubborn enamel, reduces coats, and gives truer final color. Ask for a custom tint matched to your target shade.
How Soon Can Cabinets Be Reinstalled After Painting?
You can reinstall cabinets once paint reaches full cure, typically 7–14 days; drying time may feel shorter, but cabinet durability depends on full cure, so wait those days to avoid nicks, hinges damage, or finish failure.
Are Oil-Based Enamel Caulks Compatible With Latex Topcoats?
Yes — but you’ve got to be careful: I once painted over a stubborn patch and learned the hard way. Oil based compatibility is limited, so test for caulk adhesion; prime or use a compatible latex-friendly caulk first.
Can I Mix Leftover Enamel and Latex Paints in an Emergency?
No, you shouldn’t mix leftover enamel and latex paints; they’re incompatible and will separate or fail. In emergencies, use them separately, thin with appropriate solvents, or buy a small compatible can—those are safer emergency solutions for paint compatibility.
Conclusion
You can paint latex over enamel, but prep’s key: about 80% of paint failures come from poor surface prep, so sanding and proper priming aren’t optional. If the enamel’s glossy, scuff it, clean it, and use a bonding primer; if it’s failing or lead‑based, strip or call a pro. Follow safety precautions, patch chips properly, and expect faster, durable results when you don’t skip steps—save time with smart shortcuts, not shortcuts that sacrifice adherence.