How to Paint Living Room Wall Like a Pro
You’ll prep thoroughly: move furniture, clean and sand walls, patch holes, and prime patched or stained areas. Protect floors and fixtures, remove outlet covers, and tape trim for crisp lines. Cut in with a steady hand, then roll in overlapping W-patterns with the right nap for your texture. Apply two coats as needed, sand lightly between coats, and allow full cure before heavy use. Keep going to learn tips on color, sheen, and fixes.
Quick Step-By-Step Painting Workflow
Before you pick up a brush, prep the room: move furniture, lay drop cloths, remove outlet covers, and tape trim.
Start by cleaning walls and patching holes, then sand rough spots.
Prime where needed and mix paint thoroughly, testing a small patch to check color psychology effects in your light.
Cut edges with a steady hand, then roll in overlapping W-patterns for even coverage.
Let coats dry per label, sanding lightly between if necessary.
Label cans with date and room, seal lids tightly, and organize paint storage in a cool, dry spot for future touch-ups.
Why Paint Finish Matters for Living Rooms
Choose a paint finish carefully because its sheen changes how light reflects in your living room and can make colors pop or look flat.
You’ll also want a finish that stands up to wear and is easy to clean, especially on high-traffic walls.
Finally, remember that glossier finishes highlight texture and imperfections, while flatter sheens hide them.
Sheen Impact On Light
Sheen affects how light behaves in your living room, so picking the right finish can change the room’s brightness, perceived size, and mood. You’ll notice sheen impact immediately: flatter paints soften light reflection for a cozy, muted feel, while glossier sheens bounce light, making spaces feel brighter and more open.
Consider how windows and fixtures interact with finish before choosing.
- Matte: diffuses light reflection, hides imperfections.
- Eggshell: subtle sheen, balanced warmth and light.
- Satin: gentle glow, easy to clean.
- Semi-gloss: strong reflection, highlights architectural details.
Durability And Maintenance
How a finish reflects light also affects how it wears and how much upkeep you’ll need; the same sheen that brightens a room can make scuffs, fingerprints, and washability more or less visible. Choose satin or semi-gloss where traffic and cleaning matter, since they resist stains and let you wipe without stripping color.
Flat hides flaws but needs touch-ups sooner. Consider how wall texture interacts with sheen: rough surfaces hold more dirt and may need gentler cleaning.
Always ventilate during painting to reduce paint fumes, and wait recommended cure times before heavy use. Proper finish choice cuts maintenance and extends longevity.
Texture And Imperfections
Because wall texture and surface flaws change how paint looks up close and from across the room, picking the right finish matters for both appearance and upkeep. You’ll choose finishes based on how smooth or textured your walls are and how much imperfection concealment you need.
Flat paints hide bumps and minor damage but scuff easily; eggshell balances concealment and washability; satin cleans well and highlights texture; semi-gloss shows every flaw but resists wear. Match finish to wall texture and room use so you won’t regret touch-ups later.
- Assess wall texture.
- Prioritize concealment.
- Test small patches.
- Plan maintenance.
Pick a Durable Sheen for High-Traffic Walls
For high-traffic living room walls, you’ll want a sheen that balances looks with toughness. Pick a finish like satin or semi-gloss for easier cleaning and better resistance to scuffs.
That way you’ll get durable performance without sacrificing the room’s style.
Choose The Right Sheen
When you’re picking paint for busy areas, choose a durable sheen that stands up to scuffs and frequent cleaning. Satin and semi-gloss are typically best for high-traffic walls because they resist moisture and wipe clean without losing finish.
You’ll balance appearance and practicality: satin hides imperfections better, semi-gloss emphasizes trim and is more reflective. Consider color psychology when choosing sheen—glossier finishes can feel more energetic, flatter sheens more calming.
Check paint branding for recommended uses and warranty. Test a swatch to see light reflection.
- Satin: forgiving, subtle sheen
- Semi-gloss: durable, highlights trim
- Eggshell: soft, moderate traffic
- Flat: low sheen, low visibility
Cleanability And Durability
Picking the right sheen is only part of the story; you also need paint that stands up to real life. Choose washable, scrubbable formulas for hallways and family zones so stains wipe away without dulling finish.
Matte can hide flaws, but eggshell or satin offers better cleanability while still supporting your room’s mood—color psychology matters when balancing warmth and brightness.
Look for high-quality acrylics labeled abrasion-resistant. If you prefer sustainable options, eco-friendly paints now match durability of conventional brands.
Test a small panel, scrub gently, and evaluate how color, sheen, and longevity meet your everyday needs.
Select Paint Color Based on Light, Mood, and Room Size
Although natural and artificial light will change how paint reads throughout the day, you can choose a color that enhances your room’s mood and perceived size by evaluating light direction, intensity, and the emotional effect you want to create.
Consider light direction, intensity, and mood to choose paint that enhances your room’s feeling and perceived size.
Use color psychology to pick tones that calm, energize, or neutralize, and consider paint branding for consistent quality and sheen. Cooler hues open small rooms; warm tones cozy large spaces. Balance saturation with natural light. Test near windows and lamps before committing.
- Note light direction at different times.
- Match mood to undertone.
- Use lighter shades to expand space.
- Keep finish consistent.
Use Paint Samples to Avoid Color Surprises
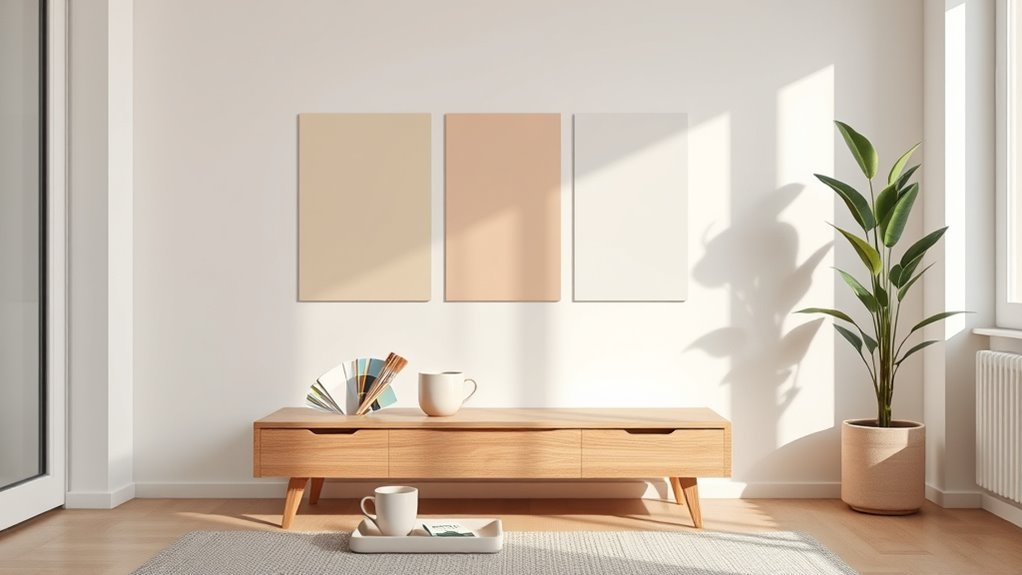
Before you commit, test paint samples on your walls and check them in morning, afternoon, and artificial light so you see how color shifts.
Use large swatches or poster-board samples to judge how the hue interacts with furniture and room scale.
Wait for the samples to fully dry and compare the dry color to the wet finish before making a final choice.
Test Multiple Lighting Conditions
Because paint looks different under various lights, test several samples on your walls before committing to a color. You’ll see lighting effects shift tones from dawn to dusk, and artificial light can alter warmth or coolness.
Consider how color psychology affects mood in different rooms, then observe samples at morning, midday, evening, and under lamps. Make notes and photos for comparison so you won’t be surprised later.
- Tape small swatches in multiple spots.
- View samples at different times of day.
- Turn on all artificial lights and note shifts.
- Photograph under each condition for accurate review.
Try Large Paint Swatches
When you want to see how a color will truly read in your room, paint large swatches—at least a foot square—directly on the wall so you can judge undertones, texture, and how light plays across the finish.
Place samples near corners, windows, and where key furniture placement will be so you see real interactions. Walk the room at different times, notice emotional effects—color psychology matters for mood and perceived space.
Use several swatches side by side to compare depths and contrasts. Leave them up for a few days to live with the hues before committing to the final choice.
Evaluate Dry Color Shift
Seeing large swatches up close is a smart move, but don’t assume wet paint shows the final hue — the color will shift as it dries. You should test samples in different light, wait 24–48 hours, and view from various angles to judge true tone.
Note how finish and sheen affect perception, and compare against existing trim to assess color contrast. Also consider how paint branding may mix pigments differently; stick to the same brand for touchups.
- Paint samples in 2–3 spots
- Observe at morning/evening light
- Compare with trim and furniture
- Record brand and formula used
Calculate How Much Paint You Need
Before you buy cans, figure out exactly how much paint you’ll need so you don’t waste money or run short mid-job. Measure wall width and height, subtract windows and doors, then multiply square footage by coat count. Check the paint can’s coverage (usually 350–400 sq ft per gallon) and allow a 10–15% buffer for touch-ups and texture.
If you’re trying a bold hue informed by color psychology, test swatches to confirm coverage needs. Choose eco-friendly paints when possible; their different pigmentation can affect coverage, so verify manufacturer specs before finalizing quantities.
Tools Pros Always Have on Hand
You’ll want a compact painter’s toolbox stocked with brushes, rollers, drop cloths, putty knives, and a quality painter’s tape.
Bring precision measurement tools too — a tape measure, level, and a stud finder — so your cuts and trim lines are exact.
Having these on hand makes the job faster and your finish more professional.
Essential Painter’s Toolbox
While a fresh can of paint gets the credit, a pro’s toolbox is what guarantees clean lines, even coverage, and a faster job. You’ll choose brushes, rollers, and tapes that suit texture and finish, and consider color psychology when selecting shades and eco friendly paints for healthier air. Keep tools organized for speed and less waste.
- Quality angled brush, nylon or natural depending on paint.
- Roller frames and nap lengths for smooth, textured walls.
- Painter’s tape, drop cloths, and reusable trays.
- Putty knife, sanding block, and a sturdy ladder.
Precision Measurement Tools
Although getting the paint and brushes right matters, precise measurements are what keep lines straight, furniture protected, and trim balanced. Pros rely on a few simple tools—tape measure, laser distance meter, level, and angle finder—to take the guesswork out of layout and guarantee every coat lands where it should.
You’ll use a tape measure for straight runs, a laser for quick room dimensions, a level to prevent crooked stripes or gallery walls, and an angle finder for awkward molding.
Accurate measuring supports color psychology choices by ensuring consistent lighting and placement, and helps you counter misleading paint marketing claims.
Affordable Alternatives to Professional Tools
If you don’t want to splurge on pro-grade gear, plenty of budget-friendly tools will still give clean, even results—think foam rollers, angled sash brushes, and an inexpensive trim brush set for corners.
You’ll use budget hacks like multipurpose trays and reusable painter’s tape to stretch supplies. Choose rollers and brushes that suit your paint finish, remembering color psychology when sampling swatches under different lights.
You’ll save by buying single good rollers and cleaning them well. Consider improvised edgers from cardboard or a sponge for tight spots; they’re cheap and effective.
- Foam roller kit
- Angled sash brush
- Reusable tape
- Cardboard edger
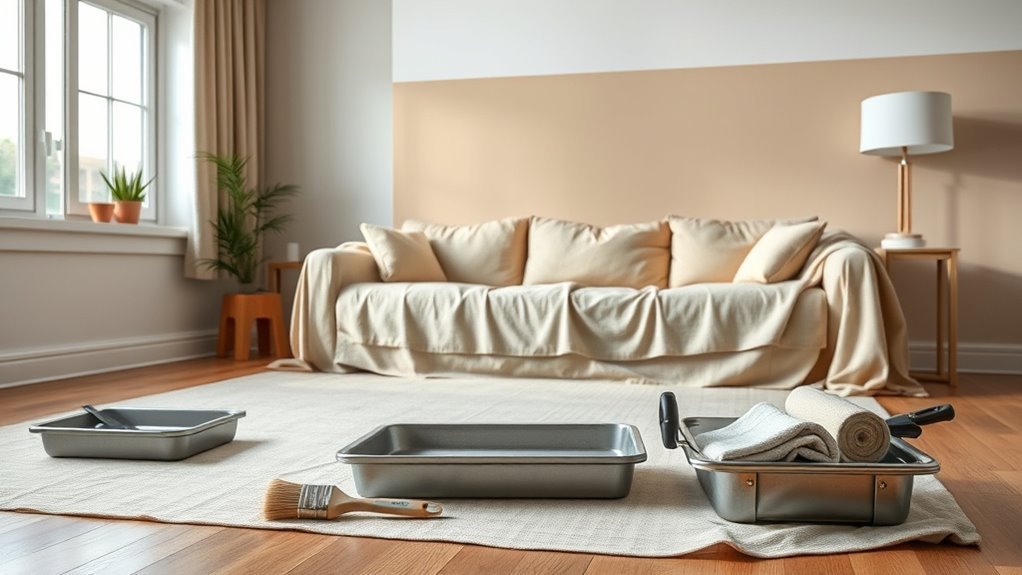
Protect Floors, Furniture, and Fixtures
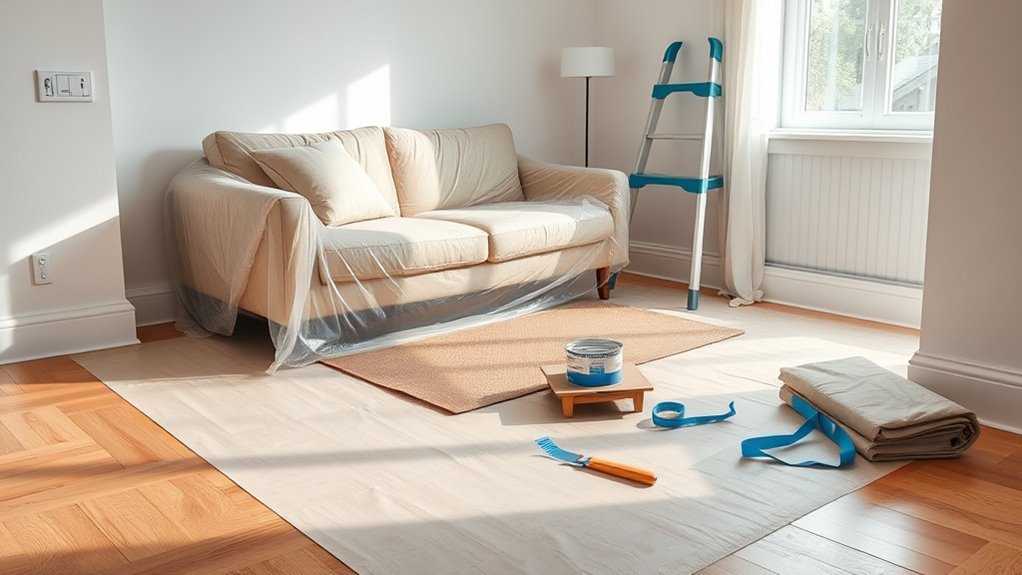
Before you start cutting in or rolling, clear the room and cover everything you want to keep paint-free. Lay heavy-duty drop cloths for floor protection and tape seams so dust and spills can’t sneak through. Move small furniture to the center and stack on protected boards; drape larger pieces with breathable cloths. For fixture safeguarding, wrap light fixtures, curtain rods, and vents with plastic and secure with painter’s tape. Keep a small toolbox and tack cloth handy for quick fixes.
| Item | Protection |
|---|---|
| Floors | Drop cloths + tape |
| Furniture | Drapes + boards |
| Fixtures | Plastic + tape |
Remove Outlet Plates, Switch Covers, and Hardware Safely
Once the room’s covered and protected, go around the walls and remove outlet plates, switch covers, and any other exposed hardware so you don’t get paint on them. Turn off power at the breaker, test switches and outlets, then unscrew plates carefully. Label screws or keep them with their plate so reassembly’s easy.
For metal fixtures, loosen mounting screws; for decorative hardware, follow manufacturer notes.
- Use a voltage tester before touching outlets.
- Store plates in labeled zip bags.
- Tape exposed wires if needed.
- Photograph placements for reference during reinstallation.
Outlet removal and switch covers handled safely speed your paint work.
Fix Nail Holes and Minor Wall Dents
Before you paint, assess the damage carefully so you know which holes and dents need attention.
For small nail holes and shallow dings, use a lightweight spackling compound applied with a putty knife. Let the filler dry, sand smooth, and wipe away dust before priming and painting.
Assess Damage Carefully
How damaged is the wall around your nails and dents? You’ll inspect closely, noting surrounding wall texture and how nearby color schemes may highlight imperfections. Run your hand to feel edges, shine a flashlight to catch shadows, and mark spots to prioritize.
- Check depth: shallow vs. deep.
- Examine texture: smooth, orange peel, or popcorn.
- Assess paint: intact, cracked, or flaking.
- Map clusters: isolated holes vs. concentrated damage.
Decide whether repairs will be visible after painting and whether texture blending or spot priming will be necessary before you proceed.
Use Proper Filler
Want the repair to disappear under fresh paint? Use proper filler for nail holes and minor dents so your wall reads smooth and professional. Choose a lightweight spackling compound for small defects; apply with a putty knife, level it, then sand when dry.
For deeper gouges, layer filler and sand between coats. Match primer type to your chosen eco-friendly paints to guarantee adhesion and true color payoff—remember, color psychology affects room mood, so flawless surfaces keep hues consistent.
Clean dust before priming, and inspect under different light angles to catch hidden imperfections.
Repair Drywall Damage Before Painting
If your drywall has dents, holes, or cracked tape, you’ll want to fix those spots so the paint goes on smoothly and lasts. Start with a quick damage assessment: clean loose debris, probe edges, and mark areas needing drywall repair.
Use lightweight spackle for small dents, patching compound for larger holes, and fiberglass tape over seams. Sand smooth after drying, wipe dust, and prime patched areas to guarantee uniform absorption.
Finish by inspecting for imperfections and re-sanding as needed. Follow these steps to avoid visible flaws once painted.
- Assess damage carefully
- Choose appropriate filler
- Sand and clean thoroughly
- Prime patched areas
When to Call a Pro for Structural or Moisture Issues
If you see cracks, sagging, or any visible structural damage, don’t ignore it—call a professional to assess the problem before you paint.
Likewise, if you have persistent moisture, mold, or recurring stains, get a pro to find and fix the source.
Addressing these issues first will protect your new paint job and keep your home safe.
Visible Structural Damage
When you spot cracks wider than a hairline, bowed walls, sagging ceiling sections, or persistent damp patches, don’t ignore them—these signs can point to serious structural or moisture problems that need a pro’s assessment.
You should halt painting and call a licensed contractor to evaluate structural integrity and recommend wall reinforcement or repairs. A pro will determine load issues, compromised studs, or hidden rot and advise temporary shoring if needed.
Don’t attempt major fixes yourself; improper repairs can worsen damage.
- Large diagonal or stair-step cracks
- Bulging or bowed drywall
- Localized sagging ceilings
- Exposed or rotten framing
Persistent Moisture Problems
Because persistent moisture can quietly ruin paint, drywall, and framing, don’t ignore recurring damp spots, peeling paint, or mildew smells—you should call a pro when you see them. You’ll want expert help if moisture intrusion persists after basic fixes, if stains reappear, or if Ventilation issues fuel mold. A contractor can locate leaks, assess insulation and structural damage, and recommend waterproofing or HVAC changes. Don’t wait—hidden rot and health risks worsen over time.
| Sign | Likely Cause | Pro Action |
|---|---|---|
| Recurrent stain | Leak/Moisture intrusion | Leak tracing |
| Mold smell | Ventilation issues | Airflow/HVAC fix |
| Soft drywall | Rot | Replace/frame |
Clean Walls for Optimal Paint Adhesion
Want your paint to stick and look its best? You’ll prep by removing dust, grease, and cobwebs so paint bonds across wall textures. Open windows or use fans to clear paint fumes during cleaning. Start with a dry brush, then a mild detergent solution; rinse and let walls fully dry.
Treat stains or mildew with appropriate cleaners before priming.
- Dust and vacuum corners and baseboards.
- Degrease kitchen-adjacent walls with trisodium phosphate substitute.
- Remove mildew with diluted bleach, rinse well.
- Wipe with clean water, allow 24 hours to dry before priming.
Sand for Smooth, Camera-Ready Surfaces
As you prep for painting, sand the walls to knock down gloss, smooth imperfections, and create a slightly toothy surface that helps primer and paint adhere evenly. Use 120–150 grit sandpaper for general smoothing; switch to finer grit for delicate spots. Work with a sanding block or pole sander, keeping strokes even and overlapping.
Address uneven wall texture by feathering edges of patched areas until consistent. Vacuum and tack cloth thoroughly to remove dust; residual particles or paint chemicals from cleaners can interfere with finish.
Wear a mask and protect floors; inspect under good light so the surface looks camera-ready before you move on.
When to Prime and Which Primer to Use
You should prime if your walls are bare drywall, patched, stained, or you’re switching from dark to light paint.
Choose a primer type—latex for general use, oil or shellac for tough stains/odor blocking, and bonding primers for glossy or tricky surfaces.
Prep by cleaning, sanding gloss away, and repairing holes so the primer can adhere properly.
When To Prime
Although you might be enthusiastic to roll on that first coat, primer matters more than most people think—prime whenever the surface is bare, stained, patched, or has a big change in color or sheen. You’ll get truer Color psychology effects and easier furniture coordination when the base is consistent.
Prime to seal odors, block stains, and smooth patched drywall; don’t skip it to save time. Choose primer based on substrate and finish goals (details in the next section). When in doubt, prime.
- Bare drywall or plaster
- Fresh patches or repairs
- Dark-to-light color shifts
- Stained or smoky walls
Primer Types Explained
When deciding which primer to use, match the product to the surface and the problem you’re solving—stain blocking for nicotine or water marks, bonding primers for glossy surfaces, and high-build primers for heavily patched areas.
You’ll prime when stains bleed, substrate varies, or you need uniform absorption. Use shellac or oil-based primers for tough stains, latex for general walls, and specialty bonding primers for slick finishes.
Consider how primer tint influences color psychology; a warm-toned primer can deepen a final hue, a white keeps it bright. Pick primer color and finish with furniture coordination in mind to preview the room’s final feel.
Surface Preparation Tips
If the wall shows stains, patching, or uneven textures, prime those areas before painting to guarantee adhesion and an even finish. You’ll decide when to prime based on surface porosity, previous sheen, and stain severity. Use stain-blocking primer for nicotine or water marks, bonding primer for slick surfaces, and high-build primer to level patched spots.
Consider how color psychology and paint symbolism influence primer choice when moving from dark to light hues to avoid multiple coats.
- Test a small area first.
- Match primer type to substrate.
- Sand between coats for smoothness.
- Let primer cure fully.
Spot-Treat Stains and Prevent Bleed-Through
Before you roll on a full coat, inspect the wall and treat any stains so they don’t bleed through fresh paint. You’ll handle stain removal by cleaning grease, smoke, or water marks with appropriate cleaners, rinsing, and drying thoroughly.
For persistent tannin or marker spots, apply a stain-blocking primer spot coat. Feather the primer beyond the stained area so new topcoat blends. Use thin, even layers and let each dry fully to guarantee bleed through prevention.
Check under good light, repeat priming if discoloration shows, then proceed with your full paint coat confident the blemishes won’t reappear.
Tape Edges Like a Pro for Crisp Lines
Pick a painter’s tape that matches your wall surface—low-tack for fresh paint, high-adhesion for textured walls.
Press the tape down firmly and run a putty knife or your fingernail along the edge to seal it tight. That sealed edge keeps paint from bleeding so your lines come out crisp.
Choose The Right Tape
When you want crisp, professional-looking edges, choosing the right tape makes all the difference. Pick a low-tack paper tape for fresh drywall or delicate trim.
A medium-adhesion tape is suitable for previously painted or textured surfaces. Consider how color psychology and furniture placement influence accent walls and where you’ll need the sharpest lines.
Match tape width to the line you want—narrow for trim, wide for baseboards. Test a small strip to confirm clean removal.
- Low-tack paper for delicate surfaces
- Medium-adhesion for typical walls
- Narrow tape for detailed trim
- Wide tape for long runs
Seal Tape Edges Tight
Wondering how to get those razor-sharp paint lines? You’ll start by applying tape with firm tape tension—pull it taut, press one end down, then smooth along the surface.
Use a plastic putty knife or your fingernail to make sure edge sealing; run the tool firmly along the tape to remove gaps.
For extra protection, paint a thin layer of the base wall color over the tape edge and let it dry; that seals small gaps.
Then paint your trim color. Remove tape while paint is tacky, pulling back on itself at a 45° angle for the cleanest result.
Cut In Around Trim, Ceilings, and Corners
Before you roll the wall, cut in the edges with a steady hand and a high-quality angled brush to create clean lines where trim, ceilings, and corners meet the new paint.
Before rolling, cut in edges with a steady hand and quality angled brush for crisp trim, ceiling, and corner lines.
You’ll steady your wrist, load the brush properly, and work in short strokes. Trim detailing needs crisp control; use corner taping techniques where needed, remove tape before paint skins over, and touch up any bleed.
Keep a damp cloth nearby for quick corrections. Follow this quick checklist to stay efficient:
- Brush angle and light load
- Smooth, connected strokes
- Remove tape at the right time
- Immediate touch-ups with a small brush
Choose the Right Roller: Nap Length and Roller Type
Now pick a roller that matches your wall texture and paint type by considering nap length and material.
For smooth walls, use a short nap, while textured surfaces need a longer nap to hold more paint.
Also choose a roller material—synthetic for latex, natural for oil-based—to get even coverage and durability.
Roller Nap Length
While you pick a roller, match the nap length to your wall’s texture. You’ll choose short naps for smooth drywall and longer naps for textured or orange-peel surfaces. The right nap holds paint evenly, reduces splatter, and helps limit paint fumes by cutting touch-ups. Choose based on surface.
- 1/4″ nap: smooth walls, minimal texture.
- 3/8″–1/2″ nap: light texture, slightly uneven surfaces.
- 3/4″ nap: medium texture, knockdown or orange peel.
- 1″–1½” nap: heavy texture, rough stucco.
Test a small patch to confirm coverage before starting.
Roller Material Type
Since the nap determines how much paint the roller holds, the roller’s material controls how smoothly and evenly that paint transfers to your wall. Choose a synthetic roller material for latex paints and a natural-fiber roller for oil-based finishes.
Consider wall texture: short naps suit smooth surfaces, medium naps handle slight texture, long naps reach deep crevices. Match paint texture and paint sheen with your tool selection to avoid stipple or roller marks.
Good surface prep and correct tape techniques reduce touch-ups. Think about color matching and drying time when planning coats, swapping rollers if you change sheen or paint type.
Load the Roller Correctly to Avoid Splatter
If you want smooth coverage without paint raining down, load the roller evenly and deliberately. You’ll dip the roller into the tray, roll it along the ridged area, and remove excess so paint doesn’t fling.
Load roller from the well, not the edges, and keep a steady wrist to prevent paint splatter. Check coverage visually before applying to the wall.
- Pour modest paint into tray well.
- Roll slowly into paint, then onto ribs.
- Remove drips by rolling back and forth.
- Refill before roller dries to maintain even pickup.
Practice this to cut mess and waste.
Roll Like a Pro for Even Coverage
When you roll, keep a light, even pressure and move in a consistent W or M pattern so the paint lays down smoothly and you don’t get lap marks.
Work in 3×3 foot sections, overlap wet edges, and finish each section with a light, unbroken roll to blend.
Work in 3×3-foot sections, overlap wet edges, and finish with a light, unbroken roll to blend seamlessly.
Watch for drips at corners and edges; pick them up immediately.
Use a quality nap suited to your wall texture and swap rollers when lint appears.
Choose eco-friendly paints to reduce odors and prolong drying accuracy.
Remember that color psychology affects how evenly applied hues read in natural and artificial light.
How Many Coats You Really Need
How many coats you need depends on the wall’s condition—smooth, repaired, or stained surfaces may need extra coverage.
You’ll also weigh primer versus paint: primer can cut down on paint coats and improve adhesion.
Finally, darker or very different colors usually require more coats for full, even coverage.
Surface Condition Matters
Because the condition of your walls determines paint performance, you’ll want to assess surface issues before deciding how many coats to apply. Inspect for cracks, stains, and uneven wall texture; good surface preparation reduces wasted coats.
Smooth, clean drywall often needs one or two coats of color. Rough or patched areas may demand extra coverage to blend sheen and depth. Use thin test coats and evaluate under natural light.
- Clean and sand patched spots
- Remove loose paint and dust
- Blend texture differences with light sanding
- Spot-prime stained or repaired areas before painting
Primer Vs Paint
Curious whether you need primer or just another coat of paint? You’ll choose primer when walls are stained, patched, or shifting from dark to light; it seals, evens porosity, and reduces needed paint coats.
If surface condition’s good and you’re repainting similar shade, one quality topcoat may suffice. Consider color psychology: bold new hues benefit from primer to reach true tone, while subtle tweaks often don’t.
Primer also helps if you plan different paint sheens near furniture placement to avoid scuffs.
Aim for efficiency—prime where needed, paint where it’s enough—to get pro results without waste.
Color And Coverage
When you’re choosing paint, think about color depth and coverage together—darker or more saturated hues usually need extra coats to reach full, even color, while lighter neutrals often hide imperfections with fewer layers.
You’ll plan coats based on sheen, undertones, and the wall’s condition. Consider color psychology when selecting intensity; a bold shade may require three coats for uniformity.
Use primer to reduce total coats on porous or patched walls. Store leftover cans properly for paint storage and touch-ups.
Estimate time for two coats as a baseline, adjust after the first coat dries.
- Test swatch
- Prime where needed
- Start with two coats
- Inspect and touch up
Blend Wet Edges to Avoid Lap Marks
If you keep a wet edge as you paint, you’ll prevent lap marks and get a smooth, even finish; that means working in manageable sections and immediately feathering new strokes into the still-wet paint. Start where light hits the wall so color psychology reads consistently, then roll toward shadowed areas while blending overlaps.
Use a loaded brush to cut in, then follow with a high-quality roller, keeping the nap and pressure consistent. Modern paint technology helps longer open time, but you still need steady, overlapping passes.
Pause between sections only after the surface evens, avoiding dry-to-wet shift that cause visible laps.
Use Extension Poles and Ladders Safely
Because you’ll be working at height, set up extension poles and ladders with care to avoid falls and uneven paint. You’ll check pole locks, secure roller frames, and inspect ladder feet before climbing.
Practice balanced, slow movements and keep a stable stance; don’t overreach. Extension safety means using the right pole length so you maintain control and finish edges cleanly.
Follow ladder precautions: lock joints, face the ladder when ascending, and have a helper hold the base if possible.
- Inspect equipment for damage.
- Use non-slip footwear.
- Keep tools on a belt or tray.
- Tie off or brace tall poles.
Handle Textured Walls and Popcorn Ceilings
Although textured walls and popcorn ceilings add character, they require different prep and paint techniques than smooth surfaces.
You’ll inspect surfaces for loose texture, patching with a lightweight joint compound and sanding gently where needed.
Use a thick-nap roller and a stippling brush to get paint into crevices on textured walls without flattening the pattern.
For popcorn ceilings, avoid sanding or scraping unless absolutely necessary—it’s messy and may release dust.
Use a sprayer or a ceiling-specific roller with an extension pole, and apply thin, even coats.
Always protect floors and furniture thoroughly; drop cloths and sealed plastic keep cleanup simple.
Paint Around Windows and Doors Without Making a Mess
When you paint around windows and doors, proper tape and masking are your best defense against drips and ragged edges.
Use smooth cutting-in techniques with a steady hand and a quality angled brush to create clean lines without smearing paint onto trim or glass.
With the right prep and a calm, controlled stroke, you’ll save time and avoid touch-ups.
Proper Tape And Masking
Want crisp, straight edges around windows and doors? You’ll prep surfaces, choose quality painter’s tape, and mask trim to avoid bleed. Consider how color psychology affects accent choices, and keep paint branding consistent for touch-ups. Follow these focused steps:
- Clean and dry surfaces; press tape edges firmly.
- Use low-tack tape on fresh paint, medium-tack on raw wood.
- Protect glass and hardware with plastic sheeting and blue tape.
- Remove tape at a 45° angle while paint’s tacky, not fully cured.
These steps save time, prevent smudges, and keep your finished wall looking professional.
Smooth Cutting-In Techniques
If you want crisp, professional edges around windows and doors, start by loading a quality angled brush with just enough paint to flow—dip only a third of the bristles—and cut a steady line where wall meets trim, letting the brush do the work rather than forcing strokes.
Work in short, controlled strokes, keeping a wet edge to blend into rolled areas.
Use painter’s tape sparingly for complex profiles, remove it while paint’s tacky.
Practice steady wrist motion, support your hand against the frame, and clean excess on the brush.
Consider color combinations and furniture placement before final coats to facilitate seamless progressions.
Create Intentional-Looking Accent Walls
Because an accent wall should feel deliberate, pick a focal point and plan the color, finish, and surrounding decor to support it. You’ll use color psychology to set mood—bold for energy, muted for calm—while balancing scale and lighting.
Consider wall texture sparingly; keep it complementary, not competing. Measure and mark edges, choose quality paint, and test swatches at different times of day.
Frame the wall with furniture and trim to anchor the space.
- Select focal point and mood
- Test swatches under real light
- Prep clean, crisp edges
- Anchor with furniture and trim
Faux Finishes and Subtle Texture Options
After you’ve settled on a focal wall and its color, consider adding a faux finish or light texture to give the surface more depth without overwhelming the room. You can layer subtle textures to mimic plaster, linen, or weathered wood using glaze, sponges, or thin coats. Faux finishes are cost-effective ways to add character. Test samples on cardboard and view in different light. Keep strokes consistent, work in small sections, and seal if needed. Choose one technique to avoid cluttered results.
| Technique | Effect | Best For |
|---|---|---|
| Glazing | Soft depth | Living rooms |
| Sponging | Organic pattern | Accent walls |
| Venetian plaster | Polished texture | Formal spaces |
Paint High Ceilings and Tall Walls Alone
When you’re tackling high ceilings and tall walls alone, plan your approach and gather the right tools—an extension pole, angled brushes, a roller with a long nap, and a sturdy ladder or platform—so you can work safely and efficiently.
Use a tinted primer to reduce coats, choose colors mindful of color psychology to influence mood, and ventilate to minimize paint odor.
Work in vertical sections, cutting in first then rolling.
Take breaks to reassess from floor level.
Secure your ladder and avoid overreaching; reposition often.
Clean tools immediately to keep edges crisp and finish professional.
- Prep and prime
- Cut in edges
- Roll large areas
- Safety checks
Manage Paint Drying Times and Ideal Conditions
If you want smooth, durable results, control drying conditions: temperature, humidity, and airflow all affect how fast paint sets and how the finish cures. You’ll aim for 50–70°F (10–21°C) and 40–60% humidity; use fans for airflow but avoid direct blasts that cause lap marks. Eco friendly paints often dry differently—check manufacturer times. Consider color psychology when choosing sheen: glossier finishes reflect light and show imperfections sooner. Plan drying between coats per label, and wait longer in cooler or humid rooms. Use the table to track ideal conditions and your room’s readings.
| Condition | Target |
|---|---|
| Temperature | 50–70°F |
| Humidity | 40–60% |
Quick Fixes for Drips, Brush Marks, and Missed Spots
Although you’ll try to avoid them, drips, brush marks, and missed spots happen—so keep a damp cloth, a fine-grit sanding sponge, and a small angled brush on hand to correct them quickly.
Keep a damp cloth, fine-grit sponge, and angled brush ready to blot drips, smooth brush marks, and blend touch-ups.
Address drips by blotting excess, letting the paint set slightly, then smoothing with the sponge. Lightly sand raised brush marks, wipe dust, and feather in touch-ups with the angled brush. For missed spots, apply thin, even strokes and blend edges while wet.
Using eco-friendly paints reduces odor and allows faster, safer touch-ups. Consider color psychology when matching tones to maintain room harmony.
- Blot drips promptly
- Sand sparingly
- Feather edges
- Match hue carefully
When to Sand Between Coats for a Flawless Finish
Because a smooth finish depends on proper prep, you’ll sand between coats whenever the surface feels rough, has visible brush or roller texture, or shows dust nibs that won’t level out on their own.
After primer application and each subsequent coat, wait until the paint is dry to the touch but not fully cured. Use fine-grit sandpaper or a sanding sponge and light pressure to remove imperfections without cutting through.
Focus on edges and overlaps, wipe with a dry tack cloth, then inspect under good light.
Proper sanding techniques keep layers even, improve adhesion, and guarantee your final coat lays down flawlessly.
Clean Brushes, Rollers, and Reusable Tools Properly
Once your coats are smooth and you’ve wiped away sanding dust, don’t let dirty tools undo your work — clean brushes, rollers, and reusable tools right away so paint won’t dry on the bristles or nap.
Rinse water-based paint under warm running water, use a brush comb, and spin rollers to remove excess.
For oil-based paints, use mineral spirits per label, then wash with soapy water.
Dry tools flat or hang to retain shape.
Store reusable items in breathable covers for short breaks and practice proper paint storage for cans.
- Flush brushes until water runs clear.
- Spin and squeeze rollers.
- Use solvent safely for oils.
- Shape and hang tools to dry.
Store Leftover Paint for Future Touch-Ups
If you’re likely to need touch-ups, store leftover paint so it stays usable. Pour remaining paint into a small, airtight container, leaving minimal headspace to reduce air exposure. Label the container with color name, brand, sheen, and date.
Store in a cool, dry place away from temperature extremes and direct sunlight; a basement or climate-controlled closet works well.
For metal cans, press a piece of plastic wrap over the paint before resealing to improve the seal. Keep cans upright and off concrete to prevent rust.
Proper paint storage preserves color match and makes future touch-ups quick and reliable.
Remove Paint From Hands, Clothes, and Surfaces
When you’re done painting, act quickly to prevent stains. Rinse hands with warm water and soap; for stubborn spots, rub hand sanitizers with alcohol to lift fresh latex. Use a dedicated paint remover for dried spots—test a hidden fabric area first.
Treat clothing immediately: scrape excess, soak in stain remover, then launder separately.
- Blot fresh spills with a damp cloth—don’t rub.
- Scrape dried paint gently with a plastic scraper.
- Apply paint remover sparingly; follow instructions and ventilate.
Protect surfaces next time with drop cloths and painter’s tape.
Act fast and use the right products.
Cost-Saving Tips Without Sacrificing Quality
Cleaning up properly after a paint job not only keeps your home tidy but also helps you spot where you can save on your next project.
You’ll reuse rollers and trays by cleaning them promptly, stretch drop cloths for multiple rooms, and store leftover paint in labeled, airtight containers to avoid waste.
Compare brands for paint discounts and buy quality where it matters—trim and high-traffic walls.
Use budget hacks like priming problem areas instead of full repainting and timing purchases around sales.
Borrow or rent specialized tools rather than buying, and keep receipts for returns or rebates to maximize savings.
Common DIY Mistakes That Ruin a Paint Job
Although a fresh coat can transform a room, skipping prep, using low-quality tools, or rushing the job will show in drips, uneven coverage, and peeling. You want even sheen, true Color psychology impact, and finishes that last. Avoid these common DIY mistakes so your living room looks professional and feels right.
- Poor surface prep — dust, grease, and loose paint prevent adhesion.
- Cheap brushes and rollers — they shed and leave streaks.
- Ignoring primer — especially over stains or drastic color changes.
- Choosing wrong paint — pick Eco friendly paints when possible for low odor and durable finish.
Touch Up Small Areas So Repairs Are Invisible
Because small imperfections catch the eye, you’ll want to blend touch-ups so they disappear into the surrounding finish. Match sheen and mix a small batch of the original paint, noting color psychology if you’re adjusting tone to affect mood.
Feather edges with a damp brush or sponge, working outward from the repair. Apply thin layers, letting each dry fully so texture and gloss align.
Use eco friendly paints when possible to maintain indoor air quality and consistent finish. Step back under varied lighting to confirm invisibility, and redo tiny areas immediately until *gradations* vanish.
Final Inspection Checklist Before Declaring the Job Done
Before you call the project finished, walk the room with a focused checklist that covers surface appearance, edges, fixtures, and cleanup.
Inspect walls at different angles and light to spot missed streaks, roller marks, or uneven sheen. Check tape lines and crisp corners, and verify outlets, switches, and trim are clean and reattached.
Smell for odors—finish should match eco friendly paints’ low VOCs—and confirm the color reads as expected; consider color psychology only for mood verification, not styling.
Finally, tidy drop cloths and dispose of waste responsibly before you declare the job done.
- Surface evenness
- Edge crispness
- Fixture condition
- Cleanup complete
Styling Tips to Show Off Your Freshly Painted Room
When your paint is fully cured, arrange furniture and accents to highlight the room’s best features—anchor seating around a focal wall, leave breathing space so color reads clearly, and use contrasting textures or metallics to add depth without competing with the finish.
Now, think about color psychology to set mood: calming blue for relaxation, warm terracotta for energy, or neutral palettes for flexibility.
Use furniture coordination to balance scale and tone—pick upholstery, rugs, and throw pillows that echo or gently contrast the walls.
Add layered lighting and a few art pieces to complete a cohesive, intentional look you’ll enjoy.
How Long Painted Living Room Walls Should Last
If you maintain the room properly, a quality latex paint job on living room walls can last 7–10 years before needing a full repaint. You’ll extend that by minimizing abrasion, controlling humidity, and choosing durable finishes.
Color psychology still matters: pick tones you’ll enjoy long-term to avoid premature change. Eco-friendly paints with good pigments can be as long-lasting as conventional options, so don’t sacrifice durability for sustainability.
Choose colors you’ll love long-term; eco-friendly paints with quality pigments can match conventional durability.
- Clean gently and spot-repair annually.
- Use washable sheens in high-traffic zones.
- Control moisture and sunlight exposure.
- Choose quality primer and proper application techniques.
When to Repaint: Signs Your Walls Need a Refresh
As wear and time start to show, you’ll notice clear signs that your living room walls need a refresh. Faded or uneven color, scuffs, nail holes, and stains signal it’s time.
If your mood changes with the room, leverage color psychology to choose tones that energize or calm.
Smells from aging paint or visible chalking mean protection has weakened. You should repaint before damage worsens or before selling.
Plan for responsible paint disposal when updating—follow local guidelines for leftover cans and avoid pouring paint down drains.
A timely refresh keeps your room looking intentional and cared for.
Fix Persistent Problems After Painting: Peel, Bubbles, and Poor Adhesion
Because paint failures rarely fix themselves, you’ll want to tackle peeling, bubbling, and poor adhesion promptly to prevent larger repairs. Inspect affected areas, scrape loose paint, sand edges smooth, and clean residues.
If wallpaper removal preceded painting, confirm adhesive residue is gone before priming.
Address moisture sources and improve ventilation; relocate or adjust heating that causes damp walls.
Test adhesion with a small patch before repainting; use a bonding primer for stubborn spots.
Consider furniture repositioning to eliminate rubbing or trapped moisture near walls.
Follow with thin, even coats and allow proper cure time to avoid repeat problems.
- Scrape and sand
- Clean and prime
- Fix moisture
- Repaint with bonding primer
Frequently Asked Questions
How Do I Safely Paint Over Lead-Based or Asbestos-Containing Surfaces?
You shouldn’t DIY; you’ll hire certified pros for lead removal and asbestos safety. They’ll test, contain, and abate using HEPA vacuums, wet methods, and proper PPE, then dispose of hazardous waste per regulations.
Can I Paint Wallpapered Walls Without Removing the Wallpaper?
Yes, you can paint wallpapered walls without removing the wallpaper, but you’ll need thorough wall preparation and careful paint selection; you’ll clean, repair seams, prime with a bonding primer, then choose quality paint suited to the surface.
What’s the Best Way to Hide TV Mounts and Wall Wiring Before Painting?
Like lifting a curtain, you’ll hide mounts and concealed wiring by removing the bracket, running cable through an in-wall kit or paintable raceway, then doing careful wall patching, sanding, priming, and painting for a seamless finish.
How Do I Handle Smell-Sensitive Occupants During and After Painting?
You’ll protect smell-sensitive occupants by using ventilation strategies like fans and open windows, low-VOC paints, timed painting when they’re away, and odor neutralizers (charcoal, baking soda, sprays); mask and air out thoroughly until smells fade.
Can I Use Non-Paint Products (Chalkboard/Whiteboard Coatings) on Living Room Walls?
I once turned a dull wall into a café-style menu board; yes, you can use chalkboard coatings or whiteboard paints on living room walls, but they’ll alter finish, require smooth prep, and affect resale appeal.
Conclusion
You’ve followed the steps, picked the right sheen, tested colors, and styled the room—so your living room looks refreshed, and by coincidence the light that first drew you to the house now flatters the new color. You’ll enjoy hard-wearing walls that resist traffic and hide little flaws, but when peeling or bubbles show up, you’ll spot them sooner. Keep samples for future tweaks, and repaint only when the room’s mood or damage tells you it’s time.