How to Paint Metallic Paint on Walls Perfectly
You’ll get a flawless metallic wall by prepping and priming thoroughly, cleaning and patching surfaces, then using tinted, bonding primer for even sheen. Mix and thin metallic paint per manufacturer directions, keep flakes suspended, and apply thin, overlapping coats with high-density rollers or spray for uniform reflection. Work in manageable wet-edge sections, feather edges, and test samples under different lights. Let each coat set to tacky before the next, and keep going to learn pro tips and techniques.
Who This Guide Is For and What You’ll Get
Whether you’re a DIY homeowner wanting a show-stopping accent wall or a professional painter adding a metallic finish for a client, this guide walks you through the exact materials, prep steps, techniques, and troubleshooting tips you’ll need to get a smooth, consistent metallic look every time.
You’ll learn who benefits most—beginners seeking clear steps and pros wanting efficient workflows—and what you’ll get: recommended tools, safe surface prep, spray and brush techniques, troubleshooting for streaks or ghosting, plus tips on color mixing to match tones and paint storage to preserve metallic sheen.
Follow it, and you’ll avoid common mistakes.
Quick Step-by-Step: Paint Metallic Walls Perfectly
Before you pick up a brush or sprayer, gather your tools, mask the room, and confirm your substrate is clean and primed so you can work in efficient, uninterrupted passes.
Gather tools, mask the room, and ensure the surface is clean and primed for smooth, uninterrupted painting.
You’ll apply metallic paint in smooth, overlapping strokes or with a sprayer for uniform sheen. Keep a wet edge, work top-to-bottom, and sand lightly between coats.
Modern metallic paint draws on metallic paint history but benefits from improved binders and eco friendly finishes.
- Mix thoroughly, test on scrap, adjust sheen.
- Apply two thin coats, drying fully.
- Seal with recommended clear coat.
When to Choose Metallic Paint vs. Regular Paint
Now that you know the technique for applying metallic finishes, you’ll want to decide whether metallic paint is the right choice for the room and your goals. Consider function: use regular paint for high-traffic areas where durability and easy touch-ups matter; choose metallic when you want drama, accent walls, or to reflect light.
Think about color psychology—metallics can feel glamorous, calming, or cool depending on hue and sheen.
Match style and period: metallics suit modern or eclectic spaces, while historical finishes may call for subtler glazes.
Budget, maintenance, and desired impact should guide your final choice.
Metallic Wall Looks: Pearlescent to High-Gloss Mercury
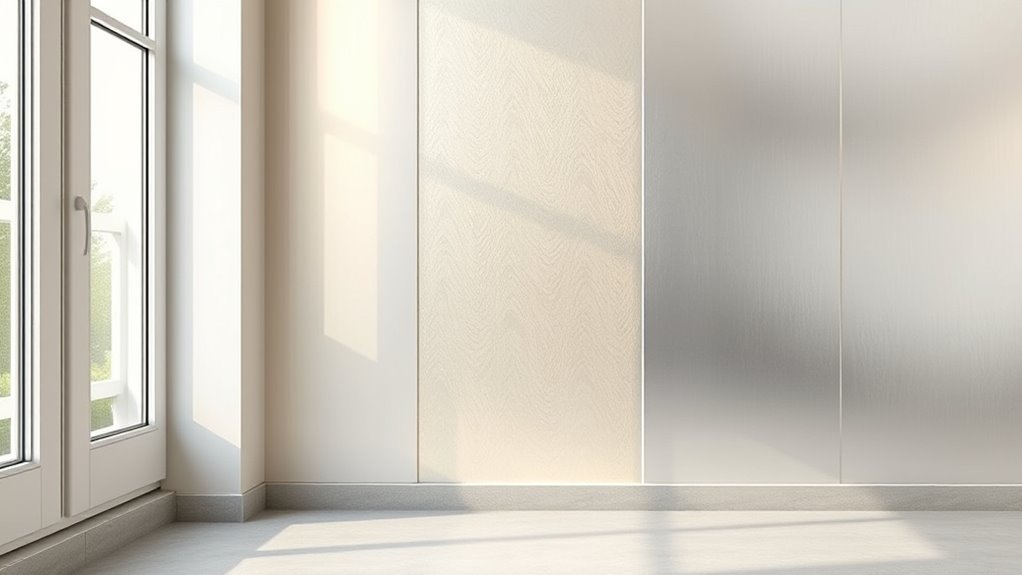
You can choose from a soft pearlescent sheen that shifts with light, a brushed-metal look that emphasizes texture, or a mirror-like high-gloss mercury finish for maximum impact.
Each option calls for different tools and application techniques to get the desired effect. I’ll walk you through what to expect and how to achieve each finish.
Pearlescent Sheen Effects
When light hits a pearlescent finish, it seems to shift and shimmer, giving your walls a soft, multidimensional glow that changes with viewing angle and lighting. You can enhance this by planning Color blending and subtle Texture patterns to guide reflections.
Apply thin, even coats and feather edges to avoid lap marks. Use a satin or low-sheen sealer to protect without killing the shine. Test samples under different lights before committing.
- Prep: smooth surface, prime compatible with pearlescent medium.
- Technique: cross-hatch strokes, thin layers, blend while wet.
- Finish: protective coat, evaluate in natural and artificial light.
Brushed Metal Texture
How do you get that industrial, linear grain of brushed metal on a wall without it looking fake? You’ll prep with a smooth, sealed substrate, then apply a base metallic paint.
Work wet-on-wet with a long, soft-bristle brush or combing tool to pull consistent, parallel strokes. Keep pressure even and maintain direction to mimic real stainless or aluminum.
Use subtle color shifts and fine scumble layers to suggest wear—borrow from historical techniques like glazing to build depth.
Be mindful of lighting and cultural symbolism tied to metal finishes; placement and sheen alter perceived meaning and authenticity.
High-Gloss Mercury Finish
Want a mirror-like, liquid-metal wall that reads as sleek rather than gimmicky? You’ll prep smooth drywall, use high-build primer, and apply ultra-sheen metallic lacquer with a spray or foam roller for an even High-Gloss Mercury Finish. Pair it with vintage furniture or bold wall murals for striking contrast.
- Sand, prime, tack cloth: eliminate texture and dust.
- Spray thin coats, light sanding between; finish with clear gloss sealer.
- Control lighting and placement to avoid glare and highlight reflections.
You’ll maintain the surface with gentle cleaners and avoid abrasive contact to keep the mercury sheen perfect.
Water-Based or Oil-Based Metallic Paint: Pick One
Although both types can create a stunning metallic finish, you’ll need to choose between water-based and oil-based metallic paints based on your priorities: drying time, durability, odor, and cleanup.
Choose water-based for quick, low-odor updates; oil-based for durable, traditional metallic finishes and tougher wear.
You’ll prefer water-based for fast drying, low odor, easy soap-and-water cleanup, and better adhesion over modern primers; it’s kinder to color psychology experiments where you’ll change hues often.
Oil-based gives tougher, smoother historical finishes and resists abrasion, but it smells, yellowing can occur, and solvent cleanup is required.
Pick water-based for convenience and frequent updates, oil-based for longevity and traditional sheen—match your choice to use and maintenance expectations.
How Metallic Sheen Changes Room Reflectivity
Whether you chose water- or oil-based metallic paint, the sheen you pick will dramatically affect how light behaves in the room. You’ll notice how gloss intensifies highlights while satin diffuses them, changing perceived depth and mood.
Consider Room lighting and Metallic color palettes together to plan impact.
- High gloss: boosts reflections, enlarges small spaces, emphasizes texture.
- Satin: softens glare, creates subtle shimmer, suits mixed lighting.
- Matte metallic: mutes shine, offers sophisticated glow under directional lamps.
Choose sheen to control reflectivity, complement fixtures, and align finish with the room’s meant atmosphere.
How Pigments and Metallic Flakes Affect Coverage
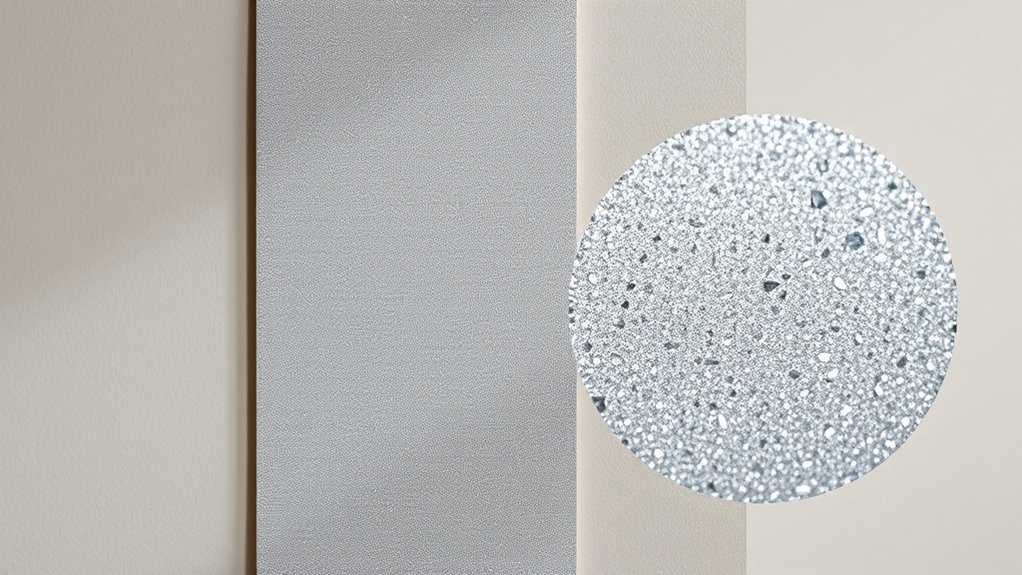
Because metallic flakes and pigments differ in size, shape, and opacity, they change how much paint you need and how many coats will hide the previous color. You’ll notice coarse flakes give a sheerer finish, requiring extra coats for full coverage, while fine pigments improve opacity and smooth Color blending. Consider how Light reflection changes with flake orientation; dense flakes boost shimmer but reduce hiding power. Plan multiple thin coats, assess between layers, and adjust tint strength to mask underlying tones. Use the table below to compare common effects and choose product based on desired balance of shimmer versus coverage.
| Effect | Result |
|---|---|
| Coarse flakes | Sheerer, more coats |
| Fine pigments | Better opacity |
| Heavy metallic | Strong shimmer |
| Light metallic | Subtle shine |
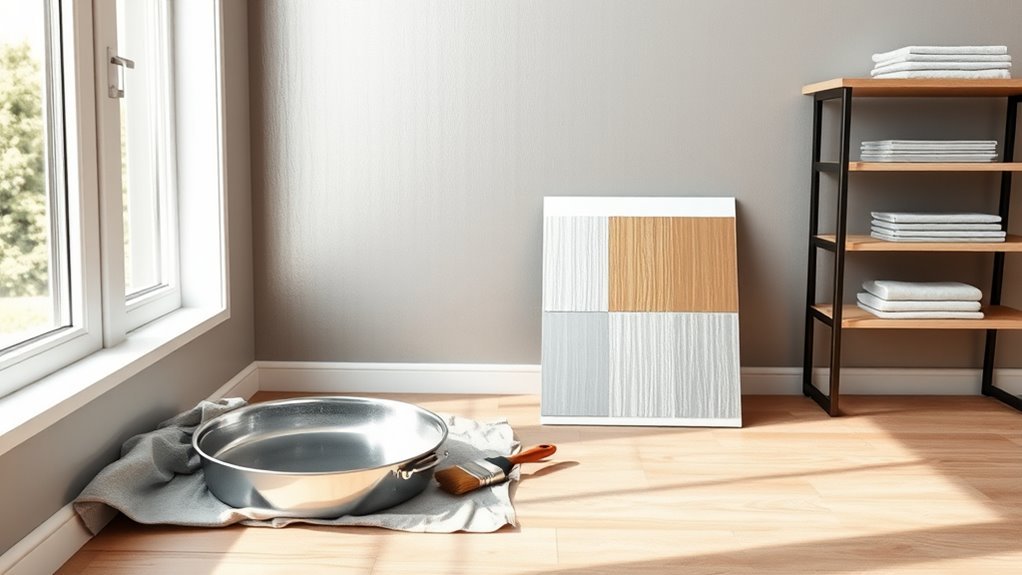
Metallic Paint Tools You Need
When you’re ready to paint with metallics, gather the right tools so the finish looks intentional and consistent. You’ll honor the historical context of metallic finishes while applying modern technique, and you’ll consider color psychology to choose sheen and hue impact.
- High-density foam rollers and a microfiber slab for smooth, even laydown that keeps flakes aligned.
- A selection of angled and sash brushes for cutting edges and blending, plus a soft brush for feathering.
- Clean mixing paddles, buckets, and a stirrer to keep metallic pigments suspended and color uniform during application.
Choose the Right Primer for Metallic Paint
How do you pick a primer that lets metallic paint shine instead of fight the wall? Choose a primer based on surface and finish: stain-blocking for imperfect drywall, bonding primer for slick surfaces, and tinted primer to boost metallic depth.
Match primer sheen to your desired effect and consult product labels for metal-flake compatibility. Consider how color psychology influences final perception—warm undertones amplify golds, cool bases favor silvers—and remember cultural symbolism may affect color choices in shared spaces.
Apply evenly, sand lightly between coats, and follow drying times to create a stable, receptive base for flawless metallic coverage.
Test Metallic Paint Samples on Your Wall
Before you commit, put several small swatches of the metallic paint on your wall and check them under different lighting conditions—morning, artificial, and evening.
Compare how the sheen and texture read across the samples, and note any areas where the metallic effect looks uneven.
After they dry, evaluate any color shift so you know the true finished look.
Test Under Different Lighting
Since metallic paints shift with light, you should test several samples on the actual wall to see how they read across different times and fixtures. Place three small swatches spaced apart and observe morning, noon, and evening.
Consider historical influences and cultural symbolism when choosing tones—warm golds read differently than cool silvers in heritage rooms.
- Check natural light at dawn and midday for true hue.
- Turn on all artificial fixtures to reveal reflected highlights and shadow play.
- Inspect under low light to verify depth and avoid unwanted flatness.
Record results before committing to a full coat.
Compare Sheen And Texture
When you test metallic paint samples on your wall, compare sheen and texture side by side so you can judge how finish and surface interact in real conditions. Lay multiple swatches—matte, satin, gloss—next to smooth and lightly textured patches.
Observe sheen comparison at different angles and times of day; note highlight intensity and directionality. Inspect texture variation: smooth surfaces emphasize metallic shimmer, while textured ones scatter light for subtler sparkle.
Touch each sample to feel application differences and note any tooling marks. Record observations and photos so you can choose the combination that achieves the metallic effect you want.
Evaluate Drying Color Shift
After you’ve compared sheen and texture, check how each metallic sample changes as it dries—metallics often shift in tone and reflectivity once solvents evaporate and binders cure. You’ll want to note color consistency and perform a fresh sheen evaluation over several hours and days. Test in the actual light and on your wall, not a card.
- Apply small swatches side-by-side, label them, and photograph at intervals.
- Observe shifts at 1 hour, 24 hours, and 72 hours, noting hue, flake orientation, and sheen evaluation.
- Decide based on final color consistency and desired sparkle.
Prep Drywall: Repair Dents and Sand
Before you paint, fix any dents and smooth the surface so the metallic finish reflects evenly and looks professional. You’ll inspect drywall for dings, nail pops, and gouges, then remove loose paper. Apply lightweight spackle for small dents and joint compound for larger damage, feathering edges to blend. Sand with a fine-grit block until seamless, wiping dust with a tack cloth.
Prime patched areas to match porosity before metallic topcoat. Remember how historical techniques and cultural influences shaped precise surface prep—traditional artisans emphasized smoothness for sheen, a lesson you’ll use to get a flawless metallic effect.
Prep Plaster and Brick for Metallic Paint
Before you start applying metallic paint to plaster or brick, clean the surface thoroughly to remove dust, efflorescence, and loose mortar so the finish will adhere evenly.
Patch cracks and spalled areas with an appropriate filler, then sand smooth once dry to create a uniform substrate.
Finally, apply a suitable primer to seal porous masonry and improve adhesion for the metallic topcoat.
Clean And Remove Debris
When you’re prepping plaster and brick for metallic paint, start by removing dust, loose mortar, and peeling paint so the finish can bond evenly. This essential step makes decor application easier and improves surface preparation quality. Work methodically with the right tools and safety gear.
- Sweep and brush: use stiff brushes and a shop vacuum to clear dust, sand, and small debris.
- Scrape and chip: remove flaking paint and unstable mortar with a putty knife or chisel, avoiding deep gouges.
- Wash and rinse: apply mild detergent, scrub, then rinse thoroughly and let the substrate dry completely before continuing.
Repair And Prime Surfaces
Once you’ve cleared loose material, patch cracks and chips with a compatible filler and sand smooth so the metallic finish lays flat and reflects evenly.
Then seal porous plaster or brick with a masonry primer to promote adhesion and block stains.
Work in small sections, feathering repair edges so texture matches surrounding walls.
Use a high-build primer on uneven masonry, then sand lightly.
Consider color coordination when choosing primer tint to enhance your metallic topcoat and reduce required coats.
Test a swatch under desired lighting to observe lighting effects and adjust primer tint, sheen, or additional smoothing before committing to the full metallic application.
Clean and Degrease Before Painting Metallic Walls
Although metallic finishes shine best over smooth, contaminant-free surfaces, you’ll get poor adhesion and visible flaws if you skip proper cleaning and degreasing. You should remove dust, oils, and residues so metallic flakes lay evenly and reflect as designed, which ties into color psychology—clean surfaces yield consistent tone and impact.
Use mild detergent, a TSP substitute, then rinse. Check paint storage labels for recoat windows and recommended cleaners.
Follow this quick sequence:
- Vacuum and wipe with soapy water.
- Degrease with TSP substitute, rinse thoroughly.
- Dry, inspect, and spot-sand before priming.
Masking and Protecting Trim, Floors, and Fixtures
Before you lay a single drop of metallic paint, protect trim, floors, and fixtures so overspray, drips, and tacky edges won’t ruin your work or cause extra cleanup. Tape trim with high-quality painter’s tape, press seams firmly, and use plastic sheeting or kraft paper on floors.
Remove light fixtures or cover them with bags and secure with tape. Cover hardware and outlets; label covered areas to avoid accidental removal.
Keep mixed metallics sealed and near work for quick touch-ups, minding color mixing ratios. Store leftover paint properly in airtight cans for paint storage and future repairs.
Best Lighting to Evaluate Metallic Paint Colors
After you’ve taped, covered, and sealed everything, you’ll want to check how your metallic finish looks under the lighting that will actually hit those walls. You’ll assess shifts in sheen, notice how color blending reads across panels, and judge texture contrast from different angles.
Before finishing, review your metallic finish in the room’s actual light to judge sheen, color blending, and texture.
- Morning natural light — reveals cool undertones and true color blending.
- Midday indirect light — shows overall uniformity and hides minor texture contrast.
- Evening artificial light — emphasizes warm tones, highlights metallic flakes differently.
Test samples in those conditions, observe from several distances, and pick the lighting that best matches your room’s daily use.
Mix Metallic Paint to Suspend Flakes Evenly
When you mix metallic paint, work deliberately to keep the metallic flakes evenly suspended so your finish stays consistent from corner to corner. Stir slowly with a flat paddle, lift and fold rather than whipping air in; that preserves metallic paint chemistry and prevents flakes sinking or clumping.
Agitate periodically during application—shake sprayers gently and remix buckets between coats. Match mixing rhythm to your pace so the metallic color psychology you want—subtle shimmer or bold sparkle—stays predictable across light changes.
Test a small panel, observe flake orientation, then proceed. Consistent technique yields uniform reflection and professional results.
How to Thin Metallic Paint Without Losing Sheen
When you need to thin metallic paint, pick a thinner that’s recommended by the manufacturer to protect the metallic flakes and sheen.
Measure your mix ratios carefully and note them so you can repeat or tweak the blend.
Always test a small sample and adjust gradually until the flow is right without dulling the finish.
Choose The Right Thinner
Wondering how to thin metallic paint without dulling its shine? Choose a thinner specifically labeled for metallic or pearl finishes so you keep the sheen and avoid cloudiness. Consider color coordination and ambient lighting when testing: small adjustments affect perceived hue and reflectivity. Test in the room under actual lights.
- Use manufacturer-recommended solvent first to preserve binder and metallic agents.
- If unavailable, pick a mild, slow-evaporating mineral spirit suited for metallics; test on a sample.
- Avoid fast-evaporating thinners that can lift metallic particles and cause dull spots.
Always test, note results, and adjust cautiously.
Measure Mix Ratios
Now that you’ve picked the right thinner, you need to get the mix ratio spot-on to keep metallic paint lively and reflective. Measure by volume with calibrated cups or syringes, following manufacturer guidelines as a starting point. Add thinner in small increments—typically 5–10%—and stir thoroughly between additions to avoid over-thinning.
Keep ratios consistent across batches to preserve color contrast and avoid patchy sheen. Note ambient temperature and humidity, since they affect flow and leveling. Record each ratio and condition so you can replicate success.
Proper measurement maintains metallic alignment and predictable lighting effects on the finished wall.
Test And Adjust Gradually
How should you thin metallic paint so it flows smoothly without flattening the shine? You’ll test small batches, note results, and adjust slowly to preserve the reflective effect while keeping color psychology and historical trends in mind for finish choices.
Begin with minimal thinner, stir, and apply a sample patch.
- Start with 5–10% thinner, evaluate sheen and flow after drying.
- Increment by 2–3% per test, recording appearance and coverage.
- If sheen dulls, revert to previous mix or add a primer-suitable extender; keep samples under consistent light to compare accurately.
Choose Brush, Roller, or Sprayer for Metallic Paint
Although metallic finishes can look fantastic with any application method, choosing between a brush, roller, or sprayer will determine your finish, speed, and prep needs.
You’ll weigh brush selection for edges and detail—use a high-quality synthetic brush to minimize streaks and maintain control.
Roller advantages include faster coverage and more even laydown, so pick a short-nap roller designed for smooth surfaces to reduce texture.
A sprayer gives the most uniform metallic sheen and fastest results but requires masking, thinning, and practice to avoid runs.
Match method to room size, detail level, and your skill to get the best outcome.
Roller Technique to Avoid Streaks and Lap Marks
When you roll metallic paint, keep a wet edge and work in manageable sections so the reflective particles lay evenly and you avoid lap marks. Load a high-density roller, roll in a “W” pattern, then fill without pressing hard. Match strokes’ direction to light sources to minimize visible joins and enhance lighting effects.
- Start with consistent pressure and short passes to blend edges.
- Overlap each pass slightly while paint stays wet for seamless color combinations.
- Inspect from multiple angles under the room’s lighting and touch up any dull bands before the paint skins.
Brush Technique for Cutting In and Edges
Because edges show first, start cutting in with a steady, light touch so the metallic finish lines up with your rolled sections, and don’t overload the brush or you’ll get drips and heavy streaks.
Work in short, confident strokes, feathering the wet edge toward the rolled area to allow subtle color blending without hard lines.
Use a high-quality angled sash brush for corners and trim, keeping wrist movements small for control.
Vary pressure to manage texture variation: lighter for smooth shine, firmer for more pronounced metallic grain.
Inspect under different light angles and blend quickly before the paint skins over.
Spray Tips for a Smooth Metallic Finish
Before you spray, you’ll prep and mask thoroughly to protect trim and create clean lines.
Use steady, overlapping passes and the right nozzle/pressure so the metallic flakes distribute evenly.
Let each coat flash dry as recommended and build thin layers for a smooth, reflective finish.
Prep And Masking
Although metallic spray finishes demand a bit more care, you’ll get a far smoother result if you prep and mask the area correctly. Clean surfaces, repair imperfections, and sand lightly so color blending reads true and texture techniques settle uniformly. Tape edges tightly and use quality paper or plastic sheeting to protect trim, floors, and fixtures. Create clean gradations where metallic meets matte surfaces.
- Degrease, fill, sand, and prime for adhesion.
- Use low-tack painter’s tape and overlap masking for full coverage.
- Secure drop cloths and ventilate the space before spraying.
Spray Technique Basics
When you spray metallic paint, control and consistency are what make the finish sing. Hold the gun 8–12 inches from the wall, keep your wrist steady, and move at a constant pace. Overlap each pass by about 50% to avoid streaks.
Adjust atomization and pressure for fine misting; test on cardboard first. Use horizontal passes then vertical for even laydown on large areas.
Mind ambient temperature and airflow to reduce orange peel. Consider color psychology when choosing sheen and tone—metallics evoke luxury or industrial vibes.
Note historical applications for inspiration, but execute with modern, precise technique.
Drying And Coats
How long should you wait between passes? You’ll usually wait 10–15 minutes for tack-free layers, but humidity and wall texture change that. Light, even passes build metallic depth without runs. Consider color psychology: darker metallics need thinner coats to avoid heavy looks; lighter ones accept more layering for sparkle.
- Thin coats: spray consistent, overlap 50% to avoid streaks.
- Dry checks: touch a hidden spot; if tacky, wait longer.
- Finish coat: apply final misting and let cure 24–48 hours, longer in cool or textured walls.
Keep a Wet Edge to Blend Panels Seamlessly
So you’ll want to keep a wet edge as you work, brushing or rolling overlapping sections before the paint starts to skin over; that continuous wet edge is what lets you blend adjacent panels without lap marks.
Work methodically in manageable panels, maintaining a consistent stroke direction so the metallic sheen reads uniformly.
Use light, even pressure and feather your edges into the next wet section to hide seams.
If you pause, back-roll into the wet border to rework it.
Clean rollers and slightly thinned metallic paint help flow.
Practice these blending techniques on a scrap board to build confidence before tackling the wall.
Layer Metallic Coats: Timing and Strategy
Once you’ve established a flawless wet edge, plan your metallic coats so each successive layer enhances depth without obscuring the sheen. You’ll control opacity and shine by spacing coats, adjusting pressure, and choosing tools that preserve metallic pigment placement. Aim for thin, even layers; thick coats dull reflectivity.
Let each coat set to tacky—not fully dry—then apply the next to promote reflective layering and adhesion. Finish with a single light glaze if needed to unify tone.
Follow this simple sequence:
- Apply a base coat thinly for coverage.
- Add two metallic coats, waiting tacky between.
- Lightly feather and inspect for uniform sheen.
Create Faux Textures and Patterns With Metallic Paint
Thinking about patterns? You can create striking faux metallic textures by using tools like brushes, sponges, combs, or rags to drag and stipple wet metallic paint for subtle sheen shifts.
Thinking patterns? Use brushes, sponges, combs, or rags to drag and stipple wet metallic paint for subtle sheen shifts.
Work in small sections and vary pressure to mimic aged metal or hammered finishes. Seal delicate effects with a compatible clear coat to protect sheen and improve metallic paint durability.
Layer glazes sparingly to adjust depth without hiding shimmer. Practice on cardboard to refine strokes, then mark guides on the wall for consistent repeats.
Keep strokes directional and blend edges while paint’s wet so patterns read as intentional, not patchy.
Achieve Pearlescent vs. Bold Metallic Effects
When you want a soft, luminous finish or a bold, mirror-like statement, pick your metallics and techniques to match the effect. You’ll choose pearlescent mica for subtle shimmer or high-chrome metallic pigments for strong reflections. Prep, application method, and topcoat control sheen and depth so reflective surfaces read as *desired*.
- Use thin, multiple pearlescent coats with a soft roller for even glow.
- Apply metallic pigments mixed with clear base, burnish lightly for mirror-like shine.
- Seal pearlescent with satin varnish; use gloss or lacquer for bold, high-reflectivity results.
Color Pairing and Accent Wall Ideas With Metallic Paint
If you want an accent wall that pops without overwhelming the room, pair metallic paint with grounding neutrals or a daring complementary hue to balance shine and scale. You’ll choose a metallic color—like warm gold, cool silver, or bronze—then decide where light enhances texture.
For small rooms, limit metallics to one wall behind a bed or sofa. In larger spaces, use vertical panels or stripes to create rhythm. Accent ideas include pairing soft matte grays, deep navy, or olive for contrast, or repeating metallic trim in fixtures for cohesion.
Keep furnishings simple so the finish remains the focal point.
Fix Streaks, Blotches, and Orange Peel on Metallic Walls
After choosing the perfect metallic accent and balancing it with neutrals, you’ll want to tackle common finish problems that can ruin the effect: streaks, blotches, and orange peel. Inspect under varying light during a lighting evaluation to locate defects.
Proper surface preparation prevents many issues—clean, sand, and prime uneven areas.
If you see orange peel, wet-sand lightly and buff; blotches may need feathered sanding and a thin glaze coat.
For streaks, recoat with consistent pressure and direction using a quality roller.
Repeat inspection under different light angles until the metallic sheen looks uniform.
- Surface preparation checklist
- Wet-sand and buff
- Recoat with consistent pressure
Repair Lap Marks and Visible Brush Strokes After Drying
If you notice lap marks or visible brush strokes after the metallic paint dries, you can correct them without stripping the whole wall.
Lightly sand the affected areas and feather the edges, then recoat with a thin, even layer using a high-quality brush or roller.
For persistent marks, blend with a light mist coat or use a foam roller to even out the metallic finish.
Fixing Lap Marks
Noticed streaks or shiny bands where the metallic finish dried unevenly? You can fix lap marks without repainting the whole wall. Consider the paint’s drying time and light angle; historical context and cultural significance of metallic finishes explain why sheen reads differently across a surface.
Follow these steps:
- Sand lightly with fine-grit, scuffing only affected zones, then wipe clean.
- Feather a thin glaze or matching metallic mix, working wet edge to wet edge to blend lapping.
- Mist a light spray of clear matte sealer after curing to even reflectivity and protect the repair.
Smoothing Brush Strokes
When brush strokes stay visible once the metallic finish dries, you’ll want to smooth them before they catch too much light and call attention to uneven texture. Lightly sand affected areas with fine-grit paper, wipe clean, then mist with water to raise any grain and sand again for a feathered edge.
Recoat sparingly with a soft brush or foam roller, matching the sheen and doing consistent strokes. Mind your brush grip to keep pressure even and avoid new marks.
Blend using gentle color mixing on a palette if touch-ups need tint adjustment, then allow full cure before final inspection.
Drying, Curing, and Safe Recoating Times
Because metallic paints rely on both solvent evaporation and chemical curing, you’ll need to distinguish between “dry to the touch” and fully cured before planning the next coat or regular use. Expect surface dryness in 1–4 hours, but curing can take days to weeks depending on humidity, temperature, and pigment load. Remember how color theory and wall textures affect apparent sheen and drying perception. Check manufacturer’s label, test a small patch, and avoid heavy handling.
Metallic paints dry to touch quickly but can take days to weeks to fully cure—check labels and test first.
- Light recoat: 4–6 hours for water-based, longer for oil.
- Functional cure: 7–14 days under ideal conditions.
- Full chemical cure: up to 30 days.
Protect Metallic Finishes With Topcoats and Sealers
To keep your metallic finish looking sharp, choose a topcoat that matches the paint’s sheerness and durability. Water-based clear coats work for most interior walls, while solvent-based options give extra toughness.
Apply sealers in thin, even layers with the right tool and dry time between coats to avoid streaks or loss of metallic effect.
Maintain protection by cleaning gently, touching up chips promptly, and reapplying a fresh topcoat every few years as needed.
Choose The Right Topcoat
Wondering which topcoat will preserve your metallic finish without dulling its sparkle? You’ll want a product that balances metallic paint durability with minimal environmental impact. Choose based on sheen, UV resistance, and VOC levels so the shimmer lasts and air quality stays safe.
- Water-based polyurethane — low VOC, clear protection, good for interiors.
- Acrylic varnish — flexible, enhances sheen, moderate environmental profile.
- Solvent-based polyurethane — extremely durable, higher VOCs; use only where ventilation and regulations permit.
Pick a compatible topcoat and test a small area to confirm finish, adhesion, and long-term appearance.
Apply Sealers Correctly
Now that you’ve picked a topcoat, you’ll need to apply sealers correctly to lock in the metallic effect and protect it from wear. Work in thin, even layers—don’t rush. Sand lightly between coats to keep wall texture techniques intact and avoid flattening metallic highlights.
Choose a sealer with compatible sheen to support the metallic color psychology you want: high gloss amplifies shimmer, satin softens it. Apply with a quality brush or roller designed for clear coats, maintain a wet edge, and allow full cure times.
Inspect under different lighting, then add a final protective coat where traffic demands it.
Maintain Metallic Protection
Because metallic finishes catch and show wear quickly, you’ll need to protect them with the right topcoats and routine care to keep the effect vivid and durable. Choose a clear, non-yellowing topcoat rated for metallic sheen to lock in luster and add surface protection. Apply thin, even coats and sand lightly between layers if manufacturer recommends.
Maintain with gentle cleaning—microfiber and mild detergent—and avoid abrasive pads.
- Use a compatible clear sealer for long-term protection.
- Recoat high-traffic areas yearly or as needed.
- Clean softly and inspect for chips to touch up promptly.
Clean and Maintain Metallic-Painted Walls Long-Term
When you want your metallic-painted walls to keep their sheen, regular gentle care beats occasional heavy cleaning every time. You’ll dust weekly with a microfiber cloth to preserve metallic paint durability and avoid abrasive buildup.
For spots, mix mild dish soap with warm water, test a hidden area, then dab—don’t rub—to protect the finish.
Take wall texture effects into account: smooth surfaces clean easier; textured walls need soft-bristle brushes to reach crevices.
Avoid harsh chemicals, waxes, or polishers that can alter reflectivity.
Reapply a compatible clear sealer every few years to refresh protection and appearance.
When to Hire a Pro for Complex Surfaces or Large Rooms
If you’re facing a very large room, coordinating ladders, scaffolding, and consistent metallic finish across wide walls can become a project in itself.
For textured, uneven, or architecturally complex surfaces, achieving a smooth metallic sheen often requires specialized tools and expertise.
Consider hiring a pro when logistics or surface challenges threaten the final look or safety of the job.
Large Room Logistics
Planning a big metallic-paint job for a large room or tricky surfaces—how do you know it’s worth hiring a pro? You’ll weigh scale, timing, and finish consistency.
If you’re moving garden furniture, protecting floors, or preserving wall murals, logistics shift fast. Consider these signs:
- Room exceeds 400 sq ft or has high ceilings needing scaffolding.
- Tight move-out/move-in schedules where you can’t afford delays.
- You need flawless, seamless metallic finish across long runs or feature walls.
If one or more apply, hire a pro—they’ll manage prep, equipment, and fast, consistent results.
Complex Surface Challenges
Because metallic finishes highlight every imperfection, you’ll want a pro for complex surfaces or expansive rooms where texture, angles, or substrate issues can ruin the look.
You’ll save time and avoid costly fixes when walls have uneven plaster, trim progression, or high ceilings that demand scaffolding. A pro matches sheen across surfaces, blends seams, and recommends primers or skim coats so metallics read smoothly.
If you plan abstract patterns or want effects tied to color psychology, hire someone who understands technique and lighting.
For intricate geometry or large-scale installs, professional skill guarantees consistent, durable, and visually balanced results.
Estimated DIY Costs and Time for a Metallic Wall
Wondering what it’ll cost and how long it’ll take to paint a metallic wall? You’ll want clear cost estimation and time planning before you start.
Estimate materials (metallic paint, primer, rollers, tape) and extras for touch-ups; expect higher per-gallon prices than standard paint.
Consider wall size: a 12×12 room often needs 2–3 gallons plus primer.
Labor’s on you—factor drying between coats.
- Materials: $80–$300 depending on brand and coverage.
- Prep and tools: $20–$60 for tape, filler, sandpaper, rollers.
- Time: 2–4 days including primer, two coats, and drying.
Low-VOC and Eco-Friendly Metallic Paint Options
You can choose low‑odor, low‑VOC metallic finishes to keep your indoor air quality healthy while still getting that shine.
Water‑based metal paints offer easy cleanup and faster drying without the strong solvent smell.
Also look for options using natural pigment alternatives if you want the most eco‑friendly, non-toxic metallic effect.
Low‑Odor Metallic Finishes
If you need metallic effects without strong fumes, low‑VOC and eco‑friendly metallic paints deliver the look with far less odor and fewer harmful emissions. You’ll protect indoor air and respect metallic paint safety while minimizing environmental impact. Choose products labeled low‑VOC or Green Seal, and test a small area for appearance.
- Pick a certified low‑VOC metallic finish for better air quality.
- Use proper ventilation and reusable brushes to reduce waste.
- Dispose of leftover paint per local eco guidelines to limit pollution.
You’ll get shine with safer chemistry, keeping occupants comfortable and the planet in mind.
Water‑Based Metal Paints
When you want metallic sheen without the fumes, water‑based metal paints give you durable, low‑VOC results that go on smoothly and clean up with soap and water.
You’ll find formulas that mimic metal leaf or subtle mica, letting you layer for depth or use with stencils to echo vintage patterns.
Apply thin, even coats and sand lightly between layers for a seamless look.
Many water‑based options offer matte finishes for understated elegance or satin for more glow, and they tolerate indoor use without strong odors.
Prep, prime, and test a small patch to confirm adhesion and final effect.
Natural Pigment Alternatives
For those wanting metallic effects with an even smaller environmental footprint, natural pigment alternatives offer low‑VOC, eco‑friendly options that still deliver shimmer and depth. You can achieve subtle metallic sheens using plant‑based binders and mineral powders, blending Natural pigments into finishes that favor muted Earth tones.
Choose products labeled low‑VOC and test tint strength on scrap. Apply thin layers, burnish lightly for luster, and seal with a breathable, water‑based topcoat.
- Raw mica blends for soft shimmer and durability
- Iron oxide mixes for warm, rustic Earth tones
- Clay‑based metallics for matte shimmer and eco safety
Final Checklist to Finish a Metallic Wall Like a Pro
Before you call the job done, run through a tight final checklist to guarantee the metallic finish looks seamless, durable, and exactly the way you planned.
Walk the room in different light, noting glare, pooling, or streaks. Check edges, seams, and trim for crisp lines and touch up with a small brush.
Confirm adhesion and dryness before removing tape. Reassess sheen and color balance—don’t let metallic paint myths or poor color psychology choices justify skipping adjustments.
Clean tools, ventilate fully, and apply a recommended clear topcoat if needed.
Photograph the wall for your portfolio and client approval.
Frequently Asked Questions
Will Metallic Paint Interfere With Wall-Mounted Electronics or Wi‑Fi Signals?
Yes — you might notice issues: metallic paint’s paint conductivity can cause electromagnetic interference with Wi‑Fi and wall‑mounted electronics if applied thickly or continuously. You’ll want grounding, discontinuous patterns, or nonconductive primers to prevent problems.
Can Metallic Paint Be Applied Over Wallpaper Safely?
You can, but you shouldn’t; wallpaper removal is recommended first. You’ll need thorough surface preparation—clean, repair, prime or use a specialized primer-sealer—otherwise metallic paint may not adhere well and could peel or bubble later.
Do Metallic Paints Emit Noticeable Odor During Curing?
Yes — you’ll notice odor emission during the curing process; metallic paints often release VOCs while drying, so you’ll want ventilation and a respirator if sensitive, and low‑VOC formulations to minimize smell and health risks.
Are Special Respirators Required for Spraying Metallic Paint Indoors?
You generally do need special respirators when spraying metallic paint indoors; respirator requirements call for NIOSH-approved respirators with appropriate cartridges, and you must guarantee strong indoor ventilation to reduce fumes, particles, and health risks.
Can Metallic Finishes Be Color-Matched After Installation?
Yes, you can color match metallic finishes after installation: you’ll need precise sampling, professional spectrophotometry, and matching formulations, and you’ll accept slight sheen or flake differences, you’ll expect careful blending and expert touch-ups for seamless results.
Conclusion
You’ve got this—metallic walls won’t ruin your life or summon disco aliens, and with the right prep, tools, and patience you’ll turn boring drywall into a showstopper. Follow the steps, pick the right sheen and base, and touch up like a pro; small mistakes are fixable. If it still feels overwhelming, call a pro for the big jobs. Celebrate when you’re done—your room will gleam so much neighbors might need sunglasses.