How to Paint Old Shiplap Walls Easily
You can refresh old shiplap quickly by inspecting for rot or loose boards, cleaning grime and mildew, filling gaps, and spot-priming stained or bare areas. Use a stain-blocking primer, then apply two thin coats of a durable latex in satin or eggshell for easy cleaning. Work top to bottom, paint grooves first with a sash brush, roll board faces, and sand lightly between coats. Keep touch-up paint handy and keep going to learn practical tips and troubleshooting.
Quick DIY Checklist: Paint Old Shiplap in 6 Steps
When you’re ready to refresh old shiplap, follow this tight 6-step checklist to get a durable, professional-looking finish without wasting time or materials.
First, inspect for rot and loose boards; repair or replace as needed.
Begin by checking for rot and loose boards, and repair or replace anything compromised.
Clean thoroughly to remove grime and mildew.
Sand lightly to key the surface, then fill gaps and nail holes with paintable caulk.
Prime with a stain-blocking primer suited to wood.
Paint with two thin, even coats using quality brushes or a sprayer for consistent coverage.
Consider color coordination and historical accuracy when choosing paint to honor the room’s character.
What Painting Old Shiplap Fixes (And What It Won’t)
Painting your old shiplap will stop visible wear and breathe new life into faded boards. It also hides minor surface imperfections like small scratches, stains, and uneven discoloration.
Don’t expect paint to fix deep gouges, bowed boards, or structural issues—you’ll need repairs or replacement for those.
Stops Visible Wear
How much wear can a fresh coat hide? You can mask years of dulling, scuffs, and sun-faded boards with paint, restoring a crisp look without stripping original fabric.
Painting preserves historical authenticity if you choose period-appropriate hues and avoid over-sanding. Good color matching hides uneven fading between boards and makes the wall read as intentional rather than patched.
Expect paint to stop visible wear like surface discoloration, light scratches, and chalking, but not structural rot or loose boards. Plan to address serious damage first; otherwise, paint only cosmetically conceals problems that still need repair beneath the finish.
Hides Surface Imperfections
You’ve seen how paint can mask wear; it’ll also hide many surface imperfections—but not all. When you paint shiplap, you’ll change surface texture and reduce color contrast, which hides stains, light scratches, and uneven aging. Still, deep gouges, warped boards, and loose seams remain visible or will telegraph through finish unless repaired.
- Stains and minor scratches: paint evens color contrast and camouflages flaws.
- Small dents and grain: altered surface texture masks them from casual view.
- Structural issues: gaps, warps, and rot need fixing before painting.
When to Paint Shiplap vs Replace It
If the boards are mostly solid and the surface issues are limited to scratches, stains, or flaky paint, it’s usually smarter to paint the shiplap rather than replace it. You’ll save time and money, preserve historical accuracy when needed, and use color coordination to refresh a room’s mood without structural work.
Replace only if boards rot, warp, or have insect damage you can’t fix. Also consider insulation or wiring needs behind walls.
If you value original character or want a quick style update, painting wins. Choose primer and paint that match your durability and aesthetic goals before starting.
Inspect First: What to Look For on Old Shiplap
Before you grab paint, walk the walls and check for rot by pressing soft spots and sniffing for mildew.
Look for gaps between boards or at trim that will need filling or new caulking. Fixing these issues first will make your paint job last.
Check For Rot
Wondering whether that warped, soft plank can be saved? You’ll do a quick rot inspection and moisture check before painting.
Press nails or a screwdriver into suspicious spots—soft, crumbly wood means rot. Smell for mustiness and look for dark streaks or powdery decay. Tap boards; a hollow sound signals hidden damage.
- Probe weak areas gently to map rot boundaries.
- Note moisture check results—use a meter or check after drying.
- Decide: repair with epoxy or replace planks if rot goes beyond surface.
Act now to avoid sealing in decay.
Look For Gaps
When you inspect old shiplap, scan for gaps between boards and at seams where paint or caulk has pulled away, because even small openings can let moisture and pests in and will show through new paint.
You should run your hand along joints, use a flashlight to spot hairline separations, and check corners and trim.
Fill gaps with appropriate flexible caulk or wood filler, then sand smooth.
Match filler and primer to your chosen paint brands to assure adhesion.
Consider how color trends will affect seam visibility—darker hues hide shadows differently—so prep thoroughly before applying the final coats.
Estimate Time and Paint for Shiplap
Because shiplap has grooves, gaps, and sometimes uneven surfaces, estimating time and paint needs takes a bit more planning than a flat wall. You’ll want to account for extra prep, priming, and two coats of finish.
Think about color contrast and historical accuracy when choosing paint—lighter tones need more coats over dark stains.
Measure square footage, then add 15–25% for texture and waste.
Plan a day for prep/priming, a day for the first coat, and a day for touchups and second coat drying.
Estimate materials accordingly and schedule breaks for proper cure times.
- Measure + add waste
- Schedule coats
- Allow cure time
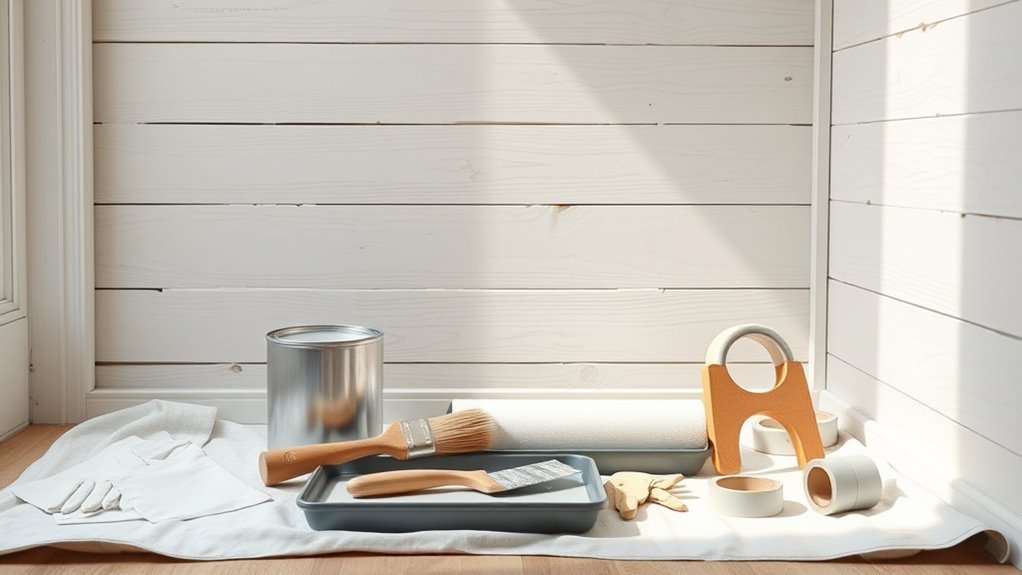
Tools and Materials You Need
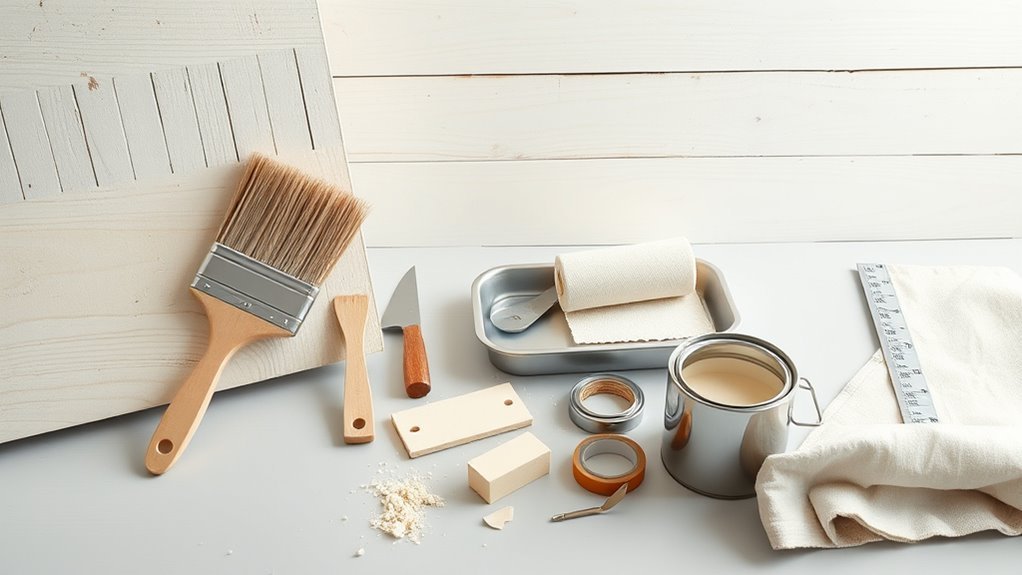
Before you start, gather the essential painting tools—brushes, rollers, drop cloths, and a good ladder—so you won’t stop midway.
Don’t forget prep and safety gear like sandpaper, caulk, respirator, and gloves to protect both the walls and yourself.
You’ll also need the right paints and fillers—primer, quality paint, wood filler, and stain-blocking products—to get a lasting finish.
Essential Painting Tools
To get clean, professional-looking results on old shiplap, you’ll want the right tools lined up: quality brushes and rollers, a good paint tray, drop cloths, painter’s tape, sandpaper, a putty knife and wood filler, plus a reliable primer and paint suited to wood.
Choose a sash brush for grooves, a 2–3″ angled brush for edges, and a foam roller for smooth panels; think about wall textures and desired paint sheens when selecting nap and finish.
Keep tools organized and ready so you work efficiently and avoid redoing sections.
- Brushes
- Rollers
- Fillers
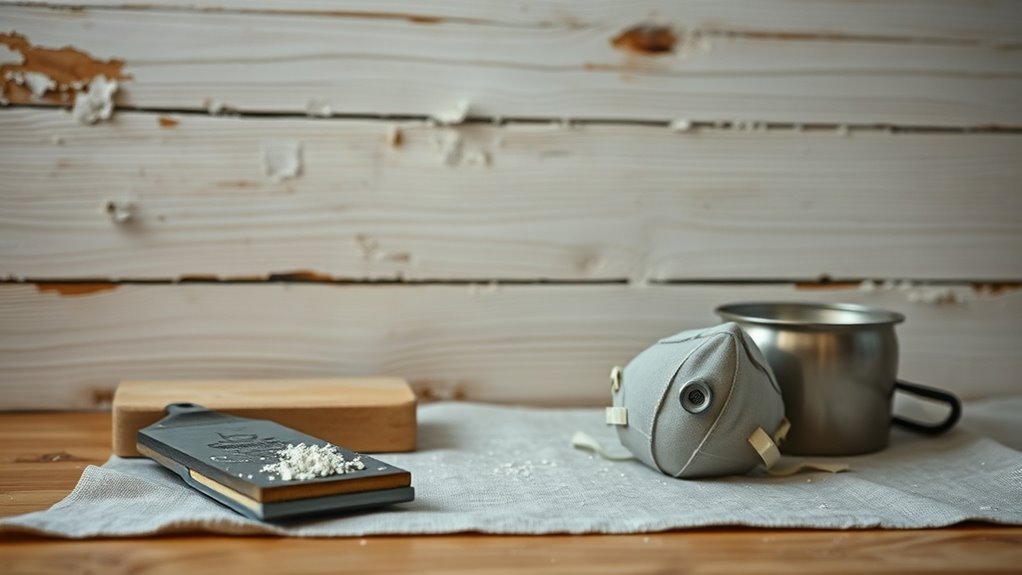
Prep And Safety Gear
When you’re prepping old shiplap, set aside the right safety gear and prep supplies so nothing slows you down. You’ll need goggles, a dust mask or respirator rated for paint particles, gloves, and knee pads for low work.
Bring a HEPA vacuum, stiff brush, drop cloths, painter’s tape, and a heat gun or scraper for stubborn paint. Keep a moisture meter and mild cleaner to test and wash surfaces.
Respect the historical context of the house—use gentler methods on fragile boards. These tools protect you and preserve the shiplap’s character while supporting your interior design goals.
Paints And Fillers
Although you can choose from many options, pick paints and fillers that match the age and condition of your shiplap: a high-quality primer that bonds to wood, a durable low-VOC latex or alkyd topcoat depending on how washable you need the surface to be, and a paintable wood filler for gaps and gouges.
You’ll want to contemplate color matching to existing trim and the right paint sheen to hide imperfections while allowing cleanability.
Gather small tools and test samples before committing.
- Primer and topcoat samples
- Paintable wood filler and putty knife
- Sandpaper, tack cloth, mixing stick
Protect Floors, Trim, and Fixtures Fast
Want the cleanup to take as little time as the painting? Start by laying down a dust sheet or contractor-grade plastic, taping seams so dirt and drips can’t sneak under. Use low-tack painter’s tape on trim and hardware to protect finishes without peeling paint. Remove or wrap light fixtures and outlet covers; label screws for quick reassembly.
For floors, consider rosin paper over vulnerable hardwood—secure edges with tape that won’t leave residue. Keep a small tray of damp rags and a putty knife nearby to lift fresh drips.
Balance historical authenticity with modern aesthetics by choosing protection that preserves original materials.
Clean Greasy, Painted, or Mildewed Shiplap
Before you prime or paint, clean greasy, painted, or mildewed shiplap so the new finish will adhere and look right. Start with a mild degreaser or trisodium phosphate substitute to remove oil and grime, rinse thoroughly, and let dry.
For mildew, use a diluted bleach solution or specialized cleaner, test a small area, scrub gently, and ventilate for mold prevention.
Sand only smooth spots after cleaning.
- Use Cleaning tips: soft brush, microfiber cloth, and proper cleaner.
- Rinse and dry completely to avoid trapped moisture.
- Wear gloves, eye protection, and ventilate the room.
Remove Loose Paint and Flaking Finish Safely
How do you get rid of peeling paint without making a bigger mess? Use drop cloths, tape off trim, and work with a utility scraper or putty knife to lift loose flakes gently.
Hold a stiff brush to sweep debris into a dustpan; vacuum with a HEPA filter afterward. For stubborn bits, use a chemical stripper per label instructions or a heat gun on low, keeping a fire extinguisher nearby.
Wipe surfaces with a damp cloth and allow to dry fully. Removing loose paint gives you a clean base so your chosen color combinations and furniture coordination will look intentional and crisp.
Sanding Shiplap for Better Paint Adhesion
Once the loose paint’s gone, sand the shiplap to create a slightly roughened surface that helps new paint adhere evenly. You’ll use a fine-grit sanding block or orbital sander, working with the grain and avoiding over-sanding edges. Wear a mask and vacuum dust between passes so primer and paint stick.
- Sand with 120–150 grit for feathering old edges and removing sheen.
- Wipe with a damp cloth, then inspect for missed spots under good light—consider color matching near trim.
- Protect nearby items; plan furniture placement before final coats to avoid scuffs.
Fill Gaps, Nail Holes, and Deep Grooves
After sanding, you’ll notice gaps, nail holes, and deeper grooves that will telegraph through primer and paint if left alone. You’ll fill small holes with wood filler and larger gaps with flexible caulk or epoxy, smoothing with a putty knife. Sand once dry, wipe dust, then prime. Thoughtful repairs let decorative accents sit flush and keep your chosen color schemes crisp. Use tapered filler for grooves and match texture to surrounding shiplap. Check for shrinkage and reapply if needed. Quick, clean repairs prevent visible flaws and ensure a professional finish.
| Tool | Material | Tip |
|---|---|---|
| Putty knife | Wood filler | Smooth excess |
| Caulk gun | Acrylic caulk | Use backer rod |
| Sandpaper | 120–220 grit | Feather edges |
| Epoxy | Two-part filler | Bond deep voids |
| Cloth | Tack cloth | Remove dust before priming |
Fix Warped or Loose Boards Without Replacing Them
If a board’s bowed or loose, you don’t have to replace it to get a flat, secure surface—start by loosening nearby fasteners, gently bending the board back with clamps or a pry bar, and then drive screws through the lap into studs to hold it tight.
Use countersunk screws and fill heads for a smooth finish. Check for rot—replace only if necessary. Consider how repaired boards will read with decorative accents and color coordination before painting.
- Clamp and bend gradually to avoid splitting.
- Screw into studs every 12–16 inches.
- Fill, sand, and touch up for seamless appearance.
When to Prime: Stain-Blocking and Adhesion Tips
Before you paint, prime any shiplap that has stains, tannin bleed, or bare wood to guarantee the topcoat hides imperfections and bonds well.
Pick a stain-blocking primer specifically rated for wood and high-tannin issues so you won’t get bleed-through later.
If the surface is previously finished but chalky or glossy, use a primer formulated for adhesion to help the paint grip.
When To Prime
Wondering whether to prime your shiplap? Consider its age and finish—shiplap history shows older boards absorb and bleed differently, and varying architectural styles used different sealers. You’ll prime when stains, tannins, or patching demand it, or when adhesion seems doubtful.
- New raw wood or porous old boards: prime to seal and equalize absorption.
- Previously stained, water-marked, or repaired areas: prime to block bleed-through.
- Smooth, glossy, or previously painted surfaces that scuff poorly: prime to promote adhesion.
Prime selectively and after cleaning; don’t skip this step if you want a durable, uniform topcoat.
Choose Stain-Blocking Primer
After you’ve decided where priming’s needed, pick a stain-blocking primer that matches the problem—oil-based or shellac for severe tannin, smoke, or water stains; high-quality acrylic for general sealing and adhesion.
Apply primer to raw wood, knots, and patched areas, following label dry times. Spot-prime stubborn stains, then sand lightly for better adhesion.
Choose primer sheen and tint to support your color schemes; a tinted primer reduces topcoat coats.
Consider how lighting options in the room reveal flaws and test a small area under real light.
Clean tools immediately and inspect before topcoating to make certain of even coverage.
Choose the Right Paint Type, Finish, and Color
Because shiplap has grooves and texture that catch light and show imperfections, picking the right paint type, finish, and color will determine not only how it looks but how long your job lasts. You’ll want durable latex for flexibility and easy cleanup, minding paint evaporation in hot or dry conditions so coverage stays even.
Use color psychology to choose tones that expand or cozy up a room. Consider low- to mid-sheen finishes to hide flaws yet clean easily. Balance light reflectivity and maintenance needs.
- Type: acrylic-latex for durability.
- Finish: satin or eggshell.
- Color: test swatches.
Brush, Roller, or Sprayer: Best Application Method
You’ll want a brush for the grooves and trim because it lets you cut in and get crisp edges.
Use a roller or sprayer to cover wide boards fast—rollers for control, sprayers for the quickest, smoothest finish.
Pick the combo that balances speed with the precision your shiplap needs.
Brush For Detail Work
Want clean edges and smooth crevices on your shiplap? You’ll reach for a quality angled sash brush to handle grooves, trim, and tight joints where rollers and sprayers can’t. Use brushes for color contrast lines and careful decorative accents that define each board.
Work steadily, loading the tip not the ferrule to avoid drips, and follow the grain for an even finish. Clean overlapping strokes keep lap marks minimal. Take breaks to inspect for missed gaps.
Finish with a light tip stroke to blend. Proper brush technique gives you crisp, controlled results on detailed shiplap surfaces.
Roller Or Sprayer Speed
While brushwork defines edges, choosing the right roller or sprayer speed will determine how evenly paint lays across your shiplap boards, so match pace to surface texture and paint type.
You’ll roll slower on rough, knotty planks to push paint into grooves and avoid thin spots; used with a medium-nap roller, a steady, measured pace prevents drips.
With an HVLP sprayer, sweep faster for thin coats and slow down for heavy coverage, keeping overlap consistent.
Adjust speed to complement your chosen color schemes and lighting options so finish looks uniform under room illumination.
Test on scrap first.
Paint Boards and Grooves for a Uniform Finish
Before you start rolling, tackle the grooves first so you get an even, professional look across boards and seams. You’ll cut in grooves with a sash brush or angled small brush, loading it lightly to avoid drips. Work along the grain and wipe excess with a rag.
- Paint grooves first, then board faces to blend edges cleanly.
- Use thin coats to prevent buildup in seams and preserve texture.
- Choose a color mindful of color psychology and historical accuracy for the room’s mood and period.
Let each coat dry fully before the next for a seamless, uniform finish.
Common Painting Mistakes and How to Avoid Them
Now that you’ve handled grooves and board faces, watch out for common painting mistakes that can undo that careful work. Don’t skip proper cleaning; dirt hides in seams and causes peeling.
Avoid heavy first coats—drips and uneven texture follow. Use primer suited to old wood; it bonds where paint won’t.
Check for millage with historical analysis if preserving period character; choose finishes accordingly.
Test color samples to use color psychology wisely—light reflects differently on shiplap.
Keep brush strokes with the boards, and sand between coats lightly.
Address moisture and nail pops before painting to prevent future failures.
Speed Tips: Cut Prep and Paint Time Safely
If you want to get the job done faster without cutting corners, focus on smart prep and efficient painting sequences that save time and prevent mistakes. You’ll choose rollers for broad coverage and angled brushes for grooves, keep tools organized, and use quick-dry primers rated for old wood.
Consider color psychology when picking finishes that need fewer coats; lighter, historical context-inspired hues often cover better. Follow a simple workflow to stay fast and safe:
- Clean, sand spots, and fill gaps in one pass.
- Prime trouble areas only, then roll entire boards.
- Work top-to-bottom and ventilate for fast drying.
Get Crisp Lines at Corners, Trim, and Ceilings
When you want sharp, professional-looking edges, tape and steady hands matter more than fancy tools. Start by cutting a clean line with a quality angled brush where shiplap meets trim and ceiling.
Sharp, professional edges come from steady hands and low-tack tape—start by cutting a clean line with an angled brush
Use low-tack painter’s tape, press edges firmly, and remove tape while paint’s tacky for crisp results.
Match sheen and color matching between trim and wall prevents visible seams; test small patches first.
Work in short sections, feathering brush strokes into the panel grooves.
For longevity, choose paints known for paint durability and recoatability.
Clean brushes, keep a steady wrist, and touch up tiny imperfections with a fine brush.
Working With Textured or Reclaimed Shiplap
Start by evaluating the surface condition so you know where repairs, sanding, or filling are needed.
Preserve character details like nail holes, knots, and worn edges if you want to keep the reclaimed look.
That balance will guide your prep and paint choices.
Assess Surface Condition
Because textured or reclaimed shiplap has more character and wear than factory-new boards, you should take a careful look before you pick paint and prep methods. Inspect boards for loose nails, rot, deep gouges, and old finishes that may affect color mixing and paint durability.
Test adherence with a scrape and a small sanding patch. Note any uneven absorption so you’ll adjust primer or tinting.
Measure how many boards need repair versus replacement; prioritize structural soundness over cosmetic fixes.
- Document damage and absorption variance.
- Decide primer type and tint.
- Mark boards for repair or replacement.
Preserve Character Details
Although you’re aiming for a fresh coat, preserve the unique marks—knot holes, nail stains, chisel marks, and uneven bevels—so the shiplap keeps its reclaimed charm. You’ll clean gently, sand selectively, and fill only where structural integrity demands it, leaving patina intact.
Choose eco friendly paints with low VOCs that highlight texture without masking history; test on a scrap to confirm opacity. Use a brush for grooves and a mini-roller for faces, feathering edges to avoid buildup.
Document features before painting for historical preservation records, and work slowly so each board’s story remains visible.
Create a Distressed or Matte Painted Shiplap Look
When you want a relaxed, lived-in finish, a distressed or matte paint treatment gives shiplap character without shouting for attention. You’ll pick a low paint sheen and plan color mixing for subtle depth. Sand lightly on edges, grooves, and raised grain to reveal undertones.
For a relaxed, lived-in look, choose a low-sheen, lightly sanded finish to reveal subtle undertones.
Use a dry brush or sanding block to distress selectively, keeping wear realistic. Seal matte surfaces with a flat protective coat if needed.
- Test combos on scrap wood to refine color mixing and distress level.
- Work in panels so wear looks natural.
- Step back often to balance contrast and texture.
Maintain Painted Shiplap and Touch Up Wear
After you’ve achieved the look you want, keep painted shiplap looking fresh with simple, regular care and quick spot repairs. Wipe dust weekly, clean marks with mild soap, and inspect seams for chips. Keep touch-up paint in a labeled jar. Consider color coordination when replacing accessories and adjust furniture placement to prevent scuffs. For stubborn wear, sand lightly, prime, and feather in paint.
| Issue | Fix |
|---|---|
| Small chip | Touch-up with brush |
| Scrape | Sand, prime, paint |
| Stain | Clean, spot prime |
| Seam gap | Caulk, paint |
Store supplies for fast future fixes.
Cost-Saving Tips and Smart Splurges
If you want to keep shiplap refurbishment affordable without sacrificing results, focus on smart choices that cut labor and material costs while letting you splurge where it counts. Prioritize prep and paint quality to preserve historical authenticity and get a lasting finish; cheap shortcuts cost more later. Use interior contrast selectively to modernize without repainting every wall.
- Do the prep yourself: sanding, cleaning, and masking save on labor.
- Buy mid-grade paint but splurge on a satin finish for durability and depth.
- Invest in quality brushes/rollers for smooth coverage and fewer touch-ups.
Troubleshooting: Peeling, Adhesion, and Visible Seams
Spending smart on prep and tools will save you from common problems like peeling paint, poor adhesion, and obvious seams. But if these issues show up, you’ll want quick, clear fixes.
If paint peels, scrape loose areas, sand edges, prime bare wood with a bonding primer, then repaint using thin coats.
For adhesion problems, roughen glossy surfaces, clean grease, and use a proper primer; test a small patch first.
To hide visible seams, fill gaps with paintable caulk, sand smooth, and feather paint to blend.
Consider color mixing and furniture coordination when touching up so repairs stay invisible.
When to Call a Pro: Signs You Need Expert Help
When you’re facing structural issues, extensive water damage, persistent mold, or rot behind the shiplap, call a pro—these problems go beyond paint and require a contractor or carpenter to assess and repair the substrate safely and effectively.
If you find structural damage, extensive water intrusion, or persistent mold behind shiplap, call a contractor.
You should also hire an expert if you want proper historical preservation or need guidance selecting eco-friendly paints that won’t harm old materials. Look for pros experienced with older homes and ventilation, permits, and structural fixes.
- Visible sagging, cracked studs, or loose boards.
- Recurring mold or unexplained moisture after repairs.
- Desire for authentic restoration with safe, green finishes.
Frequently Asked Questions
Can I Paint Shiplap Over Wallpaper Without Removing It?
You can, but it’s risky: wallpaper removal is usually best. You’ll need thorough surface preparation—cleaning, repairing seams, priming with a high-adhesion primer—so the paint sticks and you avoid bubbling or peeling later.
How Does Painted Shiplap Affect Home Resale Value?
Painted shiplap can skyrocket curb appeal—sometimes absurdly—if you choose wisely. You’ll boost perceived shiplap durability with proper prep, and smart paint color choices attract buyers; poor color risks dating the space and lowering offers.
Will Paint Hide Smoke or Nicotine Stains Completely?
Not completely; you’ll need smoke stains sealed and nicotine removal steps before painting. Clean with degreaser, then use a stain-blocking primer to lock remaining residue in so paint won’t bleed or reappear later.
Can I Paint Shiplap in Humid Climates Without Mold Issues?
Yes — you can paint shiplap in humid climates if you prep properly. You’ll use mold prevention measures, install moisture barriers, guarantee ventilation, treat existing mold, prime with mildew-resistant primer, and choose mold-inhibiting paint for lasting protection.
Are Low-Voc Paints Safe for People With Chemical Sensitivities?
Absolutely — low-VOC paints are generally safe for people with chemical sensitivities, but don’t expect miracle-level purity; they improve environmental safety, reduce fumes, and you should still test samples and ventilate to avoid reactions.
Conclusion
You’ve got this — painting old shiplap is a weekend victory if you follow the checklist and inspect first. Think of prep as the recipe’s secret spice: clean, sand, and prime where needed for lasting results. Save effort by touching up problem spots early, and call a pro if rot or major gaps show up. With smart splurges and basic maintenance, your refreshed shiplap will feel like a new room you actually want to live in.