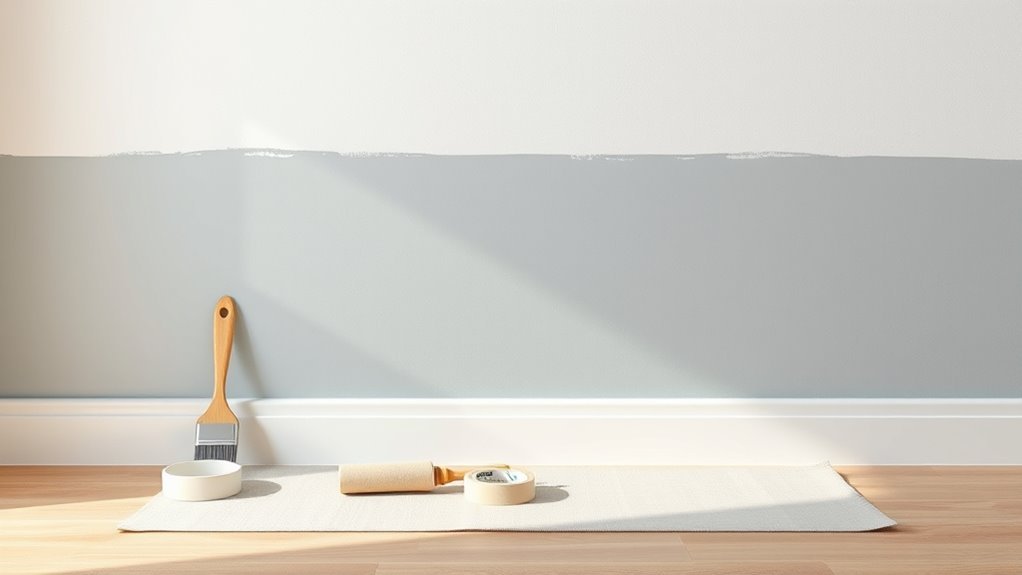
How to Paint One Horizontal Stripe on a Wall
You can paint a crisp horizontal stripe by prepping the wall—clean, sand, and prime if needed—then measure and mark a level guide at eye height. Apply quality painter’s tape along the top and bottom lines, press edges firmly, and roll or brush the chosen color between the taped lines in even passes. Remove the tape while paint is tacky, touch up any gaps, and let dry fully; keep going for tips on placement, width, and styling.
Quick Steps: Paint One Horizontal Stripe Fast
When you’re ready to add a single horizontal stripe, tape the top and bottom edges, sand and clean the wall, then roll or brush the paint between the taped lines in even passes. Remove the tape while the paint’s still slightly tacky for a crisp edge.
Measure and mark a level guide, use a quality painter’s tape, and apply primer if needed for uniform coverage.
Measure and mark a level guide, use quality painter’s tape, and prime when needed for even, professional coverage.
Choose a color informed by color psychology to set mood, and pick a finish that balances look with paint durability.
Work from one end to the other, feather edges lightly, let dry, and touch up any gaps promptly.
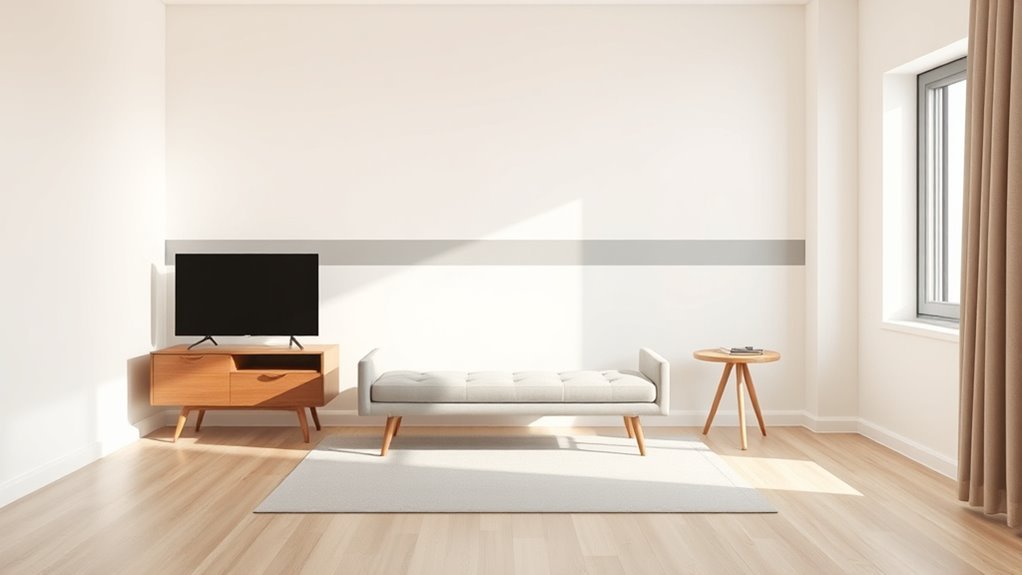
When a Single Stripe Is the Right Accent
Why choose a single stripe? You want a focused accent that doesn’t overpower the room. A lone horizontal band highlights architecture, anchors furniture, and guides sightlines without busying the palette.
Consider color psychology: muted blues calm, warm ochres energize, and neutrals harmonize—pick one hue to set tone.
A solitary stripe can also reference historical patterns in modern ways, echoing classic friezes or sailor stripes while staying minimal. Use contrast and proportion wisely so the band complements rather than competes.
When subtlety and clarity matter, a single stripe gives personality with restraint.
Decide Stripe Placement: Visual Goals
Think about placing the stripe at eye level so it becomes a natural focal band in the room.
You’ll also want to align the stripe with architectural lines like chair rails, windows, or door frames for a cohesive look.
Finally, consider where your furniture sits so the stripe complements rather than clashes with seating and storage.
Eye-Level Focal Band
Where do you want the eye to land in the room? Position a horizontal band at eye level to anchor sightlines, using color psychology to guide mood—calming blues lower perceived height, warm tones draw focus.
Measure typical standing and seated eye height for users, then test with painter’s tape before committing. Keep the band width proportional: narrow for subtle emphasis, wider for a strong focal strip.
Consider historical influences—midcentury and Regency interiors taught us how a waist-level band shapes proportion. Paint crisp edges and choose finish contrast for visibility.
This creates a deliberate, human-centered focal band without architectural changes.
Align With Architecture
When you align a horizontal stripe with existing architectural lines—like chair rails, window sills, molding, or the top of wainscoting—you reinforce the room’s proportions and make the stripe feel intentional rather than applied. You’ll use architecture to guide placement, boosting interior symmetry and leveraging Color psychology to influence mood: low stripes cozy, high stripes airy.
Match stripe thickness to trim scale, keep sightlines clear, and avoid cutting through features. Plan measurements from fixed elements, not furniture. Use painter’s tape anchored to molding for crisp edges.
- Measure from a datum line
- Respect existing proportions
- Test with sample swatches
- Keep edges aligned
Consider Furniture Placement
One key consideration is how your furniture will interact with the stripe. You’ll place the stripe where it complements furniture arrangement and enhances room layout flow. Aim the stripe to anchor large pieces—so it won’t be hidden behind a sofa or bisected by a headboard. Measure eye level and sight lines from seating; the stripe should feel intentional, not accidental. Consider continuity across openings and around built-ins. Use the table below to spark feeling about placement choices:
| Cozy | Bold | Calm |
|---|---|---|
| Sofa-aligned | Centered on wall | Low, grounding |
| Bed-backdrop | Focal point | Subtle balance |
Choose Stripe Width for Your Style
Think about how the room’s size and furniture will interact with the stripe width you pick.
You’ll want wider stripes in larger spaces and narrower bands in small rooms to keep proportions balanced with the ceiling height.
Aim for a width that complements the room’s scale rather than overpowering it.
Width Based On Room
Pick a stripe width that matches the room’s size and purpose: narrow bands add detail in small or busy rooms, medium stripes suit most living spaces, and wide stripes make a bold statement in larger or minimalist areas.
You’ll choose width by function: narrow for visual interest without overwhelming, medium for balanced aesthetics, wide for emphasis or to highlight a feature wall.
Consider color psychology for mood and tie choices to historical decor if you’re aiming for period accuracy.
Measure and mock up with painter’s tape before committing.
- Narrow: hallways, baths
- Medium: living rooms, bedrooms
- Wide: lofts, open plans
Try samples first
Proportion To Ceiling
Because the stripe sits directly beneath the ceiling, its width should relate to the ceiling height so the room feels balanced. Aim for narrower bands under low ceilings and broader stripes where ceilings are high to keep proportions natural.
You’ll decide stripe height based on ceiling proportion: low ceilings suit slim stripes (about 6–10% of wall height), standard ceilings take moderate bands (10–15%), and tall ceilings tolerate bold bands (15–25%).
Measure before taping, then step back to judge visual balance.
Lighter stripe colors recede, darker ones read as heavier, so match stripe width to color weight for cohesive, comfortable results.
Position Stripe to Make a Room Feel Wider
When you place a horizontal stripe lower on the wall, it draws the eye across the room at a broader level and instantly makes the space feel wider. You’ll want to pick a stripe height that sits below mid-wall so sightlines move laterally.
Use color psychology to choose tones that recede—cool, muted hues feel expansive. Look to historical inspiration like wainscoting bands for proportion cues.
Measure carefully, tape straight, and paint crisp edges to emphasize the effect.
- Choose cool, low-contrast colors
- Keep stripe below eye level
- Use thin to medium widths for subtlety
- Align stripe across connected walls
Position Stripe to Make a Room Feel Taller
If you place a horizontal stripe higher on the wall, it draws the eye upward and gives the impression of added height. Position the band above mid-wall—near the upper third—so sightlines travel toward the ceiling and rooms feel taller.
You’ll plan measurements carefully, taping crisp lines and using steady brushwork so the stripe reads as intentional architecture. Consider color psychology when selecting contrast levels: lighter tones near the ceiling amplify lift, while subtle contrast keeps proportions elegant.
You can borrow from historical wall techniques—like dado simplification and crown accenting—to inform placement and scale, making low ceilings seem more expansive.
Pick the Perfect Stripe Color
Think about how your room’s lighting will change a color—natural and artificial light can warm or cool a stripe.
Match the stripe to existing furnishings and accents so it feels intentional, not tacked on.
Always test a few swatches on the wall at different times of day before you commit.
Consider Room Lighting
Because lighting changes how paint reads, check your room at different times before picking a stripe color. You’ll see how natural lighting and artificial fixtures shift Color perception, so test samples on the wall. Move swatches around and observe morning, midday, and evening light to avoid surprises.
- Tape small swatches at stripe height to view in situ.
- Photograph samples at different times to compare tones.
- Use a neutral white card beside swatches for reference.
- Consider how shadows and glare alter saturation.
Trust what you observe in the actual room rather than just the paint chip under store lights.
Coordinate With Furnishings
When you pick a stripe color, let the room’s largest and most permanent pieces—sofas, rugs, curtains, and built-ins—guide the choice so the stripe ties the space together rather than fighting it. You’ll use color psychology to set mood: calming blues, energetic yellows, grounding neutrals. Match undertones to furniture finishes and repeat accent hues to unify. Look to historical inspiration for classic combos that feel intentional. Use the table below to weigh options quickly.
| Furnishing Type | Color Strategy |
|---|---|
| Sofa | Pick a complementary or neutral stripe |
| Rug | Echo dominant rug tones |
| Curtains | Coordinate warmth or coolness |
| Built-ins | Contrast subtly for depth |
Test Swatches On Wall
Curious how a stripe will actually read in your room? You’ll want to test swatches on the wall at different heights and in varied light. Pick small patches, observe morning and evening, and note how color psychology affects mood—calm blues, energizing yellows. Use eco-friendly paints for easy changes and minimal odor. Tape samples edge-to-edge to simulate stripe width before committing.
- Try three shades: light, medium, dark
- View swatches from seating and doorway
- Photograph at different times of day
- Live with them for 48 hours before deciding
Match Stripe Color to Trim and Decor
To make your stripe feel intentional, tie its color to existing trim and decor so the room reads as a cohesive whole. Look at dominant hues in curtains, rugs, and furniture, then pick a stripe shade that echoes or complements them.
Use color psychology to decide mood—soft blues calm, warm ochres energize. Consider historical influences in your home’s style; Victorian detail pairs with richer tones, mid-century spaces suit muted contrasts.
Test a small swatch next to trim under different light. Keep contrast balanced so the stripe accentuates decor without overpowering the room’s established palette.
Best Paint Finishes for a Horizontal Stripe
After you’ve matched the stripe color to trim and decor, pick a finish that supports the look and holds up to wear. Choose satin for living areas for subtle sheen and easy cleaning, or eggshell for low-traffic rooms where matte softness suits stripe pattern designs.
Use semi-gloss on trim-adjacent stripes for durability and crisp edges, especially with bolder paint color combinations. Flat works for hiding wall flaws but’s harder to clean, so reserve it for accent-only stripes.
- Satin: balanced sheen, washable
- Eggshell: soft, low-luster
- Semi-gloss: durable, sharp lines
- Flat: conceals imperfections, less washable
How Much Paint for One Horizontal Stripe
When you’re planning a single horizontal stripe, the main factors that determine paint need are the stripe’s width, the wall length it spans, and how many coats you’ll apply.
Measure the stripe area (width × length), divide by your paint’s coverage per gallon (usually 350–400 sq ft), and round up for a safety margin.
Calculate one coat, then double for two coats; small touch-ups may require an extra quart.
Consider paint sheen and color combinations that affect coverage—darker or more saturated hues may need extra coats.
Look for eco-friendly options with higher pigment load to reduce coats and odor.
Tools for a Crisp Horizontal Stripe
If you want razor-sharp horizontal stripes, start with the right tools: a quality level or laser level, a good 1–2 inch angled brush for edges, a 3–4 inch mini roller with a smooth nap for filling, painter’s tape designed for delicate surfaces, a straightedge or long ruler, a pencil or chalk for marking, and a damp rag for quick touch-ups.
You’ll use those to translate color psychology into clean bands and to echo elements from historical wall designs without muddiness. Gather compact, reliable gear so layout and paint application stay precise.
- Level and straightedge
- Painter’s tape
- Mini roller and tray
- Damp rag and pencil
Brushes: Sizes and Types Explained
Because clean edges depend on the right brush, you’ll want to match size and bristle type to each stripe task.
Use a 1–1.5″ angled sash brush for cutting in sharp lines, switching to a 2–3″ quality synthetic for wider stripes with latex.
Natural bristles suit oil-based paints; synthetics resist water swell and keep shape with latex.
Keep a separate angled brush for crisp edges and a flat for touch-ups.
Practice light pressure and short strokes.
Rinse and reshape bristles after use; follow brush maintenance and proper paint storage to prolong life and performance.
Rollers and Roller Strategies for Even Fill
Although edges get the attention, rollers do the heavy lifting for an even stripe, so pick the right nap and load the roller correctly to avoid lines and pooling.
You’ll choose nap based on surface texture, match roller techniques to paint consistency, and work in overlapping passes. Hold the frame steady, keep a wet edge, and avoid pressing too hard.
- Use a short nap for smooth walls, medium for slight texture.
- Load evenly on a tray to prevent drips.
- Roll in an “N” pattern, then smooth with light vertical strokes.
- Maintain consistent paint consistency for uniform coverage.
Preparing the Wall: Clean and Repair
Before you paint a horizontal stripe, make certain you clean the wall thoroughly to remove dust, grease, and cobwebs so the paint will adhere.
Patch holes and cracks smoothly with spackle, let it dry, then sand the repairs flush with the wall.
Finally, wipe away dust and apply a primer where needed to guarantee an even finish.
Clean Surface Thoroughly
Want your stripe to look crisp and last? Clean the wall thoroughly to remove dust, grease, and loose particles that harm wall texture and reduce paint durability. Work top to bottom with a microfiber cloth, mild detergent, and a bucket of clean water. Let the surface dry fully before taping.
- Wipe with a dry cloth first to remove dust.
- Use a degreaser for kitchen or high-traffic areas.
- Rinse with clean water to avoid residue.
- Allow at least 24 hours to air-dry in humid rooms.
Proper cleaning guarantees tape adhesion and a smooth base for even paint coverage.
Patch Holes Smoothly
Once the wall’s clean and dry, patch any dents, nail holes, or cracks so your stripe lays flat and looks professional.
Fill small holes with lightweight spackling; press into the void, level with a putty knife, and wipe away excess.
For larger gouges, use a patch kit or joint compound in thin layers, letting each set before continuing.
Match surrounding texture options so repairs blend; smooth for glossy areas, slight stipple for textured walls.
Properly finished patches improve paint adhesion and paint durability, preventing peeling or show-through.
Keep repairs minimal and neat to preserve a crisp stripe edge.
Sand And Prime
Now that holes are patched and smooth, sand the repaired areas and surrounding surface so the stripe will sit even and the paint will adhere properly. Lightly sand with fine-grit paper, remove dust with a damp cloth, and inspect for uneven texture patterns that could show through.
If you plan wall stencils nearby, make certain the surface is uniform. Apply a quality primer suited to your wall type, focusing on the stripe zone and connections. Let it dry fully before taping.
Follow these quick checks:
- Sand lines blend seamlessly
- Dust wiped away completely
- Primer covers variations
- Edges feathered for clean tape removal
Priming for Better Stripe Coverage
How do you assure your stripe looks crisp and the base color won’t bleed through? Begin by sealing patched spots with a thin primer coat, so texture and previous colors won’t telegraph.
Choose a primer compatible with your paint—this aids color mixing later and ensures topcoat adhesion. Apply two light coats if the base is dark or glossy, allowing full paint drying between coats to avoid lifting.
Once primed, use quality painter’s tape and press edges firmly. A well-primed surface needs fewer stripe touch-ups, yielding a sharp edge and uniform finish with minimal bleed through.
Measure the Wall Accurately
Start by measuring the full wall height so you know exactly where the stripe will sit.
Use a tape measure and level to mark the top and bottom edges of the stripe at several points along the wall.
Connect those marks with a light pencil line so your tape and brush work stays straight.
Measure Wall Height
Before you mark anything, measure the wall height at several points—near each corner and in the middle—so you’ll catch any variations caused by settling or uneven floors. Use a tape measure and record the shortest and tallest readings; that’ll determine stripe consistency and how color psychology plays across scale.
Consider paint durability when choosing stripe placement—higher-traffic areas need tougher finishes. Note ceiling and baseboard irregularities so your stripe aligns visually.
- Measure at eye level and near floor
- Record three readings per wall
- Use a straightedge for any bowing
- Recheck measurements after masking
Mark Stripe Placement
Want the stripe dead level and evenly spaced? Measure the wall height at several points and mark the stripe’s top and bottom lines with a pencil. Use a tape measure, record distances from floor and ceiling, and average them if floors slope.
Snap a chalk line between matched marks for a crisp guide. Consider color psychology when choosing stripe position—higher placement can feel airy, lower feels grounded—and glance at historical examples for proportion cues.
Double-check with a level and a plumb line at corners. Fix any discrepancies before taping; accurate marks make painting fast and flawless.
Mark a Level Line Without a Laser
You don’t need a laser to get a perfectly level stripe; a few simple tools and a steady hand will do the job. Start by measuring from a fixed reference (floor or ceiling), mark key points, and use a long straightedge or chalk line to connect them.
Think about color psychology when choosing stripe height—eye-level placement feels natural. Historical techniques like plumb bobs and water levels still work great.
- Measure at several points along the wall
- Use a carpenter’s level or water level for consistency
- Snap a chalk line or score lightly with a pencil
- Double-check measurements before taping and painting
Use a Laser Level for Perfect Lines
When accuracy matters, a laser level makes laying out a horizontal stripe fast and foolproof. You set the device, adjust height, and project a crisp line around the room. Use laser alignment to match your desired stripe position, then place precision markers along the beam. Check for level at corners and across long walls, correcting the device until the line is steady. Once marked, you can apply painter’s tape directly to the markers for a clean edge.
| Step | Action |
|---|---|
| 1 | Mount laser |
| 2 | Align beam |
| 3 | Mark tape |
Tape Measure and Chalk Line Technique
If you don’t have a laser level or prefer a low-tech approach, the tape measure and chalk line method gives the same straight, consistent stripe. You’ll measure reference heights from a fixed point, mark lightly, and snap a chalk line across the wall.
Check alignment at multiple points so color blending or subtle texture patterns won’t mislead your eye. Use a level to confirm the chalk line. Snap, recheck, and snap again if needed.
Check alignment at several spots—subtle texture or color can fool you. Level the line, snap, and verify again.
When satisfied, you’ll tape along the chalk line and seal edges before painting for crisp results.
- Measure from a permanent spot
- Mark at several studs
- Snap and verify
- Seal tape edges
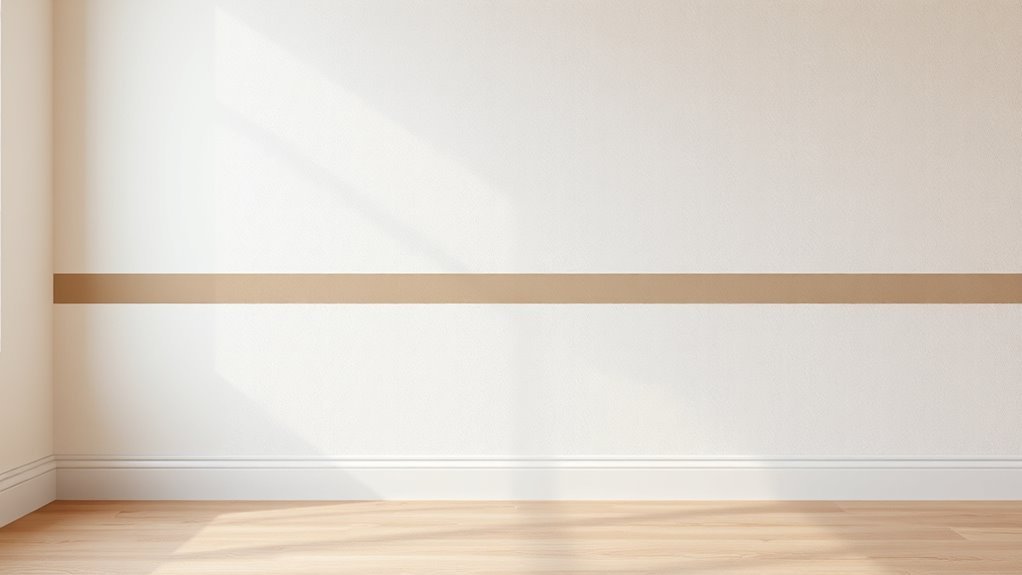
Choose the Right Painter’s Tape
Now that your line’s measured, pick a tape that sticks well without stripping paint—you’ll want the right adhesion strength for your wall type.
Check that the tape’s edge is crisp to prevent seepage and give you clean stripe lines.
Finally, choose a width that matches your stripe so you get fewer seams and quicker application.
Tape Adhesion Strength
Want crisp, clean stripe edges? You’ll want tape adhesion that grips without tearing paint when removed. Choose tape rated for your wall surface and paint durability concerns—higher adhesion for textured walls, medium for smooth.
Press the tape down firmly and remove it at a 45° angle after the paint skins over, not fully cured.
- Pick tape labeled for delicate surfaces if paint durability is low.
- Test a short strip first to confirm removal without pulling finish.
- Avoid extra-strong tapes on fresh paint or fragile primers.
- Replace old, hardened tape; its adhesive fails over time.
Tape Edge Cleanliness
Because your tape determines whether you get razor-sharp lines or fuzzy bleed, pick a tape designed for the surface and paint type you’re using. You want tape precision so your stripe edges stay crisp; test a short length first to confirm adhesion and easy removal.
Press the tape down firmly with a plastic card or your thumb to guarantee complete edge sealing, especially along textured or uneven areas. Avoid stretching the tape, which can lift when paint dries.
Remove the tape while paint is tacky or just dry at a low angle to prevent jagged edges and keep cleanup minimal.
Tape Width Options
How wide should your painter’s tape be? You’ll pick tape based on stripe height, wall texture, and design intent. Narrow tape gives fine accent lines; wide tape creates bold bands. Consider color psychology when choosing proportions—thin lines feel subtle, wide bands feel dramatic. Also think about historical patterns you’re echoing: Victorian friezes might need narrower bands than mid-century block stripes.
- For slim accents, use 1/4″–1/2″ tape and steady hands.
- For medium stripes, choose 1″–2″ tape for control.
- For bold bands, pick 3″–4″ tape to cover more area.
Test on scrap before committing to full walls.
Taping Technique to Prevent Bleed
When you’re ready to mask the stripe, use high-quality painter’s tape and press it down firmly along the top edge so paint can’t seep underneath. Run a putty knife or your fingernail along the tape, bonding it to irregular wall textures and minimizing gaps.
Seal the bottom edge by applying a thin bead of clear acrylic caulk or diluted base color, then smooth it into the seam; this blocks bleed without harming color blending.
Remove tape while paint is tacky for a crisp line, pulling back at a 45-degree angle. Work steadily along the stripe to keep edges consistent and clean.
Feather Tape Edges for Cleaner Transitions
If you want a softer shift between stripe and wall, feather the tape edges before you paint: press the tape down, then wipe a thin layer of the base color over the exposed adhesive with a small brush or roller so the tape carries the background tone. This feather tape edging step blocks color bleed and creates a seamless transition when you apply the stripe color.
Work carefully, let the base coat dry, then paint the stripe. After painting, remove tape gently at an angle.
Tips to improve results:
- Use quality painter’s tape for clean adhesion
- Apply thin base coats only
- Smooth edges with a fingertip
- Remove tape while slightly wet
Cutting the Stripe Edge With a Brush Like a Pro
Pick a high-quality angled sash brush that fits the stripe width so you can control each stroke.
Hold the brush like a pencil and brace your elbow against your side to steady your hand for crisp, even edges.
Practice short, confident pulls toward you instead of long strokes to keep the line sharp.
Choose The Right Brush
Because a crisp stripe depends on a steady, precise edge, choosing the right brush matters more than you might think. You’ll pick a high-quality angled sash brush for control, match bristle type to your paint (synthetic for latex, natural for oil), and consider width—2–2.5 inches works well for most stripes.
Think about color mixing needs when you select a brush that won’t trap pigment, and prioritize brush maintenance to keep edges sharp over multiple coats.
- Angled sash brush, 2–2.5 in
- Synthetic bristles for latex
- Short handle for control
- Clean immediately after use
Master Steady Hand Techniques
Now that you’ve chosen the right angled sash brush, it’s time to steady your hand and cut a razor-sharp stripe edge. Anchor your forearm on the wall or use a small painter’s pole to minimize shake.
Load the brush sparingly, tap off excess, and paint with short, confident strokes away from the tape line. Relax your wrist, breathe evenly, and keep the brush at a consistent angle.
Practice on scrap board using historical techniques like feathering to blend edges. Remember how Color psychology makes crisp lines feel intentional—precision sells calm or energy, depending on your hue choice.
Angled vs. Trim Brush: When to Use Each
When you’re laying down a crisp stripe, the right brush makes the cut. You’ll choose based on edge type: angled brushes give control for straight lines and corner approach; trim brushes suit long, continuous strokes.
Focus on brush techniques and paint consistency—thin slightly for smoother flow, avoid overload to prevent drips. Use steady pressure and short strokes near the line, then feather outward.
Thin your paint slightly, avoid overloading the brush, use steady short strokes at the edge, then feather outward for a clean stripe.
- Use angled for precision and cutting in
- Use trim for long runs and touch-ups
- Keep paint thin enough for smooth release
- Wipe excess to prevent bulges and maintain a sharp edge
Rounding Corners and Doorways With a Stripe
After cutting in with your angled brush or laying a long run with a trim brush, you’ll face corners and doorways where the stripe needs to curve or wrap smoothly. Measure and mark the stripe line onto adjoining surfaces so the flow feels intentional.
Use a flexible trim brush or a sash tool to ease around jambs, feathering slightly to avoid hard edges. For tight returns, roll thin coats and touch up with a liner brush.
Consider color psychology when choosing wrap width near entryways—wider wraps feel welcoming; narrow ones feel subtle. Study historical patterns for inspiration on graceful progressions.
Striping Around Outlets and Switches Safely
Before you paint, turn off the power at the breaker and test the outlets so you know they’re safe to work around.
Remove the switch and outlet covers to get a clean edge, and keep the screws in a small container so they don’t get lost.
Mask carefully around the fixtures with painter’s tape so your stripe stays crisp without risking paint on the hardware.
Turn Off Power
Why flip the breaker? You’ll protect yourself while working near outlets and switches. Prioritize electrical safety and check lighting considerations so you know which breaker affects the area. Turn off the circuit to avoid shocks, then test before painting.
- Label the breaker so you won’t accidentally restore power.
- Use a non-contact tester at each outlet and switch to confirm no voltage.
- Keep a flashlight or headlamp handy for lighting considerations once power’s off.
- Inform household members not to flip switches until you’re done.
Don’t remove plate covers yet; only confirm power is safely off.
Remove Plate Covers
Now that you’ve confirmed the power’s off and labeled the breaker, you’re ready to remove outlet and switch covers so you can paint clean stripe edges. Use a flathead or Phillips screwdriver to loosen screws, keeping each screw with its matching plate covers so reassembly’s quick.
Gently pull plates away, exposing electrical outlets and switches without touching wiring. If a device is loose, snug but don’t overtighten when reinstalling.
Place removed plates and screws in a labeled container near the work area. With plates off, you’ll get crisp stripe lines and avoid paint buildup on hardware when you proceed.
Mask Carefully Around Fixtures
When you’re ready to paint the stripe, mask carefully around outlets and switches so paint lines stay crisp and fixtures stay clean. You’ll do quick fixture masking with painter’s tape and small plastic—remove covers first, press tape tight against edges, and wrap switches to prevent splatter.
Use a craft knife to trim tape flush, then run a putty knife or credit card along seams for edge sealing. Check alignment before painting and replace covers after paint cures.
Follow safety: shut power for deep work and avoid taped live switches.
- Use low-tack tape for delicate finishes
- Trim carefully for neat corners
- Seal edges with a flat tool
- Replace plates after cure
Fill the Stripe Without Lap Marks (Multi-Coat)
Because overlapping wet edges causes visible lap marks, you’ll want to work so each pass dries before you blend the next one. Start by cutting in crisp edges with a quality angled brush, referencing color psychology to decide whether the stripe should feel bold or calming.
Roll thin, even coats with a high-density roller, keeping a wet edge along the stripe’s length. After the first coat cures to touch, sand lightly with fine grit, vacuum, and tack cloth.
Apply a second thin coat the same way. Historical wall patterns often used multiple light layers for depth—follow that method for seamless results.
Drying Times and Humidity Tips
Although temperature and humidity both affect drying, humidity is often the deciding factor for how long each coat needs to cure before you sand or recoat. You’ll want to focus on humidity control and proven drying techniques so coats set evenly and edges stay crisp.
Open windows, run a dehumidifier, or use fans to speed curing without overheating paint. Check manufacturer times and test a small area before sanding. If humidity’s high, wait longer and avoid tacky sanding.
Balance airflow and temperature to prevent blushing or skinning.
- Use a hygrometer to monitor levels
- Increase ventilation gradually
- Run a dehumidifier in damp rooms
- Follow paint label drying techniques
Removing Tape for the Sharpest Edge
If you want the cleanest stripe, pull the tape off while the final coat is still slightly tacky so paint doesn’t lift with it. Peel slowly at a 45-degree angle, keeping the tape close to the wall to minimize tearing.
If edges feather, use a small artist brush to suavely touch up while paint remains workable. Avoid pressing tape back down—repainting compromises color mixing and can muddy crisp boundaries.
Let the area rest briefly to promote paint durability before heavy contact. Clean edges immediately, dispose of used tape, and inspect in good light so any tiny flaws are corrected promptly.
When to Wait to Touch Up After Tape Removal
Wait at least 30 minutes to an hour before doing any touch-ups so the paint firms up enough to take a clean correction without dragging or lifting. You’ll check edges, feel for tackiness, and plan corrections when the stripe won’t smear.
Use the same color mixing ratio and fresh stir to match sheen and avoid noticeable patches. Consider paint durability—don’t rush; a slightly longer cure helps adhesion.
Work with a small brush, straight strokes, and minimal paint. If temperature or humidity’s high, extend waiting time. Keep a damp cloth nearby for tiny smudges before full cure.
- Check tackiness first
- Match color mixing precisely
- Use minimal brush strokes
- Extend wait if humid
Fix Paint Bleed: Easy Repair Steps
When paint bleeds under your tape, start by letting the area dry enough to avoid smearing. Then remove any raised ridges or blisters with a sharp utility knife and a light sanding, feathering the edge so the repair won’t show.
Clean dust with a tack cloth, then apply a thin coat of primer or the base wall color to seal the feathered spot. Once dry, repaint the stripe carefully, using a small angled brush for control.
Consider color psychology when matching tones so the repair reads seamless. Use eco-friendly paints to minimize fumes while achieving a clean, durable finish.
Fix Crooked or Wavy Stripe Lines
Because a crooked or wavy stripe jumps out even from across the room, you’ll want to correct it as soon as possible using steady, simple steps. Inspect the stripe for Crooked lines or Wavy edges, then remove tape, sand rough spots, and re-tape with a level or laser guide. Use painter’s caulk where the wall meets tape to seal gaps, and press tape firmly to avoid bleed.
Paint short, controlled strokes along the edge, peeling tape while wet for a clean line.
- Check level and mark endpoints
- Sand bumps, clean dust
- Apply caulk to gaps
- Re-tape with firm pressure
Fix Uneven Paint Sheen in the Stripe
If the stripe looks patchy or shinier than the surrounding wall, start by matching the paint sheen so it blends seamlessly.
Feather the edges with a light brush or roller stroke to avoid a hard line, then lightly scuff glossy spots with fine sandpaper.
If sheen still varies, clean the area and apply a thin, even recoat.
Match Paint Sheen
Although sheen can seem subtle, mismatched gloss between your stripe and the surrounding wall jumps out and makes even precise lines look amateurish. You’ll want consistent paint sheen and accurate color matching to keep the stripe cohesive.
Test samples: apply the same finish as the wall, let it dry, and view under room lighting. If gloss differs, switch to the correct finish or add a flatting medium sparingly. Work in small patches to compare.
Clean tools and surface contaminants, like wax or silicone, can alter shine—remove them before painting to guarantee predictable results.
- Test samples side-by-side
- Use same finish as wall
- Add flatting medium if needed
- Clean surface and tools
Feather Edges Smoothly
When you feather the stripe’s edges, you’ll blend paint so the shift reads seamless and avoids a glossy ridge that catches the eye. Work while paint is tacky: remove excess from your brush or roller, then lightly drag outward from the stripe into the base wall with a dry, soft-bristle brush. Use short, overlapping strokes and alternating pressure to feather edges without leaving streaks.
For effective color blending, slightly thin the stripe edge coat or lightly mist with water (latex) to keep edges workable. Step back often, check in different light, and repeat gentle feathering until sheen and hue gradation smoothly.
Lightly Scuff And Recoat
Because fresh paint can show slight gloss variations even after feathering, you’ll want to lightly scuff the stripe before recoating to guarantee an even sheen. Gently sand with fine-grit paper, remove dust, and spot-check under different lights so texture patterns don’t betray inconsistencies.
Consider how sheen affects color psychology; subtle gloss can make a stripe feel brighter or more formal.
- Sand lightly with 220-grit, following the stripe’s grain.
- Wipe with a tack cloth to remove residue.
- Apply a thin, even second coat with a soft roller.
- Inspect after drying and repeat scuffing if needed.
Touch Up Mistakes Without Repainting the Wall
Made a slip with your brush? Clean the area immediately with a damp cloth to lift wet paint. If the paint is dry, gently sand feathering the edge.
Match sheen and color—remember color psychology: people notice tiny hue shifts, so test a swatch. Apply a thin layer with a small brush, working outward to blend; use glazing medium for subtle gradations.
For raised mistakes, sand then fill, prime, and touch with matching paint to preserve paint durability. Let each coat dry fully and inspect under natural light.
Step back often; small corrections keep your stripe crisp without repainting the whole wall.
Blend a Stripe Into Textured Walls
How do you make a crisp horizontal stripe sit naturally on a textured wall? You’ll use textured wall techniques that respect the surface while applying stripe blending methods to avoid harsh edges. Work with a small brush to feather paint into peaks, and use a roller with matching nap for even coverage.
Blend wet edges quickly and step back to check sightlines.
- Test on a scrap piece or inconspicuous area.
- Use painter’s tape only on flatter sections.
- Feather with a damp sponge for subtle shifts.
- Match sheen to minimize contrast and reveal texture subtly.
Work With Wallpaper or Accent Materials
If you’re adding wallpaper or other accent materials with your stripe, pick products that’ll adhere well to your wall type and won’t peel under paint.
Prep the surface by cleaning and smoothing any bumps, and make sure seams are tight and secure.
Test a small patch to confirm paint and adhesive compatibility before you finish the whole stripe.
Choose Compatible Materials
When you plan a horizontal stripe near wallpaper or an accent panel, pick paints, primers, and tapes that won’t react with those materials or lift their adhesive. You’ll choose finishes and brands that respect color psychology while favoring eco friendly paints to reduce fumes.
Test compatibility in an inconspicuous spot, checking for staining, swelling, or adhesive failure.
Use low-solvent primers and removable painter’s tape rated for delicate surfaces.
Match sheen to surrounding finishes to avoid visible edges.
Communicate with installers about seams and overlaps so materials layer without damage or peeling later.
- Test a small patch first
- Use low-VOC options
- Select delicate-surface tape
- Confirm sheen match
Prep Surface And Seams
Before you start painting, prep the wall and seams so your stripe looks crisp and the wallpaper or accent panel stays intact. Remove loose edges, reattach seams with adhesive, and sand any rough transitions until smooth. Clean dust and oils so primer bonds evenly.
Choose a primer suited to your substrate—vinyl-safe for wallpaper, high-adhesion for textured boards. Consider texture options early; a smooth stripe contrasts raised patterns, while a subtle texture can unify surfaces.
Test paint on a scrap to see hue and finish. Think about color psychology when selecting the stripe to guarantee it sets the room’s desired mood.
Add Trim or Molding to Frame a Stripe
Though paint alone can make a stripe pop, adding trim or molding gives it a clean, professional edge and protects the paint from scuffs. You’ll use trim framing and molding accents to define the stripe, measure carefully, and pick profiles that match your room’s style.
Cut pieces accurately, dry-fit them, and caulk seams for a seamless look. Paint or stain the trim before or after installation depending on finish.
- Choose a trim profile that complements the stripe
- Measure and mark a level line around the room
- Miter corners and dry-fit before nailing
- Caulk, paint, and seal for durability
Make a Two-Tone Stripe (Two Colors in One Band)
Decide which color goes where within the band so the balance and contrast read right from across the room.
Pick compatible paint types and sheens to avoid adhesion or finish issues between the two colors.
Use a crisp, well-leveled tape line to separate the tones before you paint.
Plan Color Placement
Want a stripe that pops with depth and contrast? Plan color placement so the darker hue anchors the stripe and the lighter hue lifts it. Use color psychology to decide which tone feels calming or energetic in the room, and consider paint durability where the stripe meets high-traffic zones.
- Place darker color on bottom for grounding effect.
- Use lighter color on top to reflect light and enlarge space.
- Test small swatches together at eye level before masking.
- Mark precise centerline and measure equally from ceiling and floor.
Trust visual balance, lighting, and room function when finalizing your two-tone band.
Choose Paint Types
Now that you’ve mapped out where the stripe will sit and which tones will sit above or below, pick paint types that work together and with your wall surface. Choose matching sheens—matte with matte or eggshell with eggshell—to avoid visible lines where the two colors meet.
Consider color mixing: use pre-tinted paints from the same brand or a professional tint to guarantee consistent binder and pigment behavior.
For high-traffic areas, prioritize paint durability; look for washable, scuff-resistant formulas.
Test small swatches side by side, let them cure, and confirm finish and adhesion before painting the full two-tone band.
Tape Precise Divider
Before you apply paint, tape a crisp divider so the two colors meet cleanly. You’ll measure and level the stripe, then press painter’s tape firmly to prevent bleed.
Consider color psychology when choosing contrasting hues, and pick finishes that boost stripe durability.
Use a putty knife to seal edges and paint the lighter color first, wrapping a bit over the tape to block seepage.
Once dry, paint the darker color and remove tape at a 45° angle.
- Measure twice, tape once
- Seal tape edges carefully
- Paint light then dark
- Remove tape while paint’s tacky
Create Patterned or Stencil Stripe Effects
If you’re ready to move beyond plain bands, patterned or stencil stripe effects let you add texture and visual interest without overwhelming the room. They work well on one accent wall or repeated across a whole room.
Choose a motif that complements your decor and consider color psychology—calming blues or energetic yellows—to set mood.
Test stencils on cardboard first for spacing and repeatability. Use a stencil brush or foam roller with minimal paint to avoid bleed; secure edges with low-tack tape.
Finish with a clear protective coat if the stripe sees wear, preserving paint durability and crisp pattern edges.
Faux Textures You Can Add Inside a Stripe
When you want a stripe to do more than divide a wall, add faux textures—like wood grain, metallic patina, or linen—to give depth and character without complex remodeling. You can layer decorative finishes to mimic materials, use glazing for subtle age, or stipple for textile effects.
Work in small sections, practice on cardboard, and seal for durability. Pick tools—brushes, rags,, combs—matched to the effect. Here are simple ideas to try:
Work small, practice on cardboard, seal for durability, and choose tools—brushes, rags, combs—suited to each effect.
- Wood grain with a graining tool and glaze
- Metallic patina using layered metallic and verdigris glazes
- Linen look via dry-brush horizontal strokes
- Stone veining with a feather and wash
Eco-Friendly Paints for Bedroom Stripes
When you’re planning bedroom stripes, choose low-VOC paints to keep air quality safe for sleeping.
Consider natural pigment options if you want cleaner, more authentic colors without synthetic additives.
Also look for brands using sustainable, recyclable packaging to cut waste.
Low-VOC Paint Options
Looking for paint that keeps your bedroom fresh-smelling and healthier? Choose low-VOC formulas labeled as eco friendly options to reduce odors and indoor pollutants while you paint a horizontal stripe. You’ll still get good coverage and durability without strong fumes.
Check certifications and dry-time claims, and test a small swatch before taping.
- Look for certified low-VOC or zero-VOC brands
- Prefer water-based finishes for easy cleanup
- Confirm color stability and coverage on primer
- Use proper ventilation and a respirator if sensitivity occurs
Avoid heavy solvents; save natural pigments discussion for the next section.
Natural Pigment Choices
Although you’ll still want low‑VOC binders, choosing paints with natural pigments—like earth oxides, iron oxides, and plant‑derived dyes—keeps your bedroom stripe both eco‑friendly and colorfast.
You’ll pick tones that age gracefully and resist fading without harsh synthetic colorants. Test samples on scrap board to confirm hue and opacity, since Natural pigments can vary batch to batch.
Look for reputable suppliers noting lightfastness and pigment load. If you prefer subtler hues, seek Organic dyes derived from plants, but remember they may need stronger binders or multiple coats.
Apply thin, even layers for best coverage and durability.
Sustainable Paint Packaging
Choose paint packaging that cuts waste and keeps your bedroom stripe project low‑impact: look for recyclable tins, refillable pouches, or return‑to‑store programs that let you avoid single‑use cans. You’ll reduce landfill and support paint sustainability by choosing brands with minimal plastic and clear recycling guidance.
Check labels for recycled content and third‑party certifications, and ask about local refill options. Store leftovers in airtight, reusable containers to avoid spoilage and needless purchases.
- Prefer recyclable tins over mixed materials
- Seek refillable pouches or bulk stations
- Confirm local recycling rules
- Buy brands prioritizing Eco packaging and clear disposal instructions
Budget Ways to Get a Pro Look
You don’t need expensive tools or a contractor to get crisp, professional-looking stripes—just a few smart techniques and the right prep.
Start by choosing a high-quality, low-VOC paint to balance color psychology with environmental impact. Test a small swatch to see how the stripe changes in your light.
Use frog tape or low-tack painter’s tape, press edges firmly, and run a dry brush along seams to prevent bleed.
Cut in with a steady hand, then roll.
Remove tape while paint’s slightly tacky for sharp lines.
Clean and reuse tools to save money and reduce waste.
Safety Tips for Ladders and High Stripes
When your stripe reaches higher on the wall, ladder safety becomes part of the plan—set the ladder on a flat, solid surface and lock its spreaders or braces before climbing. You’ll inspect the ladder for damage, use the correct height to avoid overreaching, and keep three points of contact.
Be mindful of high stripe risks like falling or tipping; don’t lean sideways.
- Face the ladder and climb slowly, keeping tools secured.
- Have a helper brace the base when possible.
- Wear non-slip shoes and avoid wet or oily steps.
- Move the ladder rather than stretching to reach.
Protect Floors, Furniture, and Fixtures
Before you start rolling, spread dropcloths or plastic sheeting to protect floors from drips and stray paint.
Move smaller furniture out of the room and cover larger pieces with sheets or taped plastic so they won’t get splattered.
Finally, remove or mask outlet covers, switch plates, and light fixtures to keep paint off hardware and make cleanup easier.
Protecting Floors With Dropcloths
Want to keep paint off your floors and furniture? Use proper floor protection and choose the right dropcloth types before you tape and paint. Lay dropcloths flat, overlap seams, and secure edges with painter’s tape to prevent trips and paint seepage.
For high-traffic areas, use weighted or non-slip options.
- Canvas dropcloths: durable, breathable, reusable.
- Plastic sheeting: waterproof, best for spills, can slip.
- Paper-backed rosin: low cost, grips smooth floors.
Layering: combine canvas over plastic for extra protection.
Check for wrinkles, replace stained sections, and keep walkways clear while you stripe.
Moving And Covering Furniture
Although it takes a little extra effort, move smaller pieces out of the room and center larger furniture on protective pads so you’ve got clear, cushioned pathways while you paint.
Use moving tips like sliding furniture on cardboard or using furniture sliders to avoid scuffs.
Cover remaining items with fitted drop cloths or breathable furniture covers; secure edges with low-tack tape so covers don’t shift.
Keep cushions and fragile decor elsewhere.
Elevate legs on blocks if needed to protect from stray paint or drips.
Label covered pieces and keep a small trash bin handy to maintain a tidy, safe workspace.
Safeguarding Fixtures And Outlets
After you’ve moved and covered furniture, turn your attention to protecting fixtures and outlets so paint stays where it belongs. You’ll focus on fixture safeguarding and outlet protection before taping.
Remove switch plates and light fixtures when you can; label screws and keep parts in a safe container. Use painter’s tape for fixed items and low-tack film for recessed fixtures.
Lay drop cloths around bases and weight them so dust and drips don’t shift. Check edges twice before you roll.
Small prep now saves cleanup later and keeps your stripe crisp and professional-looking.
- Remove and label plates
- Tape exposed fixtures
- Cover recessed outlets
- Secure drop cloths
Finishing Checklist: Last-Minute Quality Checks
Before you call the job done, run a quick finishing checklist to catch any small flaws that become obvious from different angles and lighting. Walk the room close and far, checking stripe edges for crispness, touch-ups for uniform sheen, and drips at baseboards.
Verify alignment with reference lines and step back under natural and artificial light. Confirm paint labels match your color theory choice and that leftover cans are sealed; note any eco friendly materials used so you can recycle responsibly.
Reinstall fixtures carefully, test outlets, and photograph the stripe for your records before declaring the project complete.
Photo-Worthy Stripe Ideas for Living Rooms and Nurseries
When you want a stripe that looks great in photos, pick contrasts and finishes that read well on camera—matte for subtle depth, satin to catch soft highlights—then frame the stripe with furniture and lighting that enhance its lines.
Use color psychology to set mood: calming blues for nurseries, warm neutrals for living rooms.
Consider wall texture; smooth surfaces photograph cleaner, subtle texture adds cozy depth.
Balance scale so the stripe complements, not overwhelms, toys or sofas.
Test shots at different times of day and tweak lighting.
- Choose a focal wall
- Coordinate textiles and props
- Shoot with natural light
- Keep compositions simple
Stripe Placement Ideas for Small Spaces and Hallways
Now that you’ve thought about photo-friendly finishes and framing, consider how stripe placement changes in tight corridors and compact rooms. You’ll want the stripe height to guide sightlines: lower bands widen, mid-wall bands stabilize, higher bands lift ceilings.
Use color psychology to choose hues—cool tones recede, warm tones advance—and pick one focal wall to avoid clutter. Measure door frames and artwork before taping; align the stripe with existing architectural lines for coherence.
Use simple artistic techniques like soft-edged blending or thin accent lines to add interest without overwhelming the space. Test samples under hallway lighting first.
When to Hire a Pro for Complex Stripe Jobs
If your stripe design involves curved lines, multiple colors with crisp borders, or tricky surfaces like textured plaster or high ceilings, call a pro—these complications demand specialized tools and steady technique to look sharp.
You’ll save time and reduce mistakes when you hire someone with professional expertise who’s practiced precise edge work and color blending. Also consider safety considerations for ladders, scaffolding, and ventilation on difficult jobs.
Ask about experience, portfolio, timeline, cleanup, and warranty before hiring.
- Check past projects for similar complexity
- Confirm licensing and insurance
- Request a detailed quote
- Discuss timeline and guarantees
How to Update or Remove a Stripe Later
Even with a pro, tastes change and wear shows up, so you’ll want a plan for updating or removing a stripe down the road.
If you’re revitalizing color, test small samples to check color blending with adjacent paint and light.
For touch-ups, clean the stripe, sand crisp edges, prime any exposed drywall, then repaint with matching sheen.
To remove, score and peel any tape, sand edges, apply primer to block bleed-through, and feather new wall color outward for seamless coverage.
Schedule periodic stripe maintenance—clean spills, repaint scuffs—to minimize full removal and keep the finish looking intentional.
Common Beginner Questions About Horizontal Stripes
When you’re tackling horizontal stripes for the first time, you’ll likely have a handful of practical questions about planning, tools, and common mistakes—so let’s address the ones beginners ask most often. You’ll want measured planning, a level, quality tape, and patience for crisp edges.
Consider color psychology when choosing hue and stripe width; test samples on the wall. Think about how stripes fit with historical wall designs if you’re in a period home. Prep, primer, and a steady hand beat clever tricks.
- How wide should my stripe be?
- What tape works best?
- Do I need primer?
- How will this affect room mood?
Frequently Asked Questions
Can I Paint a Horizontal Stripe Over Calcimine or Old Water-Based Finish?
Yes, you can, but you’ll need thorough paint preparation: remove chalky calcimine, prime with a bonding primer, then plan stripe design and use quality painter’s tape; otherwise the stripe won’t adhere or look crisp.
Will a Stripe Highlight or Hide Structural Wall Imperfections?
A horizontal stripe can both highlight and hide flaws: you’ll hide minor wall texture irregularities if you use a matching paint sheen and color, but higher sheen or contrasting stripes will draw attention to bumps and imperfections.
Can I Stripe Over Existing Wallpaper Without Removal?
You can, but it’s often impractical—testing shows paint adhesion fails on many wallpapers. If you insist, factor in wallpaper removal risks and thorough surface preparation: clean, sand, prime with a bonding primer before striping to guarantee durability.
How Do I Match a Stripe to My Room’s Existing Color Temperature?
Match your stripe by sampling paint next to existing surfaces, comparing color contrast and adjusting warmth or coolness; test different stripe thicknesses, view under room lighting, and tweak hue or saturation until it visually balances.
Will Acoustic Panels or Fabric Walls Accept Stripe Paint Evenly?
Want even coverage on fabric-wrapped panels or acoustic tiles? You’ll need primer and fabric-safe paint; decorative border details may blur, so test for color contrast and adhesion first, and use gentle rollers for consistent results.
Conclusion
You’ve got the basics to paint one clean horizontal stripe and give your room instant personality—think of it as your room’s signature chord. Pick placement and width that match how you want the space to feel, tape precisely, and take your time with steady brush or roller strokes. If it feels intimidating, call a pro. You can always repaint or strip it later; trends change, but good design is forever (like a trusty pocket watch).